Fluffy Biscuits and Gravy: Rich, Creamy, and Worth Waking Up For
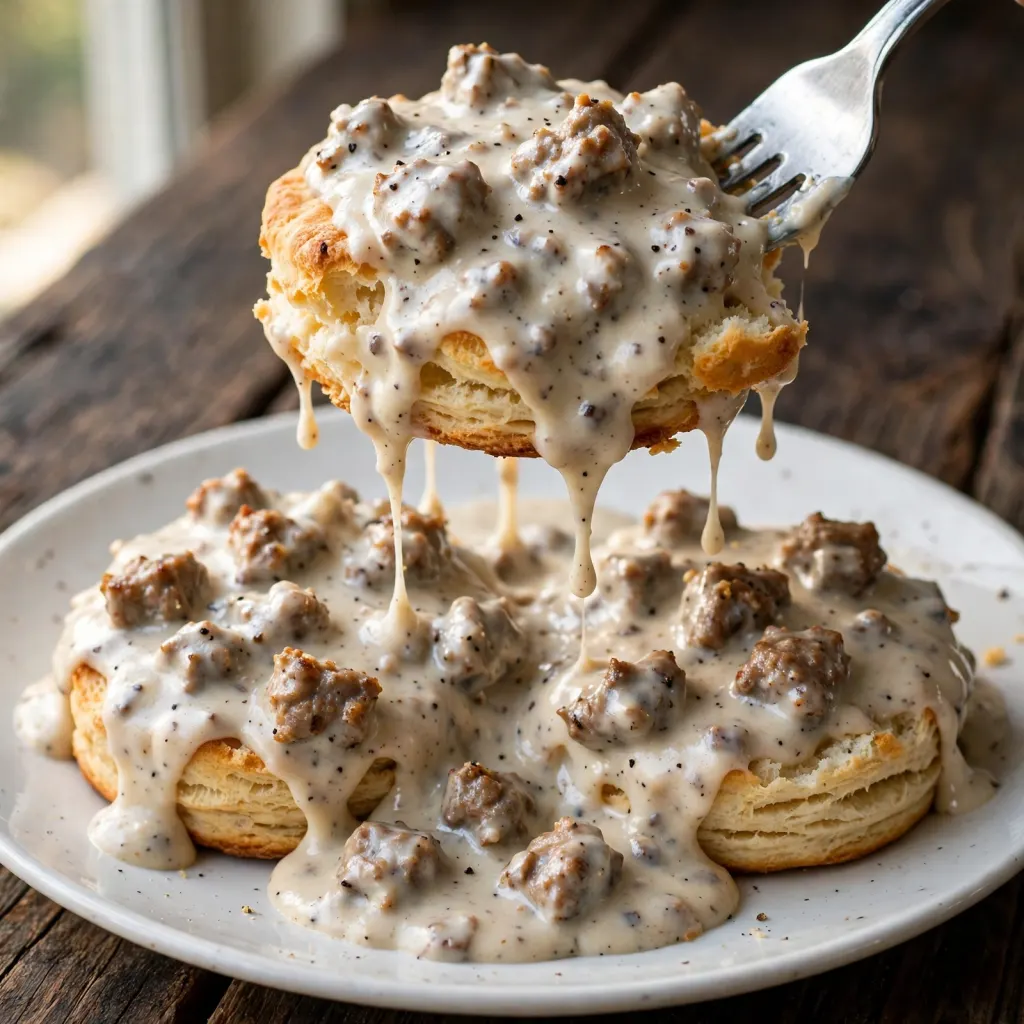
The smell of biscuits coming out of a hot oven and sausage gravy thickening on the stove at the same time is one of the more convincing reasons to get out of bed on a weekend morning. Everything about biscuits and gravy is generous: the biscuits are tall and layered, the gravy is thick and peppery, and a single plate keeps you going well past noon.
This recipe makes the biscuits from scratch using cold butter and cold buttermilk, which gives you the flaky layers that store-bought versions can’t replicate. The gravy starts with seasoned beef sausage that renders enough rich, savory fat to build a proper roux, then finishes with whole milk cooked until it coats a spoon heavily. It’s a classic Southern breakfast combination that works equally well for brunch or a slow Sunday dinner, and the whole thing comes together in under 45 minutes.
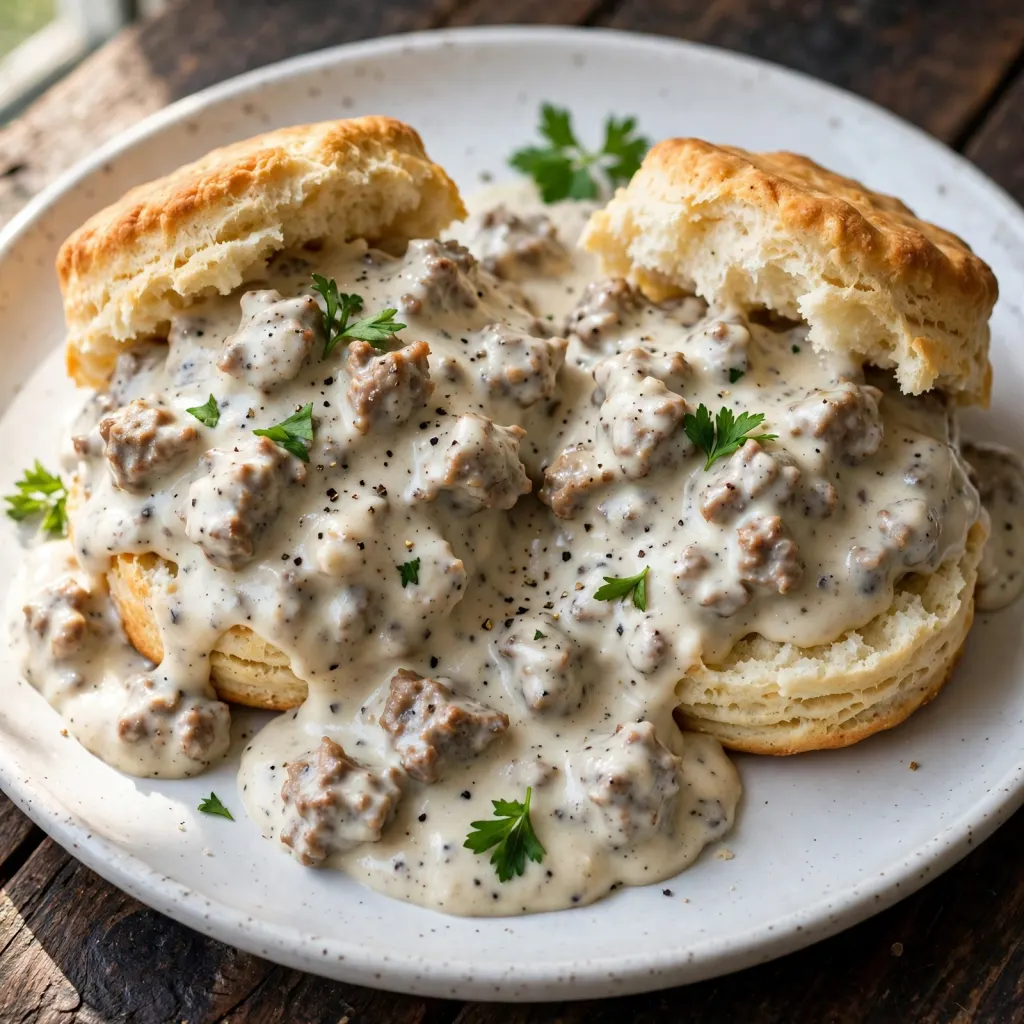
Why You’ll Love This Biscuits and Gravy
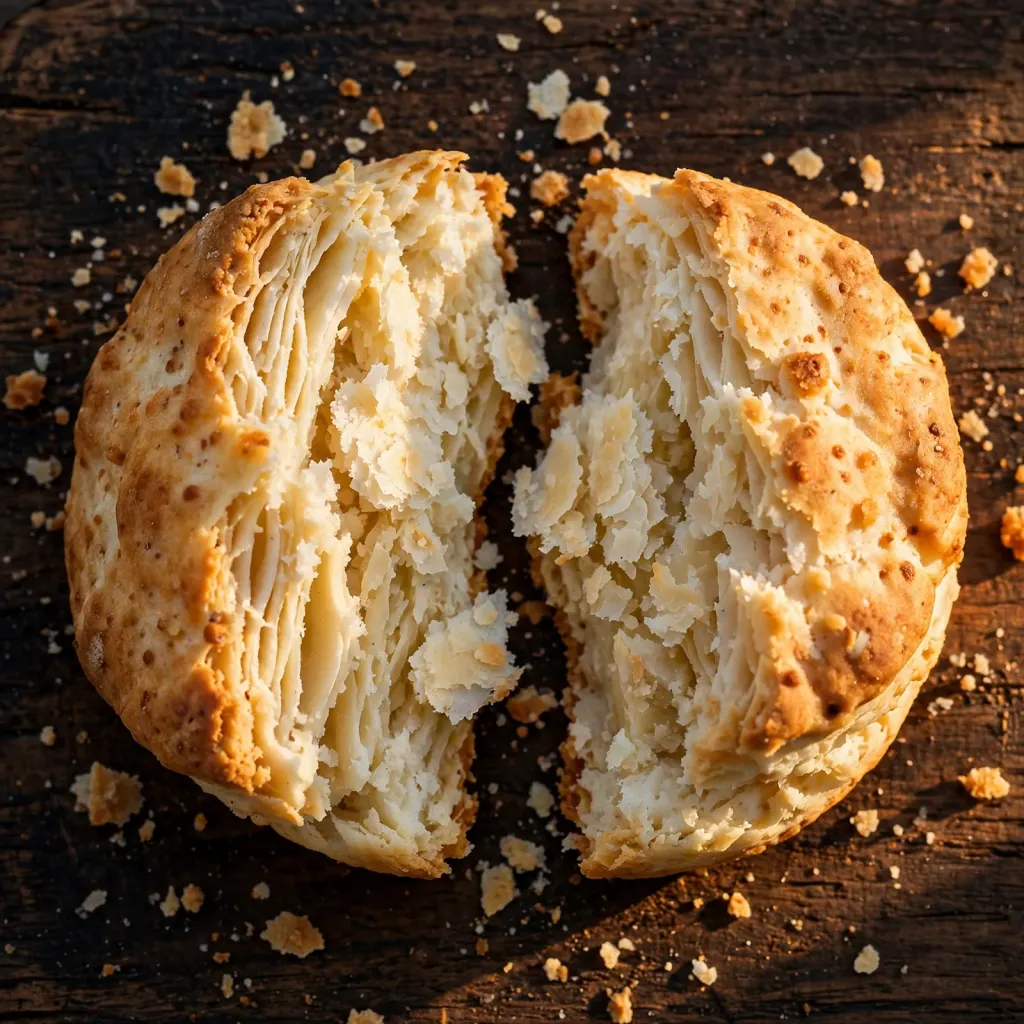
- From-scratch biscuits, no special skills needed. The technique is simple: cold butter, cold liquid, minimal handling. The result is tall, flaky biscuits with distinct layers that pull apart cleanly at the table.
- Gravy that actually coats and clings. A roux-based gravy holds its consistency and doesn’t go watery on the plate. The black pepper is generous throughout, which is exactly what makes this dish what it is.
- Both components are done in under 45 minutes. The biscuits bake while you build the gravy. Time them right and they hit the plate at the same moment.
- Genuinely filling. One plate with two biscuits and a proper ladle of gravy is a substantial meal that doesn’t need anything else beside it.
- Adjustable heat level. The base recipe is peppery but not sharp. A pinch of cayenne moves it firmly into spicy territory; leaving it out keeps it mild enough for kids.
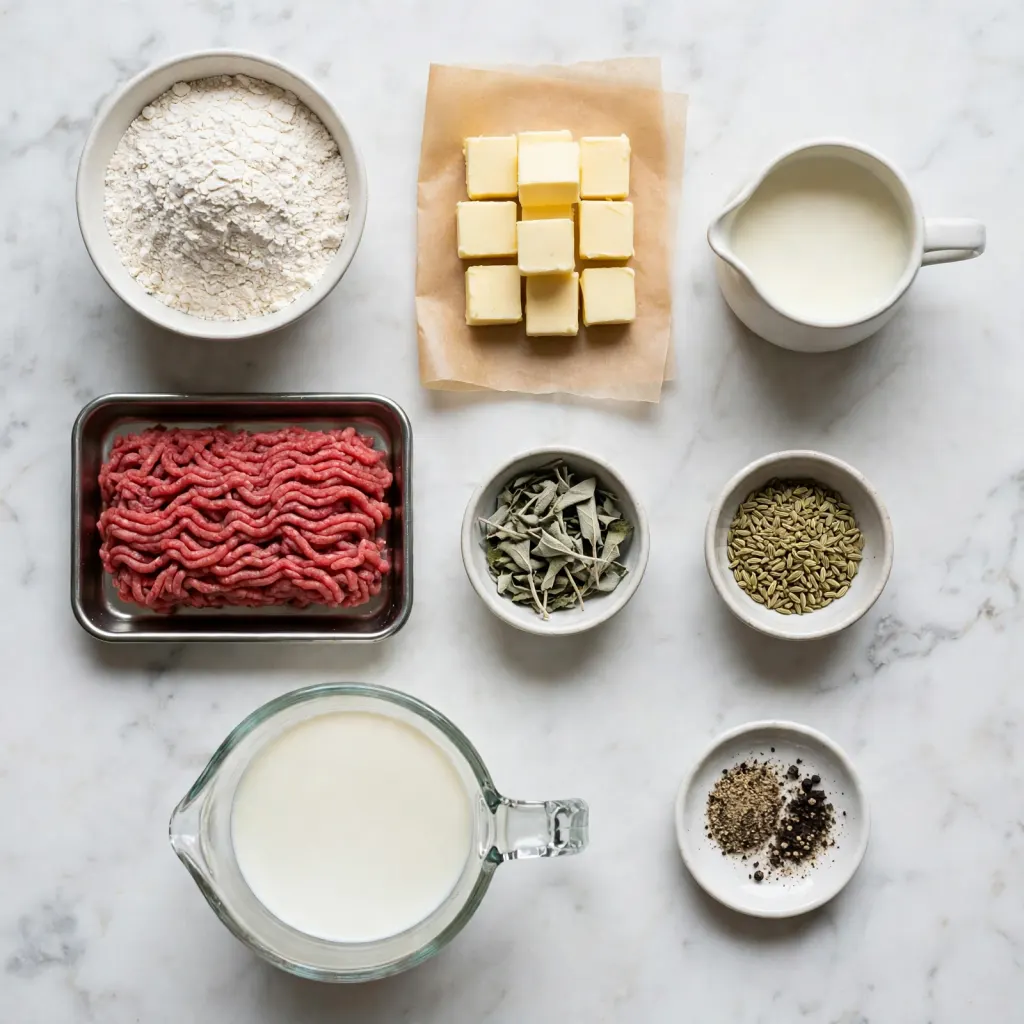
Ingredients You’ll Need
Recipe Timing
- Servings: 6
- Difficulty: Easy
- Course: Breakfast, Brunch
- Cuisine: American, Southern
- Prep Time: 15 minutes
- Cook Time: 30 minutes
- Total Time: 45 minutes
A note on the sausage: Halal beef breakfast sausage is the base of this gravy. If you can find it pre-seasoned at your local halal market, use it as-is. If not, plain ground beef seasoned with the spice blend below works just as well and gives you full control over the flavor. Beef renders a deeply savory fat with real body, and that fat is what the roux is built on. The resulting gravy is rich, meaty, and robust in a way that a neutral oil-based roux simply can’t replicate.
For the Biscuits:
- 2 cups all-purpose flour, plus more for the surface — Regular all-purpose flour has enough protein for structure without making the biscuit tough. Bread flour has too much protein and produces a noticeably chewier, denser result.
- 1 tablespoon baking powder — Provides the lift. Fresh baking powder matters here. Test yours by dropping a teaspoon into hot water; it should bubble vigorously. Anything that just fizzles limply won’t give you the rise you need.
- 1 teaspoon fine salt — Seasons the dough. Without it the biscuit tastes flat against the well-seasoned gravy.
- 1/2 teaspoon baking soda — Works with the buttermilk’s acidity for an extra layer of lift and a slight tang that you notice mostly in the aftertaste.
- 6 tablespoons cold unsalted butter, cubed — Cold butter is what creates the layers. As discrete butter pieces melt in the oven, they release steam that separates the surrounding dough into distinct sheets. Warm butter just absorbs into the flour and produces a crumbly, dense texture instead.
- 3/4 cup cold buttermilk, plus 1 tablespoon for brushing — Buttermilk’s acidity reacts with the baking soda, and its fat content keeps the crumb tender. No buttermilk on hand: stir 1 tablespoon of white vinegar or lemon juice into 3/4 cup of whole milk and let it sit for 5 minutes before using.
For the Sausage Gravy:
- 1 lb (450g) halal beef breakfast sausage or plain ground beef — For plain ground beef, mix in before cooking: 1 teaspoon lightly crushed fennel seeds, 1 teaspoon dried sage, 1/2 teaspoon dried thyme, 1/2 teaspoon garlic powder, 1/4 teaspoon red pepper flakes, 1 teaspoon salt, and 1/2 teaspoon black pepper.
- 3 tablespoons all-purpose flour — Goes directly into the rendered fat after browning to form the roux. The fat stays in the pan; don’t drain it.
- 2 and 1/2 cups whole milk, warmed — Whole milk gives the gravy its characteristic opaque, creamy color and body. Warm it for about 90 seconds in the microwave before adding. Cold milk hitting a hot roux causes lumps that take significant effort to whisk out.
- 1 teaspoon coarse black pepper, plus more to taste — This is not a finishing garnish. Black pepper is the defining flavor of this gravy and needs to go in during cooking, not just sprinkled at the end. Freshly cracked gives a more present, peppery bite than pre-ground.
- Salt to taste — Adjust after tasting, since the sausage seasoning already contributes salt to the pan.
- Pinch of cayenne pepper (optional) — Adds background heat underneath the black pepper rather than competing with it. Start small and add more after tasting.
Allergen and Dietary Disclosure
This recipe contains dairy (butter, buttermilk, whole milk) and wheat/gluten (all-purpose flour in both the biscuits and the gravy roux).
Dairy-free adaptation: Use a solid plant-based butter kept cold (not a liquid spread) for the biscuits, and make the buttermilk substitute with oat milk plus a tablespoon of lemon juice. In the gravy, full-fat oat milk or unsweetened coconut milk both work as a replacement for whole milk. The biscuits will be slightly less flaky and the gravy a little thinner, but both hold up.
Gluten-free adaptation: A 1:1 gluten-free baking flour blend that contains xanthan gum substitutes directly in both the biscuits and the gravy roux. The biscuit texture will be slightly more crumbly than the wheat version, which is normal for gluten-free baked goods. All other steps remain the same.
This recipe is prepared in a home kitchen and cannot be guaranteed safe for any specific allergy.
Equipment Needed
A few tools here genuinely affect the final result.
Box grater: Grating frozen butter on the large holes of a box grater distributes it through the flour more evenly and faster than cutting by hand. Thin gratings melt into flat layers in the oven; you get more of them per biscuit.
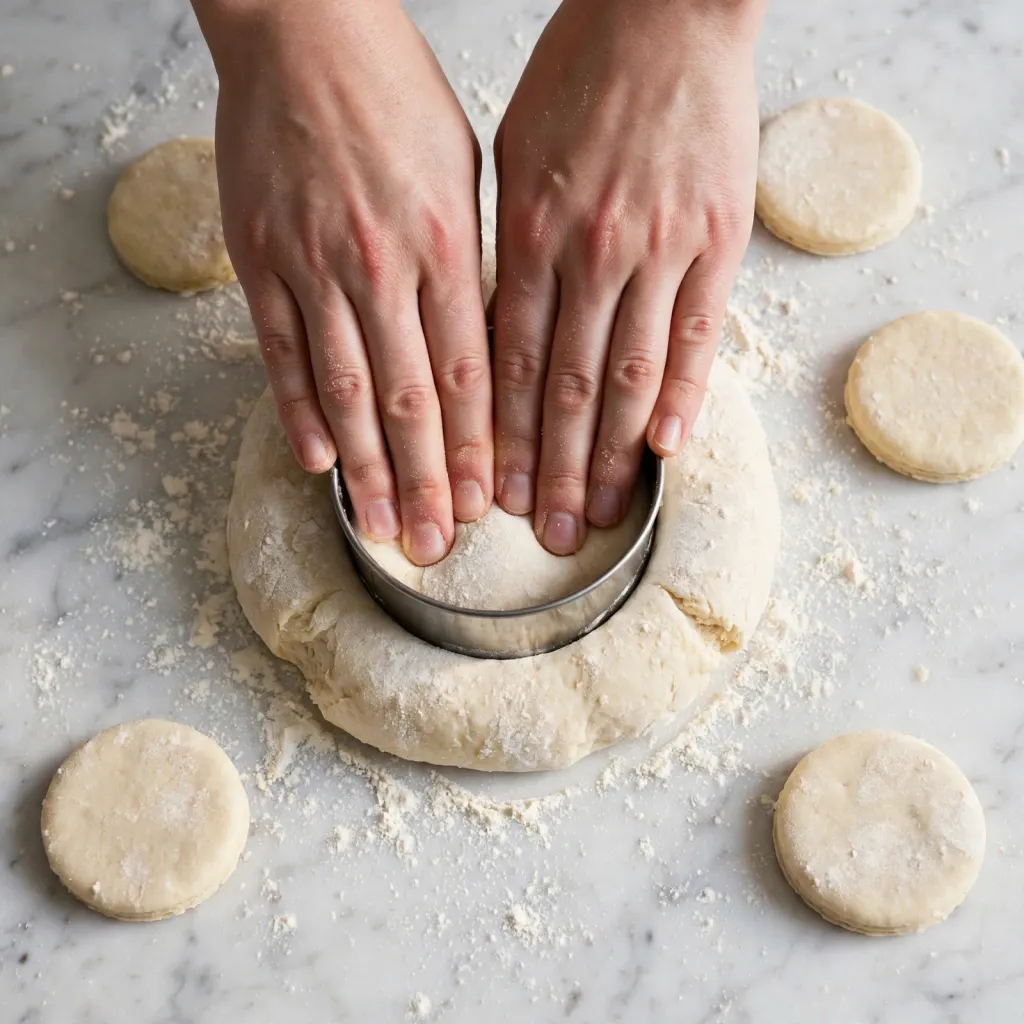
Sharp 3-inch biscuit cutter: A dull edge or a glass with a rounded rim seals the sides of the dough as it cuts, which prevents the layers from opening during baking. Sharp edge, straight down press, no twisting.
Cast iron skillet or heavy-bottomed pan: Cast iron holds heat evenly across the whole surface and prevents the roux from scorching in hot spots, which thin stainless pans are prone to. If you don’t have cast iron, a stainless steel pan with thick walls works.
Rimmed baking sheet lined with parchment: Parchment prevents sticking without greasing and makes cleanup straightforward.
Step-by-Step Directions
Step 1: Preheat the Oven and Chill the Butter
Set the oven to 425°F (220°C). Cube the butter into roughly 1/2-inch pieces and spread them on a small plate. Put them in the freezer for at least 10 minutes while you measure everything else. Alternatively, freeze the butter in one piece for 20 minutes, then grate it directly on the box grater and return the gratings to the freezer while you prep the dry ingredients. The goal is butter that’s cold enough to stay as distinct pieces when it hits the hot oven.

Chef’s Note: 425°F is specific, not approximate. Lower oven temperatures give the butter time to soften and absorb into the flour before the crust sets. High heat creates a hot exterior quickly, which forces the steam from melting butter to push through the interior layers while the butter is still intact.
Step 2: Mix the Biscuit Dough
In a large bowl, whisk together the flour, baking powder, baking soda, and salt. Add the cold butter pieces and press each one flat between your thumb and forefinger, working quickly so your hand warmth doesn’t soften them. You’re aiming for a shaggy mixture with butter pieces ranging from pea-sized to almond-sized. Both sizes are fine; the variety creates layers of different scales. Pour in the cold buttermilk and stir with a fork until the dough just barely holds together. Stop as soon as no large pockets of dry flour remain. Overworking from this point develops gluten and tightens the crumb.
Chef’s Note: The right dough looks rough and slightly shaggy, not smooth. If it looks too neat, you’ve probably worked it too much. A slightly rough, uneven dough bakes up lighter because it hasn’t developed too much gluten structure.
Step 3: Fold and Cut the Biscuits
Turn the dough onto a lightly floured surface and pat it into a rough rectangle about 1 inch thick. Fold it in thirds like a letter (left side over the middle, right side on top), then pat gently back to 1 inch. Repeat the fold one more time. These two folds stack the butter layers without requiring any kneading. After the second fold, pat the dough to a 3/4 to 1 inch thickness and cut biscuits with a straight, sharp press straight down. Lift the cutter without twisting. Gather the scraps, press together once, and cut remaining rounds. Place them on the parchment-lined sheet with sides barely touching.
Step 4: Bake the Biscuits
Brush the tops lightly with the reserved tablespoon of buttermilk, which gives a slightly golden, matte finish rather than a shiny crust. Slide the sheet into the oven and bake for 12 to 15 minutes, until the tops are light golden and the sides have visibly puffed and separated along the layer lines. Tap the bottom of one biscuit; it should sound hollow. Transfer to a wire rack and start the gravy immediately while the biscuits are still warm.
Step 5: Brown the Sausage
Heat a large cast iron skillet over medium-high heat. Add the sausage or seasoned ground beef and break it into rough pieces with a wooden spoon. Cook for 7 to 9 minutes, stirring occasionally but not constantly. You want real browning, not just gray cooked meat. Dark, caramelized edges on the meat leave flavor compounds on the pan surface that the milk dissolves into the gravy as it cooks. Do not drain the fat from the pan when the meat is done.
Food safety note: Cook ground beef to an internal temperature of 160°F (71°C) throughout. There should be no pink remaining before you proceed to the next step.
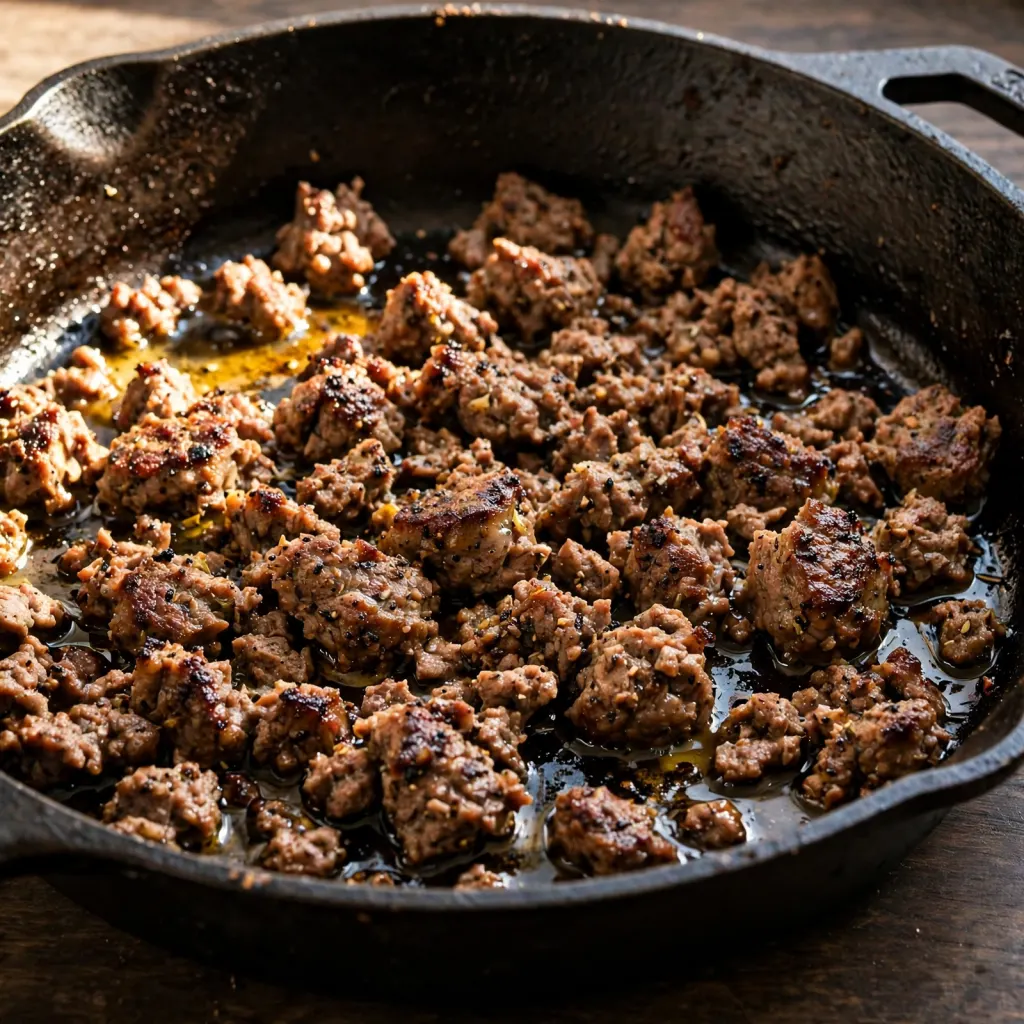
Step 6: Build the Roux and Gravy
Reduce the heat to medium. Sprinkle the flour evenly over the browned meat and fat in the pan. Stir constantly for 2 full minutes until the flour absorbs into the fat and the mixture smells faintly nutty rather than raw. You’re cooking out the starchy taste before the liquid goes in. Pour the warmed milk in a slow, steady stream, whisking continuously as you add it. Once all the milk is incorporated, switch to a wooden spoon and stir as the gravy thickens over the next 4 to 6 minutes.
Chef’s Note: Two minutes on the roux isn’t guesswork. One minute leaves a slightly floury taste at the back of the gravy. Two minutes clears it. Set a timer if you’re not sure.
Step 7: Season and Finish
Add the black pepper, salt to taste, and cayenne if you’re using it. Stir and taste. The gravy should be assertively peppery with a deep, savory baseline. If it’s thicker than you’d like, stir in warm milk a tablespoon at a time. It should coat a spoon heavily but still pour from a ladle without effort. Hold it on low heat while you plate the biscuits.
Common Mistakes and Troubleshooting
| Problem | Cause | Solution |
|---|---|---|
| Biscuits didn’t rise | Butter wasn’t cold enough, or dough was overworked | Freeze butter until the last moment and stop mixing as soon as no dry flour shows |
| Biscuits came out tough | Dough was handled too much or flour was added heavily | Pat gently, don’t knead; use a light hand with the work surface flour |
| Biscuit layers didn’t open | Cutter was twisted or had a dull edge | Use a sharp-edged cutter and press straight down without any rotation |
| Gravy turned lumpy | Cold milk was added too fast to the hot roux | Warm the milk first and add in a slow stream while whisking continuously |
| Gravy is too thin | Roux wasn’t cooked long enough, or not enough flour | Cook the roux for a full 2 minutes before adding milk; simmer for at least 5 minutes after |
| Gravy tastes flat | Fat was drained before the roux, or meat wasn’t properly browned | Keep all the fat in the pan and brown the meat until there are dark caramelized edges |
Variations and Substitutions
Turkey sausage version: Ground turkey seasoned with the same spice blend produces a lighter-colored, slightly leaner gravy. The flavor is milder than beef, so go a little heavier on the black pepper to keep the gravy assertive.
Chicken sausage version: Ground chicken with the breakfast spice blend gives the mildest, most neutral result of the three. It works especially well for younger kids who find a beef gravy too rich.
Mushroom gravy (vegetarian): Skip the meat entirely. Saute 2 cups of finely chopped cremini mushrooms in 3 tablespoons of butter over medium-high heat for 8 to 10 minutes until they release their moisture and develop brown edges. Add the flour to the mushrooms and butter and proceed exactly as you would with the sausage version. The mushrooms provide enough umami and texture to make the gravy satisfying on its own.
Spicy version: Double the black pepper and add 1/4 teaspoon cayenne plus 1/4 teaspoon smoked paprika to the finished gravy. Adding a finely diced jalapeno to the pan with the sausage at the start of Step 5 adds a fresh pepper heat that’s different from the dry spice version.
Cheese biscuits: Add 1/2 cup of finely shredded sharp cheddar directly to the dry flour mixture before cutting in the butter. It melts into the layers during baking and adds a savory, slightly sharp note that pairs well with the peppery gravy.
Herb biscuits: Stir 2 tablespoons of finely chopped fresh chives or rosemary into the buttermilk before adding it to the flour. The flavor is subtle but distinct and makes the biscuits interesting enough to eat on their own without the gravy.
Serving Suggestions
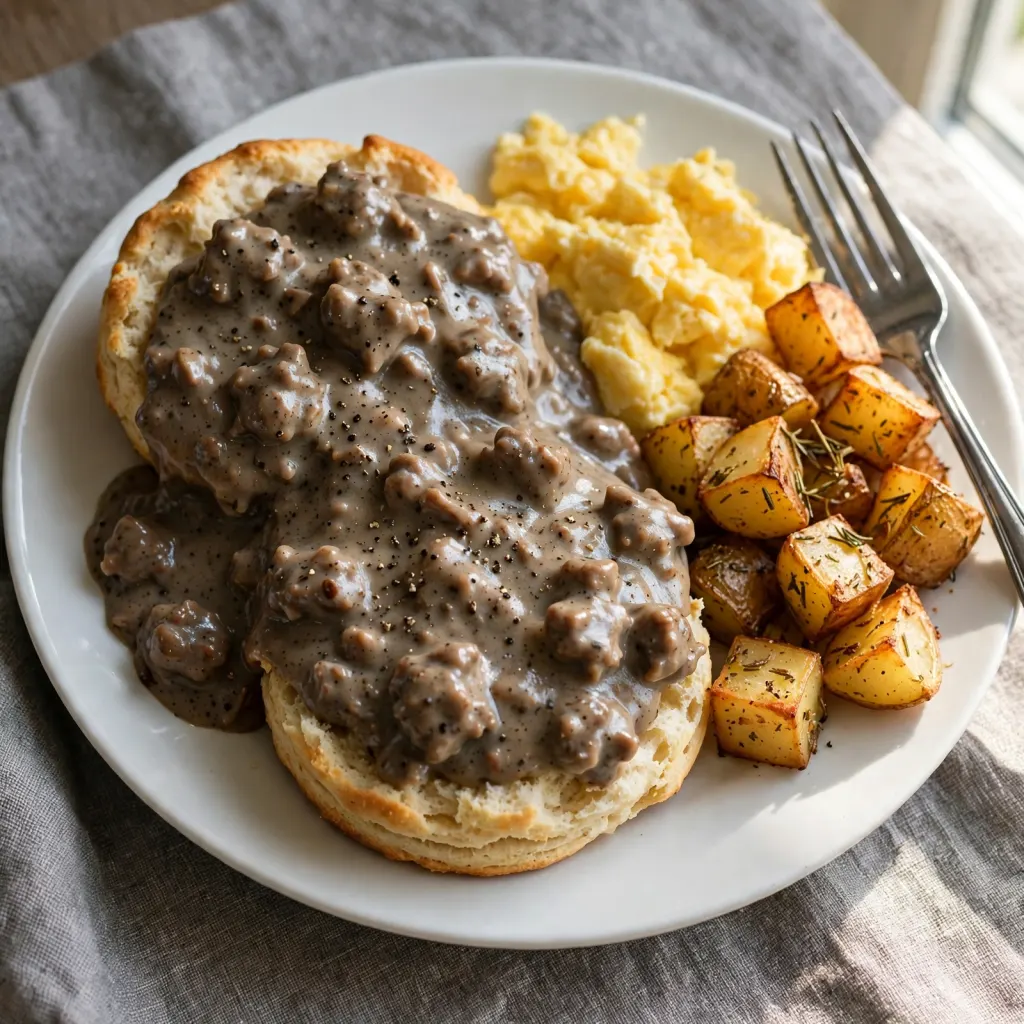
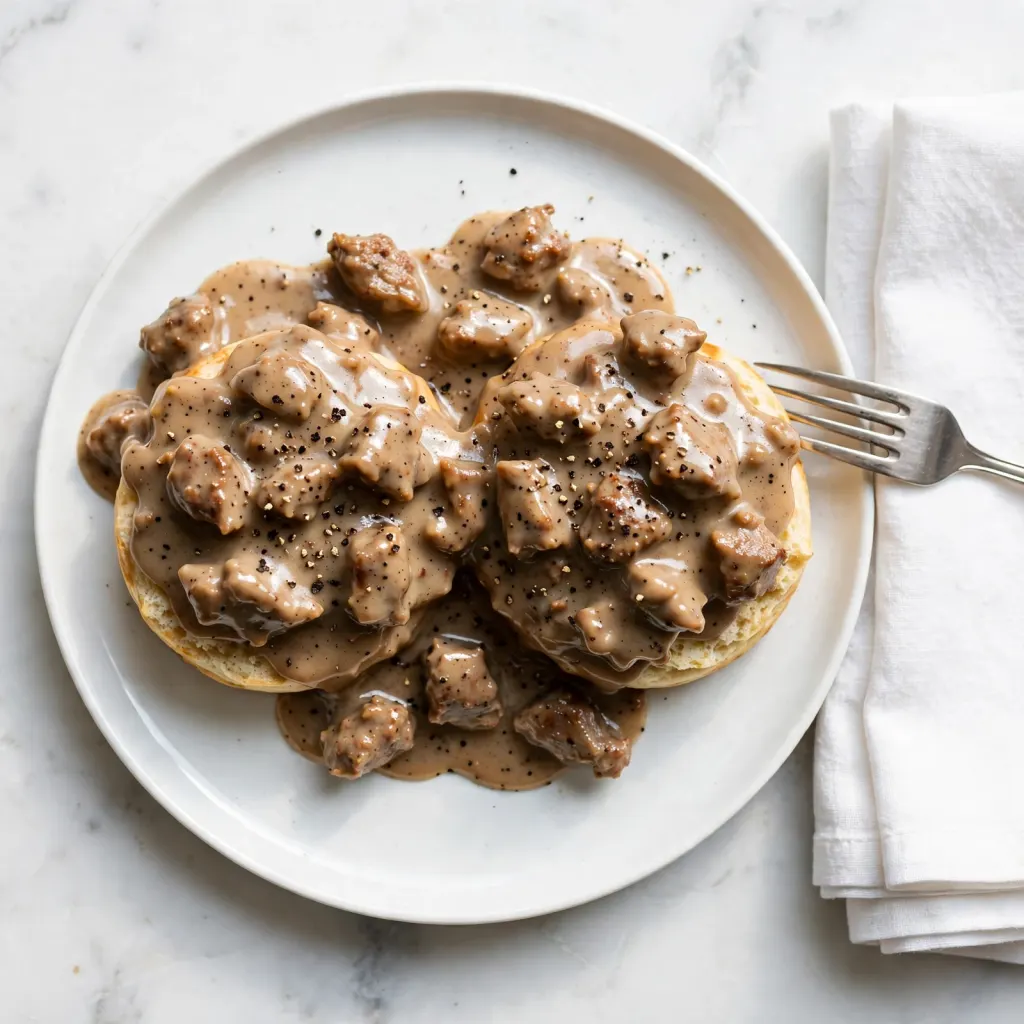
- Split each biscuit in half and ladle gravy generously over both cut sides. The exposed interior soaks up the sauce fast, so plate and serve immediately rather than letting it sit assembled.
- Scrambled eggs alongside round out the plate without competing with the gravy’s flavor. A simple two-egg scramble with salt is all you need.
- Roasted breakfast potatoes (cubed, tossed with a little oil and paprika, roasted at 425°F for 25 minutes) are a natural side. They absorb the gravy pooling on the plate just as well as the biscuits do.
- Sliced fresh fruit or a simple fruit salad cuts through the richness and keeps the meal from feeling too heavy.
- Strong black coffee is the natural drink pairing. Its bitterness balances the fatty, peppery gravy in a way that juice doesn’t.
Tips for the Best Results
Keep everything cold during biscuit prep. Cold butter, cold buttermilk, ideally even cool hands (rinse them under cold water before handling the dough). If the butter starts to soften during the cutting step, slide the cut biscuit rounds into the freezer for 5 minutes before baking. That brief re-chilling brings the butter back into shape.
Brown the sausage with patience. The meat should show dark, caramelized spots before the flour goes in. Gray, barely-cooked sausage doesn’t contribute the same flavor compounds to the pan, and the resulting gravy will taste noticeably thinner and less developed regardless of how much seasoning you add after.
Season the gravy in stages, not all at once at the end. Season the sausage as it cooks, taste the roux after cooking it for 2 minutes, and then taste again after the milk has thickened. Each stage builds on the last. Seasoning only at the end produces a gravy that tastes sharp and added-to rather than integrated.
Biscuits rise better when they touch. Placing them with sides just barely touching on the sheet gives each biscuit something to push against during baking, directing the rise upward. Biscuits placed far apart tend to spread outward and bake up flatter.
Reheat gravy with a splash of warm milk. The gravy thickens considerably as it sits. Reheating on low with a tablespoon or two of whole milk while stirring brings it back to pouring consistency within 3 to 4 minutes.
Storage Tips
Refrigerator
Store biscuits and gravy separately. Biscuits kept at room temperature in an airtight container stay good for 1 day; in the fridge, up to 3 days. The gravy keeps in an airtight container in the fridge for up to 4 days. Storing them assembled causes the biscuits to absorb the gravy completely and turn soft and waterlogged overnight.
Freezer
Biscuits freeze well after baking. Cool them completely, wrap each one individually in plastic wrap, and store in a sealed bag for up to 3 months. Reheat from frozen in a 350°F oven for 12 to 15 minutes.
For a make-ahead option, cut the unbaked biscuits and freeze them on a parchment-lined sheet. Once solid (about 1 hour), transfer to a bag. Bake from frozen at 425°F for 18 to 20 minutes with no thawing required.
Gravy also freezes, though the texture can turn slightly grainy after thawing. Freeze in a sealed container for up to 2 months. Thaw in the fridge overnight, then reheat on the stovetop over low heat with a splash of milk.
Reheating
Reheat biscuits in a 350°F oven for 5 to 8 minutes, or in an air fryer at 325°F for 3 to 4 minutes. The microwave softens the exterior and kills any crust, so use it only if you have no other option.
Reheat gravy in a small saucepan over low heat, stirring in 1 to 2 tablespoons of whole milk until smooth and pourable. It returns to serving consistency in 3 to 4 minutes.
Nutrition Information
Per serving, based on 6 servings (1 biscuit + a generous ladle of gravy)
| Nutrient | Amount |
|---|---|
| Calories | 510 |
| Protein | 22g |
| Carbohydrates | 42g |
| Fiber | 2g |
| Sugar | 6g |
| Fat | 28g |
| Saturated Fat | 13g |
| Cholesterol | 90mg |
| Sodium | 720mg |
| Calcium | 180mg |
| Iron | 3mg |
| Potassium | 410mg |
Nutrition values are approximate and may vary based on brands and portion sizes.
Why This Recipe Works
I’ve tested biscuits using three different butter methods: cubing cold butter and cutting it in by hand, using a pastry cutter, and grating frozen butter on a box grater. The grating method consistently produces the most even distribution through the dough. Thin gratings melt into flat steam pockets in the oven, and you get more distinct layers per biscuit compared to hand-cut cubes, which tend to cluster unevenly depending on how long you work the dough.
The two-fold technique borrowed from laminated dough methods is genuinely worth the extra 30 seconds. One fold produces decent layering. Two folds stacks the existing layers again and multiplies them. You’re not making croissants, but the principle is the same: more folds equal more layers before the gluten gets overworked.
Keeping the fat in the pan after browning the sausage is the single most important decision in the gravy. That rendered fat is saturated with browning compounds from the caramelized meat. The flour goes directly into it to form the roux, which means the gravy base has flavor from step one rather than relying only on what you stir in at the end. Draining the fat and starting fresh with butter produces a noticeably blander gravy.
The black pepper quantity is higher than most standard recipes call for. That’s deliberate. Black pepper is the defining characteristic of a proper sausage gravy. A politely-seasoned version tastes like cream sauce with sausage in it. A properly peppery version tastes like biscuits and gravy.
Note: Nutrition figures are estimates based on standard ingredient amounts and will vary with specific brands and portions.
Frequently Asked Questions
Can I make biscuits and gravy ahead of time?
Yes, with some planning for each component. Cut the biscuits the night before and freeze them on a tray; bake from frozen the next morning with 5 to 6 extra minutes added to the baking time. The gravy can be made a full day ahead, stored in the fridge, and reheated on the stovetop over low heat with a splash of milk while stirring. Keep both separate until right before serving so the biscuits don’t absorb the gravy overnight.
Why didn’t my biscuits rise properly?
Two causes cover most cases. The first is butter that softened before baking. Even slightly warm butter absorbs into the flour rather than staying in discrete pieces, so there are no steam pockets to push the layers apart. The second is overworked dough. Once you stop seeing dry flour pockets, the mixing is done. Additional stirring or pressing after that point develops gluten, tightens the structure, and limits how much the biscuit can expand in the oven.
Can I use store-bought biscuits instead of making them from scratch?
Yes. Canned refrigerated biscuits are a completely reasonable shortcut for a weeknight. Bake them according to the package instructions while you prepare the gravy. The layers won’t have the same character as homemade, but the gravy itself carries the dish, and it tastes just as good over a store-bought biscuit.
How do I know when the gravy has reached the right consistency?
The gravy is ready when it coats the back of a wooden spoon heavily and a line drawn through that coating holds its shape for several seconds without the line filling back in. If the gravy slides off the spoon quickly, cook it for another 2 to 3 minutes. If it’s thick enough to sit in a mound, stir in warm milk a tablespoon at a time until it loosens. Keep in mind that gravy thickens as it cools, so pull it slightly before it reaches your exact target consistency.
What can I substitute for buttermilk in the biscuit dough?
Stir 1 tablespoon of white vinegar or fresh lemon juice into 3/4 cup of whole milk and let it sit for 5 minutes before using. The milk curdles slightly and thickens, which is what you want. This substitute works in a 1:1 ratio here. Plain unsoured whole milk also works, but the biscuits will be slightly less tender since the baking soda won’t have the acidity it needs to activate properly.
Is this recipe suitable for someone with a dairy allergy?
Not in its standard form. Butter, buttermilk, and whole milk are structural components in both the biscuits and the gravy. The dairy-free substitutions in the allergen section above cover workable alternatives, but the texture and richness will differ from the original. If the allergy is severe, check individual product labels carefully for cross-contact warnings, since many plant-based dairy alternatives are processed in shared facilities.
How much black pepper is the right amount for the gravy?
One teaspoon of coarse black pepper for a batch that serves 6 is the right baseline for most people. Taste the gravy just before serving and add more if it needs it. The pepper should be noticeable and present on the palate but not overwhelming on every single bite. If you’re sensitive to pepper heat, start with half a teaspoon and adjust up. For a genuinely spicy gravy, 1 and 1/2 teaspoons plus a small pinch of cayenne sits at the upper end of what most adults who enjoy heat would find comfortable.
Conclusion
Biscuits and gravy is more about technique than mystery. Keep the butter cold, handle the dough with a light hand, let the sausage brown properly, and season the gravy with conviction. Once you’ve made it twice, you’ll stop measuring and start adjusting by instinct, which is where good cooking usually lives.
It’s the kind of breakfast that makes a slow weekend morning feel genuinely worthwhile. If you loved this biscuits and gravy recipe, save it to your breakfast or Southern recipes Pinterest board so you can find it easily later. For more healthy recipes and daily food inspiration, follow TheCookingVibes on Pinterest.
Biscuits and Gravy
Ingredients
Equipment
Method
- Heat oven to 425°F (220°C). Cube butter and freeze for 10 minutes. Line a baking sheet with parchment.
- Whisk flour, baking powder, baking soda, and salt in a large bowl. Add cold butter and press each piece flat between your fingers until the mixture is shaggy with pea- to almond-sized butter pieces throughout.
- Add cold buttermilk and stir with a fork until a rough dough barely holds together. Turn onto a floured surface, pat to 1 inch thick, fold in thirds, pat again. Repeat the fold once more, then pat to 3/4 inch and cut into rounds with a sharp-edged cutter without twisting.
- Place biscuits on the sheet with sides touching. Brush tops with buttermilk. Bake 12 to 15 minutes until light golden and puffed.
- While biscuits bake, cook sausage in a cast iron skillet over medium-high heat for 7 to 9 minutes, breaking into crumbles, until browned with dark edges. Cook ground beef to 160°F internal temperature. Do not drain the fat.
- Reduce heat to medium. Add flour to the pan and stir for 2 minutes. Pour in warmed milk in a slow stream while whisking. Cook 4 to 6 minutes, stirring, until the gravy coats a spoon heavily.
- Season with black pepper, cayenne if using, and salt. Split biscuits, ladle gravy over both halves, and serve immediately.
Notes
- Butter must remain cold until it enters the oven. Refreeze it if it softens during prep.
- Warm milk before adding to the roux to prevent lumps.
- Do not drain the fat from the sausage; it is the flavor base of the gravy.
- Store biscuits and gravy separately in the refrigerator for best texture the next day.