Twice Baked Potatoes — Crispy Skins, Loaded Creamy Filling
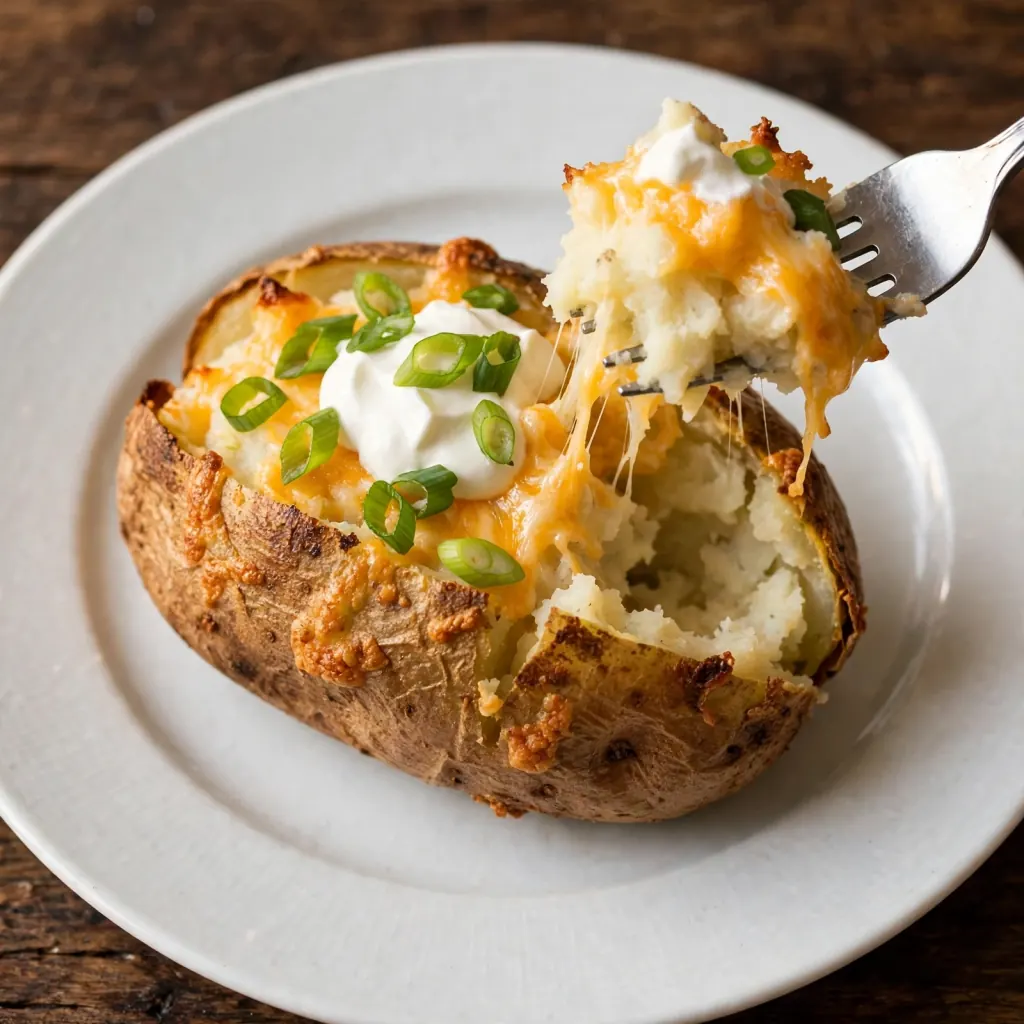
Pull a tray of twice baked potatoes from the oven and you get the best of two different things at once: potato skins that have gone through the oven twice and developed a deep, crispy exterior, and a filling that’s been whipped with butter, sour cream, and sharp cheddar into something noticeably richer and more complex than a plain baked potato could ever be. The second bake browns the cheese and sets the filling into a smooth, slightly puffed mound above the shell, and what comes out of the oven holds its shape, serves cleanly, and reheats without compromising either the skin or the filling.
This twice baked potatoes recipe uses large russet potatoes baked until fully tender, scooped and whipped with butter, sour cream, sharp cheddar, green onions, and seasonings, then refilled into the crisped skins and baked again until golden. The recipe serves 4 as a side or 2 as a complete meal, comes together in about 90 minutes with very little active work, and makes ahead so well that it is genuinely one of the most useful entertaining recipes in a home kitchen.
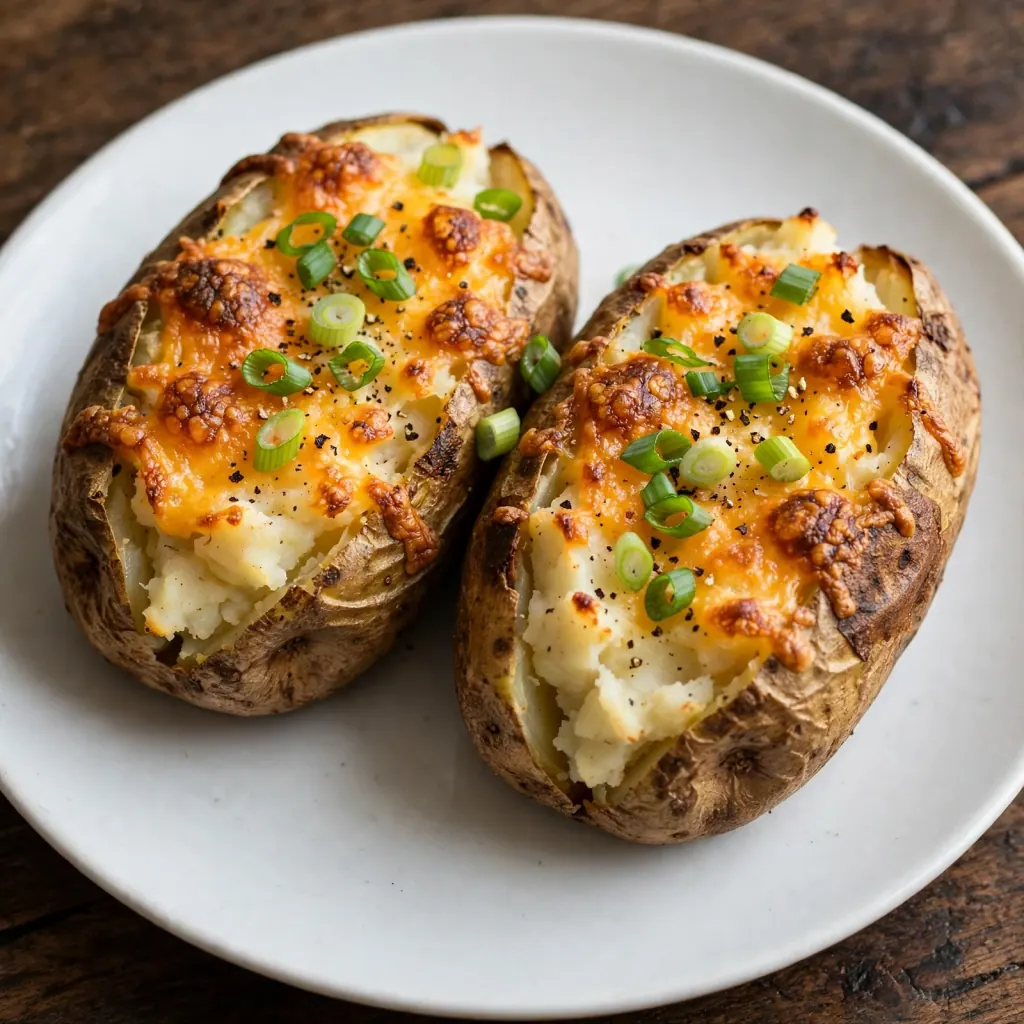
Why You’ll Love This Twice Baked Potatoes Recipe
- Skin that’s genuinely crispy, not leathery. Rubbing the potato skins with oil and salt before the first bake, then briefly baking them empty before adding the filling back, produces a potato shell that’s crunchy on the outside and still sturdy enough to hold the filling without collapsing.
- Filling that’s lighter than it looks. Whipping the scooped potato flesh with butter and sour cream rather than just stirring it produces a filling with more air incorporated, which makes it feel fluffy and light rather than dense and heavy despite the rich ingredients.
- Makes ahead completely. The filled, unbaked potatoes can be assembled, wrapped, and refrigerated for up to 24 hours before the second bake; they go from refrigerator to oven with 5 minutes added to the bake time and come out identical to same-day versions.
- Versatile enough for any occasion. They work as a side dish alongside a simple weeknight dinner, as the main event for a lighter meal, or as a make-ahead entertaining dish for a gathering where you want something that looks impressive without requiring last-minute kitchen attention.
- Customizable filling without changing the method. The base recipe is a reliable foundation; add-ins like caramelized onions, roasted garlic, or jalapeños all fold into the whipped filling without requiring any adjustments to the bake time or temperature.
Ingredients You’ll Need
Recipe Timing
| Detail | Info |
|---|---|
| Servings | 4 (as a side) or 2 (as a main) |
| Difficulty | Easy to Moderate |
| Course | Side Dish, Main Course |
| Cuisine | American |
| Prep Time | 15 minutes |
| Cook Time | 70 minutes (45 min first bake + 5 min hollow + 20 min second bake) |
| Rest Time | 5 minutes |
| Total Time | 90 minutes |
For the potatoes, large russet potatoes are the only variety that produces the right result for this recipe. Russets have a high starch, low moisture flesh that bakes fluffy and dry rather than dense and wet, which means the scooped filling whips to a light, smooth consistency without becoming gluey. Waxy varieties like red potatoes or Yukon Golds hold their shape well but contain too much moisture; their flesh turns sticky when whipped and produces a filling that’s heavy and slightly gluey rather than light and airy. Choose the largest russets you can find, each weighing approximately 280 to 340g before baking; a potato much smaller than this produces a shell too thin and fragile to hold the filling without breaking.
For the sour cream, full-fat is noticeably better than low-fat here. Full-fat sour cream has a higher fat content that emulsifies smoothly into the hot potato flesh and produces a filling that’s creamy and cohesive. Low-fat sour cream has more water, which can make the filling slightly looser and less cohesive, particularly if your potatoes had any extra moisture.
For the cheese, sharp cheddar shredded from a block melts considerably more smoothly than pre-shredded cheddar, which is coated in anti-caking starches that resist melting and produce a slightly grainy surface on the finished potato. Take 2 minutes to shred from the block; the difference in the finished top is immediately visible.
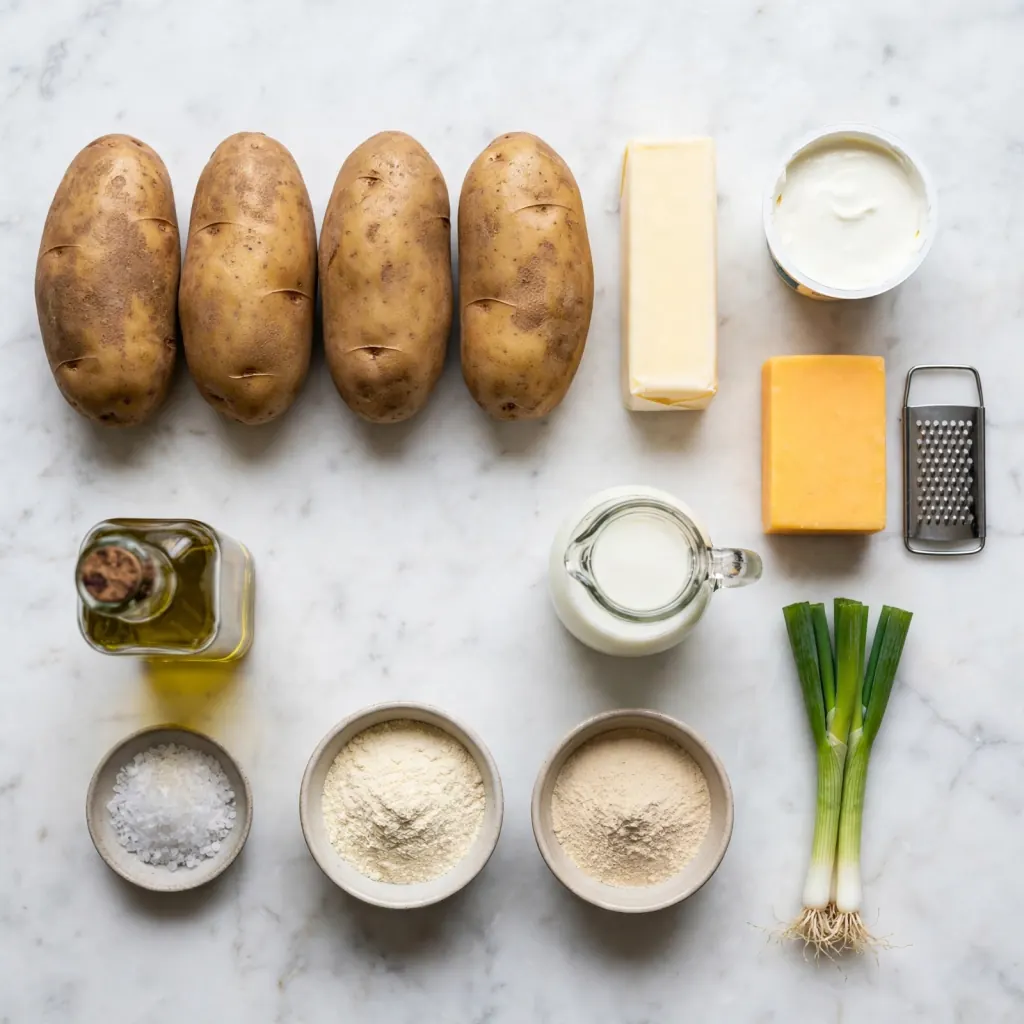
- 4 large russet potatoes (about 280 to 340g each) — the structural base and the primary filling component; size and variety both matter significantly
- 1 tablespoon olive oil or neutral oil — for rubbing the skins before the first bake; produces a crispier skin than baking uncoated
- 1 teaspoon coarse sea salt — for the exterior skin before the first bake; seasons the skin directly and draws surface moisture out to promote crispness
- 3 tablespoons unsalted butter, at room temperature — the primary fat in the filling; room temperature butter incorporates faster and more smoothly into the hot scooped potato flesh
- 1/3 cup (80ml) full-fat sour cream — adds tanginess, richness, and moisture to the filling; holds the whipped texture together
- 1/4 cup (60ml) whole milk or heavy cream — adjusts the filling to the right consistency; add gradually since potato moisture levels vary; heavy cream produces a richer result
- 3/4 cup (75g) sharp cheddar cheese, freshly shredded, divided — 1/2 cup goes into the filling, 1/4 cup goes on top; freshly shredded from a block for the smoothest melt
- 3 green onions, thinly sliced, divided — approximately 2/3 go into the filling and 1/3 reserved for garnish; adds a mild, fresh allium bite
- 1/2 teaspoon garlic powder — adds a background savory depth to the filling without the sharpness of raw garlic
- 1/2 teaspoon onion powder — reinforces the savory base of the filling
- Salt and freshly ground black pepper — season the filling carefully; taste before refilling
- Sour cream and extra green onions — for serving
Allergen and Dietary Disclosure
This twice baked potatoes recipe contains dairy (butter, sour cream, milk or cream, and cheddar cheese). It is naturally gluten-free and egg-free as written. Verify that any add-ins you use are gluten-free if that is a concern.
For dairy-free: replace the butter with a vegan butter alternative at the same quantity. Replace the sour cream with full-fat coconut cream or a dairy-free sour cream product. Use dairy-free shredded cheddar-style cheese for the filling and topping. The method stays identical; the filling will be slightly less tangy than the dairy version but still rich and satisfying.
For lower fat: replace the full-fat sour cream with plain full-fat Greek yogurt at the same quantity. Greek yogurt provides a similar tang and binding quality with less fat, and it whips into the potato flesh almost identically to sour cream. Replace the heavy cream with whole milk. Use a reduced-fat sharp cheddar but still shred it from a block rather than using pre-shredded.
This recipe has not been tested in a certified allergen-free kitchen and cannot be guaranteed safe for any specific allergy.
Equipment Needed
- Baking sheet or roasting pan — for the first bake and the second bake. A rimmed sheet keeps the potatoes steady and catches any oil drips from the skin during the first bake. The same sheet, wiped clean, is used for the second bake; the potatoes need a stable surface rather than being propped in a dish.
- Hand mixer or stand mixer — for whipping the scooped potato flesh into a smooth, airy filling. The key difference between a whipped filling and a simply mashed one is the air incorporated by the mixer’s beaters; a fork or potato masher produces a denser, heavier filling without the same lightness. A hand mixer takes about 60 seconds per batch; the filling goes from lumpy to smooth and slightly glossy.
- Sharp paring knife or small serrated knife — for cutting the top off the baked potato cleanly. A sharp knife makes a precise, clean cut that leaves the potato shell intact; a dull knife compresses the potato and can crack the fragile skin after the first bake.
- Small spoon — for scooping the baked potato flesh without piercing through the skin. A sturdy metal serving spoon is too wide for the inside edges of a large russet; a standard dessert spoon or a grapefruit spoon gets into the edges and corners cleanly.
- Aluminum foil — not for wrapping the potatoes during the first bake; wrapping steams the skin rather than crisping it. The foil is used for tenting the refilled potatoes during make-ahead storage rather than during any cooking stage.
Step-by-Step Directions
Step 1: Prepare and First-Bake the Potatoes
Preheat the oven to 220°C (425°F). Scrub each potato thoroughly under cold water and pat completely dry with paper towels; any remaining surface moisture prevents the skin from crisping properly. Pierce each potato 8 to 10 times all over with a fork, going at least 1.5cm deep; this allows steam to vent during baking and prevents the potato from building up enough internal pressure to crack or burst. Rub each potato all over with olive oil and then rub with coarse sea salt so the entire surface is coated. Place directly on the oven rack over a baking sheet on the rack below to catch any drips.
Bake for 45 to 55 minutes until the skin is visibly crisped and the potato yields completely when squeezed gently through a folded kitchen towel, with no firm core remaining anywhere. The internal temperature should reach at least 96°C (205°F) for the starch to have fully gelatinized into the fluffy, dry texture that whips well. Remove from the oven and reduce the temperature to 190°C (375°F).

Chef’s Note: Baking the potatoes directly on the oven rack rather than on a baking sheet makes a noticeable difference in the skin texture. When a potato rests on a pan surface, the contact side is insulated from direct oven heat and the moisture from the potato’s interior collects on the skin at the bottom contact point, keeping it soft. Rack baking exposes the entire skin surface to circulating dry oven heat, which crisps the skin uniformly all the way around.
Step 2: Scoop the Flesh
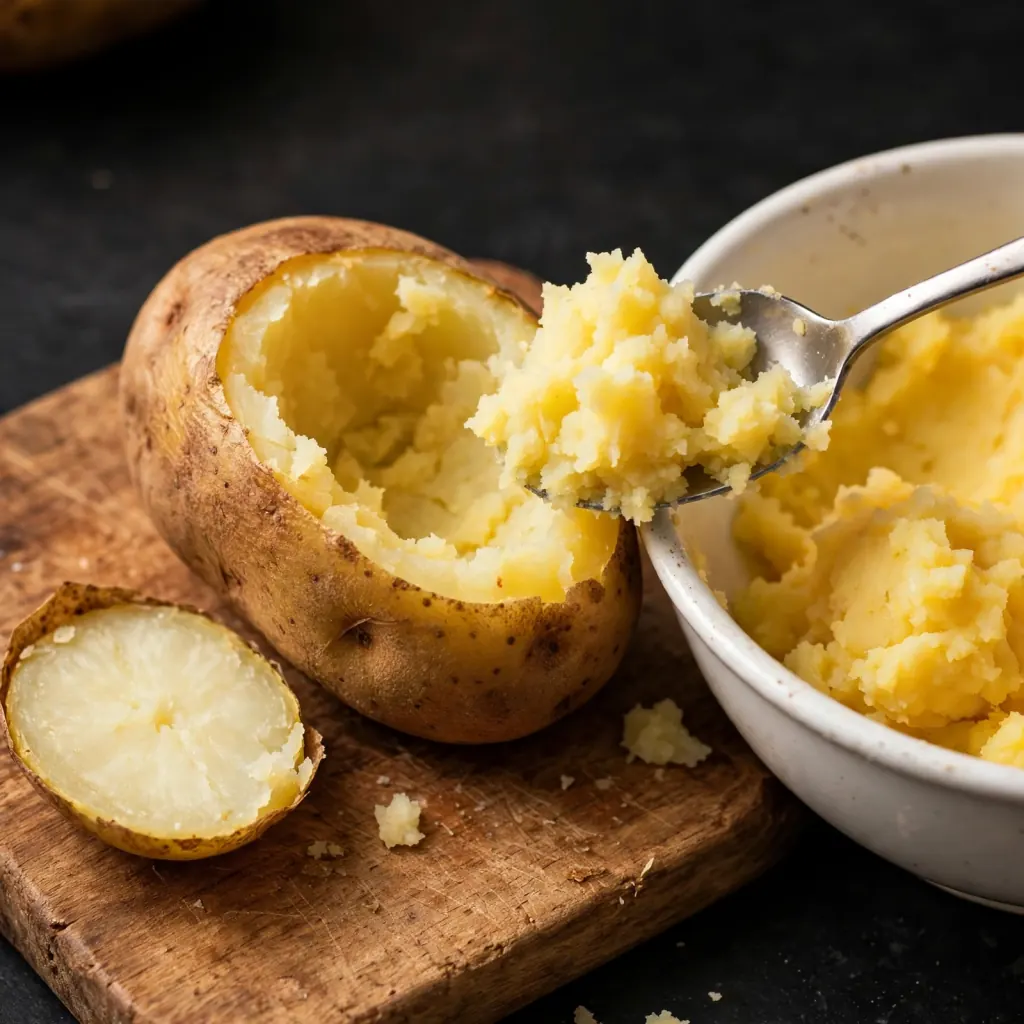
Allow the baked potatoes to rest for 5 minutes until cool enough to handle without a towel. Using the sharp paring knife, cut a lengthwise oval from the top of each potato, removing approximately the top third of the potato. This creates a wider opening than cutting just the very top, which gives you more room to scoop and more surface area for the filling to fill and the cheese to melt across. Carefully scoop the hot flesh from inside each potato and from the removed top pieces, leaving a wall approximately 5mm thick all the way around the interior to maintain the shell’s structural integrity. Place all the scooped flesh into the mixing bowl.
Chef’s Note: Leaving a 5mm wall sounds precise but it’s actually easy to gauge by feel: the shell should feel firm when you press the outside gently but should not be so thick that the potato tastes mostly skin. A wall thinner than 3mm risks cracking when you refill the potato; thicker than 8mm wastes a significant amount of the flesh you need for the filling.
Step 3: Whip the Filling
Add the room-temperature butter to the hot scooped potato flesh. Let it sit for 60 seconds so the butter begins to melt into the heat of the potatoes before beating; this prevents the mixer from pushing cold butter lumps through the filling unevenly. Beat with the hand mixer on medium speed for 30 seconds until the butter is fully incorporated. Add the sour cream and beat for another 30 seconds. Add the milk or cream 2 tablespoons at a time, beating briefly after each addition, until the filling reaches a smooth, creamy consistency that holds a gentle peak when lifted on a spoon rather than dripping off in a loose stream. The right consistency is slightly thicker than mashed potatoes from a restaurant: dense enough to mound above the potato shell without spreading flat.
Fold in 1/2 cup of the shredded cheddar and approximately two-thirds of the green onions by hand with a spoon or spatula, along with the garlic powder and onion powder. Taste the filling carefully and season with salt and black pepper. The filling at this point should taste complete and well-seasoned; it mutes slightly during the second bake, so season it just a touch more assertively than you want in the final bowl.
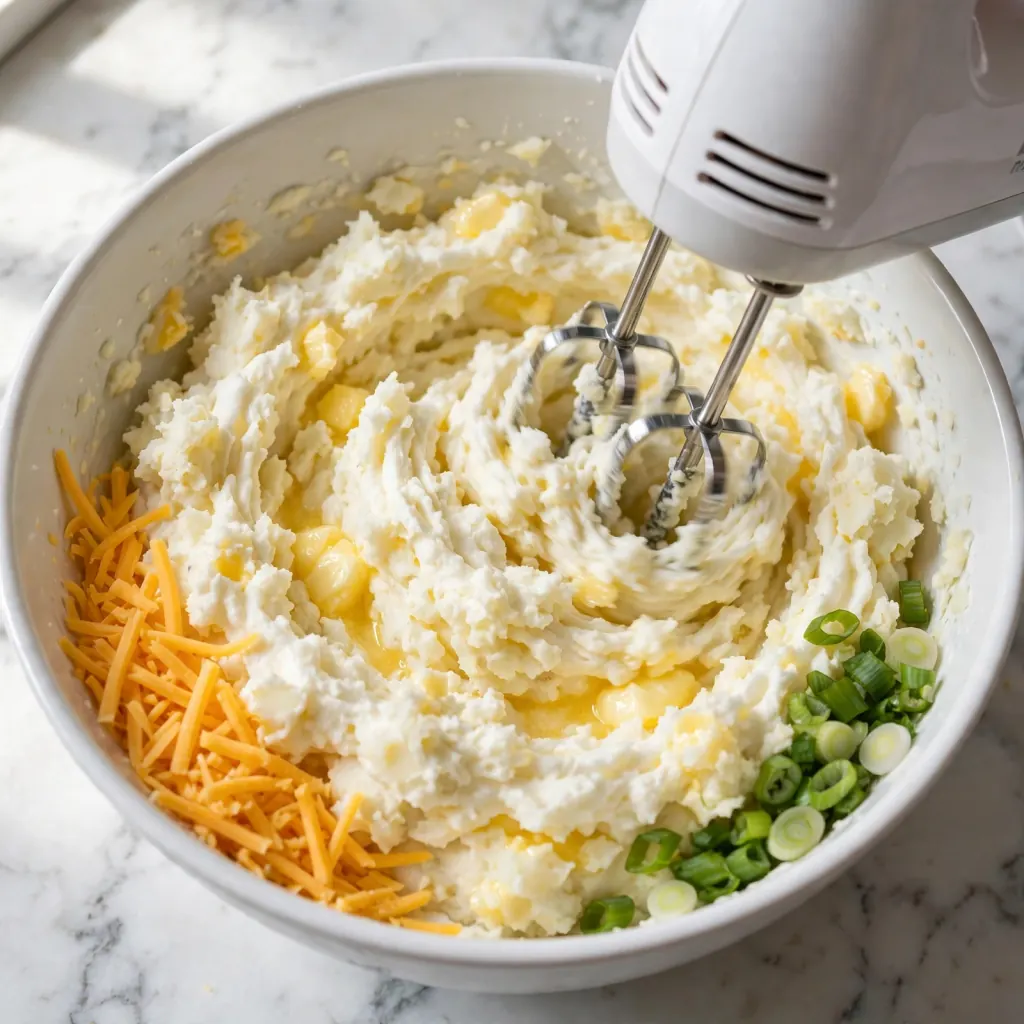
Step 4: Refill the Potato Shells
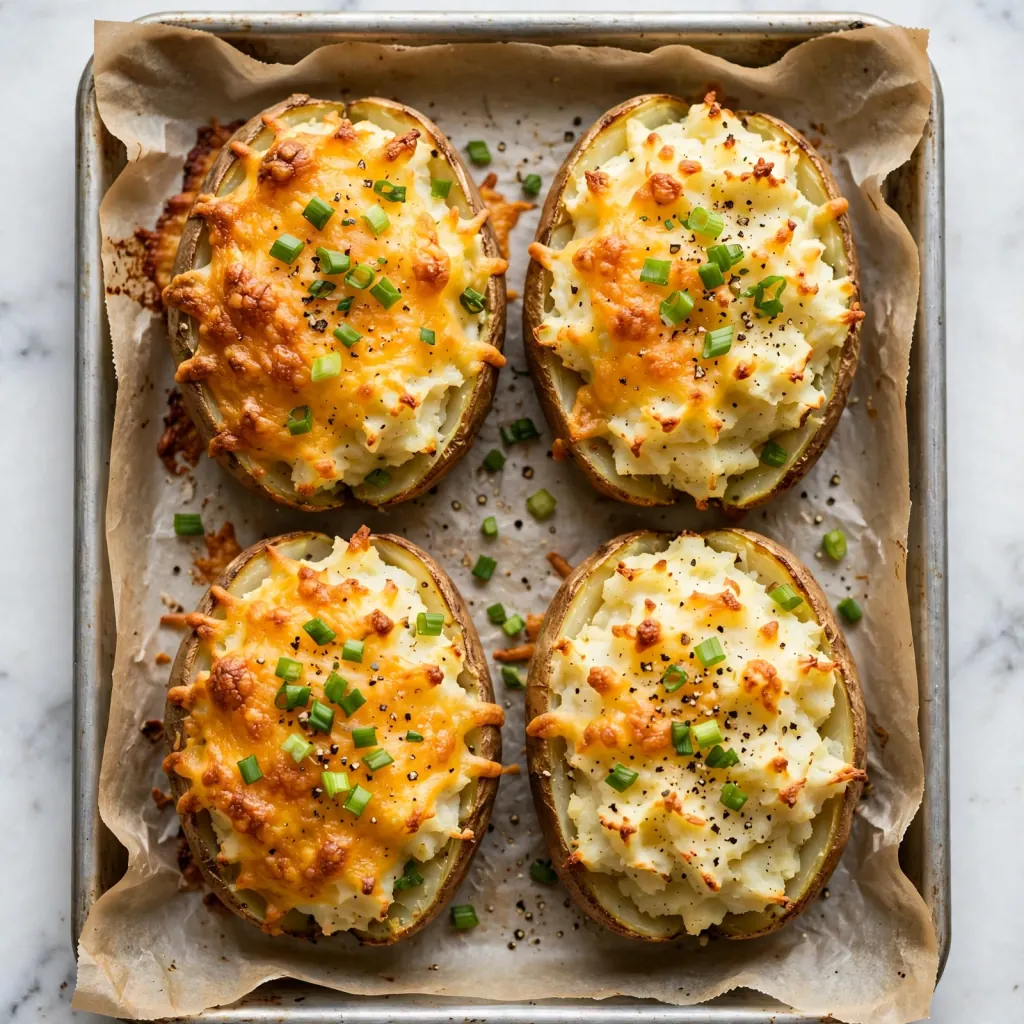
Briefly bake the empty potato shells at the reduced 190°C (375°F) for 5 minutes while you finish the filling; this step dries the interior walls slightly and firms the shell so it holds the filling without absorbing too much moisture from the refilling step. Remove from the oven and spoon the whipped filling generously into each shell, pressing gently at first to fill the base and then mounding it above the rim of the shell. The filling will settle slightly during the second bake, so a generous mound now produces a beautifully full finished potato. Scatter the remaining shredded cheddar evenly across the top of each potato’s filling.
Chef’s Note: Mounding the filling higher than the potato rim is the visual detail that separates a twice baked potato that looks properly loaded from one that looks deflated and underwhelming. Don’t be tempted to fill flush with the rim; the extra height is not only more attractive but also gives the top cheese enough of a surface to brown and bubble rather than just warming.
Step 5: Second Bake Until Golden
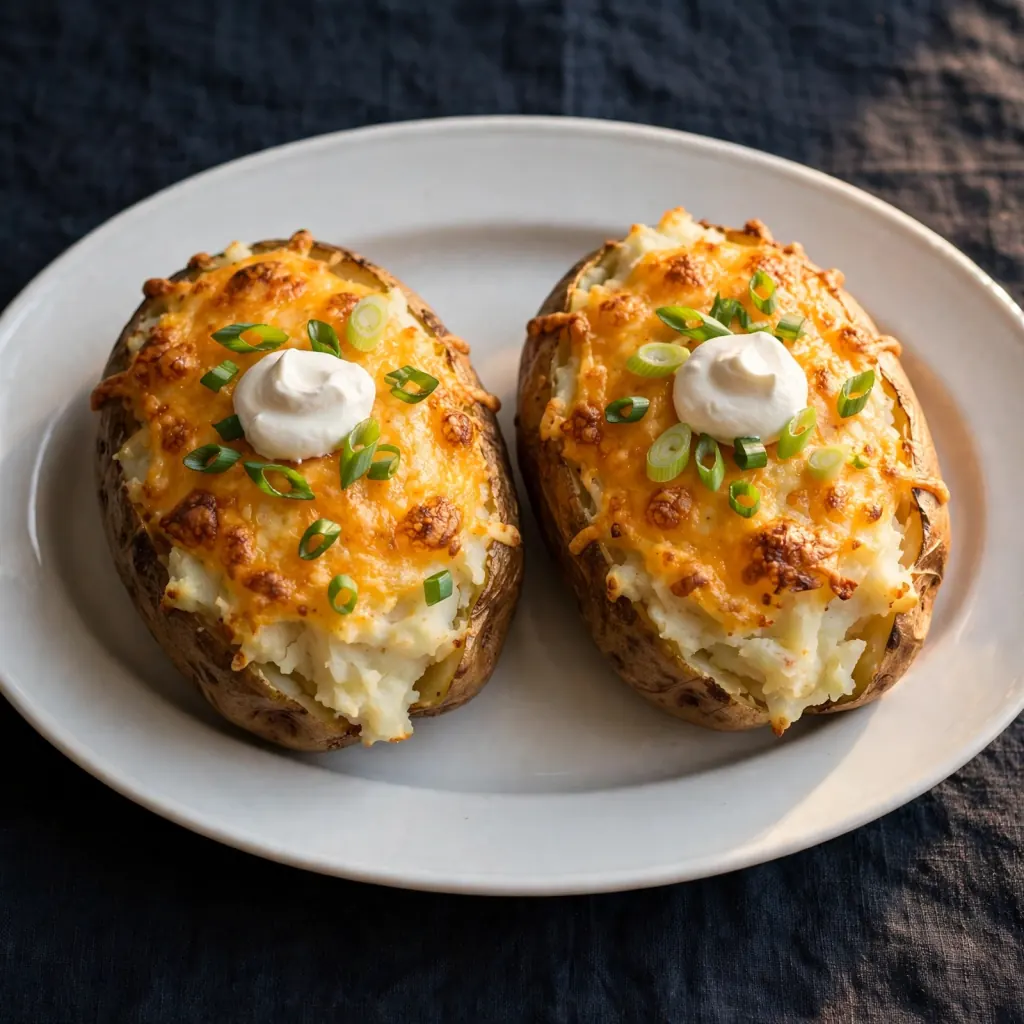
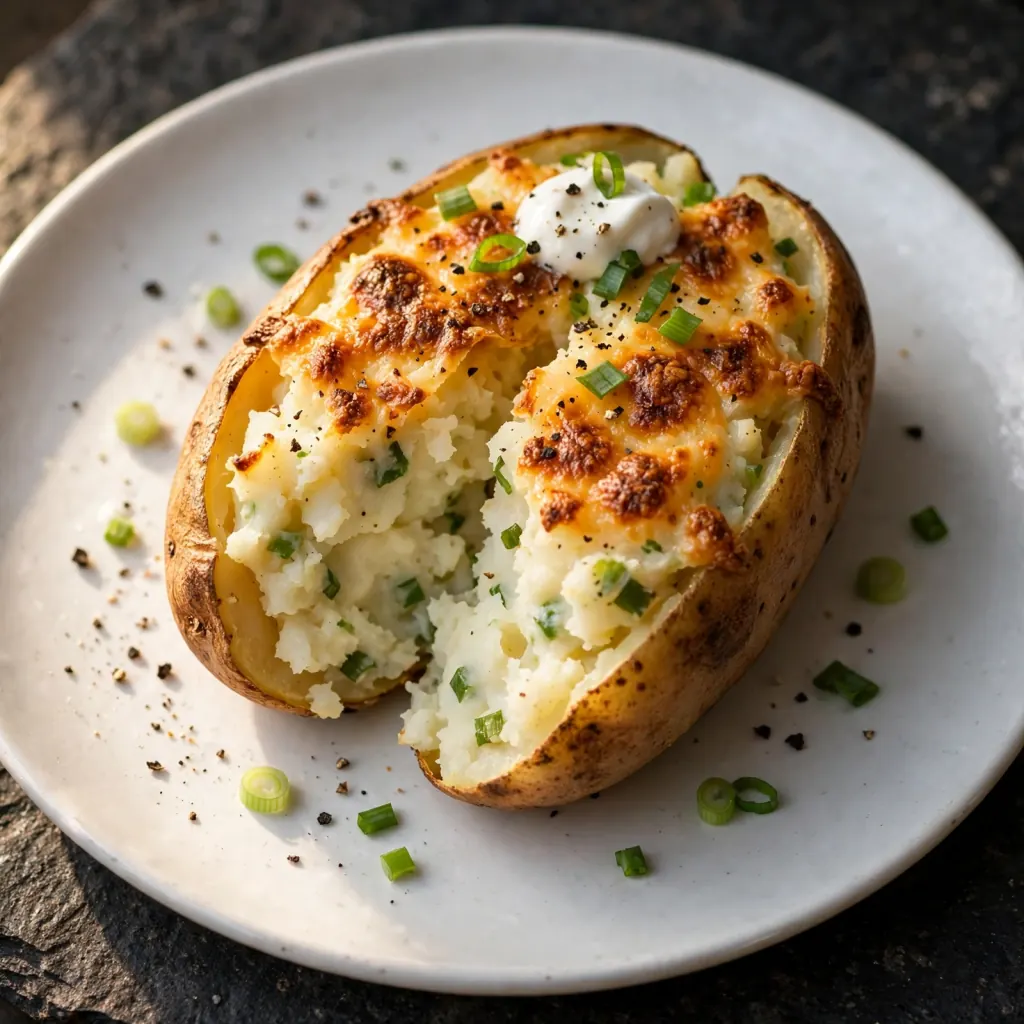
Place the refilled potatoes on the baking sheet and bake at 190°C (375°F) for 18 to 22 minutes until the cheese across the top is completely melted and has developed visible golden-brown patches across its surface, the filling appears set rather than jiggly when the tray is gently shaken, and the edges of the potato skin look deeper and more caramelized than they were before the second bake. Remove from the oven and rest on the baking sheet for 5 minutes before serving; the filling continues to firm slightly from the residual heat during this time and sets to a clean, scoopable texture.
Step 6: Garnish and Serve
Top each finished potato with the reserved sliced green onions and a small dollop of sour cream placed at the center of the filling just before serving. Add a crack of black pepper. The green onions added at this stage retain their fresh color and clean bite rather than wilting into the baked filling; the visual contrast of the bright green against the golden cheese is part of what makes twice baked potatoes look as good as they taste.
Common Mistakes and Troubleshooting
| Problem | Cause | Solution |
|---|---|---|
| Skin soft and leathery rather than crispy | Potatoes wrapped in foil during first bake, or baked on a pan rather than directly on the rack | Never wrap; always bake uncovered directly on the oven rack with a drip tray below |
| Filling gluey and dense | Waxy potatoes used, or filling over-mixed after the milk was added | Use only russet potatoes; mix just until smooth and stop before the filling becomes sticky |
| Shell cracks or collapses when refilled | Walls scooped too thin, or filling packed too aggressively | Leave at least 5mm of flesh at the walls; fill gently, pressing down before mounding up |
| Cheese doesn’t melt or browns too fast | Pre-shredded coated cheese used, or oven temperature wrong | Always shred cheddar from a block; bake at 190°C, not higher, for the second bake |
| Filling tastes bland after the second bake | Under-seasoned before refilling, or not enough dairy fat | Season assertively before refilling; use full-fat sour cream and real butter |
| Potatoes take too long to cook in the first bake | Too large, or oven not fully preheated | Use potatoes in the 280 to 340g range; always preheat to 220°C fully before adding potatoes |
Variations and Substitutions
- Roasted garlic twice baked potatoes: Roast a full head of garlic alongside the potatoes during the first bake: cut the top off the head, drizzle with olive oil, wrap in foil, and place on the tray. Squeeze the softened roasted garlic cloves directly into the filling when whipping. The roasted garlic adds a mellow, sweet depth that doesn’t have the sharpness of raw garlic powder and produces a significantly more complex filling.
- Spicy jalapeño twice baked potatoes: Finely dice 1 to 2 fresh jalapeños (seeds included for more heat, seeds removed for mild) and fold them into the filling along with the cheddar and green onions. Replace the sharp cheddar topping with Monterey Jack for a slightly milder cheese that melts more smoothly. Serve with a small bowl of sour cream on the side for those who want to cool the heat.
- Extra cheesy twice baked potatoes: Use a combination of 1/4 cup sharp cheddar plus 1/4 cup Gruyère folded into the filling, with an additional 1/4 cup of sharp cheddar across the top. The Gruyère melts into the filling with a nutty, slightly sweet depth that cheddar alone doesn’t have, and the cheddar on top browns more dramatically than Gruyère would, producing a filling that tastes complex and a top that looks dramatic.
- Caramelized onion twice baked potatoes: Cook one large yellow onion, thinly sliced, in 1 tablespoon of butter over medium-low heat for 30 to 35 minutes until deeply golden, sweet, and reduced. Fold the caramelized onion into the filling in place of the raw green onions. The long-cooked onion adds a sweet, jammy depth that makes the filling taste considerably more developed and almost French-onion-soup-like against the sharp cheddar.
- Herb and cream cheese twice baked potatoes: Replace 2 tablespoons of the sour cream with 2 tablespoons of softened full-fat cream cheese beaten into the filling. Add 2 tablespoons of finely chopped fresh chives and 1 tablespoon of fresh dill to the filling along with the green onions. The cream cheese produces a thicker, slightly denser filling that holds its shape above the rim more dramatically and adds a mild tang that complements the fresh herbs.
- Gluten-free confirmation: This recipe is naturally gluten-free as written. No adjustments are needed; all core ingredients including the potatoes, butter, sour cream, cheese, milk, and spices are inherently gluten-free. Verify that your garlic powder and onion powder brands are labeled gluten-free if processing in shared facilities is a concern.
Serving Suggestions
- Serve as a side dish alongside a simple protein: roasted chicken thighs, grilled lamb chops, or a pan-seared steak. The twice baked potato is rich and substantial enough that the protein alongside it doesn’t need to be elaborate; simple seasoned and properly cooked meat is the right match.
- For a lighter complete meal, serve two halves per person as the centerpiece with a large green salad dressed with a bright lemon vinaigrette. The acid from the vinaigrette cuts through the richness of the butter and cheese filling and makes the whole plate feel balanced.
- Set up a simple topping bar at the table: small bowls of extra sour cream, additional sliced green onions, finely diced red onion, and plain Greek yogurt. Guests add their own toppings and the presentation becomes interactive, which works well for gatherings where people have different preferences.
- Serve as a party side dish at room temperature for a buffet; twice baked potatoes hold at room temperature for up to 45 minutes after coming out of the oven without losing significant quality, which makes them practical for events where everything needs to be timed against each other.
- Pair with a cold sparkling water with lemon or a light herbal iced tea. Both provide a clean, refreshing contrast to the rich dairy-heavy filling and make the green onion garnish taste brighter at the finish.
- For a casual weeknight dinner, split one large twice baked potato in half and serve with a bowl of simple tomato soup. The combination produces a meal that’s filling without requiring any additional cooking.
Tips for the Best Results
- Never wrap the potatoes in foil for the first bake. Foil wrapping is one of the most common potato-baking habits, and for a simple baked potato it doesn’t cause a major problem. For twice baked potatoes, where the skin’s crispness is a defining quality, foil wrapping traps steam against the skin and keeps it soft rather than letting it dry and crisp in the oven heat. Bake uncovered, on the oven rack, at a high temperature.
- Use the hottest first bake temperature possible. 220°C (425°F) is higher than many baked potato recipes call for, and that extra heat is what drives the surface moisture out of the skin rapidly enough to produce a genuinely crispy exterior. A lower temperature produces a soft, pale skin that doesn’t crisp properly even when baked for the same length of time.
- Add the liquid gradually to the filling. The amount of milk or cream needed to reach the right consistency varies between potatoes depending on their individual moisture content and size. Start with 2 tablespoons and beat briefly; add 2 more tablespoons and beat again; continue until the filling holds a gentle, stable peak without dripping. Over-thinned filling collapses out of the shell during the second bake and produces a flat, spreading result rather than a mounded one.
- Let the butter reach room temperature before adding it to the hot potato. Cold butter added to the hot scooped flesh stays in firm chunks that resist mixing; even after 60 seconds of beating, the butter hasn’t fully emulsified into the potato. Room temperature butter begins to melt on contact with the hot flesh and incorporates into a smooth, even cream within seconds of beating.
- Taste the filling before refilling and season it actively. The second bake mellows flavors slightly, and the filling that tasted perfectly seasoned before going back into the shell often tastes slightly flat after the second bake. Season the filling to a point where it tastes perhaps 10% more assertive than you want in the final bite; the oven takes it exactly where you need it.
Storage Tips
Refrigerator
Fully baked and filled twice baked potatoes keep in the refrigerator for up to 4 days wrapped individually in plastic wrap or stored in a sealed container. The filling softens slightly in the refrigerator but reheats to a very close approximation of the original texture. The skin may soften during refrigerator storage; the reheating method has a significant effect on whether it regains its crispness. Store without the fresh green onion garnish; add it fresh at serving.
Freezer
Twice baked potatoes freeze well for up to 3 months. Freeze after the second bake, fully cooled, individually wrapped in plastic wrap and then aluminum foil to protect against freezer drying. Thaw overnight in the refrigerator before reheating. The filling retains its flavor well through freezing; the skin softens considerably but firms back up during oven reheating. For best results after freezing, reheat in the oven rather than the microwave.
Reheating
The oven produces the best reheating result by a considerable margin. Place refrigerated or thawed twice baked potatoes on a baking sheet at 175°C (350°F) for 18 to 22 minutes, uncovered, until the filling is hot throughout and the cheese on top has re-melted and is beginning to bubble at the edges again. The skin regains most of its crispness during this time. Microwave reheating at 60% power in 90-second intervals warms the filling adequately but leaves the skin uniformly soft; use it for a quick lunch portion when the skin texture is less important.
Make-ahead note: This is one of the best make-ahead recipes available for entertaining. Assemble the filled, uncooked second-bake potatoes up to 24 hours ahead, wrap each one tightly in plastic wrap, and refrigerate. When ready to serve, unwrap, place on a baking sheet, and bake at 190°C (375°F) for 23 to 25 minutes; the extra few minutes account for the filling starting cold rather than at room temperature. Add the fresh green onion garnish and sour cream at the table.
Nutrition Information
Per serving, approximately one whole twice baked potato (1/4 of the recipe), sour cream garnish not included:
| Nutrient | Amount |
|---|---|
| Calories | 420 kcal |
| Protein | 12g |
| Total Carbohydrates | 52g |
| Dietary Fiber | 4g |
| Total Sugar | 4g |
| Total Fat | 19g |
| Saturated Fat | 11g |
| Cholesterol | 52mg |
| Sodium | 420mg |
| Vitamin C | 18mg |
| Calcium | 220mg |
| Iron | 2.4mg |
| Potassium | 1050mg |
Nutrition values are approximate and may vary based on potato size, brands, and portion sizes. Serving garnishes not included.
Why This Recipe Works
The texture difference between a simply mashed filling and a properly whipped one comes from the physical change that mechanical aeration produces in starch-based foods. When cooked potato flesh is beaten with a hand mixer on medium speed, the mechanical action breaks apart the potato’s natural starch granule aggregates and simultaneously incorporates small air bubbles into the surrounding fat-and-water matrix formed by the butter and sour cream. Those air bubbles, trapped in the starch network, produce the light, slightly glossy filling texture that reads as fluffy on the palate. A potato filling worked by hand with a fork incorporates far less air and produces a denser result because the manual force isn’t sufficient to create and stabilize those air pockets in the starch network at the same rate as machine beaters.
The two-temperature baking approach in this recipe, starting at 220°C and reducing to 190°C for the second bake, solves a specific structural problem. The first bake at 220°C drives surface moisture out of the potato skin rapidly, concentrating the surface starches into a rigid, dehydrated layer that produces the crunchy exterior. The second bake at 190°C is lower specifically because the goal has changed: at this stage you need the filling to heat through gently and the cheese to melt without the skin, which is now thin and crispy, burning or darkening further than the visual ideal. 190°C melts cheddar and heats the filling in about 20 minutes without pushing the already-crisped skin past its ideal point.
Russet potatoes are the specific choice for this recipe because of their starch composition. Russets are classified as high-starch, low-moisture potatoes, containing approximately 22 to 25% starch by weight compared to the 14 to 16% in waxy varieties like Yukon Gold. When the potato is baked, those starch granules absorb the potato’s internal moisture and gelatinize, producing the characteristically dry, crumbly texture of a properly baked russet interior. That dry, crumbly structure whips more readily than the denser, wetter structure of a waxy potato because there is less free water competing for the fat emulsification that the butter and sour cream need to produce a smooth, light filling. Waxy potatoes have a higher water content; when whipped, that water produces a filling that runs or becomes sticky because there isn’t enough starch to stabilize the water around the fat molecules.
The 5-minute empty-shell bake between the first and second bake is a short step with a specific structural purpose. Once the potato flesh is scooped out, the interior walls of the shell are slightly moist from the steam that escaped during the first bake. Those moisture-dampened walls, if filled immediately, absorb some of the butter and sour cream from the filling’s outer layer as it settles against the wall, which can make the filling stick to the shell in an uneven, slightly wet layer rather than pulling cleanly when the finished potato is cut or scooped. The 5-minute empty bake at 190°C dries those walls slightly before the filling goes in, producing a clean boundary between shell and filling in the finished potato.
I’ve tested this recipe with three different dairy fat levels in the filling: butter-only, sour-cream-only, and the combined butter plus sour cream method described here. The butter-only filling is richest but lacks any acidity, making it taste flat and slightly one-dimensional against the starchy potato base. The sour cream-only filling has the right tangy balance but less richness, and the filling doesn’t whip to the same light consistency because sour cream has a lower fat content than butter and less capacity for fat emulsification. The combined butter and sour cream filling produces both the richness and the acidity, and the butter’s higher fat content helps stabilize the whipped structure while the sour cream’s lactic acid provides the brightness that makes the filling taste complete rather than just creamy.
Frequently Asked Questions
Can I make twice baked potatoes ahead of time?
Yes, and this is one of the recipes that most rewards advance preparation. Fill and assemble the potatoes completely through the cheese topping, wrap each one individually in plastic wrap, and refrigerate for up to 24 hours. When ready to serve, unwrap, place on a baking sheet, and bake at 190°C (375°F) for 23 to 25 minutes to account for the filling starting cold. The result is virtually identical to a same-day version. Add the fresh green onion garnish and sour cream dollop only after they come out of the oven.
Why is my twice baked potato filling gluey and sticky?
Gluey filling almost always means either the wrong potato variety was used or the filling was over-mixed. Waxy potato varieties like Yukon Gold contain too much free moisture and not enough dry starch, so they become sticky and gluey when agitated by a mixer. Only russet potatoes produce the right dry, fluffy filling. If you used russets and still have a gluey filling, the mixing time was too long; once the filling looks smooth and glossy and holds a gentle peak, stop. Additional mixing overworks the starch granules and produces the same sticky result.
Can I use Yukon Gold potatoes instead of russets?
Yukon Gold potatoes will produce an edible twice baked potato but with a noticeably different filling texture. Their higher moisture and lower starch content makes the filling denser and slightly stickier when whipped rather than light and fluffy. If Yukon Golds are the only option, reduce the milk addition to 1 to 2 tablespoons maximum and stop mixing the moment the filling is smooth; over-mixing Yukon Gold flesh produces a filling that’s close to glue. The skin won’t crisp as dramatically either, since Yukon Golds have a thinner skin with different moisture behavior than russets.
How do I know when twice baked potatoes are done in the second bake?
The second bake is complete when the cheese across the top is fully melted and has developed visible golden-brown patches rather than a uniformly pale melted appearance, the filling looks set and doesn’t jiggle when the tray is gently shaken, and the edges of the potato skin look slightly darker and more caramelized than before the second bake began. If the cheese looks done but you want to confirm the filling has heated through, insert an instant-read thermometer into the center of the filling; it should read at least 74°C (165°F). At this temperature the filling is hot throughout and properly set.
Is there a way to get the skin even crispier?
Yes. After the first bake and scooping, brush the interior and exterior of each empty shell with a thin layer of melted butter and return to the 220°C oven for 8 to 10 minutes before reducing to 190°C for the second bake. The additional fat on the skin surface encourages faster and more dramatic crisping during the brief high-heat empty-shell bake, and the interior coating creates a subtle barrier that keeps the filling from making the inside walls soggy. This step adds about 10 minutes to the total recipe time but produces a noticeably crunchier shell.
Are twice baked potatoes gluten-free?
Yes, this recipe is naturally gluten-free as written. All core ingredients, including russet potatoes, butter, sour cream, whole milk or cream, cheddar cheese, green onions, garlic powder, onion powder, olive oil, and sea salt, are inherently gluten-free. If you’re adding any optional variations or toppings, check those specific ingredients. The only potential variable for strict celiac sufferers is whether the garlic powder and onion powder brands you use are processed in facilities shared with wheat; look for specifically labeled gluten-free versions of both if this is a concern.
Can I freeze twice baked potatoes before or after the second bake?
Both work, with slightly different outcomes. Freezing after the second bake, which is what the storage section of this recipe recommends, produces the most consistent result because the filling has fully set before freezing and reheats more evenly. Freezing after assembly but before the second bake also works; thaw overnight in the refrigerator and bake at 190°C for 25 to 30 minutes from cold. The skin is marginally crispier when frozen before the second bake since it hasn’t been softened by the second bake’s steam; the filling quality is comparable between both methods.
Conclusion
Twice baked potatoes are worth mastering because the technique is transferable and the result scales reliably. Once you understand why the skin crisps, why the filling needs whipping rather than mashing, and why the make-ahead version works as well as the same-day version, the recipe stops being a set of instructions and starts being a framework you can work from without looking anything up.
The make-ahead capability is genuinely useful. Few side dishes can be assembled completely the day before, refrigerated, and baked to order in under 25 minutes at the moment they’re needed. For anything from a weeknight dinner to a holiday table, twice baked potatoes solve the timing problem that most impressive sides create.
If you loved this recipe, save it to your potato recipes and easy side dishes Pinterest board so you can find it easily later. For more healthy recipes and daily food inspiration, follow TheCookingVibes on Pinterest.
Twice Baked Potatoes
Ingredients
Equipment
Method
- Preheat oven to 220°C (425°F). Scrub potatoes clean and dry thoroughly. Pierce each potato 8 to 10 times all over with a fork. Rub with olive oil and coarse salt. Place directly on the oven rack over a drip tray below. Bake 45 to 55 minutes until skin is crispy and a fork slides through to the center with no resistance.
- Remove from oven and reduce temperature to 190°C (375°F). Rest potatoes 5 minutes. Using a sharp knife, cut a lengthwise oval from the top third of each potato. Scoop the flesh from inside and from the cut tops into a mixing bowl, leaving a 5mm wall around the interior. Place empty shells on the baking sheet and bake for 5 minutes to dry the interior walls.
- Add room temperature butter to the hot potato flesh. Let sit 60 seconds, then beat with a hand mixer on medium speed for 30 seconds. Add sour cream and beat 30 seconds more. Add milk 2 tablespoons at a time, beating after each addition, until the filling holds a gentle stable peak without dripping. Fold in 1/2 cup shredded cheddar, two-thirds of the green onions, garlic powder, and onion powder by hand. Season generously with salt and pepper.
- Spoon the filling into the empty shells, pressing gently to fill the base then mounding generously above the rim. Scatter the remaining shredded cheddar across the top of each potato.
- Bake at 190°C (375°F) for 18 to 22 minutes until the cheese is fully melted with golden-brown patches and the filling is set when the tray is gently shaken. Rest 5 minutes on the tray.
- Top each potato with reserved sliced green onions and a dollop of sour cream. Serve immediately.