Moist Protein Banana Bread — Soft, Sweet, and Actually Filling
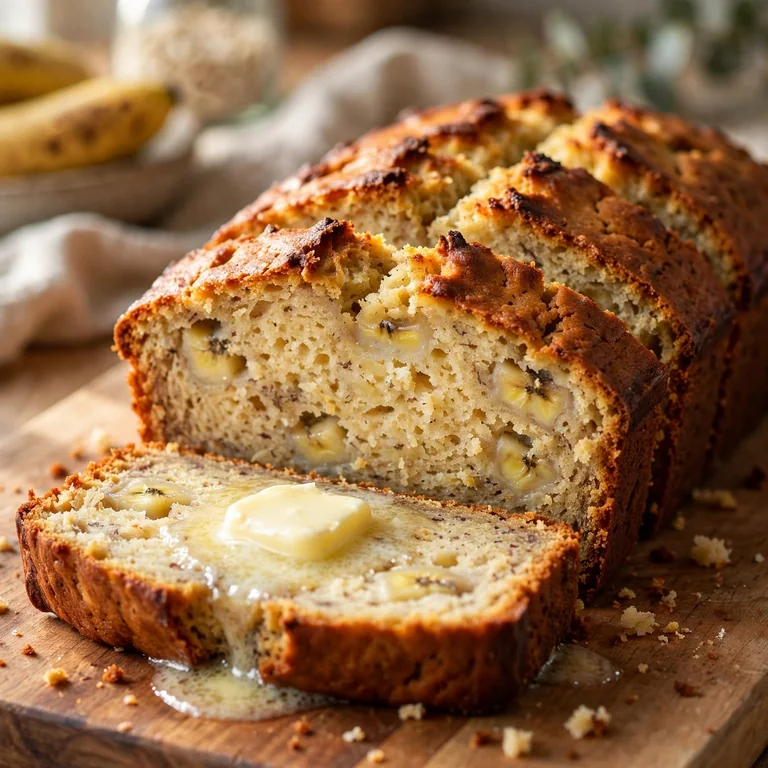
The moment you slice into this loaf, you get that familiar banana bread smell, but unlike the classic version, one slice actually keeps you full. This protein banana bread hits around 12 grams of protein per slice without tasting chalky, dry, or like a supplement shake baked into bread. That balance takes some getting right, and this recipe does.
It works for breakfast, a mid-morning snack, or post-workout fuel. It uses overripe bananas, protein powder, Greek yogurt, and oat flour, so it’s also genuinely nutritious rather than just marketed that way. The texture stays moist because of the yogurt and bananas doing the heavy lifting on moisture.

Why You’ll Love This Protein Banana Bread
- Actually tastes like banana bread. The protein powder doesn’t take over. You taste banana, a hint of cinnamon, and sweetness from the fruit itself, not a vanilla supplement bar.
- 12g of protein per slice. That’s roughly triple what standard banana bread delivers, and it comes from real food sources like eggs, Greek yogurt, and protein powder, not just a heavy scoop of powder.
- No mixer required. A bowl, a fork, and a loaf pan are all you need. The whole batter comes together in under 10 minutes.
- Naturally sweetened. Two tablespoons of honey or maple syrup are enough because ripe bananas bring their own sugar. No refined white sugar in the recipe.
- Meal-prep friendly. It slices cleanly, freezes well, and holds its texture for up to four days at room temperature, which makes it practical for a week of breakfasts.

Ingredients You’ll Need
Recipe Timing
| Detail | Info |
|---|---|
| Servings | 10 slices |
| Difficulty | Easy |
| Course | Breakfast, Snack |
| Cuisine | American |
| Prep Time | 10 minutes |
| Cook Time | 50 minutes |
| Total Time | 60 minutes |
For the best results, use bananas that are deeply speckled or fully brown on the outside. Yellow bananas with just a few spots won’t give you enough sweetness or moisture, and the bread will taste starchy rather than rich.
- 3 large overripe bananas (about 300g mashed) — The riper, the better. Brown-black bananas are sweeter, break down easily, and keep the loaf moist.
- 2 large eggs — They bind everything together and give the loaf structure without making it dense.
- 1/2 cup (120g) plain Greek yogurt — Full-fat works best for moisture and a slight tang. Low-fat is fine but yields a marginally drier crumb. This also adds protein on top of the powder.
- 2 tbsp honey or pure maple syrup — The bananas handle most of the sweetness on their own, so you only need a small amount here.
- 1 tsp pure vanilla extract — Deepens the flavor and complements the banana.
- 1 cup (120g) oat flour — Gives a slightly chewy, hearty texture. You can blend rolled oats into flour yourself. For a gluten-free version, certified gluten-free oat flour works directly.
- 2 scoops (60g) vanilla or unflavored protein powder — Whey protein gives the moistest result. Plant-based protein powders absorb more liquid, so if you use them, add an extra 2 tablespoons of yogurt to compensate.
- 1 tsp baking soda — The main lift. Make sure it’s fresh; an expired batch gives you a flat, dense loaf.
- 1/2 tsp baking powder — Works alongside baking soda for a lighter rise.
- 1/4 tsp fine salt — Balances the sweetness and brings out the banana flavor.
- 1/2 tsp ground cinnamon — Optional but genuinely improves the flavor.
- 1/2 cup dark chocolate chips or chopped walnuts (optional) — Either one works; walnuts add crunch and extra protein, chocolate chips add richness.

Allergen and Dietary Disclosure
This recipe contains eggs and dairy (Greek yogurt). For a dairy-free version, swap the Greek yogurt for an equal amount of unsweetened coconut yogurt, which maintains the moisture level well. For an egg-free version, two flax eggs (1 tbsp ground flaxseed plus 3 tbsp water each, rested for 5 minutes) work reasonably well, though the texture will be slightly denser.
The oat flour version is naturally gluten-free when you use certified gluten-free oats. Standard oat flour may contain traces of gluten from shared processing facilities.
This recipe has not been tested in an allergen-free facility. Always check your specific product labels if you have a serious allergy.
Equipment Needed
- 9×5 inch loaf pan — Standard size. A smaller pan gives you a taller loaf that may need extra bake time; a larger pan produces a flatter loaf that bakes faster.
- Large mixing bowl — You’re folding everything by hand, so go bigger than you think you need.
- Fork or potato masher — For mashing bananas thoroughly. Lumps larger than a chickpea can create wet pockets in the finished loaf.
- Kitchen scale — Measuring flour and protein powder by weight is genuinely more reliable than cups here, since both tend to pack down.
- Toothpick or skewer — The only reliable way to test doneness in the center of a loaf this dense.
Step-by-Step Directions
Step 1: Prep Your Pan and Oven
Preheat your oven to 175°C (350°F). Line your 9×5 inch loaf pan with parchment paper, leaving some overhang on the long sides so you can lift the finished loaf out easily. Lightly grease any exposed pan edges.

Chef’s Note: Parchment paper is worth using here because protein banana bread is slightly stickier than standard banana bread due to the protein powder. Greasing alone often leads to a loaf that tears when you try to remove it.
Step 2: Mash the Bananas
Add the peeled bananas to your mixing bowl and mash them with a fork until the texture is mostly smooth, with only small irregular lumps remaining. You’re aiming for about 300g of mashed banana, which is roughly the volume of 3 large overripe ones.
Step 3: Mix the Wet Ingredients
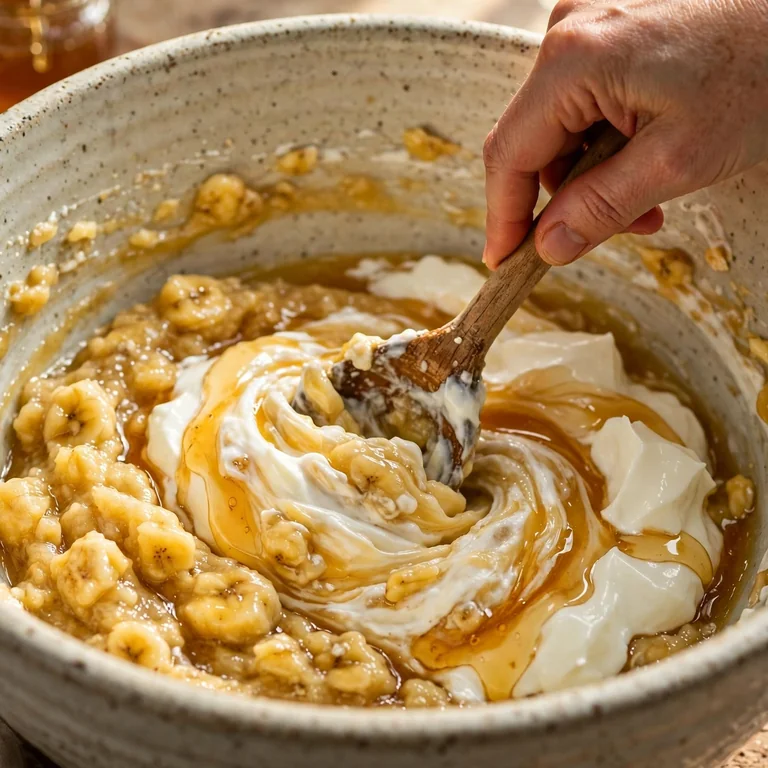
Add the eggs, Greek yogurt, honey (or maple syrup), and vanilla extract directly to the mashed banana. Stir with a fork or whisk until the mixture is uniform and no streaks of egg white remain. The batter at this point will look slightly curdled, which is normal.
Step 4: Add the Dry Ingredients
Sprinkle the oat flour, protein powder, baking soda, baking powder, salt, and cinnamon over the wet mixture. Fold everything together with a spatula until just combined. Stop mixing the moment you no longer see dry streaks. Overmixing oat flour batter develops the starches and produces a gummy, tough loaf.
Chef’s Note: If you’re using a plant-based protein powder, the batter will look noticeably thicker than it would with whey. That’s expected. Don’t add extra liquid unless the batter is stiff enough to hold its shape when you drop it from a spoon.
Step 5: Fold in Add-Ins
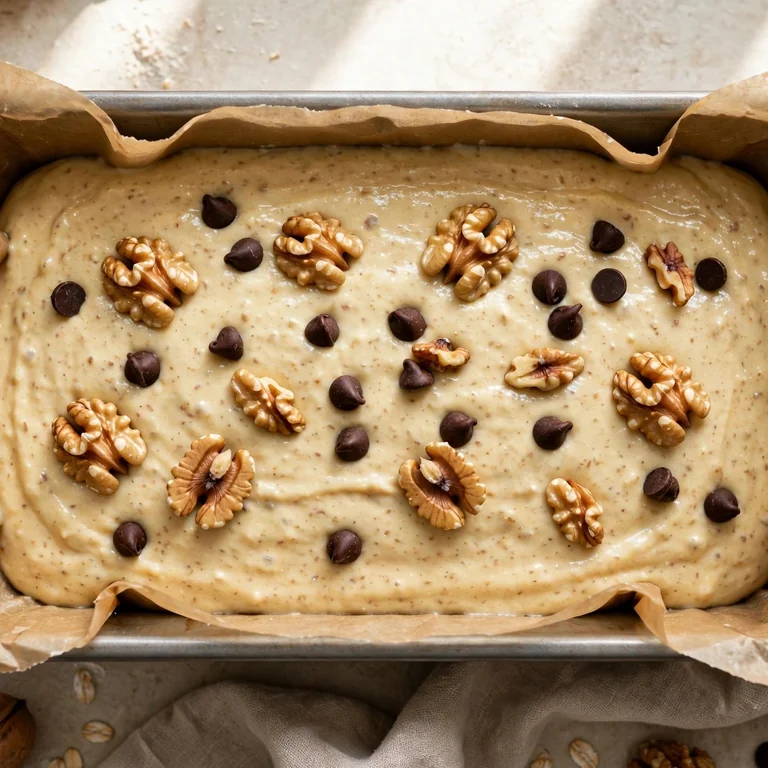
If you’re using chocolate chips or walnuts, fold them in now with two or three gentle turns of the spatula. Reserve a small handful to scatter over the top of the loaf before baking.
Step 6: Pour and Top
Step 7: Bake
Bake at 175°C (350°F) for 45 to 55 minutes. Start checking at 45 minutes by inserting a toothpick into the center of the loaf. It should come out with just a few moist crumbs attached, not wet batter. If the top is browning too quickly before the center is done, loosely tent the pan with aluminum foil and continue baking.
Chef’s Note: Protein powder makes the top of this loaf brown faster than standard banana bread. If it looks done on the outside at 35 minutes, don’t pull it out early. The inside likely still needs time. The toothpick is your actual guide.
Step 8: Cool Before Slicing
Let the loaf cool in the pan for 15 minutes, then lift it out using the parchment overhang and transfer it to a wire rack. Cool for at least 30 more minutes before slicing. Cutting into it too early causes the crumb to compress and turn gummy.
Common Mistakes and Troubleshooting
| Problem | Cause | Solution |
|---|---|---|
| Loaf is dense and gummy | Overmixed batter or too much protein powder | Fold until just combined. Use the weight measurements — no more than 60g of protein powder per loaf. |
| Dry, crumbly texture | Plant-based protein powder without extra liquid | Add 2 extra tablespoons of Greek yogurt when using plant-based powder. Whey stays more forgiving. |
| Top is very dark but center is raw | Oven runs hot or foil not used | Tent loosely with foil at the 30-minute mark and continue baking until the toothpick comes out clean. |
| Loaf sinks in the center | Underbaked, or too much baking soda | Use a fresh toothpick check, and measure baking soda precisely. Excess leavening causes the loaf to rise fast and then collapse. |
| Sticks to the pan | Greased but not lined with parchment | Always use parchment. Protein powder makes the batter stickier than regular batters. |
Variations and Substitutions
Peanut Butter Protein Banana Bread: Stir 3 tablespoons of smooth peanut butter into the wet ingredients. It adds richness and pushes the protein count even higher. Pairs especially well with chocolate chips.
Chocolate Protein Banana Bread: Replace 2 tablespoons of oat flour with 2 tablespoons of unsweetened cocoa powder. The banana and cocoa combination is genuinely good, and it doesn’t require any extra sugar.
Gluten-Free Version: Use certified gluten-free oat flour and double-check your protein powder label. Most whey and plant-based protein powders are naturally gluten-free, but cross-contamination is possible.
Nut-Free Version: Skip the walnuts and use sunflower seeds or pumpkin seeds as a topping instead. Same crunch, safe for nut allergies.
Extra Banana Flavor: Press thin banana slices onto the top of the batter before baking. They caramelize slightly in the oven and make the loaf look as good as it tastes in photos.
Lower Sugar: Skip the honey entirely. The bananas provide enough sweetness on their own, especially if they are fully ripened. The flavor is slightly less complex but still pleasant.
Serving Suggestions
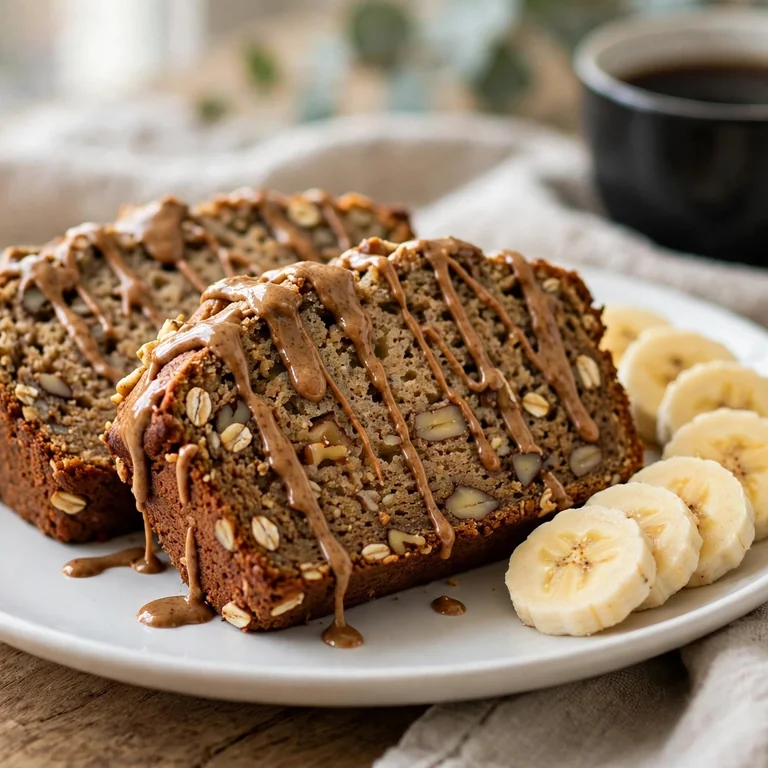
- Spread with a thin layer of almond butter for extra fat and protein, which makes it a complete post-workout meal.
- Crumble a slice over Greek yogurt with a drizzle of honey for a higher-protein breakfast bowl.
- Toast individual slices in a dry pan for 2 minutes per side. The outside crisps slightly and the chocolate chips re-melt, which is noticeably better than eating it straight from the fridge.
- Pair with a black coffee or an unsweetened latte in the morning. The sweetness of the bread balances a strong, bitter coffee well.
- Serve warm as a dessert with a small scoop of vanilla frozen yogurt. It works surprisingly well as a low-effort dessert for guests.
Tips for the Best Results
Use the ripest bananas you can find. If your bananas aren’t overripe yet, place unpeeled bananas on a baking sheet and roast at 150°C (300°F) for 15 to 20 minutes until the skins turn black and the flesh is soft and syrupy. This shortcut genuinely works.
Weigh your protein powder. Different brands have different densities. One scoop from a cheap measuring scoop can vary by 10 to 15 grams. Too much protein powder is the single most common reason this loaf comes out dry. Stick to 60g maximum.
Room temperature ingredients mix more evenly. Pull your eggs and Greek yogurt out of the fridge 20 minutes before you start. Cold yogurt can cause the batter to look curdled and uneven.
Don’t skip the cooling time. The loaf continues setting internally for the first 30 minutes out of the oven. If you slice it too early, the crumb compresses and the texture suffers noticeably. Patience matters here.
Line, don’t just grease. The combination of banana, yogurt, and protein powder makes this loaf significantly stickier than a standard recipe. Parchment paper is not optional.
Storage Tips
Refrigerator
Wrap the cooled loaf tightly in plastic wrap, or store individual slices in an airtight container. It keeps well in the fridge for up to 5 days without drying out. The texture on day 2 and 3 is often better than day 1 because the moisture evens out.
Freezer
Slice the loaf before freezing. Wrap each slice individually in plastic wrap, then place all slices in a zip-lock freezer bag. This lets you pull out one slice at a time rather than thawing the whole loaf. Slices keep well for up to 3 months.
Reheating
Thaw frozen slices overnight in the fridge, or at room temperature for about an hour. For the best texture, warm them in a dry skillet over medium-low heat for 1 to 2 minutes per side. Microwaving works (30 to 40 seconds from room temperature) but softens the crust. If you’re in a hurry, the microwave is fine.
Nutrition Information
Per slice (1 of 10), approximate values. Will vary based on protein powder brand, banana size, and any add-ins.
| Nutrient | Amount |
|---|---|
| Calories | 185 kcal |
| Protein | 12g |
| Carbohydrates | 22g |
| Fiber | 2g |
| Sugar | 9g |
| Total Fat | 4g |
| Saturated Fat | 1.5g |
| Cholesterol | 42mg |
| Sodium | 195mg |
| Potassium | 280mg |
| Calcium | 65mg |
| Iron | 1.2mg |
Nutrition values are approximate and may vary based on brands and portion sizes.
Why This Recipe Works
The texture problem with protein banana bread is almost always the protein powder. Most recipes add too much, which pulls moisture out of the crumb and leaves you with something that tastes like a baked supplement. Capping the powder at 60g (two standard scoops) keeps the protein count high without sacrificing texture.
Greek yogurt is doing more work than most people realize in this recipe. It adds moisture, acidity (which helps activate the baking soda), and about 5 to 6 extra grams of protein per serving on its own. Recipes that skip yogurt and use only protein powder tend to be noticeably drier.
Oat flour behaves differently from all-purpose flour. It doesn’t develop gluten, so overmixing doesn’t make it tough in the same way, but it does absorb liquid more slowly. That’s why the batter looks slightly thick at first and why the cooling time matters: the loaf finishes setting after it comes out of the oven.
I’ve tested this recipe with both whey and plant-based protein powder across multiple batches. Whey consistently gives a more tender crumb. Plant-based powders work, but they need the extra 2 tablespoons of yogurt to compensate for the higher absorption rate. Chocolate and vanilla flavored powders both work. Unflavored whey also works but produces a slightly plainer loaf that relies more on the cinnamon and vanilla extract for flavor.
Frequently Asked Questions
Can I make protein banana bread without protein powder?
You can, but then it’s just banana bread with slightly more yogurt. If you want higher protein without a supplement powder, swap the protein powder for an equal weight of almond flour and add an extra egg. You’ll get roughly 6 to 7 grams of protein per slice rather than 12, and the texture will be slightly denser.
Can I use any type of protein powder?
Whey protein (vanilla or unflavored) gives the best texture in this recipe. Casein protein makes the loaf gummy because it thickens as it absorbs liquid. Plant-based protein powders (pea, hemp, or brown rice blends) work, but they absorb more moisture, so you need to add 2 extra tablespoons of Greek yogurt to prevent a dry crumb. Avoid collagen powder here; it doesn’t provide the same protein structure and can make the loaf collapse.
How do I know when the loaf is done?
Insert a toothpick into the thickest part of the center. It should come out with a few moist crumbs but no wet batter clinging to it. If wet batter appears, bake for another 5 minutes and test again. The internal temperature of a fully baked loaf should reach around 93 to 96°C (200 to 205°F) if you want to check with a thermometer.
Why did my protein banana bread come out dry?
Too much protein powder is almost always the answer. Stick to 60g (two scoops) regardless of what your scoop size suggests, and measure by weight. The second most common reason is overbaking. Ovens vary, so start checking at 45 minutes rather than waiting until the recipe’s stated time.
Can I make this dairy-free?
Yes. Replace the Greek yogurt with an equal amount of unsweetened coconut yogurt or unsweetened oat yogurt. The texture is very similar. Make sure your protein powder is also dairy-free if you’re avoiding all dairy, as many whey powders contain lactose.
Can I prep the batter ahead and bake later?
It’s better to bake immediately after mixing. Baking soda starts reacting the moment it contacts the wet ingredients, so a batter that sits for an hour before baking won’t rise as well. If you want to save time, you can mash and freeze your bananas ahead of time, then thaw them overnight in the fridge.
Does this recipe work as muffins?
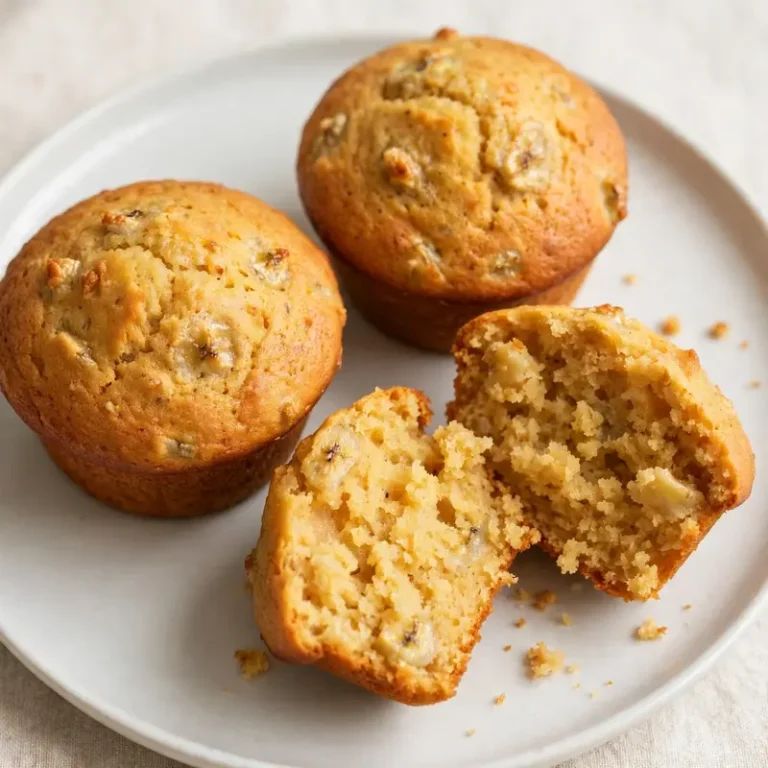
Yes. Pour the batter into a lined muffin tin, filling each cup about three-quarters full. Bake at 175°C (350°F) for 18 to 22 minutes, testing with a toothpick at 18 minutes. You’ll get 10 to 12 muffins from this recipe, which are easier to grab for on-the-go breakfasts.

Conclusion
This protein banana bread gives you real banana bread flavor with a nutritional profile that makes it worth eating regularly, not just as an occasional treat. The 12 grams of protein per slice comes from ingredients that also improve the texture, so you’re not sacrificing anything to get the numbers up. If your bananas are ripe, your batter is mixed just until combined, and you’re patient enough to let the loaf cool before slicing, the result is consistently good.
If you loved this protein banana bread recipe, save it to your healthy baking Pinterest board so you can find it easily later. For more same recipes follow Thecookingvibes Pinterest account.
Moist Protein Banana Bread
Ingredients
Equipment
Method
- Preheat oven to 175°C (350°F). Line a 9×5 inch loaf pan with parchment paper and lightly grease any exposed sides.
- Mash the bananas in a large bowl until mostly smooth with only small lumps remaining.
- Add the eggs, Greek yogurt, honey, and vanilla extract to the mashed banana. Stir until fully combined.
- Add the oat flour, protein powder, baking soda, baking powder, salt, and cinnamon. Fold gently until just combined.
- Fold in chocolate chips or walnuts, if using. Reserve a small handful for the top.
- Pour batter into the prepared pan, smooth the surface, and scatter reserved toppings on top. Tap the pan twice on the counter.
- Bake for 45 to 55 minutes, or until a toothpick inserted into the center comes out with a few moist crumbs. Tent loosely with foil if the top is browning too quickly.
- Cool in the pan for 15 minutes, then transfer to a wire rack and cool for at least 30 minutes before slicing.