Homemade Cinnamon Rolls — Pillowy Soft Dough, Thick Cream Cheese Frosting
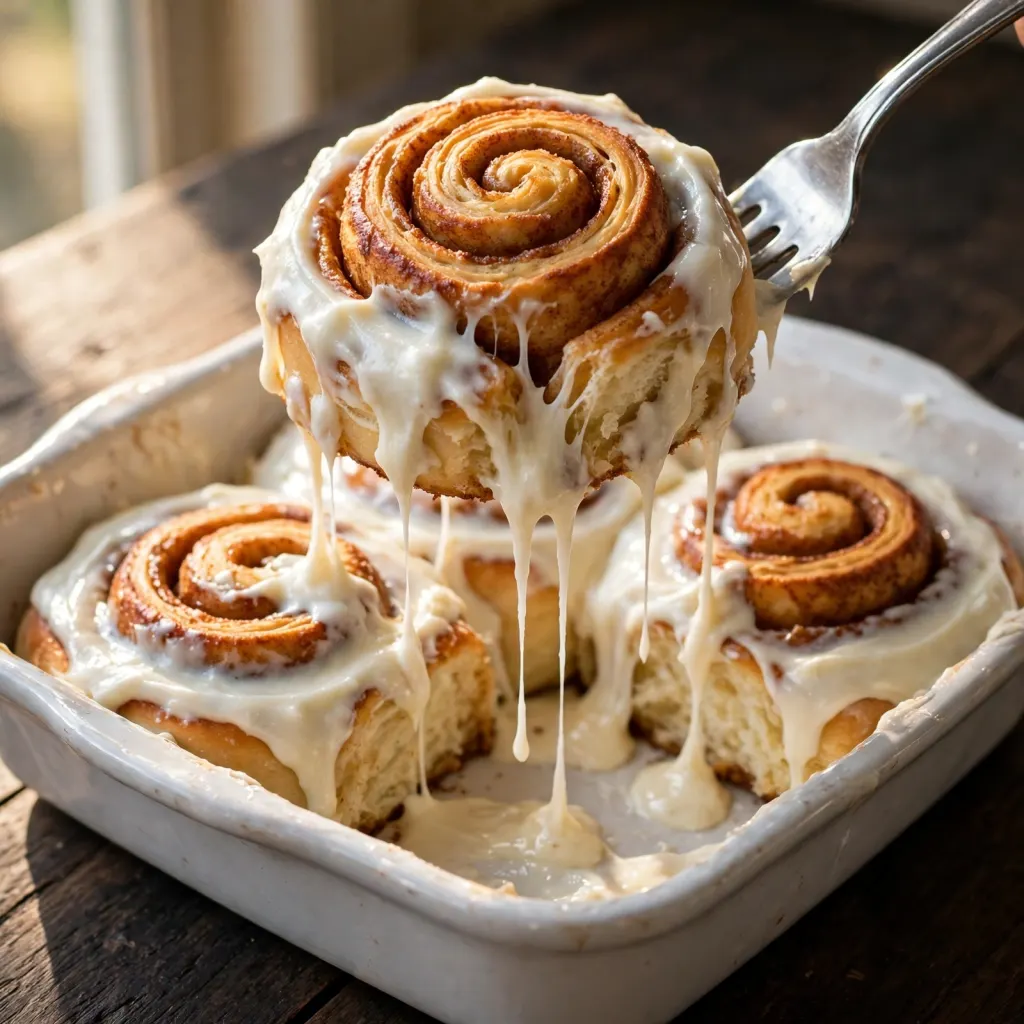
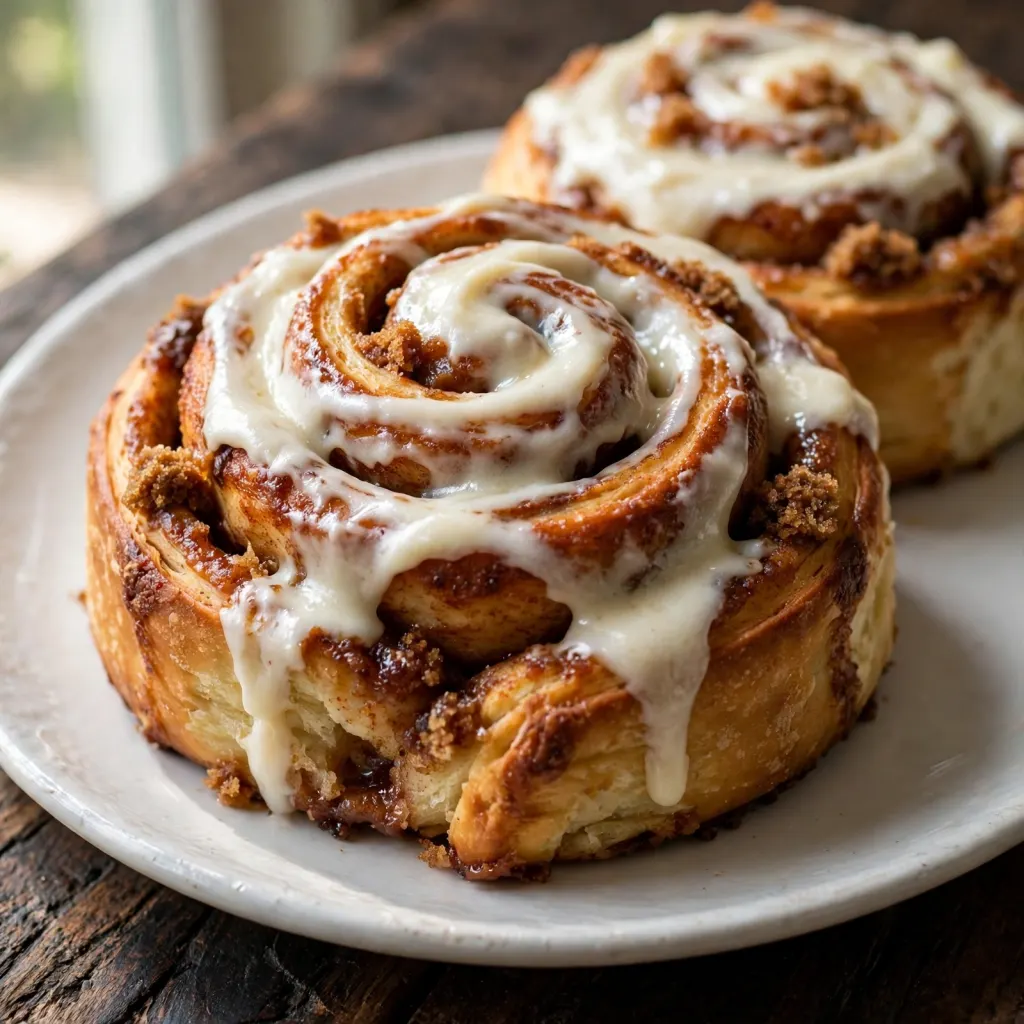
Pull a tray of cinnamon rolls from the oven and the smell hits the kitchen at least two rooms away: warm cinnamon, caramelized sugar, and something toasty and yeasty underneath it all. There’s a specific moment about 5 minutes after they come out of the oven, when the rolls are still warm but not scalding, and the cream cheese frosting begins to melt into the spirals and fill every gap between the layers. That’s the moment worth baking for.
This cinnamon rolls recipe uses a milk-based enriched dough with eggs and butter for a soft, pillowy texture that stays tender rather than turning bready or dense, a brown sugar and cinnamon filling with softened butter, and a thick cream cheese frosting made with real cream cheese rather than a thin glaze. The recipe produces 12 large rolls and takes about 3 hours from start to finish, with most of that time hands-off while the dough rises. They work for a weekend morning, a holiday breakfast, or any occasion that calls for something made from scratch and genuinely worth the effort.
Why You’ll Love This Cinnamon Rolls Recipe
- Dough that stays soft for days. The combination of whole milk, eggs, and butter in the enriched dough produces rolls that are tender and fluffy when freshly baked and still remarkably soft the next morning, unlike lean doughs that turn stale and bready within hours.
- Filling that caramelizes rather than just melts. Brown sugar in the filling rather than white sugar produces a richer, more complex caramelized pocket between every layer, with a molasses depth that white sugar simply doesn’t contribute.
- Cream cheese frosting that’s thick enough to mean something. The frosting in this recipe is applied generously while the rolls are still warm so it melts into every gap and spiral, creating what is genuinely the best part of the roll.
- Make-ahead overnight option. The shaped rolls can be refrigerated overnight after the first rise, pulled from the fridge in the morning, allowed to proof at room temperature for 45 to 60 minutes, and baked fresh without any extra work the day of.
- Forgiving dough for home bakers. The dough is slightly sticky and soft by design; working with it is easier than a stiff dough and the enriched ingredients produce a result that’s harder to accidentally ruin than a lean bread dough.
Ingredients You’ll Need
Recipe Timing
| Detail | Info |
|---|---|
| Servings | 12 rolls |
| Difficulty | Moderate |
| Course | Breakfast, Brunch, Dessert |
| Cuisine | American |
| Prep Time | 40 minutes |
| Cook Time | 25 minutes |
| Rest Time | 2 hours (rising and proofing) |
| Total Time | 3 hours 5 minutes |
For the flour, bread flour produces a slightly chewier, more structured roll than all-purpose flour because of its higher protein content (11 to 13% vs 9 to 11%), which builds more gluten during kneading. All-purpose flour produces a slightly softer, more tender crumb. Both work well; use bread flour if you want rolls that hold their shape more distinctly between swirls, and all-purpose if you prefer a softer, more pillowy texture throughout. The difference is minor in the finished roll but measurable.
For the yeast, instant yeast (also called rapid-rise yeast) doesn’t need to be proofed in warm liquid before use; it can be added directly to the flour. Active dry yeast needs to be dissolved in warm liquid for 5 to 10 minutes until foamy before proceeding. Both work in this recipe; if substituting one for the other, use the same quantity. The recipe is written for instant yeast; if using active dry, add it to the warm milk in step 1 and wait for it to become foamy before continuing.
For the milk, whole milk produces the richest, most tender dough because of its fat content. Reduced-fat milk works but produces a slightly less rich result. The milk temperature matters more than the fat content: between 38 and 43°C (100 to 110°F) is the target range. Below 35°C the yeast activates too slowly; above 49°C it begins to die.
For the cream cheese in the frosting, it must be fully softened to room temperature before beating. Cold cream cheese produces a lumpy, grainy frosting that can’t be smoothed out with additional mixing; room temperature cream cheese beats to a completely smooth consistency within 60 seconds.
The Dough:
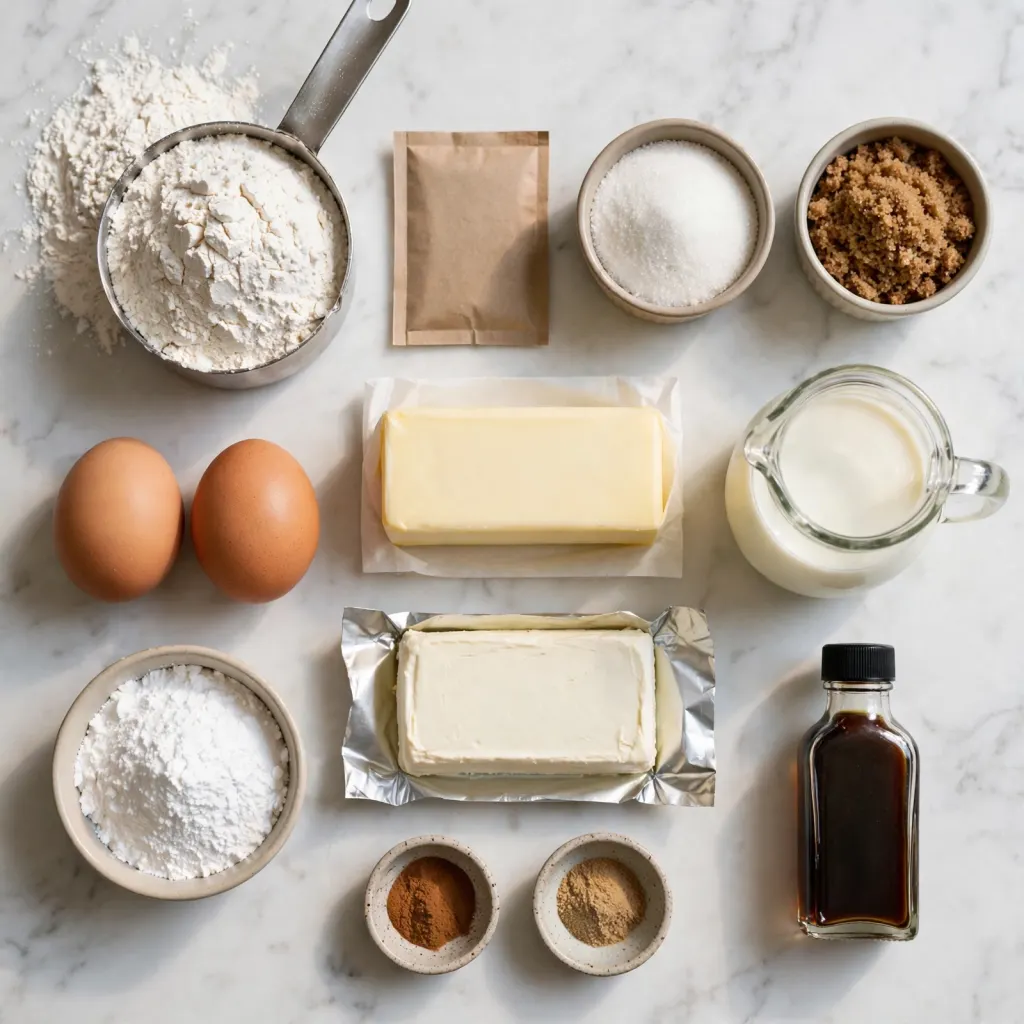
- 600g (about 4 3/4 cups) all-purpose or bread flour, spooned and leveled, plus extra for dusting — the structural base; measured by spooning into the cup, never scooping; too much flour produces a dry, dense dough
- 7g (one standard packet, about 2 1/4 teaspoons) instant yeast — the leavening; added directly to the flour without proofing for instant yeast
- 75g (1/3 cup) granulated sugar — sweetens the dough and feeds the yeast; also contributes to the golden color of the baked rolls
- 1 teaspoon fine salt — seasons the dough and regulates yeast activity; placed away from the dry yeast when mixing to avoid early inhibition
- 240ml (1 cup) whole milk, warmed to 38 to 43°C (100 to 110°F) — the primary liquid; warm temperature activates the yeast and makes the dough extensible
- 2 large eggs, at room temperature — adds richness and structure; room temperature eggs incorporate faster and more evenly than cold eggs
- 85g (6 tablespoons) unsalted butter, softened to room temperature — the fat that produces the soft, enriched texture; added after initial mixing because fat slows gluten development and should be incorporated once the gluten network has begun forming
- 1 teaspoon pure vanilla extract — adds warm background flavor to the dough
The Cinnamon Filling:
- 115g (1/2 cup) unsalted butter, very soft but not melted — spreads evenly across the dough; melted butter runs off; cold butter tears the dough
- 200g (1 cup packed) light brown sugar — the primary filling sweetener; the molasses content produces the characteristic caramelized, toffee-like filling flavor
- 2 1/2 teaspoons ground cinnamon — the dominant flavor; a generous amount ensures the cinnamon is present in every bite
- 1/4 teaspoon ground nutmeg — optional; adds a subtle warmth that makes the filling taste more complex
The Cream Cheese Frosting:
- 115g (4 oz) full-fat block cream cheese, fully softened — the base of the frosting; must be block-style, not tub, for the right consistency
- 60g (4 tablespoons) unsalted butter, softened — adds richness and makes the frosting smoother and more spreadable
- 240g (2 cups) powdered sugar, sifted — sweetens without adding moisture; sifted to prevent lumps in the finished frosting
- 1 teaspoon pure vanilla extract — adds warmth
- 2 to 3 tablespoons whole milk — added to reach the right consistency: thick enough to coat but fluid enough to drip into the spirals while the rolls are warm
- Pinch of fine salt — sharpens the sweetness
Allergen and Dietary Disclosure
This cinnamon rolls recipe contains gluten (all-purpose or bread flour), dairy (butter and cream cheese in the dough, filling, and frosting), and eggs (in the dough). It is naturally nut-free as written.
For dairy-free: replace the butter in the dough, filling, and frosting with a vegan butter alternative at the same quantities. Replace the whole milk with full-fat oat milk warmed to the same temperature. Replace the cream cheese in the frosting with a dairy-free cream cheese alternative at the same quantity. The dough and frosting textures are very close to the dairy version; the rolls may take slightly longer to achieve a golden color on the surface during baking.
For gluten-free: replace the all-purpose flour with a certified gluten-free 1:1 baking flour blend with xanthan gum. Gluten-free doughs behave differently from wheat doughs and won’t be kneadable in the traditional sense; they’re more like a thick batter. Chill the dough for 30 minutes before rolling to make it workable, and handle gently. The result is edible but noticeably different in texture from the standard version.
This recipe has not been tested in a certified allergen-free kitchen and cannot be guaranteed safe for any specific allergy.
Equipment Needed
- Stand mixer with dough hook attachment, or large mixing bowl for hand kneading — a stand mixer on medium speed kneads the dough to the right silky, smooth consistency in 8 to 10 minutes with almost no effort. Hand kneading takes 10 to 12 minutes of active work and produces an equally good result; the dough will be slightly sticky throughout and should not be over-floured. Do not use a food processor; it overheats the dough and kills the yeast.
- Rolling pin — for rolling the dough into a uniform rectangle before spreading the filling. A consistent thickness of about 6mm throughout is the target; uneven rolling produces rolls that cook unevenly and look irregular when sliced.
- Sharp serrated knife or unflavored dental floss — for cutting the rolled dough into individual rolls without compressing the layers. A sharp serrated knife saws through cleanly with minimal downward pressure. Dental floss looped under the roll and crossed over the top produces perfectly clean cuts that don’t compress the layers at all; this method is worth trying at least once.
- 9×13-inch (23x33cm) baking dish — for holding 12 rolls with slight gaps between them to allow for the second rise and to maintain the square-ish shape that holds the filling in. Individual rolls in a too-large dish spread flat; rolls in a too-small dish press against each other and don’t develop individual surfaces.
- Instant-read thermometer — both for the milk temperature (38 to 43°C for yeast activation) and optionally for the finished rolls (internal temperature of 88 to 93°C confirms they’re baked fully through to the center without cutting them open).
Step-by-Step Directions
Step 1: Make and Rest the Dough
In a stand mixer bowl, whisk together the flour, instant yeast, sugar, and salt. In a separate container, combine the warm milk, eggs, vanilla extract, and softened butter; the butter doesn’t need to fully incorporate into the milk at this stage. Pour the wet ingredients into the dry and mix on low speed with the dough hook for 2 minutes until the flour is fully incorporated and a rough, shaggy dough forms. Increase the speed to medium and knead for 8 to 10 minutes until the dough is smooth, soft, and slightly tacky but doesn’t stick aggressively to your hand when pressed briefly. If the dough is sticking to the bowl sides throughout the entire knead time, add flour 1 tablespoon at a time, waiting 60 seconds after each addition; the dough should clear the sides of the bowl by the 6-minute mark.
If kneading by hand: turn the rough dough onto a lightly floured surface and knead for 10 to 12 minutes using the heel of your hand to push, fold, and rotate the dough repeatedly until it is smooth and elastic enough to stretch without tearing.

Chef’s Note: The dough is intentionally soft and slightly tacky rather than smooth and firm like a bread dough. The enrichment from the butter, eggs, and milk produces a dough that handles more like soft playdough than a traditional bread dough. Resist the urge to add more flour than specified; a stiffer, drier dough produces denser, less tender rolls.
Step 2: First Rise
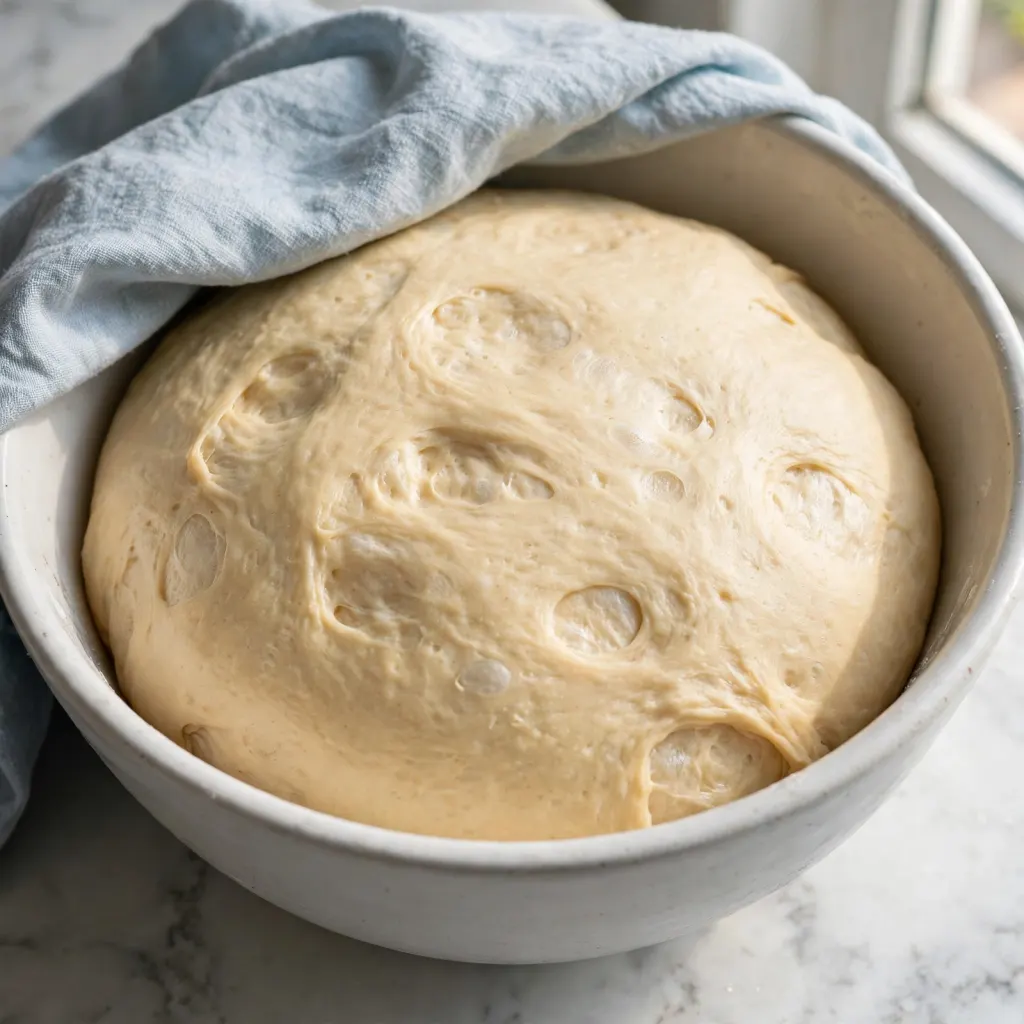
Transfer the kneaded dough to a large, lightly oiled bowl and turn it once so all surfaces are coated. Cover the bowl tightly with plastic wrap or a clean kitchen towel. Place in a warm spot, ideally at 24 to 27°C (75 to 80°F), for 60 to 90 minutes until the dough has doubled in size. A reliable warm spot is an oven that has been turned off after preheating to 150°C (300°F) briefly and then left to cool to about 27°C; place the covered bowl inside with the door closed.
Chef’s Note: The dough is properly risen when it has doubled in volume and a finger pressed about 2cm into the center of the dough leaves an indentation that fills in slowly over 3 to 5 seconds rather than snapping back immediately. If the indent fills in immediately, the dough needs more time; if it collapses around the indent without springing back, it has over-risen.
Step 3: Mix the Filling
While the dough rises, combine the softened butter, brown sugar, cinnamon, and optional nutmeg in a small bowl. Work them together with a fork or small spatula until the mixture forms a thick, spreadable paste with no dry sugar patches remaining. The consistency should be similar to peanut butter: thick enough to spread without running but soft enough to work across the dough without tearing it. If the butter is too cold and the mixture is crumbly rather than paste-like, let it sit at room temperature for 10 more minutes and try again.
Step 4: Roll and Fill the Dough
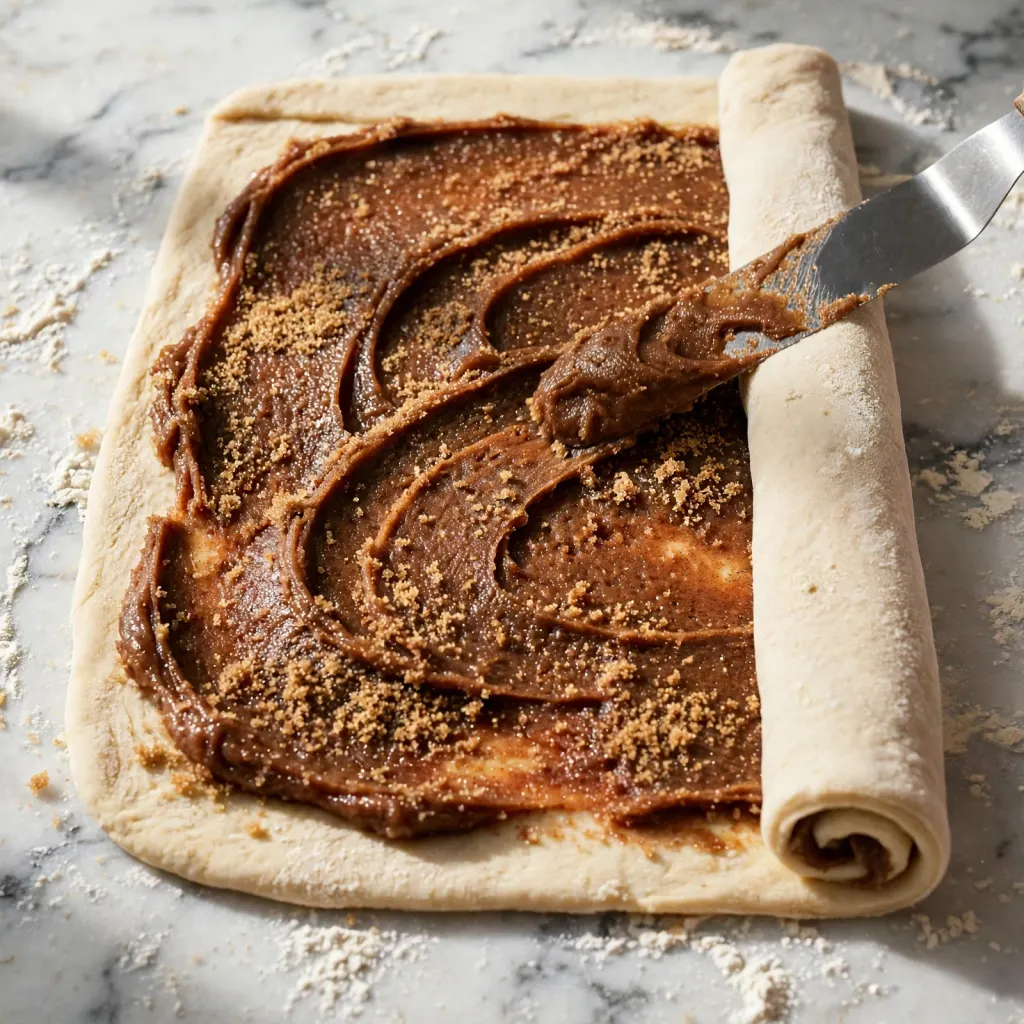
Turn the risen dough out onto a lightly floured surface. Gently press the dough into a rough rectangle, then roll it into a more precise rectangle measuring approximately 45cm wide by 35cm deep (18 x 14 inches) with a consistent thickness of about 6mm. Spread the cinnamon butter filling across the entire surface of the dough rectangle using an offset spatula or the back of a spoon, covering it all the way to the edges except for a 1.5cm border along the far long edge. The filling will act as the seal when the dough is rolled; leaving a clean border on that edge prevents the roll from unrolling during baking.
Chef’s Note: Rolling the dough from the near long edge toward the far edge, keeping it tight and even as you go, is the step that determines whether the finished rolls have tightly wound, visible spirals or loose, uneven ones. Roll with firm, even pressure rather than gentle pressure; a loosely rolled cylinder unwinds during baking and produces flat, spreading rolls.
Step 5: Roll, Slice, and Arrange
Starting from the near long edge, roll the dough into a tight cylinder by lifting the edge and rolling it away from you, maintaining even tension throughout. When the cylinder is complete, pinch the seam firmly along its entire length to seal it. Use a sharp serrated knife or dental floss to cut the cylinder into 12 equal rolls, each approximately 3.5 to 4cm thick. Place the rolls cut side up in the greased 9×13-inch baking dish with small gaps between each roll; they will expand during the second rise to fill those gaps. A tight arrangement is correct; the rolls support each other during baking and the touching sides stay soft rather than developing a crust.
Step 6: Second Rise
Cover the baking dish loosely with plastic wrap or a clean towel and allow the rolls to rise in a warm spot for 30 to 45 minutes until they have puffed and are visibly touching each other. The rolls should look noticeably larger than when they went into the dish and the dough should feel light and airy rather than dense when pressed very gently. Don’t over-proof; rolls that have risen too long collapse during baking and produce a gummy, dense center.
While the rolls proof, preheat the oven to 190°C (375°F).
Step 7: Bake the Rolls
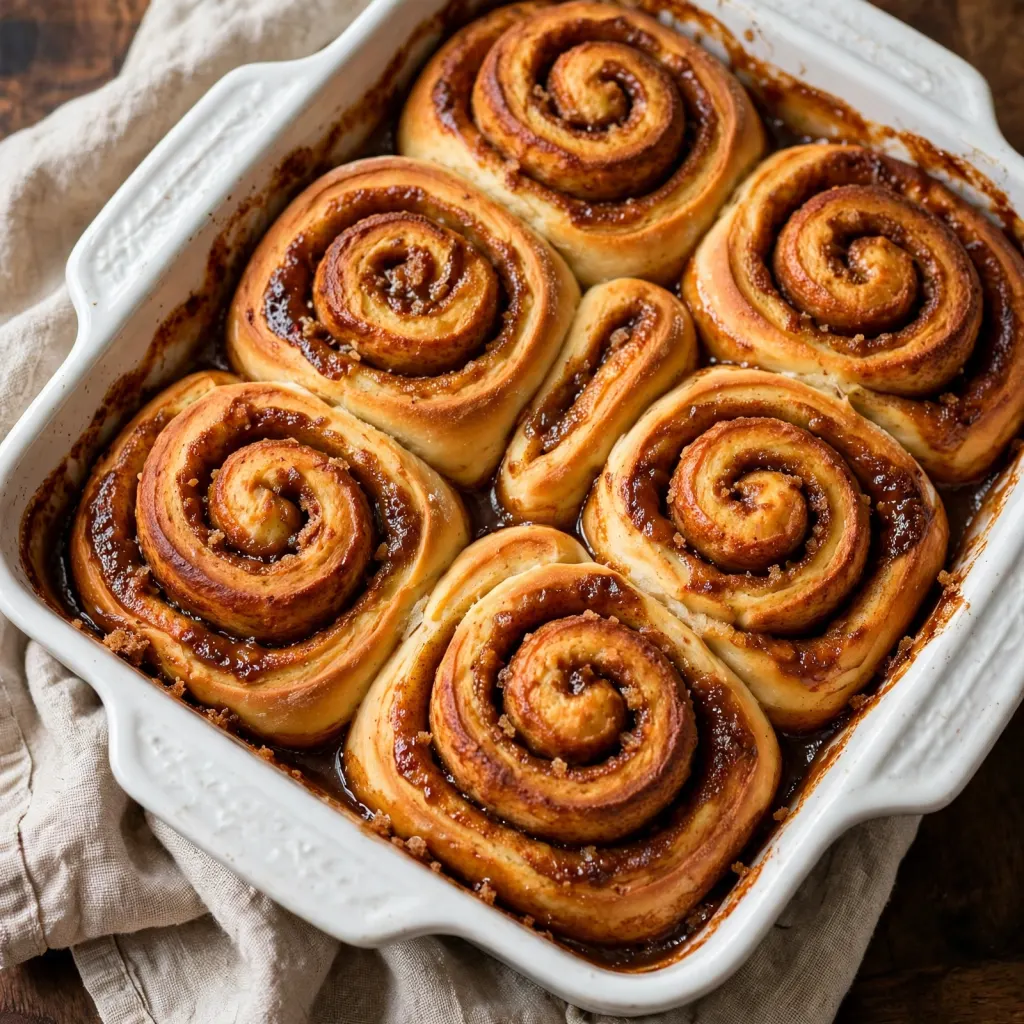
Bake the risen rolls on the center rack of the preheated oven for 22 to 26 minutes until the tops are a consistent, deep golden brown and the internal temperature of the center roll reads at least 88°C (190°F). The center roll is always the last to finish baking; checking it with a thermometer removes any guessing about whether the filling in the middle of the pan has cooked fully. If the tops are browning quickly before the 22-minute mark, tent the dish loosely with aluminum foil for the remaining time.
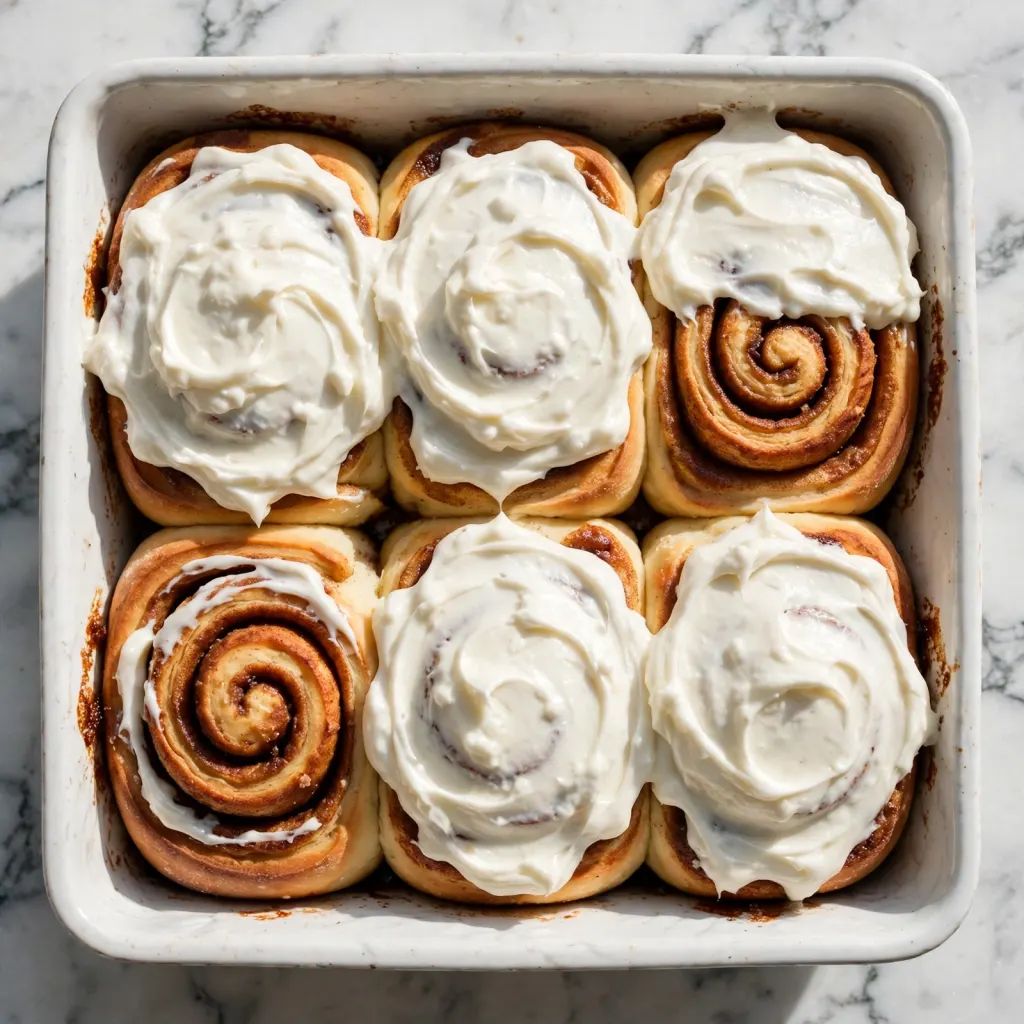
Remove from the oven and allow the rolls to cool in the dish for 10 minutes before frosting. Frosting warm rather than hot rolls allows the cream cheese frosting to melt into the spirals without completely dissolving off the surface.
Step 8: Make and Apply the Frosting
Beat the softened cream cheese and softened butter together with a hand mixer or stand mixer on medium speed for 90 seconds until completely smooth with no lumps visible. Add the sifted powdered sugar in two additions, beating on low after each to prevent a sugar cloud, then increase to medium and beat for 60 seconds until the frosting is light and fluffy. Add the vanilla extract and pinch of salt. Add milk one tablespoon at a time until the frosting flows slowly from a spoon rather than sitting in a stiff peak; the right consistency moves like a thick glaze rather than a rigid buttercream.
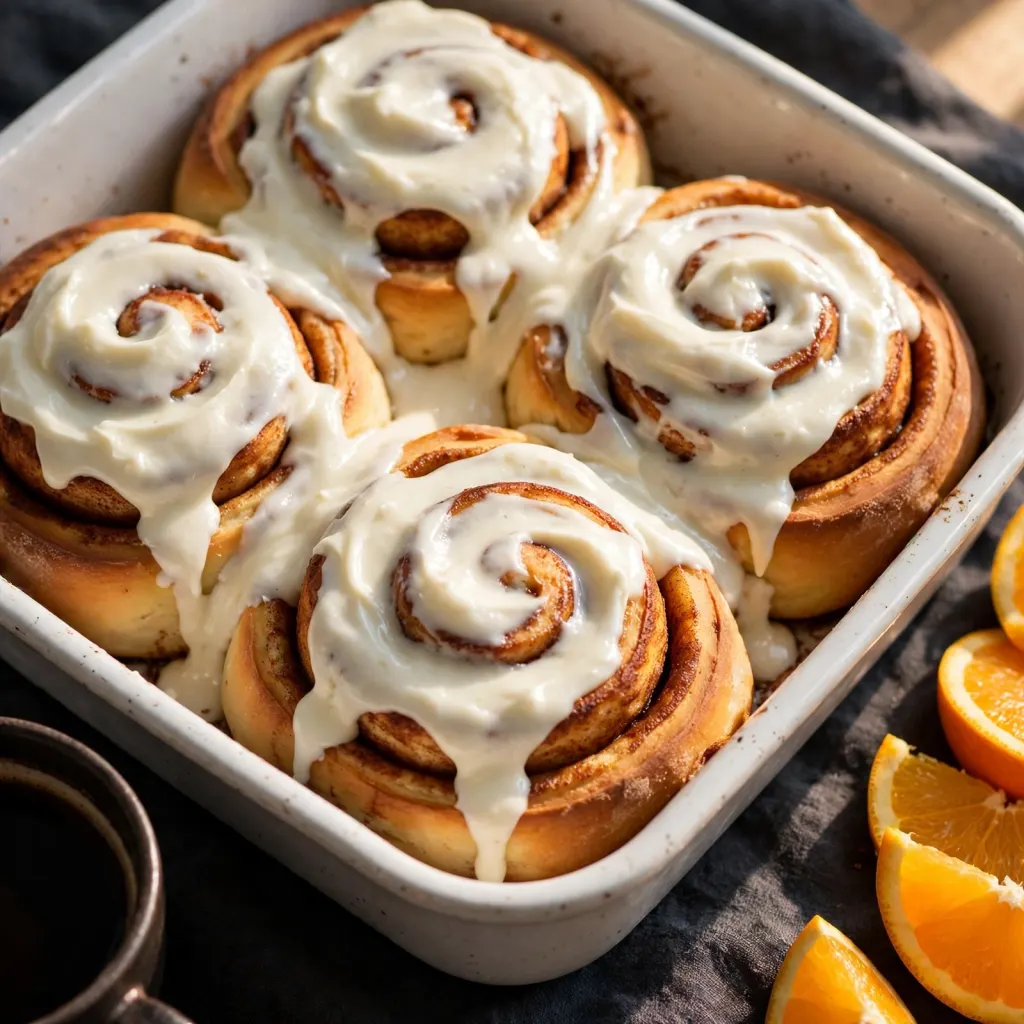
Spoon the frosting generously over the warm rolls, spreading it across the tops and nudging it into the gaps between the rolls so it flows down between the spirals. Use the full quantity of frosting; these are not lightly glazed rolls.
Common Mistakes and Troubleshooting
| Problem | Cause | Solution |
|---|---|---|
| Dough not rising after the first hour | Yeast killed by milk that was too hot, or yeast was expired | Check milk temperature; it must be 38 to 43°C, never above 49°C; always check yeast expiration date before starting |
| Filling leaks out and burns on the pan bottom | Butter in the filling was melted rather than soft, or rolls were too loosely rolled | Use softened, not melted butter; roll the cylinder as tightly as possible; pinch the seam firmly |
| Rolls gummy and doughy in the center | Underbaked; internal temperature too low | Bake until the center roll reads 88°C (190°F) internally; tent with foil if surface is browning too fast |
| Dough tears during rolling | Not enough rest time after kneading, or dough too cold | Let the dough rest 5 minutes after shaping before rolling; allow it to reach room temperature if refrigerated |
| Frosting watery and slides off completely | Applied to rolls that were too hot, or too much milk added | Wait 10 minutes after baking before frosting; add milk 1 tablespoon at a time to control consistency |
| Rolls uneven and fall apart | Cylinder not rolled tightly enough, or cuts made with a pressing motion rather than a sawing motion | Roll firmly with steady pressure; use a serrated knife with a sawing motion or dental floss for clean cuts |
Variations and Substitutions
- Overnight cinnamon rolls: After placing the cut rolls in the baking dish, cover tightly with plastic wrap and refrigerate overnight rather than proofing at room temperature. In the morning, remove from the refrigerator and let the rolls stand at room temperature for 45 to 60 minutes until they have puffed visibly, then bake as directed. The slow cold proof adds depth to the yeast flavor and makes the rolls even more tender than a same-day batch.
- Orange cream cheese frosting: Add the finely grated zest of one large orange to the cream cheese frosting along with the vanilla extract. Replace 1 tablespoon of the milk with fresh orange juice. The citrus adds a bright, floral note against the sweet cinnamon filling that makes the frosting taste considerably more complex.
- Apple cinnamon rolls: Spread a thin layer of unsweetened apple butter over the dough before adding the cinnamon butter filling. The apple butter adds a subtle fruity depth and slight tanginess that contrasts the sweet filling. Reduce the brown sugar in the filling to 150g to compensate for the sweetness already in the apple butter.
- Brown butter cream cheese frosting: Brown the butter for the frosting (see the oatmeal cookie article’s brown butter technique) before beating it with the cream cheese. The browned butter adds a nutty, toasted depth to the frosting that is noticeably more complex than standard butter.
- Extra thick cardamom cinnamon rolls: Add 1/2 teaspoon of ground cardamom to the cinnamon filling mixture alongside the cinnamon. Cardamom adds a floral, slightly citrusy warmth that transforms the filling flavor profile into something considerably more aromatic and complex. This version is particularly good with the orange cream cheese frosting.
- Smaller rolls from a double batch: Roll the dough into a longer, thinner rectangle and cut 24 smaller rolls about 2.5cm thick, using a second baking dish. Reduce the bake time to 18 to 20 minutes and check at the 16-minute mark. Smaller rolls work well for a large gathering or brunch spread where individual pieces are needed.
Serving Suggestions
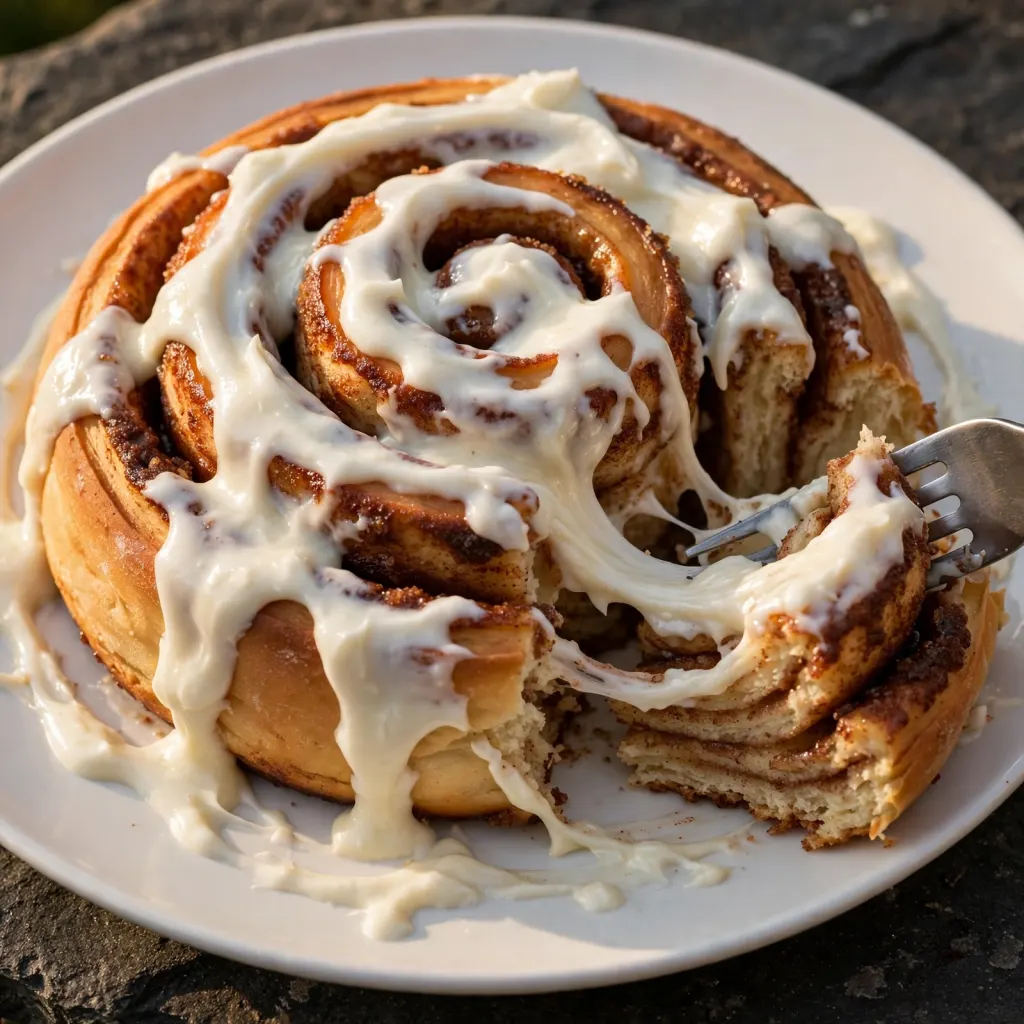
- Serve warm, directly from the baking dish, approximately 5 to 10 minutes after the frosting has been applied. The ideal eating temperature is warm enough that the frosting is still slightly fluid and the interior layers pull apart softly, but cool enough that the filling doesn’t run across the plate.
- Place the full baking dish at the center of a brunch table with a serving spatula and let guests take their own. The presentation of the frosted rolls in the dish, with the white cream cheese frosting visible across the golden tops, is attractive without any additional effort.
- Alongside a pot of strong black coffee or a rich black tea. The slight bitterness of both beverages contrasts the sweetness of the filling and frosting and makes each bite of the roll taste more vivid rather than overwhelmingly sweet.
- For a holiday morning breakfast, pair with fresh orange segments and a small fruit salad. The fresh fruit provides a clean, acidic contrast to the richness of the roll and makes the meal feel more balanced.
- Warm a leftover roll for 20 seconds at 50% microwave power and top with an extra spoonful of cream cheese frosting from the refrigerator before serving. The re-warmed roll with fresh frosting is nearly identical to freshly baked.
- For a dessert presentation, serve individual rolls on white plates with a scoop of vanilla ice cream alongside. The warm roll and cold ice cream combination works particularly well with the orange cardamom variation.
Tips for the Best Results
- Check your milk temperature with a thermometer, not by feel. The range for yeast activation is narrow: 38 to 43°C (100 to 110°F). Milk that feels “warm” to the touch can range from 35°C to 50°C depending on the person; at 50°C the yeast is killed instantly and the dough will not rise regardless of how long it sits. An instant-read thermometer used for the milk temperature eliminates the most common reason cinnamon rolls fail.
- Soften the butter properly for both the dough and the filling. Softened butter and melted butter are not interchangeable in this recipe. Softened butter in the dough produces an enriched dough that holds its structure; melted butter produces a wetter dough that requires extra flour and produces denser rolls. Softened butter in the filling spreads cleanly without tearing the dough; melted butter runs off the surface during rolling and pools at the bottom of the roll.
- Roll the dough to a consistent thickness of 6mm. Thickness consistency matters because thicker sections produce rolls that bake unevenly: thicker areas remain slightly doughy in the center while thinner areas over-bake. Take an extra minute to roll out any thick patches, working from the center outward in each direction.
- Don’t skip the 10-minute post-bake rest before frosting. Frosting applied to rolls straight from the oven melts so completely that it runs off the sides of the dish and leaves only a thin film on the rolls. Ten minutes of resting brings the roll surface temperature from approximately 95°C to around 65 to 70°C, at which point the frosting melts into the spirals and gaps without completely dissolving.
- Use full-fat block cream cheese for the frosting, never tub-style. Tub-style cream cheese contains more water and stabilizers than block cream cheese; it produces a frosting that is thinner, runnier, and less stable at room temperature. Block cream cheese produces a frosting with the right thick, slightly tangy, spreadable consistency that firms slightly as it cools and stays in place on the roll rather than pooling in the dish.
Storage Tips
Refrigerator
Fully frosted cinnamon rolls keep in the refrigerator, covered tightly with plastic wrap or in a sealed container, for up to 4 days. The rolls soften slightly in the refrigerator but retain their flavor fully; the cream cheese frosting firms to a dense, rich layer that is its own reward when eaten cold. Bring to room temperature for 20 minutes before eating for the best texture, or reheat individually as described below.
Freezer
Unfrosted, fully baked rolls freeze very well for up to 2 months. Allow the rolls to cool completely, wrap each one individually in plastic wrap, and transfer to a freezer bag. Thaw at room temperature for 1 to 2 hours or overnight in the refrigerator, then warm briefly in the microwave or oven before frosting with freshly made cream cheese frosting. Frosted rolls can also be frozen for up to 1 month; the frosting texture changes slightly after freezing but remains acceptable. For the best result, freeze unfrosted and apply fresh frosting when needed.
Reheating
Individual rolls reheat remarkably well in the microwave at 50% power for 20 to 30 seconds until just warm throughout; more than 30 seconds at full power makes the roll rubbery and the frosting very liquid. For reheating multiple rolls, place them in a covered baking dish with 1 tablespoon of water added to the dish and warm at 165°C (325°F) for 10 to 12 minutes; the small amount of water creates gentle steam that rehydrates the rolls and keeps them from drying out in the oven.
Make-ahead note: The most practical make-ahead approach is the overnight refrigerator method: after cutting and placing rolls in the baking dish, cover tightly and refrigerate for up to 15 hours. Remove from the refrigerator in the morning, let them proof at room temperature for 45 to 60 minutes until puffy, then bake. This is genuinely the approach that produces the best flavor in the finished rolls; the slow cold fermentation develops a subtle yeast complexity that same-day rolls don’t quite achieve.
Nutrition Information
Per serving, approximately one roll (1/12 of the recipe), with cream cheese frosting:
| Nutrient | Amount |
|---|---|
| Calories | 480 kcal |
| Protein | 8g |
| Total Carbohydrates | 72g |
| Dietary Fiber | 2g |
| Total Sugar | 38g |
| Total Fat | 18g |
| Saturated Fat | 11g |
| Cholesterol | 75mg |
| Sodium | 220mg |
| Vitamin C | 0mg |
| Calcium | 80mg |
| Iron | 2.5mg |
| Potassium | 120mg |
Nutrition values are approximate and may vary based on flour type, butter brand, and exact filling and frosting quantities used.
Why This Recipe Works
The soft, pillowy texture that distinguishes a great cinnamon roll from a merely adequate one comes from the dough’s classification as an enriched dough: a yeast dough that contains fat, eggs, and sugar in addition to the standard flour, water, and yeast. Each enrichment ingredient contributes a specific textural function. Butter coats the starch granules and protein strands in the flour, which lubricate the developing gluten network and prevent it from becoming tight and elastic; this produces a dough that stretches without springing back and baked rolls with a tender, soft crumb rather than a chewy, bread-like texture. Eggs contribute yolk lecithin, which acts as an emulsifier to bind the fat and water phases of the dough into a stable, uniform mixture; they also add protein that contributes structure and richness. Sugar feeds the yeast for strong leavening activity and contributes to the golden Maillard browning on the roll surfaces during baking.
The brown sugar in the cinnamon filling produces a specifically different flavor from white sugar through the same mechanism that makes brown sugar distinctive in baked goods generally. Brown sugar contains 3 to 5% molasses, which is itself a byproduct of sugar refining containing a complex mixture of glucose, fructose, and a wide range of aroma compounds including vanillin, furfural, and various caramel-adjacent molecules. When the brown sugar filling heats in the oven, those compounds undergo further caramelization and Maillard reactions, producing the deep, slightly bitter-sweet, toffee-like flavor that makes the filling in a well-made cinnamon roll taste complex rather than just sweet. White sugar filling produces a simpler, cleaner sweetness without the layered, caramel-forward depth.
The enriched dough’s softness after baking is maintained for longer than a lean dough’s due to a phenomenon related to fat’s role in staling. Staling in bread occurs primarily through a process called starch retrogradation: as the baked bread cools, the gelatinized starch molecules begin to recrystallize into a more ordered, rigid structure that produces the hard, crumbly texture of stale bread. Fat in enriched doughs physically interferes with this recrystallization process by coating starch granules and creating a physical barrier that slows the rate at which the starch molecules can rearrange into the rigid crystalline structure. This is why enriched doughs made with butter remain soft and tender for significantly longer than lean doughs, and why cinnamon rolls baked on Friday morning are still acceptably soft and tender on Saturday, whereas a lean bread loaf would be noticeably stale.
The 6mm dough thickness during rolling is calibrated to produce individual rolls with enough layers to create the visual spiral and distinct filling pockets while still being compact enough to cook fully through during the standard bake time. A thicker dough produces fewer, thicker spirals with less surface area of filling per bite; a thinner dough produces more spirals but a more delicate roll that can unwind or tear during cutting. At 6mm, each 3.5 to 4cm-thick roll contains approximately 8 to 10 complete spirals, which is the range that produces both the right visual appearance and the right ratio of dough to filling in each bite.
The cream cheese frosting applied while the rolls are warm rather than fully cooled is a specific technique decision. At a roll surface temperature of approximately 65 to 70°C (the temperature after 10 minutes of cooling from the oven), the cream cheese frosting is warm enough to melt into the gaps and spirals of the roll through capillary action but cool enough that the sugar and fat in the frosting don’t separate and run off. This produces the characteristic look of a well-frosted cinnamon roll where the frosting fills every crevice and creates a cohesive, glossy surface rather than a thin film over a roll with visible unfrosted gaps.
Frequently Asked Questions
Can I make cinnamon rolls the night before?
Yes, and the overnight method is arguably the best approach for flavor. After cutting the rolls and placing them in the baking dish, cover tightly with plastic wrap and refrigerate for up to 15 hours. In the morning, remove the dish and let the rolls sit at room temperature for 45 to 60 minutes until they look visibly puffed and the dough feels airy rather than cold and dense when pressed very gently. Bake at 190°C (375°F) as directed. The slow cold proof develops a subtle depth of yeast flavor that same-day rolls don’t fully develop.
Why didn’t my dough rise?
The most common cause is yeast killed by milk that was too hot. Above 49°C (120°F), yeast dies within a few minutes and the dough will not rise regardless of how long it sits. Check the milk temperature with a thermometer; the target is 38 to 43°C. The second most common cause is expired or old yeast that has lost its potency; always check the expiration date and store opened yeast in the refrigerator for best shelf life. A third cause is placing the dough in a spot that’s too cold; below 24°C the dough rises very slowly.
Can I use active dry yeast instead of instant yeast?
Yes, at the same quantity. The difference is that active dry yeast must be dissolved in the warm milk with 1 teaspoon of the recipe’s sugar and left to sit for 5 to 10 minutes until foamy before adding the other ingredients. If it doesn’t foam after 10 minutes, the yeast is dead or the milk temperature was off. Instant yeast can be added directly to the flour without this proofing step. Both produce the same final result; active dry yeast typically produces a slightly slower initial rise, so the first rise may take 10 to 15 minutes longer.
How do I know when the cinnamon rolls are fully baked?
Two reliable indicators confirm doneness. Visually, the tops should be a consistent, deep golden-brown across the entire surface with no pale patches at the center of the pan; pale patches indicate the center rolls are underbaked even if the outer ones look done. For certainty, insert an instant-read thermometer into the center of the center roll; a reading of 88 to 93°C (190 to 200°F) confirms the dough is fully cooked through with no raw or gummy interior.
Are cinnamon rolls made with gluten-free flour the same?
Gluten-free cinnamon rolls are achievable but distinctly different from the standard version. Without gluten’s elastic protein network, the dough won’t hold together or stretch the same way; it behaves more like a thick batter and must be chilled before it’s workable enough to roll out. The finished rolls have a less layered, more cake-like texture and the spirals don’t hold their definition as cleanly. For an occasional gluten-free treat the method works; for the classic cinnamon roll experience, the standard wheat dough is genuinely different.
Can I freeze cinnamon rolls before baking?
Yes. After cutting and placing the rolls in the baking dish, wrap tightly and freeze for up to 1 month without going through the second rise first. When ready to bake, place the frozen rolls (still in the covered dish) in the refrigerator overnight to thaw. The next morning, leave them at room temperature for 1 to 2 hours until they have visibly puffed and look fully proofed, then bake as directed. This method works well but requires advance planning for the thawing and room-temperature proofing time.
Why is my filling leaking out and burning at the bottom of the pan?
Two things cause this. Melted rather than softened butter in the filling doesn’t stay emulsified with the brown sugar and tends to pool at the base of the roll as it heats, eventually dripping through the pan. Use butter that is soft and spreadable but not liquid. The second cause is a loosely rolled cylinder; a tight roll keeps the filling compressed between the layers and prevents it from running. If filling burning at the pan bottom is a consistent problem, reduce the butter in the filling by 1 tablespoon.
Conclusion
Cinnamon rolls require a real time commitment, and they return it in kind. The 3 hours from mixing the dough to pulling the finished rolls from the oven is mostly waiting: waiting for the dough to rise, waiting for the rolls to proof, waiting those 10 minutes after the oven before the frosting goes on. The active work is maybe 40 minutes, and what it produces lasts all morning and into the afternoon.
The overnight method is worth building into the routine. Once you’ve made cinnamon rolls on a Friday night and woken up to something that requires 25 minutes in the oven and 10 minutes of frosting, the Saturday morning rhythm becomes one you’ll look forward to.
If you loved this recipe, save it to your baking and weekend breakfast Pinterest board so you can find it easily later. For more healthy recipes and daily food inspiration, follow TheCookingVibes on Pinterest.
Homemade Cinnamon Rolls
Ingredients
Equipment
Method
- Whisk flour, yeast, sugar, and salt together in a stand mixer bowl. Combine warm milk, eggs, vanilla, and softened butter; add to dry ingredients. Mix on low with dough hook for 2 minutes until combined, then knead on medium for 8 to 10 minutes until smooth and slightly tacky.
- Transfer to an oiled bowl, cover, and let rise in a warm spot for 60 to 90 minutes until doubled in volume. A finger pressed 2cm into the dough should leave an indention that fills slowly.
- Mix softened butter, brown sugar, cinnamon, and nutmeg into a thick spreadable paste for the filling.
- Turn risen dough onto a lightly floured surface and roll into a 45x35cm (18×14-inch) rectangle, 6mm thick. Spread cinnamon filling evenly to the edges, leaving a 1.5cm border on the far long edge.
- Roll the dough tightly from the near long edge toward the far edge. Pinch the seam firmly. Cut into 12 equal rolls using a serrated knife or dental floss. Arrange cut-side up in a greased 9×13-inch baking dish with small gaps between each roll.
- Cover and let rolls proof for 30 to 45 minutes until visibly puffed and touching. Preheat oven to 190°C (375°F).
- Bake 22 to 26 minutes until tops are deep golden-brown and the center roll reads 88°C (190°F) internally. Cool in the dish for 10 minutes before frosting.
- Beat softened cream cheese and butter until smooth. Add sifted powdered sugar in two additions, then vanilla and salt. Add milk to reach a thick, flowing consistency. Spread generously over the warm rolls.
Notes
- Check milk temperature with a thermometer: above 49°C kills the yeast.
- Use softened, not melted, butter for both the dough and the filling; melted butter produces different and inferior results in both.
- For overnight rolls: refrigerate the shaped rolls in the covered dish overnight; remove and proof at room temperature for 45 to 60 minutes before baking.
- Use full-fat block cream cheese only for the frosting; tub-style cream cheese produces a runny, unstable frosting.