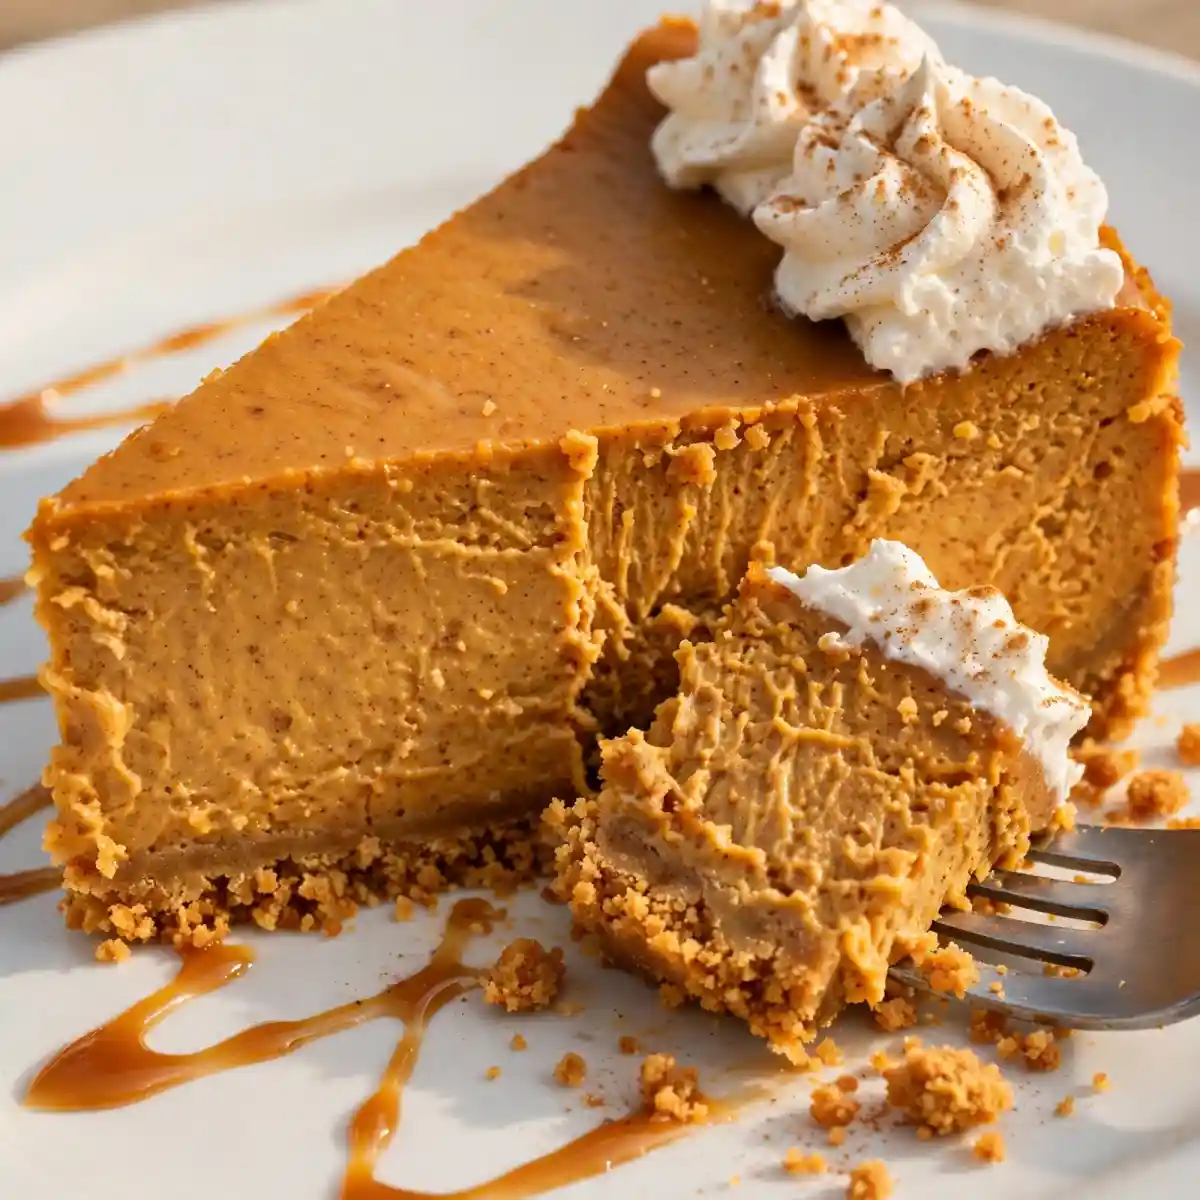
Pumpkin Cheesecake — Silky Spiced Filling, Buttery Crust
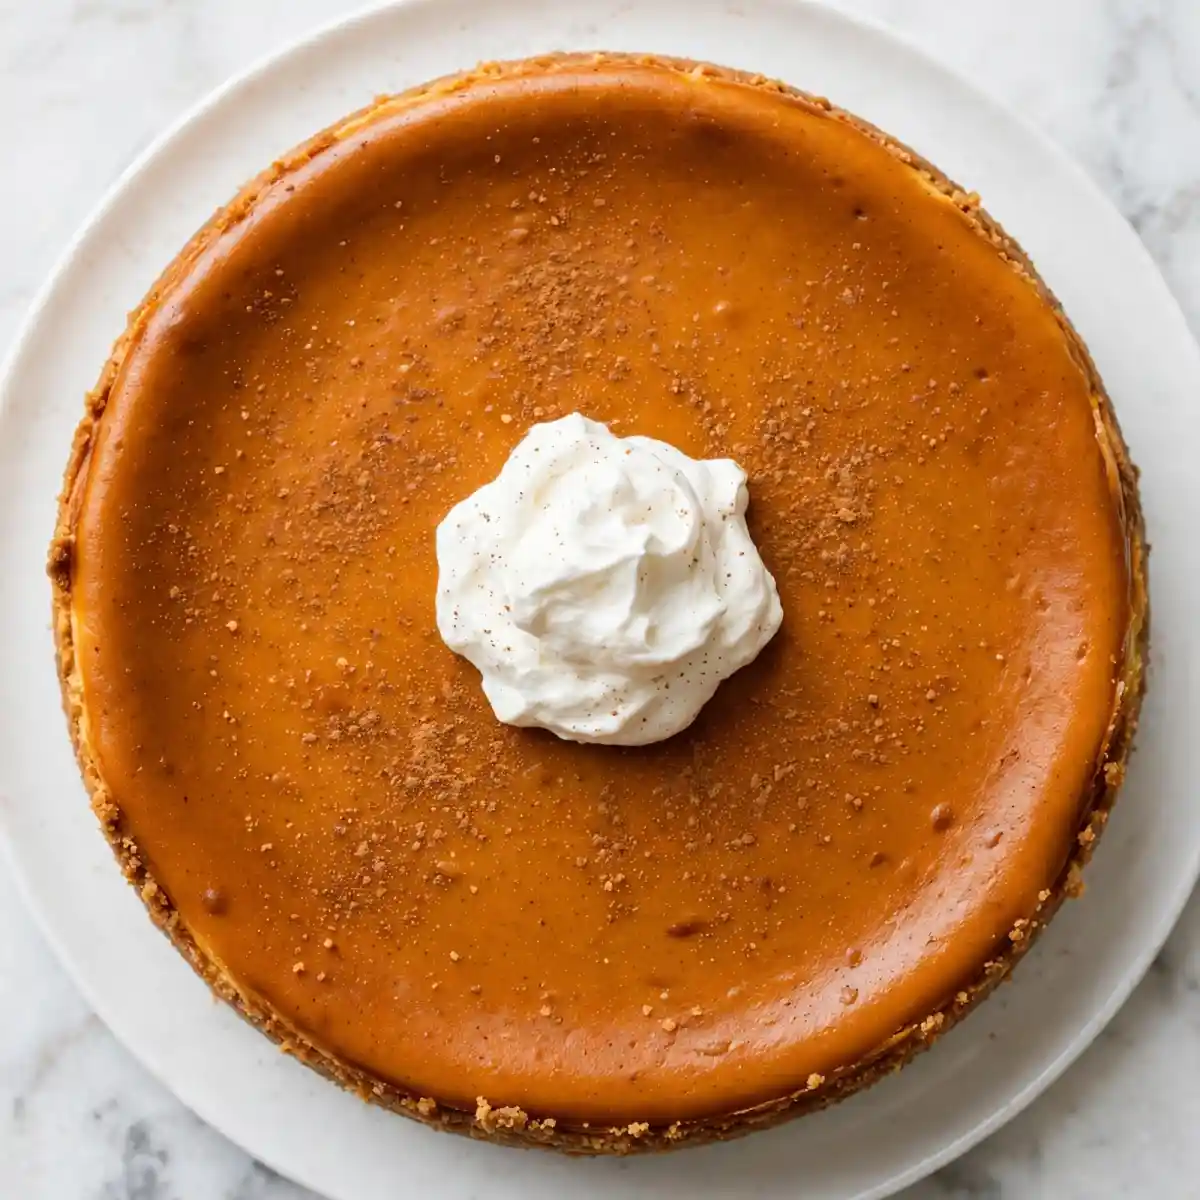
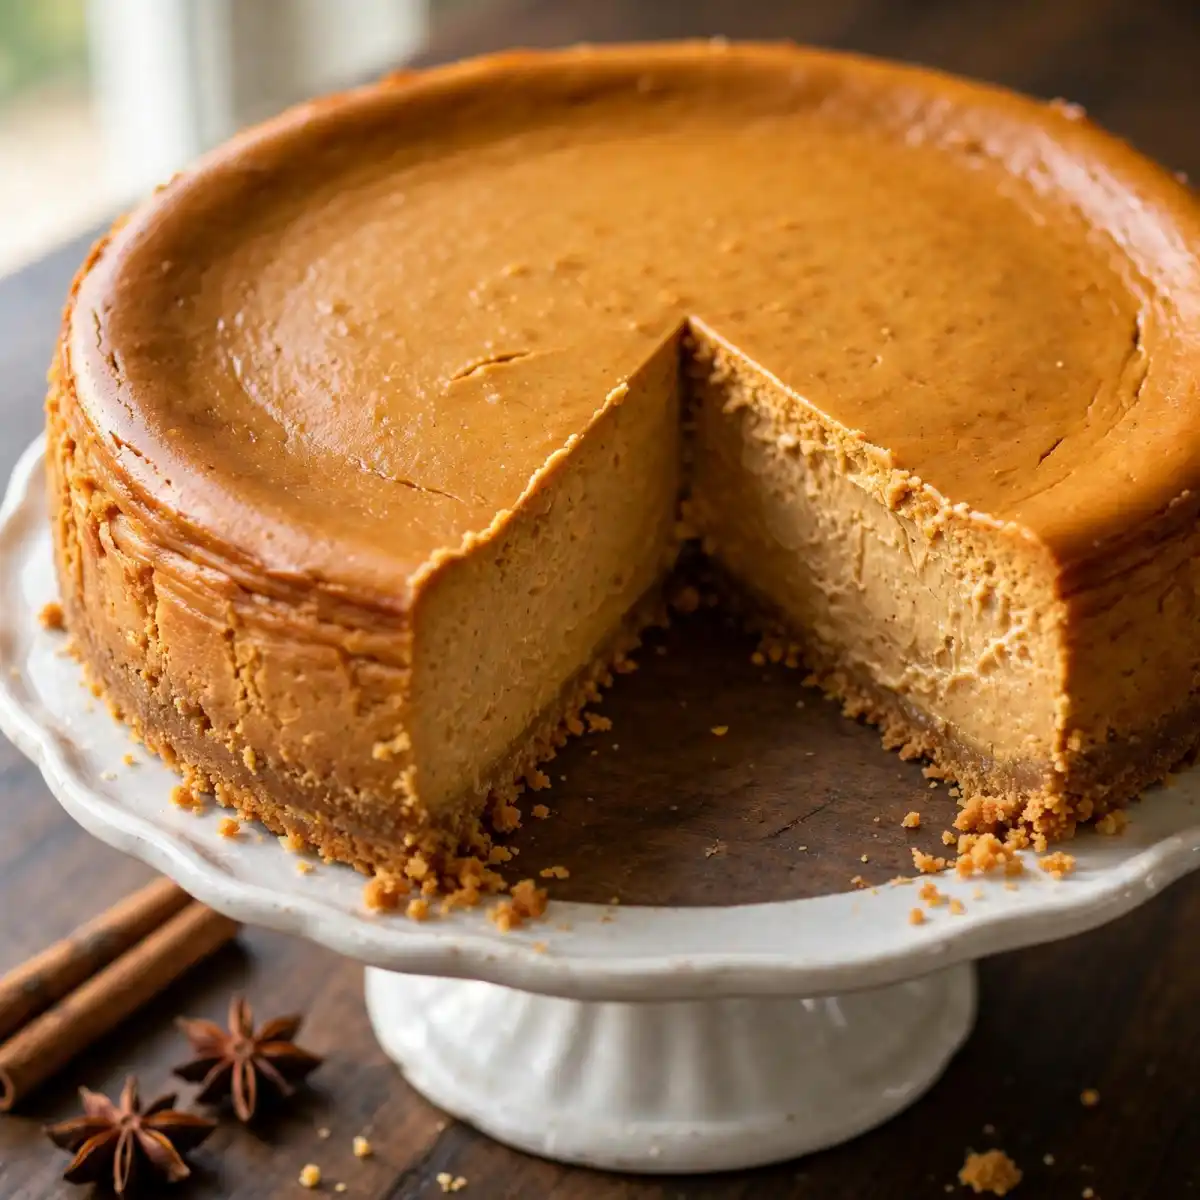
Pull a properly made pumpkin cheesecake from the refrigerator after a full overnight chill and the surface should be flat, smooth, and barely trembling at the center when the pan is gently nudged. Run a knife through it and the slice holds its shape, the filling is dense yet yielding, and the color is a deep, warm orange-tan from the pumpkin and spice. It doesn’t taste like a plain cheesecake with pumpkin extract stirred in; it tastes like both things simultaneously, the tang of cream cheese and the earthy, cinnamon-warm depth of pumpkin pie, occupying the same silky bite.
This pumpkin cheesecake recipe uses a brown butter graham cracker crust for a nuttier, more complex base than a plain melted butter version, and a filling built on full-fat block cream cheese, pure pumpkin puree, brown sugar, eggs, and a measured blend of warming spices. It bakes in a springform pan in a water bath that regulates the oven temperature around the filling, preventing the cracking and over-baked edges that give cheesecake its reputation for being difficult. It serves 12, chills overnight, and slices cleanly with a hot knife.
Why You’ll Love This Pumpkin Cheesecake
- Silky filling that holds a clean slice. The ratio of cream cheese to pumpkin is calibrated so the filling sets firmly enough to slice cleanly after overnight chilling while remaining dense and yielding rather than stiff or rubbery on the fork.
- Brown butter crust adds a layer of flavor the standard version lacks. Browning the butter before combining it with the graham cracker crumbs converts the milk solids into nutty, toasted aromatic compounds; the crust tastes noticeably more complex than one made with plain melted butter.
- Water bath removes the guesswork from doneness. Surrounding the springform pan with hot water during baking keeps the oven temperature around the filling at a gentle, stable level, which prevents cracking, over-baking at the edges, and the sunken center that result from direct dry oven heat.
- Spice blend that tastes measured rather than overwhelming. The spice quantities in this recipe are specific rather than “to taste,” producing a filling where cinnamon, ginger, and nutmeg are clearly present without any single one dominating or making the cheesecake taste like pumpkin pie spice extract.
- Make several days ahead with zero quality loss. Pumpkin cheesecake is one of the few desserts that is genuinely better at day 2 and day 3 than the day it’s made; the filling’s flavor develops and the texture firms further in the refrigerator.
Ingredients You’ll Need
Recipe Timing
| Detail | Info |
|---|---|
| Servings | 12 slices |
| Difficulty | Moderate |
| Course | Dessert |
| Cuisine | American |
| Prep Time | 30 minutes |
| Cook Time | 65 minutes |
| Rest Time | 6 hours minimum (overnight preferred) |
| Total Time | 7 hours 35 minutes (minimum) |
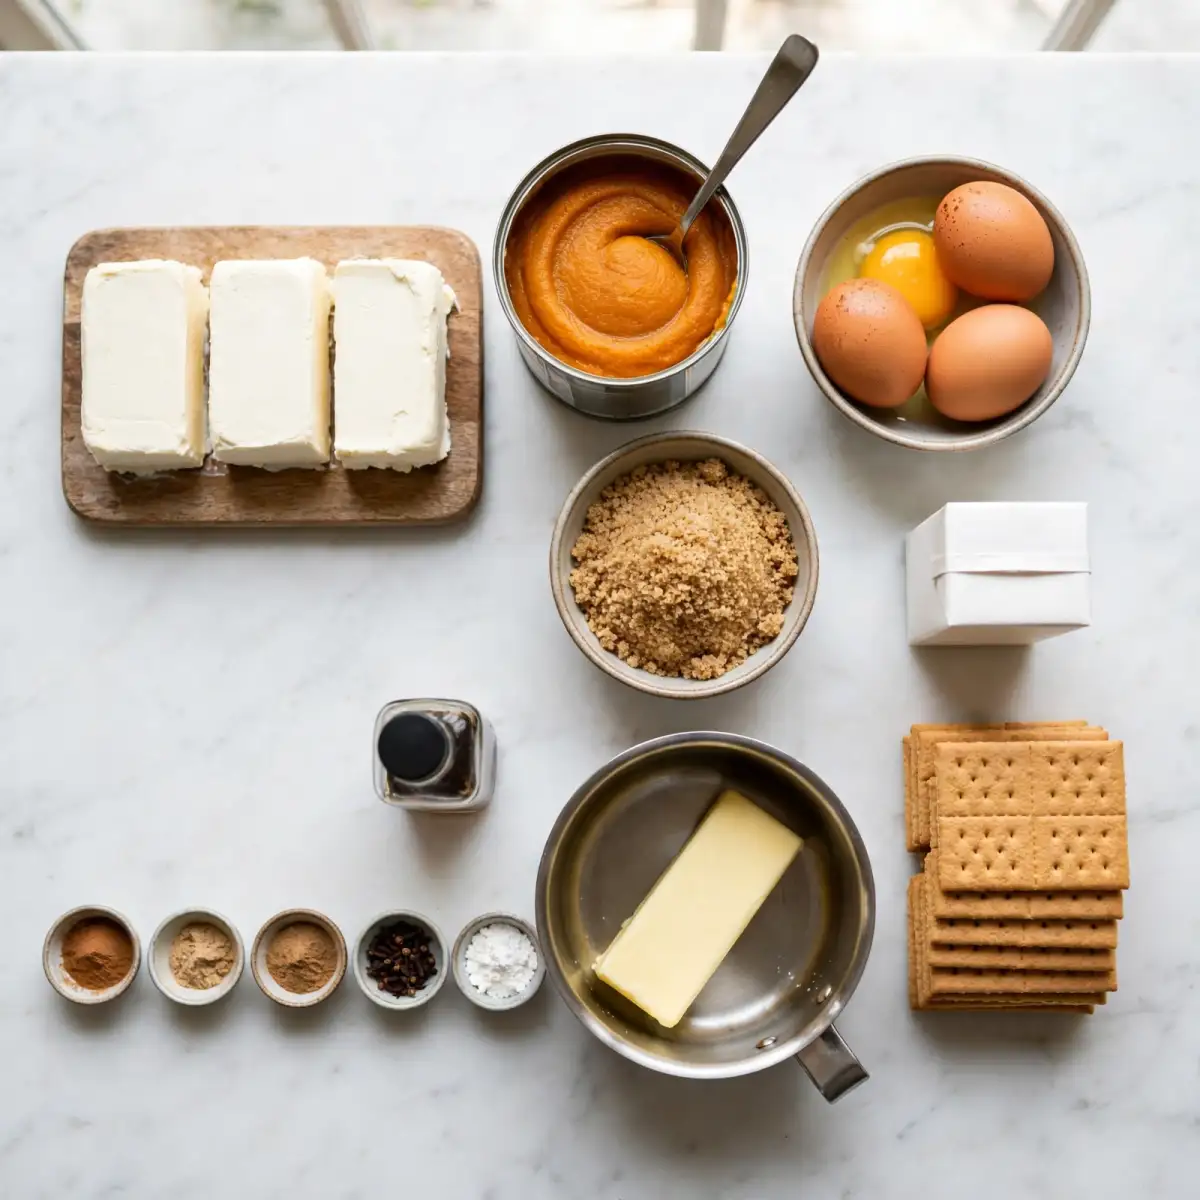
For the cream cheese, use full-fat block-style cream cheese only. The blocks sold in foil packaging contain approximately 33 to 34% fat and very little excess moisture; the spreadable cream cheese sold in tubs contains added stabilizers and significantly more water, which prevents the filling from setting to the correct density. Cold cream cheese straight from the refrigerator produces lumpy filling regardless of how long you beat it; the blocks must come to full room temperature (18 to 21°C) before the filling is mixed. Plan 45 to 60 minutes of counter time before starting.
For the pumpkin, use canned 100% pure pumpkin puree rather than canned pumpkin pie filling. Pumpkin pie filling is pre-sweetened and pre-spiced; it cannot be used as a direct substitute because the filling recipe’s sugar and spice quantities are calibrated for plain puree. The difference between canned pure pumpkin and fresh-roasted pumpkin puree in a baked cheesecake is negligible in flavor; canned is more consistent in moisture content, which matters for the filling’s set.
For the eggs, they must be at room temperature. Cold eggs added to creamed room-temperature cream cheese cause the fat to seize around the colder egg proteins and produce a lumpy, slightly broken batter that bakes into a less smooth, more porous filling. Set the eggs alongside the cream cheese when you begin bringing everything to room temperature.
For the graham crackers, standard honey graham crackers produce the best result. Chocolate graham crackers add a competing flavor that distracts from the pumpkin; cinnamon graham crackers can make the crust taste overseasoned alongside the spiced filling. Plain honey graham crackers provide a neutral, slightly sweet base that lets the brown butter and the filling both come through clearly.
The Brown Butter Graham Cracker Crust:
- 280g (about 20 full sheets) honey graham crackers, crushed to fine crumbs — the structural base; crushed fine enough that no large pieces remain which could create weak spots in the crust
- 85g (6 tablespoons) unsalted butter — browned before combining; the browning creates nutty, toasted compounds that elevate the crust flavor beyond plain melted butter
- 50g (1/4 cup) granulated white sugar — binds and sweetens the crust; the sugar caramelizes slightly during baking and helps the crust hold together
- 1/4 teaspoon fine salt — sharpens the sweetness of the crust and provides contrast to the sweet filling
The Pumpkin Cheesecake Filling:
- 680g (24 oz, three 8-oz blocks) full-fat block cream cheese, fully at room temperature — the structural and flavor base; must be lump-free before pumpkin is added
- 425g (one 15-oz can) pure pumpkin puree, not pumpkin pie filling — provides the flavor, color, and moisture of the filling; at room temperature
- 200g (1 cup) light brown sugar, packed — sweetens and adds a mild molasses depth that complements the pumpkin’s earthiness; brown sugar produces a noticeably more complex flavor than white sugar in this application
- 50g (1/4 cup) granulated white sugar — combined with brown sugar for a balanced sweetness level
- 3 large eggs, at room temperature — provide structure and set the filling during baking; eggs are the primary setting agent
- 1 large egg yolk, at room temperature — adds richness and contributes to the filling’s silky, dense texture without the structural stiffness an additional whole egg would bring
- 120ml (1/2 cup) heavy whipping cream — adds richness and softens the filling’s texture slightly; makes the finished slice feel silkier and more yielding on the palate
- 2 teaspoons pure vanilla extract
- 2 teaspoons ground cinnamon — the dominant warm spice note
- 1 teaspoon ground ginger — adds a sharp, slightly citrusy warmth that makes the cinnamon taste more vivid
- 1/2 teaspoon ground nutmeg — adds a sweet, slightly woody depth
- 1/4 teaspoon ground cloves — adds a deep, pungent warmth; use no more than this or the clove flavor becomes identifiable and medicinal
- 1/4 teaspoon fine salt
- 2 tablespoons cornstarch — optional but recommended; binds the filling slightly and reduces the chance of cracking by giving the filling a small amount of additional structural stability
For serving (optional):
- Whipped cream — a small dollop on each slice provides a cool, lightly sweet contrast to the dense, spiced filling
- A light dusting of ground cinnamon — adds visual warmth and reinforces the spice aroma at the moment of serving
Allergen and Dietary Disclosure
This pumpkin cheesecake contains dairy (cream cheese, butter, heavy cream), eggs (whole eggs and yolk), and gluten (graham cracker crust). It is naturally nut-free as written.
For gluten-free: replace the honey graham crackers with certified gluten-free graham-style crackers or gluten-free digestive biscuits at the same weight. The crust preparation method is identical. All other ingredients are naturally gluten-free. Verify the cornstarch is labeled gluten-free if strict compliance is needed.
For dairy-free: replace the block cream cheese with a dairy-free block-style cream cheese alternative at the same quantity; avoid tub-style dairy-free cream cheese as it contains too much moisture. Replace the butter with vegan butter block for the crust and the heavy cream with full-fat coconut cream. The filling will set adequately but the texture is slightly less silky than the full-dairy version.
For lower sugar: reduce the brown sugar to 130g and the granulated sugar to 30g. The filling will be noticeably less sweet and the pumpkin flavor more prominent; the structural set is unaffected since the eggs and cornstarch, not the sugar, provide the setting mechanism.
This recipe has not been tested in a certified allergen-free kitchen and cannot be guaranteed safe for any specific allergy.
Equipment Needed
- 9-inch (23cm) springform pan — the only suitable pan for this recipe; the removable sides allow the cheesecake to be released cleanly without inverting or cutting around the edges. A springform pan with a latch that closes very tightly is important for the water bath step; a pan with a loose latch allows water to seep through the base and produce a soggy crust.
- Heavy-duty aluminum foil — for wrapping the springform pan base before the water bath. Wrap the outside of the pan in two layers of heavy-duty foil, pressing it up the sides to at least 5cm above the water line in the roasting pan; this prevents water ingress even if the springform latch is slightly imperfect.
- Large roasting pan — the outer container for the water bath; it must be large enough that the springform pan fits inside with at least 2.5cm of space on all sides, and deep enough to hold at least 2.5cm of hot water.
- Stand mixer or hand mixer — for beating the room-temperature cream cheese to a lump-free, perfectly smooth consistency before any other filling ingredients are added; this step cannot be accomplished adequately by hand with a whisk.
- Fine mesh sieve or cheesecloth — for pressing excess moisture from the canned pumpkin puree if it appears very wet when opened. Canned pumpkin moisture content varies by brand; a very wet puree can destabilize the filling’s set. Spread the puree on a plate and blot with paper towels if the puree looks very liquid.
- Instant-read thermometer — the most reliable doneness indicator for cheesecake; a fully baked cheesecake reads 65 to 68°C at the center. Visual cues (the jiggle test) are helpful as a secondary check but the thermometer removes ambiguity entirely.
- Offset spatula — for pressing the crust firmly and evenly into the base and sides of the springform pan; using the base of a flat-bottomed glass or measuring cup also works for the base, but an offset spatula handles the side walls better.
Step-by-Step Directions
Step 1: Brown the Butter and Make the Crust
Preheat the oven to 175°C (350°F). Place the butter in a small light-colored saucepan over medium heat and cook, swirling occasionally, until the milk solids at the base turn a deep amber and the entire butter smells unmistakably nutty and toasted, about 5 to 6 minutes. Remove from the heat immediately and pour into a large mixing bowl to stop the browning; don’t let it sit in the hot pan or it will continue darkening into bitter territory.
Add the fine graham cracker crumbs, granulated sugar, and salt to the brown butter and mix thoroughly until every crumb is coated and the mixture looks like wet sand that holds its shape when pressed between fingers. It should not look dry or powdery; dry crust mixture produces a crust that crumbles rather than slicing cleanly.
Press the crust mixture into the base of the springform pan in an even, compact layer, using the flat base of a measuring cup to press firmly across the entire surface. For a crust that runs partially up the sides, press approximately 2cm up the walls of the pan all the way around using the offset spatula.
Bake the crust at 175°C for 10 minutes until set and very lightly golden at the edges. Remove from the oven and allow to cool completely, at least 20 minutes, before the filling goes in.

Chef’s Note: Pre-baking the crust before the filling is added is not optional; an unbaked graham cracker crust underneath a wet, heavy pumpkin filling produces a soft, soggy layer that never crisps because the moisture from the filling seeps into the unbaked crumbs immediately. The 10-minute pre-bake drives off moisture, sets the butter-sugar binding, and produces a crust that remains distinct and slightly crisp even after two days of refrigerator storage.
Step 2: Reduce the Oven Temperature and Prepare the Water Bath
Reduce the oven temperature to 160°C (325°F) after removing the crust. Allow the oven to stabilize at the new temperature for at least 10 to 15 minutes before the cheesecake goes in; most home ovens take several minutes to genuinely equilibrate after a temperature change.
Wrap the outside of the cooled springform pan (crust inside) with two layers of heavy-duty aluminum foil, pressing the foil firmly up the sides to at least 5cm above the base. This creates a waterproof barrier for the water bath.
Place the foil-wrapped springform pan in the center of the large roasting pan. Set both aside while you make the filling.
Step 3: Beat the Cream Cheese
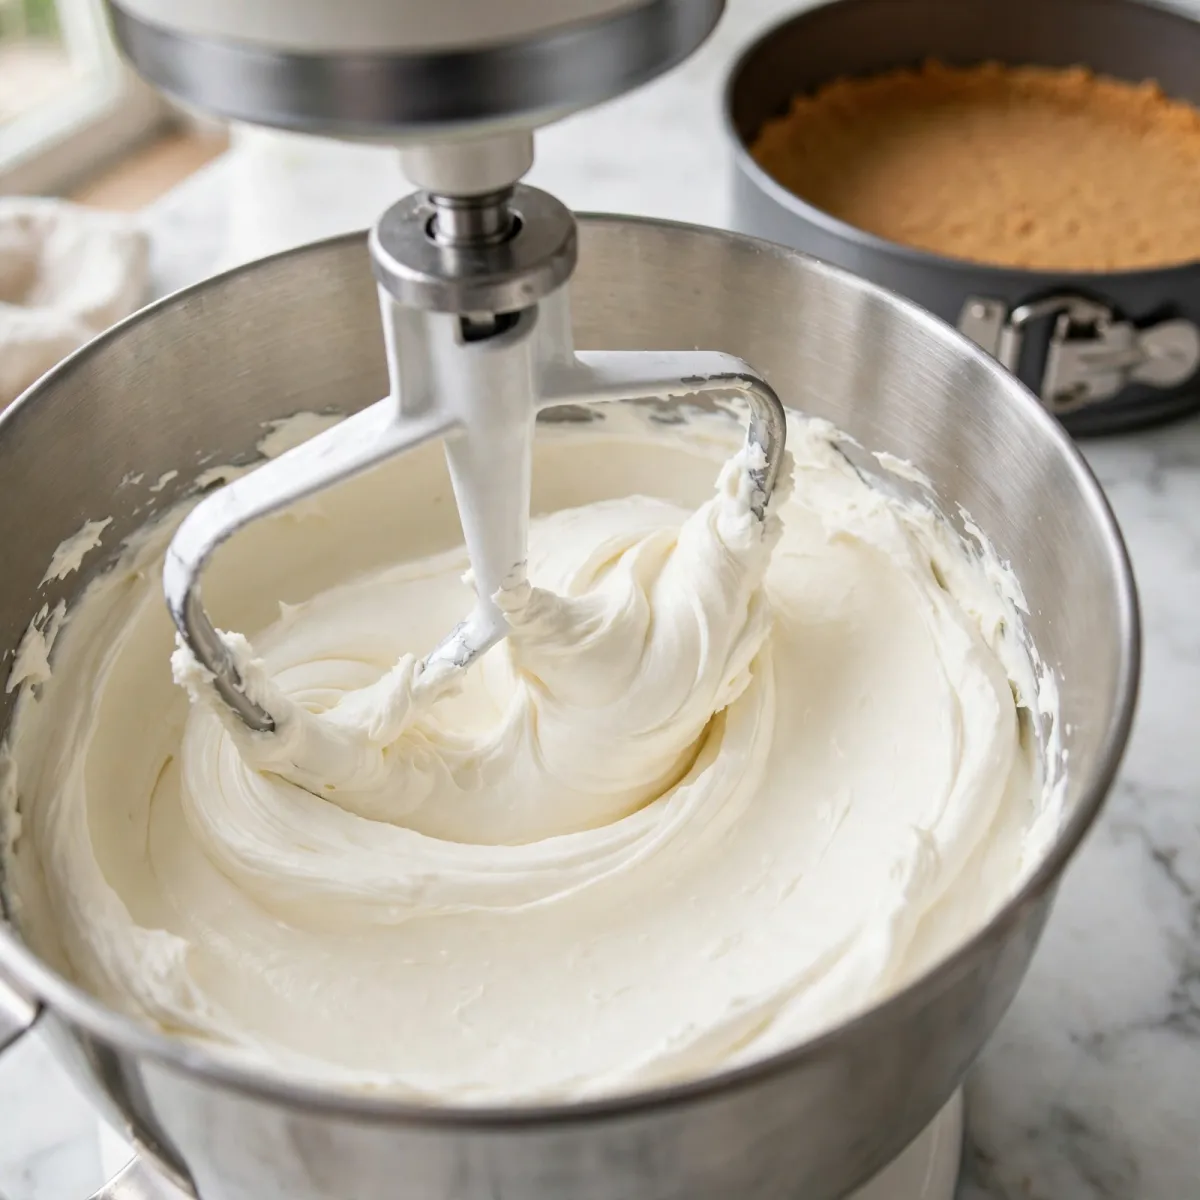
Place all three room-temperature cream cheese blocks in the stand mixer bowl fitted with the paddle attachment. Beat on medium speed for 3 to 4 minutes, scraping the bowl sides and bottom at the 1-minute and 2-minute marks, until the cream cheese is completely smooth with absolutely no lumps visible. Run a spatula through the beaten cream cheese and press it against the bowl side; it should smear uniformly with no detectable firm pieces.
This lump-free cream cheese is the foundation of a smooth filling; any lumps at this stage will not dissolve during subsequent mixing and will produce visible irregular patches in the baked cheesecake’s cross-section.
Chef’s Note: The paddle attachment, not the whisk, is the correct tool for cream cheese because the goal is a smooth, dense mixture with minimal air incorporation. A whisk beats air into the cream cheese, which appears as bubbles in the baked filling’s surface and contributes to cracking. The paddle folds and smooths the cream cheese without the aggressive air incorporation of a whisk.
Step 4: Add Sugars, Pumpkin, and Spices
Add the light brown sugar and granulated sugar to the beaten cream cheese. Mix on medium-low speed for 60 seconds until fully incorporated and no visible sugar granules remain against the bowl sides. Scrape the bowl thoroughly.
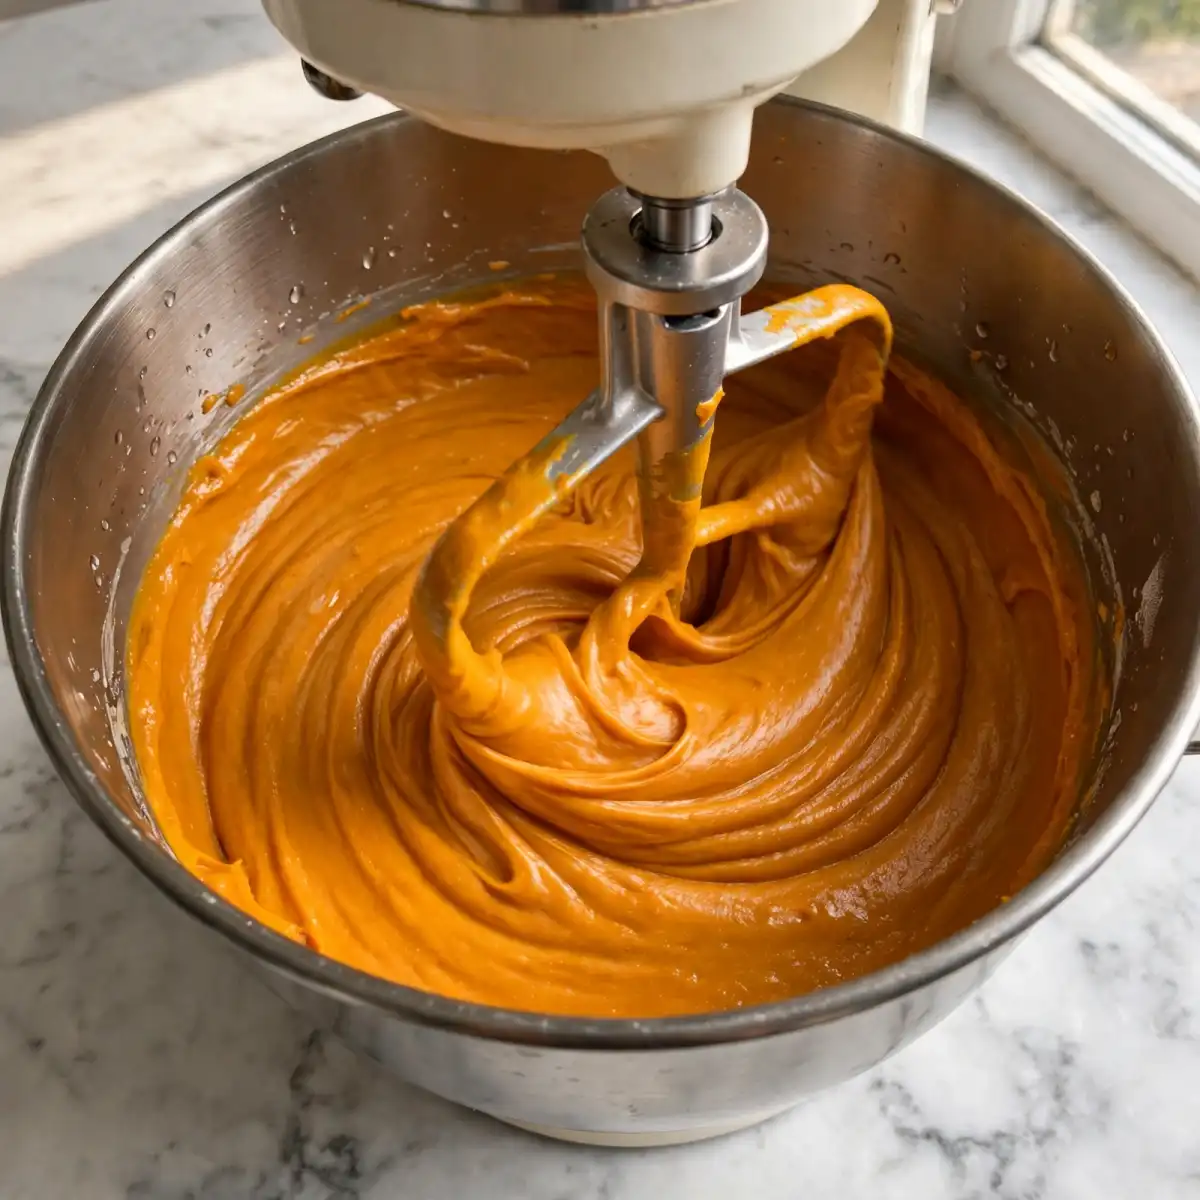
Add the pumpkin puree, ground cinnamon, ground ginger, ground nutmeg, ground cloves, salt, and cornstarch. Mix on low speed for 30 to 45 seconds until just combined into a uniform deep orange filling with no visible streaks of plain cream cheese. Don’t over-mix at this stage; the goal is uniform incorporation, not aeration.
Taste the filling at this point; it should be clearly spiced with cinnamon as the leading note, the other spices providing warmth and depth in the background. The pumpkin flavor should be present and earthy. The filling will taste slightly more assertive raw than it will baked; the heat mellows and integrates the spice during baking.
Step 5: Add Eggs and Cream
Add the room-temperature eggs and egg yolk one at a time on low speed, waiting until each is just incorporated before the next goes in. After the last egg, add the heavy cream and vanilla extract. Mix on low for 20 to 30 seconds until the cream and vanilla disappear into the filling.
Immediately after the last ingredient is incorporated, stop the mixer. The filling should look smooth, uniformly orange, and slightly thinner than the cream-cheese-only stage. Over-mixing after the eggs are added incorporates excess air that expands during baking, rises above the pan, then collapses during cooling and produces a sunken, cracked surface.
Chef’s Note: The sequence of adding eggs last and mixing on low speed minimally is the most important technique for a crack-free surface. Each egg yolk contains lecithin, a powerful emulsifier that stabilizes the filling’s structure; the whites provide protein that sets during baking. Beating them aggressively or on high speed wraps air around these proteins before they’ve had a chance to set; that air expands in the oven and contracts sharply as the cheesecake cools, pulling the surface and creating cracks. Low speed, brief mixing, done.
Step 6: Fill and Assemble the Water Bath
Pour the pumpkin filling over the cooled pre-baked crust in the foil-wrapped springform pan. The filling should level itself; if any part looks significantly higher than another, run a small offset spatula across the surface once to level it. Tap the pan gently on the counter three times to bring any trapped air bubbles to the surface.
Place the filled springform pan (inside the roasting pan) on the pulled-out center oven rack. Pour enough hot water from a kettle into the roasting pan to reach approximately 2.5cm up the outside of the springform pan. Use hot water from a just-boiled kettle; cold water takes too long to heat up to the temperature needed to regulate the oven environment effectively.
Carefully slide the oven rack in without splashing water onto the cheesecake surface.
Step 7: Bake and Check for Doneness
Bake at 160°C (325°F) for 60 to 70 minutes. The cheesecake is done when the edges look set and matte rather than shiny and liquid, the center still has a gentle wobble when the pan is nudged, and an instant-read thermometer inserted into the center reads 65 to 68°C. The wobble at the center should be a slight, uniform trembling of the whole inner circle; the outer 5cm around the edge should look fully set and stationary.
Remove the roasting pan from the oven and allow the cheesecake to cool in the water bath for 30 minutes without touching or moving it. Then lift the springform pan out of the water, remove the foil, and run a thin knife or offset spatula around the inside edge of the springform to loosen the filling from the walls before the cheesecake cools completely; this loosening step prevents the filling from cracking as it contracts away from the sides during cooling.
Allow to cool at room temperature for at least 1 more hour before refrigerating overnight or for at least 6 hours.
Common Mistakes and Troubleshooting
| Problem | Cause | Solution |
|---|---|---|
| Cracked surface | Air incorporated during egg-mixing stage, or oven too hot | Mix eggs on low speed only until just incorporated; never beat on medium or high after eggs are added |
| Soggy bottom crust | Crust not pre-baked, or water entered through foil | Always pre-bake the crust for 10 minutes; use two layers of heavy-duty foil and press firmly up the sides |
| Filling lumpy throughout | Cream cheese too cold when beaten, or not beaten long enough before other ingredients added | Bring cream cheese to full room temperature (18 to 21°C); beat until perfectly smooth before adding any other ingredient |
| Center sunken after cooling | Over-baked or baked at too high a temperature | Pull the cheesecake at 65 to 68°C center temperature; reduce oven to 160°C if center was done before edges |
| Cheesecake won’t release cleanly from pan | Filling contracted and stuck to sides during cooling | Run a thin knife around the inside edge immediately after removing from the oven; this releases the bond before the filling fully sets |
| Filling too soft and doesn’t slice cleanly | Under-baked, or not chilled long enough | Confirm 65 to 68°C internal temperature; refrigerate a minimum of 6 hours, overnight preferred |
Variations and Substitutions
- Brown sugar swirl pumpkin cheesecake: Reserve 240g (about 1/3) of the plain cream cheese filling before adding the pumpkin. Pour the pumpkin filling into the crust, then drop spoonfuls of the plain cream cheese filling across the surface. Use a toothpick or thin knife to swirl the two fillings together in broad figure-eight patterns, stopping before the swirls become muddy. The visual cross-section shows a dramatic orange and cream swirl pattern; the flavor offers bites of pure tangy cream cheese against bites of spiced pumpkin within the same slice.
- Gingersnap crust version: Replace the honey graham crackers with the same weight of plain gingersnap cookies. The ginger in the cookies amplifies the filling’s ground ginger note and produces a crust with a more assertive, slightly spicy character. No other adjustment is needed; the method is identical to the graham cracker version.
- Maple pumpkin cheesecake: Replace 60ml (4 tablespoons) of the heavy cream with pure maple syrup. Add an extra 1/4 teaspoon of ground cinnamon. The maple adds a floral, earthy sweetness that integrates with the pumpkin beautifully without being identifiable as maple on its own; the finished filling tastes deeper and more autumnal.
- No-bake pumpkin cheesecake: Dissolve 1.5 teaspoons of unflavored gelatin powder in 3 tablespoons of cold water, then heat gently until fully dissolved. Beat the cream cheese, pumpkin, spices, and sugar together as above, then fold in the dissolved gelatin and 240ml of heavy cream whipped to firm peaks. Pour into the pre-baked and cooled crust, smooth the surface, and refrigerate for at least 8 hours until firm. The no-bake version has a lighter, more mousse-like texture than the baked version; it doesn’t slice as cleanly but sets adequately for serving in wedges.
- Mini pumpkin cheesecakes: Divide the crust and filling between 12 standard muffin tin cups lined with paper liners; use 2 to 3 tablespoons of crust per cup and fill to within 5mm of the top. Bake at 160°C for 20 to 25 minutes without a water bath until the centers are just set. Cool and refrigerate for at least 3 hours. The individual portions are ideal for a dinner party since they don’t need to be sliced at the table.
- Pumpkin cheesecake bars: Press the crust into the base of a greased 23x33cm (9×13-inch) baking pan and pre-bake for 10 minutes. Pour the filling over the cooled crust in an even layer. Bake at 160°C for 35 to 40 minutes without a water bath, until the center reads 65°C. Cool completely, refrigerate 4 hours, then slice into bars. The water bath is unnecessary for a bar format because the thinner filling layer is less prone to cracking and over-baking than a deep cheesecake round.
Serving Suggestions
- Serve chilled from the refrigerator, not at room temperature; pumpkin cheesecake’s texture is at its ideal firmness and clean-slicing best when cold. If the filling softens at room temperature before the slice is finished, it loses the structural integrity that makes each clean forkful satisfying.
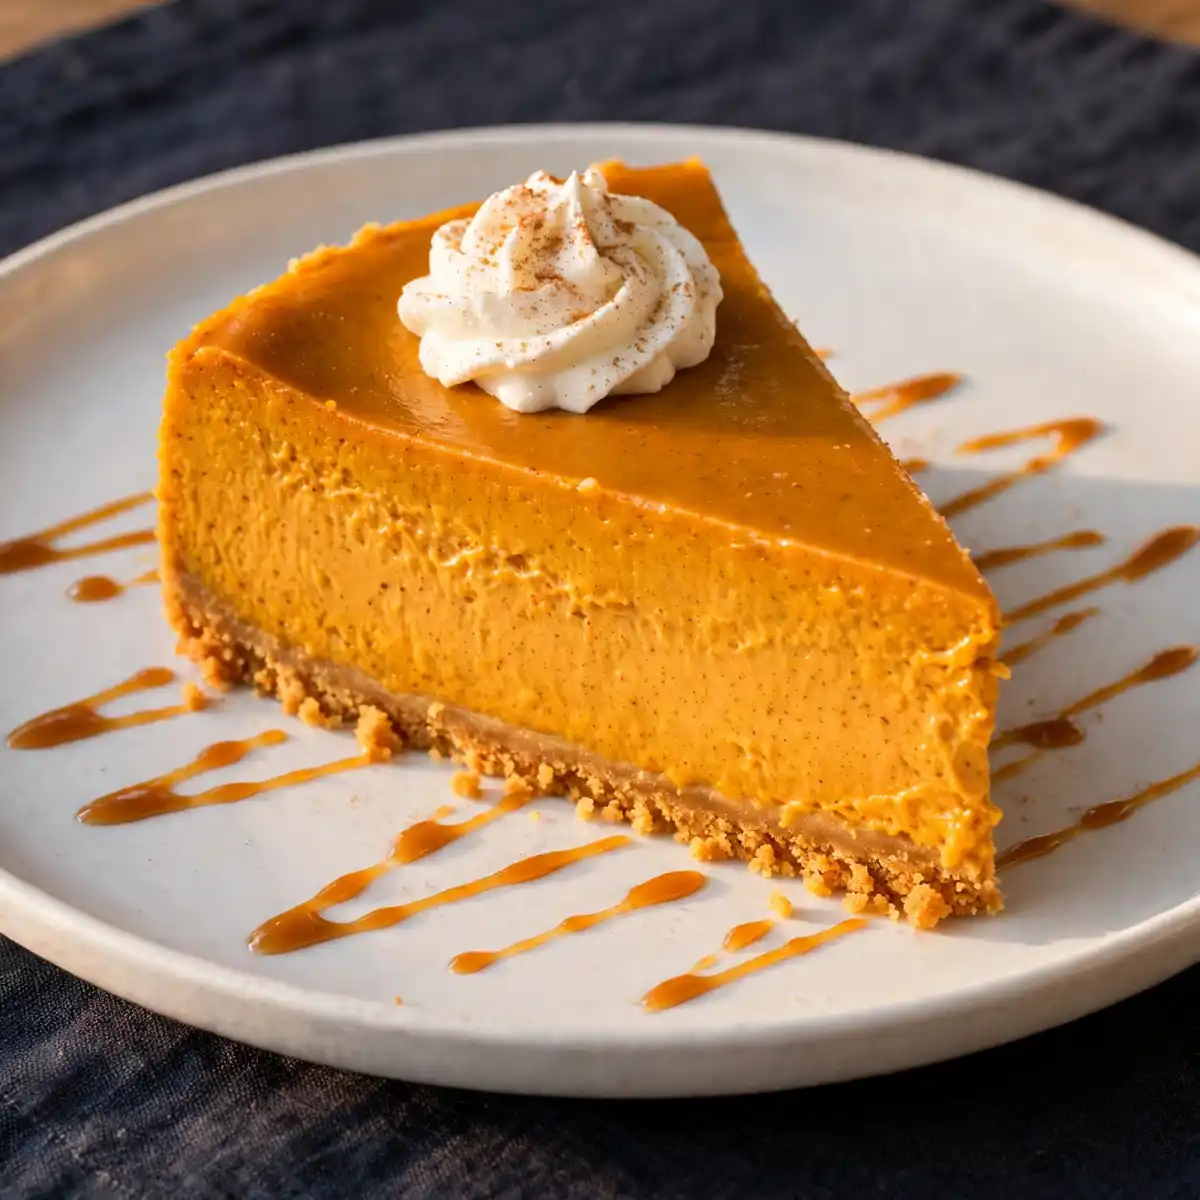
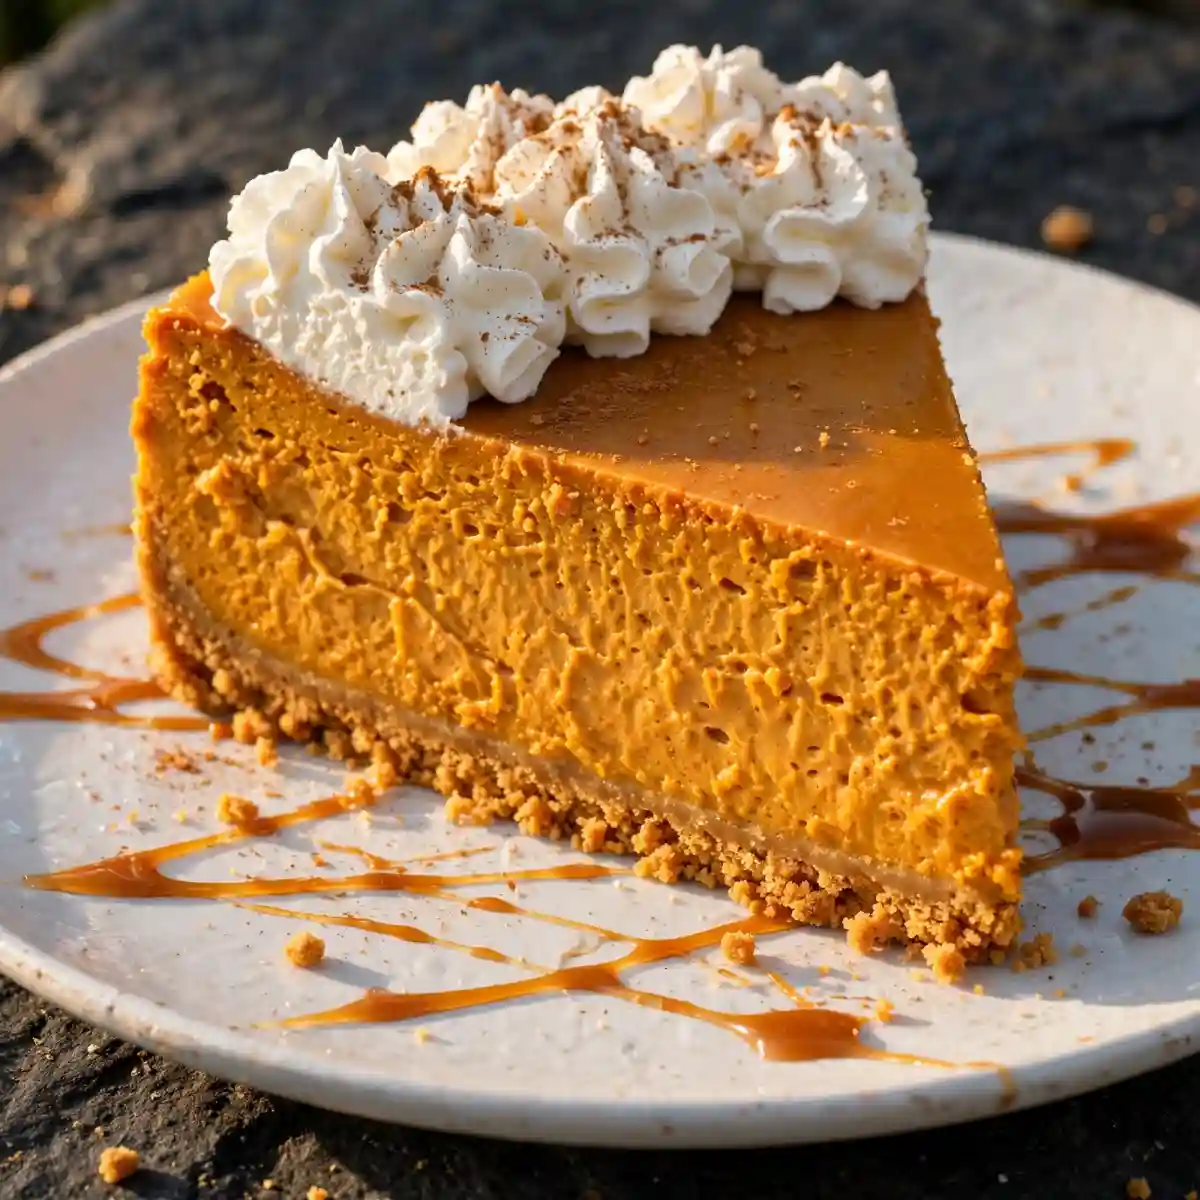
- Top each slice with a small, freshly whipped cream dollop and a light dusting of ground cinnamon immediately before serving; both additions take 60 seconds and significantly elevate the visual. Whipped cream piped from a bag looks more finished than a plain spoonful.
- Serve alongside a small scoop of vanilla ice cream on the same plate; the cold, plain sweetness of vanilla ice cream contrasts the dense, spiced pumpkin filling without competing with its flavor, and the temperature contrast between the ice cream and the chilled cheesecake is pleasant.
- For an autumn dessert table, place the whole cheesecake on a cake stand and arrange a few cinnamon sticks, star anise, and dried orange slices around the base; the presentation requires no skill and communicates the seasonal character of the dessert immediately.
- Drizzle a thin line of salted caramel sauce across each plated slice rather than over the whole cake; a whole-cake drizzle soaks into the filling before serving time, while a per-slice drizzle stays glossy and visible on the plate.
- Pair with hot black coffee or a strongly brewed black tea; both bitter beverages contrast the dense sweetness of the filling and make the pumpkin spice flavors taste more vivid between sips.
Tips for the Best Results
- Use a thermometer rather than the jiggle test alone. The jiggle test, watching for a wobble at the center, is a reasonable secondary check but it varies based on the depth of the filling, the specific cream cheese brand, and the thickness of the pan. A center temperature of 65 to 68°C is a fixed target that doesn’t change with these variables. Pulling the cheesecake at this temperature produces a perfectly set, crack-free center every single time regardless of appearance.
- Never skip the room-temperature rest for cream cheese and eggs. The pumpkin filling is a complex emulsion that depends on the fat in the cream cheese and the fat and protein in the eggs distributing evenly through the pumpkin’s water content. Cold fat doesn’t emulsify; it resists the surrounding liquid and produces a slightly broken, denser, less uniform filling. Forty-five minutes at room temperature before mixing begins resolves this entirely.
- Don’t open the oven door during the first 50 minutes of baking. Temperature drops caused by an open oven door during the early set phase can cause the filling’s proteins to contract unevenly and create cracks at the surface. The cheesecake needs a consistent, stable environment during the period when the protein structure is setting; every oven door opening reduces the temperature by 10 to 15°C inside the water bath, which is enough to disrupt the set.
- Run the knife around the edge before the cheesecake cools. This is the step most recipes bury in the cooling section and most bakers miss. As the pumpkin filling cools and contracts, it pulls inward; if the edges are stuck to the springform sides, the filling cracks at the center to accommodate the contraction. Running a thin knife around the inside edge immediately after removing from the oven separates the filling from the sides before that contraction begins, allowing the filling to pull inward freely without cracking.
- Refrigerate overnight rather than the 6-hour minimum. Six hours produces a adequately firm cheesecake; overnight produces one where the spice flavors have fully integrated, the texture is at its densest and cleanest-slicing point, and the filling tastes noticeably more cohesive than the same cheesecake eaten at the 6-hour mark. Pumpkin cheesecake made 2 days ahead is better than pumpkin cheesecake made the morning of serving.
Storage Tips
Refrigerator
Pumpkin cheesecake keeps in the refrigerator for up to 5 days. Store it covered with a dome lid or loosely tented with plastic wrap that doesn’t touch the filling surface; direct plastic wrap contact can mar the smooth surface. The cheesecake is best at day 2 and day 3 as the filling flavor deepens. Keep it in the springform pan base for easy transport; remove the sides of the springform pan before serving and place on a serving platter or cake stand.
Freezer
Pumpkin cheesecake freezes well for up to 2 months. For whole-cheesecake freezing: place the cooled, fully set cheesecake on a baking sheet and freeze uncovered until the surface is completely firm, about 2 hours, then wrap the entire cheesecake tightly in plastic wrap and again in aluminum foil. Thaw overnight in the refrigerator before serving. For sliced portions: cut into individual slices, freeze each on a parchment-lined tray until solid, then transfer to sealed freezer bags. The texture after thawing is very close to fresh; the filling’s high fat content resists the cellular damage that makes lower-fat desserts deteriorate more during freezing.
Reheating
Pumpkin cheesecake is served cold and not reheated. If a refrigerated slice feels too cold from the back of the refrigerator, allowing it to sit at room temperature for 10 to 15 minutes before eating is the ideal approach; this takes the chill off without warming the filling to the point where it softens and loses its clean structure. Never microwave cheesecake; even brief microwave exposure melts the fat in the cream cheese and separates the filling structure permanently.
Make-ahead note: Pumpkin cheesecake is one of the most practical make-ahead desserts available. Making it up to 3 days before a gathering and refrigerating covered produces a dessert in better condition than one made the day of; the flavor genuinely improves, the slicing is cleaner, and the host has one less task on the day. For Thanksgiving or other holiday gatherings, bake it 2 days ahead and refrigerate; add whipped cream and garnishes immediately before serving.
Nutrition Information
Per serving, approximately one slice (1/12 of the cheesecake, without whipped cream):
| Nutrient | Amount |
|---|---|
| Calories | 420 kcal |
| Protein | 7g |
| Total Carbohydrates | 42g |
| Dietary Fiber | 1g |
| Total Sugar | 32g |
| Total Fat | 26g |
| Saturated Fat | 15g |
| Cholesterol | 125mg |
| Sodium | 310mg |
| Vitamin C | 2mg |
| Calcium | 85mg |
| Iron | 1.4mg |
| Potassium | 155mg |
Nutrition values are approximate and may vary based on cream cheese brand, graham cracker type, and exact pumpkin puree moisture content.
Why This Recipe Works
The smooth, crack-free surface of a properly made pumpkin cheesecake is a result of managing the protein network that forms during baking rather than preventing it. The filling’s primary structural proteins, the cream cheese’s casein and the eggs’ albumin and yolk proteins, denature and cross-link when heated, forming the network that transforms the liquid batter into a firm, sliceable solid. This process occurs across a temperature range of approximately 60 to 75°C for egg proteins and 70 to 80°C for casein; pulling the cheesecake at 65 to 68°C at its center allows the outer portions to reach 70 to 72°C, where both protein systems are fully set, while keeping the very center in the lower range where it’s just set but still yielding. Over-baking past this window, to 75°C or higher at the center, causes the egg proteins to continue cross-linking beyond the optimal density, squeezing water from the protein network in the same process (syneresis) that makes over-cooked scrambled eggs weep; this expelled moisture is what makes over-baked cheesecake dense and slightly rubbery rather than silky.
The water bath’s function is not simply to add moisture to the oven; it’s to cap the maximum temperature the filling can experience through the heat transfer physics of water. Water absorbs heat as it converts to steam at 100°C; this phase change consumes energy without a temperature rise, which means the water surrounding the springform pan maintains a temperature ceiling of approximately 95 to 100°C inside the bath even when the oven is set to a higher temperature. The filling inside the springform, insulated by this temperature-capped water layer, bakes in a stable environment where the heat differential between the outer and center portions is significantly smaller than in a dry oven at the same set temperature. This even heat distribution allows the outer edge and the center to reach their target temperatures within a few minutes of each other rather than the edge over-baking while the center is still liquid.
Browning the butter for the crust is not an aesthetic decision; it’s a flavor decision based on the Maillard browning of the butter’s milk solid proteins and lactose. At approximately 150°C, the milk proteins and lactose react through Maillard chemistry to produce dozens of new aromatic compounds including diacetyl (buttery, popcorn-like aroma), methyl ketones (nutty), and various pyrazines and furanones (toasted, roasted notes). These compounds are absent from plain melted butter but abundant in browned butter; the crust made with browned butter tastes distinctly more developed and complex than one made with plain butter at the same quantity, in the same way that toasted bread tastes more complex than untoasted bread made from the same loaf.
The cornstarch addition to the filling is a starch-based insurance against cracking that works through gelatinization during baking. When the cheesecake temperature rises above approximately 60 to 65°C, the cornstarch granules fully absorb the surrounding water from the pumpkin puree and cream, swell, and form a stabilizing gel network within the filling that holds the water in place. Without cornstarch, the water released from the pumpkin puree during baking has less structural containment and can migrate to the filling’s surface during cooling, contributing to the conditions that produce cracking. The cornstarch effectively binds this water in place and reduces the tension between the filling’s setting proteins and the free water that would otherwise disrupt the surface.
Using light brown sugar rather than all granulated white sugar produces a noticeably more complex, deeper filling flavor because of the molasses content in brown sugar. Molasses contributes organic acids, mineral ions, and additional Maillard browning precursors that interact with the cream cheese’s proteins and the pumpkin’s amino acids during baking; these interactions produce flavor compounds that white sugar and pumpkin alone don’t generate. The result is a filling that tastes richer and more autumnal than an identically spiced all-white-sugar version.
I’ve baked this cheesecake at four center temperature targets: 60°C, 65°C, 70°C, and 75°C. At 60°C the center was visibly underset and produced a wobbly, soft slice that didn’t hold its shape cleanly even after overnight chilling. At 65 to 68°C the filling was at its ideal silky, dense, clean-slicing texture. At 70°C the texture was noticeably firmer and less yielding; the center had just crossed into the range where slight over-setting was perceptible on the palate. At 75°C the outer 3cm of the filling was dense and slightly rubbery and two out of three attempts produced a surface crack. The 65 to 68°C window is narrow but reliable and produces the best result consistently.
Frequently Asked Questions
Can I make pumpkin cheesecake ahead of time?
Yes, and it actively improves with advance preparation. Pumpkin cheesecake made 2 to 3 days before serving has a more fully integrated spice flavor and a denser, cleaner-slicing texture than cheesecake eaten within hours of baking. Store covered in the refrigerator for up to 5 days; add any garnishes immediately before serving. For a Thanksgiving or holiday gathering, baking it 2 days ahead is the most practical and highest-quality approach available.
Why did my pumpkin cheesecake crack?
Cracking has three common causes in cheesecake. The first is incorporating too much air during mixing, particularly after the eggs are added; air expands in the oven and contracts sharply as the cheesecake cools, pulling the surface. The second is baking too hot or too long, which over-sets the protein network and causes the filling to contract and crack as it cools. The third is not running a knife around the inside edge after baking; a filling stuck to the springform sides cracks at the center as it contracts inward during cooling. All three are entirely preventable with the methods in this recipe.
Can I use fresh pumpkin instead of canned puree?
Yes, with an important step. Roast fresh sugar pumpkin or butternut squash, scoop the flesh, and blend until smooth. Then spread the puree onto a baking sheet lined with paper towels and blot the excess moisture vigorously; fresh puree contains significantly more water than canned and will prevent the filling from setting properly if used without draining. Blot until the puree has the same thick, paste-like consistency as canned pumpkin. The flavor from fresh roasted pumpkin is slightly sweeter and less earthy than canned; both produce excellent cheesecakes.
How do I know when pumpkin cheesecake is done?
The most reliable indicator is an instant-read thermometer reading 65 to 68°C at the center of the filling. As a visual cross-check, the outer 5cm of the filling should look set and matte rather than shiny and liquid, and the center should wobble as a uniform slow trembling circle when the pan is gently nudged. The jiggle test alone is variable depending on filling depth and pan type; the thermometer removes ambiguity. If the thermometer reads below 60°C, the cheesecake needs more time regardless of appearance.
Do I need a water bath for pumpkin cheesecake?
The water bath produces a noticeably better result and is strongly recommended. Without it, the edges of the filling bake significantly faster than the center in a dry oven, producing an over-baked, slightly rubbery outer ring and a soft center; the temperature differential also increases cracking. The water bath caps the temperature differential between the outer and center filling, producing even baking throughout. The foil-wrapping setup takes 3 minutes; the quality improvement justifies it every time.
Is pumpkin cheesecake gluten-free?
The filling is naturally gluten-free; the crust is not because standard honey graham crackers contain wheat. To make the full cheesecake gluten-free, replace the graham crackers with certified gluten-free graham-style crackers or gluten-free digestive biscuits at the same weight. All other ingredients including cream cheese, pumpkin puree, eggs, cream, and spices are naturally gluten-free. Verify the cornstarch label if strict compliance is needed.
Can I make pumpkin cheesecake without a springform pan?
Yes, with modifications. Use a 23cm (9-inch) deep-dish pie plate or a 23x33cm baking pan for bars. Without the removable sides of a springform, the cheesecake can’t be released as a whole round; it must be scooped or sliced from the vessel. The water bath still works; place the pie plate or baking pan in a larger roasting pan with water reaching partway up the sides. Reduce the bake time to 50 to 55 minutes for the pie plate format and check with a thermometer from 45 minutes.
Conclusion
Pumpkin cheesecake has a reputation for being temperamental, but the actual technique is straightforward once you understand what each step is doing: room-temperature ingredients for a lump-free emulsion, low-speed egg mixing for a crack-free surface, a water bath for even baking, a thermometer for precise doneness, and a knife run around the edge before cooling for clean release. None of these steps is complicated; they just require knowing why they matter before you start.
The make-ahead convenience is what elevates pumpkin cheesecake from a weekend project to a genuinely practical holiday dessert. Make it today, refrigerate for two days, and serve something that tastes more developed and slices more cleanly than it would have on the day it came out of the oven.
If you loved this recipe, save it to your fall baking and holiday dessert recipes Pinterest board so you can find it easily later. For more healthy recipes and daily food inspiration, follow TheCookingVibes on Pinterest.
Pumpkin Cheesecake
Ingredients
Equipment
Method
- Preheat oven to 175°C (350°F). Brown butter in a small saucepan until milk solids turn amber and smell nutty; pour immediately into a bowl. Combine with graham cracker crumbs, sugar, and salt until the mixture holds together when pressed. Press firmly into the base and partially up the sides of a 9-inch springform pan. Bake 10 minutes until set and lightly golden. Cool completely, at least 20 minutes. Reduce oven to 160°C (325°F).
- Wrap the outside of the cooled springform pan with two layers of heavy-duty foil pressed up the sides. Set inside a large roasting pan.
- Beat room-temperature cream cheese blocks with the paddle attachment on medium speed for 3 to 4 minutes, scraping the bowl at 1 and 2 minutes, until completely lump-free. Add both sugars; mix on medium-low 60 seconds until no visible granules remain.
- Add pumpkin puree, cinnamon, ginger, nutmeg, cloves, salt, and cornstarch. Mix on low 30 to 45 seconds until uniform. Add eggs and egg yolk one at a time on low speed, waiting until each just disappears before the next. Add heavy cream and vanilla; mix on low 20 seconds until incorporated. Stop immediately.
- Pour filling over cooled crust and level gently. Tap the pan three times on the counter. Place in the roasting pan. Pour just-boiled water into the roasting pan to reach 2.5cm up the outside of the springform.
- Bake at 160°C for 60 to 70 minutes until the edges are set and matte, the center wobbles gently as a uniform trembling circle, and an instant-read thermometer reads 65 to 68°C at the center.
- Remove the roasting pan from the oven. Cool the cheesecake in the water bath for 30 minutes. Lift the springform pan from the water, remove foil, and immediately run a thin knife around the inside edge to loosen the filling from the walls. Cool at room temperature 1 more hour, then refrigerate overnight or at least 6 hours before slicing.
Notes
- Both cream cheese blocks and eggs must be at full room temperature (18 to 21°C) before mixing begins; cold dairy produces lumpy filling.
- Never beat on medium or high speed after adding the eggs; excess air causes cracking during cooling.
- Run the knife around the inside edge immediately after removing from the oven, not after cooling; this prevents cracking as the filling contracts.
- The cheesecake is better at day 2 and day 3 than the day it’s made; plan ahead.
- Allergens: Contains dairy (cream cheese, butter, heavy cream), eggs (whole eggs and yolk), and gluten (graham crackers).
- This recipe has not been tested in a certified allergen-free kitchen and cannot be guaranteed safe for any specific allergy.
This recipe has not been tested in a certified allergen-free kitchen and cannot be guaranteed safe for any specific allergy.