Classic Tiramisu Cake — Espresso-Soaked Layers, Silky Mascarpone Cream
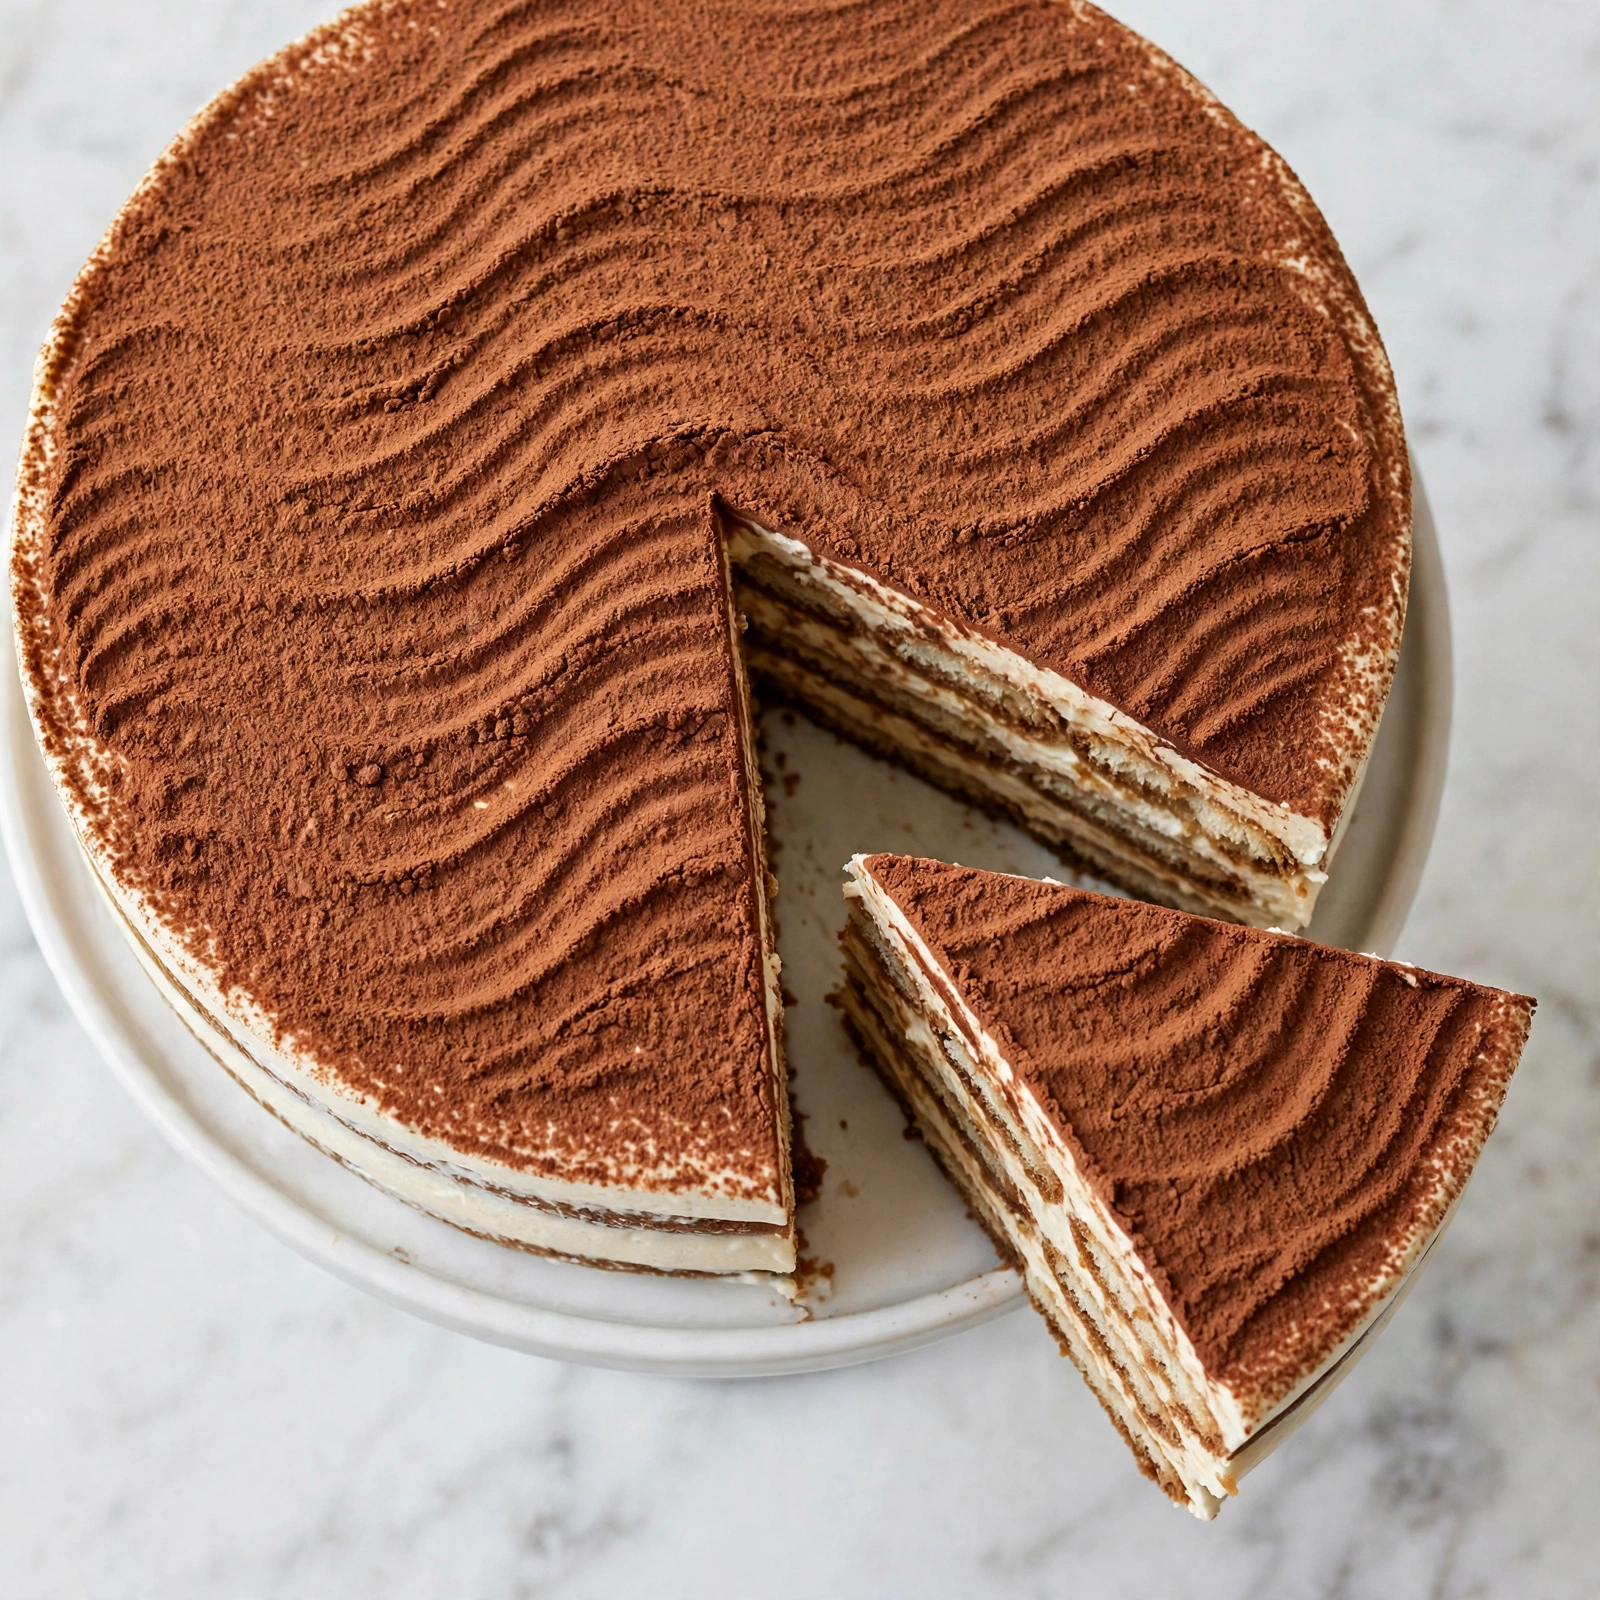
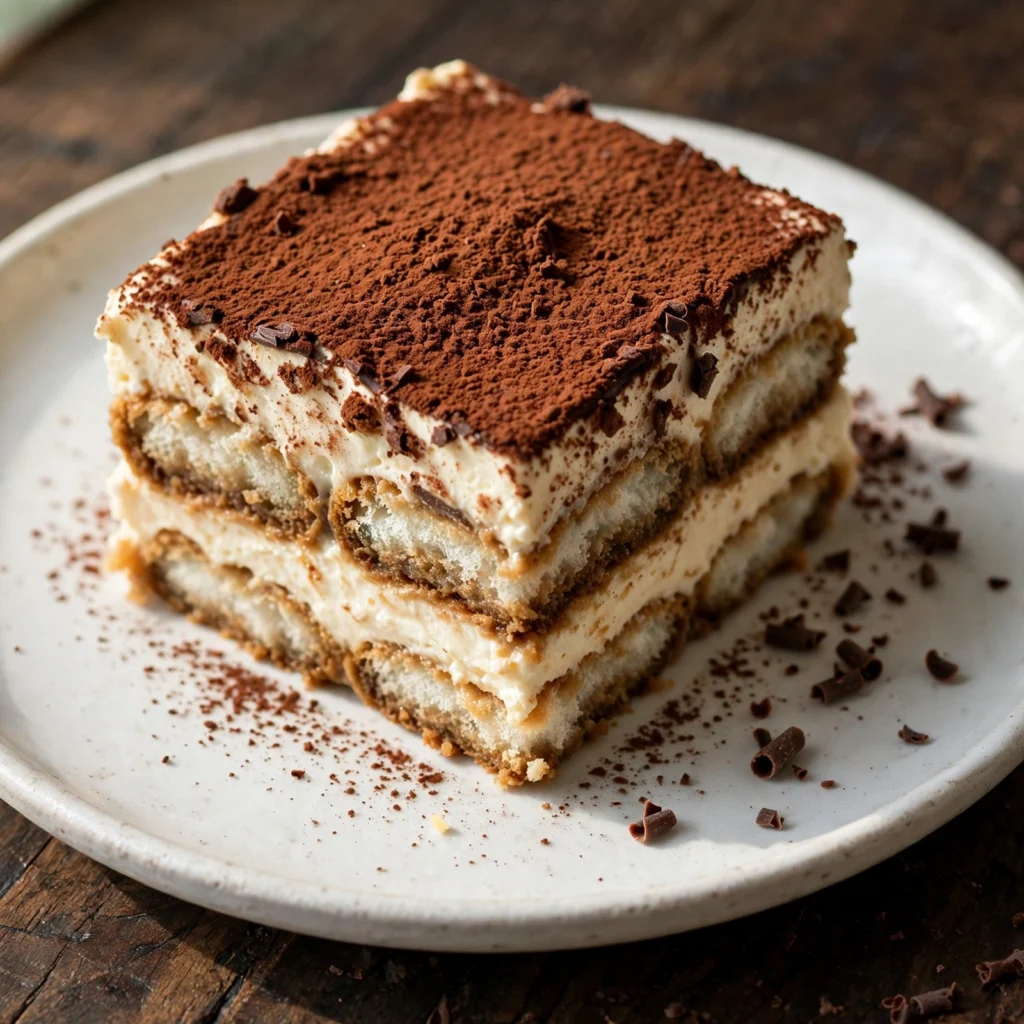
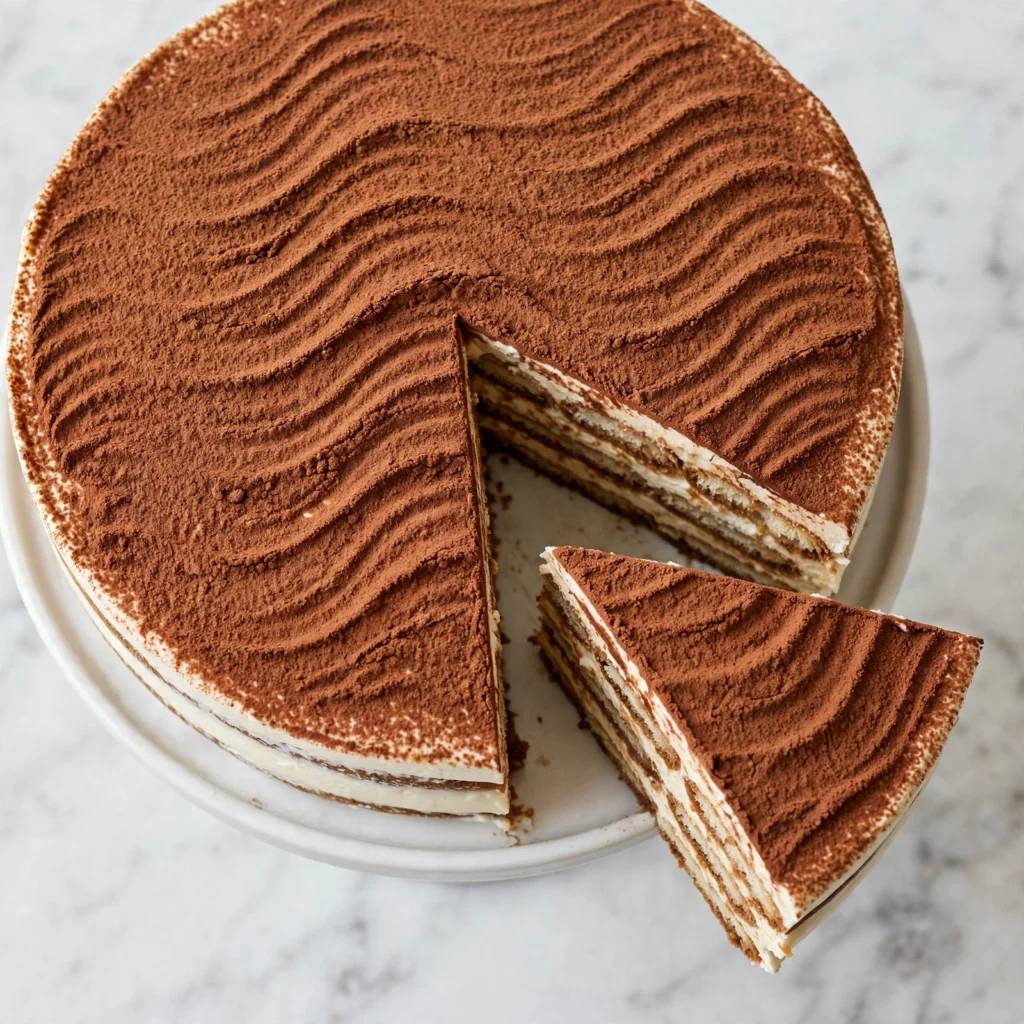
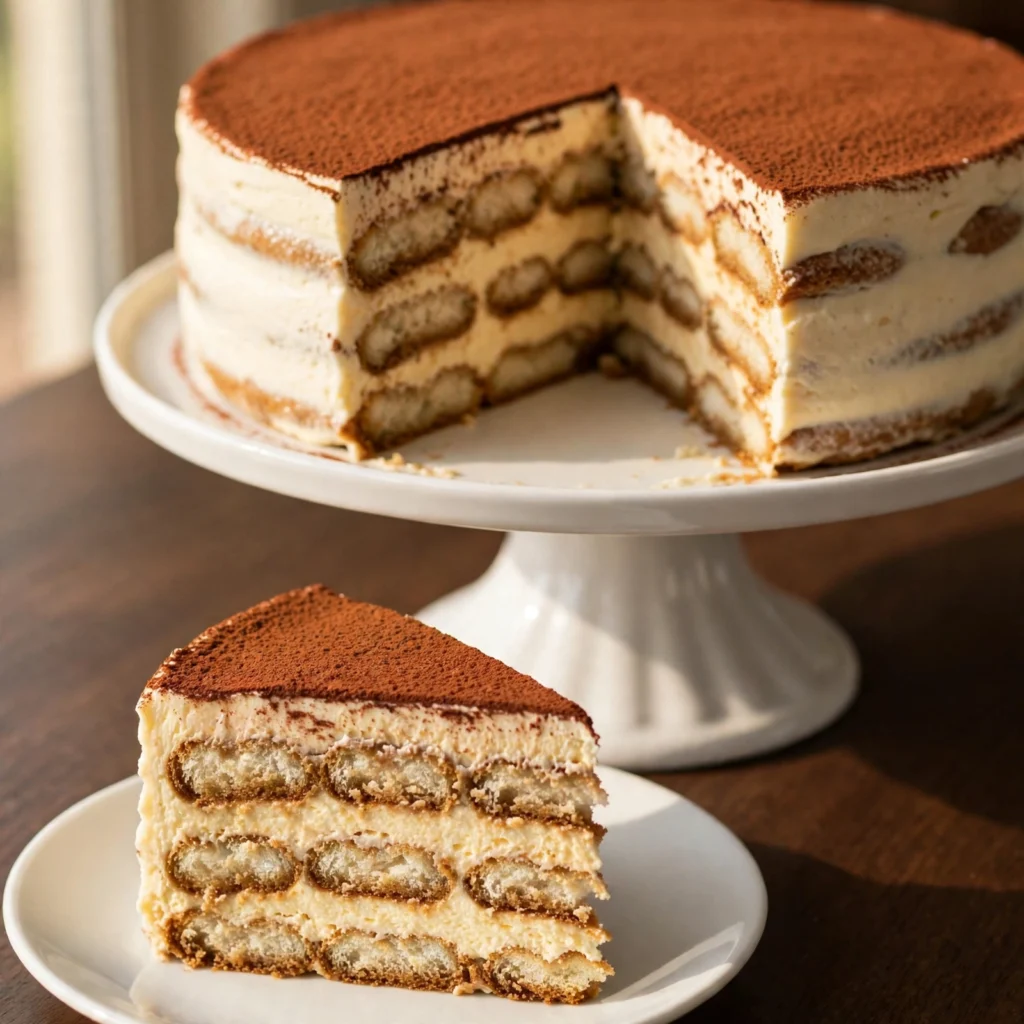
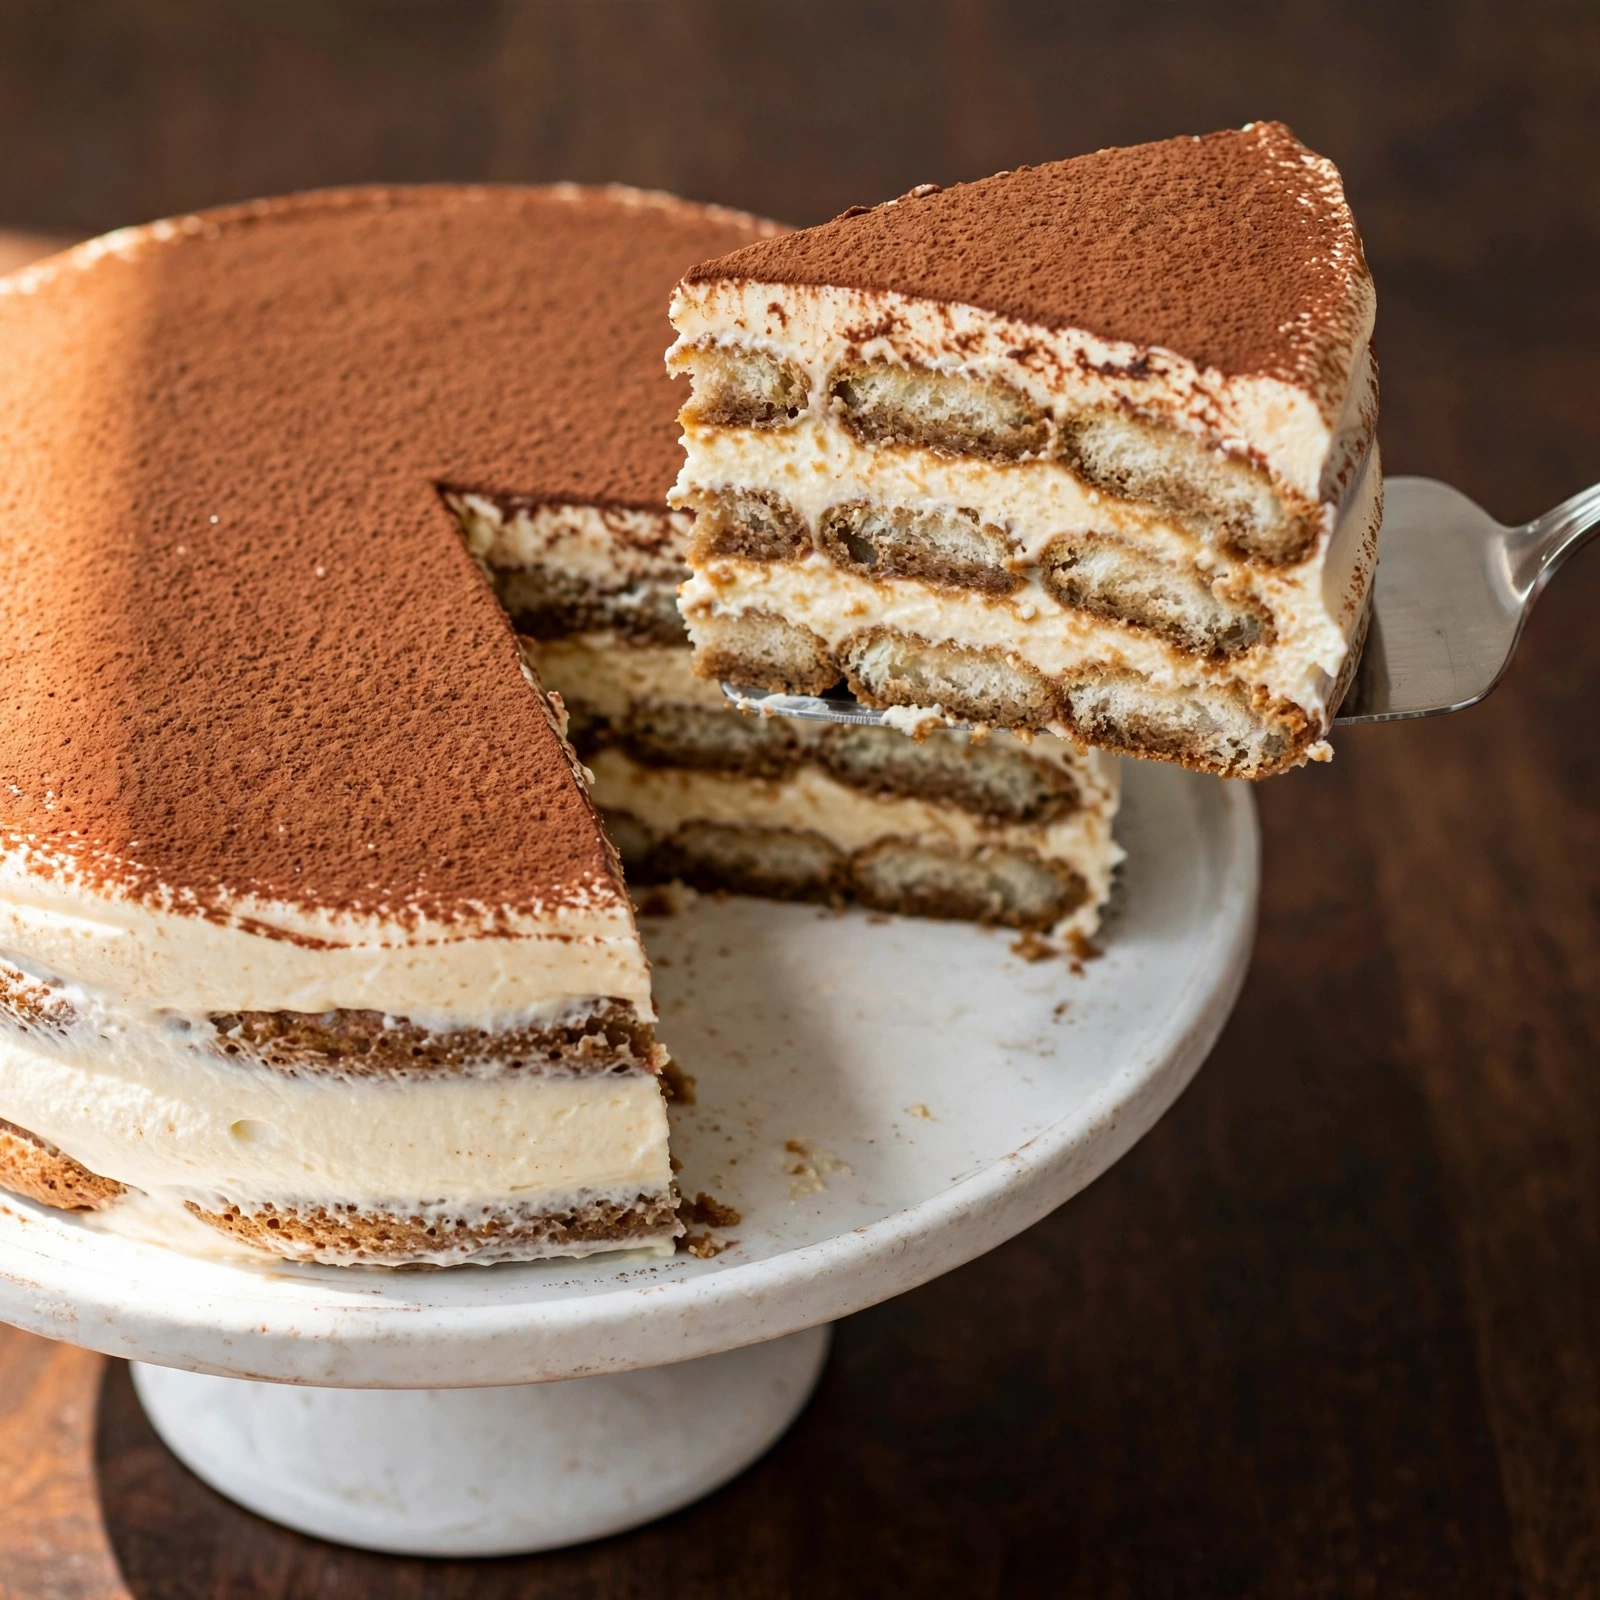
There’s a moment when you slice into a properly set tiramisu cake and the layers hold their shape cleanly: the deep brown espresso-soaked ladyfingers alternating with the pale cream, the surface dusted with a fine layer of dark cocoa, and the smell of good coffee still present even after hours of refrigeration. This is the Italian dessert in its most elegant, most achievable form, and it asks for no oven, no tempering chocolate, and no pastry skill beyond patience and a hand mixer.
This tiramisu cake recipe layers espresso-soaked ladyfingers with a stabilized mascarpone cream built on cooked egg yolks and whipped cream in a springform pan, producing a sliceable, freestanding dessert that holds its shape beautifully when unmolded. It serves 10 to 12, chills overnight, and tastes considerably better the next day as the coffee permeates every layer and the cream sets to a firm, almost truffle-like richness. The recipe skips alcohol entirely without losing any depth; strong espresso with a touch of vanilla provides all the soaking liquid the ladyfingers need.
Why You’ll Love This Tiramisu Cake
- No oven required for the cream or assembly. The mascarpone filling is built on the stovetop in about 10 minutes and then chilled; the only heat involved is making the espresso and cooking the egg yolks into a stable sabayon base.
- Holds its shape when sliced. The whipped cream folded into the mascarpone and the cooked egg yolk base together produce a cream that sets firmly enough in a springform pan to unmold cleanly and slice in neat, presentable wedges.
- Better the next day. The overnight chill allows the espresso to fully penetrate the ladyfingers and the cream to firm to its ideal texture; a tiramisu cake eaten the same day it’s assembled is good, but one refrigerated for 8 to 12 hours is noticeably more cohesive and flavorful.
- Scales for any occasion. The recipe fills a 9-inch springform pan and serves 10 to 12. It presents beautifully on a cake stand as a dinner party centrepiece and requires minimal assembly time on the day of serving.
- No alcohol required. The espresso and vanilla soaking liquid produces a deeply flavored, richly saturated result without any spirits; the ladyfingers absorb the coffee completely and the vanilla rounds the bitterness naturally.
Ingredients You’ll Need
Recipe Timing
| Servings | 10 to 12 slices |
| Difficulty | Moderate |
| Course | Dessert |
| Cuisine | Italian-inspired |
| Prep Time | 35 minutes |
| Cook Time | 0 minutes |
| Rest Time | 8 hours (overnight chilling) |
| Total Time | 8 hours 35 minutes |
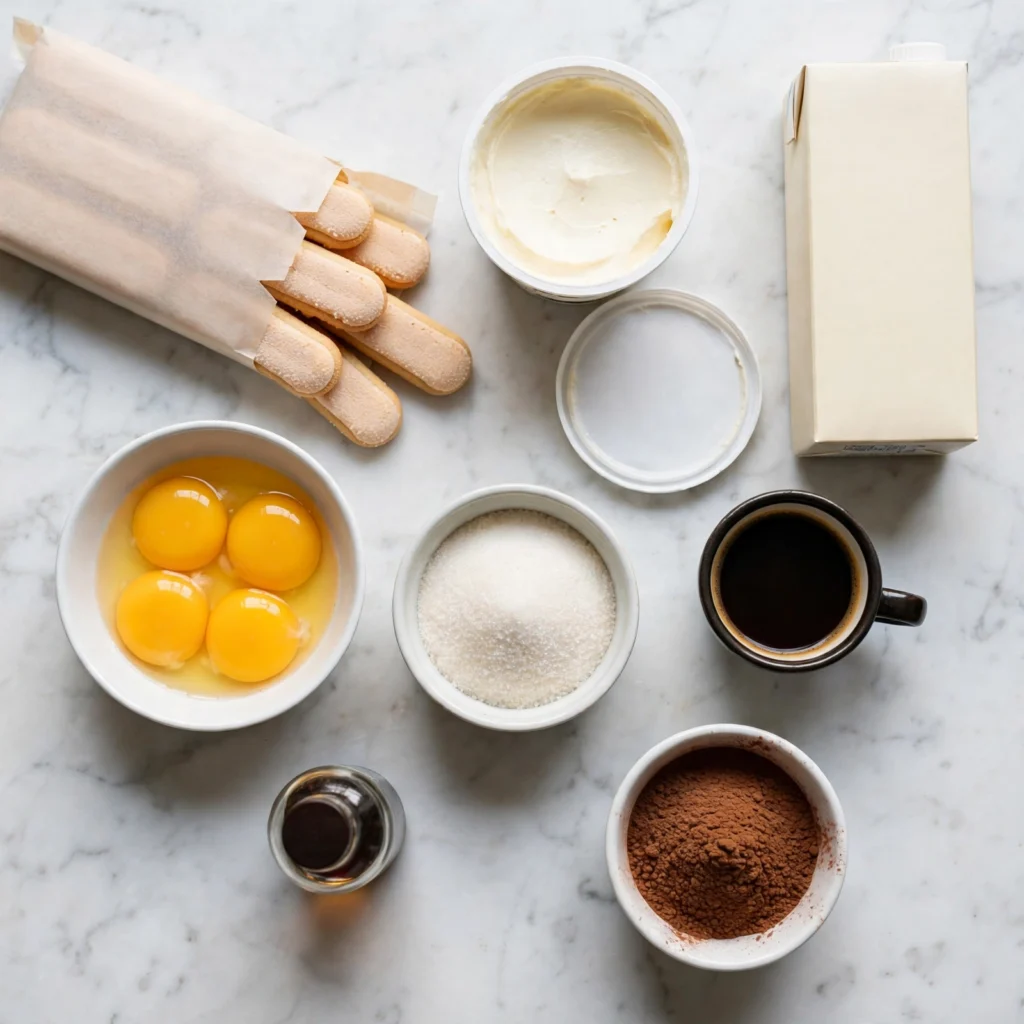
For the ladyfingers, Italian savoiardi biscuits are the specific type needed here. They are drier and more absorbent than their French counterpart (boudoir biscuits), which means they soak up the espresso without becoming waterlogged and collapsing. Soft, cake-style ladyfingers absorb too much liquid and turn into a mushy layer; firm, dry savoiardi hold their shape while still becoming moist and flavored all the way through after chilling. Buy two packages to ensure you have enough; the exact number needed depends on the size of your springform pan and how you arrange them.
For the espresso, use a genuine double shot of espresso or very strong brewed coffee. Instant coffee dissolved in 240ml of water at double the recommended strength is a reliable substitute if espresso equipment isn’t available. Weak coffee produces ladyfingers that taste more of flour than of coffee; the soaking liquid needs to be strong enough that drinking a small spoonful of it would taste noticeably bitter and concentrated.
For the mascarpone, use full-fat Italian-style mascarpone from the refrigerator section, not a spread or a substitute. Mascarpone is approximately 70 to 75% fat; this high fat content is what produces the rich, almost neutral, slightly sweet cream base that holds the whipped cream structure. Cream cheese is not a direct substitute; it has a more pronounced tang and a different fat structure that produces a firmer, less silky result.
For the eggs, the recipe uses a sabayon technique for the yolks: whisking them with sugar over a double boiler until the mixture reaches 71°C (160°F), which pasteurizes the eggs for food safety while creating a thick, glossy, stable base for the mascarpone cream. This step cannot be skipped; raw yolks at room temperature produce an unstable cream that can separate or have food safety concerns.
The Espresso Soak:
- 360ml (1 1/2 cups) very strong espresso or double-strength brewed coffee, cooled to room temperature — the primary flavoring for the ladyfingers; it must be cool before using; hot liquid turns the biscuits to mush immediately
- 1 tablespoon granulated sugar — dissolved into the coffee while still warm; sweetens the soak slightly so the ladyfingers don’t taste purely bitter
- 1 teaspoon pure vanilla extract — adds a warm complementary note that rounds the coffee’s sharpness and gives the soaking liquid additional depth
The Mascarpone Cream:
- 5 large egg yolks, at room temperature — the base of the sabayon; provides richness, structure, and acts as the emulsifier for the cream
- 120g (1/2 cup) granulated sugar — divided: 80g for the sabayon and 40g for the whipped cream
- 3 tablespoons water — added to the egg yolks for the sabayon; prevents the yolks from scrambling on the double boiler
- 500g (about 2 cups) full-fat mascarpone, at room temperature — the primary cream component; must be at room temperature so it folds without lumps or curdling
- 480ml (2 cups) cold heavy whipping cream (at least 35% fat) — whipped separately and folded into the mascarpone for volume and lightness; must be cold for maximum whipping volume
Assembly:
- 300 to 350g (approximately 40 to 48) firm dry savoiardi ladyfinger biscuits — the structural layering element; exact quantity depends on pan size
- 30g (3 to 4 tablespoons) good-quality cocoa powder, sifted — for dusting the top layer; use Dutch-process cocoa for a darker, smoother color and milder bitterness
- Optional: finely grated dark chocolate — for garnish over the cocoa layer
Allergen and Dietary Disclosure
This tiramisu cake contains eggs (cooked yolks in the sabayon and pasteurized), dairy (mascarpone, heavy cream), and gluten (savoiardi ladyfingers). The cocoa powder is naturally dairy-free and gluten-free; verify the brand if strict allergen avoidance is needed.
For gluten-free: replace the savoiardi with certified gluten-free ladyfinger biscuits, which are available from specialty baking stores and some online retailers. The cream and assembly method stay identical. Gluten-free ladyfingers may be slightly more fragile; handle them carefully during the dipping step and dip for only 1 second per side rather than 2.
For dairy-free: replace the mascarpone with full-fat coconut cream that has been refrigerated overnight and the solid portion scooped off. Replace the heavy cream with full-fat coconut cream (from a separate can) whipped until stiff. The result has a mild coconut undertone that pairs well with the strong espresso flavor. The cream will be slightly less firm than the dairy version; ensure the finished cake chills for the full 8 to 10 hours before unmolding.
For egg-free: an egg-free tiramisu cream is achievable by omitting the sabayon entirely and using 600ml of heavy cream whipped with 40g of powdered sugar until very stiff, then folding in the softened mascarpone. This version lacks the sabayon’s depth but is structurally stable and very rich. It also avoids the pasteurization step entirely.
This recipe has not been tested in a certified allergen-free kitchen and cannot be guaranteed safe for any specific allergy.
Equipment Needed
- 9-inch (23cm) springform pan — the container that gives the tiramisu its cake shape and allows it to be unmolded cleanly for serving. A springform pan’s removable sides mean you can release the finished dessert without inverting it, which would collapse the layers. Line the base with parchment paper to prevent sticking.
- Instant-read thermometer — for monitoring the sabayon (egg yolk and sugar mixture) temperature during cooking. The target is 71°C (160°F), at which point the yolks are pasteurized and the mixture is thick enough to form ribbons when lifted. Without a thermometer, this step is done by visual judgment alone, which increases the margin for error.
- Double boiler or large heatproof bowl set over a saucepan of barely simmering water — for cooking the sabayon. The gentle indirect heat of a double boiler heats the egg yolks slowly and evenly, preventing scrambling; direct heat produces curdled, grainy yolks rather than a smooth, glossy cream base.
- Hand mixer or stand mixer — for whipping the heavy cream to stiff peaks. A stand mixer on medium-high takes about 3 to 4 minutes from cold cream; a hand mixer takes 4 to 5 minutes. Cold beaters and a chilled bowl produce more volume than room-temperature equipment, since fat globules in the cream aerate more readily when cold.
- Wide shallow dish — for dipping the ladyfingers in the espresso. The dish should be wide enough to lay a ladyfinger flat and shallow enough to control how quickly it absorbs the liquid; a deep container makes it difficult to dip quickly and remove before the biscuit over-soaks.
Step-by-Step Directions
Step 1: Brew the Espresso Soak
Brew 360ml of very strong espresso or double-strength coffee and dissolve the tablespoon of sugar into it while still hot. Allow it to cool completely to room temperature; do not refrigerate to speed this up unless you’re short on time, as the condensation changes the dilution level. Once cool, stir in the vanilla extract. Pour into a wide, shallow dish and set aside. The liquid should smell strongly of coffee; taste a small spoonful and it should be noticeably bitter and concentrated.

Chef’s Note: The cooling step for the espresso is not optional for flavor reasons. Hot or even warm liquid partially pre-bakes the outer surface of the savoiardi, sealing it and preventing even absorption. Room-temperature liquid permeates the biscuit’s interior evenly during the brief dip, producing an evenly saturated ladyfinger rather than one that’s wet on the outside and dry at the core.
Step 2: Cook the Sabayon
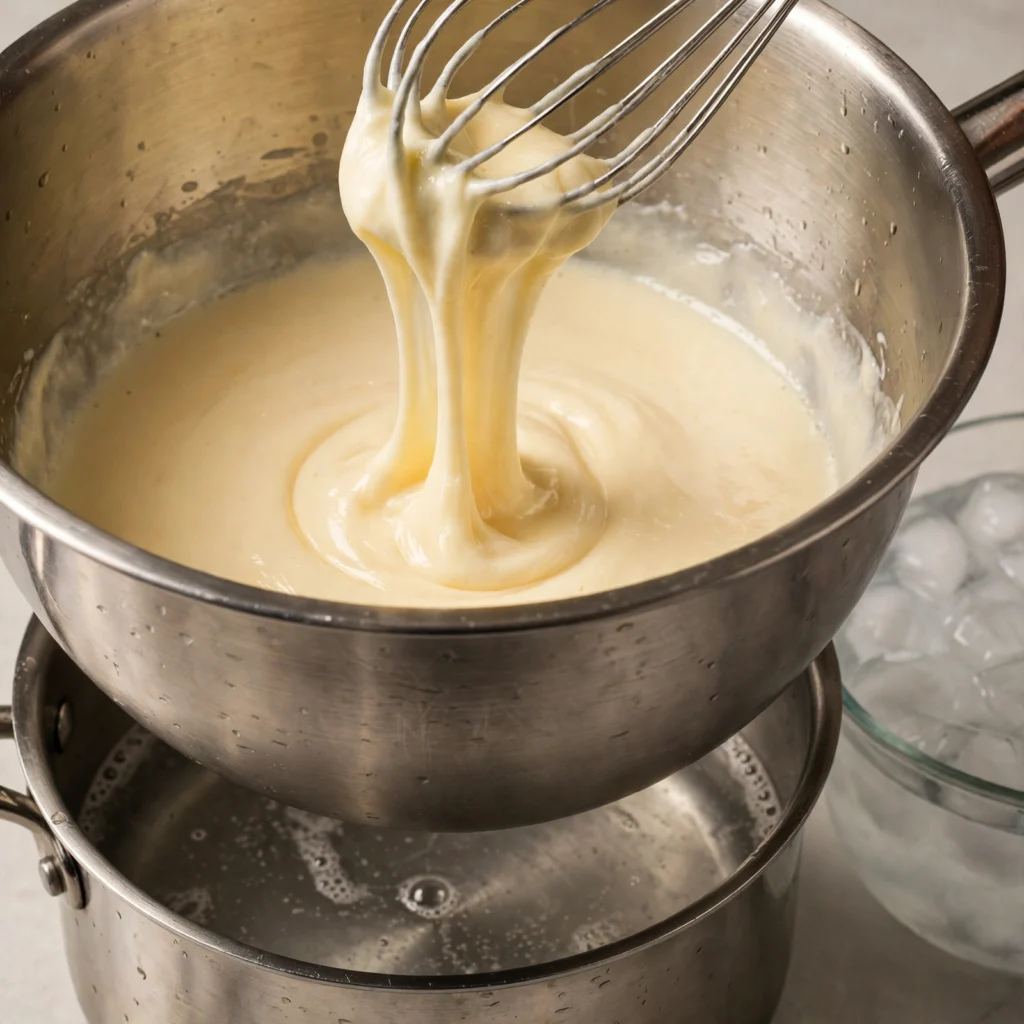
Fill a medium saucepan with 5 to 6cm of water and bring it to a gentle simmer over medium-low heat. In a large heatproof bowl that sits comfortably over the saucepan without touching the water, combine the 5 egg yolks, 80g of sugar, and 3 tablespoons of water. Place the bowl over the simmering water and immediately begin whisking continuously by hand or with a hand mixer on medium speed. Continue whisking for 7 to 10 minutes until the mixture has nearly tripled in volume, turned from bright yellow to a pale, creamy ivory color, and holds a thick ribbon trail when the whisk is lifted and the trail takes 4 to 5 seconds to fall back into the surface. At this point the temperature should read 71°C (160°F) on an instant-read thermometer.
Remove the bowl from the heat and place it over a larger bowl of ice water. Continue whisking for 2 to 3 minutes until the sabayon has cooled to room temperature and holds its ribbon consistency without deflating. The cooled sabayon should look thick, glossy, and stable rather than liquid or foamy.
Chef’s Note: Whisking continuously during the full cooking time is what builds the sabayon’s volume and prevents the egg yolks from scrambling against the hot bowl surface. Any pause in whisking during the first 5 minutes, when the mixture is thin and the yolks are most vulnerable to the heat, risks curdling the eggs into tiny, grainy specks that cannot be rescued. Keep the whisk moving throughout.
Step 3: Fold Mascarpone Into the Sabayon
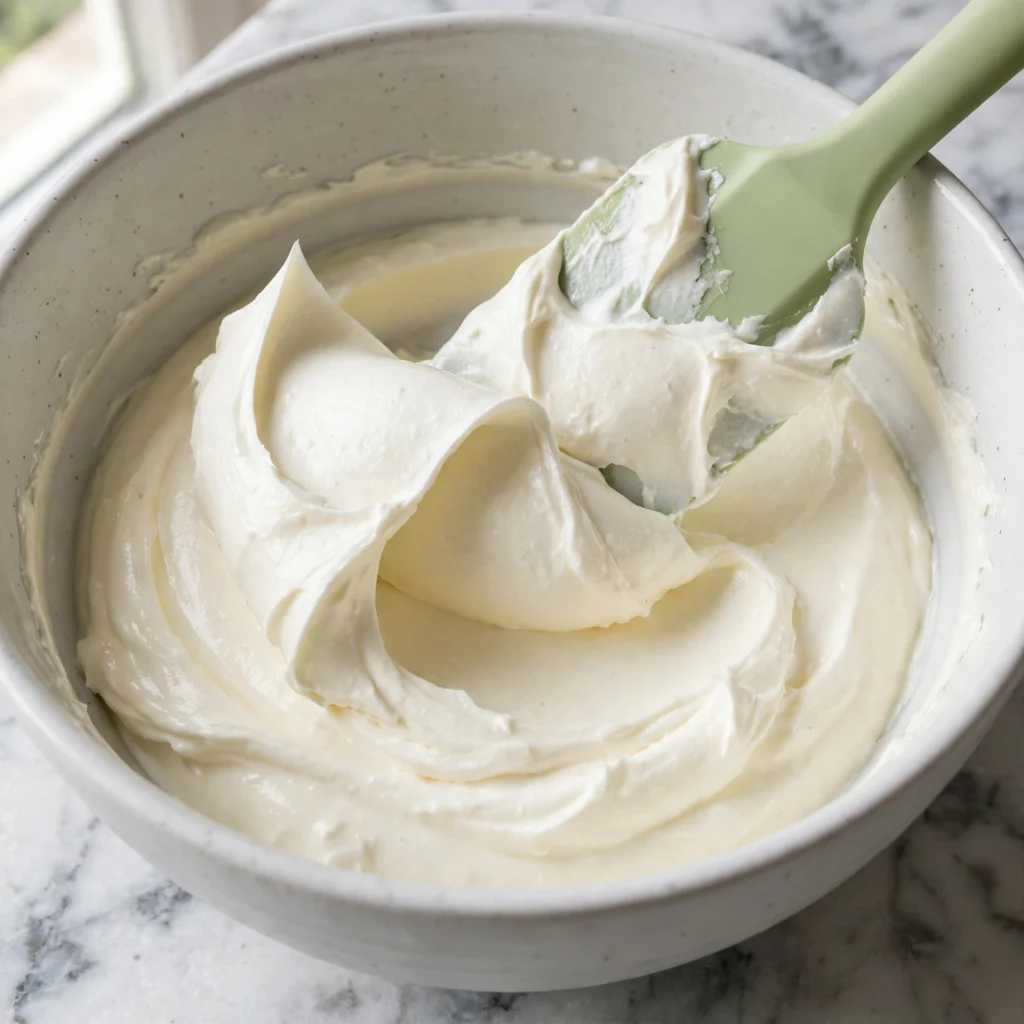
Beat the room-temperature mascarpone in a large bowl with a hand mixer on low speed for 30 seconds until it is completely smooth and free of any lumps. Add the cooled sabayon to the mascarpone in three additions, folding gently with a large spatula after each addition using broad, circular strokes that bring the mixture up from the bottom of the bowl. Work gently here; vigorous stirring deflates the air built into the sabayon. The combined mixture should look smooth, pale cream in color, and slightly glossy. Set aside at room temperature while you whip the cream.
Step 4: Whip the Cream and Combine
Using chilled beaters and a chilled mixing bowl if possible, whip the cold heavy cream with the remaining 40g of sugar on medium speed until it just forms stiff peaks that stand straight without drooping. This takes about 3 to 4 minutes from cold cream; stop at stiff peaks and not beyond, since over-whipped cream becomes grainy and eventually butterlike.
Fold the whipped cream into the mascarpone-sabayon mixture in three additions, each time using wide, gentle strokes that preserve the air in the cream. The finished cream should look light, voluminous, and smooth, with no visible streaks of unmixed cream or sabayon remaining. It should hold its shape when a spoonful is dropped back into the bowl.
Step 5: Dip the Ladyfingers for the First Layer
Line the base and sides of the springform pan with strips of parchment paper. Working with one savoiardi at a time, dip each ladyfinger briefly in the cool espresso soak: 1 second on each side for standard-sized ladyfingers. The biscuit should be moist and dark on the outside but still hold its structure and not feel wet or heavy; it will continue to absorb moisture in the pan during chilling. Arrange the dipped ladyfingers in a single, tight layer across the base of the springform pan, snapping or trimming pieces to fill gaps. The first layer should cover the entire pan base without visible holes.
Chef’s Note: The 1-second dip on each side is the most important timing rule in this recipe. A ladyfinger held in the espresso for 3 or 4 seconds absorbs so much liquid that it loses its structural integrity and produces a mushy, undefined layer after chilling. One second per side produces a biscuit that has absorbed enough espresso to be deeply flavored and moist but that retains enough firmness to contribute texture and definition to the finished slice.
Step 6: Build the Layers
Spread half of the mascarpone cream evenly over the first ladyfinger layer, using an offset spatula to work it into an even, smooth layer that reaches all the way to the edges of the pan. Repeat the dipping and arranging process for the second ladyfinger layer, placing them on top of the cream in the same tight, gap-free arrangement. Spread the remaining mascarpone cream over the second ladyfinger layer in another smooth, even layer, working the cream all the way to the sides and smoothing the surface as flat as possible.
Step 7: Dust with Cocoa and Chill
Using a fine-mesh sieve, dust the sifted cocoa powder generously and evenly over the entire surface of the cream in a uniform layer thick enough that no cream shows through. The cocoa should form a visible, even blanket across the top rather than a light, uneven sprinkle. Optionally, add a light scatter of finely grated dark chocolate over the cocoa layer for texture and visual depth.
Cover the pan tightly with plastic wrap without touching the cocoa surface. Refrigerate for a minimum of 8 hours and ideally overnight. The chilling time is not optional; the cream needs the full 8 hours to firm completely and the ladyfingers need the time to fully absorb the espresso and soften to the right tender texture.
Common Mistakes and Troubleshooting
| Problem | Cause | Solution |
|---|---|---|
| Cream too liquid and won’t hold layers | Sabayon not cooked to 71°C, or whipped cream under-whipped | Use a thermometer to confirm sabayon temperature; whip cream to firm stiff peaks, not just soft peaks |
| Ladyfingers turn to mush | Soaked too long in the espresso, or espresso was warm | Dip for exactly 1 second per side in fully cooled espresso; never use warm liquid |
| Cream curdled and lumpy when mascarpone was added | Mascarpone was too cold when combined with the sabayon | Always bring mascarpone to room temperature before combining; cold mascarpone seizes and lumps |
| Tiramisu won’t unmold cleanly | Not chilled long enough, or pan not lined with parchment | Chill for the full 8 hours minimum; always line the springform with parchment on the base and sides |
| Cocoa layer looks blotchy and uneven | Cocoa not sifted, or applied unevenly | Always sift cocoa through a fine-mesh sieve in a steady, even pass across the full surface |
| Cream deflates and loses volume | Whipped cream over-folded into the mascarpone | Fold in three additions with broad, gentle strokes; stop as soon as the cream is just incorporated |
Variations and Substitutions
- Chocolate tiramisu cake: Add 2 tablespoons of sifted cocoa powder directly to the mascarpone before combining it with the sabayon. The cocoa produces a chocolate-forward cream that pairs particularly well with the espresso-soaked ladyfingers; finish the top with a chocolate ganache poured thinly over the cocoa dusting.
- Matcha tiramisu cake: Replace the espresso soak with a mixture of 360ml of strong brewed matcha green tea (made with ceremonial-grade matcha powder) sweetened with 2 tablespoons of sugar. Replace the cocoa dusting with an even layer of sifted matcha powder. The result has a distinctly Japanese flavor character with the same silky mascarpone cream structure.
- Strawberry tiramisu cake: Replace the espresso soak with a mixture of 240ml of fresh strawberry juice (blended and strained from 300g of fresh strawberries) combined with 120ml of water and 1 tablespoon of sugar. Layer sliced fresh strawberries between the cream and the second layer of ladyfingers. Finish with a dusting of powdered sugar rather than cocoa and fresh strawberry slices on top.
- Individual tiramisu cups: Divide the recipe across 10 to 12 wide-mouthed glasses or dessert cups rather than assembling in a springform pan. Layer broken pieces of dipped ladyfinger with cream in each glass and dust cocoa on top of each. These don’t need unmolding and can be assembled 4 to 6 hours ahead; they’re practical for a dinner party where individual portions are easier to serve.
- Lighter cream version: Replace half the heavy cream with full-fat Greek yogurt, folding the yogurt directly into the mascarpone-sabayon mixture before the whipped cream is added. The yogurt adds a clean, slightly tart note that lightens the richness and produces a dessert that feels less indulgent while retaining the essential tiramisu character.
- Nutella swirl tiramisu: Drop 6 to 8 tablespoons of Nutella or a similar hazelnut spread by the spoonful over the first cream layer and swirl it through with a toothpick before adding the second ladyfinger layer. The hazelnut flavor integrates with the espresso and mascarpone during chilling and produces a richer, more dessert-forward version of the classic.
Serving Suggestions
- Unmold the tiramisu cake at the table in front of guests for maximum visual impact: release the springform latch, lift the ring, and then slide the parchment out from beneath the base. The moment the unmolded cake holds its shape is the most satisfying part of making it.
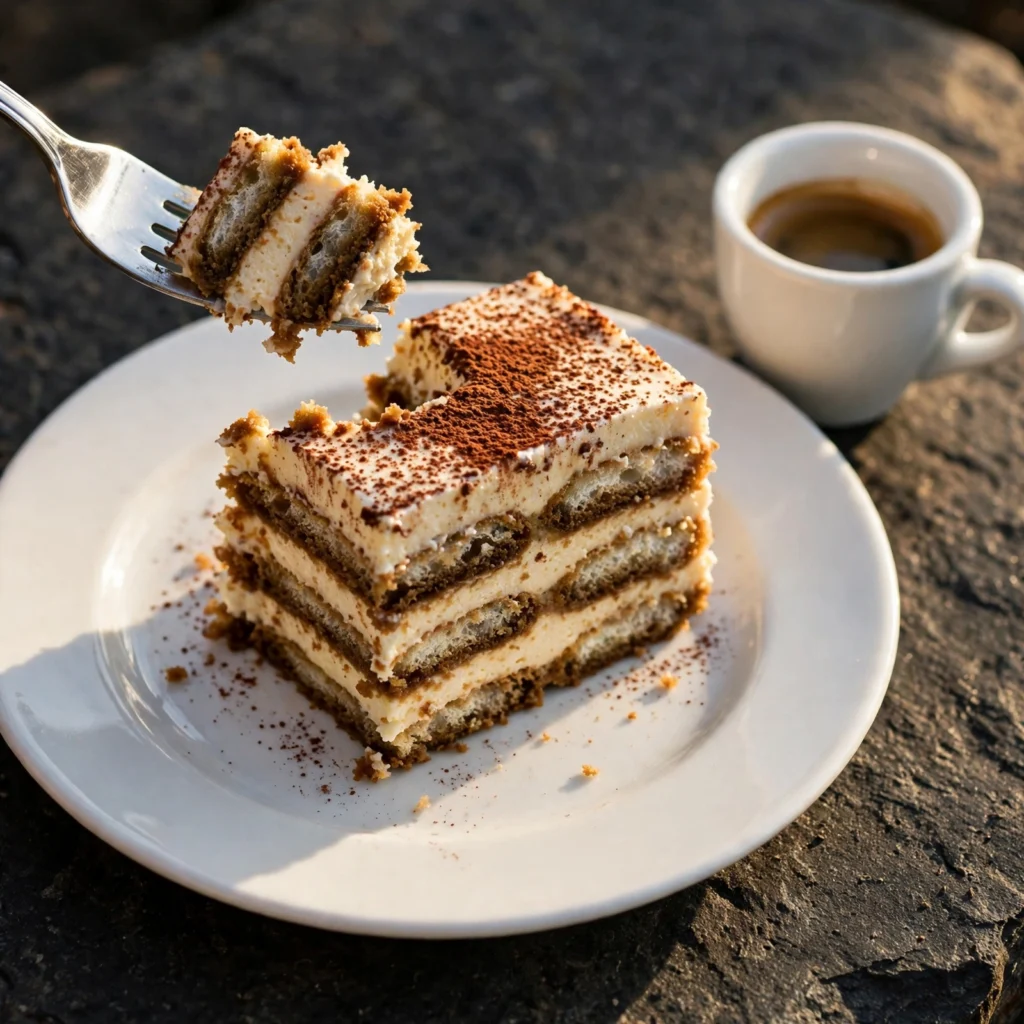
- Serve chilled slices on white ceramic plates with no garnish needed beyond what’s already on the surface; the cocoa-dusted top is the presentation. A small sharp knife dipped in hot water and wiped dry between cuts produces the cleanest, most defined slices.
- For a dinner party dessert, serve alongside small espresso cups of strong black coffee. The coffee-alongside-coffee approach amplifies the espresso in the cake and feels intentional and Italian rather than redundant.
- A thin drizzle of good-quality runny honey over each plated slice adds a floral sweetness that plays interestingly against the bitterness of the cocoa and the richness of the mascarpone.
- Pair with cold sparkling water with a slice of lemon as a palate cleanser between bites; the tiramisu cake is very rich and the fizz and acid from the water refreshes the palate and makes each subsequent bite taste as vivid as the first.
- For a festive occasion, dust a second very thin layer of fresh cocoa over each plate just before serving, so the slice sits in a cocoa halo that looks composed and intentional.
Tips for the Best Results
- Always use a thermometer for the sabayon. Visual cues like ribbon consistency are useful secondary checks, but the 71°C (160°F) target is the only reliable confirmation that the egg yolks are both pasteurized and cooked to the right structure. Under-cooked sabayon produces a cream that’s too loose to set properly; overcooked sabayon scrambles and cannot be rescued.
- Bring both the mascarpone and the eggs to room temperature before starting. Cold mascarpone meets the warm sabayon and seizes almost immediately, forming visible lumps that cannot be smoothed out with additional mixing. Cold egg yolks take longer to cook to the sabayon stage and are more prone to scrambling at the point where the temperature climbs sharply. Room temperature components combine smoothly and produce a cream with no lumps and full volume.
- Dip ladyfingers for exactly 1 second per side. This is the single most commonly disregarded instruction in tiramisu recipes and the most consequential. The espresso-soaked ladyfinger layer is the structural skeleton of the dessert; over-soaked biscuits produce a layer with no definition that collapses when sliced. A properly dipped ladyfinger is dark and moist on the surface but retains firmness at its core.
- Chill for the full 8 hours without shortcuts. The mascarpone cream needs the full chilling time to firm from a spreadable consistency to a sliceable one. A tiramisu cake removed from the refrigerator after 4 hours will slide when unmolded and not hold clean slices. The ladyfingers also need the overnight time to finish absorbing the espresso; at 4 hours they’re often still slightly firm at the center.
- Sift the cocoa powder before dusting. Unsifted cocoa applied through a sieve produces clumps that sit on the surface rather than a smooth, even blanket. The visual difference is significant: sifted cocoa produces a professional-looking surface; unsifted cocoa produces a patchy, uneven top.
Storage Tips
Refrigerator
Tiramisu cake keeps in the springform pan, tightly wrapped in plastic, for up to 4 days in the refrigerator. Once unmolded and sliced, cover the cut surface with plastic wrap pressed directly against the cream to prevent the exposed cross-section from drying. The flavor continues to develop over the first 24 to 48 hours as the espresso fully saturates the ladyfinger layers; day 2 is genuinely the best day to eat it. Add a fresh dusting of cocoa over any exposed cream before serving if the surface has discolored slightly during storage.
Freezer
Tiramisu cake freezes well for up to 1 month before the cocoa dusting is applied. Freeze the assembled cake in the springform pan, without the cocoa, wrapped in plastic wrap and then foil. To serve, thaw overnight in the refrigerator, dust with fresh cocoa through a sieve immediately before unmolding, and allow 30 minutes at room temperature for the cream to soften slightly from its frozen texture. Do not freeze once the cocoa is applied; condensation during thawing makes the cocoa wet and blotchy.
Reheating
Tiramisu cake is not reheated; it’s served cold. If a slice has been removed from the refrigerator and left at room temperature for longer than 30 minutes and has become very soft, return it to the refrigerator for 15 to 20 minutes before serving. The ideal serving temperature is cold enough that the cream holds its shape when cut but not so cold that it tastes muted; 5 to 8°C (about 40 to 46°F), or approximately 10 minutes out of the refrigerator, is the ideal eating temperature.
Make-ahead note: Tiramisu cake is genuinely designed as a make-ahead dessert. Assembling it the night before you need it is not just convenient but produces the best possible result. Everything, including making the sabayon, whipping the cream, dipping the ladyfingers, and assembling the full cake in the springform, can be done in 35 to 40 minutes the evening before, leaving only the unmolding and serving for the next day.
Nutrition Information
Per serving, approximately one slice (1/12 of the cake):
| Nutrient | Amount |
|---|---|
| Calories | 420 kcal |
| Protein | 6g |
| Total Carbohydrates | 32g |
| Dietary Fiber | 1g |
| Total Sugar | 22g |
| Total Fat | 30g |
| Saturated Fat | 18g |
| Cholesterol | 155mg |
| Sodium | 95mg |
| Vitamin C | 0mg |
| Calcium | 90mg |
| Iron | 1.2mg |
| Potassium | 140mg |
Nutrition values are approximate and may vary based on mascarpone brand, cream fat content, and ladyfinger size.
Why This Recipe Works
The structural stability of a properly made tiramisu cake depends on a fat-protein network built from three simultaneous contributors: the cooked sabayon, the mascarpone fat, and the aerated whipped cream. Understanding what each contributes explains every technique decision in the recipe.
The sabayon is a foam stabilized by heat-coagulated protein. When egg yolks are whisked with sugar and water over heat, the proteins in the yolk begin to denature and unwind as the temperature rises. Those denatured proteins form a network that traps the air bubbles introduced by continuous whisking, producing a stable, thick foam that holds its volume even after the heat is removed. When the sabayon cools, the protein network stiffens slightly and becomes the structural skeleton of the finished cream. The 71°C (160°F) target is specifically the temperature at which the proteins have denatured sufficiently to form this stable network while pasteurizing the egg for food safety, without reaching the scrambling temperature (approximately 80°C or 176°F) that would produce curdled, grainy yolks.
Mascarpone’s contribution is entirely about fat structure. At approximately 70 to 75% fat, mascarpone is closer to butter than to typical fresh cheeses. Its fat exists in a stable emulsified form that, at refrigerator temperatures, holds rigidly in place and produces the firm, cold-set texture that allows the tiramisu cake to hold a clean slice. At room temperature, mascarpone is soft and spreadable, which is why it must be fully softened before combining with the sabayon; cold mascarpone’s fat is too crystallized to incorporate smoothly without breaking the sabayon’s emulsion.
The whipped cream provides the volume and lightness that keeps the cream from tasting dense and heavy despite the richness of the mascarpone and sabayon. When cream is whipped, fat globules in the cream partially coalesce around air bubbles and form a three-dimensional network that traps those bubbles in a semi-solid foam. At refrigerator temperature this network becomes more rigid, which is why the whipped cream added to the mascarpone-sabayon mixture produces a cream that sets firmly after chilling rather than deflating to a dense, compact layer. The gentle folding technique preserves the air bubbles; vigorous stirring breaks the fat network and causes the whipped cream to lose its volume and structure before it can contribute it to the final cream.
The espresso’s role in the ladyfinger layer extends beyond flavor. The savoiardi ladyfinger is essentially a sponge cake biscuit with a fine, uniform crumb structure that is dry enough at the start that it absorbs liquid rapidly. When the dipped ladyfinger is placed in the cream-layered pan and refrigerated, capillary action continues to draw the espresso from the dipped biscuit into the surrounding mascarpone cream, and simultaneously the cream migrates slightly into the outer edges of the ladyfinger. This exchange, occurring slowly during the 8-hour chill, is what creates the unified texture of a properly rested tiramisu: the layers don’t read as separate components of cream and biscuit but as a single, cohesive dessert where each element has been transformed by its time spent adjacent to the other.
The Dutch-process cocoa on the surface serves two functions. Its fat-treated structure means it repels moisture more effectively than natural cocoa, staying dry and powdery on the mascarpone surface rather than becoming wet and dark. And its more neutral, less acidic flavor (compared to natural cocoa, which has a slight sharpness) provides a clean, bitter contrast to the sweet cream below without introducing the acidic note that would compete with the espresso’s own bitterness.
Frequently Asked Questions
Can I make tiramisu cake ahead of time?
Yes, and it’s genuinely better when made ahead. The minimum chilling time is 8 hours, but the cake tastes best at 12 to 18 hours of refrigeration, when the layers have fully exchanged moisture and the flavors have unified. You can assemble the full cake up to 48 hours before serving; the flavor continues to develop over this time. Wait to dust the cocoa on top until the day of serving to keep it looking fresh and dry. Unmold and slice just before serving.
Why is my mascarpone cream lumpy?
Almost always this is because the mascarpone was too cold when combined with the warm sabayon. The temperature difference causes the fat in the mascarpone to seize and clump against the warm mixture. Once lumps form in mascarpone, they cannot be smoothed out with additional mixing; additional stirring usually makes them worse. Prevent this by taking the mascarpone out of the refrigerator 30 to 40 minutes before you begin and letting it come fully to room temperature, until it is soft and smearable with a spoon.
Can I use cream cheese instead of mascarpone?
Cream cheese can substitute in a pinch, but the result is noticeably different. Cream cheese has a more pronounced tang, a denser texture, and a lower fat content than mascarpone, producing a cream that is firmer, less silky, and slightly sour against the espresso. If substituting, use full-fat block cream cheese (not tub-style) at the same quantity and beat it until completely smooth before adding the sabayon, since cream cheese has a firmer starting texture that requires more initial mixing to become workable.
How do I know when the sabayon is ready?
Two indicators together confirm the sabayon is ready: the mixture should have tripled in volume and turned from bright yellow to a pale ivory color, and it should hold a ribbon trail for 4 to 5 seconds when the whisk is lifted. The thermometer reading of 71°C (160°F) confirms it is both structurally complete and pasteurized. If you only have visual cues, look for the mixture to look thick, glossy, and significantly lighter in both color and weight than when you started. It should feel warm, not hot, when you touch the bowl’s outside.
Is tiramisu cake safe to eat with cooked eggs?
Yes, when the sabayon is cooked to 71°C (160°F). At this temperature the egg yolks are fully pasteurized, meaning any salmonella or other bacteria present are destroyed. The cooked sabayon method in this recipe specifically addresses the food safety concern associated with raw egg tiramisu, which uses eggs that are never heated. If you have an instant-read thermometer, hitting the 71°C target is the reliable confirmation of safety. For high-risk individuals including pregnant women, the elderly, or immunocompromised people, the egg-free cream variation in the allergen section eliminates egg concerns entirely.
Can I use instant coffee instead of espresso?
Yes. Dissolve 2 to 3 heaped teaspoons of good-quality instant coffee in 360ml of just-boiled water, stir with the tablespoon of sugar until both dissolve, then allow the mixture to cool completely before adding the vanilla extract. The result should taste very strong and slightly bitter; if it tastes mild or flat, add another half teaspoon of instant coffee. Good-quality instant espresso powder produces a result very close to brewed espresso in the finished cake.
Why does my tiramisu cake fall when I unmold it?
Insufficient chilling time is the primary cause. If the cream hasn’t had 8 full hours to firm completely in the refrigerator, it will be too soft to hold the weight of the layers and the cake will sag or collapse when the springform ring is released. A secondary cause is that the parchment paper lining wasn’t used; without it, the cream can stick to the sides of the pan and pull away in uneven sections when the ring is released, destabilizing the structure. Ensure both a full chill and a parchment-lined pan before attempting to unmold.
Conclusion
Tiramisu cake rewards patience at two specific moments: keeping the whisk moving continuously during the sabayon, and leaving the assembled cake in the refrigerator for the full 8 hours without opening it early. Both feel like waiting when you want to be done, and both produce a meaningfully better result than cutting either short.
The overnight tiramisu cake that comes out of the refrigerator the next morning is a different dessert from the one assembled the night before. The layers have unified, the cream has firmed, the espresso has fully penetrated every ladyfinger layer, and the cocoa on the surface has had time to settle into the cream beneath it. Unmolding it and carrying it to the table on a cake stand is one of those moments in home cooking that looks exactly as effortful as it was, and exactly as worth it.
If you loved this recipe, save it to your Italian desserts and special occasion cakes Pinterest board so you can find it easily later. For more same recipes follow Thecookingvibes Pinterest account.
Classic Tiramisu Cake
Ingredients
Equipment
Method
- Combine cooled espresso, sugar, and vanilla in a wide shallow dish. Stir until sugar dissolves. Set aside.
- Fill a medium saucepan with 5cm of water and bring to a gentle simmer. In a large heatproof bowl, combine egg yolks, 80g sugar, and 3 tablespoons water. Set over the simmering water without the bowl touching the water. Whisk continuously for 7 to 10 minutes until pale, tripled in volume, and holding a 4 to 5-second ribbon. Target temperature: 71°C (160°F). Remove from heat and whisk over ice water until cool.
- Beat mascarpone until completely smooth. Fold cooled sabayon into mascarpone in three additions using gentle, broad strokes.
- Whip cold heavy cream with 40g sugar to stiff peaks. Fold into the mascarpone mixture in three additions. Set aside.
- Line a 9-inch springform pan with parchment on the base and sides. Dip ladyfingers one at a time in the espresso soak for exactly 1 second per side. Arrange in a tight single layer covering the pan base.
- Spread half the mascarpone cream evenly over the first ladyfinger layer. Dip and arrange a second ladyfinger layer on top. Spread the remaining cream in an even, flat-surfaced layer reaching the pan edges.
- Sift cocoa powder evenly over the entire cream surface through a fine-mesh sieve to form a uniform blanket. Cover tightly with plastic wrap and refrigerate for 8 hours or overnight.
- To serve, release the springform, slide out the parchment, and serve cold, slicing with a knife dipped in hot water and wiped clean between cuts.
Notes
- Always bring mascarpone to room temperature before combining; cold mascarpone seizes and causes lumps that can’t be removed.
- Dip ladyfingers for exactly 1 second per side; longer dipping produces mushy, structureless layers.
- Dust the cocoa only after the full chill is complete; applying it before chilling causes it to dissolve into the cream.
- The cake keeps refrigerated for up to 4 days; the flavor improves significantly on day 2.