Classic Banana Bread — Tender Crumb, Deep Banana Flavor
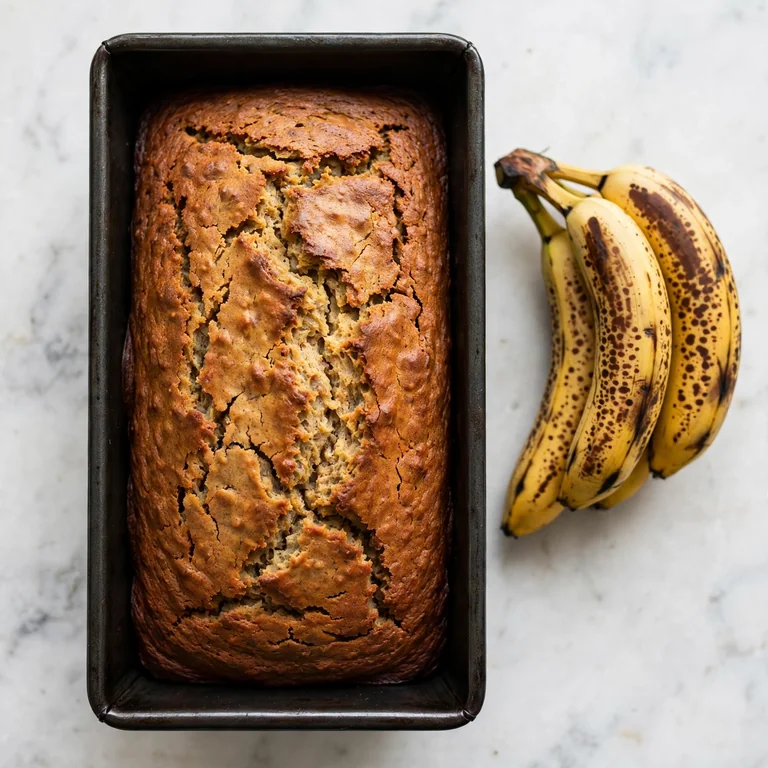
The best time to make banana bread is when those bananas on your counter have gone fully black and you’d normally throw them out. That’s not a compromise. Deeply overripe bananas, the kind with soft, almost fermented-sweet flesh, produce a loaf with more flavor and more moisture than anything you’d get from yellow or lightly spotted fruit. The smell that fills your kitchen while it bakes, warm and sweet with a hint of caramel from the browning butter, is its own reward before you’ve even cut a slice.
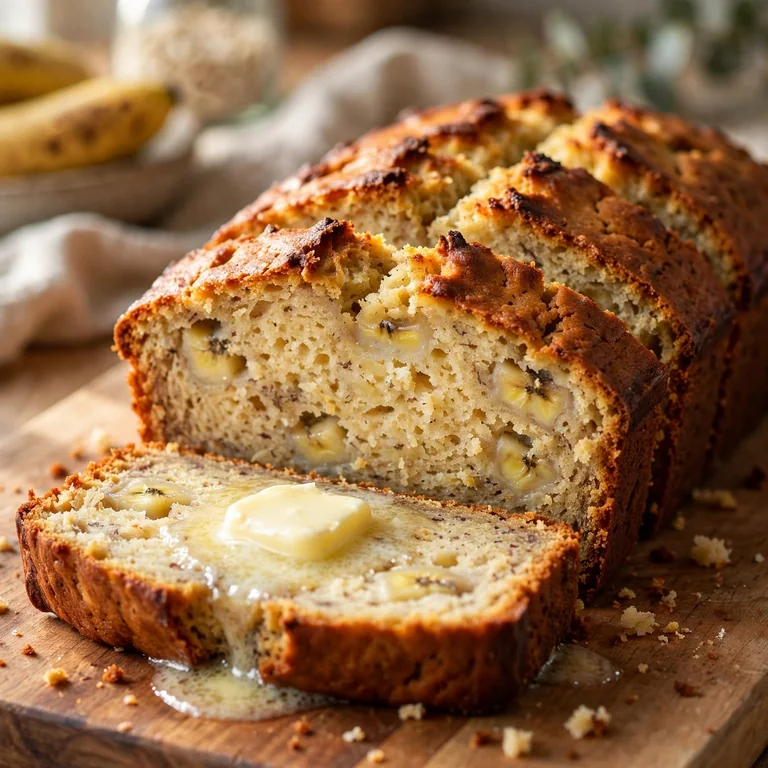
This banana bread recipe makes one loaf with a tight, moist crumb, a slightly crisp golden top, and enough banana flavor that it tastes like the fruit rather than just banana-scented sweetness. It comes together in one bowl in about 15 minutes of active work, with no mixer needed. The method uses brown butter for depth, a small amount of sour cream to keep the crumb tender without making it dense, and ripe mashed bananas as both the sweetener and the binding agent.
Why You’ll Love This Banana Bread
- Brown butter adds real depth. Most recipes use melted butter or oil. Taking 3 extra minutes to brown the butter first adds a nutty, slightly caramel note that plain melted butter simply doesn’t have.
- One bowl, no mixer. Everything comes together by hand with a fork and a spatula. There’s nothing to clean except the pan and the bowl.
- Stays moist for days. Sour cream in the batter slows the rate at which the crumb dries out; a slice on day three still has a tender, soft texture rather than a stale, compressed one.
- Scales to what you have. Got two bananas instead of three? The loaf works, just slightly less sweet and a touch denser. Got four? Use them all and expect a particularly rich result.
- Crisp top, soft interior. The crust forms a golden, slightly crackled top that contrasts with the soft crumb underneath, which is exactly the texture that makes a good loaf feel worth making from scratch.
Ingredients You’ll Need
Recipe Timing
| Detail | Info |
|---|---|
| Servings | 10 slices |
| Difficulty | Easy |
| Course | Breakfast, Snack, Dessert |
| Cuisine | American |
| Prep Time | 15 minutes |
| Cook Time | 60 minutes |
| Rest Time | 15 minutes (cooling in pan before turning out) |
| Total Time | 90 minutes |
For the bananas, the more overripe the better. A banana that’s mostly or fully black on the outside has had its starches convert almost entirely to sugar, which is what gives the loaf its natural sweetness and moisture. Yellow bananas with green tips produce a noticeably blander loaf and a drier crumb. If your bananas aren’t ripe enough and you need to bake today, place unpeeled bananas on a baking sheet and roast at 175°C (350°F) for 15 minutes until the skins turn black. The flesh inside softens and sweetens in a way that closely mimics natural over-ripening.
For the flour, all-purpose is the right choice. Bread flour makes the loaf tough; cake flour makes it too delicate to hold its shape when sliced. All-purpose sits in exactly the right range for a quick bread.
- 3 large overripe bananas (about 300g peeled weight) — the primary flavor, moisture, and most of the binding; riper is always better
- 1/2 cup (115g) unsalted butter — browned before using; browning adds nuttiness that plain melted butter can’t replicate
- 3/4 cup (150g) light brown sugar, packed — brown sugar adds a molasses note that white sugar misses; dark brown sugar works too, just more pronounced
- 2 large eggs, room temperature — provide structure and binding; cold eggs mixed into warm brown butter can cause the batter to look curdled, though it bakes out fine
- 1/3 cup (80g) full-fat sour cream — keeps the crumb moist and slightly tangy; full-fat Greek yogurt works as a 1:1 substitute
- 1 teaspoon pure vanilla extract — rounds out the banana flavor and adds warmth
- 1 1/2 cups (190g) all-purpose flour — structure; spoon into the measuring cup rather than scooping to avoid packing too much in
- 1 teaspoon baking soda — the sole leavening; reacts with the acidity in the sour cream and bananas to produce lift
- 1/2 teaspoon fine salt — sharpens every other flavor; it’s present in every good banana bread recipe for a reason
- 1 teaspoon ground cinnamon — adds warmth that complements banana without competing with it
- 1/4 teaspoon ground nutmeg — optional but genuinely useful alongside the cinnamon; freshly grated nutmeg is noticeably more aromatic than pre-ground

Allergen and Dietary Disclosure
This banana bread contains gluten (all-purpose flour), dairy (butter, sour cream), and eggs. It is tree-nut free in the base recipe, though the optional walnut variation (listed in Variations) contains tree nuts.
For dairy-free: replace the butter with the same quantity of refined coconut oil (it won’t add coconut flavor) and substitute the sour cream with a plain, full-fat dairy-free yogurt. The crumb will be slightly less tender but the loaf is otherwise comparable.
For egg-free: one flax egg (1 tablespoon ground flaxseed mixed with 3 tablespoons water, rested 5 minutes) can replace each egg. The loaf will be slightly denser and won’t rise quite as tall, but it holds together and tastes close to the original. Use both substitutions together for a fully vegan loaf.
For gluten-free: a 1:1 gluten-free baking flour blend with xanthan gum works well here. The crumb tends to be slightly stickier and the loaf may need an extra 5 minutes in the oven. Test with a skewer before pulling it out.
This recipe has not been tested in a certified allergen-free kitchen and cannot be guaranteed safe for any specific allergy.
Equipment Needed
- 9×5-inch (23x13cm) loaf pan — the standard size for this recipe. An 8×4-inch pan also works but produces a taller, slightly more domed loaf that may need 5 extra minutes of baking time. Avoid a very dark non-stick pan; it accelerates crust browning and the exterior can darken before the center is set.
- Light-colored or glass loaf pan — if you have the choice, lighter pans bake more evenly than dark ones for quick breads. A glass pan requires a slightly lower oven temperature (reduce by 10°C/25°F) and adds a few minutes to the bake time.
- Small light-colored saucepan — for browning the butter. A light pan lets you see the color change from golden to brown clearly. A dark non-stick pan hides the milk solids and makes it easy to overshoot to burnt.
- Large fork or potato masher — for mashing the bananas. A fork leaves small pieces throughout the loaf, which is a good thing. A blender or food processor over-smooths the fruit and removes the texture contrast.
- Parchment paper — line the loaf pan with a strip that overhangs both long sides. This creates handles for lifting the loaf out cleanly rather than fighting to pry it loose with a knife.
Step-by-Step Directions
Step 1: Brown the Butter
Place the butter in a light-colored saucepan over medium heat. Let it melt completely, then continue cooking, swirling the pan every 30 seconds. The butter will foam, then the foam will subside, and the milk solids on the bottom will turn from pale yellow to a deep golden brown. At that point it smells nutty and slightly toasted. Remove it from the heat immediately and pour it into a large mixing bowl to stop the cooking. It goes from browned to burnt in under a minute once the color arrives, so don’t walk away.

Chef’s Note: Browning the butter is the single most impactful technique upgrade in this recipe. The Maillard reaction that produces the brown color also creates dozens of new flavor compounds that plain melted butter doesn’t contain. It takes 3 extra minutes and it’s worth every second.
Step 2: Mash the Bananas
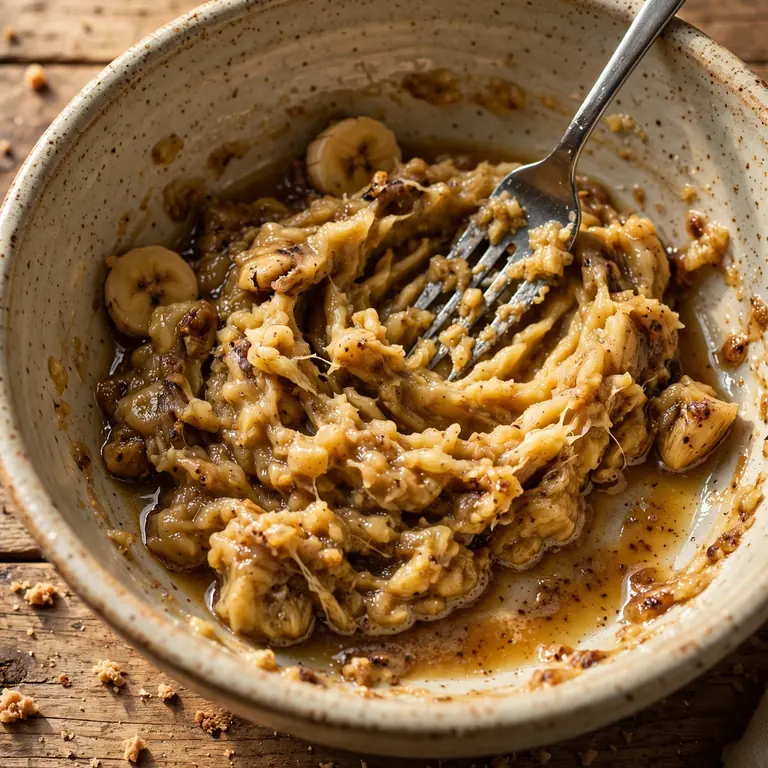
Peel the bananas and add them directly to the bowl with the browned butter. The residual heat of the butter softens the banana flesh slightly, which makes mashing easier. Use a large fork to mash everything together until mostly smooth with a few small lumps remaining throughout. The mixture should look like a thick, uneven puree. Those small lumps become pockets of concentrated banana flavor in the finished loaf.
Step 3: Add the Wet Ingredients
Let the banana and butter mixture cool for 3 to 4 minutes until it’s warm rather than hot, then add the brown sugar, eggs, sour cream, and vanilla. Stir with the fork until the mixture is fully combined and uniform in color. The batter at this stage should look glossy and smooth, somewhere between a thick sauce and a loose batter.
Chef’s Note: Letting the mixture cool before adding the eggs is not optional. Hot butter scrambles eggs on contact. Warm is fine; hot is not. If you’re in a hurry, set the bowl in a cold water bath for 60 seconds rather than waiting.
Step 4: Add the Dry Ingredients
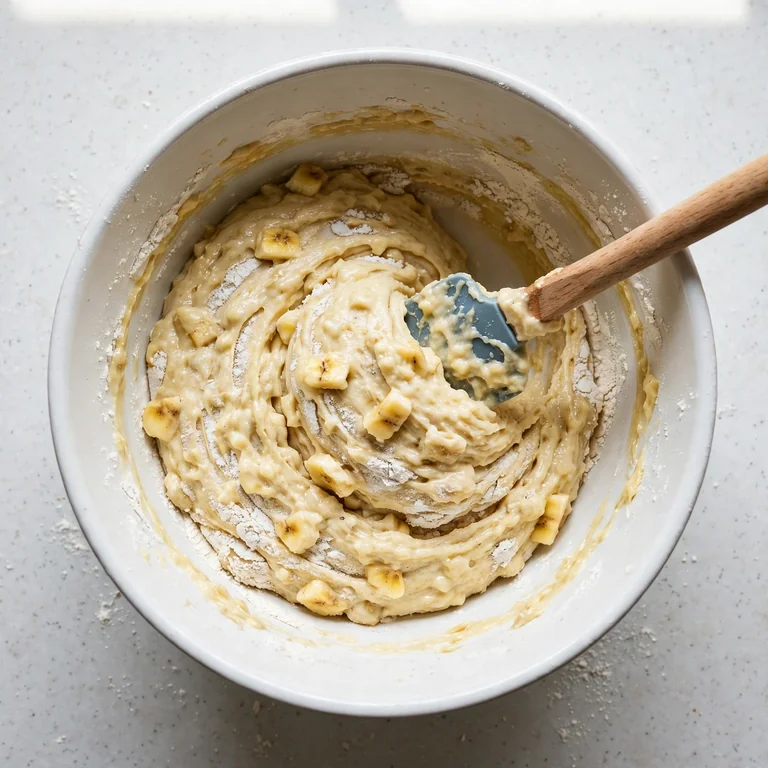
Sprinkle the flour, baking soda, salt, cinnamon, and nutmeg directly over the wet mixture. Using a spatula or wooden spoon, fold everything together with slow, deliberate strokes just until no visible flour streaks remain. Count your strokes if you like; 12 to 15 folds is usually enough. Overworking the batter develops gluten and produces a tough, chewy loaf rather than a tender one.
Chef’s Note: Lumps in the batter are fine. A smooth, fully-mixed batter means you’ve worked it too hard. Stop folding the moment the dry ingredients disappear into the wet.
Step 5: Prepare the Pan and Pour
Preheat your oven to 175°C (350°F). Grease a 9×5-inch loaf pan, then line it with a strip of parchment paper that overhangs both long sides by about 2 inches. Pour the batter in and smooth the top with the spatula. If you want a classic split down the center of the loaf, run the tip of a butter knife down the length of the batter surface. This scores the top and encourages a clean crack as the bread rises in the oven.
Step 6: Bake to a Deep Golden Brown
Bake on the center rack at 175°C (350°F) for 55 to 65 minutes. Start checking at the 55-minute mark. The loaf is done when a thin skewer or toothpick inserted into the very center comes out clean or with just a few dry crumbs. The top should be a deep golden brown with a visible crack running down the middle. If the top is browning too fast before the center is set, lay a loose sheet of foil over the pan from about the 40-minute mark onward.
Chef’s Note: The center of a banana bread loaf is the last part to bake through because of the high moisture content from the bananas. A skewer that comes out with wet, sticky batter rather than dry crumbs means the loaf needs more time regardless of how the top looks. Trust the skewer.

Step 7: Cool and Slice
Remove the pan from the oven and set it on a wire rack. Let the loaf cool inside the pan for exactly 15 minutes. Then lift it out using the parchment overhang, peel away the paper, and let it cool on the rack for at least another 20 minutes before slicing. Cutting into a hot loaf compresses the crumb and produces gummy, misshapen slices. The interior continues setting as it cools, and slicing too early interrupts that process.
Common Mistakes and Troubleshooting
| Problem | Cause | Solution |
|---|---|---|
| Raw, gummy center when the top looks done | Bananas too wet, or oven temperature too high | Tent the top with foil from 40 minutes and keep baking; an oven running hot browns the crust before the inside cooks through |
| Dense, flat loaf with almost no rise | Baking soda too old, or batter overmixed | Test baking soda freshness: drop 1/4 teaspoon into hot water; if it doesn’t bubble vigorously, replace it. Mix batter only until flour disappears |
| Dry, crumbly texture | Too much flour or overbaked | Spoon flour into the measuring cup instead of scooping; pull the loaf the moment a clean skewer comes out |
| Sunken center after cooling | Underbaked, or pan removed from oven too early | A skewer must come out fully clean before the loaf leaves the oven; carryover heat doesn’t finish a wet center |
| Crust too dark, bottom almost burnt | Dark non-stick pan or oven rack too low | Use a light-colored pan and bake on the center rack; reduce temperature by 10°C if using a dark pan |
| Loaf sticks to the pan | Pan not lined with parchment | Always use a parchment sling with overhang; greasing alone is not reliable enough for a moist quick bread |
Variations and Substitutions
- Chocolate chip banana bread: Fold 3/4 cup (130g) of chocolate chips into the batter just before pouring it into the pan. Semi-sweet chips balance the sweetness of the banana better than milk chocolate, which can make the loaf taste overly sweet.
- Walnut banana bread: Add 1/2 cup (60g) of roughly chopped walnuts to the batter. They add crunch and a slightly bitter note that cuts through the richness. Toast them in a dry pan for 3 minutes first for noticeably more flavor.
- Banana chocolate swirl: Mix 2 tablespoons of cocoa powder with 1 tablespoon of sugar. Spoon half the batter into the pan, dust the cocoa mixture over it, spoon the remaining batter on top, and drag a knife through once to swirl. Don’t over-swirl or the layers blend together.
- Spiced banana bread: Increase the cinnamon to 1 1/2 teaspoons and add 1/4 teaspoon of ground cardamom and 1/4 teaspoon of ground ginger alongside the existing spices. The result is warmer and more complex without straying far from the original.
- Mini loaves: Divide the batter among four mini loaf pans (about 5×3 inches each). Fill them 2/3 full and bake at the same temperature for 28 to 35 minutes. They make better gifts than a full loaf and freeze individually with less waste.
- Less sweet version: Reduce the brown sugar to 1/2 cup (100g) and add an extra banana to compensate for the sweetness loss with natural fruit sugar. The loaf tastes more banana-forward and less dessert-like, which works well as a breakfast slice.
Serving Suggestions
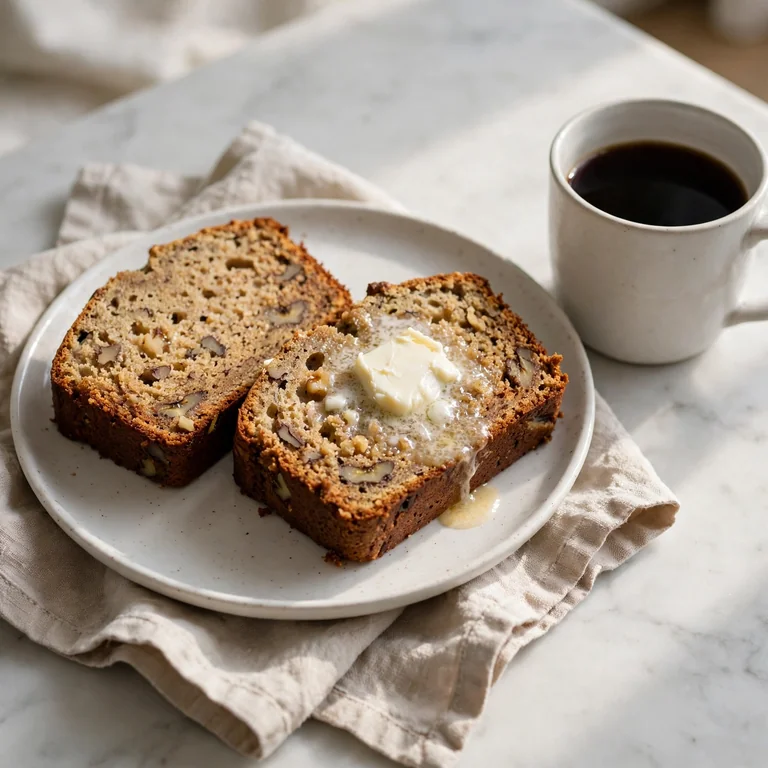
- Serve slices at room temperature with salted butter. The salt contrast against the sweet crumb is one of those small things that makes a significant difference in how the flavor reads.
- A spread of good peanut butter or almond butter on a warm slice is one of the most satisfying combinations. The fat and protein also make it more filling as a breakfast option.
- Toast slightly thick slices in a dry pan over medium heat for 2 minutes per side. The cut surfaces caramelize and the texture shifts from soft to slightly crisp at the edges, which is a different and equally good eating experience.
- Serve alongside a hot black coffee or a chai with milk. The spices in the bread and in a well-made chai echo each other in a way that feels intentional.
- For a simple dessert presentation, cut a thick slice, warm it briefly in the microwave for 15 seconds, and serve with a scoop of vanilla ice cream and a drizzle of honey. It takes 2 minutes to plate and it looks and tastes considerably more composed than it is.
- Thin slices with cream cheese make a reasonable afternoon snack. The tang of cream cheese cuts the sweetness and makes the banana flavor more distinct.
Tips for the Best Results
- Use the blackest bananas you can find. This is repeated because it’s the most impactful variable in the entire recipe. A banana that’s 50% brown spots produces a good loaf. A banana that’s 90% black produces a noticeably sweeter, more intensely flavored one. Don’t throw those bananas out; freeze them in their skins and thaw when you’re ready to bake. They’ll be perfectly soft.
- Don’t skip browning the butter. It adds about 3 minutes to the process and produces a measurably different flavor. The toasted milk solids that give browned butter its color are concentrated flavor compounds. Plain melted butter is a shortcut that costs you the best part of this recipe.
- Measure flour carefully. Scooping the measuring cup directly into the flour bag can pack in 20 to 30% more than the recipe calls for, which pushes the loaf toward dry and dense. Spoon the flour loosely into the cup, then level it with a straight edge.
- Resist opening the oven before 50 minutes. Quick breads rise from the steam and heat buildup inside the oven. Opening the door before the structure has set lets that heat escape and can cause the center to sink. If you need to check on it, use the oven light.
- Cool before slicing. The 30 to 35 minutes of total cooling time is not excessive. A warm quick bread continues to set up as moisture redistributes through the crumb. Slicing too early gives you a gummy, compressed texture at the cut face that firms up and improves significantly if you just wait.
Storage Tips
Refrigerator
Wrap the cooled loaf tightly in plastic wrap or store it in an airtight container. It keeps well in the fridge for up to 7 days without a significant change in texture, because the high moisture content from the bananas slows staling. The chilled loaf slices more cleanly than a room-temperature one. Bring slices to room temperature for 15 minutes before eating, or warm them briefly in the microwave for 10 to 12 seconds.
Freezer
Banana bread freezes exceptionally well for up to 3 months. Slice the fully cooled loaf first, wrap individual slices in plastic wrap, and store them together in a sealed freezer bag. This way you can pull out one slice at a time rather than thawing the whole loaf. To thaw, leave a slice at room temperature for 30 to 40 minutes, or microwave it from frozen at 50% power for 45 to 60 seconds. Freezing the whole unsliced loaf is also fine; wrap it tightly in plastic wrap and then foil, and thaw overnight in the fridge.
Reheating
A toaster oven at 160°C (325°F) for 8 minutes restores the crust’s slight crispness better than a microwave. If using a microwave, keep it at 50% power and check every 10 seconds; overheating makes the crumb rubbery and the top surface slightly sticky.
Make-ahead note: The batter doesn’t hold well overnight in the fridge because the baking soda activates on contact with the acidic ingredients and loses potency by the next day. Bake the loaf and store it instead of storing the batter.
Nutrition Information
Per serving, approximately one slice (1/10 of the loaf):
| Nutrient | Amount |
|---|---|
| Calories | 245 kcal |
| Protein | 4g |
| Total Carbohydrates | 36g |
| Dietary Fiber | 1.5g |
| Total Sugar | 19g |
| Total Fat | 10g |
| Saturated Fat | 6g |
| Cholesterol | 60mg |
| Sodium | 190mg |
| Vitamin C | 3mg |
| Calcium | 30mg |
| Iron | 1.2mg |
| Potassium | 175mg |
Nutrition values are approximate and may vary based on brands and portion sizes.
Why This Recipe Works
The moisture in banana bread comes from two places: the bananas themselves, and the fat in the batter. Overripe bananas contain significantly more free liquid than firm ones because the cell walls have broken down, releasing water and simple sugars that were previously bound inside the fruit’s structure. That released liquid keeps the crumb hydrated through baking and for days afterward. It’s why a loaf made with black bananas stays moist on day four while one made with underripe fruit tastes dry by day two.
Sour cream serves a specific function beyond adding fat. Its acidity activates the baking soda in the batter, producing the carbon dioxide bubbles that give the loaf its lift. It also slightly weakens the gluten network in the flour through the same mechanism that buttermilk works in pancakes, producing a softer, more tender crumb than a loaf made with neutral dairy like whole milk. Full-fat Greek yogurt behaves almost identically in this role, which is why it’s the most reliable substitute.
Brown butter contributes something that’s harder to explain in purely technical terms but easy to taste. When butter is heated past its melting point, the water evaporates and the milk proteins undergo the Maillard reaction, producing hundreds of new flavor compounds including diacetyl, which is associated with a nutty, almost toffee-like character. None of those compounds are present in plain melted butter. The difference in the finished loaf is subtle but real, and it’s most noticeable in the first few bites when the flavor of the crust is still on your palate.
The baking soda is the only leavener in this recipe, and it works specifically because of the acids already present in the batter: the sour cream, the brown sugar (which carries a trace of molasses), and the bananas themselves all contribute acidity. Baking powder produces its own acid internally and doesn’t need a partner, but baking soda reacts more vigorously with an external acid source, which is part of why this loaf rises as reliably as it does with just the one leavener.
I’ve tested this recipe with both white sugar and brown sugar at the same quantities. Brown sugar consistently produces a darker, moister crumb with a deeper background flavor that reads as slightly caramel-adjacent. White sugar works fine but the flavor is flatter. The molasses content in brown sugar is a small variable with a noticeable effect here, so it’s worth using if you have it.
Frequently Asked Questions
Can I make banana bread ahead of time?
Yes, and it actually improves slightly after a day. Bake the loaf, cool it completely, wrap it tightly, and store it at room temperature for up to 2 days or in the fridge for up to 7. The flavor deepens as the spices meld into the crumb and the moisture distributes more evenly through the loaf. For longer storage, slice and freeze individual portions for up to 3 months. The loaf does not benefit from being assembled or baked in advance with the intention of using the batter later; bake it and store the finished loaf.
Why is my banana bread still gooey in the middle after baking?
The center is the last part of any quick bread to reach temperature, and with a moisture-heavy loaf like banana bread, the difference between a gummy center and a set one can be 10 minutes. If your toothpick or skewer comes out wet, keep baking, tent the top with foil to prevent over-browning, and check again every 5 minutes. An oven running hotter than its dial shows can also cause the outside to look done while the inside is still raw. Verifying your oven temperature with an inexpensive thermometer solves this problem permanently.
Can I use frozen bananas?
Frozen bananas work well here, often better than fresh overripe ones. Thaw them in a bowl at room temperature for about an hour or overnight in the fridge. They’ll release a significant amount of dark liquid as they thaw; include all of it in the batter. That liquid is concentrated banana sugar and it contributes both flavor and moisture. Drain it out and you lose some of both.
My banana bread doesn’t rise much. What went wrong?
Two causes account for most cases. First, the baking soda may have lost its potency. Test it by stirring 1/4 teaspoon into a small amount of hot water; fresh baking soda will bubble vigorously within a few seconds. If it doesn’t, replace it. Second, the batter may have been overmixed after the flour went in. Overdeveloped gluten creates a tight structure that traps gas poorly and produces a flat, dense loaf. Mix only until the flour disappears, then stop.
Can I substitute oil for the butter?
Neutral oil (sunflower, vegetable, or light olive oil) works as a 1:1 substitute by volume, and the resulting loaf will actually stay moist slightly longer because oil doesn’t solidify at room temperature the way butter does. You lose the brown butter flavor entirely, but the texture is comparable or slightly better for storage purposes. If you go this route, use the same amount of oil as the recipe calls for in butter and skip the browning step.
How ripe do the bananas really need to be?
The more spots, the better. A banana that’s 100% black on the outside produces the most flavorful, sweetest loaf because virtually all of the starch has converted to sugar by that point. A banana that’s uniformly yellow with no spots produces a noticeably blander result. The minimum threshold for a good loaf is a banana that’s at least 50% brown-spotted. If yours aren’t ripe enough, roast unpeeled bananas on a baking sheet at 175°C (350°F) for 15 minutes until the skins blacken; the flesh softens and sweetens similarly to natural over-ripening.
Can I add mix-ins and how much?
Yes, up to about 1 cup (150 to 160g) of mix-ins total without affecting the structure of the loaf significantly. Chocolate chips, chopped walnuts, dried cranberries, and toasted coconut all work well. Add them at the very end of mixing with a few gentle folds. Beyond 1 cup, the loaf can become heavy and the center may not cook through reliably in the standard bake time.

Conclusion
Banana bread is one of those recipes that rewards attention to the small things: the ripeness of the fruit, the extra few minutes to brown the butter, the restraint to stop mixing when the flour disappears. None of those steps are difficult. They’re just worth doing deliberately.
Once you’ve made this a couple of times, you’ll stop measuring the bananas so carefully and start recognizing what the batter should look like before it goes into the pan. That’s when banana bread becomes the kind of thing you make on a Sunday morning without thinking too hard about it, and it comes out right every time because the method is genuinely reliable.
Good banana bread isn’t about the recipe. It’s about using fruit that’s actually ripe, handling the batter with a light hand, and giving the loaf enough time to finish baking and cooling before you cut it. Those three things, done consistently, are all it takes.
If you loved this recipe, save it to your baking Pinterest board so you can find it easily later. For more same recipes follow Thecookingvibes Pinterest account
Classic Banana Bread
Ingredients
Equipment
Method
- Preheat oven to 175°C (350°F). Grease a 9×5-inch loaf pan and line it with a parchment sling that overhangs both long sides.
- Melt butter in a light-colored saucepan over medium heat, continuing to cook and swirl until the milk solids turn deep golden brown and the butter smells nutty. Pour immediately into a large mixing bowl.
- Cool the browned butter for 3 to 4 minutes. Add the peeled bananas and mash with a fork until mostly smooth with small lumps remaining.
- Add brown sugar, eggs, sour cream, and vanilla. Stir until fully combined and uniform in color.
- Sprinkle flour, baking soda, salt, cinnamon, and nutmeg over the wet mixture. Fold with a spatula just until no dry flour streaks remain, about 12 to 15 folds. Do not overmix.
- Pour batter into the prepared pan and smooth the top. Score a shallow line down the length of the batter surface for a clean split.
- Bake on the center rack for 55 to 65 minutes until a skewer inserted in the very center comes out clean or with just a few dry crumbs. Tent with foil from 40 minutes if the top browns too quickly.
- Cool in the pan on a wire rack for 15 minutes. Lift out using the parchment overhang and cool on the rack for at least 20 more minutes before slicing.
Notes
- The blacker the banana, the more flavorful the loaf. Freeze overripe bananas in their skins and thaw as needed.
- Do not skip browning the butter; it is the most significant flavor upgrade in the recipe.
- Spoon flour into the measuring cup rather than scooping to avoid over-measuring.
- Do not cut into the loaf until it has cooled for at least 30 to 35 minutes total; cutting too early compresses the crumb.