Hot Buffalo Chicken Dip — Creamy, Spicy, and Impossible to Stop Eating
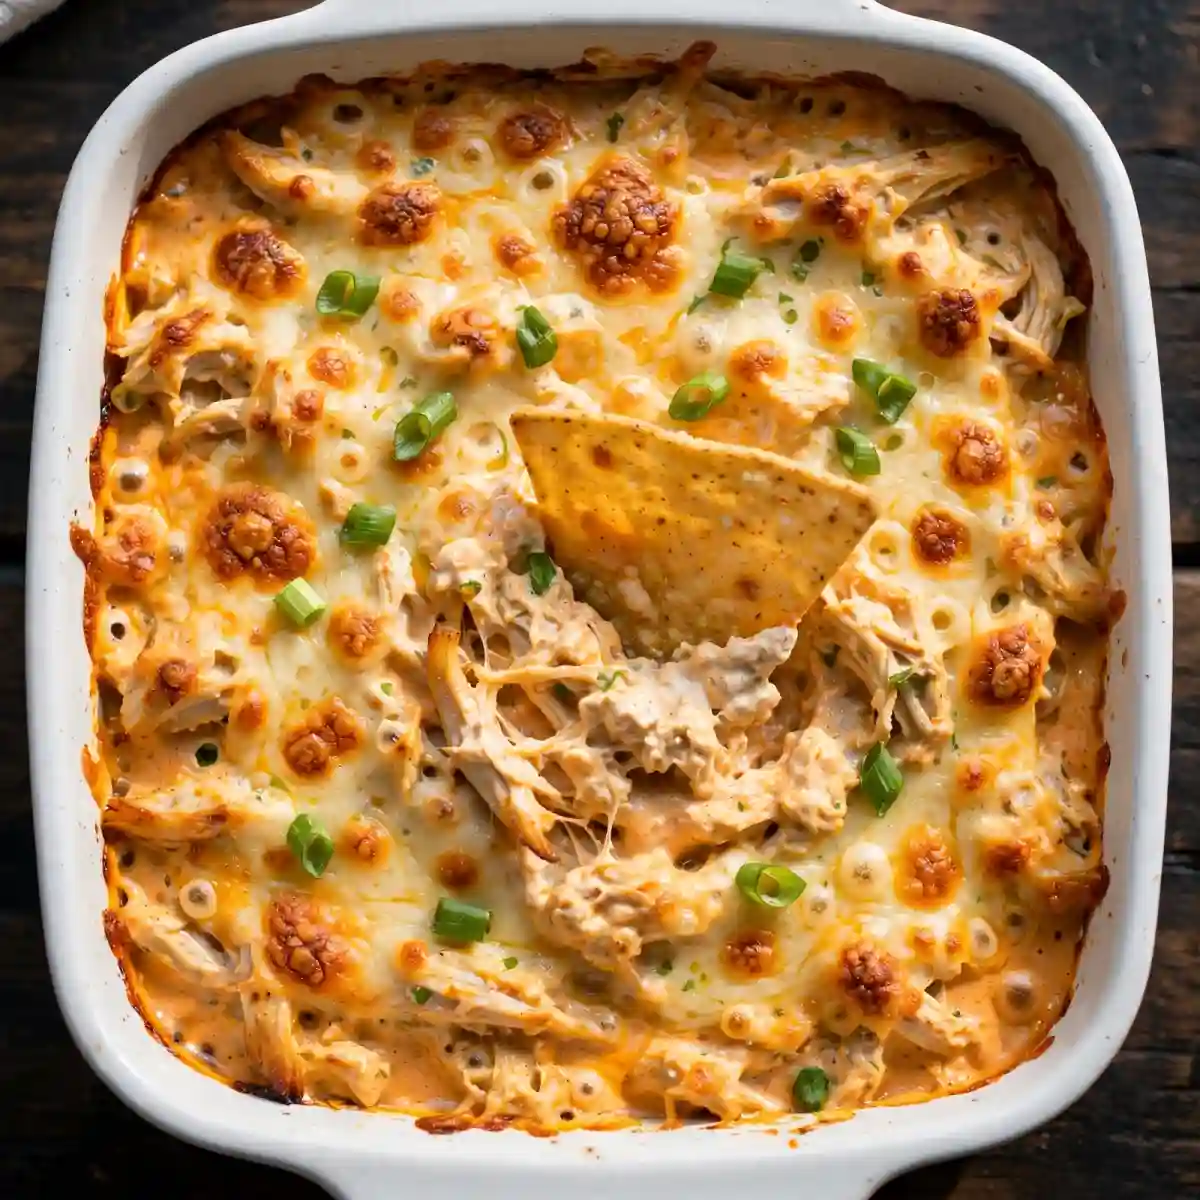
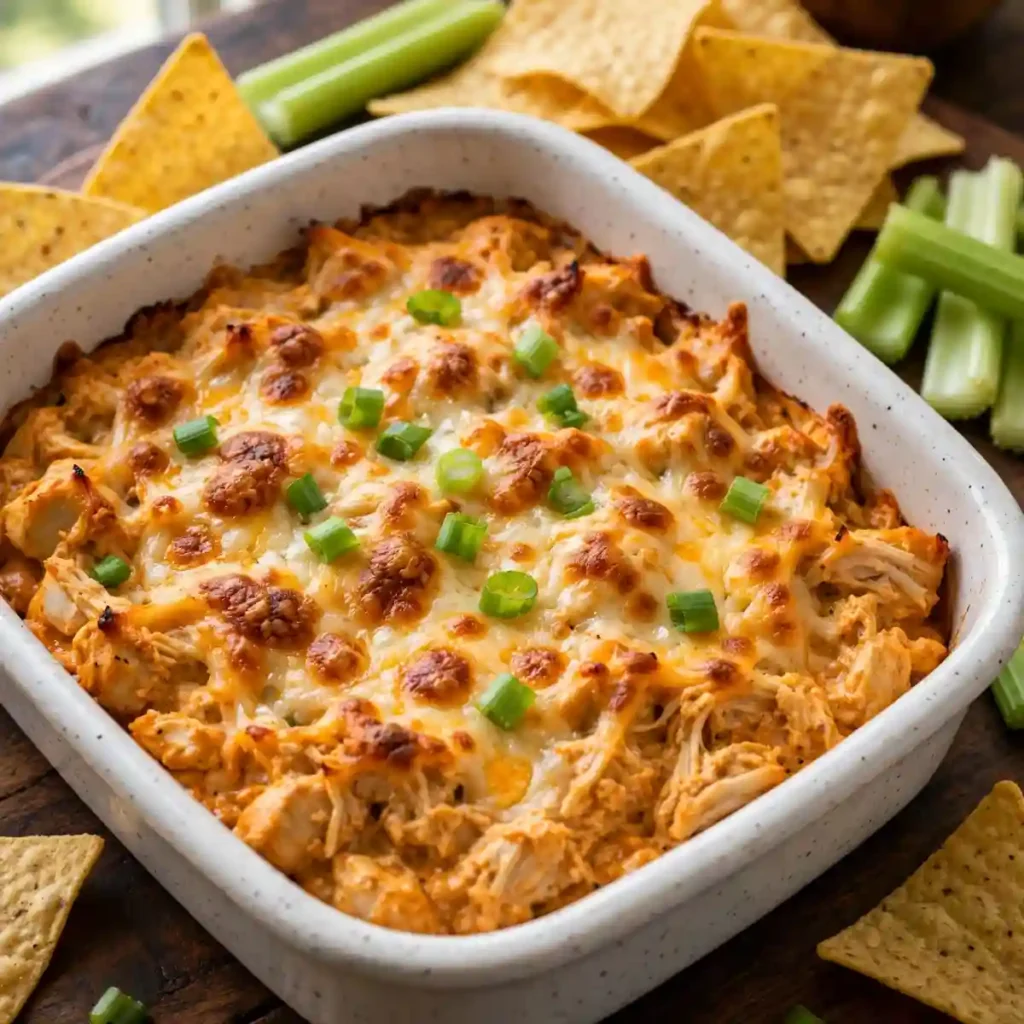
The moment this comes out of the oven, bubbling at the edges with the cheese starting to brown in the center, people move toward it before it even hits the table. Buffalo chicken dip has that effect. It smells like hot wings and delivers on that promise in every scoop: tangy hot sauce, rich cream cheese, shredded chicken, and enough cheddar to make it properly indulgent.
This buffalo chicken dip recipe produces a thick, scoopable dip that holds its consistency for over an hour at the table rather than separating into an oily mess once it cools slightly. It uses full-fat cream cheese and sour cream as the base, two cheeses layered at different stages for both internal richness and a browned surface, and shredded rotisserie chicken for the fastest possible prep. It’s ready in 30 minutes, serves 10 to 12 people as a party appetizer, and reheats cleanly if there are leftovers. For game day, a movie night spread, or any gathering where the food needs to disappear fast, this is the dip that earns repeat requests.
Why You’ll Love This Buffalo Chicken Dip
- Thick and scoopable, not runny. The combination of full-fat cream cheese and sour cream at the right ratio produces a base that holds its structure even as the dip sits on the table and cools slightly. Recipes that use too much hot sauce or ranch dressing produce a thin, oily result that falls off the chip.
- Tangy heat that’s genuinely balanced. The hot sauce level here is bold but not aggressive. The cream cheese and cheese temper the heat so the dip tastes like buffalo wing flavor rather than just a hit of capsaicin. Adjust the hot sauce up or down by 2 tablespoons to suit your crowd.
- Ready in 30 minutes with minimal prep. Using pre-shredded rotisserie chicken cuts the active work to mixing and baking. The whole recipe is assembled in one bowl and transferred to one baking dish.
- Stays good on the table for over an hour. A properly made buffalo chicken dip holds its consistency and flavor for well past the first 20 minutes, which is a real practical advantage at parties where people come back for seconds.
- Two-cheese strategy for maximum flavor. Cream cheese forms the creamy base; shredded cheddar goes in the filling and again on top. The layered cheese approach gives you internal richness and a properly browned surface that looks as good as it tastes.

Ingredients You’ll Need
Recipe Timing
| Detail | Info |
|---|---|
| Servings | 10 to 12 as an appetizer |
| Difficulty | Easy |
| Course | Appetizer, Snack |
| Cuisine | American |
| Prep Time | 10 minutes |
| Cook Time | 20 minutes |
| Total Time | 30 minutes |
Use a pre-cooked rotisserie chicken for the fastest prep. Pull the breast and thigh meat separately: breast meat shreds into clean, even strands while thigh meat contributes more fat and flavor. A mix of both produces the best texture and richness in the finished dip. If cooking chicken fresh, two large boneless skinless thighs simmered for 20 minutes in lightly salted water and then pulled apart with two forks is the most reliable method.
For the hot sauce, use a Frank’s RedHot-style cayenne hot sauce rather than a thick chili sauce or sriracha. The thin, vinegar-based cayenne sauce blends smoothly into the cream cheese base and delivers the tangy, briny buffalo flavor the dip needs. Thicker chili sauces change the texture and don’t integrate as cleanly.
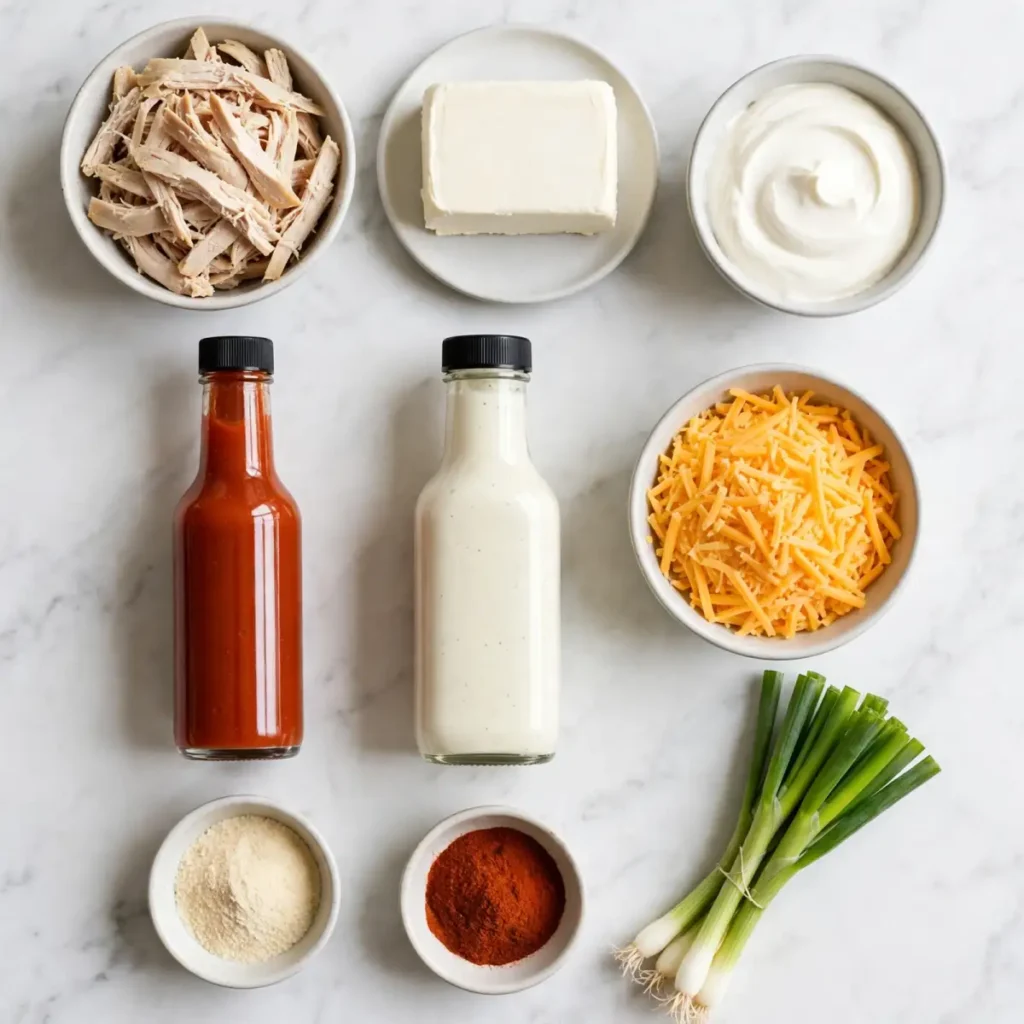
- 2 cups (about 300g) cooked shredded chicken — The main ingredient. Rotisserie chicken gives the most flavor for the least effort. Shred the pieces into bite-sized strands; pieces that are too large make the dip hard to scoop cleanly on a chip.
- 225g (8 oz) full-fat cream cheese, softened to room temperature — The structural backbone of the filling. It must be genuinely softened, not cold from the fridge; cold cream cheese produces lumps that don’t fully disappear during baking. Set it out at least an hour before you start.
- 1/2 cup (120g) full-fat sour cream — Adds richness and a faint tang that keeps the dip from tasting flat. Low-fat sour cream is thinner and makes the filling slightly looser after baking; full-fat produces a creamier, more cohesive result.
- 1/2 cup (120ml) cayenne-based hot sauce — This is the primary flavor driver. Start here and adjust up to 3/4 cup if you want more heat. Down to 1/3 cup for a milder crowd. The brand you use directly affects the final flavor; Frank’s RedHot-style sauce is the standard reference point for this dish.
- 1/2 cup (120g) ranch dressing — Adds cooling creaminess and an herby note that balances the acidity of the hot sauce. Blue cheese dressing is the classic alternative (more pungent and tangy) and works directly in the same quantity if you prefer that direction.
- 1.5 cups (150g) sharp cheddar cheese, freshly shredded, divided — 1 cup goes into the filling; the remaining 1/2 cup is scattered across the top before baking. Sharp cheddar has enough flavor to come through clearly in a filling this rich. Pre-shredded cheddar from a bag works but melts slightly less smoothly than freshly grated block cheese.
- 1/2 tsp garlic powder — Adds background depth without identifiable garlic flavor.
- 1/4 tsp onion powder
- 1/4 tsp smoked paprika — Adds a faint smokiness that makes the dip taste like it has more complexity than its ingredient list suggests.
- Sliced green onions and extra smoked paprika, for garnish
Allergen and Dietary Disclosure
This recipe contains dairy (cream cheese, sour cream, and cheddar cheese) and gluten if served with crackers, bread, or flour tortilla chips. The dip itself contains no gluten in its base form. Check your ranch dressing label if you are managing gluten sensitivity, as some commercial ranch dressings contain wheat-based thickeners.
For a dairy-free version, use a plant-based cream cheese block (cashew-based varieties hold structure best), dairy-free sour cream, and a dairy-free cheddar-style shred. The texture will be slightly different but the dip holds together and tastes very similar. Use a dairy-free ranch dressing as well.
For a lower-heat version, reduce the hot sauce to 1/4 cup and add 1 tablespoon of honey to the filling. The honey rounds the remaining heat and adds a mild sweetness that makes the dip more accessible for people who are sensitive to spice.
This recipe has not been prepared in an allergen-free facility. Always verify individual product labels if you are managing a serious allergy.
Equipment Needed
- Large mixing bowl — For combining all the filling ingredients before the dip goes into the baking dish. A bowl that’s too small makes proper mixing awkward without splashing.
- 8-inch or 9-inch round baking dish, or a similar-volume oven-safe skillet — This recipe fits a standard 8-inch round or a 1.5-quart baking dish. A larger dish spreads the dip too thinly and dries the top before the center heats through. A cast iron skillet works particularly well because it retains heat and keeps the dip warm longer at the table.
- Hand mixer or sturdy rubber spatula — A hand mixer on low speed makes beating the softened cream cheese completely smooth in about 2 minutes; a spatula works fine if the cream cheese is genuinely soft but takes more effort.
- Instant-read thermometer (optional) — The most reliable way to confirm the filling is heated through; it should read at least 74°C (165°F) at the center when done.
Step-by-Step Directions
Step 1: Preheat the Oven
Set your oven to 190°C (375°F). Lightly grease your baking dish with cooking spray or a thin smear of butter on the bottom and sides. A greased dish prevents the filling from sticking to the edges and makes cleanup significantly faster.
Step 2: Soften and Beat the Cream Cheese
Place the softened cream cheese in your large mixing bowl. Beat it on medium speed with a hand mixer, or work it vigorously with a rubber spatula, for 1 to 2 minutes until it is completely smooth with no lumps remaining. This is the most important prep step in the recipe. Lumpy cream cheese produces a lumpy finished dip, and no amount of baking fixes cream cheese that wasn’t properly smoothed out before the other ingredients went in.

Chef’s Note: Warm cream cheese straight from the microwave is not the same as properly room-temperature softened cream cheese. Microwaved cream cheese can be melted in some spots and cold in others, which makes a uniform smooth texture difficult to achieve. Set the full block out for a full hour before you start. It should hold a clear thumbprint when you press your finger into it.
Step 3: Mix the Filling
Add the sour cream, hot sauce, ranch dressing, garlic powder, onion powder, and smoked paprika to the beaten cream cheese. Stir vigorously until the mixture is completely uniform and no streaks of cream cheese or sour cream are visible. The mixture should look like a smooth, deeply orange-pink sauce.
Add 1 cup of the shredded cheddar and all of the shredded chicken. Fold everything together with a spatula until the chicken is evenly distributed through the cream cheese mixture and there are no concentrated pockets of any single ingredient.
Chef’s Note: Folding the chicken in gently rather than beating it into the base keeps the shredded strands intact rather than breaking them into small fragments. Visible shreds of chicken in the finished dip give each scoop a satisfying, pulled-apart texture that tiny fragments don’t provide.

Step 4: Transfer and Top
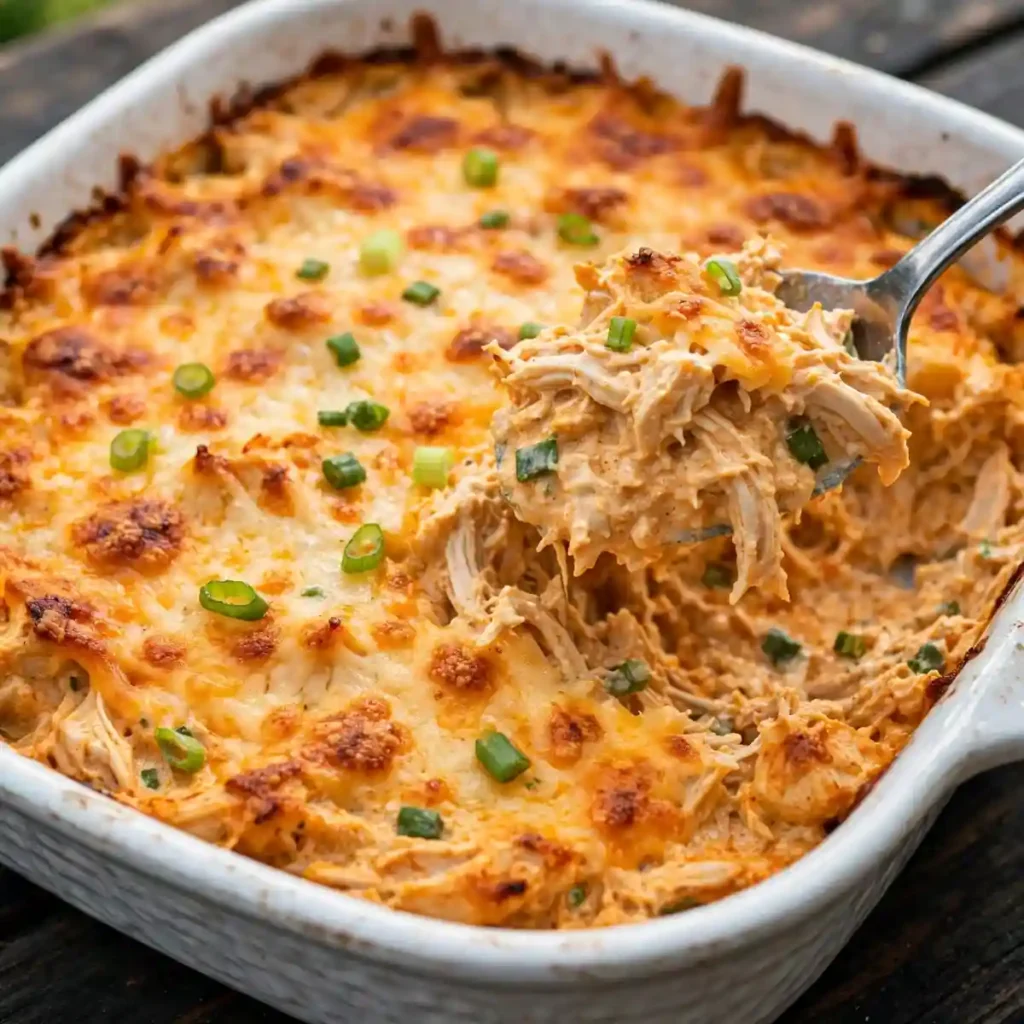
Spoon the filling into the prepared baking dish and spread it into an even layer that reaches all the edges. Smooth the surface with the back of the spatula so it bakes evenly. Scatter the remaining 1/2 cup of shredded cheddar in an even layer across the top. This top cheese layer will brown and bubble during baking and create the visually appealing golden surface that makes the dip look irresistible when it comes out of the oven.
Step 5: Bake Until Bubbling and Browned
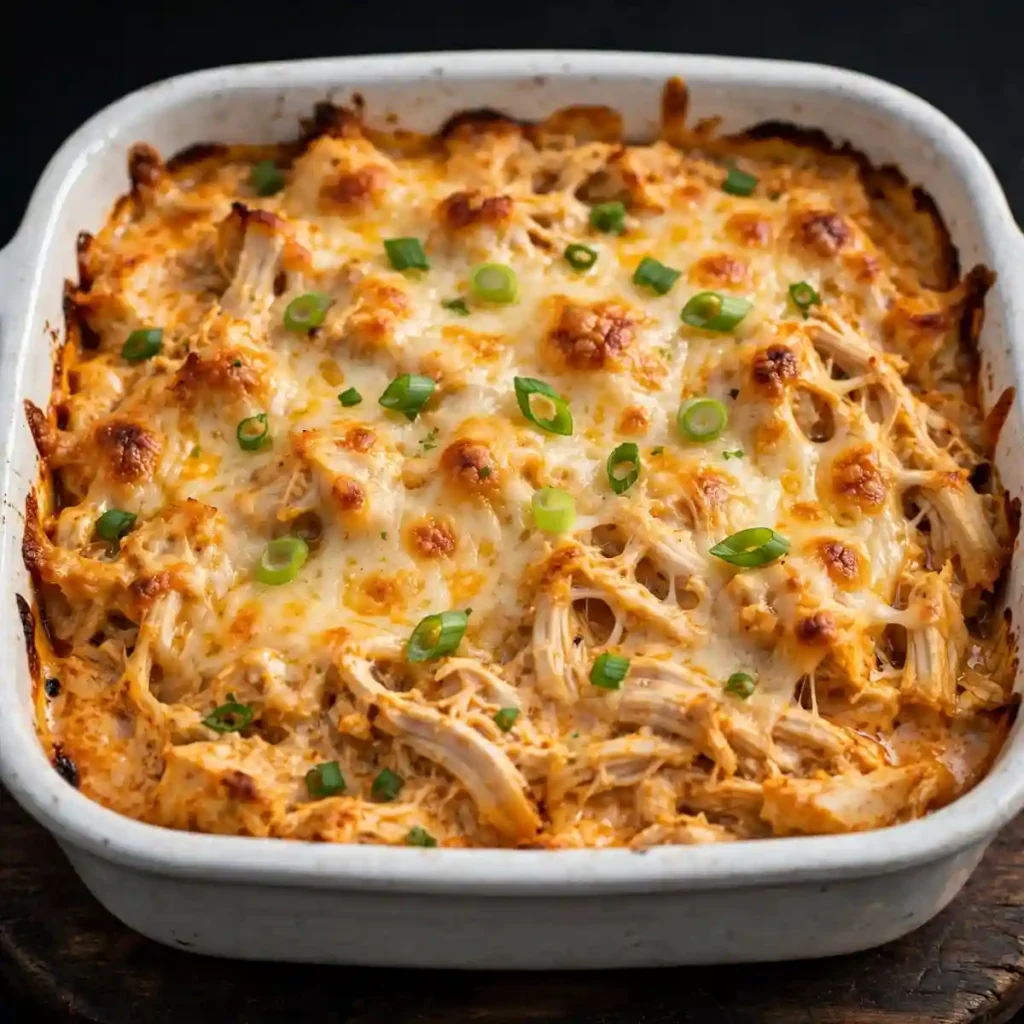
Place the dish on the center rack of the preheated oven. Bake at 190°C (375°F) for 18 to 22 minutes until the cheese across the top is fully melted and golden with slightly darker patches in the center, and the filling is bubbling actively around the perimeter and starting to bubble in the center as well. The internal temperature at the center of the dip should reach at least 74°C (165°F).
Chef’s Note: The dip is fully heated when you can see it bubbling at the center, not just at the edges. Edge bubbling alone means the outer ring is hot but the center may still be cool. For a crowd where food safety matters, use a thermometer to confirm the center temperature.
Step 6: Garnish and Serve
Remove the dish from the oven and immediately scatter sliced green onions across the surface and add a light dusting of smoked paprika over the top for color. Let the dip rest for 3 to 5 minutes before serving; it is extremely hot directly from the oven and the brief rest makes it safe to dip without burning anyone’s mouth. Serve directly from the baking dish with chips, bread, and vegetables arranged alongside.
Common Mistakes and Troubleshooting
| Problem | Cause | Solution |
|---|---|---|
| Dip is lumpy and uneven | Cream cheese was too cold when mixed, or wasn’t beaten smooth before other ingredients were added | Always soften cream cheese for a full hour at room temperature. Beat it alone until completely smooth before adding anything else. |
| Dip is thin and runny | Too much hot sauce relative to cream cheese, or low-fat dairy products used | Stick to the quantities as written. Use full-fat cream cheese and sour cream; reduced-fat versions contain more water and produce a significantly looser result. |
| Cheese on top is burnt before the center is hot | Oven temperature too high, or dish too close to the top element | Bake on the center rack at exactly 190°C (375°F). If the top is browning too fast, tent loosely with foil for the remaining baking time. |
| Dip is greasy and oily on top | Pre-shredded cheese used, or baked at too high a temperature | Shred cheese fresh from the block when possible. The starch coating on pre-shredded cheese can contribute to greasiness as it separates during baking. Keep the temperature at 190°C. |
| Filling is too spicy after baking | Hot sauce quantity was too high for the crowd | Taste the filling before baking and adjust the hot sauce. Once baked, stir 2 tablespoons of additional room-temperature sour cream into the hot dip; it will mellow the heat noticeably. |
Variations and Substitutions
Slow Cooker Buffalo Chicken Dip: Combine all the filling ingredients directly in the slow cooker, stir to mix, and scatter the top cheese layer over the surface. Cook on HIGH for 1.5 to 2 hours or LOW for 3 to 4 hours, stirring once at the halfway point. The slow cooker version won’t develop the browned cheese surface that the oven produces, but it stays warm on the LOW setting throughout a party without any supervision.
Blue Cheese Buffalo Chicken Dip: Replace the ranch dressing with an equal amount of blue cheese dressing and fold 1/4 cup of crumbled blue cheese into the filling along with the cheddar. The flavor is bolder, more pungent, and closer to the experience of eating bone-in buffalo wings with blue cheese dip.
Extra Spicy Version: Increase the hot sauce to 3/4 cup and stir 1/4 teaspoon of cayenne pepper directly into the filling base. Serve with extra hot sauce on the side for anyone who wants even more heat. Keep the extra ranch dressing nearby for the people who misjudged their heat tolerance.
Gluten-Free Version: The dip itself is already gluten-free as written. Check your ranch dressing label specifically (some commercial versions contain wheat) and serve with corn tortilla chips, rice crackers, and celery and carrot sticks rather than wheat crackers or bread.
Loaded Topping Version: After baking, scatter additional toppings across the surface before serving: extra crumbled blue cheese, additional sliced green onions, a drizzle of hot sauce in a zigzag pattern, and a small handful of crispy fried onions for crunch. The layered toppings make the dip look impressive with minimal extra effort.
Serving Suggestions
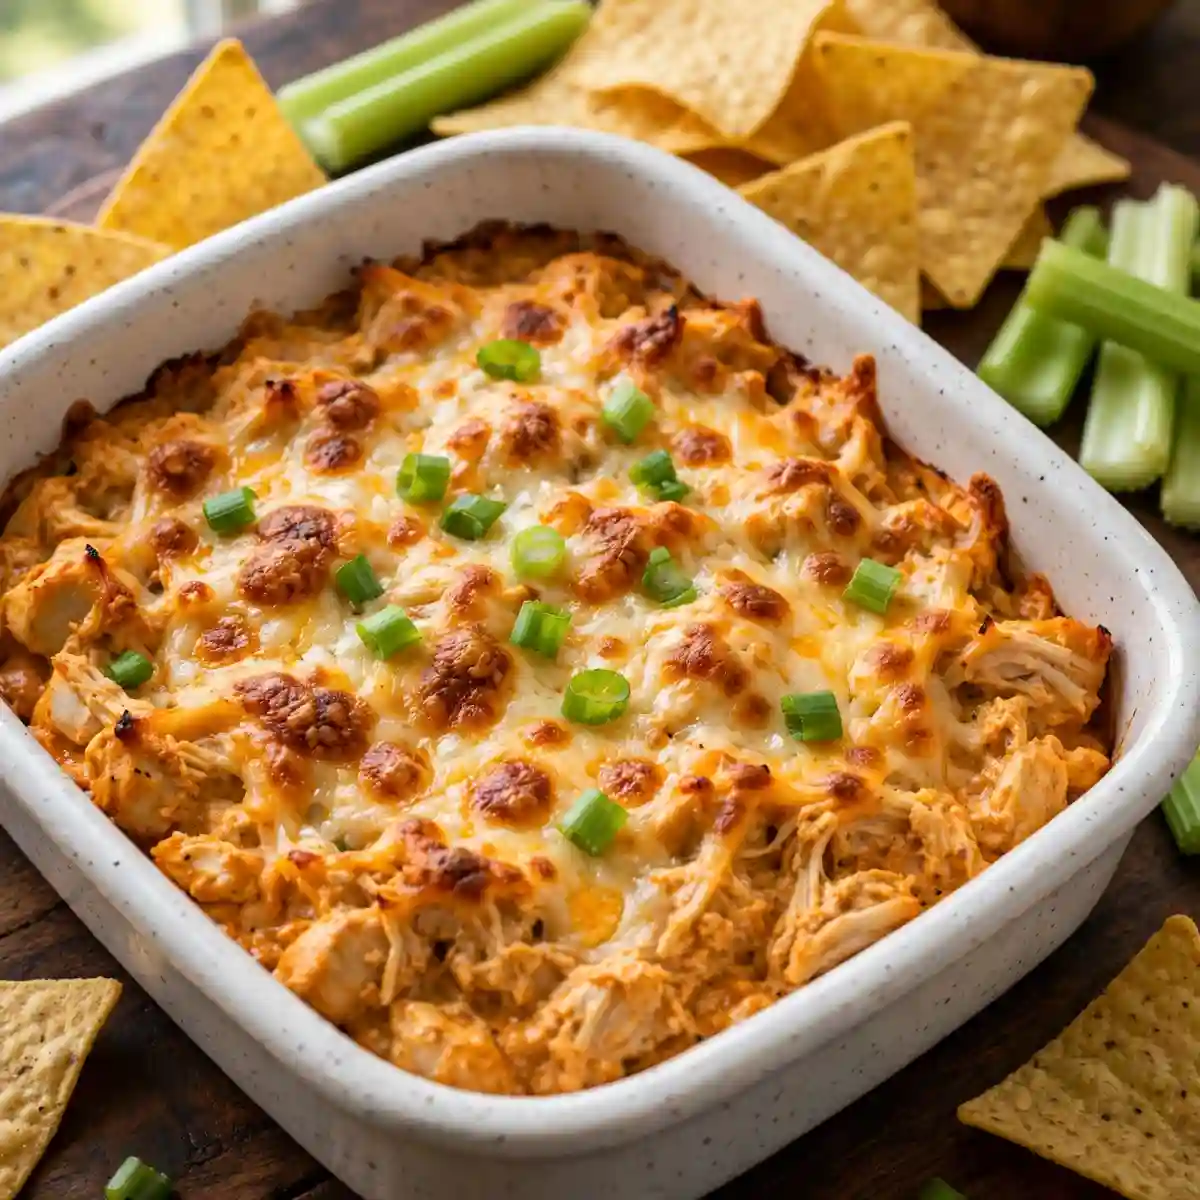
- Serve with corn tortilla chips as the primary dipper; they’re sturdy enough to hold a generous scoop without breaking and their neutral corn flavor doesn’t compete with the spiced buffalo filling.
- Offer celery sticks and carrot sticks alongside the chips. The cool, crunchy vegetables balance the richness of the dip naturally and give the spread a visual contrast against the orange-colored filling.
- Lightly toasted pita triangles or sliced baguette rounds work particularly well because their texture holds up under a heavy scoop of thick dip better than crackers, which can snap under pressure.
- Serve in a cast iron skillet placed on a folded kitchen towel at the table. Cast iron retains heat significantly longer than ceramic, keeping the dip warm and scoopable for 45 minutes to an hour without a warming device.
- Pair with a cold, sparkling drink or an iced tea. The carbonation or the mild tannin in the tea provides a refreshing break between the warm, spiced bites and prevents the richness from building up too quickly.
Tips for the Best Results
Use genuinely softened cream cheese. One hour at room temperature is the minimum; two hours in a cool kitchen is better. The cream cheese should feel uniformly soft when you press it, not cold in the center with a soft surface. This single detail affects the final texture more than any other step in the recipe.
Taste the filling before it goes into the oven. The hot sauce level, salt balance, and overall seasoning are set at the mixing stage, not during baking. Run a clean spoon through the filling and taste it; if it needs more heat, add hot sauce now. If it tastes too salty, a small extra spoonful of sour cream stirs in cleanly and reduces the saltiness before baking.
Shred the chicken into medium-sized pieces, not fine shreds. Very finely shredded chicken disappears into the cream cheese base and you lose the textural contrast that makes the dip satisfying. Aim for strands about 3 to 5 cm long. If using a fork to shred, stop when you have recognizable pieces rather than pulling until the chicken is broken into fibers.
Use a cast iron skillet for the best table longevity. A preheated cast iron skillet placed over a low burner for 2 minutes before the filling goes in retains heat long enough to keep the dip warm for up to an hour at the table. Ceramic and glass dishes cool faster, so if you’re not using cast iron, consider placing the baking dish on a small warming tray.
Scatter the top cheese at the last moment before it goes in the oven. The longer shredded cheese sits on top of the warm filling, the more it starts to settle and absorb moisture from below before baking. Adding it immediately before the dish goes into the oven means it has the full baking time to melt from above rather than absorbing from below.
Storage Tips
Refrigerator
Transfer leftover dip to an airtight container and refrigerate for up to 4 days. The filling thickens considerably when cold, which is expected from the cream cheese base. The flavor actually improves slightly after a day as the hot sauce and cheese meld further. Keep the leftover green onion garnish separate and add fresh ones when reheating if presentation matters.
Freezer
Buffalo chicken dip freezes reasonably well for up to 2 months. The texture of the cream cheese base changes slightly after freezing, becoming a little more grainy than fresh, but once reheated and stirred it comes back close to its original consistency. Freeze in an airtight container before baking for the cleanest result; thaw overnight in the fridge and bake as directed, adding 5 extra minutes to the bake time.
Reheating
For the best reheated texture, spoon the leftover dip back into a small oven-safe dish, cover with foil, and bake at 175°C (350°F) for 15 minutes, then remove the foil for 5 minutes to re-brown the surface. This method restores the bubbly, fresh-from-oven consistency. Microwave reheating works for speed: 60 to 90 seconds at 70% power per individual portion, stirring once at the halfway point. The microwave version heats well but won’t produce any surface browning.
Make-Ahead Note: The filling can be fully assembled and refrigerated, unbaked, in the baking dish for up to 24 hours before the party. Cover tightly with plastic wrap and refrigerate; remove the plastic wrap and bake directly from the fridge at 190°C (375°F), adding 5 to 8 extra minutes to the bake time since it starts cold. This is a genuinely practical party-prep approach.
Nutrition Information
Per serving, based on 12 servings, dip only without dippers. Values are approximate.
| Nutrient | Amount |
|---|---|
| Calories | 215 kcal |
| Protein | 14g |
| Carbohydrates | 3g |
| Fiber | 0.2g |
| Sugar | 1.5g |
| Total Fat | 16g |
| Saturated Fat | 8g |
| Cholesterol | 68mg |
| Sodium | 580mg |
| Potassium | 155mg |
| Calcium | 130mg |
| Iron | 0.6mg |
| Vitamin C | 2mg |
Nutrition values are approximate and may vary based on brands and portion sizes.
Why This Recipe Works
Buffalo chicken dip fails in one of two directions: it either stays together and tastes flat, or it separates into an oily mess that tastes aggressively sour. Both problems come from the same underlying cause: an imbalanced ratio between the acidic hot sauce and the stabilizing dairy components.
Cayenne-based hot sauce is acidity-forward. At the right concentration in a cream cheese base, that acidity brightens the entire dip and provides the characteristic tang of buffalo flavor. Too much hot sauce overwhelms the dairy components and the filling can’t hold together during baking; the cheese separates from the base and an oily layer forms on the surface. Too little and the dip tastes like a mild cheese spread with a hint of pepper rather than the bold, identifiable buffalo flavor the dish promises.
The specific ratio here (1/2 cup hot sauce against 225g cream cheese, 1/2 cup sour cream, 1/2 cup ranch, and 1.5 cups cheddar) keeps the acidity in range for the dairy proteins to remain stable through the full 20-minute bake. The ranch dressing plays an active structural role, not just a flavoring one: its emulsified fat and water content adds a stabilizing layer between the hot sauce acidity and the cream cheese, preventing the cheese proteins from seizing and separating.
Using two cheese applications (one cup folded into the filling, another half cup scattered on top) addresses both the internal creaminess and the visual finish. Cheese folded into a hot dip filling disperses throughout the base and contributes to the overall richness of every bite; a surface layer that bakes directly under the oven’s radiant heat browns and forms a crust that holds the dip together visually and prevents the surface from drying out during baking.
The softened cream cheese technique matters structurally. Cold cream cheese, even when it eventually warms and melts in the oven, never distributes through the dip as evenly as pre-softened cream cheese does, because cold fat doesn’t blend smoothly with other ingredients at room temperature. The result is pockets of dense cream cheese alongside runnier sections of hot sauce and ranch, which produces an uneven, curdled-looking filling. Pre-softened cream cheese blends uniformly into a cohesive, stable base before anything else contacts it.
Frequently Asked Questions
Can I make buffalo chicken dip ahead of time?
Yes. Assemble the full dip in the baking dish, cover tightly with plastic wrap, and refrigerate for up to 24 hours before baking. When ready to serve, remove the plastic wrap and bake at 190°C (375°F) for 25 to 27 minutes (adding 5 to 8 minutes for the cold start). You can also bake it fully in advance and reheat it; the flavor is excellent the next day, though the surface won’t be as freshly browned. Reheat covered at 175°C (350°F) for 15 minutes, then uncovered for 5 minutes.
Why is my buffalo chicken dip greasy or oily?
An oily surface almost always comes from one of three things: too much hot sauce relative to the cream cheese base, baking at too high a temperature (which causes the cheese fat to separate before the protein network sets), or using pre-shredded cheese, which has a starch coating that can contribute to separation during baking. Stick to the written quantities, bake at exactly 190°C (375°F), and shred your cheddar fresh from the block for the cleanest result.
Can I use canned chicken instead of rotisserie?
Yes. Drain two cans (about 300g total drained weight) of cooked canned chicken thoroughly, then shred any larger pieces. Canned chicken has a milder, slightly softer flavor than rotisserie chicken, so the hot sauce and ranch flavors come through more prominently. It’s a convenient and practical substitute when you don’t have a rotisserie chicken available. Pat the drained canned chicken dry with paper towels before adding it to the filling to minimize any extra liquid.
How do I make buffalo chicken dip less spicy?
Reduce the hot sauce to 1/4 cup and replace the missing volume with an extra 2 tablespoons each of ranch dressing and sour cream. For further reduction, add 1 tablespoon of honey to the filling before mixing; the sweetness directly counterbalances the heat without changing the texture. If the dip is already baked and too spicy for the crowd, stir in a spoonful of sour cream at the table; it blends in quickly and immediately softens the heat.
Can I make this in a slow cooker?
Yes. Add all the filling ingredients to the slow cooker and stir together. Scatter the top cheese layer across the surface. Cook on HIGH for 1.5 to 2 hours or LOW for 3 to 4 hours, stirring once at the halfway point to redistribute the heat. Keep it on the WARM or LOW setting during serving. The slow cooker version doesn’t produce the browned cheese surface that the oven creates, but it stays warm for the entire party without any additional attention, which is a significant practical advantage.
Is buffalo chicken dip gluten-free?
The base recipe is naturally gluten-free: chicken, cream cheese, sour cream, hot sauce, ranch dressing, and cheddar all contain no gluten as long as you check the specific ranch dressing brand (some contain wheat-based thickeners). The dip itself is gluten-free; the allergen concern comes from the dippers. Serve with corn tortilla chips and fresh vegetables rather than crackers or bread for a fully gluten-free table.
How much does this recipe make?
The recipe yields enough dip to generously fill a standard 8-inch or 9-inch baking dish and serves 10 to 12 people as one of several party appetizers. If this is the only appetizer, or if your crowd is enthusiastic about dipping, plan for 8 servings. The recipe scales up straightforwardly: double every ingredient and use a 9×13-inch baking dish, adding 5 minutes to the bake time.
Conclusion
Buffalo chicken dip works because it delivers on a very specific flavor promise in every bite: the tang and heat of hot sauce carried through a rich, creamy, cheesy base that stays thick and scoopable. Getting that balance right is about the ratios, the cream cheese temperature, and baking at the right heat long enough to let the cheese brown without letting the filling separate.
Once you’ve made it once and seen how it comes together, it becomes one of those recipes you can put on the table in 30 minutes flat without looking at the quantities again. It’s the kind of buffalo chicken dip that empties the dish before halftime.
If you loved this recipe, save it to your game day appetizers Pinterest board so you can find it easily later. For more healthy recipes and daily food inspiration, follow TheCookingVibes on Pinterest.
Hot Buffalo Chicken Dip
Ingredients
Equipment
Method
- Preheat oven to 190°C (375°F). Lightly grease an 8-inch or 9-inch baking dish.
- Beat the softened cream cheese in a large bowl until completely smooth with no lumps.
- Add the sour cream, hot sauce, ranch dressing, garlic powder, onion powder, and smoked paprika. Stir vigorously until fully uniform. Taste and adjust hot sauce level if needed.
- Add 1 cup of shredded cheddar and all of the shredded chicken. Fold gently with a spatula until the chicken is evenly distributed throughout the filling.
- Transfer the filling to the prepared baking dish and spread into an even layer. Scatter the remaining 1/2 cup of cheddar evenly across the top.
- Bake at 190°C (375°F) for 18 to 22 minutes until the top cheese is golden and bubbling and the filling is bubbling at the center. Internal temperature should reach 74°C (165°F).
- Rest for 3 to 5 minutes. Garnish with sliced green onions and smoked paprika. Serve directly from the dish with chips, celery, and carrots.
Notes
- Cream cheese must be genuinely softened to room temperature. Cold cream cheese causes lumps that don’t resolve during baking.
- Taste the filling before baking and adjust the hot sauce level. The flavor is set at the mixing stage.
- For make-ahead: assemble fully, cover, and refrigerate up to 24 hours. Add 5 to 8 minutes to the bake time when starting from cold.
- For slow cooker: combine all ingredients in the slow cooker, scatter the top cheese, and cook on HIGH for 1.5 to 2 hours or LOW for 3 to 4 hours.
- Allergens: Contains dairy (cream cheese, sour cream, cheddar). Naturally gluten-free; check your ranch dressing label for wheat-based thickeners. For dairy-free, use plant-based cream cheese, dairy-free sour cream, dairy-free cheddar shreds, and dairy-free ranch. Not prepared in an allergen-free facility. Always check individual product labels.
- Always check individual product labels.