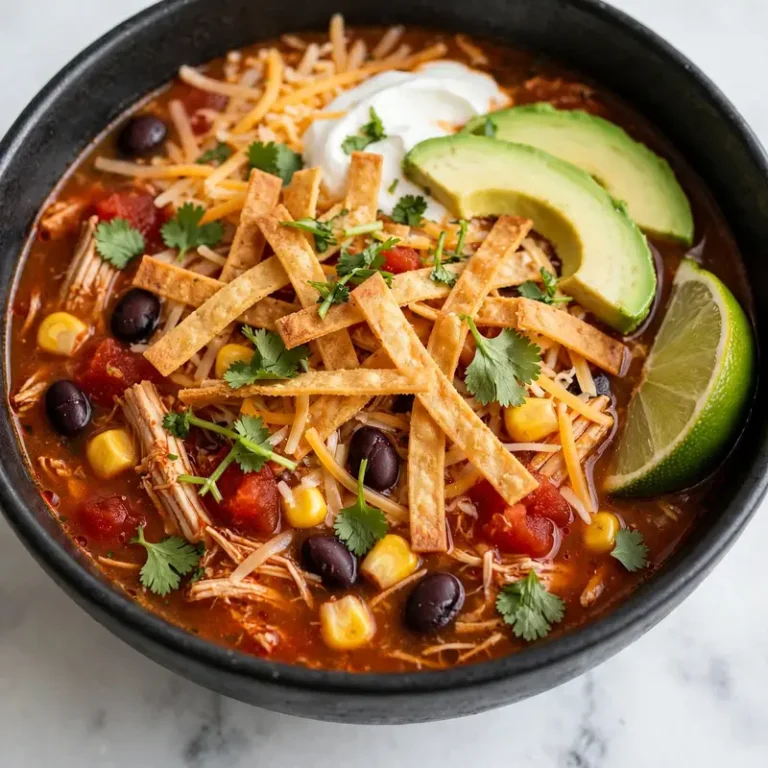
Crispy Baked Chicken Tacos
The smell of taco seasoning hitting a hot skillet is enough to pull everyone into the kitchen before you even call them for dinner. These baked chicken tacos take that moment and turn it into something you can actually get on the table in 30 minutes, with minimal cleanup and real crunch.
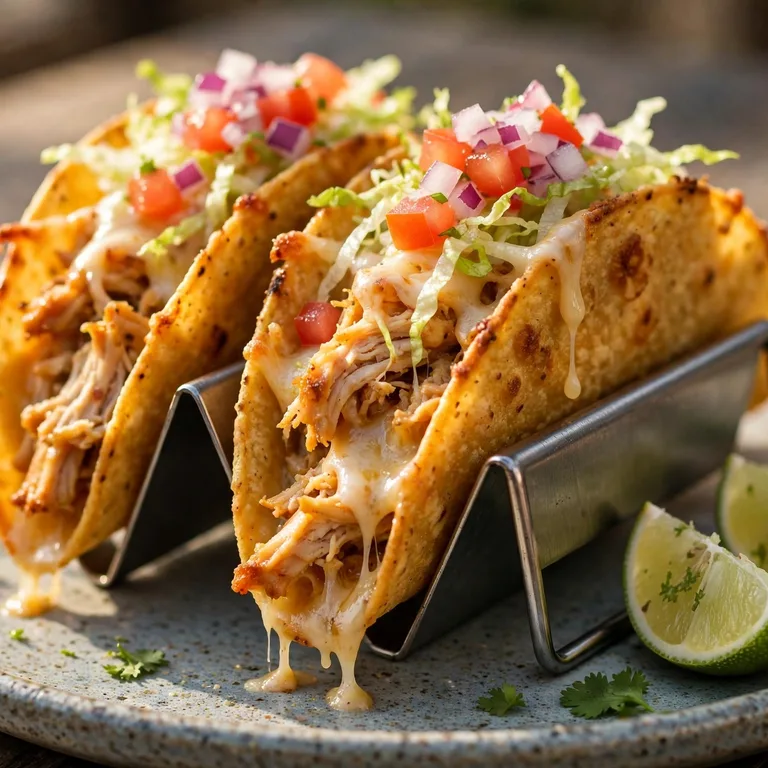
The concept is simple. Seasoned chicken goes into corn tortillas with cheese, the whole thing bakes in a hot oven until the shells are golden and crispy, and every bite holds together the way a good taco should. No frying, no soggy shells, no mess.
Whether it is a busy Tuesday or a casual weekend dinner, baked chicken tacos work. The recipe scales easily, the kids eat it without negotiation, and the leftovers (when there are any) reheat well.

Why You’ll Love This Baked Chicken Tacos Recipe
- Crispy without frying. The oven does the heavy lifting. You get that satisfying crunch without standing over a pan of hot oil or dealing with splatter.
- 30 minutes, start to finish. The cooking steps overlap efficiently, so you are never standing around waiting. Chicken cooks while the oven preheats, tortillas warm while you shred.
- Customizable for everyone at the table. The base recipe is solid on its own, but a toppings spread lets everyone build their own version.
- Approachable seasoning with real depth. The spice blend has a smoky, earthy warmth without being hot. Adults can add heat with jalapeños or hot sauce; kids can leave it plain.
- Meal-prep friendly. Cook the chicken filling up to 3 days ahead and taco night becomes a 15-minute job on a weeknight.
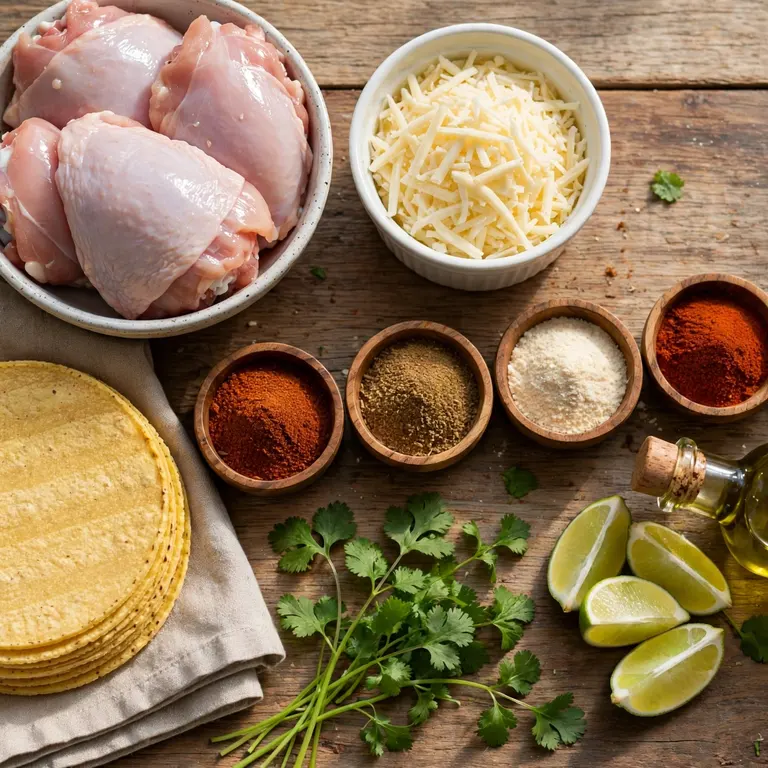
Ingredients You’ll Need
Recipe Timing
| Detail | Info |
|---|---|
| Servings | 4 (makes 10 tacos) |
| Difficulty | Easy |
| Course | Main Dish |
| Cuisine | Mexican-American |
| Prep Time | 10 minutes |
| Cook Time | 20 minutes |
| Total Time | 30 minutes |
Go for chicken thighs when you can. They have more fat than breasts, which means more flavor and easier shredding. Breasts work too, but pull them at exactly 165°F internally or they dry out fast. For the tortillas, 6-inch corn tortillas crisp up better than flour in a hot oven.
For the chicken:
- 1.5 lbs boneless, skinless chicken thighs (or breasts) — thighs shred more easily and stay juicier
- 2 tbsp olive oil — helps the seasoning adhere and gets a good sear on the surface
- 2 tsp chili powder — the backbone of the spice blend
- 1 tsp ground cumin — adds a smoky, earthy note that makes everything smell like tacos
- 1 tsp garlic powder — substitute a teaspoon of minced fresh garlic if you prefer
- 1/2 tsp smoked paprika — regular paprika works, but the smoked version adds subtle depth
- 1/2 tsp onion powder
- 1/2 tsp salt
- 1/4 tsp black pepper
- 1 tbsp fresh lime juice — squeezed over the shredded chicken before assembly
For the tacos:
- 10 corn tortillas, 6-inch — look for ones with minimal ingredients; they crisp up cleanest
- 1.5 cups shredded Mexican blend cheese or cheddar — about 2 tablespoons per taco
- Cooking spray or a light brush of neutral oil — for the pan surface and the tortilla tops
Toppings (optional but recommended):
- Shredded lettuce
- Diced roma tomatoes
- Plain Greek yogurt or sour cream
- Sliced jalapeños
- Fresh cilantro leaves
- Lime wedges
- Salsa or hot sauce
- Diced avocado

Allergen and Dietary Disclosure
This recipe contains dairy (cheese). For a dairy-free version, use a plant-based shredded cheese alternative or skip the cheese entirely and add a spoonful of dairy-free yogurt after baking.
Corn tortillas are naturally gluten-free. The rest of the ingredients in this recipe do not contain gluten either. If celiac disease or a serious gluten intolerance is a concern, buy corn tortillas labeled “certified gluten-free,” since some brands are processed in facilities that also handle wheat.
These notes are meant to be helpful, not a substitute for checking every ingredient label yourself when managing a serious allergy.
Equipment Needed
- Large rimmed baking sheet — a half-sheet pan is ideal; the rim keeps the tacos from sliding when you flip them
- Heavy skillet or cast iron pan — for a proper sear on the chicken; a cast iron holds heat evenly and gives better browning
- Instant-read meat thermometer — the most reliable way to pull chicken at exactly 165°F without cutting into every piece
- Two forks — for shredding the chicken once cooked
- Tongs — makes flipping the tacos mid-bake much cleaner than using a spatula, which tends to tear the shell
- Foil or parchment paper — lining the baking sheet cuts cleanup time significantly
Step-by-Step Directions
Step 1: Preheat the Oven and Prep the Pan
Set your oven to 425°F (220°C). Line a large baking sheet with foil and coat it generously with cooking spray or a light brush of oil. The pan needs to be well greased, or the tortilla bottoms will stick and tear when you flip them halfway through baking.
Step 2: Cook the Chicken
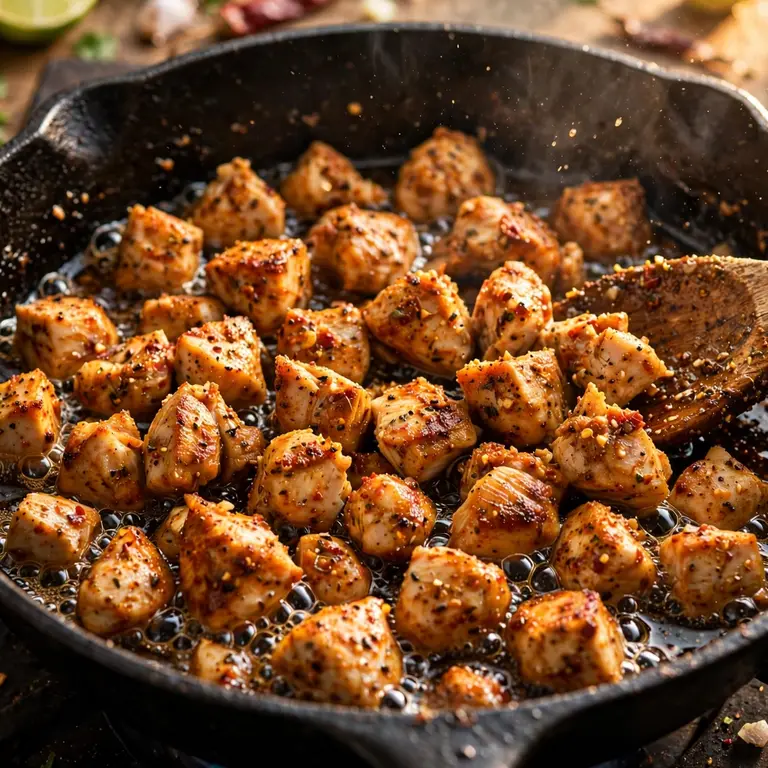
Mix the chili powder, cumin, garlic powder, smoked paprika, onion powder, salt, and pepper together in a small bowl. Heat the olive oil in a skillet over medium-high heat until it shimmers. Add the chicken thighs and coat both sides evenly with the seasoning mix. Cook 5 to 6 minutes per side. Pull the chicken when the thickest part reads 165°F on your thermometer. A little char on the outside is not a problem; it actually adds flavor.

Chef’s Note: Do not crowd the pan. If your skillet is on the smaller side, cook in two batches. Crowding causes the chicken to steam instead of sear, and you lose the browned bits that make the seasoning taste like it cooked into the meat rather than sitting on top of it.
Step 3: Shred the Chicken
Move the chicken to a cutting board or wide bowl and let it rest 3 minutes. This keeps the juices inside rather than running out onto the cutting board. Shred with two forks by pulling the meat apart along the grain. Squeeze the lime juice over the shredded chicken and toss to coat. Taste at this point and adjust the salt if needed.
Step 4: Warm the Tortillas
Stack the corn tortillas, wrap them in a damp paper towel, and microwave for 30 to 45 seconds. Warm tortillas are pliable enough to fold without cracking. Cold tortillas straight from the bag will split down the middle the moment you try to fold them, and a cracked shell during baking means the filling spills and the taco loses its structure entirely.
Chef’s Note: Work quickly after microwaving. The tortillas cool and stiffen within a couple of minutes. Have your filling and cheese ready to go before you pull them from the microwave.
Step 5: Assemble and Bake
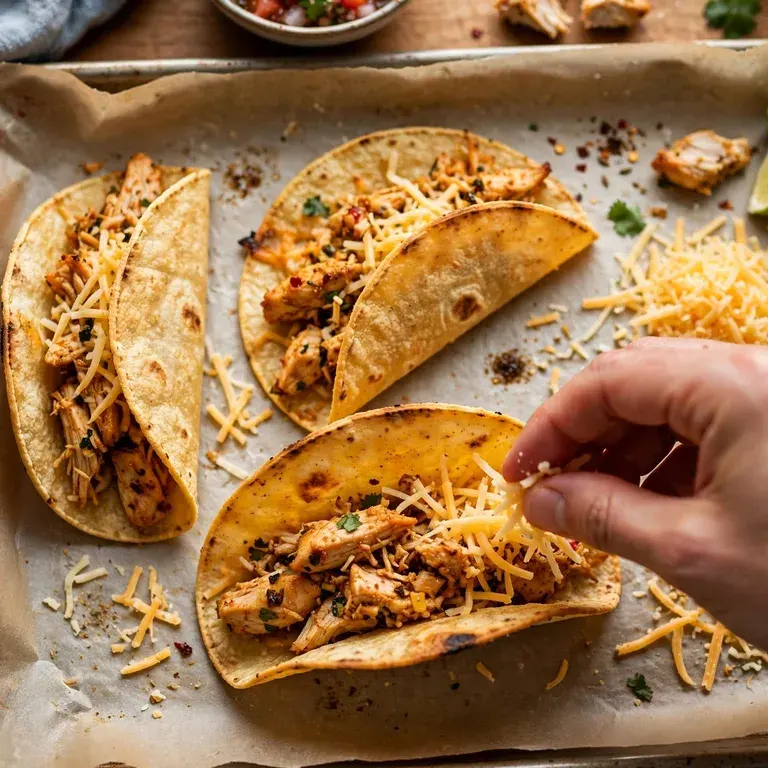
Lay the warmed tortillas flat on the prepared baking sheet. Spoon 2 to 3 tablespoons of shredded chicken onto one half of each tortilla. Add a small pinch of shredded cheese directly over the chicken. Fold the empty half over the filling and press gently to close. Spray or lightly brush the tops with oil.
Bake for 8 minutes. Using tongs, flip each taco carefully. Bake another 4 to 5 minutes until both sides are golden brown and the shells feel crispy when you press them lightly.
Step 6: Add Toppings and Serve
Remove the tacos from the pan immediately. Let them rest one minute before loading on the cold toppings: shredded lettuce, diced tomato, a spoonful of Greek yogurt or sour cream, sliced jalapeños, fresh cilantro. Serve with lime wedges on the side.
Chef’s Note: All toppings go on after baking. Anything wet inside before baking will soften the shell and undo all the crispiness you just built. The cheese is the only thing that goes in before the oven.
Common Mistakes and Troubleshooting
| Problem | Cause | Solution |
|---|---|---|
| Shells crack during folding | Tortillas too cold or dry | Wrap in a damp paper towel and microwave 30-45 seconds right before folding |
| Shells stick to the pan | Not enough oil on the baking sheet | Coat the pan generously with cooking spray; under-greasing is the most common sticking cause |
| Shells come out soft, not crispy | Oven too cool or tops not oiled before baking | Use 425°F minimum; spray or brush the tops before they go in |
| Filling bursts out during baking | Too much chicken per taco | Keep filling to 2-3 tablespoons; overfilling pushes the shell open |
| Chicken tastes dry | Overcooked, or breast meat pulled too late | Use a thermometer and pull at exactly 165°F; thighs are more forgiving than breasts |
Variations and Substitutions
Spicy: Add 1/4 teaspoon of cayenne to the seasoning mix, or stir a tablespoon of adobo sauce from a can of chipotles in adobo directly into the shredded chicken before filling.
Kid-friendly: Drop the chili powder to 1 teaspoon and skip any cayenne. Set out mild toppings like diced avocado and shredded lettuce so they can customize without the heat.
Vegetarian: Replace the chicken with a mix of canned black beans and frozen corn, drained and seasoned with the same spice blend. The shells bake the same way and the filling holds up well.
Gluten-free (certified): Use certified gluten-free corn tortillas. Everything else in this recipe is already free of gluten.
Extra crispy cheese edges: Add a second small pinch of cheese after flipping the tacos. It melts onto the shell surface and creates slightly lacier, crispier edges.
Rotisserie shortcut: Use about 2 cups of shredded rotisserie chicken. Season it with the spice mix and a splash of lime juice, then go straight to assembly. Total time drops to around 15 to 20 minutes.
Serving Suggestions
- Cilantro lime rice alongside makes the whole meal feel complete and restaurant-style without much extra effort.
- Refried beans or spiced black beans work well on the side or stirred into the chicken filling for a heartier taco.
- A simple fresh salsa of diced tomato, onion, cilantro, jalapeño, and lime juice takes about 5 minutes and is noticeably better than jarred.
- Pickled red onions add a sharp, tangy contrast to the rich chicken and melted cheese that cuts through the heaviness well.
- Sliced jalapeños on the side let heat-seekers customize their own plate without making the main recipe too spicy for everyone else.
- Agua fresca or sparkling water with lime balances the warm spices and keeps the meal feeling light.
Tips for the Best Results
- Use a meat thermometer every time. Guessing when chicken is done leads to dry, overcooked meat or, worse, undercooked poultry. 165°F internal is the only reliable target, and a basic instant-read thermometer costs less than a meal out.
- Do not skip the flip. Both sides need direct contact with the hot pan to crisp evenly. A taco baked on one side only will be golden underneath and soft on top.
- Rest the chicken before shredding. Three minutes off the heat lets the juices redistribute. Shred immediately and you push those juices out onto the board instead of keeping them in the meat.
- Oil the tops of the tortillas before baking. This step is easy to forget, but it is what gives the top side its golden color. Dry tortilla tops stay pale and papery even at high heat.
- Keep filling portions consistent. Two to three tablespoons per taco sounds conservative, but it keeps the shells closed and prevents the filling from spilling onto the pan during baking.
Storage Tips
Refrigerator
Store the baked shells and the shredded chicken filling separately in airtight containers. The shells lose their crispiness quickly once they contact the moisture in the filling. Both keep well for up to 3 days.
Freezer
The cooked, seasoned chicken freezes well for up to 3 months. Cool it completely first, portion it into freezer-safe bags, press out the air, and seal flat. The baked shells do not freeze well; they go soft after thawing. Assemble fresh shells when you are ready to eat.
Reheating
Reheat the shells on a baking sheet at 375°F for 5 to 6 minutes, or in an air fryer at the same temperature for 3 to 4 minutes. Both methods bring back a satisfying crispiness. The microwave warms them fast but eliminates the crunch entirely. When you have a few extra minutes, the oven is worth it.
Nutrition Information
Per taco, based on 10 tacos without optional toppings. Values are approximate and may vary based on ingredient brands and portion sizes.
| Nutrient | Per Taco |
|---|---|
| Calories | 185 |
| Protein | 16g |
| Carbohydrates | 14g |
| Fiber | 2g |
| Sugar | 1g |
| Total Fat | 7g |
| Saturated Fat | 2.5g |
| Cholesterol | 55mg |
| Sodium | 310mg |
| Calcium | 110mg |
| Iron | 1.2mg |
| Potassium | 220mg |
Why This Recipe Works
Baking at 425°F is not arbitrary. Below that temperature, the tortillas warm through but do not crisp. The high heat drives surface moisture out of the corn tortilla quickly, causing it to firm up and turn golden rather than staying pliable. The flip halfway through ensures both sides get direct contact with the hot, greased pan, which is what creates an even crust rather than a crispy bottom and a soft top.
The spice blend works because it uses fat as a carrier. The olive oil you cook the chicken in pulls the oil-soluble flavor compounds out of the chili powder, cumin, and paprika and distributes them into the meat itself as it cooks. By the time you shred the chicken, the seasoning is throughout the meat rather than just coating the outside.
Lime juice after cooking serves a specific purpose. The acid brightens the overall flavor of the seasoned chicken and balances the richness of the melted cheese. Without it, the filling can taste heavy and one-dimensional. It takes 10 seconds and makes a noticeable difference.
Nutrition values above are calculated using standard USDA data for chicken thighs and a common Mexican blend cheese. Results will vary slightly depending on the brands and portions you use.
Frequently Asked Questions
Can I make baked chicken tacos ahead of time?
The chicken filling is ideal for making ahead. Cook and shred it up to 3 days in advance, store it in the fridge, and warm it in a skillet for a few minutes before assembly. Do not assemble the tacos in advance; the shells absorb moisture from the filling and go soft before they even reach the oven. The baking step takes under 15 minutes, so it is always worth doing fresh.
Why do my corn tortillas keep cracking when I fold them?
Cold tortillas crack. That is almost always the entire issue. Wrap them in a damp (not soaking) paper towel and microwave for 30 to 45 seconds right before you fold. The steam softens the corn enough to bend without splitting. Work quickly once they come out of the microwave because they cool and stiffen within a couple of minutes.
Can I use flour tortillas instead of corn?
Yes, but the texture will be different. Flour tortillas stay soft and pliable after baking rather than crisping up. You get a warm, soft-shell taco rather than a crunchy one. If that works for you, use small 6 or 8-inch flour tortillas and follow the same steps. The flavor is still good; it is just a different eating experience.
How do I know when the chicken is fully cooked?
The thickest part of the thigh should read 165°F on an instant-read thermometer. If you don’t have one, cut through the thickest piece. The meat should be white all the way through with no pink remaining. Clear juices are a good sign. Cooking time typically falls between 5 and 7 minutes per side depending on thickness, so time alone is not reliable.
Can I use rotisserie chicken for this recipe?
Yes, and it is one of the better shortcuts here. Shred about 2 cups of rotisserie chicken, toss it with the spice mix and a tablespoon of lime juice, and skip straight to the assembly step. Total time drops to around 15 to 20 minutes, and the flavor is still very good because the seasoning blend does most of the work.
How do I store and reheat leftover baked chicken tacos?
Keep the shells and filling in separate airtight containers in the refrigerator for up to 3 days. To reheat the shells, spread them on a baking sheet and warm at 375°F for 5 to 6 minutes. An air fryer at the same temperature takes about 3 to 4 minutes and works just as well. Add fresh toppings after reheating, not before.
Are these tacos gluten-free?
Corn tortillas are naturally gluten-free, and nothing else in this base recipe contains gluten. If you are managing celiac disease or a serious gluten intolerance, buy corn tortillas labeled “certified gluten-free” since some are manufactured in facilities that also process wheat. Always check the seasoning blend and cheese packaging too, as cross-contact can happen at the production level.
Conclusion
Baked chicken tacos solve the weeknight dinner problem without asking much of you. The seasoning is pantry-friendly, the process is straightforward, and dinner lands on the table in 30 minutes. Once you have the technique down (warm the tortillas, run a hot oven, flip halfway), this recipe runs on autopilot.
If you loved this recipe, save it to your Chicken Recipes or Easy Weeknight Dinners Pinterest board so you can find it easily later. For more same recipes must follow Thecookingvibes Pinterest account.
Crispy Baked Chicken Tacos
Ingredients
Equipment
Method
- Preheat the oven to 425°F. Line a rimmed baking sheet with parchment paper or foil and set aside.
- Mix chili powder, cumin, garlic powder, smoked paprika, onion powder, salt, and pepper together. Heat olive oil in a skillet over medium-high. Season chicken thighs on both sides and cook 5 to 6 minutes per side until internal temperature reaches 165°F.
- Transfer chicken to a cutting board and rest 5 minutes. Chop into bite-size pieces.
- Wrap the tortillas in a damp paper towel and microwave 30 to 45 seconds until soft and pliable.
- Preheat oven.
- Lay warmed tortillas flat on the prepared baking sheet. Spoon 2 to 3 tablespoons of chicken onto one half of each. Add a small amount of shredded cheese. Fold closed and press gently. Spray or brush the tops with oil.
- Bake 8 minutes. Flip each taco carefully using tongs. Bake another 4 to 5 minutes until both sides are golden and crispy.
- Cool 2 minutes. Open each taco slightly and add lettuce, tomatoes, red onion, and your favorite toppings. Serve with lime wedges.
Notes
2. The minimum effective oven temperature for crispy shells is 400°F. At 425°F the results are noticeably better.
3. Warm the tortillas right before folding, not a few minutes ahead. They stiffen quickly as they cool.
4. Store the filling and shells separately in the fridge. Shells reheat best in an oven or air fryer at 375°F.