Marry Me Chicken Pasta — Creamy Sun-Dried Tomato, Seared Chicken
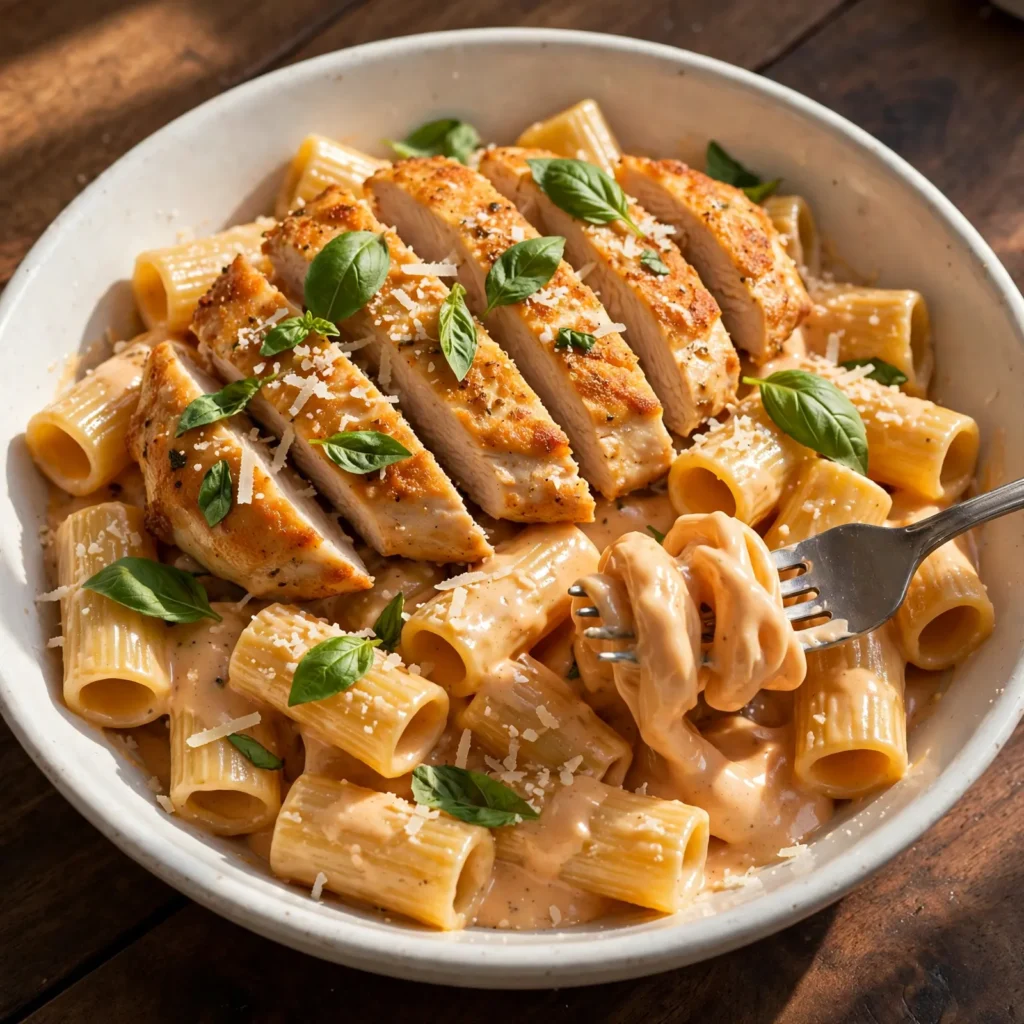
The name came from somewhere specific: reportedly the dish is so good that whoever you make it for proposes on the spot. That’s marketing, but the underlying claim about the flavor is harder to dismiss. What actually happens when you make this dish correctly is that the sun-dried tomatoes and their oil, combined with garlic, cream, and parmesan, build a sauce in the same pan the chicken seared in, picking up every bit of the fond and carrying it into a deeply savory, slightly tangy, rich cream that coats every strand of pasta. It’s the kind of sauce that makes people ask what’s in it and then ask you to make it again.
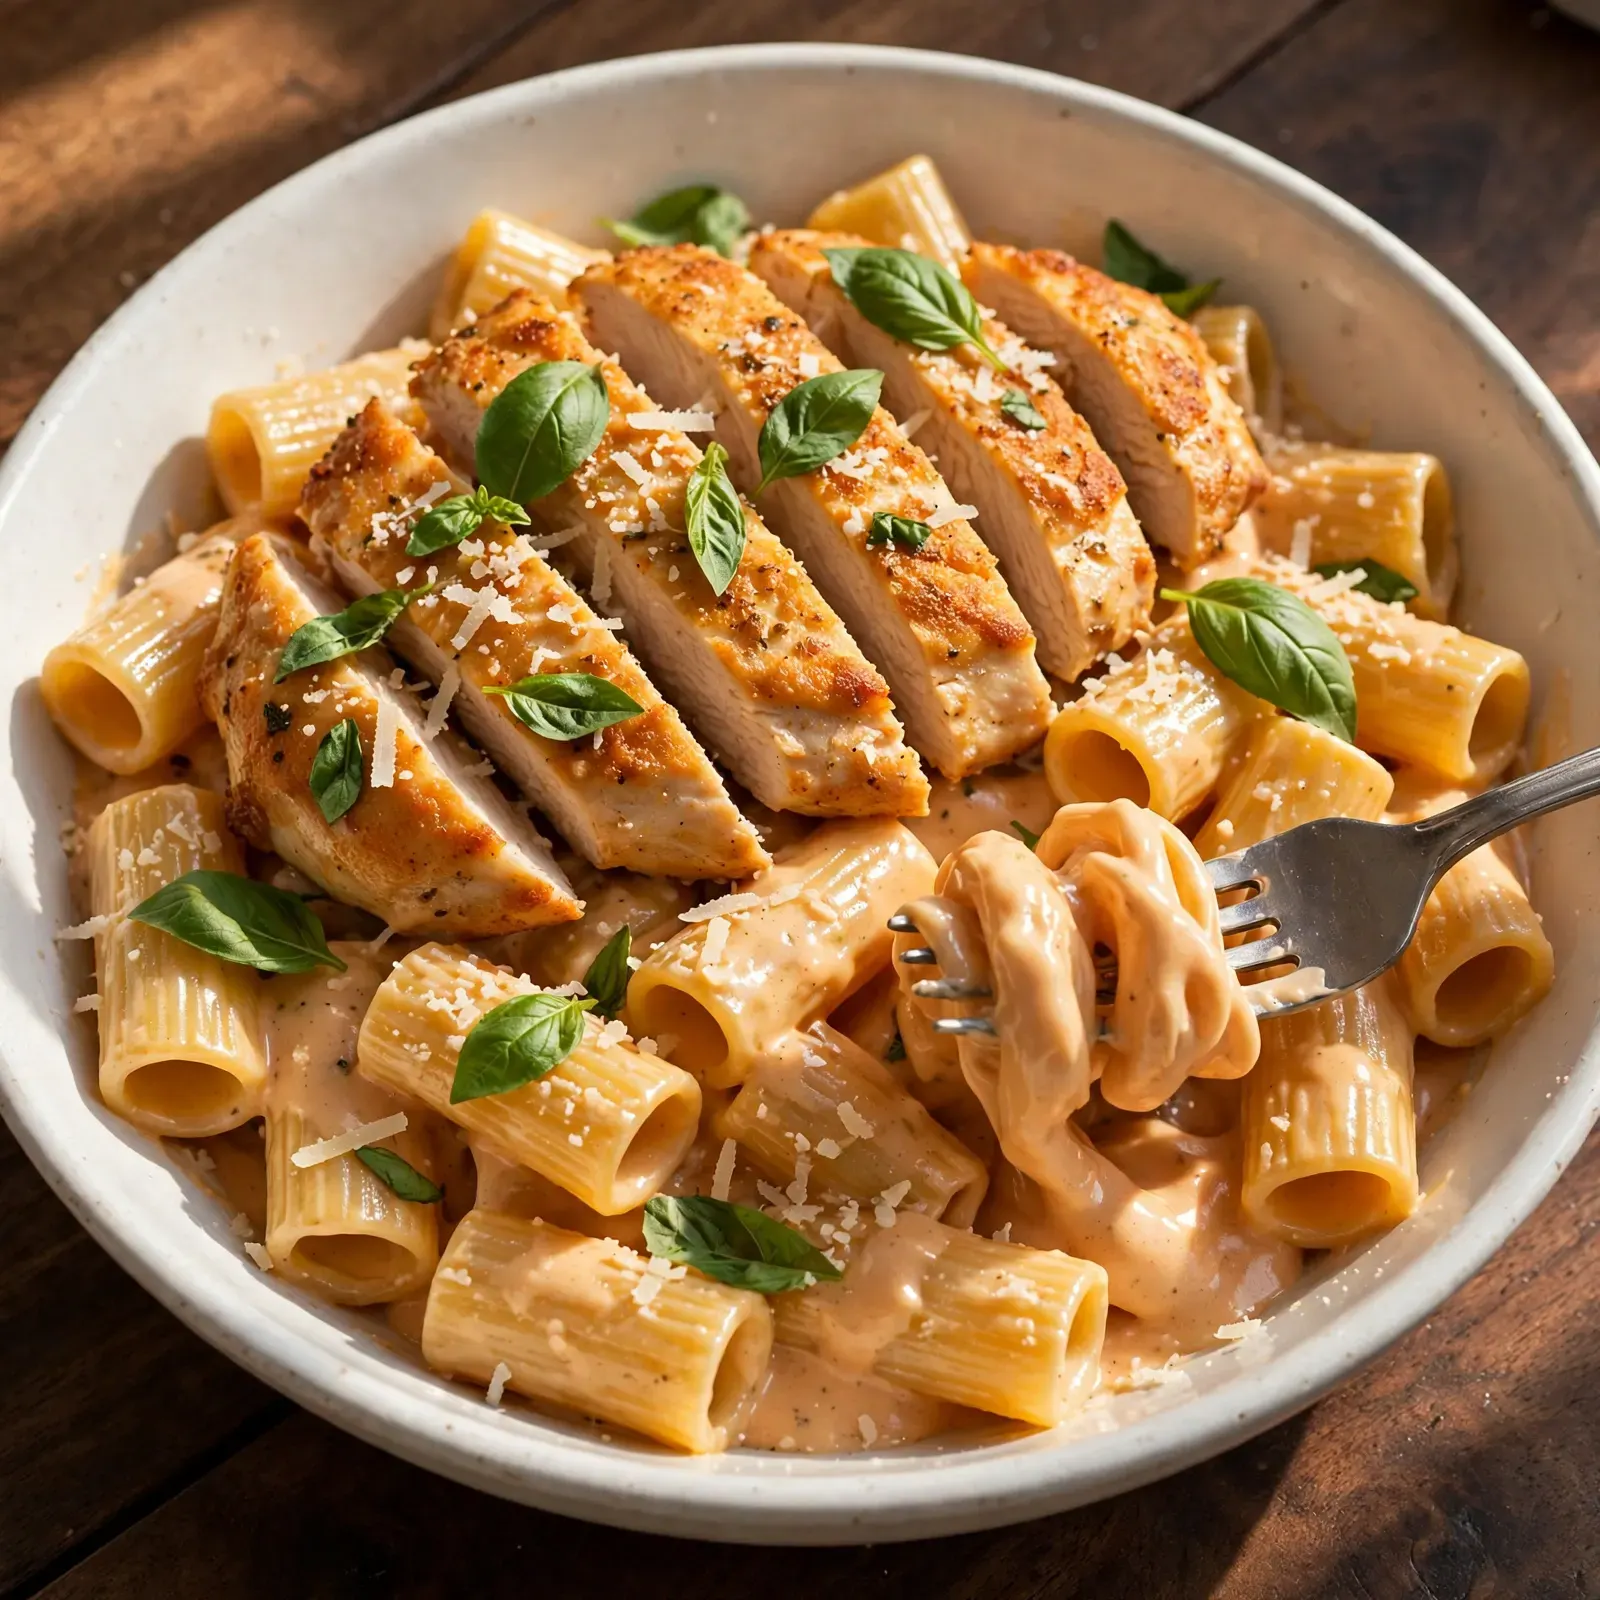
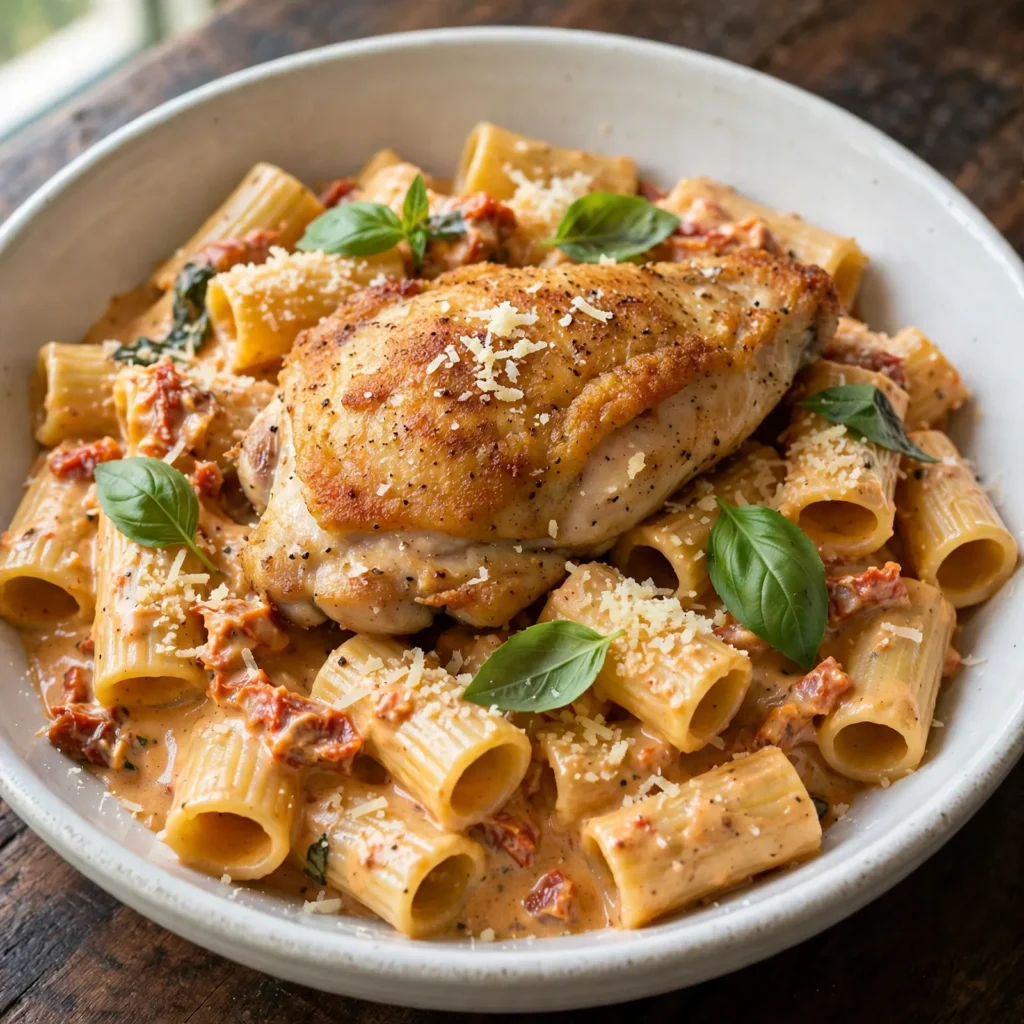
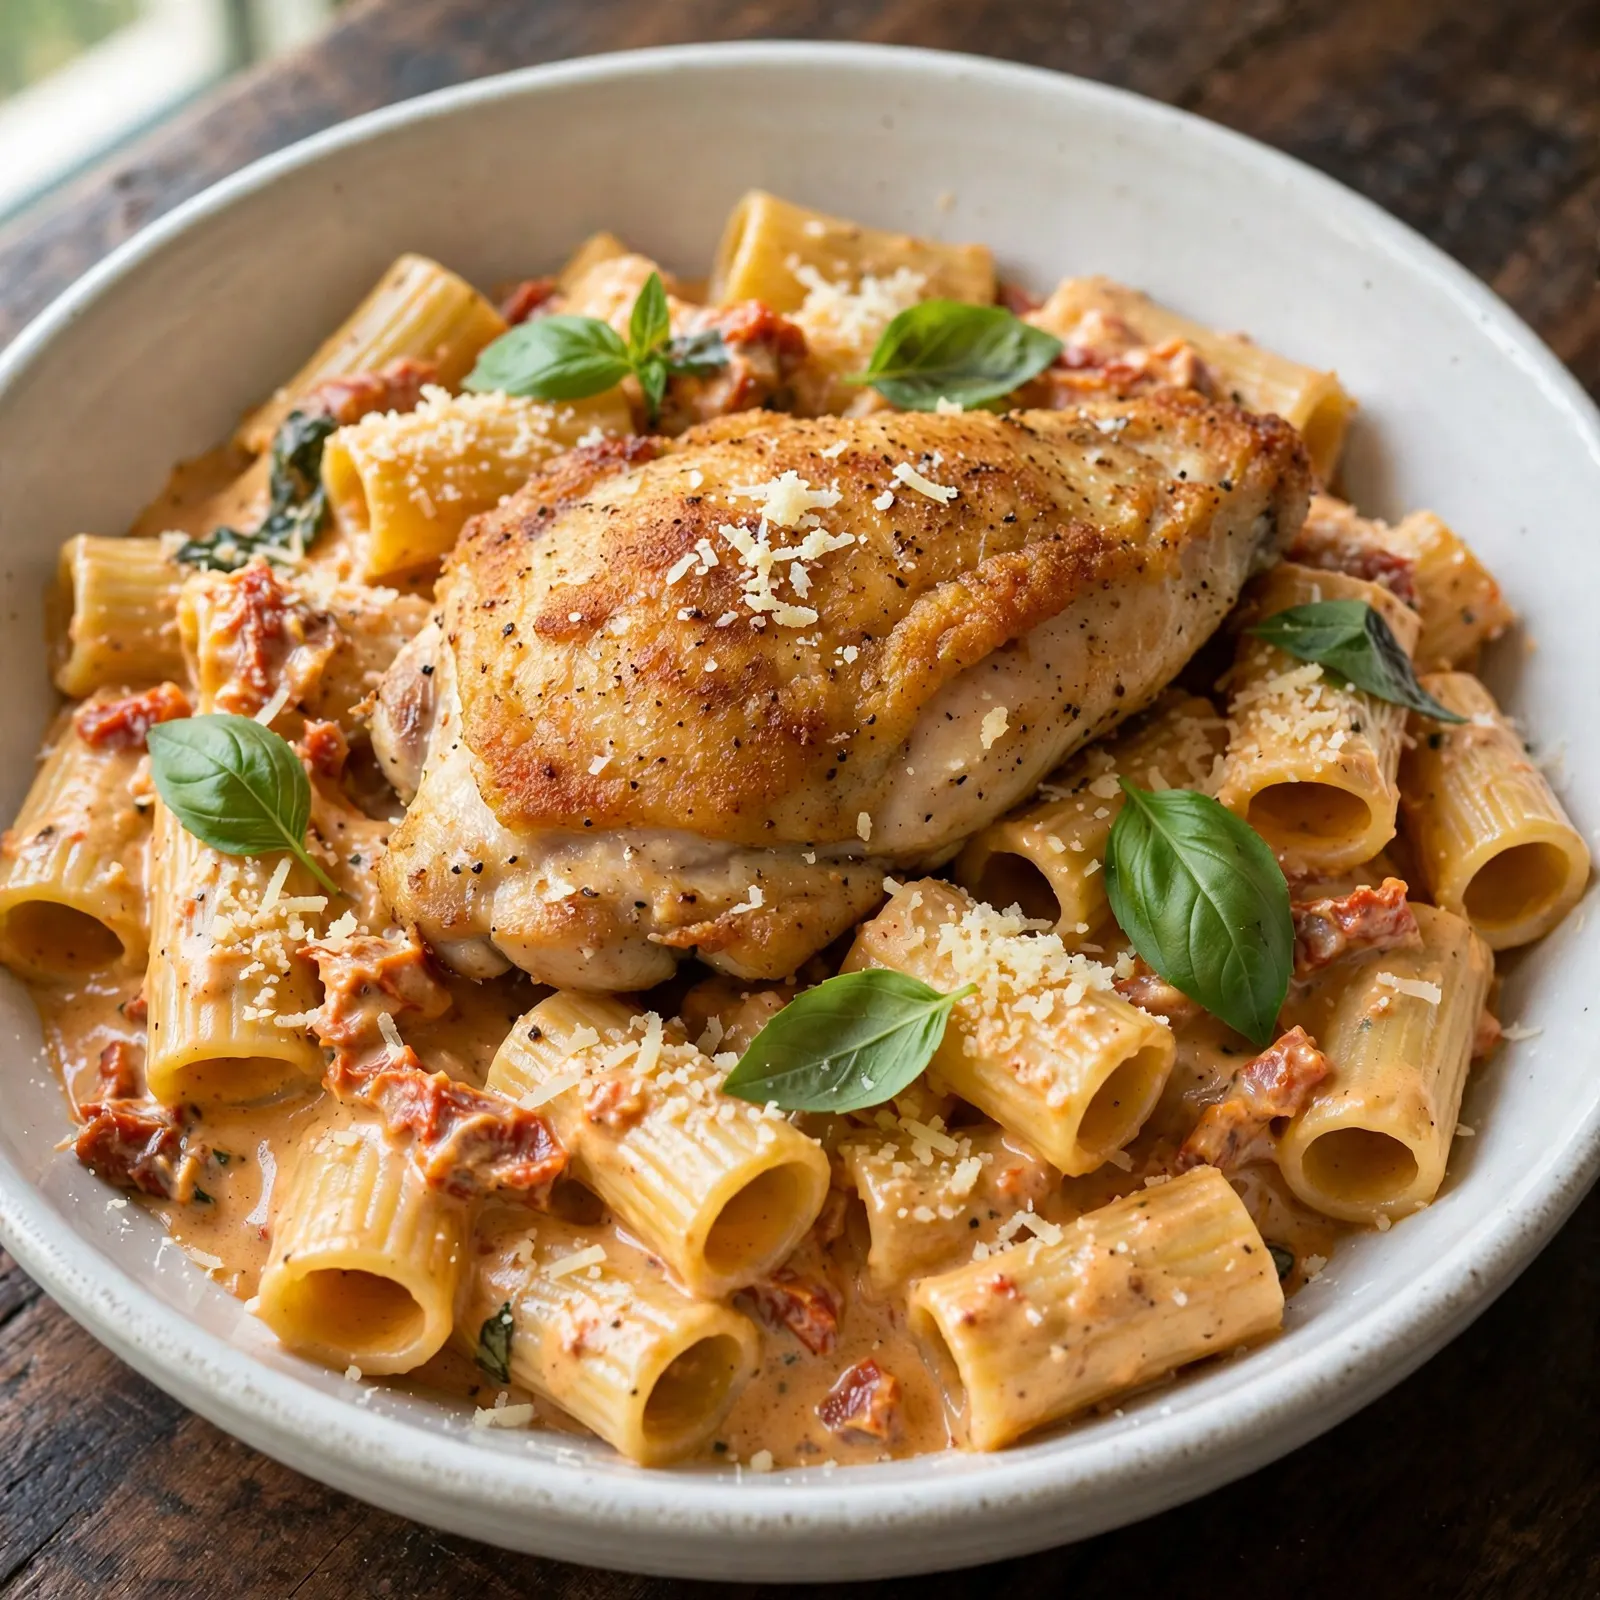
This marry me chicken pasta recipe uses bone-in or boneless chicken thighs seared until golden in a skillet, removed while a creamy sun-dried tomato sauce builds in the same pan, then returned to finish cooking in the sauce before being served over pasta. The whole recipe comes together in about 40 minutes, serves 4 generously, and works equally well for a weeknight dinner and a genuinely impressive meal for guests. The sauce is the reason people remember it.
Why You’ll Love This Marry Me Chicken Pasta
- One-pan sauce that tastes restaurant-built. Every bit of flavor from searing the chicken stays in the pan and gets lifted into the cream sauce; the fond from the sear is what gives the sauce its savory depth that a sauce built in a clean pan simply can’t match.
- Sun-dried tomatoes do something that fresh tomatoes can’t. Their concentrated, slightly tangy, intensely savory flavor distributes through the cream in a way that produces a sauce with depth and complexity rather than a simple cream-and-tomato combination.
- Ready in 40 minutes. Searing the chicken takes 8 minutes, the sauce comes together in about 10, and the pasta cooks while both happen; the timing lines up cleanly without rushing anything.
- The sauce clings to every pasta shape. The cream and parmesan emulsify into a coating sauce that doesn’t pool at the bottom of the bowl; each forkful carries a full ratio of pasta, sauce, and chicken in every bite.
- Genuinely impressive for guests. The plated dish looks considerably more elaborate than the work it required, which makes it the ideal dinner party main course for a cook who wants to be present at the table rather than stuck in the kitchen.
Ingredients You’ll Need
Recipe Timing
| Detail | Info |
|---|---|
| Servings | 4 |
| Difficulty | Easy |
| Course | Main Course |
| Cuisine | Italian-American |
| Prep Time | 10 minutes |
| Cook Time | 30 minutes |
| Rest Time | 0 minutes |
| Total Time | 40 minutes |
For the chicken, boneless skinless thighs produce the most flavorful and forgiving result. Thighs have enough fat to withstand the high-heat sear without drying out and produce more rendered flavor into the pan than chicken breasts do, which contributes directly to the sauce’s depth. Chicken breasts work but require closer attention to internal temperature since they dry out quickly past 74°C (165°F). If using bone-in thighs, the sear time increases to 6 to 7 minutes per side and the chicken should finish in the sauce for a full 15 minutes to cook through to the bone.
For the sun-dried tomatoes, oil-packed varieties in a jar are strongly preferred over dry-packed. The oil in the jar is infused with tomato flavor and herbs; using 1 to 2 tablespoons of that oil in place of part of the olive oil at the searing step adds an additional layer of flavor to the fond before the sauce even begins. Dry-packed sun-dried tomatoes can substitute; rehydrate them in hot water for 10 minutes and drain before using, then compensate with an extra tablespoon of olive oil in the sauce.
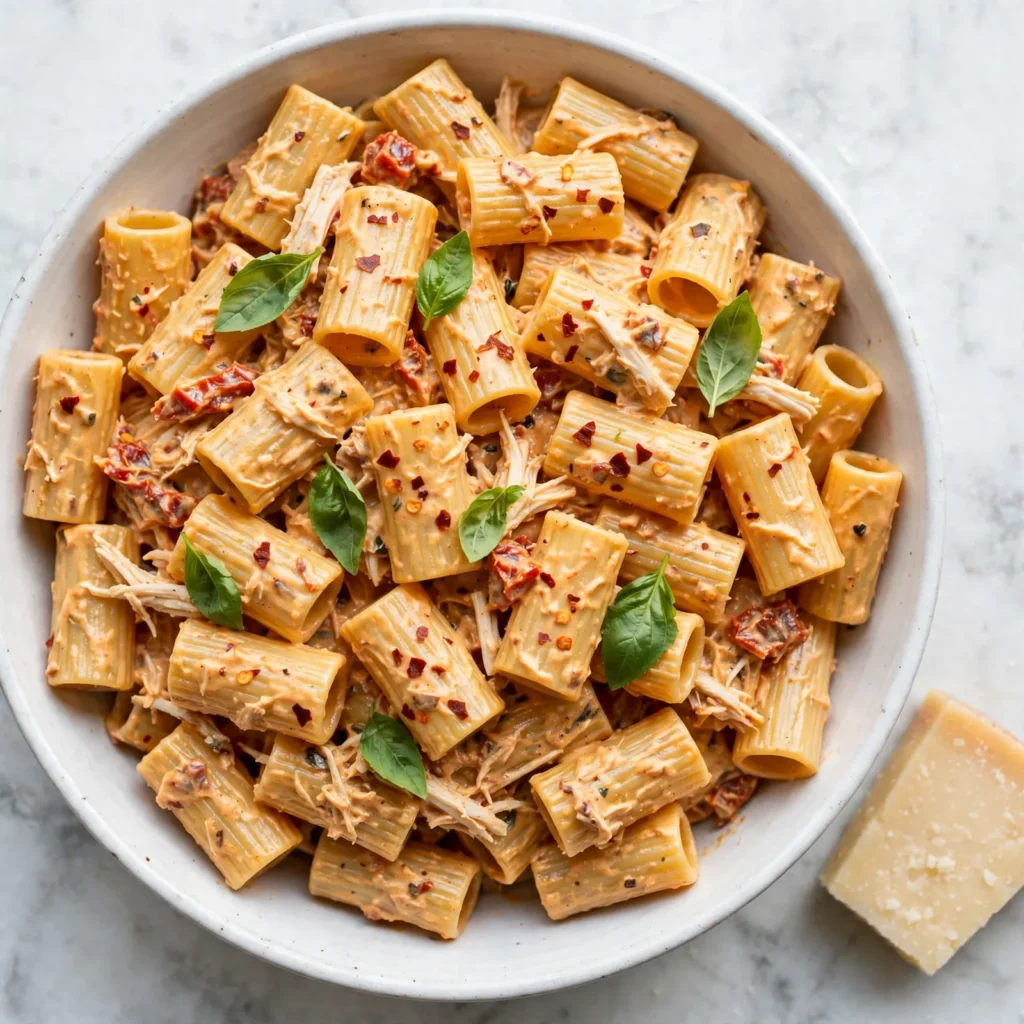
For the pasta, a short tube shape like rigatoni, penne, or ziti captures the sauce inside each piece as well as outside, producing a more satisfying bite than strand pasta. Linguine or pappardelle also work well if that’s a preference; the sauce clings to any shape. Cook pasta in generously salted water (1 tablespoon of fine salt per 4 litres) and reserve at least 1 cup of pasta water before draining; the starchy water adjusts the sauce consistency without diluting the flavor.
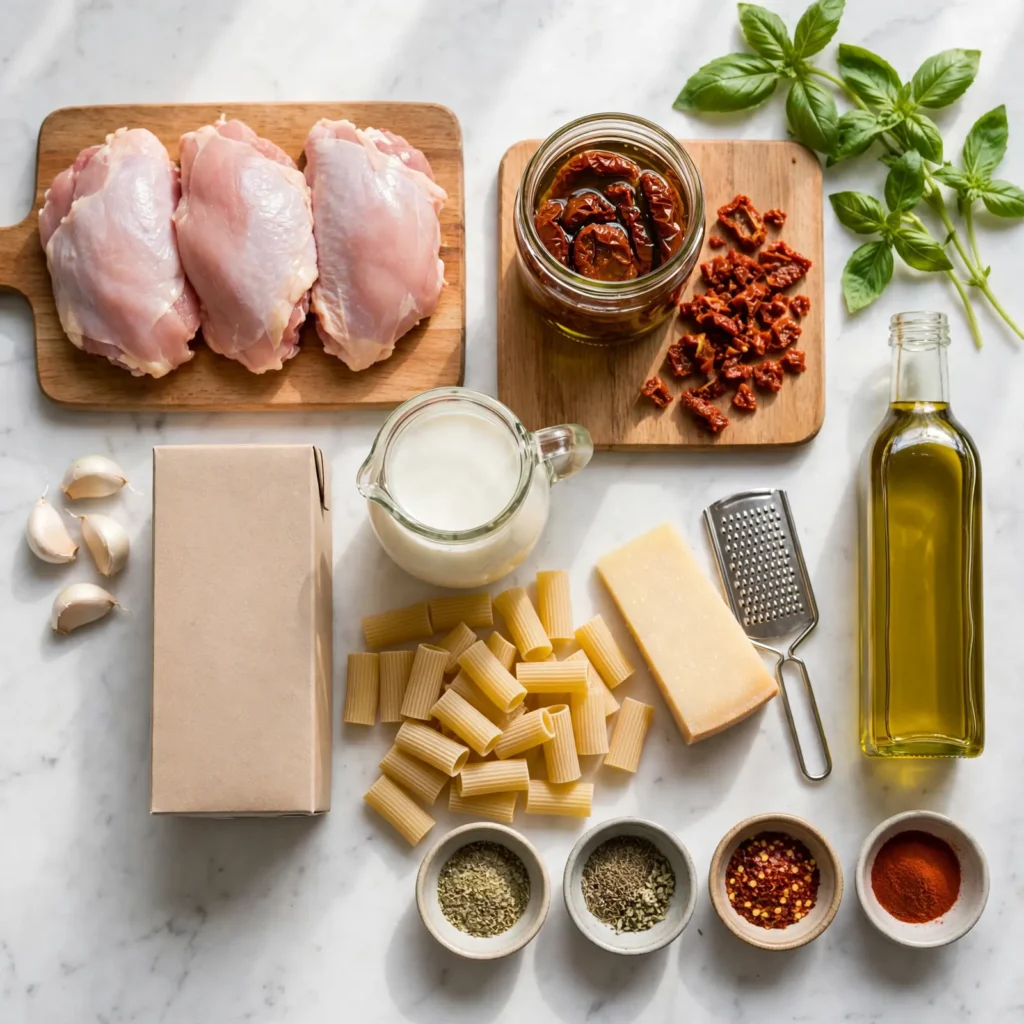
- 600g (about 1.3 lbs) boneless skinless chicken thighs — the primary protein; food safety note: chicken must reach an internal temperature of 74°C (165°F) at the thickest point before consuming
- 1 teaspoon fine salt — for seasoning the chicken before searing
- 1/2 teaspoon freshly ground black pepper
- 1/2 teaspoon garlic powder — for seasoning the chicken surface before searing; adds depth to the crust
- 1/2 teaspoon smoked paprika — adds color and a subtle smokiness to the seared surface
- 2 tablespoons olive oil — for searing; use a neutral, high-smoke-point oil or supplement with the sun-dried tomato oil
- 4 garlic cloves, finely minced — the aromatic foundation of the sauce; added after the chicken is removed so it doesn’t burn
- 1/2 cup (80g) sun-dried tomatoes, oil-packed, roughly chopped — the flavor centerpiece of the sauce; their concentrated, tangy depth is what defines the dish
- 1 teaspoon dried oregano — adds a herbal anchor to the sauce
- 1/2 teaspoon dried thyme — pairs naturally with the cream and garlic
- 1/4 teaspoon red chili flakes — adds very mild heat that cuts through the richness; adjust freely
- 1 teaspoon tomato paste — a small amount caramelized in the pan adds concentrated tomato depth
- 240ml (1 cup) low-sodium chicken broth — adds savory liquid depth and the volume the sauce needs to reduce from; produces a richer base than plain water
- 240ml (1 cup) heavy cream — the primary body of the sauce; produces the characteristic rich, pale orange color when combined with the sun-dried tomatoes
- 60g (about 3/4 cup) freshly grated Parmesan cheese — stirred in at the end; the aged, salty, umami-rich Parmesan emulsifies into the sauce and gives it a glossy, coating consistency; always freshly grated from a block
- 400g (14 oz) rigatoni, penne, or pasta of choice — cooked to al dente in heavily salted water
- Fresh basil leaves — torn and scattered at serving; adds color and brightness
- Extra Parmesan — for the table
Allergen and Dietary Disclosure
This marry me chicken pasta contains dairy (heavy cream and Parmesan cheese) and gluten (pasta). It is naturally egg-free and nut-free as written.
For gluten-free: use certified gluten-free pasta at the same quantity. The sauce is naturally gluten-free; verify the chicken broth label if strict gluten-free certification is needed, as some brands include additives from wheat sources.
For dairy-free: replace the heavy cream with full-fat coconut cream at the same quantity. The coconut cream produces a slightly sweeter, more tropical-adjacent sauce that pairs well with the sun-dried tomatoes and garlic. Replace the Parmesan with 2 tablespoons of nutritional yeast for a savory umami finish; the sauce won’t emulsify quite as glossily but still tastes rich and full-flavored.
For lower fat: replace the heavy cream with an equal quantity of full-fat coconut milk (not cream) or evaporated whole milk. Both produce a lighter sauce; reduce the heat during the simmering stage and stir frequently to prevent separation.
This recipe has not been tested in a certified allergen-free kitchen and cannot be guaranteed safe for any specific allergy.
Equipment Needed
- Large stainless steel or cast iron skillet, 12-inch — for searing the chicken and building the sauce in the same pan. Stainless steel generates the best fond (the browned layer on the pan base) from searing the chicken, which dissolves into the sauce when the broth is added and provides the sauce’s savory backbone. Non-stick pans prevent the fond from forming; the sauce will still taste good but lacks that particular depth.
- Large pasta pot, 6 quart minimum — for cooking the pasta in enough water to stay at a rolling boil. A small pot produces pasta that cooks unevenly and sticks together; the pasta needs room to move freely.
- Instant-read thermometer — for confirming the chicken has reached 74°C (165°F) internal temperature. Chicken thighs can look fully cooked on the outside while remaining slightly underdone at the thickest part, particularly if they vary in thickness.
- Ladle or measuring cup — for reserving pasta cooking water before draining. Having 1 cup of hot, starchy pasta water beside the stove before draining is a practical step; it’s easy to forget until after the pasta has already gone down the drain.
Step-by-Step Directions
Step 1: Season and Sear the Chicken
Pat the chicken thighs completely dry with paper towels; surface moisture on the chicken produces steam in the pan rather than a sear, resulting in pale, soft exterior rather than the golden-brown crust that contributes flavor to both the chicken and the sauce. Combine the salt, black pepper, garlic powder, and smoked paprika in a small bowl and season both sides of each thigh evenly.
Heat the olive oil (or a mixture of olive oil and sun-dried tomato oil) in the large skillet over medium-high heat until the oil shimmers actively across the surface. Add the chicken thighs smooth side down without overcrowding. Sear undisturbed for 4 to 5 minutes until the underside has turned a deep golden-brown and releases cleanly from the pan surface. Flip and sear the second side for 3 to 4 minutes. Transfer to a plate; the chicken doesn’t need to be fully cooked through at this point; it finishes in the sauce.
Food safety note: Chicken must reach an internal temperature of 74°C (165°F) at the thickest point. Use a thermometer to verify doneness when the chicken returns to the sauce.

Chef’s Note: Leaving the chicken undisturbed for the full 4 to 5 minutes on the first side is the most important searing rule. Moving or pressing the chicken before the crust has formed pulls the developing caramelization off the pan surface rather than building it on the chicken, and also leaves the best part of the fond behind rather than allowing it to form under the chicken where it becomes the most concentrated flavor in the sauce.
Step 2: Start the Pasta Water
Immediately after removing the chicken, fill the large pasta pot with water, add 1 tablespoon of fine salt, and bring to a boil over high heat. Starting the pasta water at this point means it reaches a full boil around the same time the sauce is ready, allowing the pasta to be added and timed to finish alongside the chicken.
Step 3: Build the Sauce Aromatics
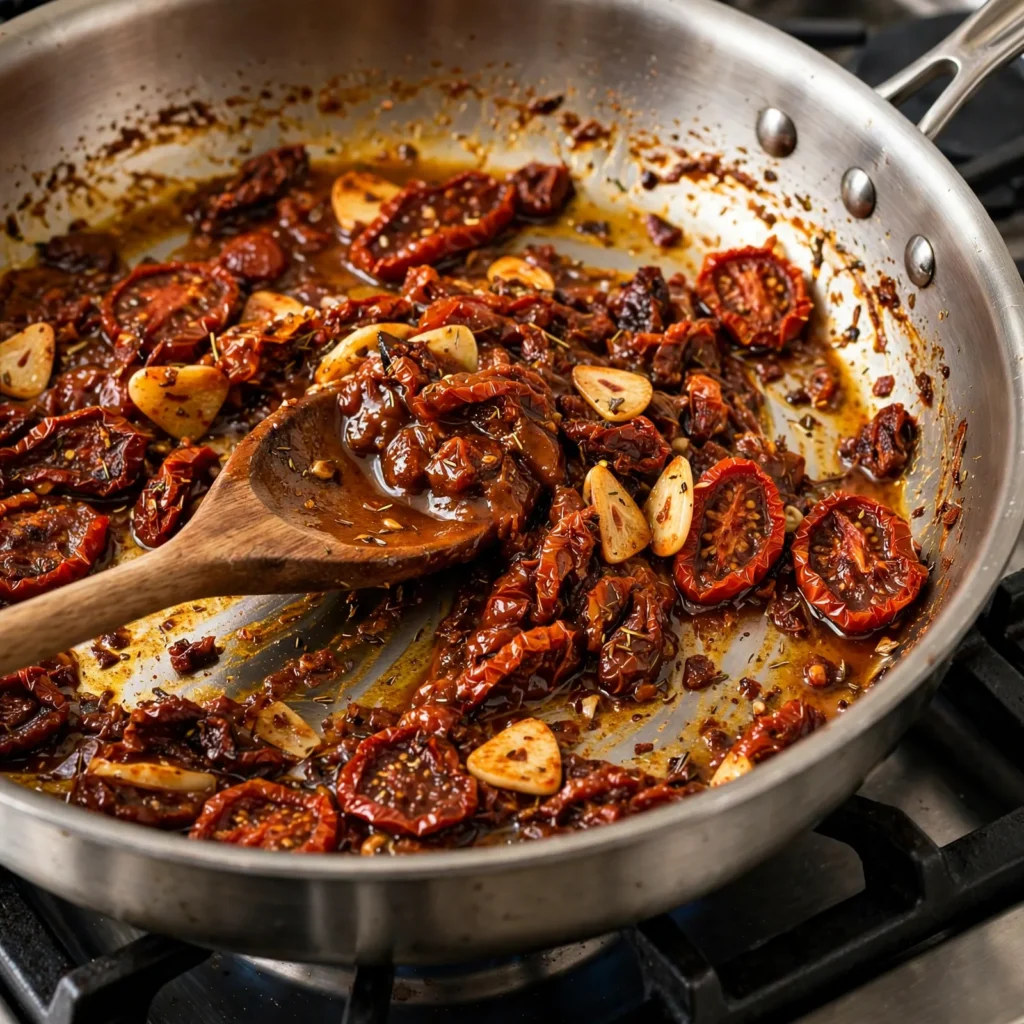
Reduce the heat in the skillet to medium. The pan should still have the rendered chicken fat and the dark fond from searing. Add the minced garlic to the pan and stir it through the fat continuously for 60 seconds until the raw sharp smell softens and the garlic turns faintly golden at the edges. Add the tomato paste to the center of the pan and let it sit undisturbed for 30 to 45 seconds until it darkens slightly, then stir it through the garlic.
Add the chopped sun-dried tomatoes, dried oregano, dried thyme, and red chili flakes. Stir everything together and cook for 60 seconds until the tomatoes are warmed through and the dried herbs have bloomed slightly in the fat.
Chef’s Note: Adding the tomato paste directly to the bare pan rather than immediately stirring it into the surrounding mixture allows it to caramelize slightly against the hot surface. This single extra step takes less than a minute and converts the raw concentrated tomato flavor of the paste into something sweeter and more complex, which integrates seamlessly into the cream sauce rather than sitting as a separate sharp tomato note.
Step 4: Add Liquid and Simmer
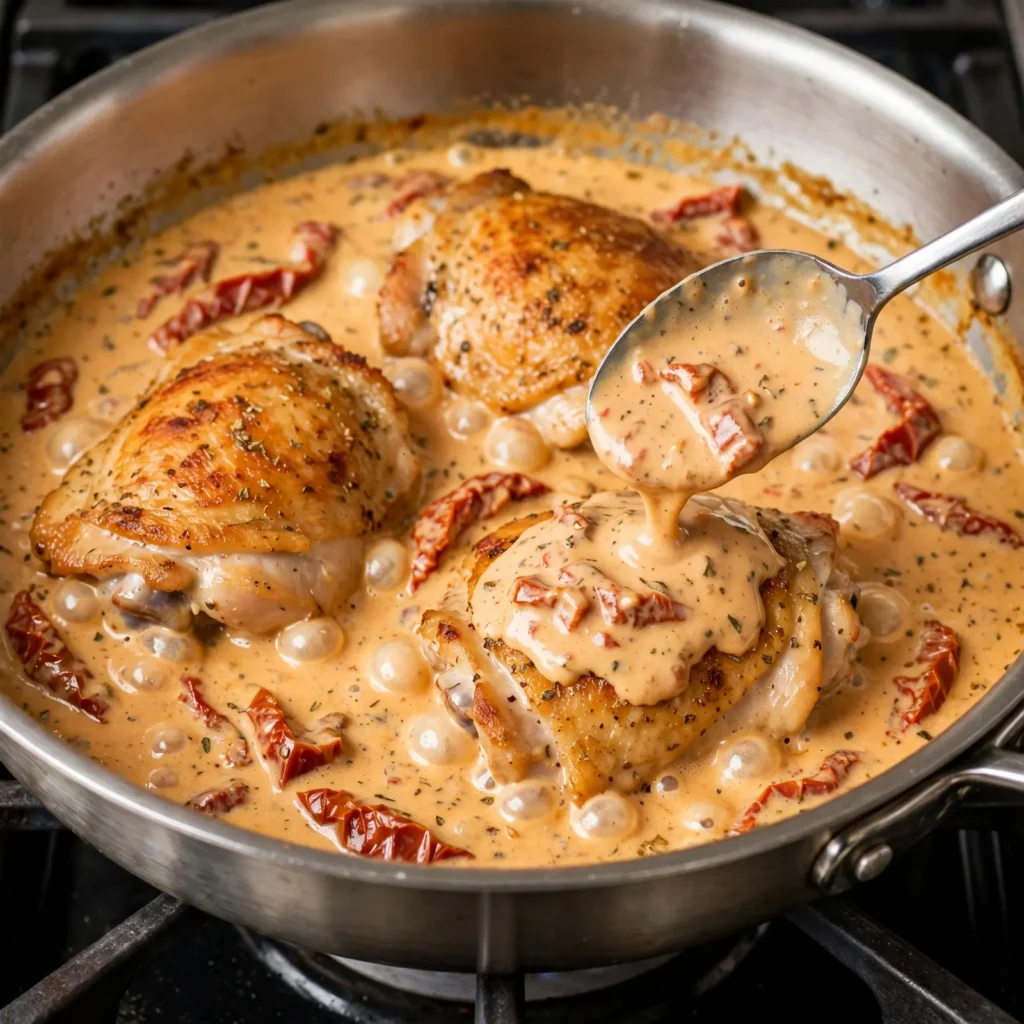
Pour the chicken broth into the pan in a steady stream while stirring; the broth will immediately begin lifting the fond from the pan base. Stir continuously for 30 seconds to fully deglaze, ensuring all the dark, flavorful bits are dissolved into the liquid. Add the heavy cream and stir to combine. Bring the mixture to a gentle simmer over medium heat, stirring occasionally.
Cook uncovered for 4 to 5 minutes until the sauce has reduced slightly and thickened enough to coat the back of a spoon; a line drawn through the sauce on the spoon should hold for 2 to 3 seconds before flowing back in. The sauce will be a pale, warm orange color from the cream and sun-dried tomatoes.
Step 5: Return the Chicken and Cook Through
Nestle the seared chicken thighs back into the sauce, pushing them down so they are partially submerged. Reduce the heat to medium-low and cook, uncovered, for 8 to 10 minutes until the chicken reaches 74°C (165°F) at the thickest point. Spoon sauce over the chicken twice during this time to baste the top surfaces. By the time the chicken is cooked through, the sauce will have reduced further and thickened to a richer, more deeply flavored consistency from the chicken’s released juices.
Chef’s Note: Returning the chicken to finish in the sauce rather than finishing it separately in the oven produces a specifically better result for the sauce as well as for the chicken. As the chicken finishes cooking, its juices release directly into the cream, adding a savory, chicken-forward richness to the sauce that boosts its depth considerably compared to a separately cooked chicken placed on top of independently made sauce.
Step 6: Add Parmesan and Finish the Sauce
Remove the pan from the heat. Remove the cooked chicken to a cutting board and rest for 3 minutes while you finish the sauce. Stir the freshly grated Parmesan into the hot sauce in two additions, stirring after each addition until fully melted and incorporated. The sauce will thicken noticeably and turn from a pale cream to a more opaque, slightly glossier consistency as the Parmesan emulsifies. Taste and adjust salt, pepper, and chili flakes.
Step 7: Cook Pasta, Combine, and Serve
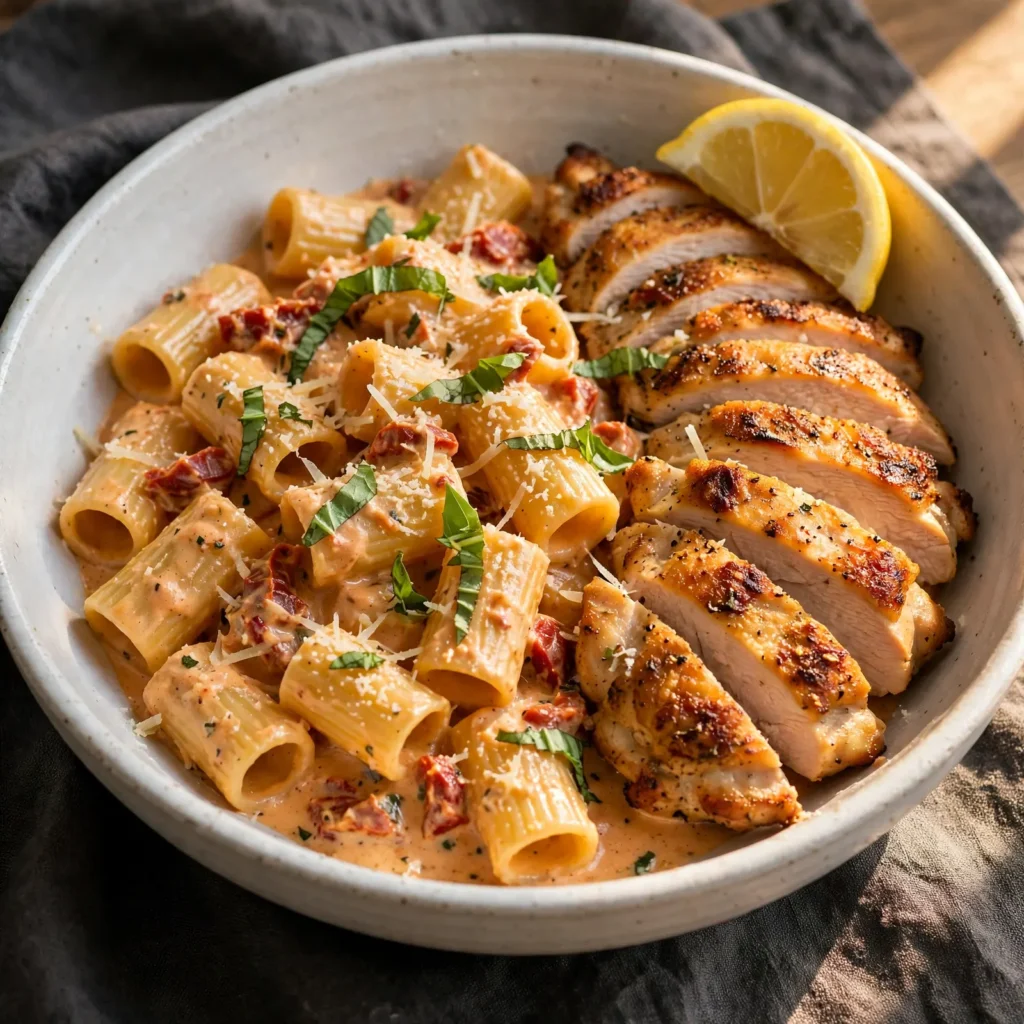
While the chicken rested and the sauce finished, the pasta should be nearing al dente. Reserve 1 cup of pasta cooking water before draining. Drain the pasta and add it directly to the skillet with the sauce. Toss everything together over low heat for 60 to 90 seconds, adding pasta water 2 to 3 tablespoons at a time if the sauce is too thick to coat the pasta fluidly. Slice or shred the rested chicken and lay it over the pasta in the pan. Scatter fresh torn basil leaves across the surface and finish with extra grated Parmesan. Serve immediately directly from the skillet or ladle into individual bowls.
Common Mistakes and Troubleshooting
| Problem | Cause | Solution |
|---|---|---|
| Sauce too thin and doesn’t coat pasta | Cream not reduced long enough before adding chicken, or too much pasta water added | Simmer the cream and broth for the full 4 to 5 minutes before returning chicken; add pasta water only 1 tablespoon at a time |
| Chicken pale and soft rather than golden-seared | Pan not hot enough before chicken was added, or chicken was wet | Heat oil until shimmering; always pat chicken completely dry; don’t move chicken for the full 4 to 5 minutes |
| Parmesan clumps rather than melting smoothly | Parmesan was added when sauce was too hot, or pre-shredded Parmesan was used | Remove the pan from heat before adding Parmesan; always grate from a block rather than using pre-shredded |
| Sauce separated or looks greasy | Heat too high when cream was simmering, or cream added to a very hot pan | Keep the sauce at a gentle simmer, never a hard boil; let the pan cool for 30 seconds before adding cream if necessary |
| Chicken dry and stringy | Overcooked past 74°C, or breasts used without adjusting cook time | Use boneless thighs for the most forgiving result; pull the chicken the moment it reaches 74°C |
| Sauce tastes flat | Fond not properly formed (non-stick pan), or garlic added too early | Use a stainless steel or cast iron pan; add garlic only after the chicken is removed; deglaze thoroughly with broth |
Variations and Substitutions
- Spinach and sun-dried tomato version: Add 2 large handfuls of fresh baby spinach to the sauce immediately after the Parmesan has melted and before the pasta goes in. Stir the spinach through the hot sauce for 60 seconds until wilted. The spinach adds color, nutrition, and a slight bitterness that cuts through the richness of the cream.
- Extra spicy version: Double the red chili flakes to 1/2 teaspoon and add 1 finely diced fresh red chili alongside the garlic in step 3. The fresh chili adds a building heat with a brightness that dried flakes alone don’t produce; the combination of both produces a layered warmth that suits the richness of the cream sauce.
- Lighter cream substitute: Replace the heavy cream with half heavy cream and half full-fat Greek yogurt stirred together before adding to the pan. The yogurt adds a subtle tang that balances the richness and slightly reduces the total fat without the sauce losing its body. Stir the yogurt mixture into the sauce off a hard boil to prevent separation.
- Mushroom marry me pasta (vegetarian): Replace the chicken with 400g of cremini or portobello mushrooms, sliced 5mm thick. Sear the mushrooms in two batches over high heat until deeply golden on both sides; they release significant moisture before browning so patience is needed. Use vegetable broth in place of chicken broth. The sauce has the same depth and structure; the mushroom version is genuinely satisfying as a meatless main.
- Penne alla vodka style: Replace the chicken broth with an equal quantity of passata (smooth tomato purée) and increase the sun-dried tomatoes to 100g. Omit the oregano and thyme; add 1/2 teaspoon of dried basil instead. The result is a denser, more tomato-forward sauce that skips the chicken flavor profile in favor of a rich, Italian-American tomato cream.
- Lemon and caper addition: Add 1 tablespoon of drained capers and the finely grated zest of 1 lemon to the sauce alongside the sun-dried tomatoes. The capers add a salty, briny pop that cuts through the cream, and the lemon zest brightens the entire flavor profile. Squeeze a small amount of fresh lemon juice over the finished dish at the table.
Serving Suggestions
- Serve directly from the skillet at the center of the table with a large serving spoon; the visual of the cream-sauced pasta with the chicken pieces and fresh basil in the pan is part of the appeal. A wide, heavy-bottomed skillet placed on a trivet in the middle of the table is an effortless and impressive presentation.
- A crisp green salad dressed with a simple lemon vinaigrette alongside cuts through the richness of the cream sauce and balances the meal without requiring any additional cooking or effort.
- Warm garlic bread or a sliced sourdough baguette alongside provides something to soak up the sauce remaining in the bowl; the sun-dried tomato cream at the bottom of the bowl is arguably the best part, and a piece of bread captures it properly.
- For a dinner party, serve the pasta as a main course after a light starter of bruschetta or a small soup. The marry me chicken pasta is rich enough that it needs only a simple beginning and a light dessert to feel like a complete, impressive meal.
- A cold sparkling water with lemon or a chilled sparkling grape juice provides a refreshing contrast to the richness of the cream and parmesan sauce and makes the red chili warmth more vivid between bites.
- For an elevated plating, use a pasta fork to twirl a portion into a mound in a wide pasta bowl, slice the chicken thigh and fan the pieces alongside, and finish with a single large fresh basil leaf, a crack of black pepper, and a light dusting of Parmesan.
Tips for the Best Results
- Always use a stainless steel or cast iron pan, never non-stick. The fond that builds during the chicken sear is the single most important flavor contribution to the sauce; it’s the layer of caramelized chicken proteins and fat that sticks to the pan and lifts into the sauce when the broth is added. Non-stick pans are engineered to prevent this layer from forming, which means the sauce built in one lacks the savory, developed backbone that makes this dish memorable.
- Grate the Parmesan fresh from a block immediately before adding it. Pre-shredded Parmesan is coated in cellulose or potato starch to prevent clumping in the bag; those coatings melt at different temperatures than the cheese and produce a sauce that’s slightly gritty or grainy rather than silky. Freshly grated Parmesan dissolves instantly into the hot sauce and creates the glossy, coating emulsification that makes the sauce cling.
- Reserve pasta water before draining without fail. The starchy, salty pasta water is the sauce adjustment tool; it loosens a too-thick sauce while contributing body rather than diluting the flavor the way plain water would. Having it beside the stove means you can adjust the sauce consistency in seconds after the pasta is added.
- Pat the chicken dry immediately before seasoning. Not 10 minutes before, not 5 minutes before; the surface moisture that builds back on refrigerated chicken reappears within a minute or two after initial drying. Pat dry, season, and go directly to the hot pan.
- Taste the sauce three times before serving. Once before the Parmesan goes in, once after the Parmesan has melted, and once after the pasta is tossed in. The pasta absorbs salt from the sauce as it’s tossed, which drops the perceived saltiness; a final adjustment after the pasta is combined produces the right seasoning in the finished bowl rather than in the sauce before the pasta dilutes it.
Storage Tips
Refrigerator
Marry me chicken pasta keeps in a sealed container in the refrigerator for up to 4 days. The pasta absorbs some of the sauce during storage and the dish will be noticeably thicker on day 2 than it was fresh; add a splash of chicken broth or water and stir when reheating to restore the original flowing consistency. Store the chicken and pasta together with all the sauce; the sauce continues to flavor the chicken and pasta during storage and the refrigerated version reheats into something nearly as satisfying as the fresh batch.
Freezer
The cream sauce freezes adequately but with some texture change; cream-based sauces can separate slightly during the freeze-thaw cycle, producing a slightly grainier texture after reheating. For the best frozen result, freeze only the chicken and sauce without the pasta and make fresh pasta when reheating. Freeze in a sealed container for up to 2 months. Thaw overnight in the refrigerator and reheat gently on the stovetop.
Reheating
The stovetop produces the best reheating result. Transfer the pasta and sauce to a wide skillet or saucepan over medium-low heat with 3 to 4 tablespoons of chicken broth or water added. Cover with a lid and heat for 4 to 5 minutes, stirring every 90 seconds, until the sauce is hot and flowing again and the pasta has absorbed any additional liquid. Microwave reheating at 60% power in 90-second intervals with stirring between works for a single portion; the pasta may be slightly softer than fresh but the sauce reheats cleanly without separation at lower power.
Make-ahead note: The sauce can be made up to 2 days ahead without the pasta or Parmesan: cook through the cream and broth reduction step, cool completely, and refrigerate. When ready to serve, reheat the sauce, finish with Parmesan, cook fresh pasta, and add the chicken to finish cooking in the reheated sauce. This splits a 40-minute recipe into two easy stages.
Nutrition Information
Per serving, approximately one bowl (1/4 of the recipe) with pasta:
| Nutrient | Amount |
|---|---|
| Calories | 720 kcal |
| Protein | 42g |
| Total Carbohydrates | 68g |
| Dietary Fiber | 4g |
| Total Sugar | 6g |
| Total Fat | 28g |
| Saturated Fat | 14g |
| Cholesterol | 195mg |
| Sodium | 720mg |
| Vitamin C | 8mg |
| Calcium | 220mg |
| Iron | 3.8mg |
| Potassium | 620mg |
Nutrition values are approximate and may vary based on pasta brand, cream fat content, and portion sizes.
Why This Recipe Works
The marry me chicken pasta sauce works because it builds flavor through three sequential stages that each contribute something the next stage cannot retroactively add. The first stage is the fond formed during the chicken sear. When the seasoned chicken surface contacts the hot stainless steel pan, the proteins and trace sugars in the chicken undergo Maillard reactions above approximately 150°C, producing hundreds of aromatic compounds that adhere to the pan surface as a dark, concentrated layer. When broth is added in step 4 and the pan is deglazed, those compounds dissolve into the liquid and disperse through the entire sauce, giving it the savory, complex backbone that distinguishes a pan sauce from one built in a separate, clean pan.
The second stage is the sun-dried tomato’s flavor contribution relative to fresh tomatoes. Sun-dried tomatoes have had approximately 90% of their water removed during drying, which concentrates their glutamate content, their natural acidity, and their carotenoid pigments into a fraction of the original volume. Glutamates are the primary driver of umami; a tablespoon of chopped sun-dried tomato contributes significantly more savory depth per gram than the equivalent amount of fresh tomato. When the chopped sun-dried tomatoes are added to the pan and cooked briefly in the garlic-infused fat, their fat-soluble carotenoid pigments dissolve into the oil and then distribute evenly through the cream when it’s added, producing the characteristic warm orange color of the sauce.
The Parmesan emulsification in the final step is responsible for the sauce’s glossy, coating texture. Parmesan at 18 months of aging contains approximately 28 to 32% fat by weight, along with significant protein and moisture. When freshly grated Parmesan is added to a hot liquid sauce and stirred vigorously, the fat and protein in the cheese distribute into the surrounding liquid and form an emulsion: fat droplets suspended in the water-based sauce, held apart by the protein from the cheese. This emulsion produces a sauce that appears uniformly glossy and thick rather than separating into an oily pool and a watery layer. Pre-shredded Parmesan, coated in anti-caking starch, cannot form this emulsion cleanly because the starch coating interferes with the fat dispersal process.
Finishing the chicken in the sauce rather than cooking it completely separately before adding it to the sauce is a deliberate technique decision. When the partially cooked chicken is nested into the cream and broth sauce and finishes cooking there over medium-low heat, its residual juices release directly into the surrounding liquid as the internal temperature climbs from about 60°C to the final 74°C. Those juices, containing dissolved myoglobin, collagen breakdown products, and dissolved flavor compounds from the original seasoning, enrich the sauce with chicken-specific flavor that independently made cream sauce lacks. In testing this recipe with both methods, chicken finished in the sauce produces a noticeably more cohesive result where the sauce and chicken flavors have integrated rather than sitting separately on the plate.
Frequently Asked Questions
Can I make marry me chicken pasta ahead of time?
Yes, with the best approach being to make the sauce and chicken a day ahead without the pasta. Cook through step 6, cool completely, and refrigerate the chicken and sauce together for up to 2 days. When ready to serve, reheat gently in the skillet over medium-low heat with a splash of broth to loosen the sauce, then cook fresh pasta and combine. Same-day pasta that’s been sitting absorbs the sauce and becomes soft; fresh pasta cooked on the day of serving produces the best texture.
Why is my sauce too thin?
Two causes account for most thin sauces. First, the cream and broth weren’t reduced for long enough before the chicken was returned; the simmer in step 4 should continue for the full 4 to 5 minutes until the sauce coats a spoon before the chicken goes back in. Second, too much pasta water was added at once when combining; add it only 1 tablespoon at a time until the sauce flows smoothly but still coats. If the sauce is already thin and the pasta is combined, simmer everything together over medium heat for 2 to 3 minutes and it will reduce to the right consistency.
Can I use chicken breasts instead of thighs?
Yes, but adjust the approach. Boneless skinless chicken breasts sear well but have significantly less fat and dry out quickly if cooked past 74°C (165°F). Pound the breasts to an even 2cm thickness before seasoning for consistent cooking, and pull them from the sauce the moment they hit 74°C. The fond from breast meat is slightly lighter than from thighs, so the sauce will be marginally less rich; add an extra 1 tablespoon of sun-dried tomato oil to compensate.
How do I know when the sauce is the right consistency?
The spoon-coating test is the most reliable indicator. Dip a large spoon into the sauce and hold it up; a well-reduced sauce coats the back of the spoon in a visible, uniform layer that a finger drawn across the spoon back leaves a clean, defined trail that holds its shape for 3 to 4 seconds rather than flowing immediately back in. A sauce that drips off the spoon in a thin, watery stream needs more time. After the Parmesan is added, the sauce will appear thicker; adjust the final consistency with pasta water after combining with the pasta.
Is marry me chicken pasta gluten-free?
The sauce is naturally gluten-free; the only source of gluten is the pasta itself. Substitute certified gluten-free pasta at the same quantity and cook according to that pasta’s package directions. Gluten-free pasta can be stickier than wheat pasta; toss it into the sauce immediately after draining and avoid letting it sit in the colander, where it will stick together. Verify the chicken broth label for any gluten-containing additives if strict celiac compliance is needed.
Can I use half-and-half or milk instead of heavy cream?
Half-and-half works but produces a noticeably thinner, less rich sauce that requires a longer reduction time to achieve the right coating consistency. Standard whole milk is too thin and has a higher protein content that can cause the sauce to curdle if simmered aggressively. If using half-and-half, simmer the sauce for 8 to 10 minutes instead of 4 to 5 before returning the chicken, and keep the heat at a gentle simmer throughout. Heavy cream (at least 35% fat) is the ingredient that produces the characteristic richness and stability of the original sauce.
What pasta shape works best?
Any short tube pasta, specifically rigatoni, penne, or ziti, works best because the hollow interior captures the sauce and the ridged or smooth exterior holds the coating simultaneously. Each bite delivers sauce from both the outside of the pasta and from inside the tube, producing a more satisfying flavor delivery than flat or strand pasta. Linguine and tagliatelle work well if that’s a preference; the sauce clings to long pasta readily. Avoid very small pasta shapes like orzo or ditalini, which produce an uneven ratio of sauce to pasta in each forkful.
Conclusion
Marry me chicken pasta earns its reputation because the technique behind it is actually sound. The sear fond that builds on the chicken produces the sauce’s savory backbone. The sun-dried tomatoes contribute concentrated depth that fresh tomatoes can’t approximate. The Parmesan emulsifies the cream into a coating sauce rather than leaving it thin and pooled at the bottom of the bowl. Each of those decisions has a specific, visible result in the finished dish.
Once you’ve made this a couple of times, the method becomes fast and intuitive. You’ll know by the smell of the garlic in the fond when the aromatics are ready, and by the way the sauce moves on the spoon when it’s reduced enough. That’s the moment the dish stops being a recipe to follow and becomes something you understand.
If you loved this recipe, save it to your easy pasta dinners and Italian recipes Pinterest board so you can find it easily later. For more same recipes follow Thecookingvibes Pinterest account.
Marry Me Chicken Pasta
Ingredients
Equipment
Method
- Pat chicken thighs dry with paper towels. Combine salt, pepper, garlic powder, and smoked paprika; season both sides of each thigh. Heat olive oil in a 12-inch stainless steel skillet over medium-high until shimmering.
- Add chicken smooth-side down. Sear undisturbed 4 to 5 minutes until deeply golden and releasing cleanly. Flip and sear 3 to 4 more minutes. Transfer to a plate; the chicken doesn’t need to be fully cooked yet.
- Start a large pot of generously salted water and bring to a boil for the pasta.
- Reduce skillet heat to medium. Add garlic to the fond in the pan; stir 60 seconds until golden. Add tomato paste to the center; cook undisturbed 30 to 45 seconds until brick-red, then stir through. Add sun-dried tomatoes, oregano, thyme, and chili flakes; cook 60 seconds.
- Pour in chicken broth, scraping all fond from the pan base. Add heavy cream and stir to combine. Bring to a gentle simmer and cook uncovered 4 to 5 minutes until the sauce coats a spoon.
- Nestle chicken back into the sauce. Simmer on medium-low 8 to 10 minutes, basting twice, until chicken reaches 74°C (165°F) at the thickest point.
- Meanwhile, cook pasta to al dente. Reserve 1 cup pasta water before draining.
- Remove pan from heat. Remove chicken; rest 3 minutes. Stir Parmesan into the sauce in two additions until melted and glossy. Taste and season.
- Add drained pasta to the sauce and toss over low heat 60 to 90 seconds, adding pasta water by the tablespoon if needed. Slice or shred chicken and return to the pan. Top with fresh basil and extra Parmesan. Serve immediately.
Notes
- Use a stainless steel or cast iron pan for the best fond; non-stick pans prevent fond formation and produce a flatter sauce.
- Always grate Parmesan freshly from a block; pre-shredded cheese doesn’t emulsify cleanly into the sauce.
- Pat chicken completely dry immediately before seasoning and cooking for the best sear.
- Reserve pasta water before draining; it’s the sauce-adjustment tool and easy to forget.