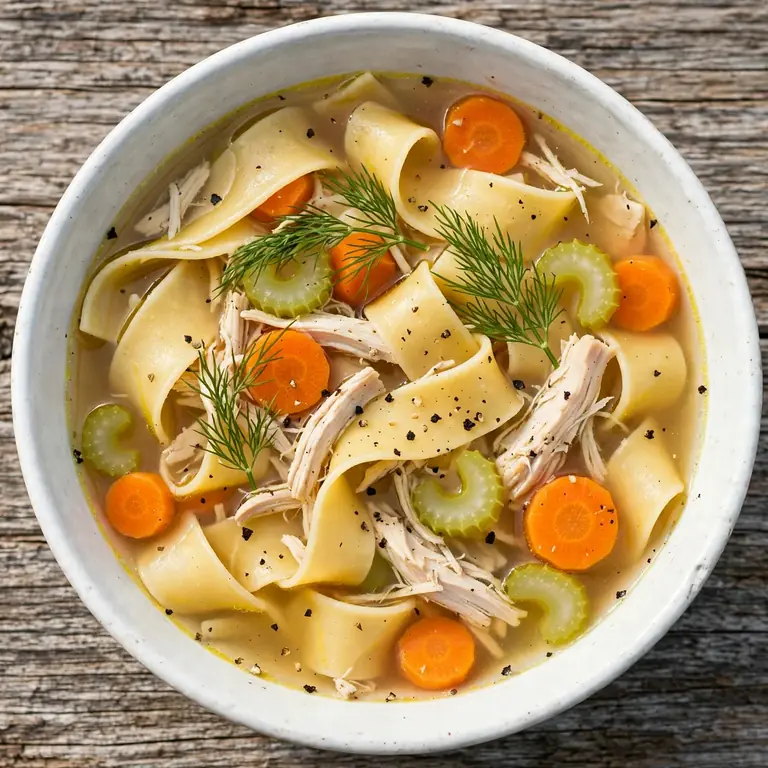
Homemade Chicken Noodle Soup — Golden Broth, Deep Flavor
There is a reason chicken noodle soup is the meal people reach for when they want something that feels restorative. Not because it has any particular ingredient that performs some special function, but because a properly made version, one with a broth that’s genuinely golden and herb-scented and full-bodied, with chicken that falls apart in the right way rather than drying into stringy pieces, is one of those meals that tastes like care went into it even when it came together in under an hour.
This chicken noodle soup recipe builds its broth from scratch using bone-in chicken thighs simmered with aromatics and fresh herbs, then removes the chicken to shred before the noodles go in. That sequence, broth first, noodles last, is the detail that separates a clear, clean bowl from a cloudy, starchy one where the noodles have absorbed most of the liquid by the time the bowl hits the table. The whole pot takes about 60 minutes and comes together in one Dutch oven with ingredients most kitchens already have.

Why You’ll Love This Chicken Noodle Soup
- Broth with genuine depth. Simmering bone-in chicken thighs with the aromatics and herbs rather than poaching boneless pieces releases collagen and fat that produce a broth with body, color, and a full-bodied flavor that canned broth cannot replicate.
- Noodles that stay intact. Adding noodles in the final 8 to 10 minutes rather than simmering them in the broth from the start keeps them tender without going soft. They hold their texture even in leftover bowls.
- One pot, minimal cleanup. From the first sautéed vegetable to the finished, shredded chicken, every step happens in a single Dutch oven. Nothing extra to wash except bowls and spoons.
- Adaptable to what you have. The base technique works with any pasta shape, any bone-in chicken cut, and any combination of vegetables you have on hand. The method is the same; the details are flexible.
- Freezes as a broth, reheats as a fresh soup. The broth without noodles freezes perfectly for up to 3 months. Add fresh noodles when reheating and the bowl tastes like it was just made.
Ingredients You’ll Need
Recipe Timing
| Detail | Info |
|---|---|
| Servings | 6 |
| Difficulty | Easy |
| Course | Main Course, Starter |
| Cuisine | American |
| Prep Time | 15 minutes |
| Cook Time | 40 minutes |
| Rest Time | 5 minutes (off heat before serving) |
| Total Time | 60 minutes |
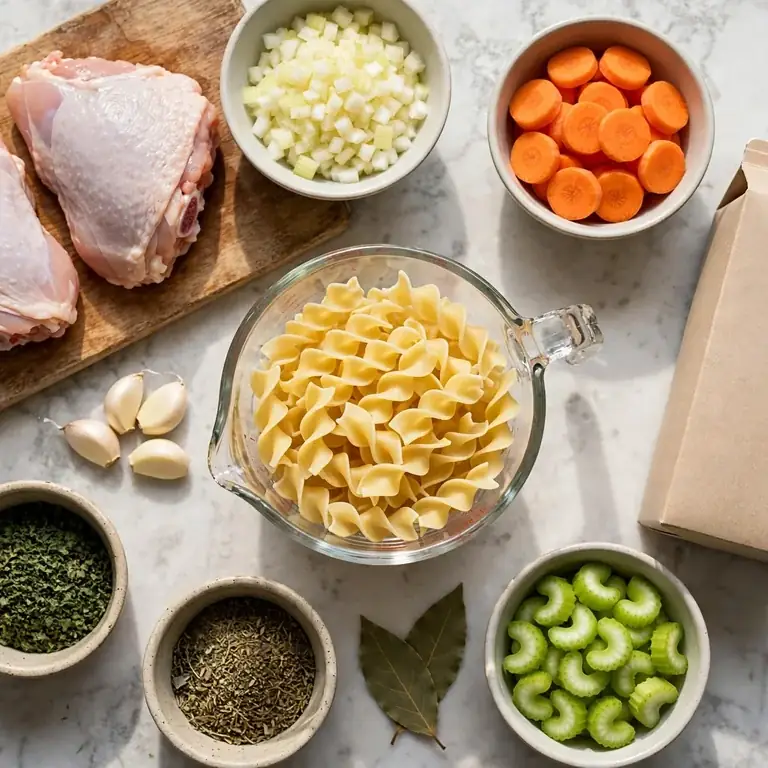
For the chicken, bone-in skin-on thighs produce the richest broth because the bones release collagen during simmering and the skin contributes fat that carries flavor into the liquid. The skin is removed before the chicken is shredded and returned to the soup, so it doesn’t appear in the finished bowl. Bone-in chicken breasts work too, but the broth will be slightly less rich; they also need less cooking time, so check them at the 20-minute mark. Boneless thighs can be used in a time crunch, but the broth will be noticeably thinner and lighter in color without the bone contribution.
For the noodles, wide egg noodles are the classic choice because their flat, broad shape holds the broth and stays satisfying even in a light soup. Medium egg noodles or broken fettuccine work equally well. Avoid very thin pasta like angel hair or vermicelli; they overcook quickly in hot broth and turn mushy before the soup reaches the table. If you prefer no egg in the noodles, a good dried pasta such as pappardelle or wide flat rice noodles substitutes cleanly.
For the broth, using low-sodium chicken broth as the cooking liquid rather than water gives the soup a baseline of chicken flavor from the first minute. The bone-in thighs add to this base as they cook. Water alone produces a thinner, less complex broth at the 40-minute mark that needs significantly more seasoning to compensate.
The Soup:
- 1.2 kg (about 2.5 lbs) bone-in, skin-on chicken thighs — the primary source of both protein and broth flavor; skin removed before shredding but kept on during cooking; food safety note: raw poultry must reach an internal temperature of 74°C (165°F) before consuming
- 2 tablespoons olive oil — for sautéing the aromatics; adds a light richness to the base
- 1 large yellow onion, diced — the aromatic anchor; softens and sweetens into the broth during the long simmer
- 3 medium carrots, peeled and sliced into rounds about 5mm thick — adds natural sweetness and color; uniform thickness ensures even cooking
- 3 celery stalks, sliced — the classic pairing with carrot in chicken soup; adds a faint herbal, slightly bitter note that balances the richness of the chicken
- 4 garlic cloves, minced — builds a savory background flavor; add it after the onion has softened to prevent burning
- 1.5 litres (about 6.5 cups) low-sodium chicken broth — the liquid base; low-sodium allows you to control final seasoning without the soup becoming oversalted as it reduces
- 1 teaspoon dried thyme — the herb most associated with chicken soup; adds warmth and a slight earthiness
- 1 teaspoon dried parsley — mild and herbal; adds a green freshness to the background of the broth
- 2 bay leaves — removed before serving; contribute a subtle bitter, herbal depth that’s hard to identify but noticeable when missing
- 1 teaspoon fine salt, plus more to taste — season in layers; the broth needs adjusting again after the chicken shreds and the noodles cook
- 1/2 teaspoon black pepper, freshly ground — adjust at the end after tasting
- 200g (about 7 oz) wide egg noodles — added in the final 8 to 10 minutes so they cook directly in the finished broth without absorbing too much liquid
- 2 tablespoons fresh parsley, roughly chopped — stirred in just before serving for a bright, clean herb finish that dried parsley can’t replicate
Allergen and Dietary Disclosure
This chicken noodle soup contains gluten (wide egg noodles) and eggs (egg noodles). It is dairy-free in its base form. The chicken broth used may contain allergens depending on the brand; check the label if gluten or soy is a concern.
For gluten-free: substitute certified gluten-free pasta in the same quantity, or use wide flat rice noodles. Rice noodles cook slightly faster than wheat noodles, so begin checking for tenderness at the 6-minute mark rather than 8. Also verify that your chicken broth is certified gluten-free.
For egg-free: use a dried pasta that contains no egg, such as pappardelle, broken fettuccine, or regular wide flat noodles made from semolina and water. The flavor and texture are slightly different but still very good in the finished soup.
For lower sodium: use unsalted chicken broth and rely entirely on the seasoning you add during cooking. The bone-in chicken and the aromatics provide enough natural flavor that the broth tastes full without high levels of added sodium.
This recipe has not been tested in a certified allergen-free kitchen and cannot be guaranteed safe for any specific allergy.
Equipment Needed
- Large Dutch oven or heavy-bottomed pot, 6 to 8 quart — the volume is important. Bone-in chicken thighs take up considerable space before the liquid is added, and you need enough room for the broth to develop freely around the chicken rather than crowding the pieces together. A Dutch oven also distributes heat evenly, which prevents the bottom of the broth from scorching during the simmer.
- Tongs — for adding and removing the hot chicken thighs safely. Trying to manage bone-in chicken pieces with a spoon in a pot of hot broth is awkward and less controlled than tongs.
- Two forks — for shredding the cooked chicken thighs on a cutting board or plate. Working with two forks held back-to-back and pulled in opposite directions produces long, natural shreds rather than chopped pieces.
- Instant-read thermometer — the most reliable way to confirm the chicken has reached a safe internal temperature of 74°C (165°F) at its thickest point. Poultry’s doneness should never be judged by color alone, especially in a broth where the exterior color shifts from the liquid.
- Fine-mesh strainer (optional) — if you want the clearest possible broth, strain it after removing the chicken and before adding the noodles. This removes any small floating particles and produces a visually cleaner finished bowl. It’s not required for flavor.
Step-by-Step Directions
Step 1: Sauté the Aromatics
Heat the olive oil in a large Dutch oven over medium heat until it shimmers across the surface. Add the diced onion and spread it into an even layer. Cook for 6 to 7 minutes, stirring every 2 minutes, until the onion is completely soft and has turned slightly translucent at the edges with a few golden pieces mixed in. Add the sliced carrots and celery and cook for another 3 minutes, stirring once or twice, until the vegetables look slightly glossy from the oil and have softened just at their outer edges. Add the minced garlic and stir for 60 seconds until the aroma changes from sharp and raw to warm and faintly nutty.

Chef’s Note: Cooking the carrots and celery briefly before the liquid goes in is not just about softening. Direct heat in fat pulls out a different range of flavor compounds than simmering in water does. Those few minutes in oil produce a more complex, savory vegetable contribution to the finished broth.
Step 2: Add the Chicken and Broth
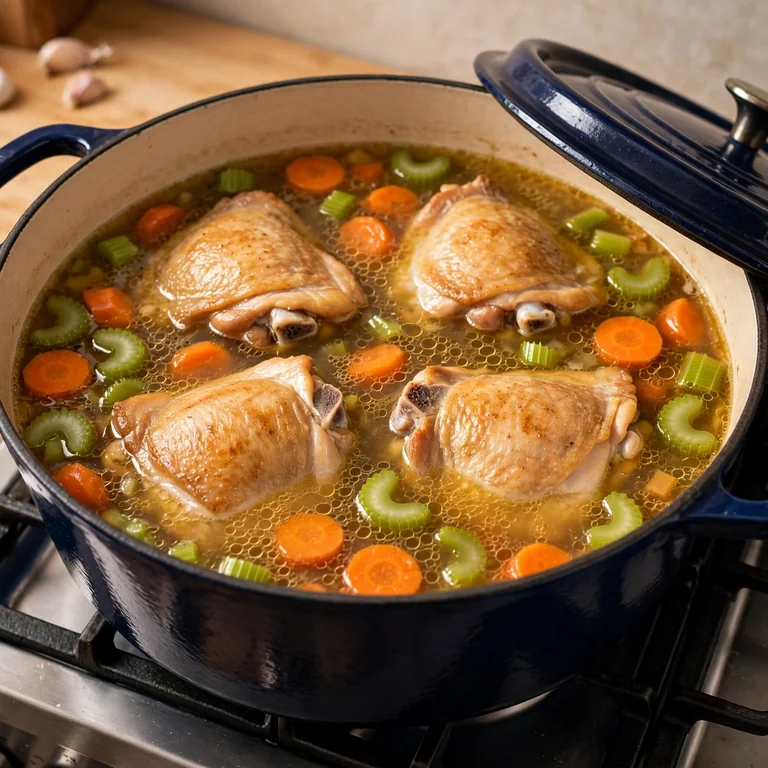
Nestle the bone-in chicken thighs into the pot skin-side up in a single, even layer across the vegetable base. Pour the chicken broth over and around the pieces until the liquid just covers the meat. Add the dried thyme, dried parsley, bay leaves, salt, and black pepper. Bring the pot to a steady boil over medium-high heat, watching for the moment the liquid starts rolling rather than just steaming.
Food safety note: Raw poultry must reach an internal temperature of 74°C (165°F) at the thickest point before it is safe to consume. Use a thermometer to confirm, not color or cooking time alone.
Step 3: Simmer the Chicken
Once the broth reaches a full boil, reduce the heat to medium-low and maintain a steady, gentle simmer with small, consistent bubbles breaking the surface. Cover the pot with a lid slightly ajar and cook for 25 to 30 minutes. At 25 minutes, check the internal temperature of the thickest thigh piece. At 74°C (165°F) or above, the chicken is done. At 82 to 85°C (180 to 185°F), it will shred into long, tender pieces without any effort, which is the target for this soup.
Chef’s Note: A gentle simmer rather than a hard boil matters for broth clarity and chicken texture. Aggressive boiling agitates the collagen and fat releasing from the bones and skin, creating a cloudy, slightly emulsified broth. A gentle simmer lets those compounds rise to the surface gradually, producing a cleaner, golden liquid. It also keeps the chicken from toughening, which boiling accelerates.
Step 4: Remove and Shred the Chicken
Lift the cooked chicken thighs out of the broth using tongs and transfer them to a cutting board or large plate. Remove and discard the bay leaves from the broth. Let the chicken rest for 5 minutes; handling very hot chicken immediately tears the meat and produces jagged pieces rather than clean shreds. Once rested, peel away and discard the skin, then use two forks to pull the meat from the bones into shreds. Discard the bones. The shredded chicken should pull apart easily into long, even pieces with minimal resistance.
Step 5: Skim the Broth
While the chicken rests, look at the surface of the broth. You’ll likely see a thin layer of fat and small foam particles floating on top. Use a wide, flat spoon to skim these off and discard them. This takes about 60 seconds and produces a noticeably cleaner-tasting, clearer broth. If you want the cleanest possible result, pour the broth through a fine-mesh strainer into a large bowl, wipe the pot, and pour the strained broth back in. Either way, bring the broth back to a gentle simmer before adding the noodles.
Chef’s Note: Skimming the fat is optional from a safety perspective but meaningful from a flavor one. Chicken thigh fat is flavorful in the right quantity but can make the broth feel greasy rather than rich if left entirely. Removing the visible surface fat while leaving the collagen-dissolved body intact is the correct balance.

Step 6: Cook the Noodles in the Broth
Add the wide egg noodles directly to the simmering broth. Stir immediately to prevent any pieces from sticking together on the bottom. Cook uncovered over medium heat, stirring every 2 minutes, for 8 to 10 minutes. Test a noodle at the 8-minute mark by pressing it between two fingers; it should bend completely with a slight, satisfying chew and no chalky firmness at the center. Pull the noodles slightly before they reach the texture you want to serve, because they continue softening from the residual heat of the broth for 2 to 3 minutes after the pot comes off the stove.
Step 7: Return the Chicken and Finish
Add the shredded chicken back to the pot and stir to distribute it evenly through the noodles and broth. Turn the heat to low and let everything warm together for 2 minutes. Taste the broth at this point and adjust the salt and pepper; the noodles absorb some of the seasoning from the broth as they cook, so the soup almost always needs a small final adjustment. Stir in the fresh chopped parsley, then turn the heat off and rest the pot for 5 minutes before serving.
Common Mistakes and Troubleshooting
| Problem | Cause | Solution |
|---|---|---|
| Broth is cloudy and grey rather than clear and golden | Hard boiling rather than gentle simmering during chicken cooking | Maintain small, consistent bubbles throughout; reduce heat immediately if the liquid starts rolling aggressively |
| Chicken is dry and stringy rather than tender | Cooked to exactly 74°C and pulled immediately, or boneless chicken used | Let bone-in thighs cook to 82 to 85°C for soup; the higher temperature produces easier shredding and more tender texture |
| Noodles absorbed all the broth overnight | Noodles stored in the broth rather than separately | Store broth and noodles separately for leftovers; add fresh noodles when reheating |
| Broth tastes flat despite seasoning | Bay leaves skipped, or not enough simmer time for the bones to contribute | Simmer for the full 25 to 30 minutes; never skip bay leaves; taste and adjust salt at the very end after noodles are cooked |
| Vegetables too soft and mushy | Added at the same time as the chicken and broth and cooked for the entire 30 minutes | Sauté briefly in oil first but allow them to finish cooking during the simmer; check carrot tenderness at 20 minutes |
| Soup too thin with no body | Boneless skinless chicken used, or simmer time too short | Use bone-in pieces and let them simmer for the full time; the collagen from the bones is what produces the broth’s body |
Variations and Substitutions
- Lemon herb version: Squeeze the juice of one large lemon into the broth just before serving and add 1 teaspoon of lemon zest along with the fresh parsley. The acidity lifts the flavor of the broth considerably and makes it taste lighter and brighter, which is particularly pleasant when the soup is being made for someone who’s feeling unwell.
- Orzo instead of egg noodles: Replace the egg noodles with an equal weight of orzo pasta. Orzo releases more starch into the broth than flat noodles and produces a slightly thicker, more substantial soup. Cook for 9 to 11 minutes and watch carefully; orzo thickens quickly as it cools.
- Rotisserie chicken shortcut: Skip steps 2 to 4 entirely. Use 1.5 litres of store-bought low-sodium chicken broth, heat it with the vegetables and herbs, simmer for 15 minutes until the vegetables are tender, then add shredded rotisserie chicken meat along with the noodles. The broth will be lighter and less full-bodied, but the active time drops to under 25 minutes.
- Turmeric golden broth: Add 1/2 teaspoon of ground turmeric to the pot with the dried herbs. The broth turns a deeper, more vibrant golden color and picks up a very faint earthy warmth from the turmeric. This version looks visually striking and adds a mild spice note without changing the overall character of the soup.
- Extra vegetables: Add 1 medium zucchini diced into small cubes and 1 cup of fresh or frozen corn kernels along with the noodles in the last 8 to 10 minutes. Both are soft and cooked through by the time the noodles finish. They add color, sweetness, and extra nutrition without changing the soup’s fundamental character.
- Gluten-free rice noodle version: Replace egg noodles with an equal weight of wide flat rice noodles. Soak the rice noodles in cold water for 10 minutes before adding them to the broth, then cook for 4 to 6 minutes in the simmering liquid. They cook faster than wheat noodles and absorb broth differently; check for tenderness from 4 minutes and adjust from there.
Serving Suggestions
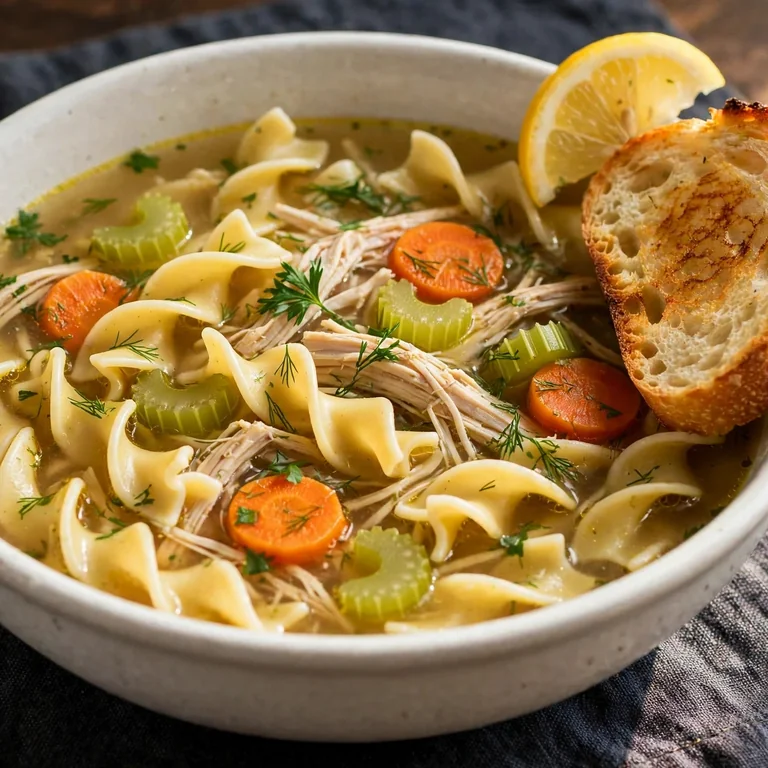
- Serve with thick slices of crusty bread or warm dinner rolls. The bread soaks up the broth at the bottom of the bowl and turns the soup into a more complete, filling meal.
- A squeeze of fresh lemon juice over individual bowls just before eating brightens the broth in a way that’s immediately noticeable, even if the lemon isn’t in the recipe itself. Keep a wedge or two on the table.
- For a complete meal pairing, serve alongside a simple side salad with a light vinaigrette. The acid in the dressing contrasts with the richness of the broth and makes both elements taste more distinct.
- Sprinkle extra fresh herbs over each bowl just before it goes to the table: parsley, dill, or finely sliced chives all work well. The color and freshness lift the visual presentation and add a clean top note to the warm, savory broth.
- For a comforting sick-day version, serve in a deep mug rather than a bowl. The mug retains heat longer and is easier to hold. Keep the noodle portion slightly smaller so the broth ratio is higher and the soup feels more restorative.
- Serve with a grilled cheese sandwich alongside for a classic pairing that works equally well for children and adults. The richness of the sandwich and the lightness of the soup balance each other well as a combined meal.
Tips for the Best Results
- Use bone-in chicken, not boneless. The bones and skin release collagen and fat into the broth during the 25 to 30-minute simmer that fundamentally changes its texture, color, and flavor. Boneless skinless chicken cooks faster and is easier to work with, but the broth it produces is thinner, paler, and less satisfying. The extra step of removing the skin and bones before shredding takes about 3 minutes and is worth every second.
- Simmer gently, never boil hard. The most common reason a homemade chicken soup broth turns out cloudy and slightly murky rather than clear and golden is sustained aggressive boiling. Once the soup comes to its initial boil, immediately reduce the heat and keep it at a lazy, relaxed simmer for the rest of the cooking time. The patience pays off in the bowl.
- Add the noodles last, not first. Noodles cooked in the broth from the beginning of the recipe absorb the liquid as they cook, cloud the broth with starch, and turn soft and swollen by the time the chicken is done. Adding them in the final 8 to 10 minutes keeps them tender, keeps the broth clear, and keeps the soup looking like soup rather than a thick stew.
- Season at the end, not just at the beginning. Salt added to the broth before the chicken shreds and before the noodles cook distributes through the liquid at that point. After 30 minutes of simmering, the noodles absorb some of it and the natural sodium from the chicken also changes the balance. A final taste and adjustment right before serving is not optional; it’s the difference between a soup that tastes complete and one that tastes nearly there.
- Shred the chicken at the right temperature. Chicken pulled from the pot immediately after cooking is very hot and tears into ragged, uneven pieces under the forks. Letting it rest for 5 minutes on a cutting board allows the muscle fibers to relax, and the shredding produces long, even pieces that distribute more evenly through the bowl.
Storage Tips
Refrigerator
Store the soup with the noodles and broth together for up to 4 days in a sealed container. The noodles will absorb a significant amount of broth overnight and the soup will look much thicker than when freshly made. This is normal. Stir in a splash of chicken broth or water when reheating to restore the original consistency. The broth’s flavor actually improves after a day in the fridge as the herb and vegetable notes settle and round out. Store the fresh parsley topping separately and add it only when serving.
Freezer
For the best freezer result, store only the broth with the vegetables and shredded chicken, without the noodles. Noodles absorb liquid during freezing and thawing and become very soft and bloated. The broth alone freezes beautifully for up to 3 months in a sealed freezer-safe container. Thaw overnight in the refrigerator, reheat on the stovetop until simmering, then add fresh noodles and cook for 8 to 10 minutes before serving. The result is indistinguishable from a freshly made batch.
Reheating
The stovetop is the better method for reheating a full portion. Pour the soup into a saucepan over medium heat and stir occasionally until it reaches a steady simmer throughout. Add a splash of broth to loosen it if the noodles have absorbed too much overnight. Microwave reheating works for a single bowl; heat at 70% power in 90-second intervals and stir between each to distribute heat evenly through both the broth and the noodles.
Make-ahead note: The broth and chicken can be made completely through step 5 up to 2 days ahead and refrigerated. When ready to serve, bring the broth back to a simmer, add fresh noodles, and cook for 8 to 10 minutes. Stir in fresh parsley just before ladling into bowls. This method consistently produces the freshest-tasting finished soup.
Nutrition Information
Per serving, approximately one bowl (1/6 of the recipe):
| Nutrient | Amount |
|---|---|
| Calories | 385 kcal |
| Protein | 34g |
| Total Carbohydrates | 28g |
| Dietary Fiber | 2.5g |
| Total Sugar | 4g |
| Total Fat | 14g |
| Saturated Fat | 3.5g |
| Cholesterol | 130mg |
| Sodium | 590mg |
| Vitamin C | 8mg |
| Calcium | 45mg |
| Iron | 2.4mg |
| Potassium | 520mg |
Nutrition values are approximate and may vary based on brands and portion sizes.
Why This Recipe Works
The body and color of a chicken noodle soup broth come almost entirely from the chicken itself, specifically from the collagen in the connective tissue and cartilage of bone-in pieces. Collagen is a structural protein that breaks down into gelatin when subjected to sustained heat in liquid. Gelatin doesn’t create the thick, starchy consistency of a flour-thickened sauce, but it produces a broth that feels silky and full in the mouth rather than thin and watery. You can feel this difference immediately when you take the first spoonful: a bone-in broth coats the tongue lightly; a boneless broth slides off it. That textural quality is the single biggest reason to use bone-in pieces for this recipe even though the shredding step adds a few extra minutes.
The sequence of adding noodles at the very end rather than mid-cook is grounded in starch behavior. Pasta releases amylose and amylopectin, two forms of starch, into the surrounding liquid as it cooks. In a broth that’s being kept warm but not actively simmered, those starches gradually absorb water and continue to gelatinize even after the heat is off. A pot of chicken noodle soup with noodles added 30 minutes before serving and left to sit will look almost porridge-like at the bottom of the pot by serving time. Adding noodles in the final 8 to 10 minutes and serving promptly eliminates this entirely.
Sautéing the onion, carrot, and celery in oil before the broth is added is a technique decision that produces a measurably different flavor profile from adding raw vegetables directly to liquid. When vegetables cook in fat, the volatile aromatic compounds responsible for their flavor are dissolved into the fat rather than simply leaching into surrounding water. Those fat-soluble flavor compounds then disperse through the entire broth as soon as the liquid is added, producing a more evenly seasoned, more complex base than vegetables simmered raw from the start.
Skimming the broth surface after the chicken is removed addresses a specific aesthetic and flavor point. The foam and fat that accumulate on the surface during simmering contain some proportion of rendered chicken fat. In the right quantity, chicken fat makes the broth richer. In excess, it makes it taste greasy, which is distinct from rich in a way most people notice immediately even if they can’t identify exactly why the soup doesn’t taste quite right. Removing the visible surface accumulation while preserving the collagen that’s dissolved invisibly into the broth achieves the correct balance.
I’ve tested this recipe with both bone-in breast and bone-in thigh at the same simmer time. Thighs consistently produce a darker, richer, more golden broth because they have a higher fat content and their connective tissue breaks down more fully over 25 minutes. Breasts produce a lighter, milder broth that some people prefer. Both are valid; thighs are the better default for a soup where the broth is as important as what’s in it.
Frequently Asked Questions
Can I make chicken noodle soup ahead of time?
Yes, with one adjustment that makes a significant difference. Prepare everything through step 5, including the shredded chicken returned to the broth, but hold the noodles. Refrigerate the broth and chicken for up to 2 days. When ready to serve, bring the broth back to a full simmer on the stovetop, then add fresh noodles and cook for 8 to 10 minutes. This method keeps the noodles from absorbing the broth overnight and produces a bowl that tastes made fresh even when the base was prepared two days before.
Why is my broth cloudy rather than clear and golden?
Hard boiling is the primary cause. When the liquid rolls and churns at a full boil, it physically breaks the fat droplets and collagen particles into smaller pieces and emulsifies them into the broth rather than allowing them to rise to the surface where they can be skimmed. The result is a broth that looks grey and cloudy rather than clear and amber. Keep the heat at medium-low once the initial boil is reached, maintain a lazy simmer throughout, and skim the surface before adding the noodles. These three steps together produce a noticeably cleaner broth.
Can I use boneless skinless chicken thighs or breasts?
Yes, but the broth will be lighter and less full-bodied because the bones and skin won’t be present to release collagen. Reduce the cooking time in step 3 to 15 to 18 minutes and pull the chicken when it reaches 74°C (165°F) internally; boneless pieces reach this temperature faster than bone-in and will dry out if left for the full 30 minutes. To partially compensate for the thinner broth, add an extra 120ml (1/2 cup) of chicken broth and consider adding a tablespoon of olive oil to the broth for richness.
How do I know when the chicken is cooked through?
An instant-read thermometer inserted at the thickest part of the largest piece is the only fully reliable method. Bone-in thighs are done at 74°C (165°F) for food safety, but for soup purposes, cooking them to 82 to 85°C (180 to 185°F) produces a texture that shreds easily and returns to the broth as tender, long pieces rather than slightly firm chunks. Color is not a reliable doneness indicator in a seasoned broth, where the exterior of the chicken absorbs color from the liquid as it cooks.
My noodles absorbed all the broth overnight. How do I fix it?
Add warm chicken broth or water to the pot when reheating, starting with 120ml (1/2 cup) and adding more as needed until the soup returns to a broth-forward consistency. Stir over medium heat until everything is evenly warmed through. To prevent this in future batches, store the cooked noodles separately from the broth in their own container and combine them only when reheating individual portions. The noodles continue absorbing liquid for as long as they’re submerged, so separation is the only reliable prevention.
Can I make this gluten-free?
Yes. Replace the wide egg noodles with certified gluten-free pasta or wide flat rice noodles in the same quantity. Rice noodles benefit from a 10-minute cold water soak before being added to the broth; they then cook in 4 to 6 minutes rather than the 8 to 10 minutes for wheat noodles. Also verify that your chicken broth is labeled gluten-free, as some brands use gluten-containing flavor additives or are processed in facilities that handle wheat.
Can I add other vegetables to this soup?
Yes, and the soup is forgiving about additions. Diced zucchini, corn kernels, frozen peas, sliced mushrooms, and fresh spinach all work well. Add sturdy vegetables like zucchini and mushrooms with the carrots and celery in the initial sauté. Add quick-cooking items like frozen peas, corn, or fresh spinach in the final 3 minutes of cooking along with the shredded chicken so they warm through without losing their texture or color.
Conclusion
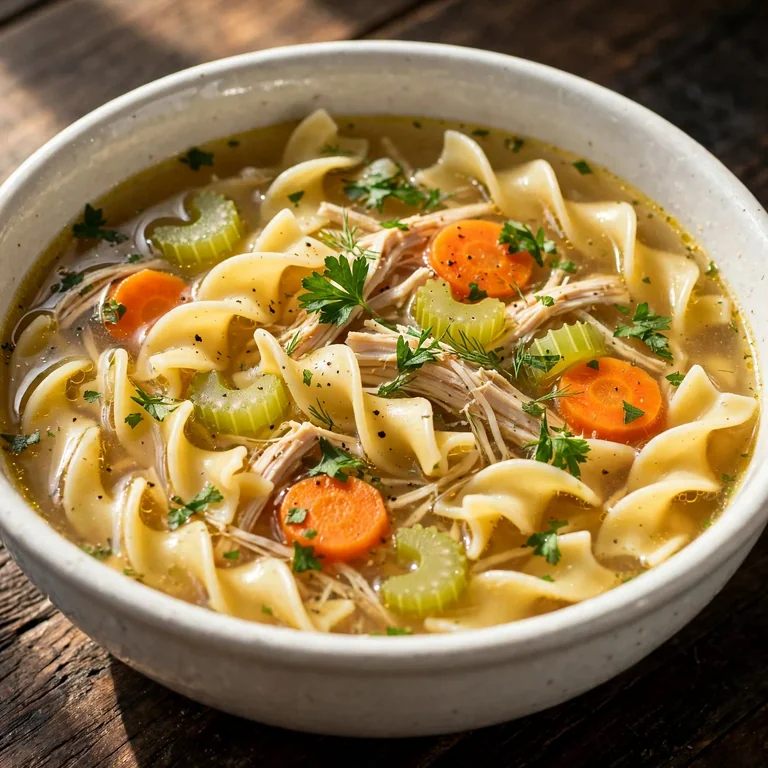
Chicken noodle soup rewards the simple things done carefully. Bone-in chicken over boneless, a gentle simmer rather than a hard boil, noodles added at the very end rather than early in the cook, and a final taste adjustment before the bowl goes to the table. None of these steps are technically demanding. They just require following the process in the right order and resisting the shortcuts that compromise the broth.
What you get at the end of 60 minutes is a pot of chicken noodle soup that tastes genuinely made rather than assembled, with a broth that has actual body and color and a flavor that holds up to the last spoonful. That’s a realistic outcome for a weeknight dinner, and it’s a pot worth making in volume because the leftovers and the frozen broth batches keep giving for weeks.
If you loved this recipe, save it to your soup and comfort food Pinterest board so you can find it easily later. For more same recipes follow Thecookingvibes Pinterest account.

Homemade Chicken Noodle Soup
Ingredients
Equipment
Method
- Heat olive oil in a large Dutch oven over medium heat. Add diced onion and cook for 6 to 7 minutes until soft and slightly translucent. Add carrots and celery and cook 3 minutes more. Add garlic and stir for 60 seconds until fragrant.
- Nestle bone-in chicken thighs skin-side up into the pot. Pour chicken broth over everything until the chicken is just covered. Add dried thyme, dried parsley, bay leaves, salt, and pepper. Bring to a full boil over medium-high heat.
- Reduce heat to medium-low. Maintain a gentle simmer with the lid slightly ajar. Cook for 25 to 30 minutes until chicken thighs reach an internal temperature of 74°C (165°F) at the thickest point. For optimal shredding texture, cook to 82 to 85°C (180 to 185°F).
- Lift chicken from the pot with tongs and transfer to a cutting board. Remove and discard bay leaves. Rest chicken for 5 minutes, then remove and discard the skin and bones. Shred meat with two forks into even pieces.
- Skim visible fat from the surface of the broth with a wide spoon. Bring broth back to a gentle simmer over medium heat.
- Add egg noodles to the simmering broth and stir immediately. Cook uncovered for 8 to 10 minutes, stirring every 2 minutes, until noodles are just tender with a slight chew.
- Return shredded chicken to the pot. Stir to combine and cook on low for 2 minutes until warmed through. Taste and adjust salt and pepper.
- Stir in fresh parsley. Turn off heat and rest 5 minutes before ladling into bowls.
Notes
- Bone-in chicken is essential for a full-bodied, golden broth; boneless produces a noticeably thinner result.
Add noodles only in the final 8 to 10 minutes; earlier addition causes them to absorb the broth and cloud the liquid.
For make-ahead, store broth and chicken separately from noodles; add fresh noodles when reheating.
Freeze the broth without noodles for up to 3 months; cook fresh noodles directly in the reheated broth before serving.