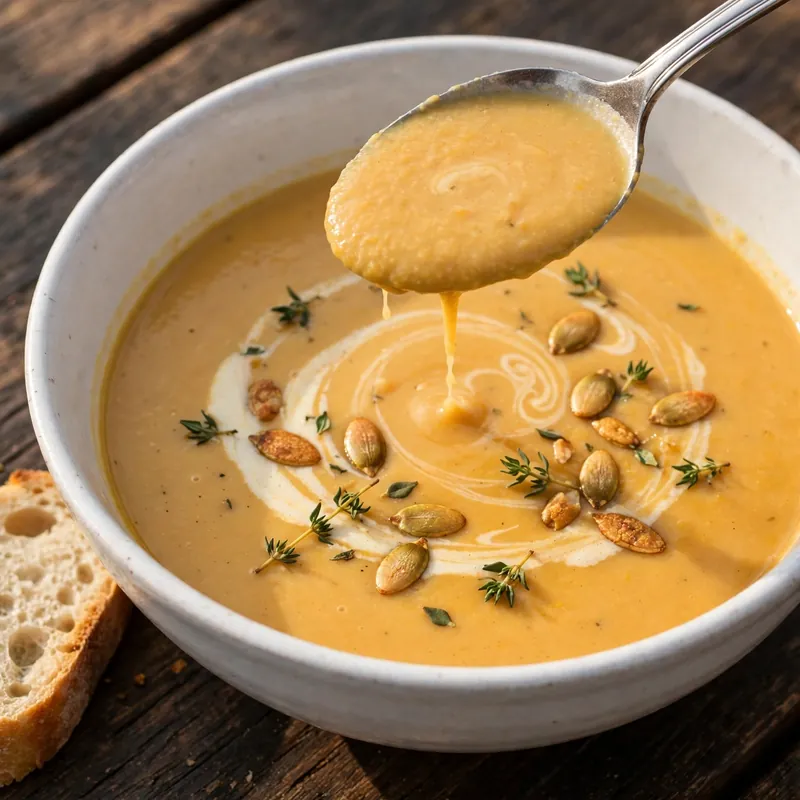
Creamy Butternut Squash Soup — Roasted, Silky, Deeply Flavored
Roasting butternut squash before it goes into the soup is the step that changes everything. The cut surfaces caramelize against the hot sheet pan, concentrating the squash’s natural sugars and producing a depth of flavor that boiled or steamed squash never reaches. By the time it gets blended with sautéed onion, garlic, and warm spices, the resulting soup has a richness that tastes like it simmered for hours rather than 20 minutes on the stovetop.
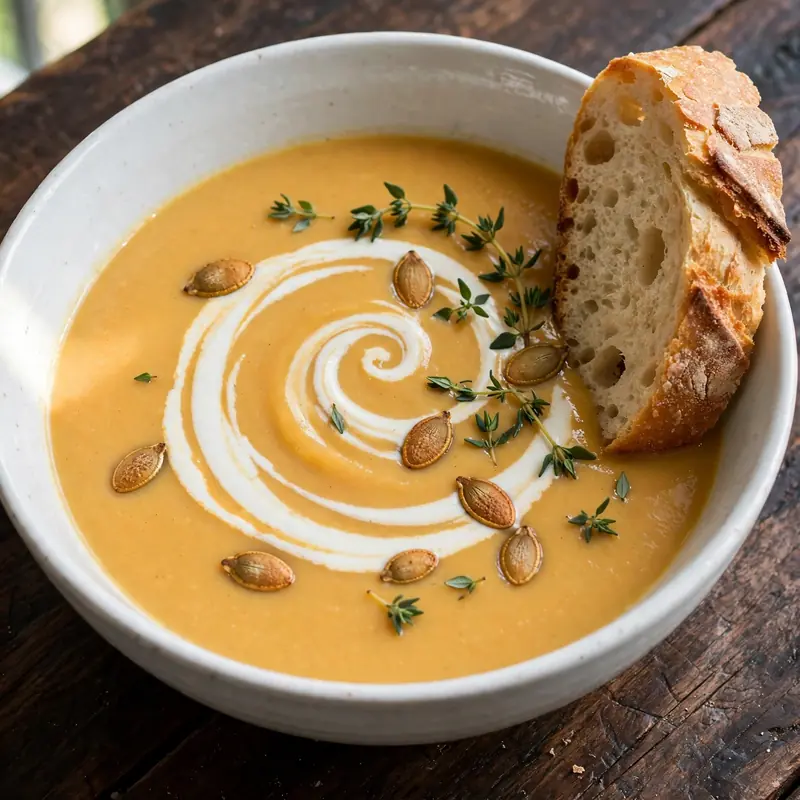
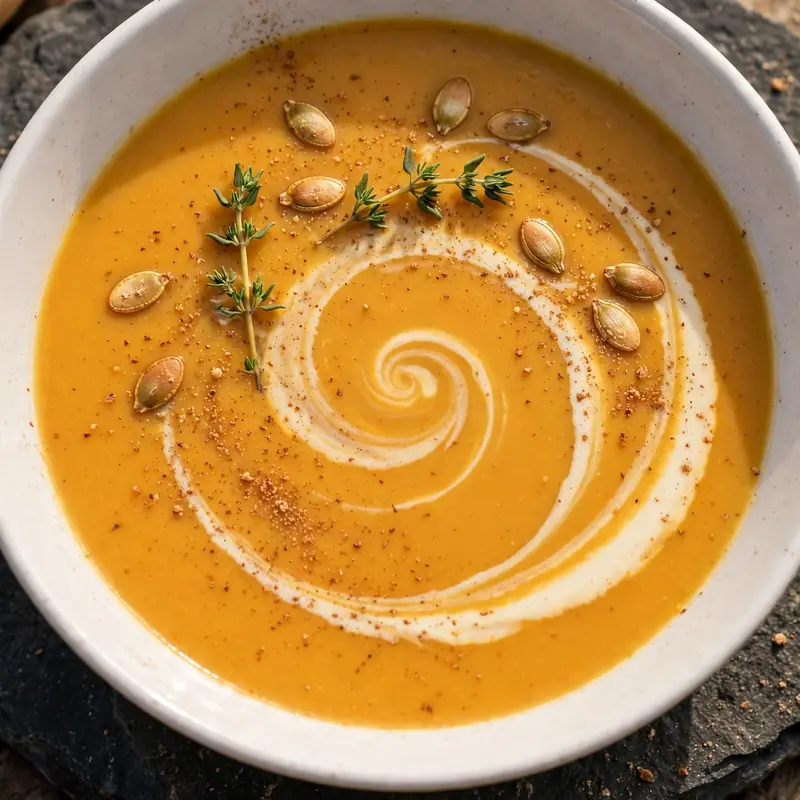
This butternut squash soup recipe builds its flavor in two stages: a high-heat roast that develops the squash’s sweetness, followed by a brief simmer with aromatics and broth before everything gets blended into a smooth, velvety finish. A small amount of heavy cream stirred in at the end rounds the flavor and gives the soup its characteristic pale amber, almost golden color. It serves 6 generously, comes together in about 60 minutes, and works equally well as a weeknight starter or the centerpiece of a fall dinner spread. A swirl of cream and a handful of toasted seeds on top, and it looks considerably more composed than the effort involved.
Why You’ll Love This Butternut Squash Soup
- Roasted squash builds real flavor. Caramelizing the cut surfaces of the squash at 220°C before it goes anywhere near the pot produces a sweetness and depth that raw squash simmered in broth simply can’t match; the flavor difference is immediate and obvious.
- Silky texture without a strainer. A high-powered blender or immersion blender produces a completely smooth, restaurant-quality texture without passing the soup through a fine-mesh sieve; the roasted squash flesh blends to a genuinely velvety consistency on its own.
- One pan and one pot. The squash roasts on a sheet pan while the aromatics cook in a pot; both come together in the blender. Cleanup is minimal for a soup that presents as something much more involved.
- Naturally sweet, not artificially so. The sweetness in this soup comes entirely from the roasted squash and a small amount of caramelized onion; no added sugar is needed, which means the flavor is clean and layered rather than one-dimensional.
- Freezes perfectly. This soup is one of the better candidates for batch cooking; it keeps its silky texture through the freeze-thaw cycle and reheats in 10 minutes on the stovetop, which makes it genuinely useful for weekday lunches throughout the month.

Ingredients You’ll Need
Recipe Timing
| Servings | 6 |
| Difficulty | Easy |
| Course | Starter, Main Course |
| Cuisine | American, European-inspired |
| Prep Time | 15 minutes |
| Cook Time | 45 minutes |
| Rest Time | 0 minutes |
| Total Time | 60 minutes |
For the squash, choose one large butternut squash weighing approximately 1.2 to 1.4 kg (about 2.5 to 3 lbs) before peeling. A squash that feels heavy for its size has denser flesh with more developed sugars. The skin should be uniformly tan with no green streaks; green areas indicate the squash was picked before fully ripening, which produces a starchier, less sweet flesh. If you’re buying pre-cut squash to save time, choose pieces that look uniformly deep orange rather than pale or streaky.
For the onion, yellow onion caramelizes most predictably of all the onion varieties and contributes a sweetness that complements the squash rather than competing with it. White onion is sharper; shallots are more delicate and work well if that’s what you have.
For the broth, a good-quality low-sodium vegetable broth keeps this soup vegetarian without any flavor compromise; the roasted squash does most of the flavor work. Chicken broth makes the soup slightly more savory and full-bodied; either choice works and the method stays identical.
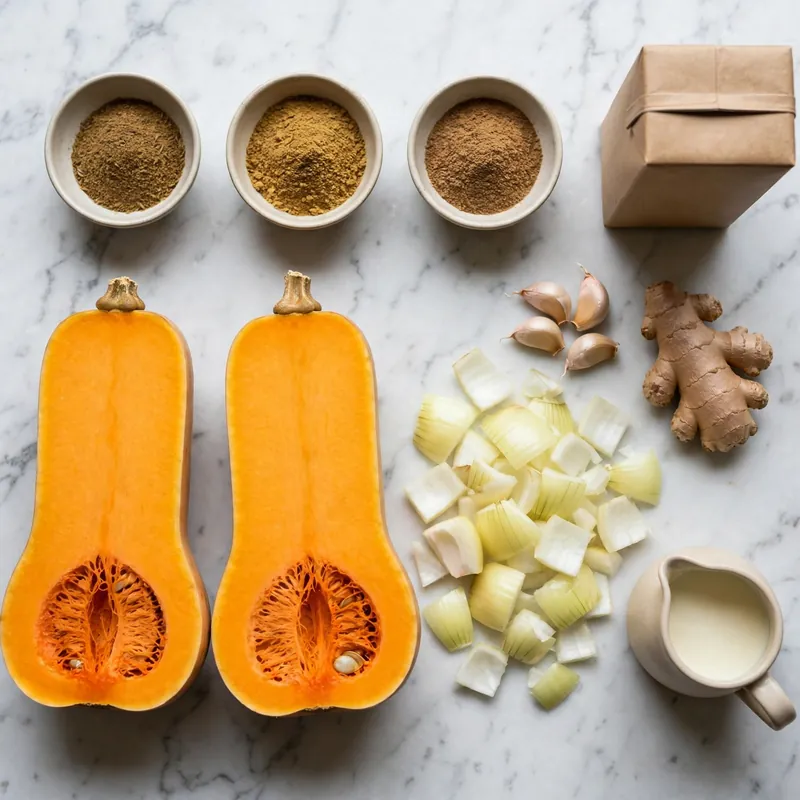
- 1 large butternut squash, about 1.3 kg (approximately 3 lbs), peeled, seeded, and cut into 4cm cubes — the primary ingredient and the dominant flavor; roasting concentrates its natural sweetness before blending
- 3 tablespoons olive oil, divided — 2 tablespoons for roasting the squash, 1 tablespoon for the aromatics; olive oil produces better caramelization on the squash surface than neutral oil
- 1 large yellow onion, roughly chopped — the aromatic backbone; sautéed until soft and golden before the broth goes in
- 4 garlic cloves, roughly chopped — adds savory depth; added after the onion so it doesn’t burn first
- 1 tablespoon fresh ginger, peeled and grated — adds warmth and a subtle brightness that lifts the sweetness of the squash; ground ginger substitutes at 1/2 teaspoon
- 1 teaspoon ground cumin — adds a warm, slightly earthy note that grounds the soup’s sweetness
- 1/2 teaspoon ground coriander — pairs naturally with cumin and adds a faintly citrusy, floral depth
- 1/4 teaspoon ground nutmeg — a classic complement to winter squash; freshly grated is noticeably more aromatic
- Pinch of cayenne pepper — optional; adds a very mild background warmth that makes the sweetness more dynamic
- 1 litre (about 4 cups) low-sodium vegetable or chicken broth — the liquid base; low-sodium preserves your control over the final seasoning
- 1/2 cup (120ml) heavy cream — stirred in at the end for richness and color; full-fat coconut cream substitutes directly for a dairy-free version
- Salt and freshly ground black pepper — season in layers throughout
- 1 tablespoon unsalted butter — optional; stirred in at the very end alongside the cream for added richness and a slight glossiness
For serving:
Heavy cream or coconut cream (swirl), toasted pumpkin seeds, fresh thyme leaves, chili flakes, crusty bread
Allergen and Dietary Disclosure
This butternut squash soup contains dairy (heavy cream and optional butter). It is naturally gluten-free, egg-free, and nut-free as written.
For dairy-free and vegan: replace the heavy cream with full-fat coconut cream in the same quantity. The coconut cream adds a mild sweetness and a faintly tropical note that actually pairs well with the warm spices, particularly the cumin and ginger. Skip the butter finish entirely. The soup’s color and texture are virtually identical to the dairy version.
For lower fat: replace the heavy cream with full-fat coconut milk rather than coconut cream, or use 1/4 cup of cream instead of 1/2 cup and compensate with an extra 1/4 cup of broth for consistency. The soup will be slightly less rich but the flavor stays very close.
This recipe has not been tested in a certified allergen-free kitchen and cannot be guaranteed safe for any specific allergy.
Equipment Needed
- Large rimmed baking sheet — for roasting the squash cubes. A rimmed sheet keeps the cubes and their released moisture contained; a flat sheet risks spills in the oven. The sheet should be large enough to spread all the squash in a single layer with small gaps between pieces; overcrowded squash steams rather than roasts and won’t caramelize properly.
- Large heavy-bottomed pot or Dutch oven, 5 to 6 quart — for cooking the aromatics and simmering the broth. Heavy-bottomed construction distributes heat evenly so the onion softens rather than scorching in a hot spot.
- High-powered blender or immersion blender — for achieving the silky, completely smooth texture. A countertop blender produces a noticeably smoother result than an immersion blender because it creates a tighter vortex and breaks down the squash fibers more completely. If using a countertop blender, work in batches and never fill past the halfway point with hot liquid; the steam pressure from hot soup can force the lid off and cause burns.
- Ladle — for transferring the hot soup and aromatics into the blender in controlled batches without spillage.
Step-by-Step Directions
Step 1: Roast the Butternut Squash
Preheat the oven to 220°C (425°F). Spread the squash cubes across the rimmed baking sheet in a single layer with visible gaps between pieces. Drizzle with 2 tablespoons of olive oil, season generously with salt and black pepper, and toss to coat each cube evenly. Roast on the center rack for 28 to 32 minutes, turning once at the 20-minute mark, until the squash is completely tender when pierced with a fork and the cut surfaces have developed a deep, caramelized amber color. The darker the color on the cut surfaces, the more developed the flavor in the finished soup; pale, barely golden squash produces a noticeably blander result.

Chef’s Note: The high roasting temperature is intentional. At 220°C, the surface sugars in the squash undergo caramelization and Maillard reactions rapidly once the surface moisture evaporates. A lower temperature produces soft squash but none of the concentrated, slightly sweet caramelized flavor that makes roasted squash soup taste distinct from the boiled version.
Step 2: Cook the Aromatics
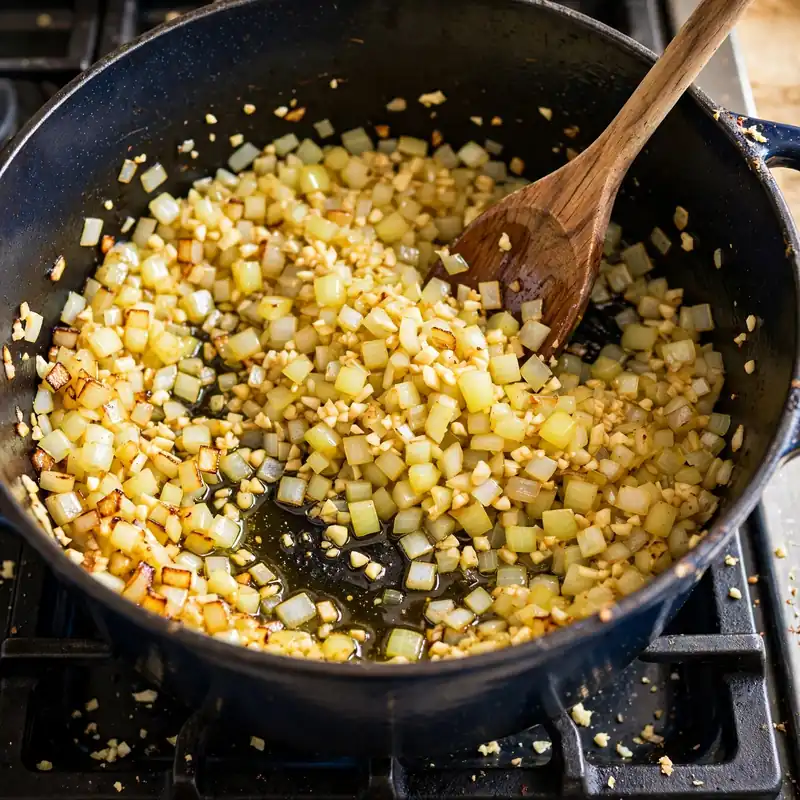
While the squash roasts, heat the remaining tablespoon of olive oil in a large pot over medium heat. Add the chopped onion and cook, stirring every 2 to 3 minutes, for 8 to 10 minutes until the pieces are completely soft, translucent, and developing pale golden edges. Add the garlic and grated ginger and stir continuously for 90 seconds until the raw sharp smell softens into something warm and faintly sweet. Add the cumin, coriander, nutmeg, and cayenne directly to the aromatics and stir for 60 seconds, letting the spices toast briefly in the oil before the liquid goes in.
Chef’s Note: Cooking the spices in the oil for 60 seconds before adding broth activates the fat-soluble aromatic compounds in each spice and produces a more fully integrated, rounded spice flavor throughout the soup. The same spices stirred into cold or warm broth without this step produce a flatter, less cohesive spice presence in the finished bowl.
Step 3: Add Broth and Simmer
Pour the vegetable or chicken broth into the pot in a steady stream and stir to lift any browned aromatics from the base of the pot. Bring the liquid to a gentle boil over medium-high heat, then reduce to medium-low and simmer for 10 minutes. This brief simmer allows the spice flavor to fully penetrate the broth before the roasted squash goes in, so every component is properly developed before blending.
Step 4: Add the Roasted Squash
Once the squash has finished roasting, scrape all of it off the baking sheet and into the simmering broth, including any dark caramelized bits stuck to the pan surface; those bits carry concentrated flavor. Stir everything together and simmer for an additional 5 minutes, long enough for the squash to absorb some of the spiced broth and for both components to reach the same temperature before blending.
Chef’s Note: Those dark, slightly sticky caramelized bits on the baking sheet are not burnt; they’re the most flavor-concentrated part of the roasted squash and they dissolve completely into the soup during blending. Leaving them on the pan is the one mistake that noticeably dulls the finished soup’s depth of flavor.

Step 5: Blend Until Completely Smooth
Turn off the heat. Using a ladle, transfer the soup in batches to a countertop blender, filling each batch no more than halfway. Remove the blender lid’s center cap and hold a folded kitchen towel firmly over the opening to allow steam to vent while preventing splatter. Blend each batch on high speed for 60 to 90 seconds until completely smooth with no visible fibrous threads or chunks. Pour the blended batches into a clean pot or large bowl. Alternatively, use an immersion blender directly in the pot, moving it in slow circular motions for 2 to 3 minutes until the soup is as smooth as possible.
Step 6: Finish and Season
Return all the blended soup to the pot over low heat. Stir in the heavy cream and the optional tablespoon of butter. Heat gently for 3 to 4 minutes until the cream is fully incorporated and the soup reaches a steady, gentle simmer; don’t allow it to boil hard after the cream goes in. Taste carefully and adjust salt, pepper, and spices at this stage. A soup that needs a lift usually benefits from a small extra pinch of salt rather than more spice; salt amplifies all the other flavors already present.
Step 7: Serve with Toppings
Ladle the soup into warmed bowls. Add a slow swirl of cream or coconut cream by pouring a thin stream in a spiral from the center outward. Scatter toasted pumpkin seeds and a few fresh thyme leaves over the surface, add a pinch of chili flakes if using, and grind a little black pepper over the top. Serve immediately with crusty bread alongside.
Common Mistakes and Troubleshooting
| Problem | Cause | Solution |
|---|---|---|
| Soup tastes bland despite all the spices | Squash wasn’t roasted long enough to caramelize, or spices weren’t toasted in oil | Roast until cut surfaces are deep amber, not pale gold; always toast spices for 60 seconds in oil before adding broth |
| Texture is stringy or grainy rather than silky | Blender not powerful enough, or blending time too short | Blend on high speed for 90 seconds minimum; a high-powered blender is genuinely better here than an immersion blender |
| Soup is too thick after blending | Squash had low moisture, or broth quantity was slightly short | Stir in extra broth or water, 1/4 cup at a time, while reheating until the desired consistency is reached |
| Soup is too thin and watery | Squash had high moisture, or extra broth was added | Simmer uncovered over medium heat for 8 to 10 minutes after blending to reduce and thicken; it concentrates as it reduces |
| Soup tastes one-dimensionally sweet | Ginger or spices were skipped, or no salt was added in layers | Season at every stage; ginger and cumin cut through the sweetness; salt in layers is the most important seasoning decision |
| Cream separates or looks curdled | Soup was boiling when the cream went in, or cold cream added to very hot soup | Always reduce heat to low before adding cream; warm the cream briefly in a small saucepan before stirring it in if the soup is very hot |
Variations and Substitutions
- Coconut milk butternut squash soup: Replace the heavy cream with one full 400ml can of full-fat coconut cream. Increase the ginger to 2 teaspoons and add 1 teaspoon of red curry paste stirred in with the aromatics. The result is a Southeast Asian-inflected version with a more complex, fragrant spice profile that works particularly well with a lime juice squeeze added at the very end.
- Apple and butternut squash soup: Add one large Granny Smith apple, peeled, cored, and roughly chopped, to the aromatics at the same time as the garlic. The apple’s natural tartness balances the squash’s sweetness, and its pectin content produces a slightly thicker, silkier finished texture. Use vegetable broth to keep the vegetable flavors clean.
- Roasted garlic version: Replace the 4 raw garlic cloves with a full head of garlic roasted alongside the squash on the same baking sheet. Cut the garlic head crosswise, drizzle with olive oil, wrap in foil, and roast at the same temperature for 30 minutes. Squeeze the softened cloves directly into the pot with the aromatics. Roasted garlic adds a considerably more mellow, sweet garlic flavor compared to the sautéed raw version.
- Spiced Indian-style version: Replace the cumin, coriander, and nutmeg with 1 teaspoon of garam masala, 1/2 teaspoon of turmeric, and 1/4 teaspoon of ground cardamom. Use coconut cream instead of heavy cream and finish with a squeeze of fresh lime juice. Serve with warm naan rather than crusty bread.
- Extra vegetable version: Add 2 medium carrots and 1 medium sweet potato, both cut to the same 4cm cube size, to the roasting sheet alongside the squash. Both vegetables add natural sweetness and body to the blended soup and extend the recipe to 8 portions without requiring any changes to the method.
- Vegan version: Use vegetable broth, replace the heavy cream with full-fat coconut cream, and skip the butter finish. Every other ingredient and step in the recipe is already plant-based; no other substitutions are needed.
Serving Suggestions
- Serve as a starter before a main course of roasted chicken, grilled lamb chops, or a simple pasta. The soup’s richness works well as a first course that warms the appetite without filling people before the main event.
- Warm crusty sourdough or a whole-grain baguette alongside is the most natural pairing: the bread soaks up the cream-enriched broth at the bottom of the bowl in a way that makes finishing the soup completely satisfying.
- Toasted pumpkin seeds scattered over the surface add a crunchy, nutty contrast that the smooth soup genuinely needs. Toast raw pumpkin seeds in a dry skillet over medium heat for 3 to 4 minutes, shaking frequently, until they begin to pop and turn golden. Season with a pinch of salt while still warm.
- A sharp green salad dressed with a lemony vinaigrette alongside turns this into a complete light meal. The acid from the dressing cuts through the richness of the cream-finished soup and makes the combination feel balanced.
- For a fall dinner party, serve the soup in small, warmed espresso cups as a passed amuse-bouche before the main course. The swirl of cream and the pumpkin seeds on a small cup look elegant and require no silverware.
- Pair with a warm spiced herbal tea or a glass of cold sparkling water with a lemon wedge. Both provide a clean, palate-refreshing contrast to the warm, sweet soup.

Tips for the Best Results
- Roast the squash until deeply caramelized, not just soft. Tender squash and caramelized squash are two different things. Tender means the fork goes through easily; caramelized means the cut surfaces have darkened to a deep amber brown. The caramelization is where the complex, concentrated sweetness comes from. Give the squash the full 28 to 32 minutes at high heat and don’t pull it early just because a fork passes through.
- Toast the spices in oil before adding broth. This takes 60 seconds and produces a measurably more flavorful soup. Fat-soluble aromatic compounds in spices dissolve into oil but not into water, which means spices added directly to broth release a fraction of their full flavor potential compared to the same spices briefly heated in oil first.
- Use a countertop blender for the smoothest texture. An immersion blender is faster and easier to clean, and it produces a very good result, but a high-powered countertop blender creates a tighter vortex that more completely breaks down the squash’s cell walls. The difference is most noticeable in the final texture: a countertop-blended soup feels genuinely silky while an immersion-blended version is smooth but with occasional faint texture. Either is acceptable; this is just the distinction if texture is a priority.
- Season the soup after blending, not just before. Blending concentrates flavors and redistributes salt throughout the soup; the seasoning balance that seemed right before the blender often needs a small adjustment afterward. Always taste and adjust salt, pepper, and spices after everything is blended and the cream is incorporated, since that’s the moment the finished flavor is fixed.
- Warm the bowls before serving. Butternut squash soup cools faster than most because of its relatively high sugar content, which conducts heat differently than a starchy or protein-rich soup. Fill the serving bowls with hot water for 2 minutes before ladling the soup in; the difference in how long the soup stays hot at the table is noticeable.
Storage Tips
Refrigerator
Butternut squash soup keeps in a sealed container for up to 5 days in the refrigerator. The flavor deepens over the first 24 hours as the spices continue to meld with the sweet squash base. The soup thickens slightly in the refrigerator from the natural starches in the squash; stir in a small splash of broth or water while reheating to restore the original flowing consistency. Store without toppings; add fresh cream, seeds, and herbs at serving.
Freezer
This is one of the best soups for freezing. Cool completely, portion into freezer-safe containers or bags, and freeze for up to 3 months. The blended texture holds through the freeze-thaw cycle without separating or turning grainy, which is unusual for cream-based soups. For best results, freeze before adding the cream and stir in fresh cream when reheating; this keeps the texture cleaner through freezing. Thaw overnight in the refrigerator and reheat gently on the stovetop.
Reheating
Pour the refrigerated or thawed soup into a saucepan over medium-low heat. Stir every 2 minutes as it warms, adding a splash of broth if the consistency has thickened beyond what you want. Heat until a steady, gentle simmer appears across the surface; this takes 8 to 10 minutes from refrigerator temperature. Avoid boiling hard after the cream has been incorporated since high heat can cause the emulsion to break and the cream to look slightly separated. Microwave reheating at 60% power in 90-second intervals with stirring between each works well for individual portions.
Make-ahead note: The soup without cream can be made up to 3 days ahead and refrigerated. Reheat and stir in fresh cream just before serving; this produces a fresher, more vivid cream flavor than reheating the cream along with the soup.
Nutrition Information
Per serving, approximately one bowl (1/6 of the recipe), cream swirl and toppings not included:
| Nutrient | Amount |
|---|---|
| Calories | 220 kcal |
| Protein | 3g |
| Total Carbohydrates | 28g |
| Dietary Fiber | 5g |
| Total Sugar | 9g |
| Total Fat | 12g |
| Saturated Fat | 5g |
| Cholesterol | 22mg |
| Sodium | 380mg |
| Vitamin C | 28mg |
| Calcium | 90mg |
| Iron | 1.4mg |
| Potassium | 660mg |
Nutrition values are approximate and may vary based on squash size, broth brand, and portion sizes. Toppings not included.
Why This Recipe Works
Roasting the squash at 220°C rather than simmering it in broth from raw is the decision that produces the most measurable flavor difference in this recipe. When the cut surfaces of the squash contact the hot sheet pan in an oven at that temperature, the surface moisture evaporates within the first 8 to 10 minutes of roasting. Once dry, the surface temperature climbs rapidly above 150°C, where two separate reactions begin producing flavor. The first is caramelization: the fructose and glucose in the squash’s flesh undergo thermal decomposition into hundreds of smaller aromatic molecules associated with the complex, deep sweetness of caramelized sugar. The second is a limited Maillard reaction between the squash’s small amino acid content and its sugars, which adds a faint savory depth to what would otherwise be a one-dimensionally sweet flavor profile. Boiling or steaming the squash before blending keeps the surface temperature at 100°C throughout, which prevents both reactions entirely and produces a much simpler, flatter sweetness.
The blending technique accounts for the soup’s texture in a specific way. Butternut squash flesh is composed primarily of starch granules, water, and pectin-rich cell walls. When the roasted squash is added to the hot broth and blended at high speed, the mechanical action of the blender blades shears through the cell walls and breaks the starch granules apart, releasing their starch into the surrounding liquid. The released starch disperses through the hot liquid and contributes to the soup’s body and silky texture. The cream added at the end provides fat molecules that coat the tongue and create the perception of richness, while also contributing to the soup’s smooth visual appearance by binding with the water-based broth into a stable, light emulsion.
Toasting the whole spices in oil before the broth is added is a technique borrowed from Indian cooking called blooming. The fat-soluble aromatic compounds in cumin, coriander, and nutmeg are released into the oil within 60 seconds of heat contact. Those oil-soluble compounds are significantly more aromatic and flavor-active than the water-soluble compounds the same spices release when stirred cold into broth. In practice, bloomed spices produce a soup where the warm spice notes are present in every spoonful rather than sitting as a faint background note behind the squash’s sweetness.
Adding the cream at the end rather than cooking it into the soup from the beginning preserves its delicate flavor. Cream contains volatile aromatic compounds associated with its characteristic dairy richness; sustained heat above 85°C drives those compounds out of the soup as steam, leaving a flavor that’s less nuanced and more flatly fatty. Stirring cold or room-temperature cream into the hot blended soup just before serving keeps the aromatic compounds in the bowl.
I’ve tested this recipe with three different finishing fats: heavy cream, full-fat coconut cream, and no added fat at all. The no-cream version is thinner, less visually appealing, and tastes noticeably flat compared to either cream version. The heavy cream version produces the most balanced flavor: rich without being heavy, with a pale amber color that reads as warm and autumnal. The coconut cream version has a slightly tropical undertone that requires the spice profile to shift toward ginger and coriander to balance it; the result is very good but a distinctly different soup.
Frequently Asked Questions
Can I make butternut squash soup ahead of time?
Yes, and it’s one of the better soups for advance preparation. Make the full recipe without the cream, cool completely, and refrigerate for up to 3 days or freeze for up to 3 months. When ready to serve, reheat gently on the stovetop and stir in fresh heavy cream just before ladling into bowls. Adding the cream fresh rather than reheating it with the soup produces a noticeably brighter cream flavor and a cleaner-looking finish.
Why does my butternut squash soup taste bland?
Almost every case of bland butternut squash soup traces back to one of two things: the squash wasn’t roasted long enough to develop caramelization on the cut surfaces, or the spices went directly into the broth without being toasted in oil first. A pale, barely golden squash produces a sweet but flat soup regardless of how much seasoning is added afterward. Roasting until the cut surfaces are deep amber and toasting the spices in oil for 60 seconds before the broth goes in are the two steps that most dramatically change the flavor of the finished soup.
Can I use pre-cut butternut squash?
Yes. Pre-cut squash from the grocery store works well and saves significant prep time. Look for pieces that are uniformly deep orange rather than pale or streaky, which indicates the squash was fully ripe when cut. Spread the pre-cut pieces on the baking sheet in a single layer and proceed exactly as written. The roasting time may be slightly shorter if the pieces are smaller than 4cm; check at the 22-minute mark for caramelization and tenderness.
Can I make this soup without cream?
Yes, though the texture and flavor change noticeably. Without cream, the soup is thinner and the flavor is less rounded. For a dairy-free version with a creamy texture, full-fat coconut cream substitutes directly at the same quantity and produces a rich, smooth result with a mild coconut undertone. For a completely fat-free version, an extra 1/4 cup of broth plus 2 tablespoons of tahini stirred in at the end adds body and a faintly nutty richness without any dairy or coconut.
How do I know when the butternut squash is done roasting?
Two things confirm proper roasting: a fork should pass through the thickest cube with no resistance whatsoever, and the flat cut surfaces that were in contact with the baking sheet should show deep amber caramelization, not just a light golden tint. If the squash is tender but the surfaces are still pale, remove it from the oven, briefly turn on the broiler to high, and return the pan for 3 to 4 minutes watching closely until the color develops. Pale squash produces a noticeably less flavorful soup.
Is butternut squash soup gluten-free?
Yes. This butternut squash soup is naturally gluten-free as written. None of the core ingredients, including the squash, olive oil, aromatics, spices, broth, or cream, contain gluten. The only variable is the broth: some packaged vegetable or chicken broths contain gluten-containing additives or are processed in shared facilities. If gluten-free certification is required, check the broth label specifically. The crusty bread served alongside contains gluten but is a topping, not part of the soup itself.
Can I freeze butternut squash soup with the cream already in it?
You can, but the texture after thawing is slightly less smooth and the cream can look faintly separated when you first reheat it. Vigorous stirring over medium-low heat while reheating brings it back together in most cases. For the cleanest result, freeze before adding the cream and stir in fresh cream when reheating; this is the approach that produces a finish most similar to freshly made.
Conclusion
Butternut squash soup is one of those recipes where understanding a single technique, in this case roasting before blending rather than boiling, changes the result so dramatically that it’s worth making again just to taste the difference. The caramelization that develops on the sheet pan is irreplaceable; no amount of extra spice or seasoning compensates for skipping it.
Once you’ve made this version, the stovetop-boiled approach is difficult to go back to. The roasted version has a depth that reads as something carefully considered rather than thrown together, and the effort required to produce it is almost identical to the simpler method.
If you loved this recipe, save it to your fall soups and cozy dinner Pinterest board so you can find it easily later. For more healthy recipes and daily food inspiration, follow TheCookingVibes on Pinterest.
Creamy Butternut Squash Soup
Ingredients
Equipment
Method
- Preheat oven to 220°C (425°F). Spread squash cubes on a large rimmed baking sheet in a single layer. Drizzle with 2 tablespoons olive oil, season with salt and pepper, and toss to coat. Roast 28 to 32 minutes, turning once at 20 minutes, until deeply caramelized on the cut surfaces and fully tender.
- While squash roasts, heat remaining 1 tablespoon olive oil in a large pot over medium heat. Cook the onion, stirring occasionally, for 8 to 10 minutes until soft and lightly golden. Add garlic and ginger, stir 90 seconds until fragrant.
- Add cumin, coriander, nutmeg, and cayenne to the pot. Stir for 60 seconds until the spices smell toasted and aromatic in the oil.
- Pour in the broth and bring to a gentle boil. Reduce heat and simmer 10 minutes.
- Scrape the roasted squash off the baking sheet into the pot, including all caramelized bits. Simmer 5 more minutes.
- Turn off heat. Blend in batches in a countertop blender on high speed for 90 seconds until completely smooth, filling each batch no more than halfway. Or use an immersion blender directly in the pot for 2 to 3 minutes.
- Return blended soup to the pot over low heat. Stir in cream and butter. Heat gently until a steady simmer appears. Taste and adjust salt, pepper, and spices.
- Ladle into warmed bowls. Garnish with a cream swirl, toasted pumpkin seeds, fresh thyme, and chili flakes. Serve immediately.
Notes
- Roast squash until the cut surfaces are deep amber, not just pale golden; the caramelization is the primary source of flavor depth in this soup.
- Always toast the spices in oil for 60 seconds before adding broth; this blooms the fat-soluble aromatic compounds and produces a noticeably more integrated spice flavor.
- For make-ahead: refrigerate without cream for up to 3 days or freeze for up to 3 months; add fresh cream when reheating.
- For dairy-free or vegan: replace cream with full-fat coconut cream and skip the butter; the method stays identical.