Easy Taco Soup — Bold Spiced Broth, Hearty One-Pot Meal
There are weeknights when dinner needs to be ready in 35 minutes, taste like it took longer, and leave the kitchen with minimal mess. Taco soup is exactly that meal. It has the flavors of a well-seasoned taco filling: cumin-forward, slightly smoky, with a heat level you can dial up or down, but it’s built into a rich, loaded broth that eats more like a hearty stew than a standard soup. One pot from start to finish, and it reheats even better the next day.
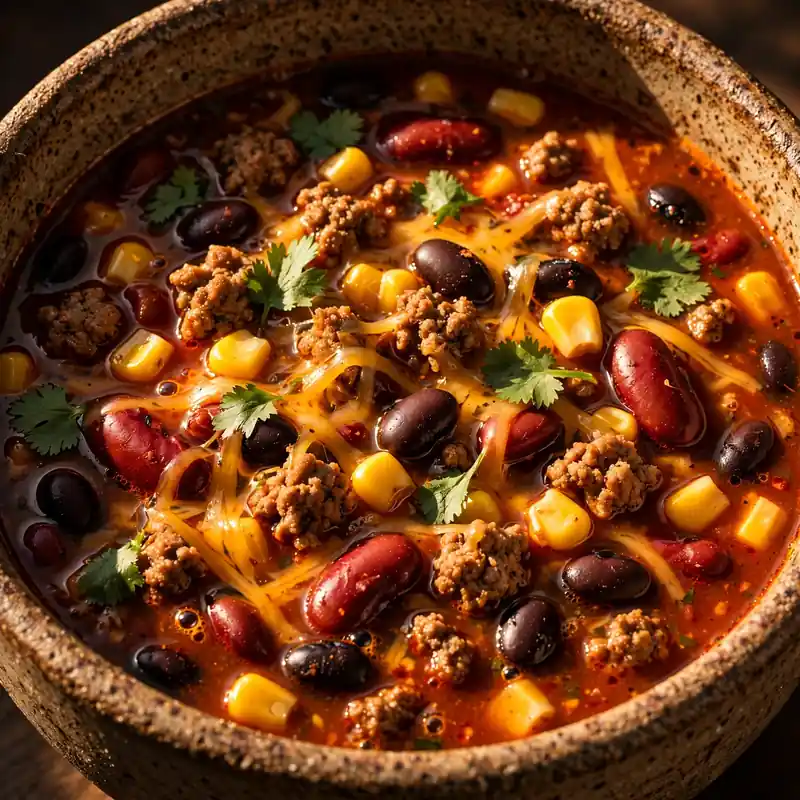
This taco soup recipe builds its broth from seasoned ground beef browned with onion and garlic, then simmered with canned tomatoes, black beans, corn, and a blend of spices that includes cumin, chili powder, and smoked paprika. The whole thing comes together in one Dutch oven in about 35 minutes and serves 6 generously. It’s the kind of recipe that works equally well for a fast weeknight dinner and for a casual gathering where you want something filling that holds in a pot without losing quality.
Why You’ll Love This Taco Soup
- All the taco flavors, none of the assembly. The seasoned ground beef, beans, corn, and tomatoes in a spiced broth deliver the same flavors as a well-built taco without any of the folding, topping, or last-minute rush.
- One pot, under 35 minutes. From browning the beef to ladling into bowls, the whole recipe stays in a single Dutch oven. Clean-up is genuinely minimal.
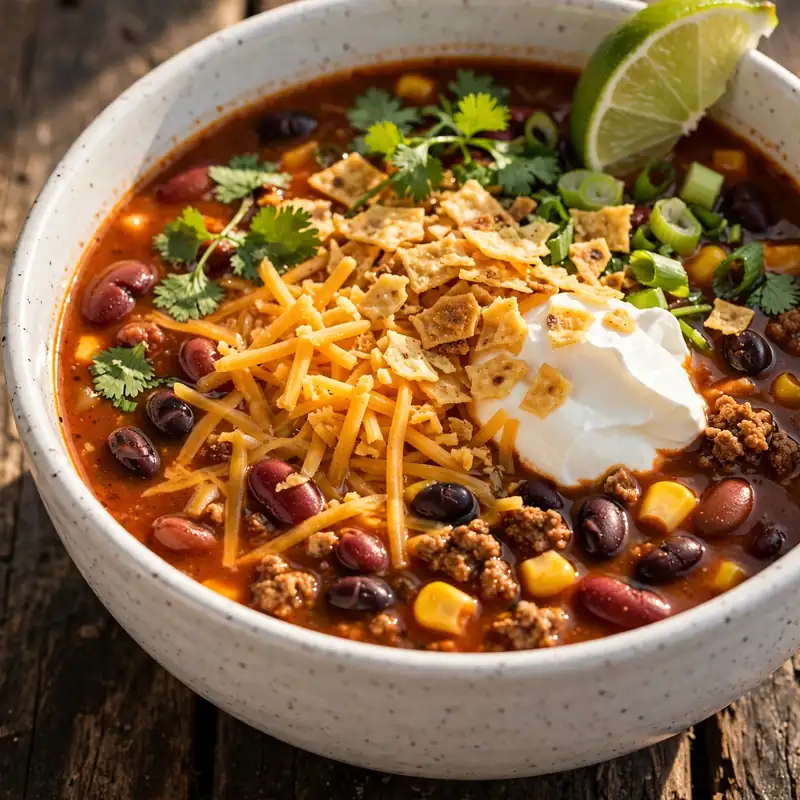
- Toppings make it interactive. Set out bowls of shredded cheese, sour cream, sliced jalapeños, and crushed tortilla chips and let everyone customize their bowl. It’s one of the few weeknight dinners that works as a hands-off crowd meal.
- Better the next day. The spices settle and deepen overnight, and the beans absorb more of the broth flavor. Leftover taco soup reheats into something that tastes like it spent hours developing.
- Endlessly adaptable. Swap the beef for ground turkey, add a second can of beans, stir in frozen corn or diced zucchini: the base method handles additions without changing the timing or technique.

Ingredients You’ll Need
Recipe Timing
| Detail | Info |
|---|---|
| Servings | 6 |
| Difficulty | Easy |
| Course | Main Course |
| Cuisine | Tex-Mex, American |
| Prep Time | 10 minutes |
| Cook Time | 25 minutes |
| Rest Time | 0 minutes |
| Total Time | 35 minutes |
For the ground beef, an 80/20 lean-to-fat ratio produces the richest broth because the rendered fat carries flavor compounds directly into the cooking liquid. If you prefer a leaner result, 90/10 works, but drain any excess fat from the pot after browning rather than leaving it in, since lean beef can still render a surprising amount of fat when cooked in volume. The beef should be browned properly before the liquid goes in; grey, steamed ground beef produces a flat-tasting broth while browned, caramelized beef contributes a savory depth that carries through every spoonful.
For the tomatoes, fire-roasted diced tomatoes add a smoky depth that plain diced tomatoes don’t have. Both cans are called for in this recipe: one for body and one for texture. If fire-roasted isn’t available, regular diced tomatoes work, but add an extra 1/4 teaspoon of smoked paprika to compensate for the lost smokiness.
For the beans, black beans are the most common choice and they hold their shape reliably through the simmer time. Kidney beans are slightly more starchy and produce a marginally thicker broth. Pinto beans are softer and break down slightly during cooking, which some people prefer for a more textured, chunky result. Any of the three work well; the method doesn’t change.
- 500g (about 1 lb) ground beef, 80/20 — the primary protein and the fat base for the broth flavor; food safety note: ground beef must reach an internal temperature of 71°C (160°F) before consuming
- 1 tablespoon olive oil — for the initial browning if needed; adds richness to the base
- 1 large yellow onion, diced — the aromatic anchor; softens quickly and builds the savory base of the broth
- 4 garlic cloves, minced — adds depth; added after the onion so it doesn’t burn before the beef goes in
- 1 can (400g/14 oz) fire-roasted diced tomatoes, with juice — contributes body, acidity, and mild smokiness to the broth
- 1 can (400g/14 oz) regular diced tomatoes, with juice — adds additional tomato texture and liquid volume
- 1 can (400g/14 oz) black beans, drained and rinsed — adds protein and starch; rinsing removes excess sodium from the canning liquid
- 1 can (400g/14 oz) kidney beans, drained and rinsed — a second bean for additional body and texture contrast
- 1 cup (150g) frozen corn kernels — adds natural sweetness and color; added directly from frozen so it doesn’t overcook
- 720ml (about 3 cups) low-sodium beef broth — the liquid base; low-sodium gives you control over the final seasoning level
- 2 tablespoons tomato paste — caramelized briefly before the liquid goes in for a deeper, richer tomato flavor than the canned tomatoes alone provide
- 2 teaspoons ground cumin — the dominant spice; earthy and warm, it defines the taco flavor character of the broth
- 1 1/2 teaspoons chili powder — adds mild heat and a reddish depth; adjust up for more heat, down for a milder bowl
- 1 teaspoon smoked paprika — contributes a warm smokiness that makes the broth taste fuller and more complex
- 1/2 teaspoon garlic powder — reinforces the fresh garlic through the simmer time
- 1/2 teaspoon onion powder — fills out the savory base of the broth quietly in the background
- 1/2 teaspoon dried oregano — a subtle herbal note that connects the spice blend
- 1/4 teaspoon cayenne pepper — optional; adds a building heat; start with less and adjust at the end
- Salt and freshly ground black pepper — to taste; season in layers throughout
- Juice of 1 lime — stirred in at the very end; the acidity lifts all the other flavors and brightens the finished broth
For serving (optional but strongly recommended):
Shredded cheddar or Monterey Jack cheese, sour cream, crushed tortilla chips, sliced jalapeños, fresh cilantro, sliced avocado, lime wedges

Allergen and Dietary Disclosure
This taco soup contains dairy if topped with sour cream or shredded cheese (both optional), and the tortilla chips topping contains gluten depending on the brand. The soup base itself is naturally gluten-free as written; verify that your beef broth and tomato paste are labeled gluten-free if this is a concern, as some brands include gluten-containing additives.
For dairy-free: skip the sour cream and cheese toppings, or use dairy-free alternatives. The soup base contains no dairy. A sliced avocado or a spoonful of guacamole provides a creamy topping element without dairy.
For vegetarian: replace the ground beef with 400g of crumbled extra-firm tofu or an additional can of beans, and swap the beef broth for a good-quality vegetable broth. Add 1 teaspoon of soy sauce or a small amount of miso paste to compensate for the savory depth the beef provides. The method stays identical.
For lower sodium: use unsalted or very-low-sodium broth, rinse the beans thoroughly before adding, and choose no-salt-added canned tomatoes. The spices provide enough flavor that the overall dish doesn’t suffer significantly from the sodium reduction.
This recipe has not been tested in a certified allergen-free kitchen and cannot be guaranteed safe for any specific allergy.
Equipment Needed
- Large Dutch oven or heavy-bottomed pot, 6 quart minimum — taco soup generates significant volume once all the cans of tomatoes, beans, and broth are added. A smaller pot makes it difficult to stir without spilling and causes uneven simmering where the center stays hot but the edges cool down rapidly.
- Wooden spoon or heat-resistant spatula — for breaking the ground beef into fine, even crumbles during browning. Breaking it into small, uniform pieces ensures even distribution through every bowl rather than a few large chunks settled at the bottom of the pot.
- Instant-read thermometer — to confirm the ground beef has reached a safe internal temperature of 71°C (160°F). The color of cooked ground beef in a pot of broth is not a reliable safety indicator; it can appear brown before it’s fully safe.
- Can opener — three cans per recipe means this is worth having at hand before you start. Having all cans opened and staged before the beef goes in keeps the workflow moving without interruptions.
Step-by-Step Directions
Step 1: Brown the Ground Beef
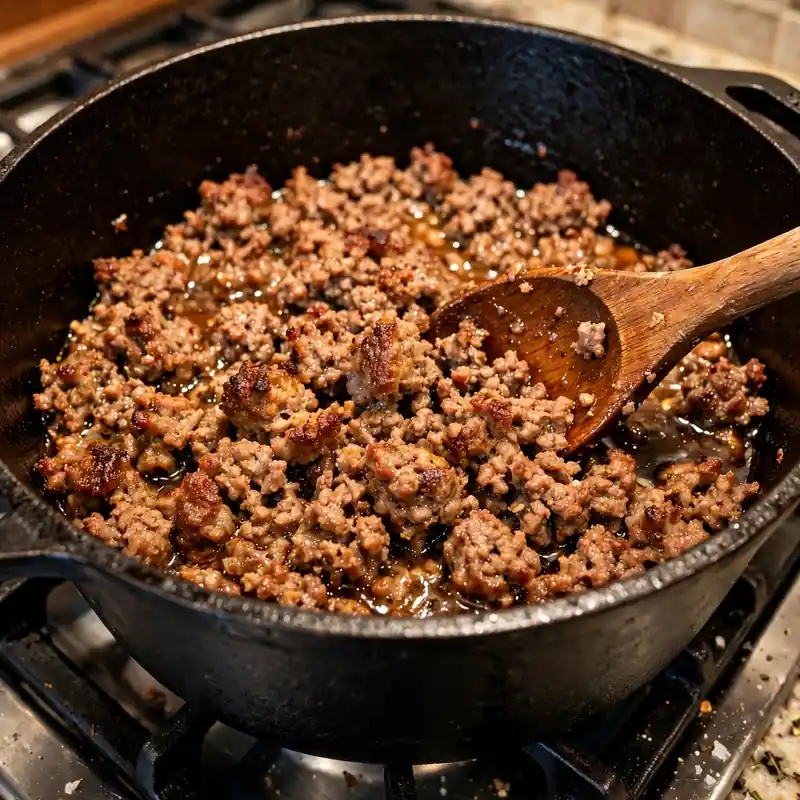
Heat the olive oil in a large Dutch oven over medium-high heat until it shimmers across the surface. Add the ground beef in an even layer across the base of the pot, pressing it into a single contact layer rather than piling it. Let it cook undisturbed for 2 to 3 minutes until a deep brown crust forms on the underside, then begin breaking it into small pieces and turning. Cook for another 4 to 5 minutes, stirring every minute, until no pink remains anywhere in the pot and the beef smells caramelized and deeply savory rather than steamy.
Food safety note: Ground beef must reach an internal temperature of 71°C (160°F) throughout before it is safe to eat. Use a thermometer to verify rather than relying on color alone.
Drain all but about 1 tablespoon of fat from the pot, leaving a thin layer to cook the aromatics in. If your beef was very lean and produced little fat, skip the draining step.

Chef’s Note: A properly browned, caramelized crust on the beef, formed from direct contact with the hot pan surface, is where the majority of the broth’s savory depth comes from. Ground beef that’s been stirred constantly and steamed grey rather than left to form a crust produces a noticeably flatter-tasting finished soup regardless of how many spices are added afterward.
Step 2: Soften the Aromatics
Reduce the heat to medium. Add the diced onion to the pot with the beef and cook, stirring every 2 minutes, for 4 to 5 minutes until the onion is fully soft and turning translucent with golden edges. Add the minced garlic and stir constantly for 60 seconds until the aroma shifts from sharp and raw to warm and faintly toasted. At this point the pot should smell like the beginning of a taco filling.
Step 3: Bloom the Spices and Tomato Paste
Add the cumin, chili powder, smoked paprika, garlic powder, onion powder, dried oregano, and cayenne directly to the beef and onion mixture. Stir for 60 seconds, coating everything in the pot with the dry spices and toasting them briefly in the residual fat. Move the spiced beef mixture to the sides of the pot and add the tomato paste directly to the bare center of the hot pan surface. Let it sit without stirring for 60 to 90 seconds until it darkens from bright red to a deep brick-red and smells faintly sweet and caramelized. Stir it through the beef and spices.
Chef’s Note: Toasting the spices dry in fat before liquid is added activates their volatile oil compounds and produces a richer, more fully developed spice flavor in the finished broth. And caramelizing the tomato paste against the hot pan adds a Maillard-reaction depth to the tomato flavor that adds noticeably to the overall complexity of the soup.
Step 4: Add Liquid and Canned Ingredients
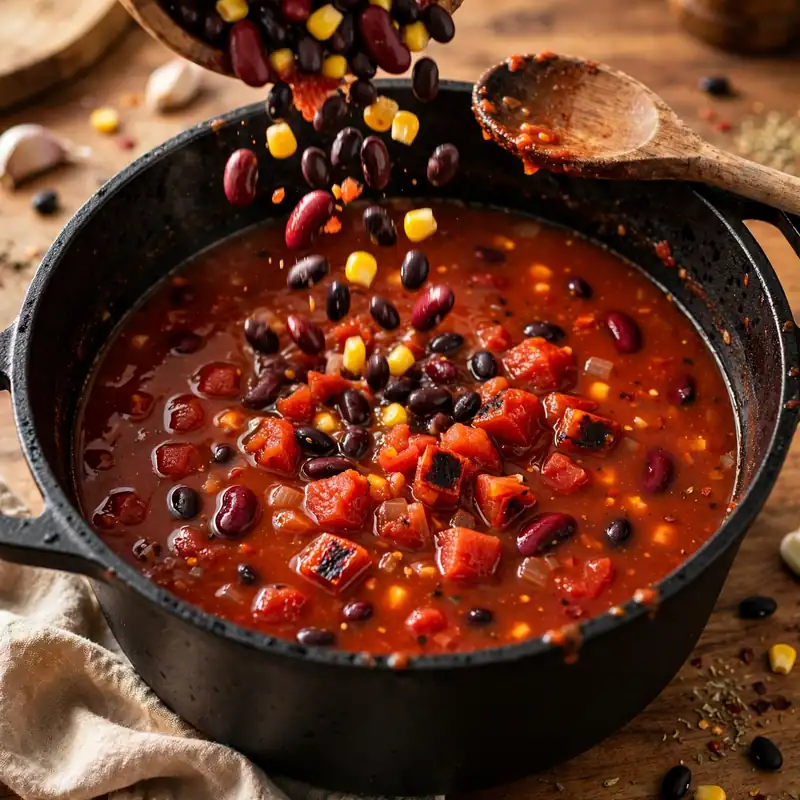
Pour the beef broth into the pot in a steady stream while stirring to loosen any browned bits from the base of the pan. Add both cans of diced tomatoes with all their juice, the drained and rinsed black beans, and the drained kidney beans. Stir everything together and bring the pot to a boil over medium-high heat, then reduce to medium-low.
Chef’s Note: The browned bits on the base of the pot, the dark fond that forms during searing, carry concentrated beef and spice flavor. Pouring in liquid and scraping the base ensures all of that flavor makes it into the soup rather than staying stuck to the pot.
Step 5: Simmer and Add Corn
Maintain a steady, gentle simmer for 15 minutes, stirring every 4 to 5 minutes. The broth will deepen in color and the beans will absorb some of the spiced liquid around them. After 15 minutes, add the frozen corn directly from the freezer and stir it through. Continue simmering for 3 to 4 more minutes until the corn is heated through and tender.
Step 6: Finish and Season
Turn off the heat. Squeeze the lime juice directly into the pot and stir it through. Taste the broth carefully and adjust the salt, pepper, and any spices at this point. The lime juice is the finishing element that lifts all the other flavors and makes the broth taste bright rather than flat. A soup that tasted slightly dull before the lime will taste considerably more alive after it. If the broth tastes sharp or acidic, a small pinch of sugar corrects it without adding sweetness.
Ladle immediately into bowls and add toppings at the table.
Common Mistakes and Troubleshooting
| Problem | Cause | Solution |
|---|---|---|
| Broth tastes flat despite all the spices | Spices weren’t bloomed in fat, or lime juice was skipped | Toast spices in the fat for 60 seconds before adding liquid; always add lime juice at the very end |
| Beef is grey and steamed rather than browned | Pot too crowded, or beef stirred too frequently | Leave beef undisturbed for 2 to 3 minutes to form a crust; don’t stir until the bottom side is visibly brown |
| Soup too thin and brothy | Too much liquid added, or simmered too briefly | Simmer uncovered for the full 15 minutes; if still too thin, add 1 more tablespoon of tomato paste and simmer 5 more minutes |
| Soup too thick and stew-like | Beans broke down from overcooking, or too little broth | Add extra broth 1/2 cup at a time to reach the consistency you want; reduce simmer time to 12 minutes |
| Broth tastes one-dimensional | Only one or two spices used, or tomato paste was skipped | Use the full spice blend; caramelize the tomato paste separately before stirring it in |
| Ground beef not evenly distributed | Beef was not broken into small pieces during browning | Break beef into very small crumbles as it cooks; a wooden spoon pressed firmly against the pot works better than a spatula for fine crumbling |
Variations and Substitutions
- Ground turkey version: Replace the ground beef with ground turkey thighs (not breast, which runs drier and produces a lighter-tasting broth). Turkey produces a paler broth; compensate by increasing the smoked paprika to 1 1/2 teaspoons and adding an extra tablespoon of tomato paste for depth. The method is identical.
- Three-bean taco soup: Skip the ground beef entirely and use three cans of beans: black beans, kidney beans, and pinto beans. Use vegetable broth instead of beef broth and add 1 teaspoon of soy sauce to build savory depth that the beef would have provided. This produces a fully vegetarian version that’s filling and full-flavored.
- Spicy version: Double the cayenne to 1/2 teaspoon and add one finely diced chipotle pepper in adobo sauce along with the garlic. The chipotle adds both heat and a deep smoky character that amplifies the smoked paprika already in the recipe. Serve with pickled jalapeños at the table for those who want additional heat.
- Slow cooker taco soup: Brown the beef, onion, garlic, and tomato paste with the spices on the stovetop through step 3. Transfer to a slow cooker, add all remaining ingredients except lime juice and corn. Cook on low for 6 to 7 hours or high for 3 to 4 hours. Add frozen corn in the last 30 minutes. Stir in lime juice just before serving.
- Creamy taco soup: Stir 170g (6 oz) of softened full-fat cream cheese into the finished soup off the heat, breaking it up and stirring steadily until fully incorporated. The cream cheese thickens the broth into a creamy, slightly richer version that’s particularly satisfying in cold weather.
- Extra vegetables: Add 1 diced zucchini, 1 diced green bell pepper, or 1 cup of frozen diced butternut squash along with the canned tomatoes. All three soften into the broth during the simmer time without changing the flavor profile significantly, and they add color and nutritional value.
Serving Suggestions
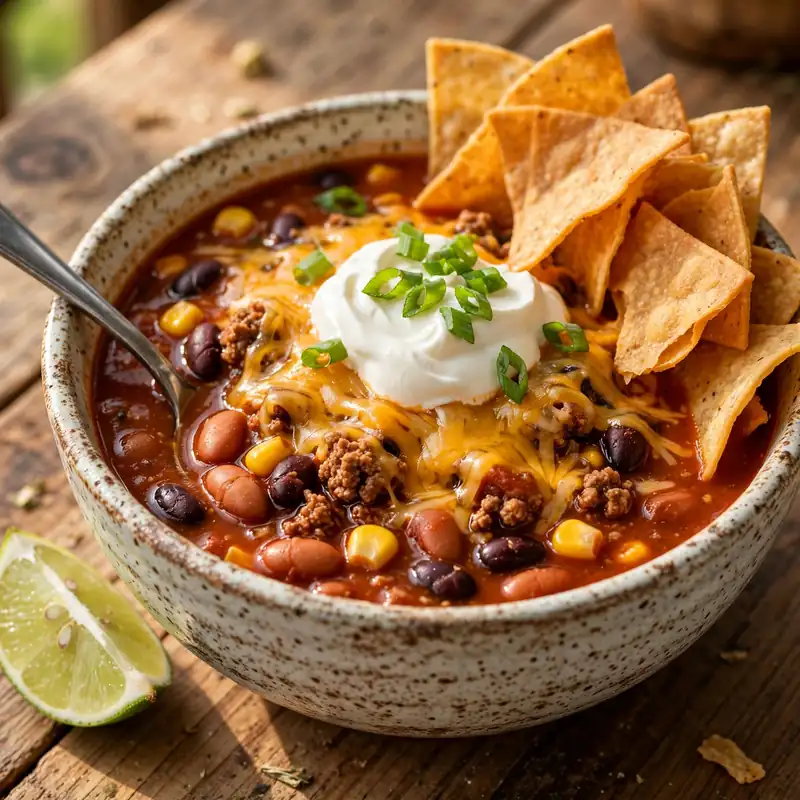
- Set up a toppings bar at the table rather than adding toppings directly to the pot: bowls of shredded cheddar, Monterey Jack, sour cream, crushed tortilla chips, sliced pickled jalapeños, fresh cilantro, diced avocado, and lime wedges. Each person customizes their bowl and the soup stays fresh and adjustable rather than becoming a uniform presentation.
- Serve alongside warm flour tortillas or corn tortillas for dipping into the broth. The tortilla soaks up the spiced liquid and turns the meal into something between a soup and a taco experience.
- A scoop of cooked white rice added to each bowl before the soup is ladled in makes the meal more substantial and slightly mellows the heat level for people who prefer a milder bowl.
- Crushed tortilla chips added at the last moment add a textural element that contrasts well with the soft beans and tender beef. Add them at the table rather than in the kitchen so they stay crispy for at least the first few bites.
- Pair with a cold sparkling water with lime or a horchata-style drink. Both complement the Tex-Mex flavor profile and provide a refreshing contrast to the warm, spiced broth.
- Serve in smaller portions as a starter before grilled chicken or a simple quesadilla. A half-bowl of taco soup as a first course is filling enough to anchor the meal without overpowering what follows.
Tips for the Best Results
- Brown the beef properly before adding anything else. This is the step that accounts for most of the difference between a taco soup that tastes genuinely good and one that tastes like seasoned canned goods. Two to three minutes of undisturbed contact with a hot pan builds the caramelized crust that carries savory depth into the broth. Every additional stir during those first minutes slows down that process.
- Caramelize the tomato paste against the bare pan. Stirring tomato paste directly into liquid produces a sauce that tastes of raw concentrated tomato. Pressing it against a hot dry spot on the pan for 60 to 90 seconds until it darkens to brick-red produces a sweeter, more complex flavor contribution. One extra minute, clear difference in the finished broth.
- Add lime juice after the heat is off. Lime juice added to simmering broth loses a significant portion of its volatile aromatic compounds to evaporation almost immediately. Added off the heat, those compounds stay in the broth and produce the bright, fresh finish that makes taco soup taste complete rather than flat. This is the easiest finishing technique in the recipe and the one most often skipped.
- Season in layers, not all at once. Add a small amount of salt when the onion goes in, again when the liquid is added, and a final adjustment after the lime juice is stirred through. Each stage of added ingredients changes the sodium balance; catching up with salt at the very end requires adding much more than it would have taken in small amounts throughout.
- Use both types of canned tomatoes. Fire-roasted tomatoes provide smokiness; plain diced tomatoes provide clean acidity and body. Using only one type produces a broth that’s either too smoky or too straightforwardly acidic. The combination produces a layered tomato flavor that works better with the cumin and chili powder spice blend.
Storage Tips
Refrigerator
Cool the taco soup completely before transferring to a sealed container. It keeps in the refrigerator for up to 5 days. The flavor genuinely improves by day two as the spices settle into the broth and the beans absorb more of the surrounding liquid. The broth may thicken slightly overnight as the starch from the beans continues to release; stir in a splash of broth or water when reheating to restore the original consistency.
Freezer
Taco soup freezes very well for up to 3 months. Cool completely, portion into freezer-safe containers or bags, and freeze flat for easier stacking. Thaw overnight in the refrigerator before reheating. The beans and corn hold their texture through the freeze-thaw cycle better than most vegetables because of their firmer cell structure. The broth may separate slightly on thawing; stir well as it reheats and it comes back together cleanly.
Reheating
The stovetop is the best method for reheating a full batch. Pour the soup into a saucepan over medium heat and stir every 90 seconds until it reaches a steady simmer throughout. Add a splash of beef broth if the soup has thickened overnight. For a single serving, microwave at 70% power in 90-second intervals, stirring between each, until evenly hot throughout. Stir in fresh lime juice if the brightness has faded during storage.
Make-ahead note: Taco soup is one of the best meal-prep soups available because it holds its flavor and texture for the full 5-day refrigerator window. Making a full batch on a Sunday for weekday lunches or dinners works consistently well with no quality compromise.
Nutrition Information
Per serving, approximately one bowl (1/6 of the recipe), toppings not included:
| Nutrient | Amount |
|---|---|
| Calories | 385 kcal |
| Protein | 28g |
| Total Carbohydrates | 38g |
| Dietary Fiber | 10g |
| Total Sugar | 7g |
| Total Fat | 13g |
| Saturated Fat | 4.5g |
| Cholesterol | 55mg |
| Sodium | 580mg |
| Vitamin C | 22mg |
| Calcium | 80mg |
| Iron | 4.8mg |
| Potassium | 750mg |
Nutrition values are approximate and may vary based on brands and portion sizes. Toppings not included.
Why This Recipe Works
The flavor architecture of taco soup depends on three separate cooking stages that each contribute something the others can’t. The first is browning the ground beef. When beef proteins reach around 150°C (300°F) on the surface of the pan, Maillard reactions produce hundreds of new flavor compounds including furfurals, pyrazines, and various carbonyl compounds that are associated with the complex, meaty taste of properly cooked beef. Those compounds dissolve into the broth when liquid is added and give the soup its savory backbone. Beef that’s been steamed or simmered rather than browned doesn’t develop those compounds; the flavor registers as milder, lighter, and less complex.
The second stage is blooming the spices in fat before liquid is added. Cumin, chili powder, smoked paprika, and oregano all contain flavor compounds that are significantly more soluble in fat than in water. Cooking them briefly in the rendered beef fat and olive oil creates a spiced fat that carries their full aromatic intensity into the surrounding broth once liquid is added. The same spices stirred directly into water or broth without the fat-blooming stage produce a detectably flatter, less integrated spice flavor in the finished soup.
The third stage is caramelizing the tomato paste separately from the liquid. Tomato paste is a concentrated suspension of tomato solids in water. When that paste contacts a dry hot surface, its water evaporates rapidly and the remaining sugars and glutamates undergo caramelization and partial Maillard reactions that produce flavor compounds associated with a roasted, slightly sweet, deeply savory tomato character. Stirred directly into liquid, those same reactions can’t occur because the water prevents the surface temperature from rising high enough.
Lime juice added off the heat is the finishing technique that resolves the most common complaint about homemade taco soup: that it tastes bold but somehow flat. Citric acid from fresh lime juice raises the perceived brightness of all the other flavors present by providing a sharp contrast point. In a broth heavy with earthy cumin and smoky paprika, that acidity sharpens the perception of each individual spice. The aromatic compounds in fresh lime zest and juice are highly volatile; they begin evaporating above 60°C (140°F). Adding lime to simmering broth means most of those aromatics escape with the steam. Adding it after the heat is off keeps the full aromatic profile in the bowl.
I’ve tested this recipe with both fire-roasted and plain diced tomatoes as the sole tomato ingredient. Fire-roasted tomatoes alone produce a broth that’s slightly too smoky and one-dimensional. Plain diced tomatoes alone produce a broth that’s acidic but lacks depth. Using one can of each produces a balanced tomato contribution where the smokiness enhances the paprika and the acidity provides a clean background note for the cumin.
Frequently Asked Questions
Can I make taco soup ahead of time?
Yes, and it’s one of the most practical dishes for advance preparation. Make the full batch, cool it completely, and refrigerate for up to 5 days. The flavor improves noticeably after the first 24 hours as the spices settle into the broth and the beans absorb surrounding flavor. For longer storage, freeze in individual portions for up to 3 months. Reheat gently on the stovetop with a splash of broth, and stir in a fresh squeeze of lime juice before serving to restore the brightness that fades slightly during storage.
Why does my taco soup taste flat even with all the spices?
Two things cause a flat-tasting taco soup most often. The spices weren’t bloomed in fat before the liquid went in, which means they released only the water-soluble portion of their flavor compounds. And the lime juice was either skipped or added to simmering broth rather than off the heat, which means the volatile aromatic compounds evaporated before they could brighten the finished broth. Fix both in the next batch and the difference is immediate and obvious.
Can I use ground turkey instead of ground beef?
Yes. Ground turkey thighs produce a richer, more flavorful result than turkey breast because of the higher fat content in the darker meat. The broth will be paler than a beef version; increase the smoked paprika to 1 1/2 teaspoons and add an extra tablespoon of tomato paste to deepen the flavor. The method stays exactly the same. Turkey also produces slightly less fat during browning, so you may not need to drain anything before adding the aromatics.
How do I know when the soup is done?
Taco soup is done when the broth is actively simmering, the spices have had at least 15 minutes to fully integrate into the liquid, and the beans have softened slightly and absorbed some of the surrounding flavor. Taste the broth; it should taste bold, spiced, and well-rounded. If any single spice stands out as sharp or raw-tasting, continue simmering for 3 to 4 more minutes and taste again. The final lime juice addition should be the last thing you add, just before the pot comes off the heat.
Can I make this in a slow cooker?
Yes. Brown the beef, onion, garlic, tomato paste, and spices on the stovetop through step 3 first; the slow cooker alone can’t generate enough heat to properly brown beef or caramelize tomato paste. Transfer the browned mixture to the slow cooker and add all remaining ingredients except lime juice and corn. Cook on low for 6 to 7 hours or high for 3 to 4 hours. Stir in the frozen corn during the last 30 minutes of cooking. Add lime juice just before serving.
Is taco soup gluten-free?
The soup base as written is naturally gluten-free. The main variables are the beef broth and tomato paste; some brands contain gluten-containing additives or are processed in shared facilities. Check that both are labeled gluten-free if this is a strict requirement. The tortilla chip topping is also a variable; certified gluten-free tortilla chips are widely available if needed. Shredded cheese and sour cream are naturally gluten-free.
Can I add more beans and reduce the beef to make it go further?
Yes, and this is one of the most practical ways to extend the recipe for a larger group or to reduce the cost per serving. Adding a third can of beans (any variety) increases the volume by about 25% and adds fiber and protein. If you’re also reducing the beef, add 1 extra teaspoon of cumin and 1/2 teaspoon of smoked paprika to compensate for the flavor depth the reduced beef would have contributed. The soup thickens slightly with the additional beans, so add an extra 1/2 cup of broth to maintain the consistency.

Conclusion
Taco soup works because the method behind it is actually sound rather than just convenient. Browning the beef, blooming the spices, caramelizing the tomato paste, and finishing with lime off the heat are four decisions that each have a specific, noticeable effect on the finished broth. Skip any of them and the soup is still edible; include all of them and it tastes like something you’d order rather than something you threw together on a Tuesday.
The toppings are where you make it yours. Crushed chips, shredded cheese, a spoonful of sour cream, a few jalapeño slices: each one adds something different and the combination changes every bowl. That flexibility, plus the 35-minute timeline and the quality of the leftovers, is what makes this taco soup a recipe worth keeping in regular rotation.
If you loved this recipe, save it to your Tex-Mex and easy weeknight dinner Pinterest board so you can find it easily later. For more recipes and daily food inspiration, follow TheCookingVibes on Pinterest.
Easy Taco Soup
Ingredients
Equipment
Method
- Heat olive oil in a large Dutch oven over medium-high heat. Add ground beef in an even layer and cook undisturbed for 2 to 3 minutes to build a browned crust, then break into crumbles and cook until no pink remains. Drain excess fat, leaving about 1 tablespoon. Confirm beef has reached 71°C (160°F) internal temperature.
- Reduce heat to medium. Add diced onion to the pot and cook for 4 to 5 minutes until fully soft. Add garlic and stir for 60 seconds until fragrant.
- Add all spices directly to the beef mixture and stir for 60 seconds. Push mixture to the sides and add tomato paste to the bare pan center. Let it caramelize for 60 to 90 seconds until dark brick-red, then stir through everything.
- Pour in beef broth, scraping the base to lift any browned bits. Add both cans of tomatoes with their juice, the drained black beans, and drained kidney beans. Stir to combine and bring to a boil.
- Reduce heat to medium-low and simmer steadily for 15 minutes, stirring occasionally. Add frozen corn and continue simmering for 3 to 4 more minutes until corn is heated through.
- Turn off heat. Squeeze lime juice into the pot and stir through. Taste and adjust salt, pepper, and spices. Ladle into bowls and add toppings at the table.