Rich Oreo Cake — Fudgy Chocolate Layers, Creamy Oreo Frosting
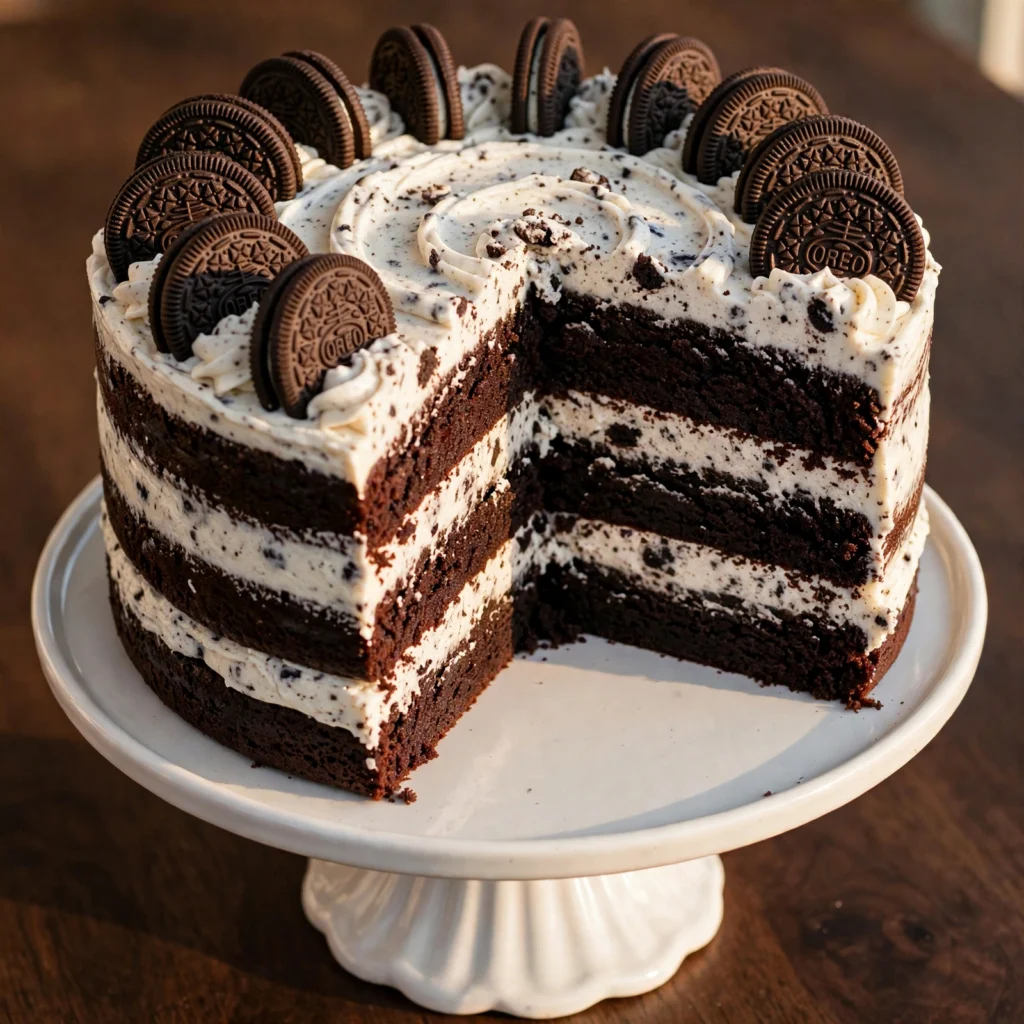
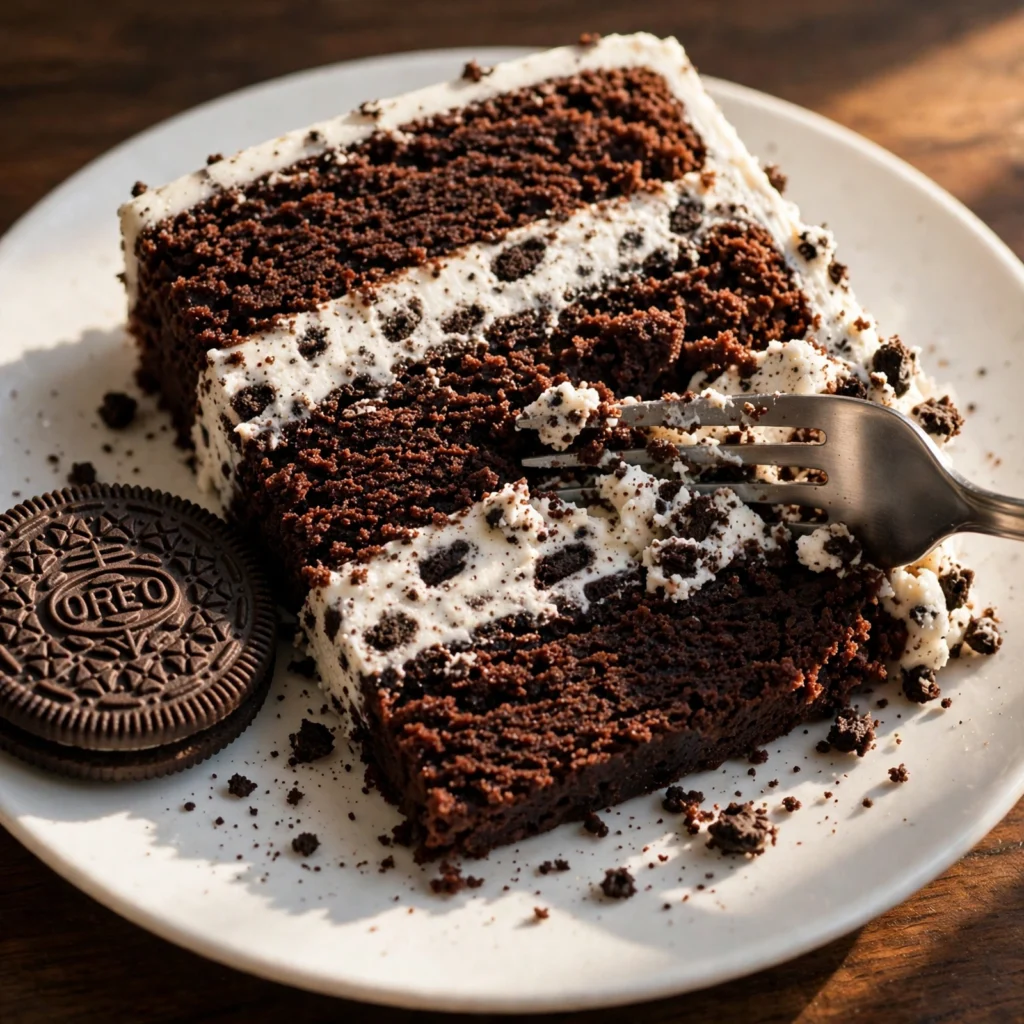
The first slice of this cake tells you everything. The layers are dark, fudgy, and genuinely moist, the frosting is thick with crushed Oreo cookies folded through a smooth vanilla buttercream, and the cookies pressed into the sides and top make every piece look like it came from a bakery case rather than a home kitchen. It’s the kind of cake that disappears fast at a birthday party and that people ask about before they’ve even finished their slice.
This Oreo cake uses a from-scratch chocolate base that relies on cocoa powder and brewed coffee for depth, buttermilk for a tender crumb that doesn’t dry out, and a cookies and cream buttercream that has real Oreo crumbs folded directly into it rather than just used as decoration. The result is a three-layer cake that holds up well at room temperature, cuts cleanly into 12 generous slices, and is far more achievable at home than it looks. Two hours from start to finished cake.
Why You’ll Love This Oreo Cake
- Deep chocolate flavor without being one-dimensional. Brewed coffee in the batter amplifies the cocoa without making the cake taste like coffee. It adds a background bitterness that keeps the cake from tasting flat and sweet rather than rich.
- Cookies and cream frosting with actual Oreo crumbs inside. The buttercream has finely crushed Oreos folded through the base, not just sprinkled on top. Every spoonful of frosting has the texture and flavor of cookies and cream, which is what makes this an Oreo cake and not just a chocolate cake with decoration.
- Three layers that stay moist for two days. Buttermilk in the batter and vegetable oil as the fat source both contribute to a crumb that stays soft and moist long after baking, which matters when you’re making a cake in advance for a party.
- Cuts cleanly into 12 neat slices. The cake layers are dense enough to hold their shape when sliced, and the buttercream sets firmly enough to give clean edges. No crumbling, no sliding layers.
- Looks impressive without advanced decorating skills. Whole Oreo cookies pressed into the top border of the frosting does most of the visual work. Rough-swirled buttercream looks intentional and textured rather than unfinished.

Ingredients You’ll Need
Recipe Timing
| Detail | Info |
|---|---|
| Servings | 12 slices |
| Difficulty | Intermediate |
| Course | Dessert |
| Cuisine | American |
| Prep Time | 30 minutes |
| Cook Time | 35 minutes |
| Cooling Time | 60 minutes |
| Total Time | 2 hours 5 minutes |
Use Dutch-process cocoa powder rather than natural cocoa if you can find it. Dutch-process has been alkalized, which gives it a darker color and a smoother, less sharp chocolate flavor that works better in this style of cake. Both work, but Dutch-process produces a noticeably richer result. For the brewed coffee, use it at room temperature, not hot; hot liquid added to the batter would partially cook the eggs.
For the Chocolate Cake Layers:
- 2 cups (250g) all-purpose flour — The structural base. Measure by weight for consistency; cup measurements can vary by up to 30g depending on how packed the bag is, and excess flour produces a dry, dense cake.
- 2 cups (400g) granulated white sugar — Sweetens and contributes to the moist, tender crumb by binding water molecules during baking.
- 3/4 cup (75g) unsweetened cocoa powder — The primary chocolate flavor source. Sift it into the dry ingredients; cocoa clumps badly and doesn’t distribute evenly when added unsifted.
- 2 tsp baking soda — The main leavening agent. Reacts with the acidic buttermilk to create lift during baking.
- 1 tsp baking powder — Works alongside baking soda for a lighter, more even rise.
- 1 tsp fine salt — Sharpens the chocolate flavor and keeps the sweetness in balance.
- 2 large eggs, at room temperature — Bind the batter and contribute structure. Cold eggs can cause the batter to curdle slightly when they contact the oil.
- 1 cup (240ml) full-fat buttermilk, at room temperature — Adds acidity (which activates the baking soda), fat (which keeps the crumb moist), and a faint tang that balances the sweetness of the frosting. No buttermilk: stir 1 tablespoon of white vinegar into a measuring cup, fill to the 1-cup line with whole milk, and wait 5 minutes.
- 1 cup (240ml) strong brewed coffee, cooled to room temperature — Deepens the chocolate flavor significantly without adding any detectable coffee taste. Replace with an equal volume of hot water if you prefer not to use coffee; the cake will be slightly less complex in flavor but still good.
- 1/2 cup (120ml) vegetable oil — Oil produces a moister crumb than butter in this style of batter because it remains liquid at room temperature, whereas butter solidifies and the crumb tightens as the cake cools.
- 1 tsp pure vanilla extract
For the Oreo Buttercream:
- 1 cup (225g) unsalted butter, softened to room temperature — The base of the frosting. Cold butter produces a lumpy, dense buttercream that won’t pipe or spread smoothly.
- 4 cups (480g) powdered sugar, sifted — Sifting removes lumps before mixing, which means less beating time and a smoother final texture.
- 3 to 4 tbsp heavy cream — Adjusts the consistency. Add one tablespoon at a time until the frosting is thick enough to hold its shape when swirled but loose enough to spread without tearing the cake surface.
- 1 tsp pure vanilla extract
- 1/4 tsp fine salt — Cuts the sweetness and prevents the frosting from tasting one-dimensional.
- 20 Oreo cookies, finely crushed (about 2 cups of crumbs), divided — Half goes into the buttercream; half is used for decoration. Crush them in a zip-lock bag with a rolling pin or blitz in a food processor until they resemble fine sand with no large chunks. Large chunks clog piping tips and create uneven textures when spreading.
For Decoration:
- 10 to 12 whole Oreo cookies — Pressed into the top border of the frosted cake.
- Additional crushed Oreo crumbs — Scattered across the top surface between the whole cookies.

Allergen and Dietary Disclosure
This recipe contains dairy (buttermilk, butter, and heavy cream), eggs, and gluten (all-purpose flour). Oreo cookies themselves contain wheat flour and are processed on shared equipment with milk products, so trace dairy contact is possible depending on the batch.
For a dairy-free version, replace the buttermilk with unsweetened oat milk plus 1 tablespoon of apple cider vinegar (rested 5 minutes). Use a plant-based butter block (not a spread) in the frosting and replace the heavy cream with full-fat coconut cream. The frosting will be slightly softer but holds up well if kept cool. For a gluten-free version, a 1:1 gluten-free baking flour blend works at the same weight in the cake layers; note that standard Oreo cookies contain gluten, so gluten-free Oreo alternatives would be needed throughout.
This recipe has not been prepared in an allergen-free facility. Always verify individual product labels if you are managing a serious allergy.
Equipment Needed
- Three 8-inch (20 cm) round cake pans — The recipe is calibrated for three 8-inch pans producing layers of roughly equal height. Two 9-inch pans also work but the layers will be thinner and the bake time reduces by about 4 to 5 minutes. Check earlier.
- Stand mixer or hand mixer — Essential for the buttercream. A hand mixer on medium-high speed takes about 5 minutes to get the butter fully light and fluffy. A stand mixer is faster but not necessary. Don’t attempt buttercream by hand; the final texture will be dense and grainy.
- Kitchen scale — Flour and powdered sugar both compress dramatically in cup measurements. Weight measurements give you a consistent cake and frosting every time.
- Wire cooling racks (at least two) — Cake layers must cool completely on a rack with airflow underneath before frosting. Frosting a warm cake melts the buttercream and causes the layers to slide.
- Offset spatula — For spreading frosting between layers and across the outside of the cake. The angled blade gives you control that a regular knife doesn’t, especially when smoothing the sides.
- Cake turntable (optional but useful) — Rotating the cake while spreading frosting produces a cleaner, more even finish. A lazy Susan works as a substitute.
- Parchment paper circles — Placed in the bottom of each greased cake pan, they guarantee the layers release cleanly. Cake layers that stick tear and are difficult to repair.
Step-by-Step Directions
Step 1: Prepare the Pans and Preheat
Set your oven to 175°C (350°F). Grease all three 8-inch cake pans with butter or cooking spray, line the bottom of each with a parchment paper circle, and grease the parchment as well. Both the parchment and the extra grease on the paper ensure clean release even for a deeply colored, sticky chocolate cake.
Step 2: Mix the Dry Ingredients
Sift the flour, cocoa powder, baking soda, baking powder, and salt together into a large mixing bowl. Whisk once after sifting to distribute everything evenly. Sifting cocoa is not optional here; lumps of unsifted cocoa create dense, dark pockets in the finished cake that don’t bake through properly.

Chef’s Note: Combining all the dry ingredients before the wet ingredients go in means the leavening agents are evenly distributed throughout the flour from the start. When the wet ingredients hit, the baking soda begins reacting with the acidic buttermilk, and you want that reaction happening uniformly across the batter, not concentrated in one spot.
Step 3: Combine the Wet Ingredients
In a separate large bowl or a large measuring jug, whisk together the eggs, buttermilk, cooled coffee, vegetable oil, and vanilla extract until fully blended. The mixture will look thin and slightly separated; that’s normal. The oil doesn’t fully emulsify with the other liquids at this stage.

Step 4: Make the Cake Batter
Pour the wet ingredients into the bowl with the dry ingredients. Using a rubber spatula or a whisk, stir gently until the batter is fully combined and smooth with no dry pockets remaining. The batter will be noticeably thin and pourable compared to most cake batters; this is the coffee and oil doing their job. Thin batter produces moist, fine-crumbed chocolate cake rather than the denser result a thicker batter would give.
Chef’s Note: Don’t overmix past the point where the dry ingredients have fully incorporated. At this hydration level the batter comes together quickly, usually within 30 to 40 strokes, and additional mixing beyond that develops excess gluten, which tightens the crumb and makes the finished layers slightly rubbery.
Step 5: Divide and Bake
Pour the batter evenly across the three prepared pans. Each pan should hold roughly the same volume; use a kitchen scale to weigh the pans if you want precise equal layers. Tap each pan twice on the counter to release any large air bubbles trapped in the batter. Bake all three pans together on the center and lower oven racks at 175°C (350°F) for 30 to 35 minutes, rotating the pans halfway through if your oven has hot spots.
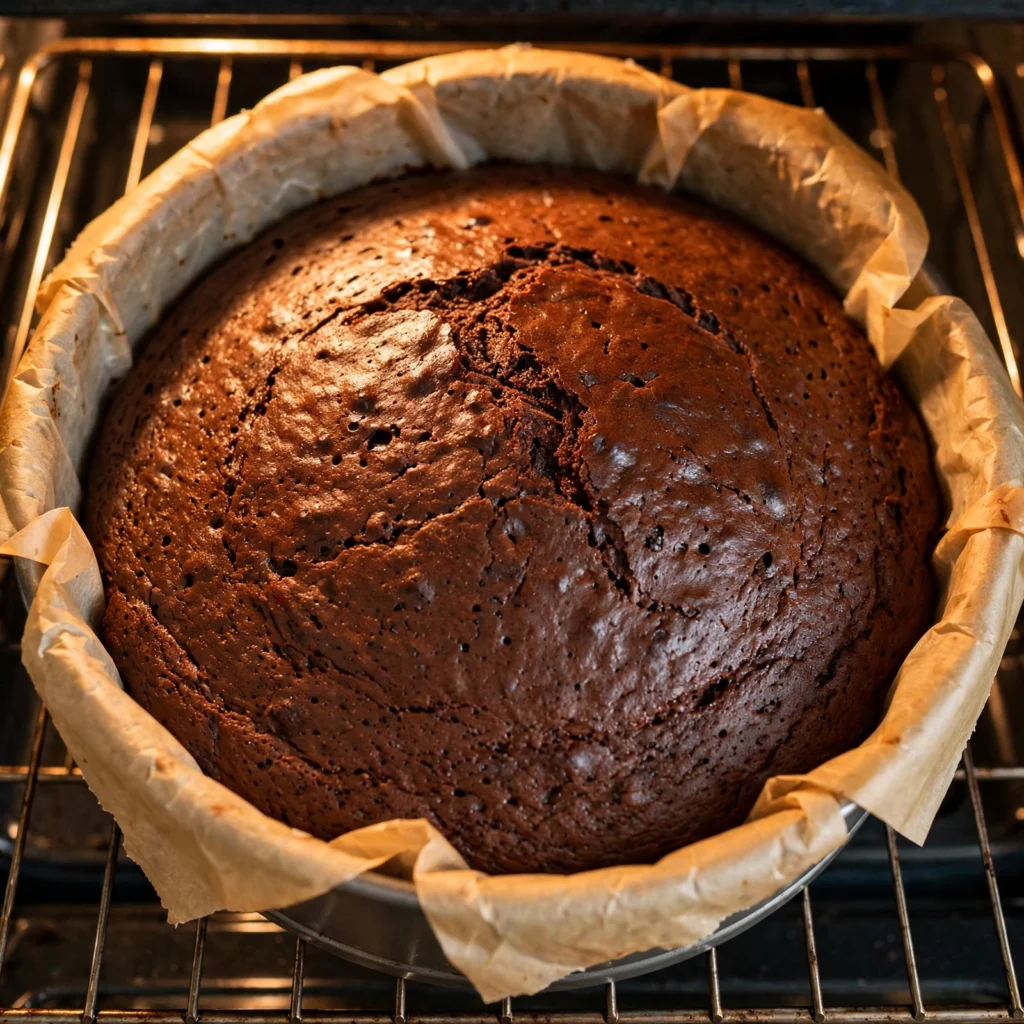
Chef’s Note: The layers are done when a toothpick inserted into the thickest part of the center comes out with just one or two dry crumbs attached, not wet batter. The top of each layer should spring back lightly when pressed at the center. If it leaves a dent that doesn’t rise, the cake needs another 3 minutes.
Step 6: Cool the Layers Completely
Let the cake layers cool in their pans for 15 minutes, then run a thin knife around the inside edge of each pan and turn the layers out onto wire cooling racks. Peel away the parchment paper immediately. Allow the layers to cool at room temperature for a full 60 minutes before frosting. A layer that is even slightly warm will melt the butter in the buttercream on contact, causing the frosting to slide and the layers to shift.
Step 7: Make the Oreo Buttercream
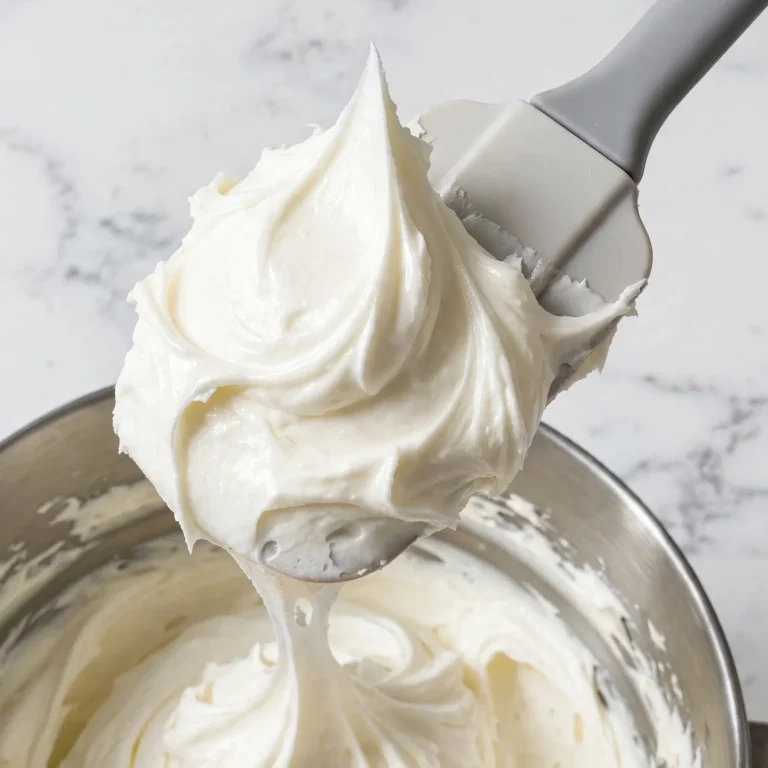
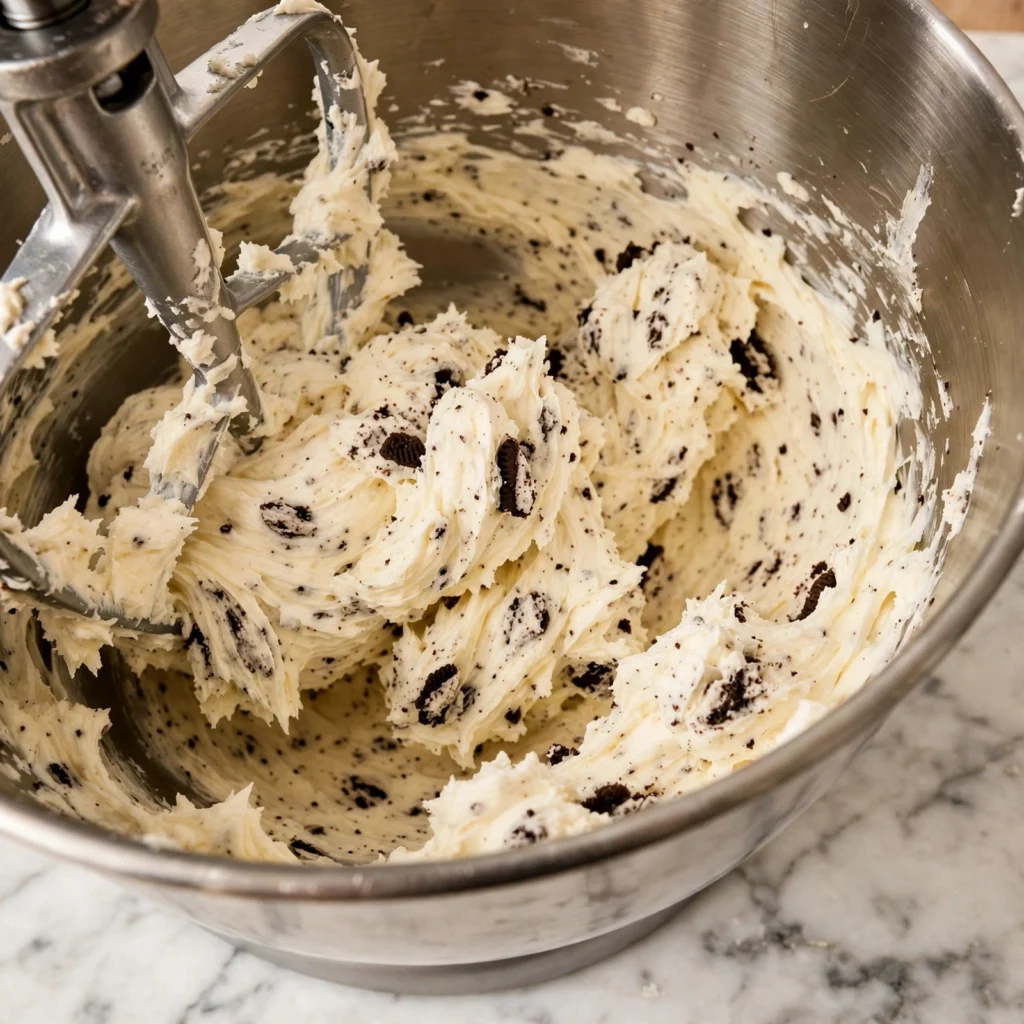
Beat the softened butter in your stand mixer or with a hand mixer on medium-high speed for 3 to 4 minutes until it has turned noticeably pale and increased in volume. Reduce to low speed and add the sifted powdered sugar in three additions, mixing after each until incorporated before adding the next. Add the vanilla extract, salt, and 3 tablespoons of heavy cream. Increase to medium-high and beat for 2 minutes until the frosting is light and fluffy. Fold in 1 cup of finely crushed Oreo crumbs with a spatula until evenly distributed. Taste: if it’s too sweet, add a small pinch of extra salt. If it’s too thick to spread, add the remaining tablespoon of cream and beat briefly.
Step 8: Assemble and Frost
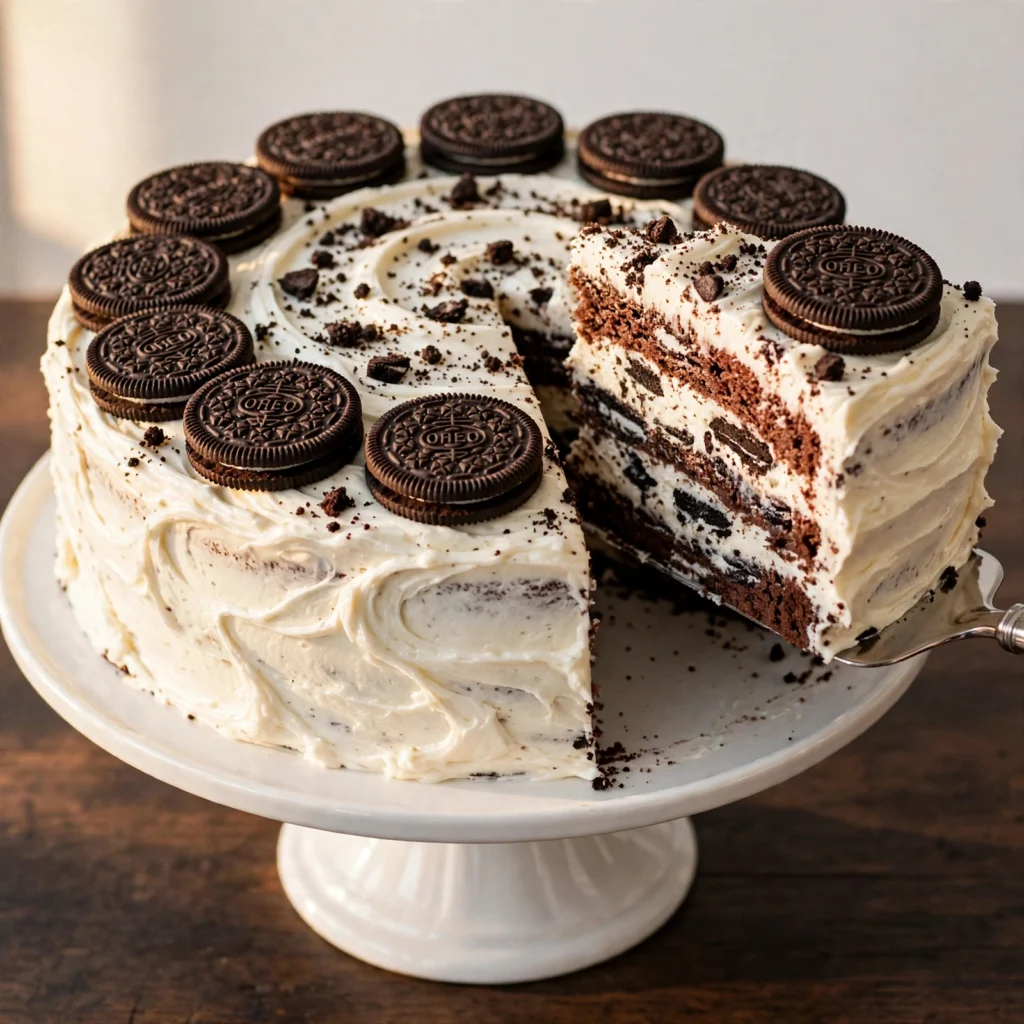
Place one cooled cake layer on your serving plate or cake board. Spread a generous, even layer of Oreo buttercream across the top using your offset spatula, about 1 cm thick. Place the second layer directly on top and repeat. Add the third layer. Apply a thin crumb coat (a very thin layer of frosting that seals in the loose crumbs) over the entire outside of the cake and refrigerate for 15 minutes until the coat is set. Apply the final, thicker layer of frosting to the top and sides, smoothing as evenly as you can. Press the remaining 1 cup of Oreo crumbs along the bottom third of the cake sides, then arrange whole Oreo cookies around the top border. Scatter additional crumbs over the top surface between the cookies.
Common Mistakes and Troubleshooting
| Problem | Cause | Solution |
|---|---|---|
| Cake layers sank in the center | Oven temperature too low, batter overmixed, or underbaked | Verify oven temperature with a thermometer. Mix only until combined. Always test with a toothpick before removing from the oven. |
| Frosting melted and slid off the cake | Layers weren’t fully cooled before frosting, or kitchen is too warm | Cool layers a full 60 minutes. If the kitchen is above 26°C (78°F), frost and refrigerate between each layer for 10 minutes before adding the next. |
| Buttercream is grainy and dense | Butter was too cold, or powdered sugar was added too quickly | Always start with room-temperature butter and beat it alone for a full 3 to 4 minutes before sugar goes in. Add sugar in three additions, not all at once. |
| Oreo crumbs in frosting are too chunky | Cookies weren’t crushed finely enough | Crumbs should resemble fine sand. Blitz in a food processor for 30 seconds, or crush in a sealed bag and roll repeatedly with a rolling pin, checking the texture between passes. |
| Layers stuck in the pan | Pan wasn’t lined with parchment, or parchment wasn’t greased | Always grease the pan, line with parchment, and grease the parchment. The double layer of protection is what makes the difference for a rich, sticky chocolate cake. |
Variations and Substitutions
Double Chocolate Oreo Cake: Add 1/2 cup of mini semi-sweet chocolate chips directly to the batter before dividing into pans. The chips partially melt during baking and create pockets of melted chocolate throughout each layer, which intensifies the chocolate experience alongside the cookie frosting.
Oreo Cheesecake Filling: Replace one layer of buttercream with a no-bake cheesecake filling: beat 225g of softened cream cheese with 1 cup of powdered sugar, 1 teaspoon of vanilla, and 1/2 cup of whipped cream until thick and stable. Fold in 1/2 cup of Oreo crumbs and spread between the bottom two layers. Keep the top two layers frosted with the regular buttercream. This version must be refrigerated.
Oreo Cake Cupcakes: Pour the batter into two lined standard muffin tins filling each cup about two-thirds full. Place half an Oreo cookie flat in the bottom of each cup before adding the batter; it sinks slightly and creates a cookies and cream base as the cupcake bakes. Bake at 175°C (350°F) for 18 to 22 minutes. Top with the same Oreo buttercream piped through a large star tip.
Gluten-Free Version: Swap the all-purpose flour for an equal weight of a 1:1 gluten-free baking flour blend and use gluten-free Oreo alternatives throughout, both in the frosting and for decoration. The batter will look slightly thicker and the layers will be a little more fragile when handling; let them cool completely before moving them off the rack.
Reduced Sugar Frosting: Reduce the powdered sugar to 3 cups instead of 4 and increase the cream to 5 tablespoons for the right consistency. The frosting is noticeably less sweet and the Oreo flavor in the crumbs comes through more distinctly.
Serving Suggestions
- Serve at room temperature for the best texture. Refrigerated buttercream firms significantly and the layers lose some of their softness straight from the fridge. Pull the cake out 30 to 45 minutes before serving and let it come to room temperature.
- Pair with a strong cup of black coffee or an unsweetened espresso. The bitterness of the coffee against the sweet, cookie-heavy frosting is one of the most satisfying flavor combinations at a dessert table.
- Serve alongside a scoop of vanilla frozen yogurt or a small glass of cold milk on the side for anyone who wants to balance the richness of the cake.
- Present the cake whole on the stand before slicing; the visual of the whole cookies arranged around the top makes a significant impression and works well as a centerpiece at a birthday party or celebration.
- Leftovers served the next day are genuinely excellent. The moisture redistributes overnight and the cake becomes slightly denser and fudgier, which most people prefer to the fresh-baked version.
Tips for the Best Results
Weigh every dry ingredient. Flour and powdered sugar are the two ingredients where cup measurements cause the most variation. Too much flour in the cake batter produces a dry, dense layer. Too much powdered sugar in the frosting makes it stiff and overly sweet. A kitchen scale costs less than a bag of groceries and removes both problems permanently.
Beat the butter alone before adding sugar. The most common reason buttercream is dense and grainy rather than light and fluffy is skipping this step. Three to four minutes of beating butter alone, before any sugar goes in, incorporates enough air to give the frosting its characteristic lightness. Sugar added to under-beaten butter never fully lightens regardless of how long you mix it afterward.
Crush the Oreo crumbs finer than you think necessary. For frosting that spreads without dragging and piping that comes out clean, the crumbs need to be as fine as sand. Large chunks create friction when spreading and block piping tips when decorating. A food processor produces the most consistent result in under a minute.
Apply a crumb coat before the final frosting layer. A thin initial coat of frosting sealed with 15 minutes of refrigeration traps the loose chocolate crumbs against the cake surface so they don’t contaminate the white final layer with dark streaks. Skipping this step is the most common reason home-baked layer cakes have visually messy outsides despite good frosting technique.
Cool the layers fully before stacking. A warm layer melts the frosting on contact and makes the cake lean and unstable. Sixty minutes is the minimum. If you’re in a rush, place the layers in the freezer for 20 minutes after the first 30 minutes of room-temperature cooling; they’ll be cold through to the center and safe to frost.
Storage Tips
Counter
A fully frosted Oreo cake keeps at room temperature, covered loosely with a cake dome or inverted bowl, for up to 2 days. Keep it away from direct sunlight, which softens the buttercream unevenly. The Oreo cookies used as decoration will begin to soften after the first day as they absorb moisture from the frosting, which is a texture change but not a quality problem.
Refrigerator
Store the cake covered in the refrigerator for up to 5 days. The buttercream firms considerably when cold, so allow 30 to 45 minutes at room temperature before serving each time. Individual slices can be stored in airtight containers and pulled out one at a time, which keeps the rest of the cake from drying out at the exposed cut edges.
Freezer
Both the unfrosted cake layers and the fully assembled cake freeze well. For unfrosted layers: wrap each cooled layer tightly in two layers of plastic wrap and freeze for up to 3 months. Thaw overnight in the fridge and frost the next day. For the assembled cake: freeze uncovered until the frosting is solid (about 2 hours), then wrap tightly in plastic wrap and foil. Freeze for up to 2 months. Thaw overnight in the fridge and bring to room temperature before serving.
Make-Ahead Note: Bake the cake layers up to 2 days before assembly, wrap tightly in plastic wrap, and store at room temperature. The frosting can be made up to 3 days ahead and refrigerated in an airtight container. Re-beat the cold frosting for 2 minutes before using to restore its original fluffy texture. This staging approach reduces day-of assembly to about 30 minutes.
Nutrition Information
Per serving, based on 12 slices. Values are approximate.
| Nutrient | Amount |
|---|---|
| Calories | 680 kcal |
| Protein | 6g |
| Carbohydrates | 95g |
| Fiber | 2.5g |
| Sugar | 72g |
| Total Fat | 32g |
| Saturated Fat | 15g |
| Cholesterol | 82mg |
| Sodium | 420mg |
| Potassium | 175mg |
| Calcium | 55mg |
| Iron | 2.8mg |
| Vitamin C | 0mg |
Nutrition values are approximate and may vary based on brands and portion sizes.
Why This Recipe Works
The chocolate cake layers in this recipe are built around three decisions that each address a common failure in home-baked chocolate cake: dense texture, muted flavor, and a crumb that dries out within hours.
Vegetable oil instead of butter in the batter keeps the crumb soft at room temperature because oil stays liquid as the cake cools. Melted butter solidifies as the temperature drops, and that solidification compresses the crumb and makes the cake feel firmer and drier after a few hours. The oil version is noticeably moister when you cut into it at room temperature, and it stays that way for longer.
Brewed coffee is the most impactful flavor addition in this recipe, even though it produces no discernible coffee flavor in the finished cake. Cocoa powder contains flavor compounds that respond to the heat and acidity of coffee; the coffee extracts and intensifies those compounds in a way that hot water alone doesn’t replicate. Side-by-side test batches of this cake with hot water versus brewed coffee produced a visible difference in the depth of color and a clear difference in flavor intensity of the finished layer.
The crumb coat is the structural decision that makes the final appearance possible. Chocolate cake crumbs are dark and dense, and they contaminate white frosting immediately when they make contact during spreading. Sealing them under a thin, refrigerated first coat means the final layer of white Oreo buttercream goes on over a clean, cold surface and stays visually clean throughout the frosting process.
Folding crushed Oreo crumbs into the buttercream rather than just pressing them on the outside distributes the cookies and cream flavor through every bite of frosting rather than concentrating it only at the decorated edges. That choice is what makes this taste like an Oreo cake rather than a chocolate cake with Oreo garnish.
Frequently Asked Questions
Can I make this Oreo cake the day before?
Yes, and this is actually the recommended approach for parties. Bake and cool the layers the day before, wrap each in plastic wrap, and store at room temperature. Make and refrigerate the frosting. The next day, re-beat the cold frosting briefly and assemble the cake. It can also be fully assembled the night before and kept covered in the fridge; just allow 45 minutes at room temperature before serving so the frosting softens and the layers return to their best texture.
Why did my cake layers sink in the middle?
The most common cause is opening the oven door before the layers have fully set, usually before the 25-minute mark. The rush of cool air collapses the structure before the batter has firmed up around the air bubbles created by the leavening. The second cause is an oven running cooler than its displayed temperature; invest in an oven thermometer if your bakes consistently undercook or bake unevenly. Overmixing is a third possibility: too much gluten development creates a structure that rises fast and then collapses.
Can I make this as a two-layer cake instead of three?
Yes. Use two 9-inch round pans instead of three 8-inch pans. The batter volume is the same but the layers will be shorter. Reduce the bake time to 28 to 32 minutes and start testing at 28 minutes. The frosting recipe produces enough for a two-layer assembly with a generous coating on the outside. You may have some frosting left over, which keeps well in the fridge for up to a week.
How finely do the Oreo crumbs need to be crushed for the frosting?
The crumbs should be as fine as coarse sand, with no pieces larger than a small pea remaining. Large chunks create uneven texture in the frosting, make it difficult to spread smoothly, and block piping tips entirely. A food processor gives you the most consistent result; 20 to 30 seconds of pulsing brings whole cookies to the right consistency. A zip-lock bag and rolling pin also works but takes more passes than most people expect.
Can I use a box chocolate cake mix instead of making the layers from scratch?
Yes. A standard dark chocolate box mix prepared according to its package instructions will work structurally in this recipe. The layers will be slightly less rich and the chocolate flavor less complex than the from-scratch version, but the Oreo buttercream is flavorful enough to carry the overall result. Follow the box instructions for a two or three-layer cake, cool fully, and frost with the Oreo buttercream in this recipe.
Does this cake need to be refrigerated?
At room temperature (below about 22°C / 72°F) the cake is stable for up to 2 days under a cake dome. Above that temperature, the buttercream softens and the layers can shift, so refrigeration is safer in warm kitchens or during summer months. If you refrigerate it, always bring it back to room temperature before serving; cold buttercream is stiff and the cake loses its soft texture straight from the fridge.
Can I make this without coffee in the batter?
Yes. Replace the brewed coffee with an equal volume of hot water. The cake will still taste like chocolate, and the texture will be identical. The flavor will be slightly less complex because the coffee compounds that amplify the cocoa won’t be present, but it’s a good substitute for households that don’t drink coffee or want to serve the cake to children without any caffeine.
Conclusion
Oreo cake lands somewhere between a celebration cake and an everyday indulgence, and that range is exactly what makes it worth learning. The chocolate layers are deeply flavored without being precious about technique, the Oreo buttercream is straightforward to make and unmistakably good, and the assembled cake looks put-together regardless of your decorating experience.
The make-ahead structure here is the practical key. Bake the layers one day, assemble the next, and you arrive at whatever gathering you’re heading to with a cake that looks like it required more effort than it did. Oreo cake has a way of doing that.
If you loved this recipe, save it to your cake recipes Pinterest board so you can find it easily later. For more recipes and daily food inspiration, follow TheCookingVibes on Pinterest.

Oreo Cake
Ingredients
Equipment
Method
- Preheat oven to 175°C (350°F). Grease three 8-inch round cake pans, line each with a parchment circle, and grease the parchment.
- Sift together flour, cocoa powder, baking soda, baking powder, and salt into a large bowl. Whisk to distribute.
- In a separate bowl or jug, whisk together eggs, buttermilk, cooled coffee, vegetable oil, and vanilla until blended.
- Pour wet ingredients into the dry ingredients and stir gently until smooth and fully combined. Batter will be thin. Do not overmix.
- Divide batter evenly between the three prepared pans. Tap each pan twice on the counter. Bake for 30 to 35 minutes until a toothpick inserted in the center comes out with a few dry crumbs.
- Cool in pans for 15 minutes, then turn out onto wire racks. Peel off parchment. Cool completely for 60 minutes before frosting.
- Beat softened butter on medium-high for 3 to 4 minutes until pale and fluffy. Add sifted powdered sugar in three additions on low speed. Add vanilla, salt, and 3 tablespoons of cream. Beat on medium-high for 2 minutes. Fold in 1 cup of finely crushed Oreo crumbs.
- Place one cake layer on a plate or board. Spread a generous layer of Oreo buttercream. Add second layer, repeat. Add third layer. Apply a thin crumb coat over the entire cake and refrigerate 15 minutes. Apply the final layer of frosting, smooth the sides and top. Press Oreo crumbs along the bottom third of the sides. Arrange whole Oreos around the top edge. Scatter extra crumbs across the top.