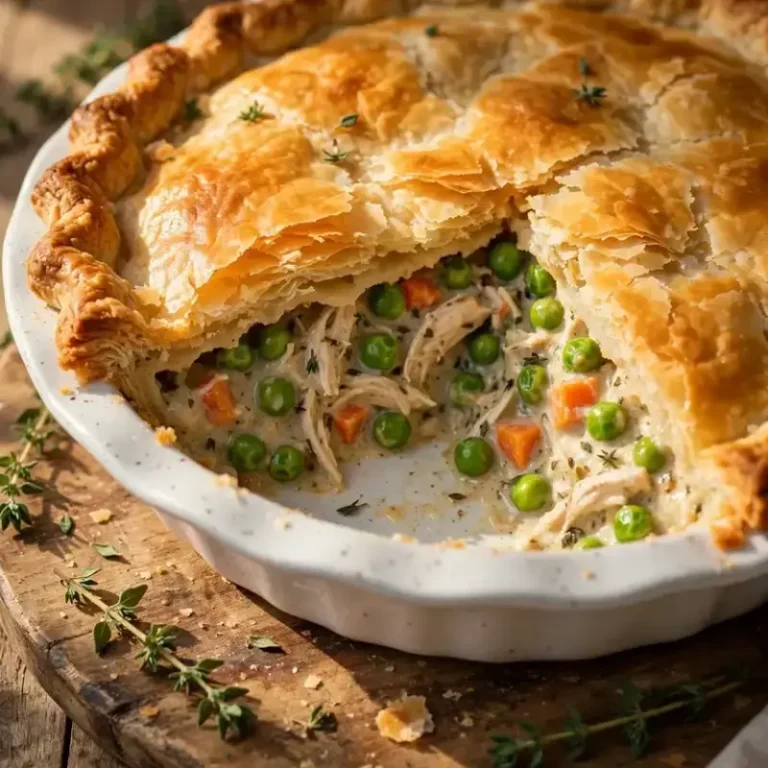
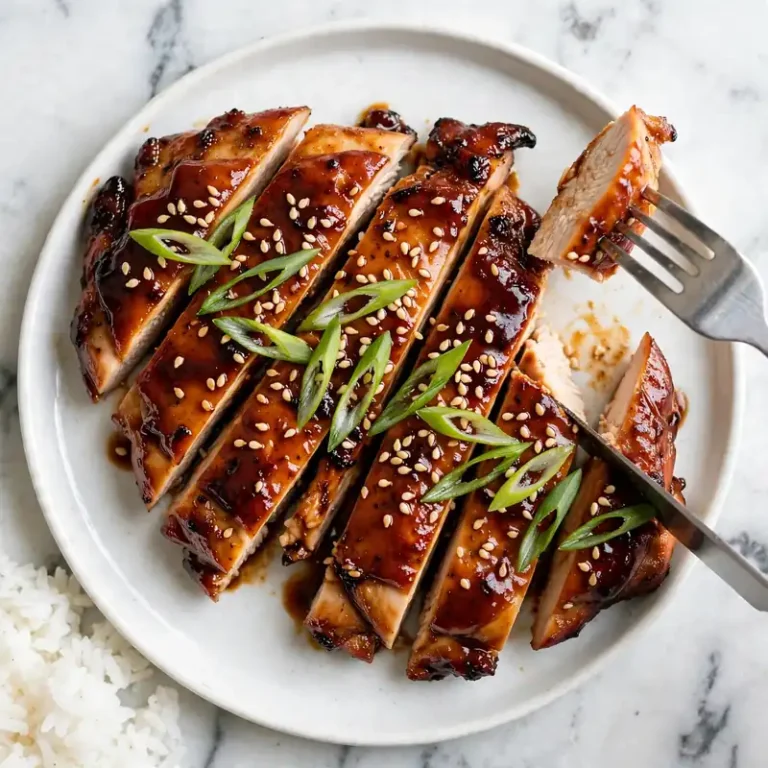
Creamy White Chicken Chili — Bold Flavor, One Pot
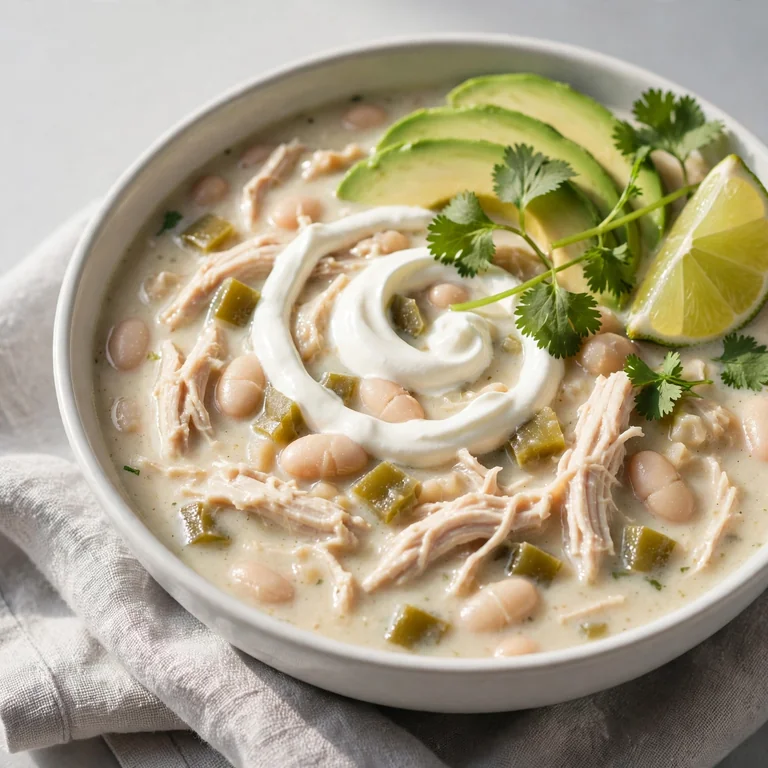
There’s a specific kind of satisfaction that comes from a bowl of white chicken chili: the broth is thick and creamy but not heavy, the chicken pulls apart in long tender shreds, and the green chiles give it just enough heat to notice without overwhelming the whole thing. It’s the kind of meal that smells ready before it actually is, which makes the last 10 minutes of cooking genuinely difficult to be patient about.
White chicken chili is a lighter, brothier alternative to traditional red chili, built on shredded chicken, white beans, roasted green chiles, and a cumin-forward spice blend finished with cream cheese for body. It comes together in one pot in about 45 minutes of active cooking, which makes it realistic on a weeknight but satisfying enough for a weekend crowd. The base is bold, the toppings are flexible, and the leftovers are even better the next day once the flavors have had time to settle into each other.

Why You’ll Love This White Chicken Chili
- One pot, minimal cleanup. Everything cooks in a single Dutch oven or large pot from the first sautéed onion to the finished broth. No extra pans to scrub, no oven required.
- Cream cheese as the thickener. Stirring in softened cream cheese near the end creates a velvety, full-bodied broth without any flour or cornstarch roux. It also adds a subtle tang that brightens the whole bowl.
- Deep flavor from roasted green chiles. Canned fire-roasted green chiles bring a smoky, mild heat that forms the flavor backbone of the broth. They do more work than their can size suggests.
- Done in under an hour. From raw chicken to a fully cooked, shredded, creamy chili takes about 45 minutes of active time. Nothing about the method is fussy.
- Gets better the next day. The spices deepen overnight and the broth thickens as it cools. Leftover white chicken chili reheats into something that tastes like it spent hours on the stove.

Ingredients You’ll Need
Recipe Timing
| Detail | Info |
|---|---|
| Servings | 6 |
| Difficulty | Easy |
| Course | Main Course |
| Cuisine | American, Tex-Mex |
| Prep Time | 15 minutes |
| Cook Time | 40 minutes |
| Rest Time | 5 minutes (off heat before serving) |
| Total Time | 60 minutes |
For the chicken, boneless skinless chicken thighs are the better choice over chicken breasts here. Thighs stay moist through longer simmering and shred into longer, more substantial pieces. Breasts work but require more attention to timing; overcook them even slightly and they shred into a dry, fibrous texture that doesn’t meld well with the broth. If you’re using breasts, pull them from the pot the moment they reach 74°C (165°F) internally.
For the green chiles, canned fire-roasted green chiles (mild or hot, depending on your preference) are what most people have reliable access to. If you can find fresh Hatch chiles or poblanos, roasting and peeling them yourself adds another layer of smokiness. But the canned version at a quality brand is genuinely good and not a compromise.
For the beans, canned Great Northern beans or cannellini beans both work. Great Northern beans are slightly firmer and hold their shape through the simmering process. Cannellini beans are creamier and break down at the edges, which thickens the broth slightly. Both are correct; it’s a texture preference.
- 1.2 kg (about 2.5 lbs) boneless skinless chicken thighs — the primary protein; thighs stay moist and shred well; food safety note: raw poultry must reach an internal temperature of 74°C (165°F) before consuming
- 1 tablespoon olive oil — for sautéing the aromatics; any neutral oil works
- 1 large white onion, diced — the aromatic base; white onion is slightly sharper than yellow and holds up in a long simmer
- 4 garlic cloves, minced — adds depth; pre-minced jarred garlic is convenient but fresh produces noticeably more flavor
- 2 cans (each 113g/4 oz) fire-roasted diced green chiles — the signature flavor component; mild gives warmth without heat, hot gives a real kick
- 2 cans (each 400g/14 oz) Great Northern beans, drained and rinsed — body and protein; rinsing removes excess sodium from the canning liquid
- 900ml (about 4 cups) low-sodium chicken broth — the broth base; low-sodium gives you control over the final seasoning
- 1 teaspoon ground cumin — the dominant spice; earthy and warm, it ties all the other flavors together
- 1 teaspoon garlic powder — reinforces the fresh garlic without duplicating it
- 1 teaspoon dried oregano — adds an herbal note; Mexican oregano is more citrusy and works especially well here if you have it
- 1/2 teaspoon chili powder — mild heat and a reddish depth to the broth; increases to taste
- 1/2 teaspoon ground coriander — slightly citrusy, softens the cumin’s earthiness
- 1/4 teaspoon cayenne pepper — optional, for extra heat; start with less if cooking for children
- Salt and freshly ground black pepper — to taste; add in stages as the broth develops
- 170g (6 oz) full-fat cream cheese, softened and cubed — the thickener; softened cream cheese melts smoothly into the broth without lumping; do not use low-fat, it doesn’t melt the same way
- 1/2 cup (120ml) heavy cream — added with the cream cheese for a silkier finish; whole milk works as a lighter substitute
- Juice of 1 lime — stirred in at the very end; the acidity lifts the whole flavor and makes everything taste brighter
For serving (optional but recommended):
Sliced avocado, sour cream, shredded Monterey Jack cheese, fresh cilantro, pickled jalapeños, crushed tortilla chips, lime wedges

Allergen and Dietary Disclosure
This white chicken chili contains dairy (cream cheese, heavy cream) and poultry. The base recipe is gluten-free as written, provided the chicken broth you use is certified gluten-free. Most major brands are, but labels are worth checking if gluten is a concern.
For dairy-free: replace the cream cheese with a plain, full-fat dairy-free cream cheese alternative (cashew-based versions work particularly well here) and substitute the heavy cream with full-fat coconut cream. The broth will have a faint coconut note, but the spice profile mostly masks it. Coconut cream also adds a slight sweetness that works reasonably well in this context.
For a lower-fat version: reduce the cream cheese to 85g and replace the heavy cream with whole milk. The broth will be thinner and less rich, but the flavor is comparable. You can also mash about 1/2 cup of the cooked beans before adding them back to the pot as a natural thickener.
This recipe has not been tested in a certified allergen-free kitchen and cannot be guaranteed safe for any specific allergy.
Equipment Needed
- Large Dutch oven or heavy-bottomed pot (5 to 6 quart) — the size matters here. The chicken needs enough surface area to poach evenly in the broth rather than piling up and cooking unevenly. A too-small pot crowds everything and extends the cook time.
- Instant-read thermometer — the most reliable way to know when the chicken is done. Poultry must reach 74°C (165°F) at the thickest point. A thermometer removes guesswork and prevents both undercooked and overcooked results.
- Two forks for shredding — pull the cooked chicken apart with two forks held back-to-back and worked in opposite directions. The chicken can be shredded directly in the pot or on a cutting board; the pot method is faster and keeps the meat warm.
- Immersion blender (optional) — if you prefer a thicker, creamier broth, blending a portion of the beans and liquid directly in the pot takes about 10 seconds and significantly changes the texture. A regular blender works too; transfer about 2 cups of the chili and blend, then return it to the pot.
Step-by-Step Directions
Step 1: Sauté the Aromatics
Heat the olive oil in a large Dutch oven over medium heat until it shimmers. Add the diced onion and cook, stirring occasionally, for 5 to 6 minutes until it turns soft and slightly translucent at the edges. Add the minced garlic and cook for another 60 seconds, stirring constantly, until fragrant. The garlic should smell nutty and toasted, not sharp. If it starts to brown in spots, lower the heat immediately.

Chef’s Note: Taking the time to cook the onion properly rather than rushing it lays the flavor foundation for the entire chili. An onion that’s cooked down and slightly sweet reads differently in the finished broth than one that’s barely softened.
Step 2: Add the Spices and Green Chiles
Add the cumin, garlic powder, oregano, chili powder, coriander, and cayenne directly to the pot and stir them into the onions and garlic. Toast the spices in the residual oil for about 60 seconds, stirring constantly. Then add both cans of fire-roasted green chiles, including all the liquid from the cans. Stir everything together and let it cook for another minute until the chiles are fully incorporated into the spiced base.
Chef’s Note: Toasting dry spices in oil before adding liquid is called blooming. It drives off the dusty, raw top note of ground spices and opens up their aromatic compounds. A minute of toasting produces a noticeably more complex and rounded spice flavor in the finished chili.

Step 3: Add Chicken and Broth
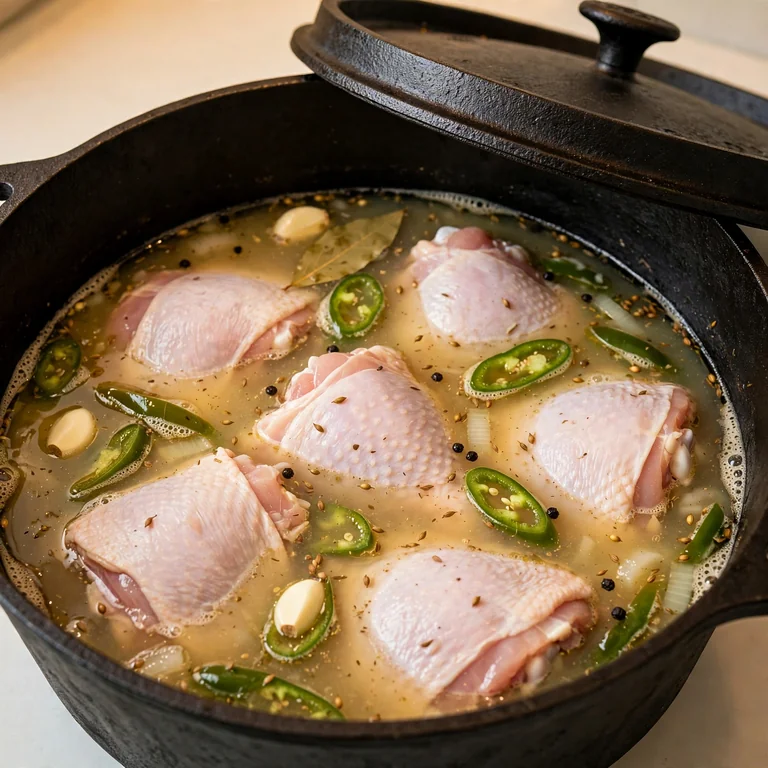
Nestle the raw chicken thighs into the pot in a single layer, or as close to single as the pot allows. Pour the chicken broth over everything. The liquid should come up high enough to just cover the chicken; add a splash more broth if needed. Bring the liquid to a gentle simmer over medium-high heat, then reduce to medium-low. You want a steady, gentle bubble, not a hard rolling boil. Hard boiling makes the chicken tough and produces a cloudy, less flavorful broth.
Food safety note: Raw chicken must reach an internal temperature of 74°C (165°F) at its thickest point before it is safe to eat. Use a thermometer to verify, not color or texture alone.
Step 4: Simmer Until the Chicken is Fully Cooked
Cover the pot with a lid slightly ajar and simmer for 20 to 25 minutes. Chicken thighs of average thickness are typically fully cooked at the 20-minute mark when held at a steady simmer. Check the thickest piece with an instant-read thermometer. At 74°C (165°F) or above, the chicken is done. Remove the cooked thighs to a cutting board or large plate.
Chef’s Note: Leaving the lid slightly ajar lets some steam escape, which concentrates the broth slightly over the cook time. A fully sealed lid traps all the steam and keeps the broth thinner. The difference over 20 minutes is subtle but present.
Step 5: Shred the Chicken
Use two forks to pull the chicken thighs apart into shreds. Work across the grain of the meat, pulling in opposite directions, until you have rough, uneven shreds ranging from thin wisps to thicker pieces. Uneven shreds are better than uniform ones in this dish; the variation in size gives every spoonful a different texture. Return all the shredded chicken to the pot.
Step 6: Add the Beans
Add the drained and rinsed beans to the pot and stir to distribute them through the shredded chicken and broth. Increase the heat to medium and bring the chili back to a gentle simmer. If you want a thicker, creamier consistency, use the back of a large spoon or a potato masher to crush about a quarter of the beans against the side of the pot. This releases starch that naturally thickens the broth over the next few minutes.
Step 7: Stir In the Cream Cheese and Cream
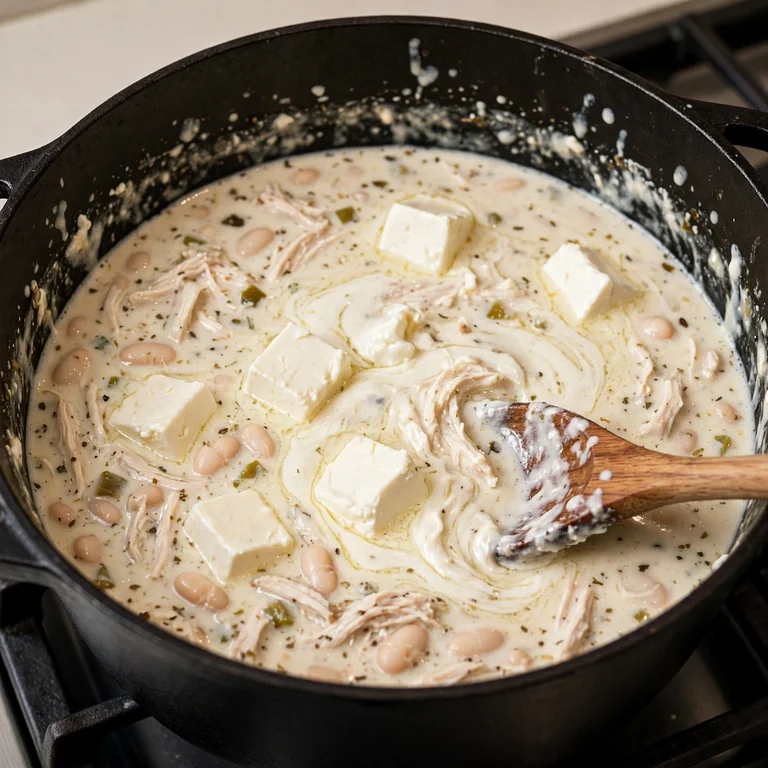
Reduce the heat to low. Add the cubed, softened cream cheese to the pot and stir steadily for 2 to 3 minutes until it melts completely into the broth with no visible lumps. Then pour in the heavy cream and stir once more. The broth will visibly change color, turning from a pale golden to a creamy, opaque white. Simmer gently for 5 minutes until everything is fully integrated and the broth has thickened slightly.
Chef’s Note: The cream cheese must be genuinely soft, not just at room temperature for 10 minutes. If it’s still firm when you add it, it will take much longer to melt evenly and may leave small lumps in the broth. Cut it into small cubes and let it sit out for at least 30 minutes before adding, or microwave it for 15 seconds to soften it quickly.
Step 8: Season and Finish
Common Mistakes and Troubleshooting
| Problem | Cause | Solution |
|---|---|---|
| Cream cheese leaves lumps in the broth | Cream cheese was too cold or added to boiling liquid | Always soften cream cheese fully before adding; reduce heat to low before stirring it in |
| Chicken is dry and stringy rather than tender | Overcooked, or hard boiled rather than gently simmered | Pull chicken at exactly 74°C (165°F); maintain a gentle simmer, not a hard boil |
| Broth too thin after adding cream cheese | Beans not mashed, or not enough cream cheese | Mash 1/4 of the beans against the pot wall; add an extra 30g of cream cheese if needed |
| Chili tastes flat or bland | Lime juice skipped, or under-seasoned broth | Lime is essential, not optional; taste and adjust salt and cumin before serving |
| Broth turned grey or murky | Heat too high during chicken simmering | Keep the simmer gentle; hard boiling breaks down the broth proteins and clouds the liquid |
| Chicken falls apart into mush instead of shredding | Overcooked past 82 to 85°C (180 to 185°F) | Check temperature earlier; well-done thighs shred well up to about 80°C, above that they start to disintegrate |
Variations and Substitutions
- Spicier version: Add one finely diced fresh jalapeño with the onions at step one and increase the cayenne to 1/2 teaspoon. Serve with pickled jalapeños on top for additional heat that guests can control themselves.
- Rotisserie chicken shortcut: Shred the meat from a store-bought rotisserie chicken and add it at step 6 with the beans, skipping steps 3 to 5 entirely. Reduce the broth slightly since you won’t have the poaching liquid. The flavor is slightly less layered but the active time drops to under 25 minutes.
- Extra vegetables: Add a drained can of corn kernels and one diced zucchini along with the beans in step 6. The corn adds sweetness and the zucchini softens into the broth without changing the flavor significantly. It extends the pot and makes it more filling.
- Slow cooker method: Sauté the onions, garlic, chiles, and spices on the stovetop through step 2, then transfer everything plus the raw chicken and broth to a slow cooker. Cook on low for 6 to 7 hours or high for 3 to 4 hours. Shred the chicken, return it, then stir in the beans, cream cheese, and cream. Cook uncovered on high for 20 more minutes.
- Dairy-free version: Substitute cashew-based cream cheese and full-fat coconut cream in equal quantities. The flavor shifts slightly but the creamy texture holds. Omit the heavy cream entirely if the coconut cream is very thick.
- Lighter broth: Skip the heavy cream and use whole milk instead. Increase the cream cheese by 30g to compensate for the reduced fat content. The broth is thinner but still creamy and works well if you’re serving this as a soup rather than a thick stew.
Serving Suggestions
- Ladle the chili over a scoop of cooked white rice or alongside warm flour tortillas. The rice soaks up the creamy broth and makes the meal more substantial without adding prep time.
- Crushed tortilla chips on top add texture contrast that the smooth broth lacks on its own. They soften into the chili after a minute or two, which is also good.
- A wedge of warm cornbread on the side is one of the best pairings for this dish. The slight sweetness of the cornbread balances the savory, spiced broth.
- Set up a topping bar when serving a group: sliced avocado, sour cream, shredded Monterey Jack cheese, fresh cilantro, lime wedges, sliced green onions, and hot sauce. Everyone adjusts their bowl to their preference and you don’t have to make multiple versions.
- Serve with a simple side salad of sliced cucumber, tomato, and red onion with lime juice. The cool, crisp vegetables next to the warm, creamy chili work well as a contrast.
- For a more filling meal, add a half cup of cooked elbow pasta or small shells directly into each bowl before ladling the chili over. It thickens the serving and makes it feel closer to a hearty pasta dish.

Tips for the Best Results
- Soften the cream cheese completely before it goes into the pot. This is the step most people rush and then regret. A properly softened cream cheese stirred into hot broth over low heat melts in under 3 minutes and leaves zero lumps. A cold cream cheese block dropped into a simmering pot leaves white chunks that take 10 minutes of vigorous stirring to break down, if they break down at all.
- Toast the spices before adding liquid. The 60 seconds of blooming the spices in the oil and aromatics makes the finished chili taste like it simmered for hours rather than 40 minutes. It’s a small step with an outsized effect on depth of flavor.
- Use low-sodium broth and season at the end. Canned beans carry a reasonable amount of sodium even after rinsing, and cream cheese adds more. Starting with low-sodium broth gives you control over the final salt level. Taste before serving and adjust from there rather than building in too much salt from the start.
- Don’t skip the lime juice. Dairy-forward dishes like this one need acidity to keep them from tasting flat or overly rich. The lime added at the very end does exactly that. It doesn’t make the chili taste citrusy; it makes everything else taste more like itself.
- Let it rest 5 minutes before serving. The broth thickens noticeably off the heat as the cream cheese and cream continue to set. Serving immediately after turning off the stove gives you a slightly looser, thinner bowl than waiting 5 minutes produces.
Storage Tips
Refrigerator
Cool the chili completely before storing. Transfer it to a sealed container and refrigerate for up to 4 days. The broth thickens significantly as it chills because of the cream cheese; it will look almost solid when cold, which is normal. It loosens back to a creamy, pourable consistency once reheated. The flavor deepens noticeably after the first 24 hours, making this one of those dishes that genuinely rewards making a day ahead.
Freezer
White chicken chili freezes well for up to 3 months, with one caveat: dairy-based broths sometimes separate slightly upon thawing, leaving a slightly grainy texture. To minimize this, thaw it overnight in the fridge and reheat gently over low heat while stirring steadily rather than microwaving on high. Adding a small splash of cream or broth during reheating helps restore the smooth consistency. Freeze in individual portions for the most practical thawing.
Reheating
The stovetop is the better reheating method here. Transfer the chili to a saucepan over medium-low heat and stir every minute or two until it returns to a steady simmer and the broth is smooth and creamy again. Add a splash of chicken broth if it’s too thick. Microwave reheating works in a pinch; cover the bowl and heat at 70% power in 90-second intervals, stirring between each, until hot throughout.
Make-ahead note: The entire chili, including the cream cheese and cream, can be made up to 2 days ahead and refrigerated. Reheat slowly on the stovetop. The flavor on day two is genuinely better than day one.
Nutrition Information
Per serving, approximately one generous bowl (1/6 of the recipe):
| Nutrient | Amount |
|---|---|
| Calories | 490 kcal |
| Protein | 42g |
| Total Carbohydrates | 28g |
| Dietary Fiber | 7g |
| Total Sugar | 4g |
| Total Fat | 22g |
| Saturated Fat | 11g |
| Cholesterol | 160mg |
| Sodium | 620mg |
| Vitamin C | 12mg |
| Calcium | 110mg |
| Iron | 3.5mg |
| Potassium | 780mg |
Nutrition values are approximate and may vary based on brands and portion sizes. Toppings not included.
Why This Recipe Works
The flavor depth in this chili comes from layering rather than from any single ingredient. The process starts with sweated aromatics, adds spices that bloom in fat before liquid touches them, builds a poaching broth that absorbs flavor from the chicken as it cooks, and finishes with dairy that rounds and thickens without masking what came before. Each stage adds something the next stage can’t replace.
Chicken thighs over breasts is a deliberate choice grounded in fat content. Thighs contain roughly twice the intramuscular fat of breasts, which serves two purposes here: they stay moist through extended simmering without drying out, and the fat they release into the broth contributes flavor and body that lean breast meat can’t. I’ve tested this recipe with both cuts multiple times. The broth tastes noticeably richer and the shredded texture is better with thighs. If you use breasts for dietary reasons, they work, but pull them earlier and expect a slightly thinner broth.
Full-fat cream cheese is not interchangeable with low-fat here. The fat content in full-fat cream cheese is what allows it to emulsify into the broth rather than breaking and floating. Low-fat cream cheese has a different protein-to-fat ratio, and when added to a hot liquid, it has a higher tendency to separate and form white specks that don’t fully integrate no matter how long you stir. The calorie difference between the two over six servings is small; the texture difference in the finished broth is not.
The lime juice added at the end matters for a specific reason. Richly flavored, fat-forward dishes lose some of their contrast over a long cook time because the heat rounds off sharper flavor edges. A tablespoon of fresh acid, added after the heat is off, restores that contrast. It wakes the individual flavors back up without adding noticeable citrus character. The same principle is why good chefs finish soups and stews with a splash of acid before serving.
Fire-roasted green chiles provide both mild heat and a light smokiness that comes from the roasting step in their production. Plain diced green chiles work as a substitute, but the flavor is flatter and one-dimensional by comparison. The fire-roasted variety typically sits within the same price range at most stores, so there’s no reason to choose the plain version when the better option is right next to it.
Frequently Asked Questions
Can I make white chicken chili ahead of time?
Yes, and it’s one of the better dishes for this. Make the full recipe, cool it completely, and refrigerate for up to 2 days before serving. The flavor improves overnight as the spices settle into the broth. Reheat gently over medium-low heat on the stovetop, stirring regularly, and add a splash of chicken broth if the consistency is too thick. The chili also freezes for up to 3 months; thaw overnight in the fridge for the smoothest texture on reheating.
Why is my broth still thin even after adding cream cheese?
Two reasons are most common. First, the cream cheese may not have melted fully, leaving it suspended in the broth rather than integrated into it. Lower the heat and keep stirring for another 2 to 3 minutes. Second, the beans may not have been mashed at all. Crushing about a quarter of the beans against the side of the pot releases starch that naturally thickens the liquid. If the broth is still looser than you’d like, uncover the pot and simmer for an additional 5 to 7 minutes to reduce and concentrate it.
Can I use chicken breasts instead of thighs?
Yes, with adjustments. Breasts cook faster than thighs at a simmer, typically reaching 74°C (165°F) in 15 to 18 minutes rather than 20 to 25. Check the temperature earlier and pull them from the pot as soon as they’re done. Overcooked breasts shred into dry, stringy pieces that don’t integrate well into the creamy broth. The finished chili will be slightly less rich because breasts release less fat into the cooking liquid, but the flavor is still solid.
How do I know when the chicken is fully cooked?
The only reliable method is an instant-read thermometer inserted into the thickest part of the largest piece. Chicken is fully cooked and safe to eat at 74°C (165°F). Color is not a reliable indicator, particularly in a spiced broth where the exterior of the meat absorbs color from the liquid and can appear cooked before the interior is done. Don’t rely on the 20-minute mark as a guarantee either; actual timing depends on your specific stovetop and the thickness of the pieces.
Can I make this in a slow cooker?
Yes. Sauté the onions, garlic, chiles, and spices in a pan on the stovetop first, because slow cookers don’t get hot enough to bloom spices or properly soften aromatics. Transfer the sautéed mixture to the slow cooker with the raw chicken and broth. Cook on low for 6 to 7 hours or on high for 3 to 4 hours. Shred the chicken in the pot, add the beans, then stir in the softened cream cheese and cream. Cook uncovered on high for 20 minutes to allow the dairy to incorporate and the broth to thicken slightly.
My chili tastes a bit flat. What can I add to fix it?
Start with lime juice if you haven’t added it yet. A tablespoon of fresh lime juice stirred in after the heat is off fixes flat-tasting chili in most cases by restoring acidity contrast. If the flavor is still dull, the issue is likely under-seasoning with salt: add 1/4 teaspoon at a time and stir, tasting between each addition. A pinch more cumin or chili powder can also deepen the spice layer. Avoid adding more broth at this stage since it dilutes what flavor is already there.
Can I add corn or other vegetables?
Yes, a drained can of corn kernels or frozen corn stirred in with the beans is one of the most natural additions to this recipe. It adds sweetness and texture contrast without changing the overall flavor profile. Diced zucchini softens nicely in the simmering broth. Diced bell pepper added with the onions contributes color and mild sweetness. Keep total vegetable additions to about 2 cups to avoid diluting the broth. Avoid watery vegetables like tomatoes, which can thin the creamy broth and change its character significantly.
Conclusion
White chicken chili earns a permanent spot in regular rotation because it consistently delivers more than the effort it requires. The spice-blooming step and the lime at the end are the two places where the technique is doing real work, and both take under 2 minutes combined. Everything between them is mostly hands-off simmering.
The cream cheese finish is what sets this version apart from a simpler broth-based chili. It produces a bowl that feels substantial without being heavy, and the acidity of the lime keeps the dairy richness in check. It’s the kind of balance that makes people ask what’s in it.
This white chicken chili is worth making for a crowd and equally worth making for a weeknight dinner that reheats well twice over.
If you loved this recipe, save it to your soup and chili Pinterest board so you can find it easily later. For more same recipes follow Thecookingvibes Pinterest account
Creamy White Chicken Chili
Ingredients
Equipment
Method
- Heat olive oil in a large Dutch oven over medium heat. Add diced onion and cook for 5 to 6 minutes until softened. Add minced garlic and cook 60 seconds, stirring constantly.
- Add cumin, garlic powder, oregano, chili powder, coriander, and cayenne to the pot. Stir and toast in the oil for 60 seconds. Add both cans of green chiles including their liquid and stir to combine.
- Nestle the raw chicken thighs into the pot. Pour in the chicken broth, enough to just cover the chicken. Bring to a gentle simmer over medium-high heat, then reduce to medium-low.
- Partially cover the pot and simmer for 20 to 25 minutes until the chicken reaches an internal temperature of 74°C (165°F). Remove chicken to a cutting board.
- Shred the cooked chicken with two forks into rough, uneven pieces. Return shredded chicken to the pot.
- Add drained beans and stir to combine. Mash about a quarter of the beans against the pot wall with a spoon to thicken the broth. Bring back to a gentle simmer.
- Reduce heat to low. Add cubed softened cream cheese and stir for 2 to 3 minutes until fully melted. Add heavy cream and stir until the broth is creamy and uniform. Simmer gently for 5 minutes.
- Squeeze in fresh lime juice. Taste and adjust salt, pepper, and spices. Turn off heat and rest 5 minutes before serving with desired toppings.
Notes
- Full-fat cream cheese is essential; low-fat versions tend to break and leave lumps in hot broth.
- Chicken thighs stay more moist than breasts through simmering; if using breasts, check temperature at 15 minutes.
- For a thicker broth, blend about 2 cups of the chili with an immersion blender before adding the cream cheese.
- Leftovers keep for 4 days refrigerated and taste better on day two.