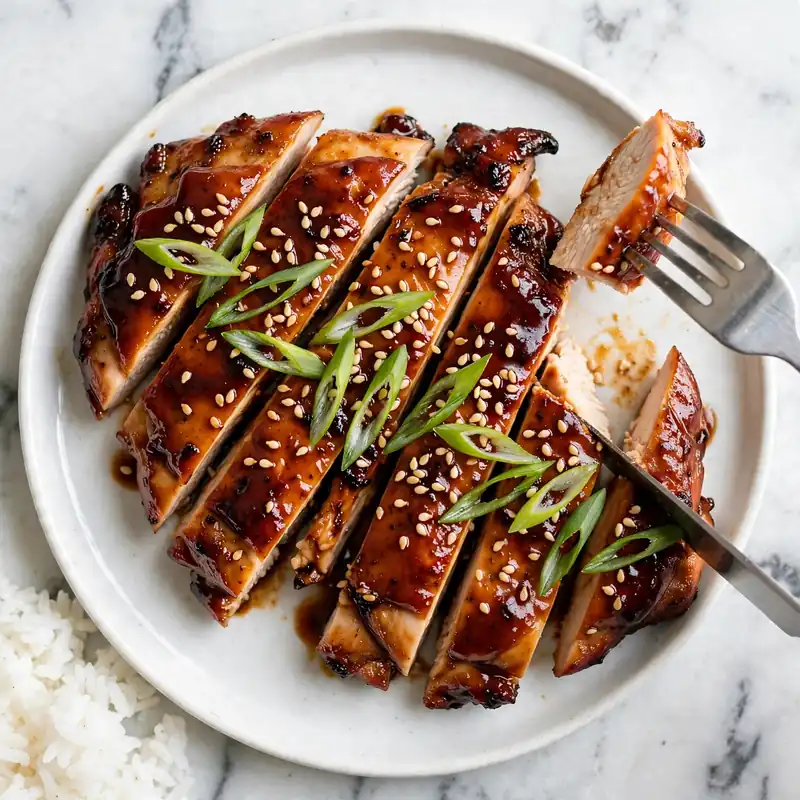
Easy Teriyaki Chicken — Glossy Homemade Sauce, Juicy Every Time
Pull a skillet of teriyaki chicken off the heat at the right moment and the sauce does something specific: it coats the back of a spoon in a thick, glossy layer that’s equal parts sweet and savory, and every surface of the chicken is lacquered with it. That’s the version worth making at home. It’s not complicated to achieve, but it requires understanding what the sauce is actually doing during the last few minutes in the pan, which is where most home-cooked versions fall short.
This teriyaki chicken recipe uses boneless skin-on or skinless chicken thighs seared until the skin crisps and the surface caramelizes, then finished in a homemade teriyaki sauce that reduces around the chicken in the final minutes of cooking. The sauce is built from soy sauce, brown sugar, fresh ginger, garlic, and apple juice, which adds a natural sweetness and depth that carries the flavor cleanly without any sharpness. It comes together in 30 minutes from prep to plate, serves 4, and works over steamed rice, noodles, or alongside roasted vegetables.
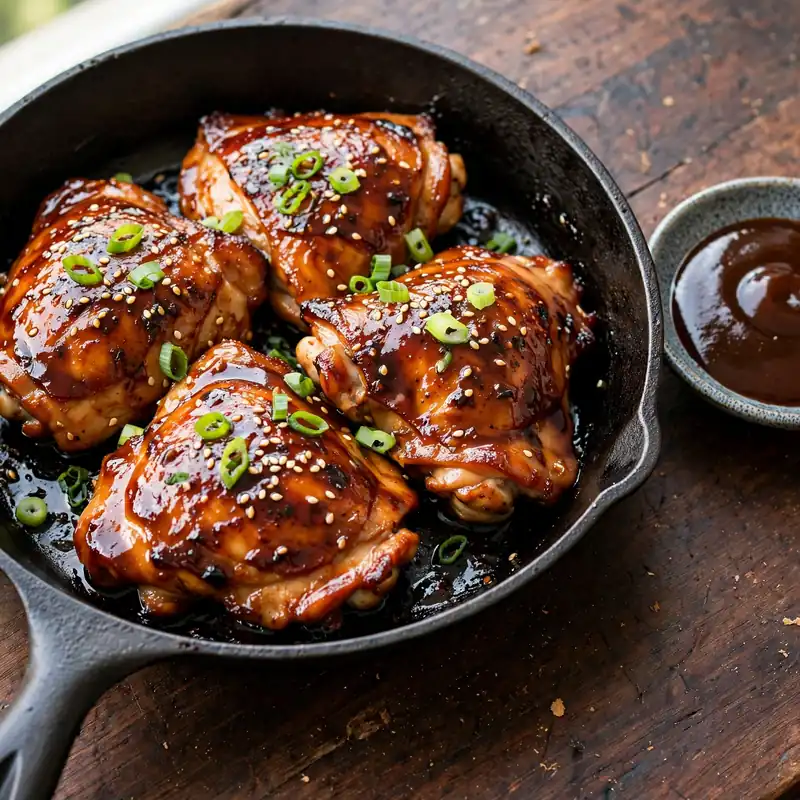
Why You’ll Love This Teriyaki Chicken
- Sauce that actually glazes. The cornstarch-thickened sauce reduces around the seared chicken in the final 3 to 4 minutes of cooking, coating every surface in a thick, lacquered layer rather than pooling at the bottom of the pan.
- Chicken thighs that stay juicy. Boneless thighs have enough fat to handle the high initial sear and the sauce reduction without drying out; breast meat requires a different approach and consistently produces a drier result with the same method.
- Made entirely from pantry ingredients. Soy sauce, brown sugar, garlic, ginger, cornstarch, and apple juice are the sauce components; nothing specialty is needed.
- Faster than ordering takeout. The full recipe, from the first knife cut to a plated bowl, takes 30 minutes at a comfortable pace. The sauce comes together in the time it takes the chicken to sear.
- Flexible enough for meal prep. The sauce-coated chicken refrigerates well for 4 days and reheats without drying out or losing its glaze, which makes it a genuinely useful batch-cook option for weekday rice bowls.
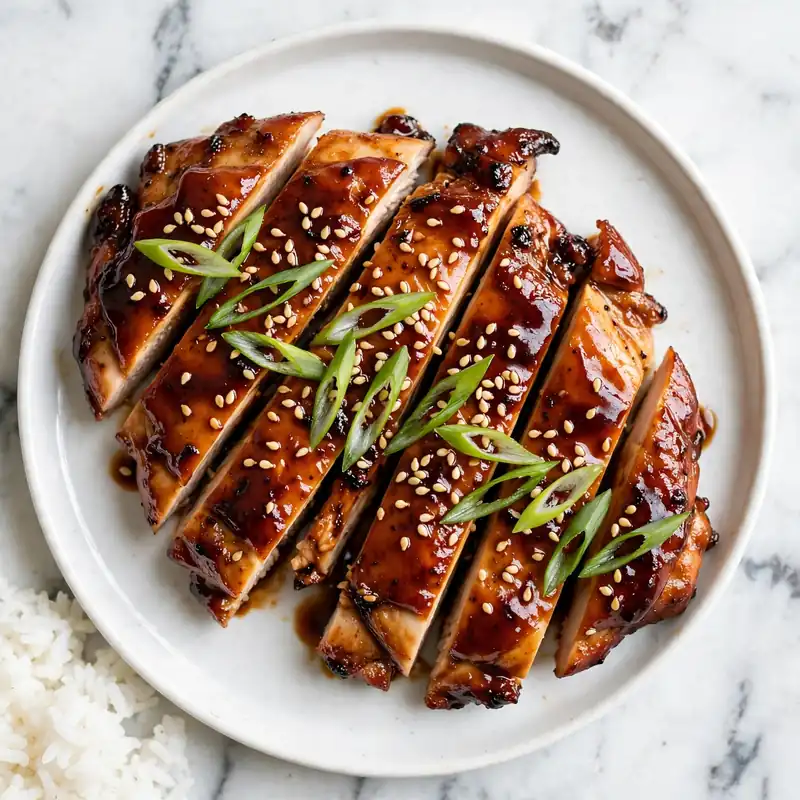
Ingredients You’ll Need
Recipe Timing
| Detail | Info |
|---|---|
| Servings | 4 |
| Difficulty | Easy |
| Course | Main Course |
| Cuisine | Japanese-inspired |
| Prep Time | 10 minutes |
| Cook Time | 20 minutes |
| Rest Time | 5 minutes |
| Total Time | 35 minutes |
For the chicken, boneless thighs are the better choice for this recipe over chicken breasts for a specific reason. Thighs contain a higher proportion of intramuscular fat, which keeps the meat moist during the high-heat searing stage and through the sauce reduction. A boneless breast cooked at the same temperature and time will be noticeably drier because it has little fat to compensate for the moisture lost during cooking. Skin-on boneless thighs produce a particularly good result: the skin crisps during searing and provides a firm base for the sauce to adhere to. Skinless thighs work well and produce a slightly lighter result; the method stays identical.
For the soy sauce, a regular sodium soy sauce produces the right flavor balance in this sauce. Low-sodium soy sauce makes the sauce taste diluted unless you compensate with additional salt, which complicates the seasoning. If you regularly use low-sodium soy sauce and prefer it, add 1/4 teaspoon of fine salt to the sauce mixture to restore the balance.
For the apple juice, choose a clear, unsweetened or lightly sweetened apple juice rather than cloudy pressed juice; the cleaner flavor integrates more evenly into the sauce without adding any fruit pulp. The apple juice contributes both liquid for the sauce to reduce from and a natural fructose sweetness that rounds the soy sauce’s saltiness and contributes to the sauce’s caramelization during cooking.
The Chicken:
- 700g (about 1.5 lbs) boneless chicken thighs, skin-on or skinless — the primary protein; food safety note: chicken must reach an internal temperature of 74°C (165°F) before consuming
- 1 tablespoon neutral oil (sunflower, canola, or light olive oil) — for searing; a neutral oil handles high heat without smoking as quickly as butter and doesn’t compete with the sauce flavor
The Teriyaki Sauce:
- 1/4 cup (60ml) soy sauce — the dominant savory, umami base of the sauce; use regular sodium, not low-sodium
- 1/4 cup (60ml) clear apple juice — adds sweetness and the liquid volume the sauce needs to reduce properly; the fructose in apple juice caramelizes during cooking and deepens the mahogany color
- 3 tablespoons light brown sugar, packed — the primary sweetener; the molasses component adds a faint depth beyond plain white sugar
- 2 teaspoons rice vinegar — adds a clean brightness that prevents the sauce from tasting purely sweet; white wine vinegar substitutes at the same quantity
- 3 garlic cloves, finely grated or minced — adds savory depth; grating on a microplane distributes the garlic more evenly through the sauce than chopping
- 1 teaspoon fresh ginger, peeled and finely grated — adds a warm, slightly spicy freshness that lifts the soy-sugar base
- 1 teaspoon cornstarch — the thickening agent; whisked into the liquid sauce before it goes into the pan to produce the glossy, coating consistency
- 1 tablespoon water — mixed with the cornstarch to form a slurry before adding to the sauce components
For Serving:
Steamed white or brown rice, toasted sesame seeds, diagonally sliced green onions, steamed broccoli or edamame

Allergen and Dietary Disclosure
This teriyaki chicken contains soy (soy sauce is the primary sauce ingredient) and gluten (most standard soy sauce contains wheat). It is naturally dairy-free and egg-free.
For gluten-free: replace the regular soy sauce with an equal quantity of certified gluten-free tamari. Tamari is brewed with little to no wheat and produces a virtually identical flavor in the finished sauce. Every other ingredient in the recipe is naturally gluten-free; verify the cornstarch label as some brands process near wheat facilities.
For soy-free: replace the soy sauce with coconut aminos at a slightly higher quantity, approximately 5 tablespoons rather than 4, since coconut aminos are slightly less salty and less concentrated than soy sauce. The sauce will be marginally lighter in color but the flavor profile remains close.
For lower sugar: reduce the brown sugar to 1 1/2 tablespoons and add an extra teaspoon of rice vinegar to compensate for the reduced sweetness balance. The sauce will be slightly thinner and less glossy since less sugar means less caramelization, but the flavor stays savory and well-rounded.
This recipe has not been tested in a certified allergen-free kitchen and cannot be guaranteed safe for any specific allergy.
Equipment Needed
- Large cast iron skillet or heavy stainless steel pan, 12-inch — for the initial sear and the sauce reduction. Cast iron retains heat exceptionally well once preheated, which produces the consistent, even surface contact needed for proper caramelization across the full surface of each thigh. A non-stick pan works for the sauce reduction stage but cannot generate the same searing heat needed for the first step.
- Instant-read thermometer — the only reliable way to confirm chicken thighs have reached 74°C (165°F) internally. Thighs are more forgiving than breasts and can safely stay on the heat longer without drying out, but confirming the internal temperature is still important for food safety.
- Microplane grater or fine grater — for grating the garlic and ginger directly into the sauce. Grated garlic and ginger distribute through the liquid far more evenly than minced pieces, which means every spoonful of sauce carries the same flavor intensity. A knife-minced garlic version works but produces slightly more uneven flavor distribution.
- Small whisk or fork — for combining the cornstarch with the water into a smooth slurry before adding it to the sauce components. Cornstarch added directly to the sauce without being dissolved first creates lumps that don’t break down during cooking.
Step-by-Step Directions
Step 1: Mix the Teriyaki Sauce
In a small bowl or measuring jug, combine the soy sauce, apple juice, brown sugar, rice vinegar, grated garlic, and grated ginger. In a separate small bowl, whisk the cornstarch and water together until completely smooth with no white powder remaining at the bottom of the bowl. Pour the cornstarch slurry into the soy sauce mixture and stir everything together until the sugar begins to dissolve. Set the sauce aside at room temperature; the cornstarch will settle to the bottom within 5 minutes, so give it a quick stir immediately before it goes into the pan.

Chef’s Note: Mixing the sauce before the chicken goes on the heat is the step that makes the rest of the recipe fast and controlled. Once the chicken is searing, you have a narrow window to add the sauce at the right moment; having it mixed, measured, and right beside the stove means you never have to scramble or reduce the heat while you search for an ingredient.
Step 2: Dry and Season the Chicken
Pat the chicken thighs completely dry on both surfaces with paper towels before any seasoning or oil. Surface moisture is the enemy of a proper sear; wet chicken steams rather than making direct contact with the pan surface, which prevents caramelization and produces a pale, soft exterior rather than a deep, amber-brown crust. Season both sides lightly with a small pinch of salt; the sauce carries most of the seasoning, so this is just a foundation layer.
Food safety note: Always wash hands thoroughly after handling raw poultry, and keep raw chicken away from other ingredients and surfaces. Use a separate cutting board for poultry.
Step 3: Sear the Chicken
Heat the neutral oil in the cast iron skillet over medium-high heat until the oil shimmers and a small drop of water flicked into the pan evaporates immediately on contact. Place the chicken thighs smooth side down in the pan without crowding them; if 4 thighs don’t fit with a small gap between each, sear in two batches. Cook undisturbed for 5 to 6 minutes until the underside is a deep golden-amber color when you lift the edge with tongs. Flip and cook the second side for 4 to 5 minutes. The chicken at this stage doesn’t need to be fully cooked through to temperature; it will finish cooking in the sauce.
Chef’s Note: The undisturbed sear for 5 to 6 minutes without moving the chicken is critical. Moving the chicken before the crust has set pulls the developing caramelization off the surface along with the meat, leaving the flavor stuck to the pan rather than on the chicken. The chicken will release cleanly from the pan when the crust is properly formed; if it sticks when you try to lift it, it needs another 60 seconds.

Step 4: Reduce the Heat and Add the Sauce
Once both sides of the chicken have seared, reduce the heat to medium. Give the sauce mixture a quick stir to redistribute the settled cornstarch, then pour it carefully around the chicken pieces rather than directly over them. The sauce will immediately begin to bubble around the edges. Tilt the pan to distribute the sauce evenly across the base.
Step 5: Glaze and Finish
Cook the chicken in the simmering sauce for 3 to 4 minutes, spooning the sauce over the top of each piece every 60 seconds. As the sauce reduces, it transitions from a thin, nearly translucent liquid to a thicker, deeper-colored glaze that coats the spoon completely. When the sauce has reduced to a consistency where a spoon dragged across the pan base leaves a clear trail that fills in slowly over 3 to 4 seconds, the chicken is ready. Check the internal temperature of the thickest piece with an instant-read thermometer; it should read at least 74°C (165°F). Remove from heat.
Chef’s Note: The spooning-over technique during the final minutes does two things: it builds multiple thin layers of sauce on the chicken surface, each one reducing slightly before the next goes on, which produces a deeper, more developed glaze than simply pouring the sauce and waiting. It also keeps the sauce temperature consistent across the pan, preventing the thinner edges from burning while the center reduces.

Step 6: Rest and Slice
Transfer the glazed chicken to a cutting board and rest for 5 minutes before slicing. Resting allows the internal temperature to stabilize and the juices, which have been driven toward the center by the heat, to redistribute through the meat. A chicken thigh sliced immediately after cooking releases a pool of pink-tinged juice across the cutting board; the same thigh rested for 5 minutes yields a clean, moist cut with minimal juice loss. Slice on a diagonal into 1.5cm strips and serve over rice with sauce from the pan drizzled over the top.
Common Mistakes and Troubleshooting
| Problem | Cause | Solution |
|---|---|---|
| Sauce too thin and watery | Cornstarch slurry not properly mixed, or sauce not reduced long enough | Always stir the cornstarch and water until completely smooth before adding to sauce; cook for the full 3 to 4 minutes until the spoon-trail test shows proper thickness |
| Sauce burns in the pan | Heat too high during the sauce reduction stage, or too little liquid | Reduce heat to medium before adding sauce; if the sauce reduces too quickly, add 2 tablespoons of water and stir |
| Chicken pale and soft rather than caramelized | Pan not hot enough, or chicken surface was wet | Preheat the pan until the oil shimmers before adding chicken; always pat the chicken completely dry before cooking |
| Sauce tastes too salty | Standard-sodium soy sauce used with additional seasoning on the chicken | Season the chicken only lightly before searing; the sauce provides the majority of the saltiness |
| Chicken dry and stringy | Chicken breasts used instead of thighs, or overcooked past 82°C | Use boneless thighs; pull from the heat the moment the thermometer reads 74°C (165°F) |
| Sauce lumpy rather than smooth | Cornstarch added directly to the warm sauce without being dissolved first | Always dissolve cornstarch in cold water separately before adding to the sauce mixture |
Variations and Substitutions
- Honey teriyaki chicken: Replace the brown sugar with an equal volume of honey. Honey produces a slightly more floral, complex sweetness than sugar and caramelizes at a slightly lower temperature, which means the sauce develops its gloss a minute or two faster during the reduction stage. Watch it closely; honey-based sauces can go from perfectly glazed to burnt in about 30 seconds.
- Spicy teriyaki: Add 1 to 2 teaspoons of gochujang (Korean chili paste) or 1/2 teaspoon of chili garlic sauce to the sauce mixture before cooking. The heat level is adjustable by quantity; start with 1 teaspoon and taste the raw sauce before adding more. The chili paste’s natural sweetness integrates well with the soy and brown sugar without requiring any other adjustment.
- Teriyaki chicken thighs in the oven: Place the seared, sauce-coated chicken in a 200°C (400°F) oven for 12 to 15 minutes rather than finishing in the pan. Brush the sauce from the pan over the chicken every 5 minutes. The oven method produces a slightly drier, more concentrated glaze with a firmer texture on the chicken surface, which some people prefer.
- Teriyaki chicken with vegetables: Add 1 cup of bite-sized broccoli florets or sliced bell peppers to the pan alongside the chicken for the final 4 minutes of sauce reduction. The vegetables absorb the teriyaki sauce as it reduces and serve alongside as a built-in side dish without any additional cooking needed.
- Teriyaki chicken skewers: Cut the thighs into 3cm cubes, thread onto soaked wooden skewers, and grill over medium-high direct heat for 4 to 5 minutes per side, brushing the sauce mixture on during the final 2 minutes of grilling per side. The grill caramelizes the sauce with a faintly smoky depth that the pan version doesn’t have; ideal for summer gatherings.
- Gluten-free teriyaki chicken: Swap the regular soy sauce for certified gluten-free tamari and verify the cornstarch brand for shared facility processing. Every other ingredient in the recipe is naturally gluten-free; the method stays completely unchanged.
Serving Suggestions
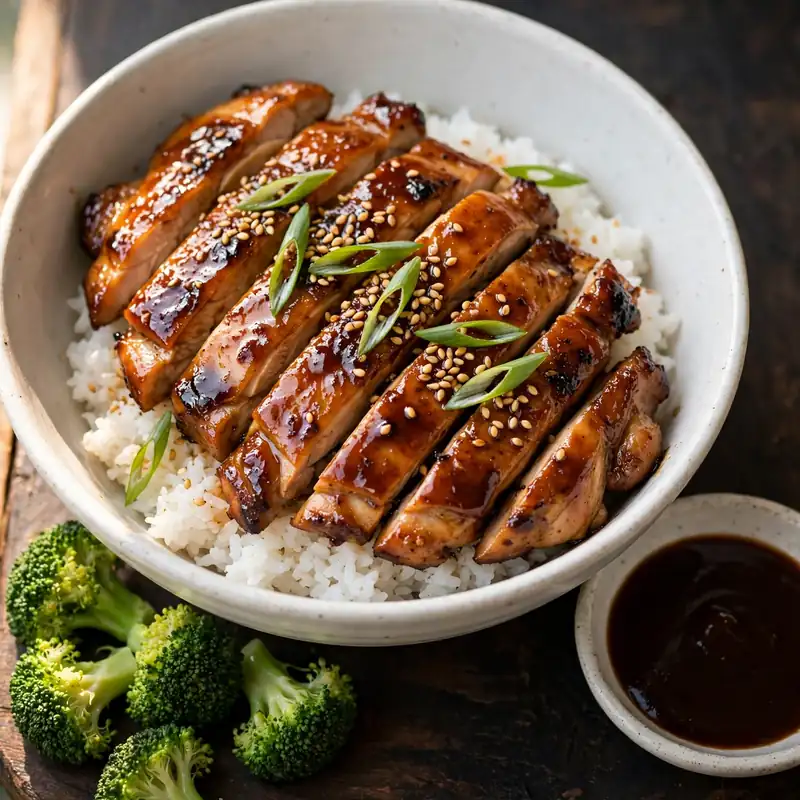
- Serve directly over a bowl of steamed Japanese short-grain rice, which has a slightly sticky texture that holds the sauce well. The sauce from the pan poured over the rice at the table produces a rice dish as satisfying as the chicken itself.
- Sliced teriyaki chicken arranged over a simple salad of shredded cabbage, grated carrot, and sliced cucumber with a sesame dressing turns this into a lighter, more composed meal that works as a lunch or a first course.
- Steamed broccoli alongside is the most natural vegetable pairing; the florets catch the sauce when you pour it over the plate and the slightly bitter brassica flavor contrasts cleanly with the sweet-savory glaze.
- Serve in a rice bowl topped with a soft-fried egg placed directly over the sliced chicken; the runny yolk mixes with the teriyaki sauce in the rice below and creates a richer, more complex bowl than either element produces on its own.
- For a simple noodle bowl, cook ramen or udon noodles, toss them with a teaspoon of sesame oil and sliced green onions, and lay the sliced teriyaki chicken across the top with extra sauce drizzled over everything.
- Pair with a cold sparkling water with lemon or a light, unsweetened iced green tea. Both provide a clean, palate-refreshing contrast to the rich, savory-sweet sauce.
Tips for the Best Results
- Dry the chicken thoroughly before it goes into the pan. This cannot be overstated. Surface moisture creates a steam layer between the chicken and the pan that prevents the Maillard reaction from occurring until all the water has evaporated. By that point, the chicken has already partially cooked through. A completely dry chicken surface makes contact with the pan immediately and begins caramelizing within 60 seconds.
- Don’t crowd the pan. Each thigh needs direct contact with the hot pan surface on all sides to sear rather than steam. If you have more than 4 medium thighs or your pan is smaller than 12 inches, sear in two batches rather than squeezing them in. The second batch can rest in the sauce together with the first once both are seared.
- Add the sauce at medium heat, not high. The cornstarch in the sauce thickens rapidly above a certain temperature; adding it to a very hot pan causes it to seize almost immediately, producing a thick, lumpy sauce before it has a chance to coat the chicken evenly. Medium heat gives you the 3 to 4 minutes of controlled reduction needed to build the glaze properly.
- Stir the sauce right before it goes in. Cornstarch settles to the bottom of the liquid within a few minutes of being mixed. If you pour the sauce into the pan from a glass where the cornstarch has settled, the liquid goes in first and the starch hits the pan last as a concentrated paste, producing uneven thickening. A quick stir takes 2 seconds and prevents this entirely.
- Let the chicken rest before slicing. This is the instruction most consistently skipped when the food smells good and the table is set. Five minutes of resting on a cutting board, not back in the hot pan, allows the muscle fibers to relax and the internal juices to redistribute from the center back toward the surface. A rested thigh yields noticeably more juice when cut than one sliced straight from the heat.
Storage Tips
Refrigerator
Store leftover teriyaki chicken in a sealed container in the refrigerator for up to 4 days. The sauce thickens further as it cools but returns to a glossy, flowing consistency when gently reheated. Store sliced chicken and any remaining sauce together so the meat stays moist and continues absorbing flavor during storage. The flavor actually deepens slightly overnight as the soy, ginger, and garlic notes continue to penetrate the chicken.
Freezer
Teriyaki chicken freezes well for up to 2 months. Allow it to cool completely before transferring to a freezer-safe container or bag. Freeze the chicken and sauce together; the sauce protects the chicken from freezer drying and keeps the surface coating intact through the freeze-thaw cycle. Thaw overnight in the refrigerator before reheating; do not thaw at room temperature, particularly for poultry.
Reheating
The stovetop is the best reheating method for teriyaki chicken. Place the chicken and its sauce in a small skillet over medium-low heat with 2 tablespoons of water added to the pan. Cover with a lid and heat for 4 to 5 minutes until warmed through and the sauce has returned to a flowing consistency. Microwave reheating at 60% power in 60-second intervals also works; the sauce rehydrates adequately and the chicken stays moist if not overheated. Avoid reheating on high microwave power, which dries the chicken rapidly.
Make-ahead note: The teriyaki sauce can be made and refrigerated in a sealed jar for up to 7 days. The chicken can be seared ahead and refrigerated for up to 2 days before finishing in the sauce; this splits the recipe into a very quick final step that takes under 10 minutes.
Nutrition Information
Per serving, approximately one portion (1/4 of the recipe), rice and sides not included:
| Nutrient | Amount |
|---|---|
| Calories | 310 kcal |
| Protein | 30g |
| Total Carbohydrates | 14g |
| Dietary Fiber | 0.5g |
| Total Sugar | 11g |
| Total Fat | 14g |
| Saturated Fat | 3.5g |
| Cholesterol | 140mg |
| Sodium | 780mg |
| Vitamin C | 2mg |
| Calcium | 20mg |
| Iron | 1.5mg |
| Potassium | 380mg |
Nutrition values are approximate and may vary based on chicken thigh size, skin presence, and brands used. Rice and side dishes not included.
Why This Recipe Works
The caramelization that develops on the chicken surface during the initial high-heat sear is doing more than producing color. When the chicken’s surface temperature climbs above 150°C on the pan surface, the amino acids in the protein and the trace sugars in the chicken’s surface moisture undergo Maillard reactions, producing hundreds of new aromatic compounds associated with the complex, savory flavor of browned meat. Those compounds become part of the finished dish’s flavor once the sauce reduces around them. Chicken that’s been steamed or cooked in the sauce from the start, without prior searing, lacks those compounds and tastes noticeably milder and less complex than a properly seared version.
The cornstarch in the sauce works through starch gelatinization. When the sauce mixture hits the hot pan, the starch granules begin absorbing water and swelling. Above approximately 62 to 72°C, they swell enough to rupture, releasing their starch molecules into the surrounding liquid. Those starch molecules form a network that traps water and creates a viscous, glossy liquid rather than a thin, watery one. The amount of cornstarch in this recipe, 1 teaspoon in approximately 120ml of liquid, is calibrated to produce a sauce that flows and coats but doesn’t set into a gel. A second teaspoon produces a sauce too thick to spoon smoothly; half a teaspoon produces one that doesn’t cling to the chicken consistently.
The apple juice in the sauce contributes more than just liquid volume. Its fructose content caramelizes readily above 110°C on the pan surface during the sauce reduction, producing the deep mahogany color characteristic of a well-made teriyaki glaze. Plain water or a lower-sugar liquid in the same quantity produces a sauce that reduces adequately but doesn’t develop the same color depth or the faint caramelized sweetness that distinguishes a restaurant-quality finish from a flat, soy-dominated home version.
Basting the sauce over the chicken repeatedly during the final minutes builds the glaze in layers rather than as a single coat. Each spoonful of sauce deposited on the chicken surface begins to reduce and slightly concentrate from the residual heat of the chicken before the next layer goes on. The result is a glaze with measurably more coating thickness and depth than one formed by simply reducing the sauce around the chicken without active basting. I’ve tested both approaches side by side; the basted version shows a noticeably thicker, shinier glaze after the same 4-minute reduction time.
Resting chicken after cooking is not optional for texture reasons. During high-heat cooking, the muscle fibers contract and push fluid toward the center of the meat. The center of a freshly cooked chicken thigh contains a higher concentration of juice than the outer layers. Resting for 5 minutes allows the muscle fibers to relax and the temperature gradient across the thigh to equalize, which draws the juice back toward the surface. A chicken thigh sliced at rest temperature loses about 20% less juice than one sliced directly off the heat; in a sauced dish, this retained moisture mixes with the teriyaki sauce coating and contributes to the perception of juiciness in each bite.
Frequently Asked Questions
Can I make teriyaki chicken ahead of time?
Yes, and it holds up particularly well compared to many pan-sauced chicken dishes. Fully cooked and glazed teriyaki chicken keeps in the refrigerator for up to 4 days and reheats without drying out because the sauce coating protects the meat surface. For meal prep, cook the full batch, slice, and store with the remaining sauce poured over the chicken in the container. Reheat in a small covered skillet with 2 tablespoons of water on medium-low heat for 4 to 5 minutes.
Why is my teriyaki sauce not thickening?
Two things cause this most often. The cornstarch wasn’t fully dissolved in cold water before being added to the sauce mixture, so it clumped rather than dispersing evenly through the liquid. Or the sauce was added to a pan that was still on very high heat, which caused the starch to seize unevenly. Dissolve the cornstarch completely in cold water first, stir the sauce immediately before adding it to the pan, and maintain medium heat throughout the sauce reduction for a smooth, evenly thickened result.
Can I use chicken breasts instead of thighs?
Yes, with adjustments. Boneless chicken breasts have significantly less fat than thighs and dry out quickly at high searing heat. Pound the breasts to an even 2cm thickness before cooking to ensure they cook through at the same rate, and pull them from the heat the moment they reach 74°C (165°F). Don’t let them continue cooking in the sauce beyond 2 minutes at that point. Thighs are still the better choice for this recipe; the result with breasts is noticeably drier and the texture is less forgiving of any timing variation.
How do I know when the teriyaki sauce is ready?
The spoon-trail test is the most reliable indicator. Drag the back of a spoon across the base of the pan through the sauce; if the trail fills in immediately, the sauce needs more time. If the trail holds for 3 to 4 seconds before the sauce flows back in, it’s ready. The sauce should also coat the back of the spoon in a thick, opaque layer rather than running off in a thin, transparent stream. At this point the chicken surface should look visibly lacquered and glossy rather than wet.
Is teriyaki chicken gluten-free?
Standard teriyaki sauce is not gluten-free because regular soy sauce contains wheat as a fermentation grain. To make a fully gluten-free version, replace the soy sauce with certified gluten-free tamari at the same quantity. Tamari is brewed with minimal or no wheat and produces an almost identical flavor profile. Verify the cornstarch is labeled gluten-free if cross-contamination is a concern. Every other ingredient in the recipe is naturally gluten-free.
Can I use this sauce for other proteins?
Yes. The teriyaki sauce works well with salmon fillets, firm tofu pressed and seared until golden, and thinly sliced beef. For salmon, sear the fillets skin-side down for 4 minutes, flip for 2 minutes, then pour the sauce in and glaze for 2 minutes; salmon reaches the right internal temperature faster than chicken. For tofu, press the block for 30 minutes to remove moisture before cutting and searing; the sauce requires no adjustment. Beef strips work well in a very fast, high-heat stir-fry application with the sauce added in the final 90 seconds.
Why does my teriyaki chicken look pale rather than dark and glossy?
Pale teriyaki chicken usually means one of two things: the chicken wasn’t patted dry before searing, so it steamed rather than caramelized, or the sauce reduction didn’t go long enough for the sugars to darken. Make sure the chicken surface is completely dry before it touches the pan, and hold the sauce reduction for the full 3 to 4 minutes even when the sauce looks close to done at 2 minutes. The color deepens most noticeably in the final 60 to 90 seconds of reduction.

Conclusion
Teriyaki chicken succeeds when each step is given its proper attention: a dry chicken surface that actually sears rather than steams, a cornstarch-thickened sauce added at the right heat, and the patience to baste and reduce for the full 3 to 4 minutes until the glaze is genuinely thick rather than just warm. Those three things together produce the mahogany, lacquered surface and the sauce that coats the rice below the chicken.
This is a recipe that improves each time you make it, not because it changes but because you get better at reading the pan. The sound of the chicken releasing from the cast iron cleanly, the smell of the sauce going from liquid to caramelized, and the look of the glaze when it’s exactly right: each of those gets easier to recognize with one more batch behind you.
If you loved this recipe, save it to your easy Asian dinners and weeknight meals Pinterest board so you can find it easily later! For more healthy recipes and daily food inspiration, follow TheCookingVibes on Pinterest.
Easy Teriyaki Chicken
Ingredients
Equipment
Method
- Mix the sauce: In a small bowl or measuring jug, combine the soy sauce, apple juice, brown sugar, rice vinegar, grated garlic, and grated ginger. In a separate small bowl, whisk the cornstarch and water until completely smooth, then pour the slurry into the soy sauce mixture and stir until the sugar begins to dissolve. Set aside; stir again right before it goes into the pan, as the cornstarch settles within 5 minutes.
- Dry and season the chicken: Pat the chicken thighs completely dry on both sides with paper towels – surface moisture steams instead of searing and prevents caramelization. Season both sides lightly with a small pinch of salt; the sauce carries most of the seasoning.
- Sear the chicken: Heat the neutral oil in a cast iron skillet over medium-high heat until it shimmers. Place the thighs smooth side down without crowding (sear in two batches if needed) and cook undisturbed for 5 to 6 minutes, until the underside is deep golden-amber. Flip and cook the second side for 4 to 5 minutes. The chicken finishes cooking in the sauce.
- Add the sauce: Reduce the heat to medium. Stir the sauce to redistribute the cornstarch, then pour it carefully around the chicken pieces rather than directly over them. It will bubble immediately around the edges; tilt the pan to distribute it evenly.
- Glaze and finish: Cook the chicken in the simmering sauce for 3 to 4 minutes, spooning sauce over each piece every 60 seconds. The glaze is ready when a spoon dragged across the pan base leaves a trail that fills in slowly over 3 to 4 seconds. Check the thickest piece reaches at least 74°C (165°F), then remove from heat.
- Rest and slice: Transfer the glazed chicken to a cutting board and rest for 5 minutes so the juices redistribute. Slice on a diagonal into 1.5cm strips and serve over rice with the pan sauce drizzled over the top.
Notes
- Mix the sauce before the chicken goes on the heat; once searing starts, there is no time to measure.
- Pat the chicken completely dry – wet chicken steams instead of searing and stays pale.
- Do not move the chicken during the first 5 to 6 minutes; it releases cleanly once the crust has formed.
- Give the sauce a quick stir right before it goes into the pan, because the cornstarch settles to the bottom.