Parmesan Crusted Chicken — Crispy Golden Crust, Juicy Interior
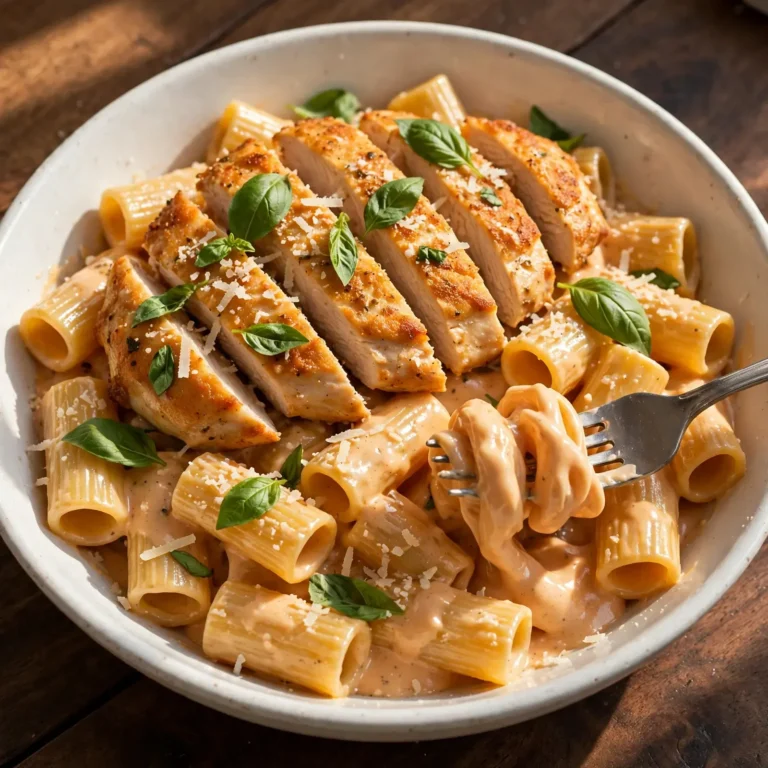
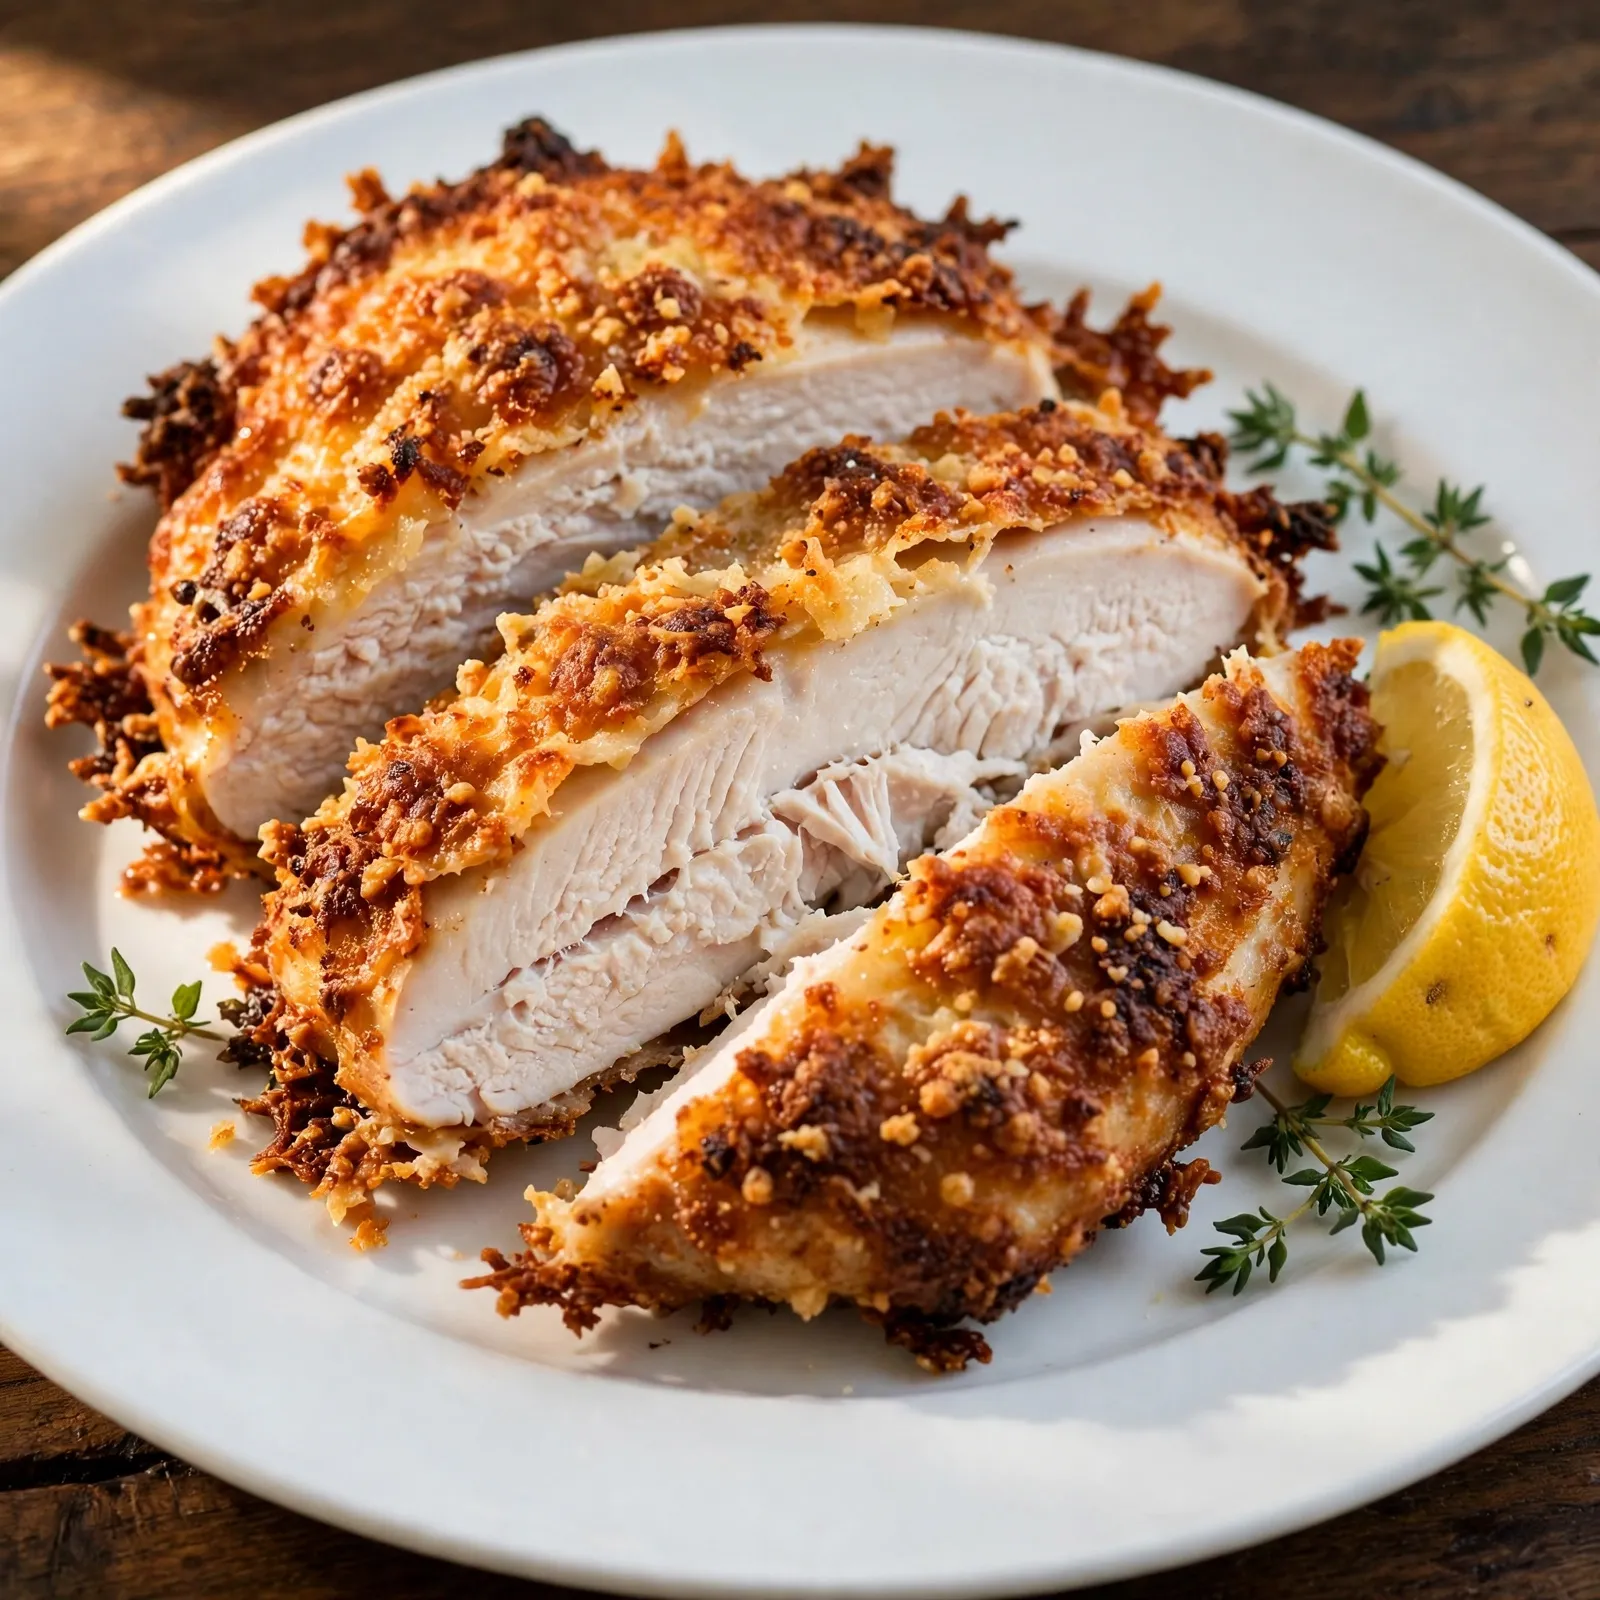
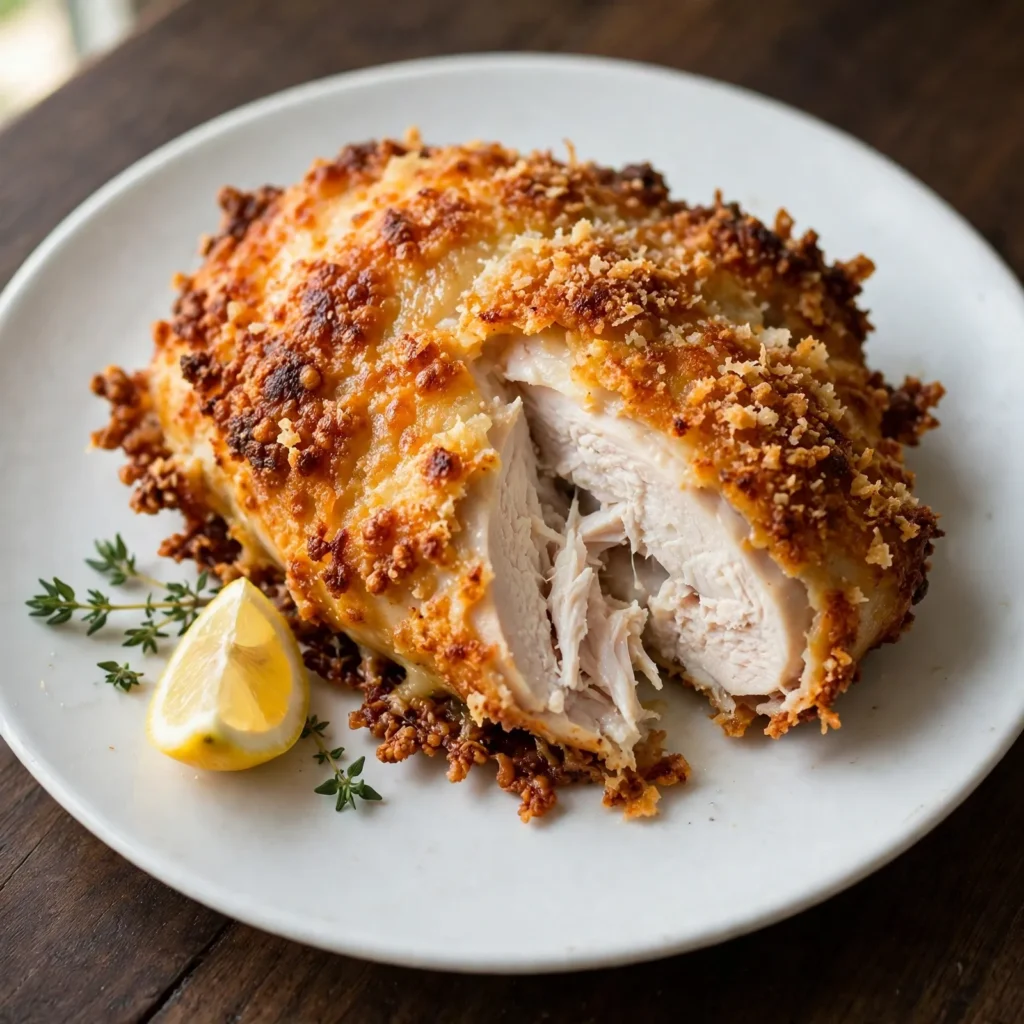
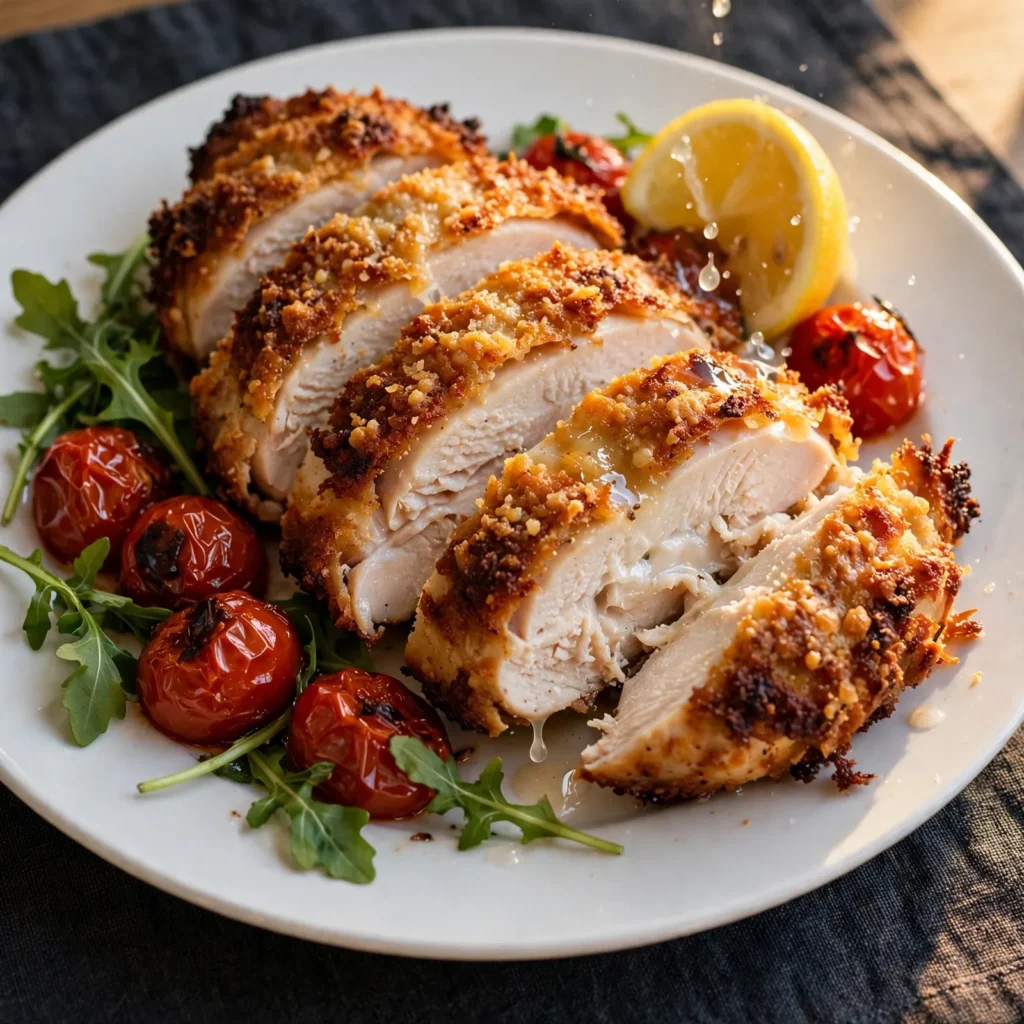
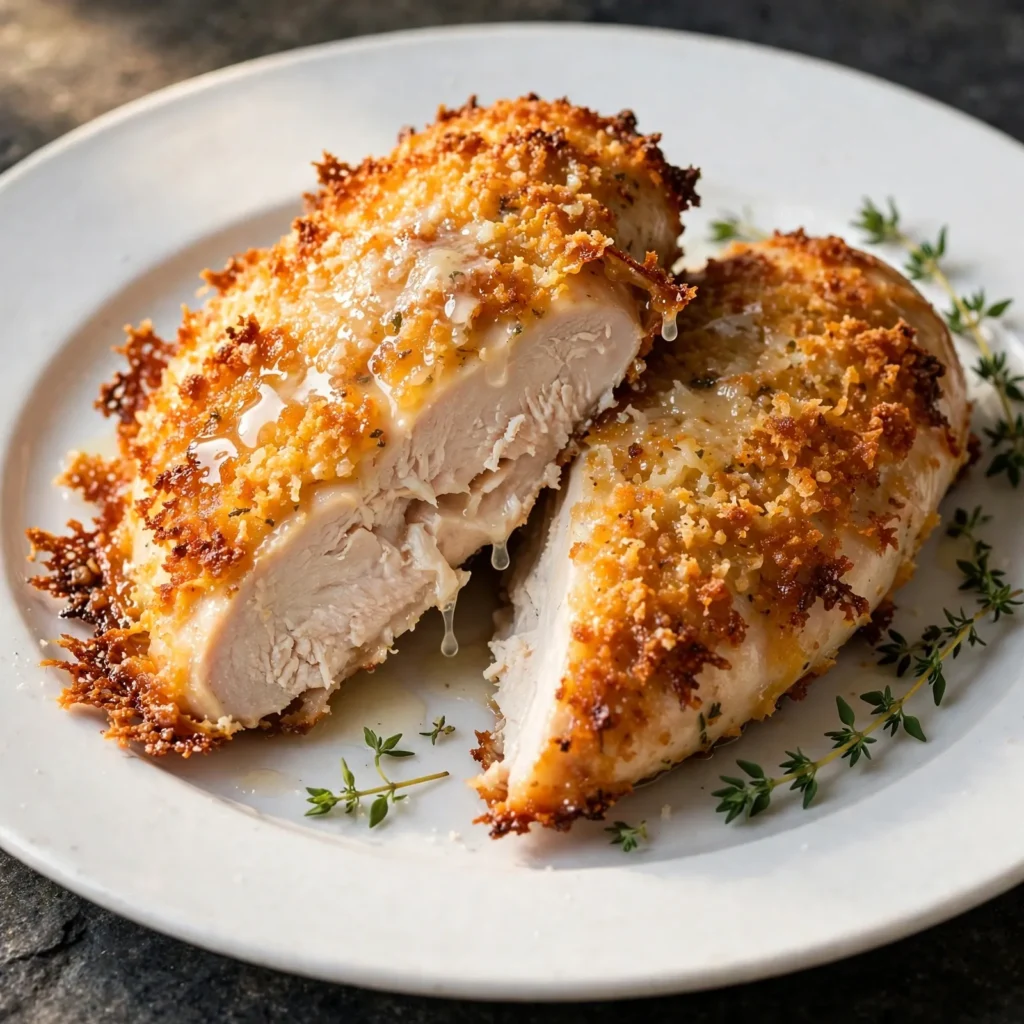
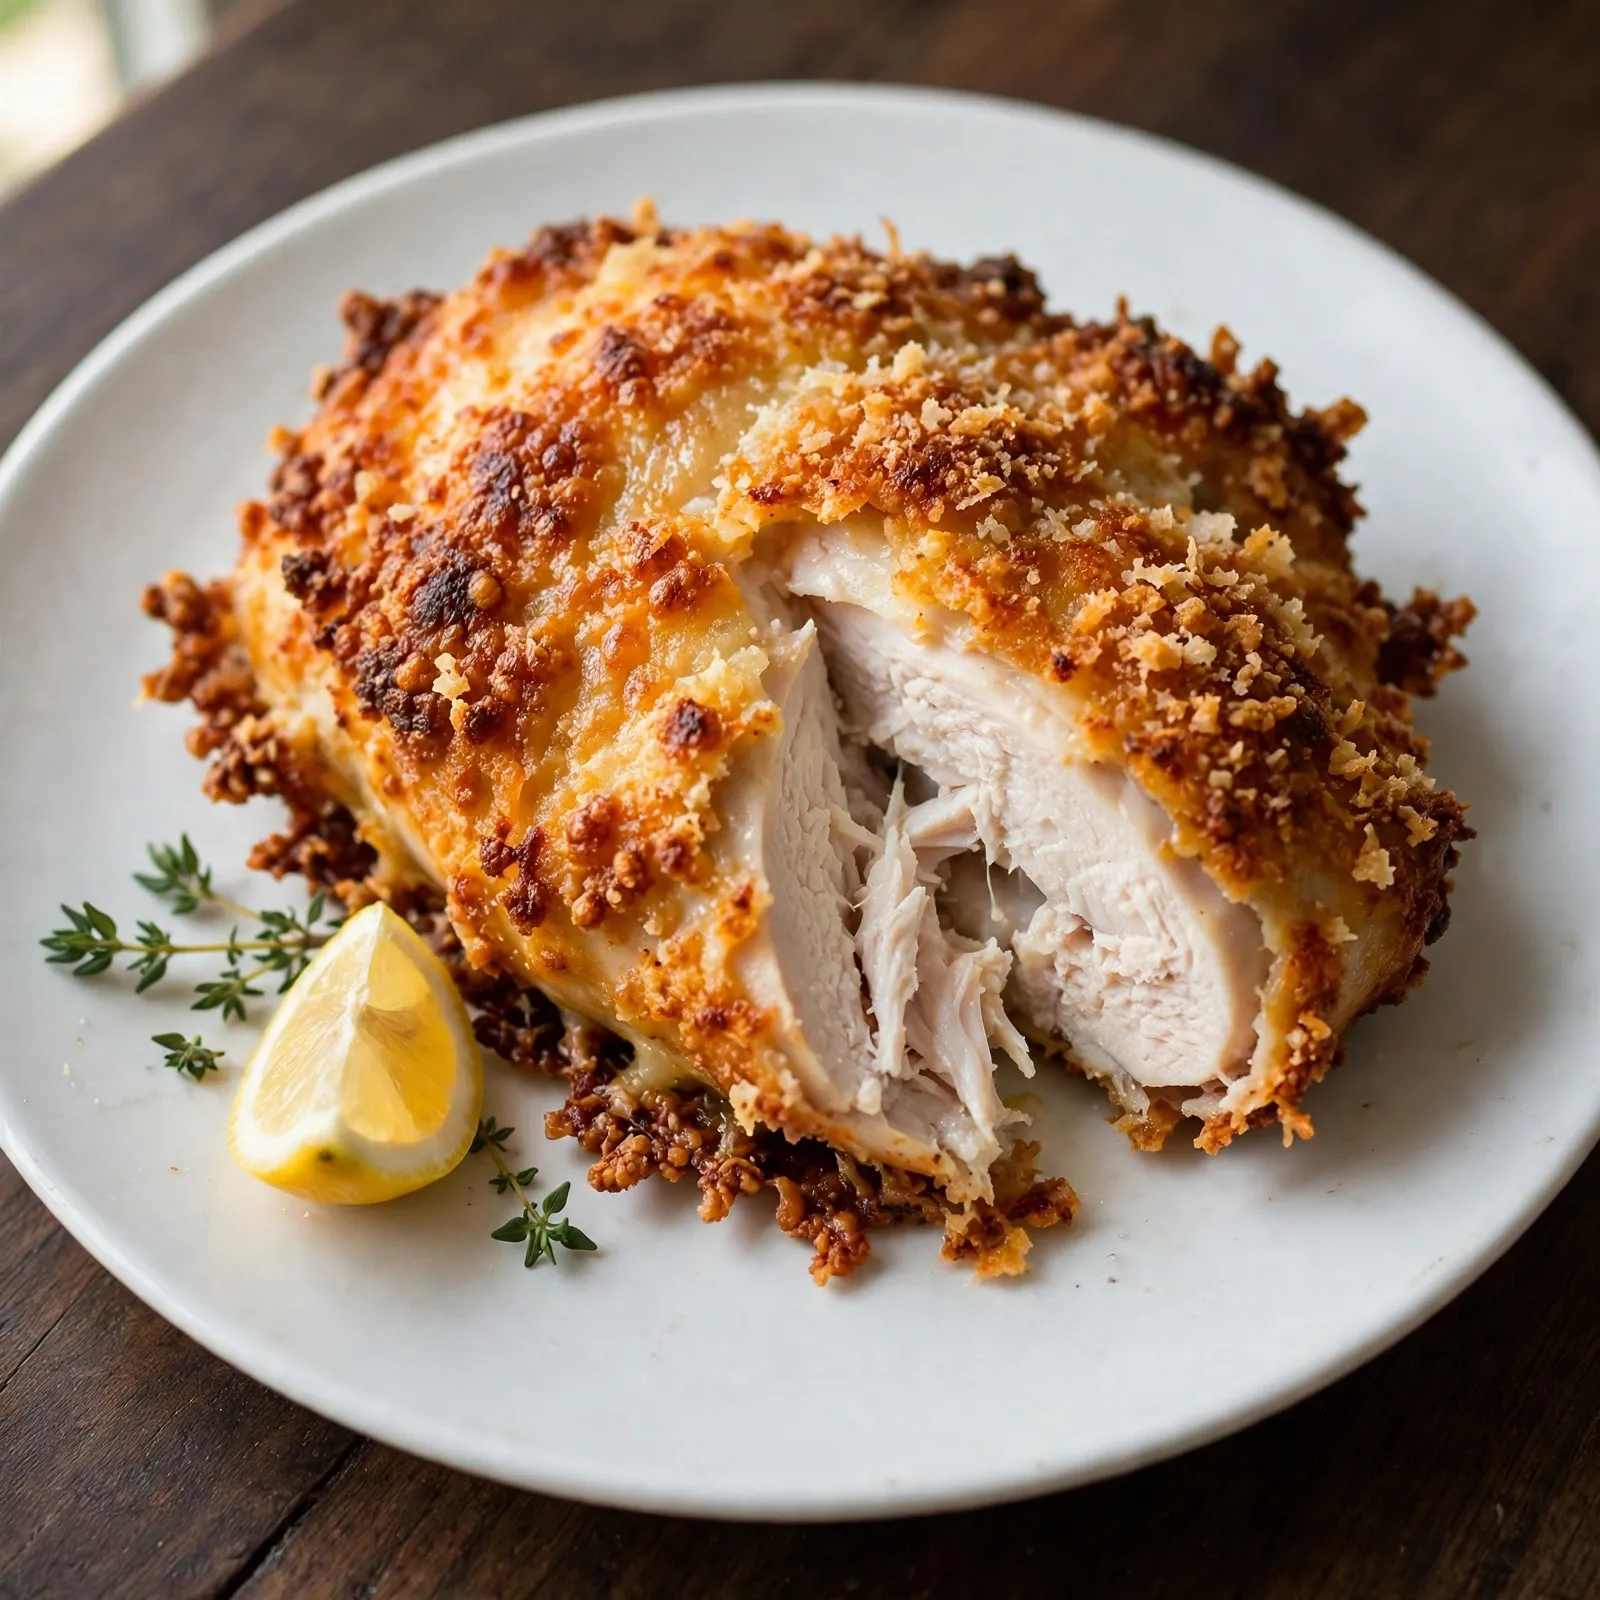
The first thing you notice when parmesan crusted chicken comes out of the oven is the crust: a deep amber-gold that looks like it belongs in a restaurant, with the edges slightly more caramelized than the center and tiny visible flecks of parmesan that have crisped into something almost lacy. Cut into it and the interior is white and fully juicy rather than the chalky, dry texture that plagues most breaded chicken. That combination, genuinely crispy exterior with a moist interior that didn’t sacrifice one for the other, is what this recipe is built around.
This parmesan crusted chicken recipe uses thin-cut boneless chicken breasts coated in a parmesan and seasoned breadcrumb mixture, seared briefly in a hot oven-safe skillet to set the crust, and finished in the oven so the interior cooks through without the crust burning on the stovetop. The whole recipe takes 30 minutes, serves 4, and requires no deep frying. The parmesan in the crust does more than add flavor: it melts slightly during the sear, binding the coating into a cohesive, crunchy layer that stays attached from the first cut to the last bite.
Why You’ll Love This Parmesan Crusted Chicken
- Crust that stays on through cutting and eating. The parmesan melts slightly during the initial sear and bonds the breadcrumb layer to the chicken surface; this adhesion is what keeps the coating intact from the moment you cut in rather than sliding off the moment a fork touches it.
- No deep frying and no oil splatter. A shallow layer of oil in a hot skillet plus a short oven finish produces a crust with the same depth of color and crunch as a deep-fried version without requiring more than a cup of oil or a dedicated fryer.
- Ready in 30 minutes from cold ingredients. The prep takes 10 minutes and the cook time is 20; nothing needs to marinate overnight and no special equipment speeds the process.
- Works for a weeknight dinner and a dinner party equally. The finished chicken looks composed and deliberate on a plate alongside almost any side; the presentation requires no additional effort beyond a lemon wedge and fresh herbs.
- The parmesan itself does the seasoning. Aged Parmesan contains enough salt and glutamate to season the crust without any additional cheese flavor additions; the crust tastes complete with only garlic powder, Italian seasoning, and black pepper added to the breadcrumb mixture.
Ingredients You’ll Need
Recipe Timing
| Detail | Info |
|---|---|
| Servings | 4 |
| Difficulty | Easy |
| Course | Main Course |
| Cuisine | Italian-American |
| Prep Time | 10 minutes |
| Cook Time | 20 minutes |
| Rest Time | 5 minutes |
| Total Time | 35 minutes |
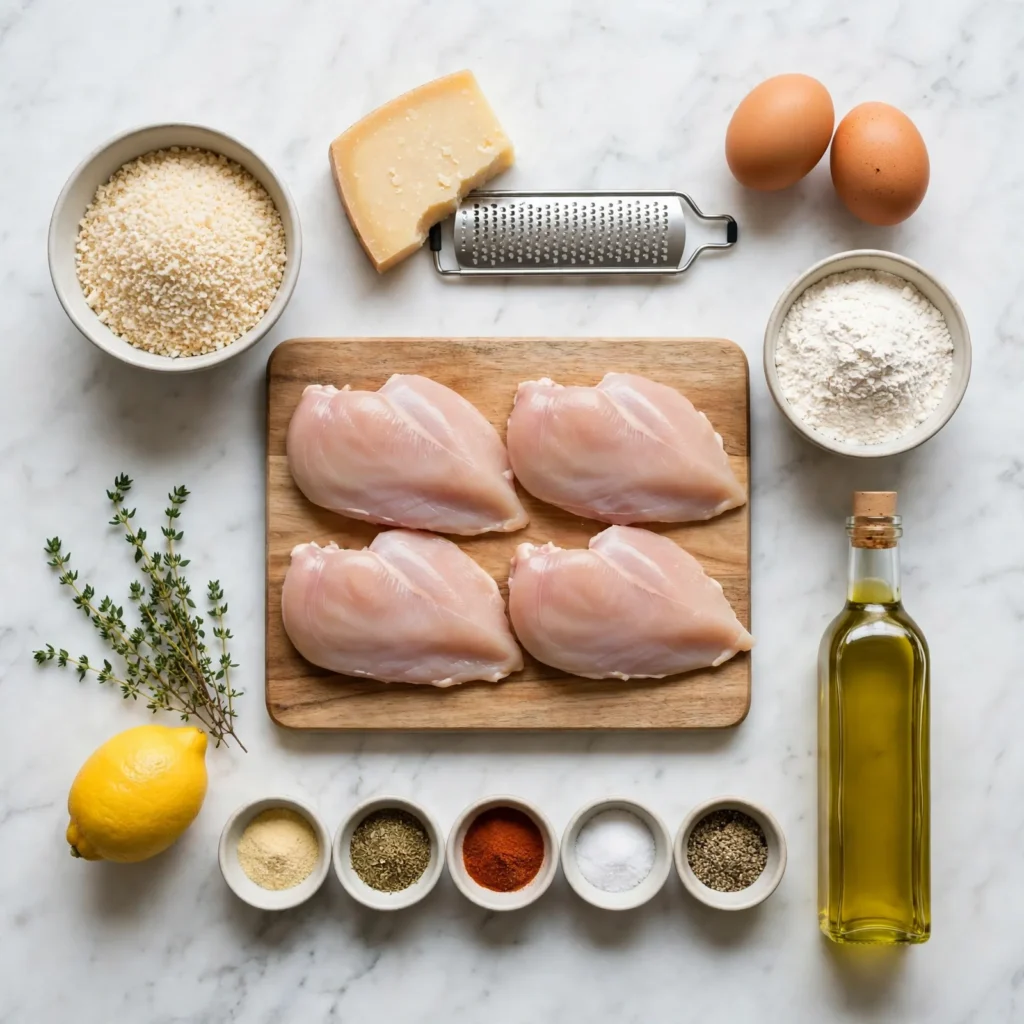
For the chicken, thin-cut boneless skinless breasts are the optimal choice for this recipe. A standard boneless breast at its full thickness (typically 2.5 to 3cm at the thickest point) takes significantly longer to cook through in the oven, which means either the crust burns before the interior reaches 74°C (165°F) or the interior cooks correctly while the crust becomes pale and soft waiting for the center to finish. Thin-cut breasts at 1 to 1.5cm thickness cook through quickly and allow the crust to develop and hold its color. If only regular-thickness breasts are available, place them between two sheets of plastic wrap and pound to an even 1.5cm thickness with a meat mallet or the bottom of a heavy skillet.
For the parmesan, freshly grated from a block is the non-negotiable choice for this recipe. Pre-shredded parmesan is coated in cellulose anti-caking starch that prevents it from melting and browning properly; it produces a sandy, pale coating rather than the amber, slightly melted crust that freshly grated parmesan creates. Use the fine side of a box grater or a microplane; finely grated parmesan distributes more evenly through the breadcrumb mixture and produces a more consistent crust color than coarsely grated pieces.
For the breadcrumbs, panko produces a noticeably crunchier crust than regular dried breadcrumbs. Panko’s irregular, flaky structure creates more surface area per gram than standard breadcrumbs, which means more area for browning and more actual crunch per bite. Regular Italian breadcrumbs produce a denser, slightly softer crust; both work, but panko is the better choice if it’s available.
- 4 thin-cut boneless skinless chicken breasts (about 150 to 170g each, approximately 1 to 1.5cm thick) — the base protein; food safety note: chicken must reach an internal temperature of 74°C (165°F) before serving
- 80g (about 1 cup) freshly grated Parmesan, grated on the fine side of a box grater — the dominant flavor and the binding agent of the crust; never pre-shredded
- 60g (about 2/3 cup) panko breadcrumbs — the structural crunch component of the crust
- 1 teaspoon garlic powder — adds savory depth to the crust without the sharpness or moisture of raw garlic
- 1 teaspoon Italian seasoning — adds a herbal background note; alternatively use 1/2 teaspoon dried oregano and 1/2 teaspoon dried basil
- 1/2 teaspoon smoked paprika — contributes warmth, subtle smokiness, and helps the crust achieve a deeper amber color
- 1/2 teaspoon fine salt — the parmesan contributes salt, so use less here than you would in a non-parmesan crust; taste the dry mix before applying and adjust
- 1/2 teaspoon freshly ground black pepper
- 2 large eggs — the binding agent between the chicken surface and the parmesan-breadcrumb crust; beaten with a fork until smooth
- 2 tablespoons all-purpose flour — the first dredge layer; creates a dry surface for the egg to adhere to, which dramatically improves crust adhesion
- 3 tablespoons olive oil — for searing; enough to coat the pan base and produce even browning without shallow frying
- Lemon wedges and fresh thyme or parsley — for serving
Allergen and Dietary Disclosure
This parmesan crusted chicken contains dairy (Parmesan cheese), eggs (in the egg wash), and gluten (panko breadcrumbs and all-purpose flour). It is naturally nut-free.
For gluten-free: replace the all-purpose flour with a 1:1 gluten-free flour blend at the same quantity. Replace the panko with certified gluten-free panko-style breadcrumbs, which are available at most grocery stores. The method stays identical; the crust texture is very close to the standard version.
For dairy-free: replace the Parmesan with a dairy-free hard cheese alternative grated at the same quantity. Dairy-free Parmesan alternatives vary significantly in how they melt and brown; keep a close eye on the crust color during searing since some dairy-free options brown faster than real Parmesan. The crust won’t develop quite the same melted-and-browned complexity as the dairy version but remains flavorful and crispy.
For egg-free: replace the egg wash with 3 tablespoons of plain unsweetened Greek yogurt thinned with 1 tablespoon of water, or with full-fat mayonnaise spread in a thin layer directly on the floured chicken surface. Both provide enough moisture and protein to bond the breadcrumb-parmesan coating to the chicken through the oven.
This recipe has not been tested in a certified allergen-free kitchen and cannot be guaranteed safe for any specific allergy.
Equipment Needed
- Oven-safe skillet, 12-inch, stainless steel or cast iron — for the stovetop sear and the oven finish in the same pan. An oven-safe skillet eliminates the transfer step of moving the chicken from a non-oven-safe pan to a baking sheet, which risks disturbing the crust at its most fragile point immediately after the sear. Cast iron retains heat more aggressively than stainless steel and produces a deeper sear color in a shorter time; stainless steel gives slightly more control over browning rate.
- Three shallow dishes or bowls — for the three-stage dredging station: one for flour, one for the beaten eggs, one for the parmesan-breadcrumb mixture. The dishes should be wide enough to lay a chicken breast flat without the edges curling up; a rimmed dinner plate works as well as a dedicated shallow dish.
- Meat mallet or heavy-bottomed skillet — for pounding regular-thickness chicken breasts to an even 1.5cm thickness if thin-cut breasts aren’t available. Consistent thickness is critical for even cooking; a thicker edge or lobe on one breast will still be raw when the thinner center has already reached temperature.
- Instant-read thermometer — the only reliable way to confirm the chicken has reached 74°C (165°F) without cutting it open and releasing the juices. Insert the probe into the thickest part of the breast from the side rather than from the top; the side-entry measurement reads the true center temperature rather than the hotter surface temperature.
Step-by-Step Directions
Step 1: Prepare the Dredging Station
Preheat the oven to 200°C (400°F). Set up three shallow dishes in a row: the first with the flour, the second with the two eggs beaten until completely smooth and uniform (no visible streaks of white remaining), and the third with the Parmesan, panko, garlic powder, Italian seasoning, smoked paprika, salt, and black pepper combined and stirred together until the seasoning is evenly distributed throughout the mixture. Taste a small pinch of the dry mixture; it should taste savory and well-seasoned but not aggressively salty since the Parmesan contributes significant salt of its own.

Chef’s Note: Tasting the dry coating mixture before any chicken is dredged is the most useful quality control step in this recipe. The amount of salt in different Parmesan brands varies considerably; a block of aged domestic Parmesan can be noticeably saltier than a younger imported one. This single taste takes 5 seconds and prevents a crust that is either oversalted or under-seasoned.
Step 2: Dredge the Chicken
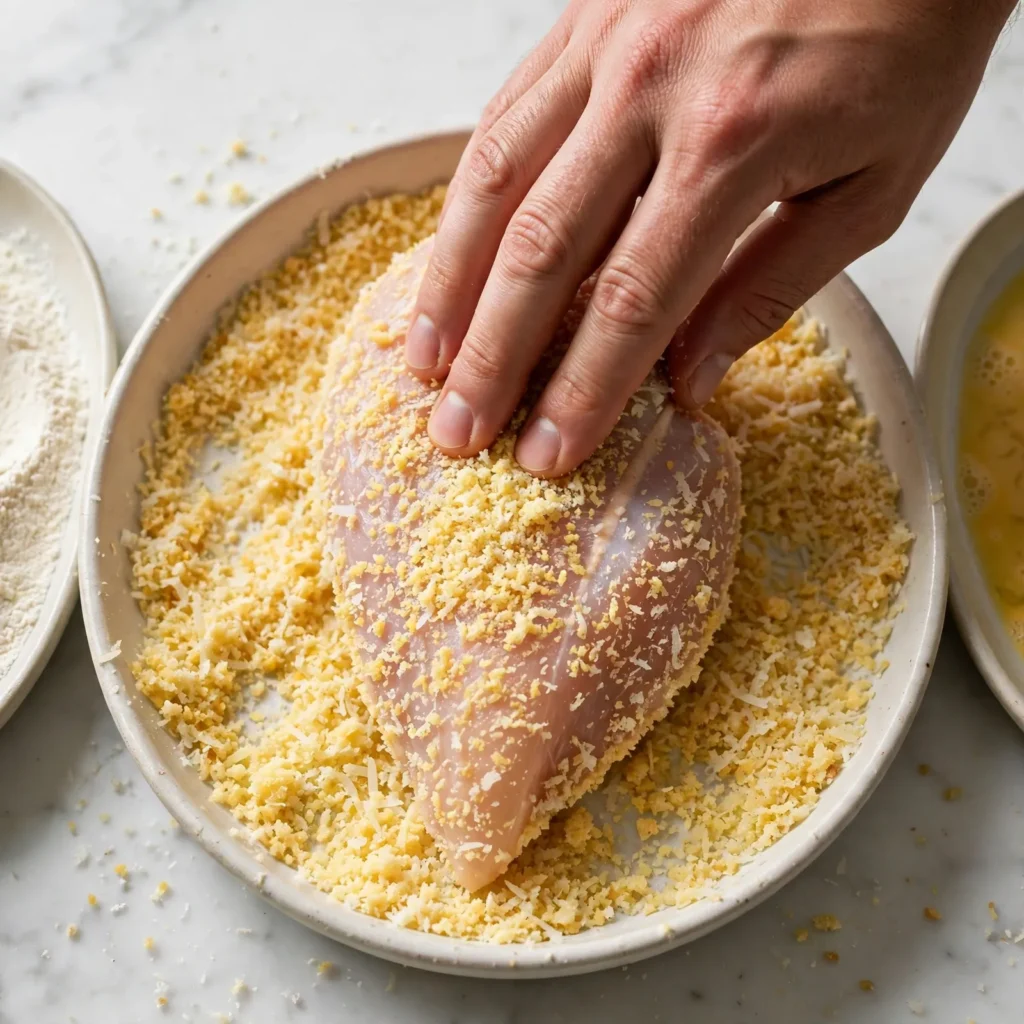
Pat each chicken breast completely dry with paper towels; surface moisture causes the flour to clump and the egg to slide off rather than adhering evenly. Working one breast at a time, dredge the chicken in the flour first, pressing it gently against both sides to coat the full surface in a thin, even layer. Shake off any excess flour; the flour layer should be thin and matte, not thick and white. Dip immediately into the beaten egg, letting the excess drip off for 2 to 3 seconds. Transfer to the Parmesan-panko mixture and press firmly on both sides with your palm, using moderate downward pressure to push the coating into the egg-coated surface. The crust should look fully coated with no visible egg patches and no thin spots where the chicken shows through.
Set each coated breast on a clean plate or wire rack. Allow them to rest for 3 to 4 minutes after all four are coated; this brief rest lets the coating adhere more firmly before heat is applied.
Chef’s Note: The three-stage dredge, flour then egg then breadcrumb, is a specific sequence with a specific purpose at each stage. The flour creates a completely dry surface that gives the egg something to grip rather than sliding across the moist chicken surface. The egg provides the adhesive layer that bonds the parmesan-panko coating to the flour. Skip the flour stage and the egg beads on the chicken’s surface; skip the egg stage and the dry coating falls off during the sear. All three stages are structural, not optional.
Step 3: Sear the Crusted Chicken
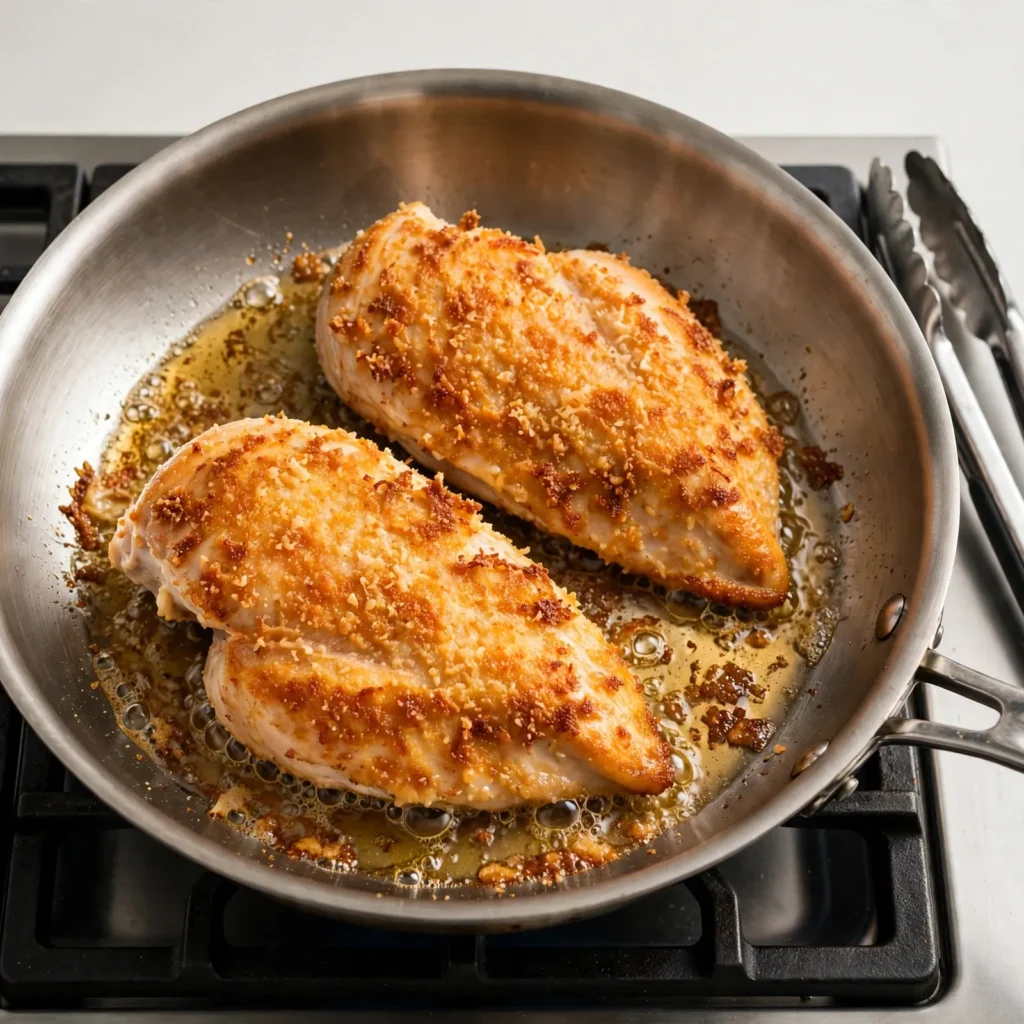
Heat the olive oil in the oven-safe skillet over medium-high heat until the oil shimmers actively and a small breadcrumb dropped in sizzles immediately on contact. Add the coated chicken breasts smooth-side down (the more uniform side, usually the top of the breast) without overcrowding. Sear for 2 to 3 minutes without moving the chicken; moving it before the crust has set will peel the coating off the surface. The crust is ready to flip when it releases cleanly from the pan surface with very light pressure from a spatula; if it resists, give it another 30 seconds.
Carefully flip each breast and sear the second side for 90 seconds to 2 minutes until the second side is also golden and set.
Chef’s Note: The oil temperature before the chicken goes in is the most consequential factor in crust color and adhesion. If the oil is not hot enough, the coating absorbs oil rather than browning in it, producing a greasy, pale crust. If it’s too hot, the Parmesan can burn before the panko has properly browned. The shimmering-but-not-smoking point at medium-high heat is the correct temperature window; a breadcrumb test (dropping one piece in and observing whether it sizzles immediately) takes 2 seconds and eliminates guessing.
Step 4: Finish in the Oven
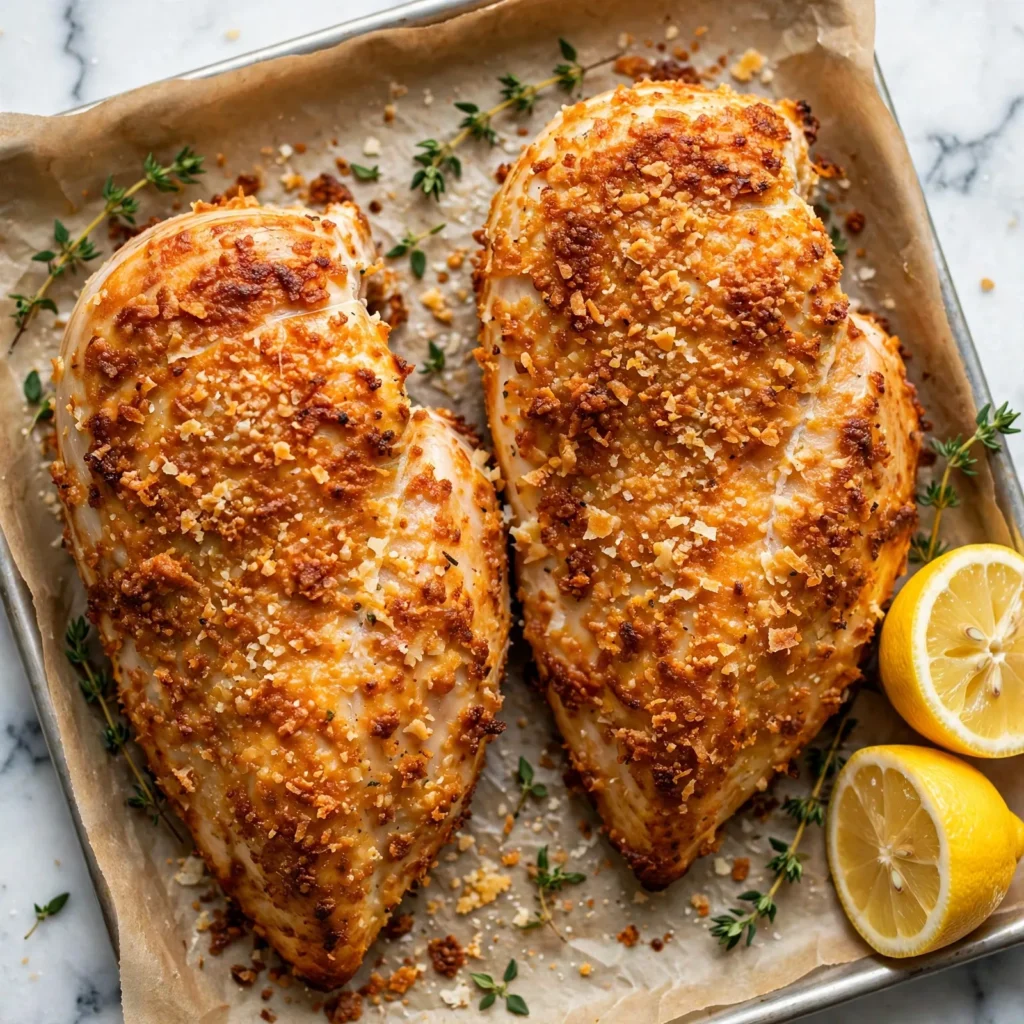
Transfer the skillet directly to the preheated 200°C oven. Bake for 10 to 14 minutes until the internal temperature at the thickest part of each breast reads 74°C (165°F) and the crust is deep amber-gold across its entire surface. The exact time depends on the thickness of the breasts; 1cm-thick breasts finish in 10 minutes, 1.5cm-thick breasts in 12 to 14 minutes. Check the temperature at 10 minutes and continue only if the thickest breast hasn’t reached 74°C.
Food safety note: Do not rely on color or juices running clear as doneness indicators; always confirm 74°C (165°F) at the thickest point of the largest breast.
Step 5: Rest and Serve
Remove the skillet from the oven and allow the chicken to rest directly in the pan for 5 minutes before plating. The resting period allows the juices that concentrated at the center of each breast during cooking to redistribute toward the edges; a chicken breast cut immediately off the heat releases significantly more juice onto the plate than one rested for 5 minutes. The crust also continues to firm slightly during the rest as the residual heat from the pan evaporates any remaining surface moisture.
Serve immediately after resting with lemon wedges for squeezing over the top; the lemon juice’s acidity brightens the parmesan flavor and makes the crust taste considerably more vibrant.
Common Mistakes and Troubleshooting
| Problem | Cause | Solution |
|---|---|---|
| Crust falls off during searing | Chicken not dried before dredging, flour layer skipped, or chicken moved too early | Always pat completely dry; never skip the flour dredge; don’t attempt to flip until the crust releases cleanly from the pan |
| Crust pale and soft rather than golden | Oil not hot enough before chicken was added, or pan overcrowded | Test oil temperature with a breadcrumb; cook in two batches if all four breasts don’t fit with clearance between them |
| Crust too dark or burnt before interior is cooked | Chicken too thick, oven too hot, or pan too hot during sear | Pound breasts to an even 1.5cm thickness; sear at medium-high not high; reduce oven to 190°C if the crust is browning faster than expected |
| Chicken dry and chalky interior | Overcooked past 74°C, or breasts too thin and cooked too long | Check internal temperature at 10 minutes; very thin breasts (under 1cm) finish in 8 to 10 minutes total |
| Coating not sticking in one area | Not enough pressure during the parmesan-panko dredge, or egg layer too thin | Press firmly with the palm rather than patting; ensure the full chicken surface is coated in egg before the final dredge |
| Crust has sandy, pale color | Pre-shredded parmesan used | Always grate fresh from a block; pre-shredded cannot melt and brown in the same way |
Variations and Substitutions
- Lemon herb parmesan crust: Add the finely grated zest of 1 lemon and 1 tablespoon of finely chopped fresh rosemary to the parmesan-panko mixture. The lemon zest brightens the overall flavor profile of the crust and produces a noticeably more aromatic coating; the rosemary adds a resinous, slightly piney depth that works particularly well alongside the aged parmesan.
- Dijon mustard egg wash: Replace the plain egg wash with eggs beaten with 1 tablespoon of Dijon mustard. The mustard adds a subtle, tangy sharpness to the coating’s inner layer and acts as an additional binder. The mustard flavor itself is not prominent in the finished chicken but adds a background complexity to the crust that makes it taste more developed.
- Almond parmesan crust (gluten-free naturally): Replace the panko entirely with finely ground blanched almond flour at the same quantity. Almond flour produces a slightly denser, nuttier crust with excellent browning characteristics and no gluten. The fat in the almond flour browns similarly to breadcrumbs and the result is rich, golden, and crispy. This variation requires no flour stage if using pure almond flour as the final coating; the almond flour adheres directly to the egg without the intermediate flour step.
- Spicy parmesan crust: Add 1/2 teaspoon of cayenne pepper and increase the smoked paprika to 1 teaspoon in the breadcrumb mixture. The cayenne adds a building heat that emerges after the crust’s initial richness; the increased smoked paprika deepens the color dramatically, producing a crust that’s darker amber with slight reddish tones.
- Parmesan crusted chicken thighs: Replace the chicken breasts with boneless skinless chicken thighs, pounded to an even 1cm thickness. Thighs have higher fat content and are more forgiving of a minute or two of extra cooking time without drying out. Sear for the same time but extend the oven finish to 15 to 18 minutes to account for the slightly denser muscle structure; confirm 74°C at the thickest point.
- Panko-free crispy rice crust: Replace the panko with an equal weight of finely crushed plain puffed rice cereal (about 60g). The puffed rice produces an unusually light, shatteringly crispy crust with a slightly neutral flavor that lets the parmesan do more of the flavoring work. This variation is naturally gluten-free (verify the rice puffs brand) and produces a crust with exceptional crunch that holds well for longer than panko.
Serving Suggestions
- Serve over a simple arugula salad dressed with extra virgin olive oil and a squeeze of lemon; the peppery arugula contrasts the richness of the parmesan crust and the lemon bridges the dressing to the chicken without requiring a separate sauce.
- Place alongside roasted cherry tomatoes (halved, drizzled with olive oil, roasted at 200°C for 15 minutes) and a spoonful of good-quality ricotta; the sweet-acid tomatoes and the fresh ricotta create a quick, composed plate that looks restaurant-quality with minimal effort.
- Serve over cooked pasta tossed with olive oil, garlic, and fresh parsley for a complete dinner that comes together while the chicken is in the oven; the crust’s parmesan flavor carries through to the pasta when the chicken is sliced and placed on top.
- Slice the rested chicken on the diagonal and serve in a warm wrap or flatbread with sliced tomatoes, shredded lettuce, and a drizzle of garlic yogurt sauce for a fast lunch version that uses the same recipe in a completely different format.
- Pair alongside roasted asparagus or steamed broccolini; both green vegetables have enough inherent bitterness to cut through the fat of the parmesan crust cleanly and require no additional sauce to complete the plate.
- Pair with cold sparkling water with lemon or a lightly chilled sparkling grape juice; both provide a clean, refreshing contrast to the richness of the cheese crust and refresh the palate between bites.
Tips for the Best Results
- Never skip the flour as the first dredge layer. It is the foundation the entire crust rests on. Moist chicken protein creates a surface that egg wash beads on rather than coating evenly; the thin flour layer creates a completely dry, absorbent surface that the egg grips uniformly. The flour layer itself is invisible in the finished crust; its only job is adhesion, and it does that job critically.
- Press the coating on firmly rather than patting it. The parmesan-panko mixture needs physical contact with the egg-coated surface to bond properly; a light pat leaves air gaps between the coating and the egg that produce sections of coating that cook separately from the chicken and fall off under the spatula. Use the flat of your palm and moderate downward pressure for 3 to 4 seconds per side.
- Don’t move the chicken during the first 2 to 3 minutes of searing. The crust begins as a fragile, unset layer; the proteins in the egg binding the coating to the chicken need heat and time to coagulate into a set structure before any lateral movement is applied. Moving the chicken before the crust has set guarantees peeling. The release test, a gentle lift with a spatula, tells you exactly when the crust is ready; no timer is more reliable.
- Use a hot enough pan before the oil goes in. Heat the pan over medium-high for 90 seconds before adding the olive oil, then heat the oil until shimmering before adding the chicken. A pan that goes cold to hot with the oil already in takes longer to reach the right temperature; heating the pan first and adding oil to a hot surface produces a faster, more even heat-through in the oil, which means the chicken starts browning from the first moment of contact rather than sitting in warming oil.
- Rest the chicken for the full 5 minutes and don’t cover it. Covering a resting breaded chicken traps steam and immediately softens the crust; 5 minutes uncovered in the warm pan maintains the crust’s texture while still allowing the interior juices to redistribute. The chicken doesn’t cool to an unpleasant temperature in 5 minutes; it goes from very hot to serving-temperature hot, which is exactly where it needs to be.
Storage Tips
Refrigerator
Cooked parmesan crusted chicken keeps in the refrigerator for up to 3 days in a sealed container. The crust softens significantly during refrigerator storage as moisture from the chicken interior migrates outward through the coating; day-1 leftovers have a noticeably softer crust than fresh-cooked. Store the chicken on a wire rack inside the container rather than flat on the bottom; air circulation around the base prevents the underside crust from becoming soggy from pooled condensation.
Freezer
Cooked parmesan crusted chicken freezes adequately for up to 2 months. The crust texture after thawing and reheating is softer than fresh but the flavor is well-preserved. Freeze individually on a baking sheet until solid (about 1 hour), then transfer to a sealed freezer bag. Thaw overnight in the refrigerator before reheating. Uncooked coated chicken can also be frozen: after dredging, freeze the coated breasts on a parchment-lined sheet and transfer to a sealed bag once solid. Cook from frozen at 200°C for 25 to 28 minutes, flipping once at the halfway point.
Reheating
The oven produces the only reheating result that restores meaningful crust crispness. Place refrigerated or thawed chicken on a wire rack set over a baking sheet (the rack prevents the bottom crust from steaming against the pan surface) and reheat at 200°C for 8 to 12 minutes until the crust is crisp again and the internal temperature is back above 74°C. An air fryer at 180°C for 6 to 8 minutes produces an equivalent result with less preheat time. Microwave reheating heats the interior but makes the crust irreversibly soft; avoid it for this recipe.
Make-ahead note: The coating mixture (Parmesan, panko, and spices) can be combined and stored in a sealed jar at room temperature for up to 1 week. Having the dry mixture ready reduces the active prep to dredging and cooking only, which brings the total time down to under 25 minutes on busy evenings.
Nutrition Information
Per serving, approximately one coated chicken breast (1/4 of the recipe):
| Nutrient | Amount |
|---|---|
| Calories | 380 kcal |
| Protein | 42g |
| Total Carbohydrates | 14g |
| Dietary Fiber | 0.8g |
| Total Sugar | 0.5g |
| Total Fat | 17g |
| Saturated Fat | 5g |
| Cholesterol | 175mg |
| Sodium | 680mg |
| Vitamin C | 1mg |
| Calcium | 240mg |
| Iron | 1.8mg |
| Potassium | 420mg |
Nutrition values are approximate and may vary based on chicken breast size, parmesan brand, and exact oil absorption during searing.
Why This Recipe Works
The textural integrity of the crust in parmesan crusted chicken, its ability to stay attached, stay crispy, and stay distinct from the chicken beneath it, depends on a three-mechanism system that operates simultaneously during cooking. The first mechanism is the flour dredge’s adhesion function. Chicken breast has a moist, protein-rich surface that repels water-based coatings; the thin flour layer physically desiccates the immediate surface and provides a porous, absorbent substrate that the egg wash penetrates and locks into. Without this intermediate layer, the egg forms a film on the moisture-repellent chicken surface that doesn’t bond firmly enough to hold the outer coating under the shear stress of the sear.
The second mechanism is Parmesan’s melting behavior during the sear. Parmesan is an aged hard cheese with a relatively low water content (approximately 30% moisture compared to 50% or more in younger cheeses) and a high protein content. When freshly grated Parmesan contacts the hot oil in the skillet, its proteins begin to coagulate and its residual fat melts into the surrounding panko mixture; this partial melting creates a matrix that physically bonds the individual breadcrumb particles to each other and to the egg-coated chicken surface below. The result is a crust that behaves as a single cohesive unit rather than a pile of loose particles held loosely by egg. Pre-shredded parmesan, coated in cellulose starch that prevents this melting behavior, cannot form this matrix and produces a friable, easily detached coating.
The sear-then-oven method solves a specific thermal problem inherent in cooking breaded chicken. The crust needs very high surface heat (above 150°C) to undergo Maillard browning and develop its characteristic amber color and complex flavor. The chicken interior needs sustained moderate heat (around 74°C) to cook through without drying. On the stovetop at the searing temperature, the surface heat is sufficient for browning but the heat transfer to the center is too rapid; the exterior overcooks while waiting for the interior to reach safe temperature. The oven, by contrast, surrounds the chicken with gentle circulating heat (200°C ambient) that penetrates the interior steadily without concentrating on the surface. The sear develops the color in 2 to 3 minutes per side; the 10 to 14 minutes of oven heat finishes the interior without adding any further color to the already-browned crust.
The 5-minute rest after removing from the oven is not a waiting period; it’s an active part of the cooking process. During the high-heat oven finish, the muscle fibers in the chicken’s interior contract under heat and squeeze moisture toward the center of the breast in a phenomenon called moisture migration. At 74°C the proteins have coagulated and the center of the breast has the highest moisture concentration of any part of the chicken. The resting period allows these contracted muscle fibers to relax slightly and the concentrated moisture to redistribute back toward the edges of the breast. A chicken cut immediately after the oven releases a visible pool of juice onto the plate; the same chicken rested 5 minutes releases very little because that juice has redistributed into the meat. The crust also firms during the rest as the skillet’s residual heat continues to evaporate surface moisture from the coating.
I’ve tested this recipe with three different parmesan-to-panko ratios: equal parts, parmesan-heavy (60% parmesan, 40% panko), and panko-heavy (40% parmesan, 60% panko). Equal parts produced the ideal balance: the parmesan provides enough melting and binding to hold the coating together and enough flavor to season it completely, while the panko provides enough structural crunch to prevent the crust from becoming dense and compacted. The parmesan-heavy version produced a slightly softer, denser crust with a more intense cheese flavor that some people prefer; the panko-heavy version was crunchier but paler and less cohesive, with sections of crust detaching more readily during cutting.
Frequently Asked Questions
Can I make parmesan crusted chicken ahead of time?
The coated, uncooked chicken can be prepared up to 4 hours ahead and refrigerated on a wire rack over a plate, uncovered; the refrigerator’s dry air helps set the coating before cooking. The dry coating mixture itself keeps in a sealed jar for up to 1 week at room temperature. Fully cooked chicken keeps refrigerated for 3 days, though the crust softens during storage; reheat in the oven at 200°C on a wire rack to restore most of the crispness. Do not coat the chicken more than 4 hours ahead as extended contact between the egg and the coating makes the panko soggy.
Why does my crust keep falling off?
Crust detachment comes from one of three causes. The most common is skipping the flour dredge, which removes the dry adhesion layer the egg needs to grip; always flour-egg-breadcrumb in that exact order. The second cause is moving the chicken too soon during the sear; the crust needs 2 to 3 uninterrupted minutes on each side to set before it can tolerate movement. The third cause is using pre-shredded parmesan rather than freshly grated; the anti-caking coating on pre-shredded cheese prevents the melting and bonding that holds the crust together. Address all three and the crust stays on reliably.
Can I use chicken thighs instead of breasts?
Yes, boneless skinless thighs work well and are more forgiving than breasts because their higher fat content prevents them from drying out as easily. Pound the thighs to an even 1cm thickness (they’re often irregular in shape) and follow the same dredge and sear process. Extend the oven time to 15 to 18 minutes and confirm 74°C at the thickest point; the denser muscle fiber of the thigh requires slightly more time at temperature than breast meat.
How do I know when the parmesan crust is golden enough before flipping?
The release test is the most reliable doneness indicator for the sear: gently slide a thin spatula under one edge of the chicken. If it releases cleanly with very light pressure, the crust has set and is ready to flip. If it resists and clings to the pan surface, give it another 30 to 60 seconds. A crust that releases cleanly will be the right golden-amber color; a crust that still resists hasn’t browned fully. This test eliminates the need to lift the chicken to peek at the bottom, which risks tearing the crust.
Is parmesan crusted chicken gluten-free?
The standard recipe contains gluten from two sources: the all-purpose flour in the first dredge and the panko breadcrumbs in the final coating. To make a fully gluten-free version, replace the flour with a certified gluten-free 1:1 flour blend and the panko with certified gluten-free panko-style breadcrumbs. Alternatively, replace the panko entirely with finely ground blanched almond flour for a naturally gluten-free crust that browns beautifully. Verify the parmesan brand; authentic aged parmesan contains no gluten ingredients, but some grated varieties include anti-caking agents that may be wheat-derived.
Can I bake this entirely in the oven without the stovetop sear?
Yes, but the crust color and texture will be noticeably different. A sear-free oven version at 220°C (425°F) on a wire rack over a baking sheet for 20 to 25 minutes produces a crust that’s evenly pale golden rather than the deeper amber produced by direct pan contact. Spray the coated chicken lightly with olive oil before baking to encourage browning. The crust is slightly less cohesive without the parmesan-melting sear step, but the result is still a crispy, well-seasoned coating. The oven-only method is more hands-off and produces less cleanup.
What’s the best way to reheat parmesan crusted chicken and keep it crispy?
The oven is the best reheating method by a significant margin. Place the chicken on a wire rack set over a rimmed baking sheet (so air circulates beneath the crust as well as above it) and heat at 200°C (400°F) for 8 to 12 minutes until the crust is crisp and the center is hot throughout. An air fryer at 180°C for 6 to 8 minutes produces an equivalent result faster. Never microwave this dish; even 30 seconds of microwave heat turns the crust irreversibly soft through steam condensation on the coating surface.
Conclusion
Parmesan crusted chicken is one of those recipes where understanding the purpose of each step makes the result reliable rather than occasional. The flour dredge isn’t extra work; it’s the adhesion layer. The sear isn’t just for color; it sets the crust’s structure through the parmesan’s melting behavior. The rest isn’t impatience management; it’s moisture redistribution. Once those three connections are understood, the recipe produces consistent results without guessing.
The crust in the almond flour variation, the lemon-herb version, and the spicy version all use the same three-step logic; the technique transfers cleanly to any coating combination. Make the base recipe a few times until the release test and the thermometer read feel automatic, and the variations follow naturally from there.
If you loved this recipe, save it to your easy chicken dinners and Italian recipes Pinterest board so you can find it easily later. For more same recipes follow Thecookingvibes Pinterest account.
Parmesan Crusted Chicken
Ingredients
Equipment
Method
- Preheat oven to 200°C (400°F). Set up three shallow dishes: flour in the first, beaten eggs in the second, and combined Parmesan, panko, garlic powder, Italian seasoning, smoked paprika, salt, and pepper in the third. Taste the dry mixture and adjust seasoning.
- Pat each chicken breast completely dry with paper towels. Dredge in flour on both sides, shake off excess. Dip in beaten egg and let excess drip off 2 to 3 seconds. Press into the parmesan-panko mixture firmly on both sides using the palm of the hand. Rest on a plate for 3 to 4 minutes.
- Heat an oven-safe 12-inch skillet over medium-high heat for 90 seconds. Add olive oil and heat until shimmering. Add coated chicken and sear without moving for 2 to 3 minutes until the crust releases cleanly from the pan. Flip and sear the second side 90 seconds to 2 minutes until set.
- Transfer the skillet directly to the preheated oven. Bake 10 to 14 minutes until the internal temperature at the thickest point reaches 74°C (165°F) and the crust is deep amber across its surface.
- Remove from oven. Rest in the pan uncovered for 5 minutes. Serve immediately with lemon wedges.
Notes
- Never skip the flour dredge; it creates the dry adhesion layer the egg wash requires to bond the coating to the chicken.
- Always grate Parmesan fresh from a block; pre-shredded cannot melt and bond the crust properly.
- Do not move the chicken during the first 2 to 3 minutes of searing; premature movement tears the unset crust from the surface.
- Rest uncovered, not covered; covering traps steam and immediately softens the crust.