Homemade Sausage Gravy — Creamy, Savory, Ready in 25 Minutes
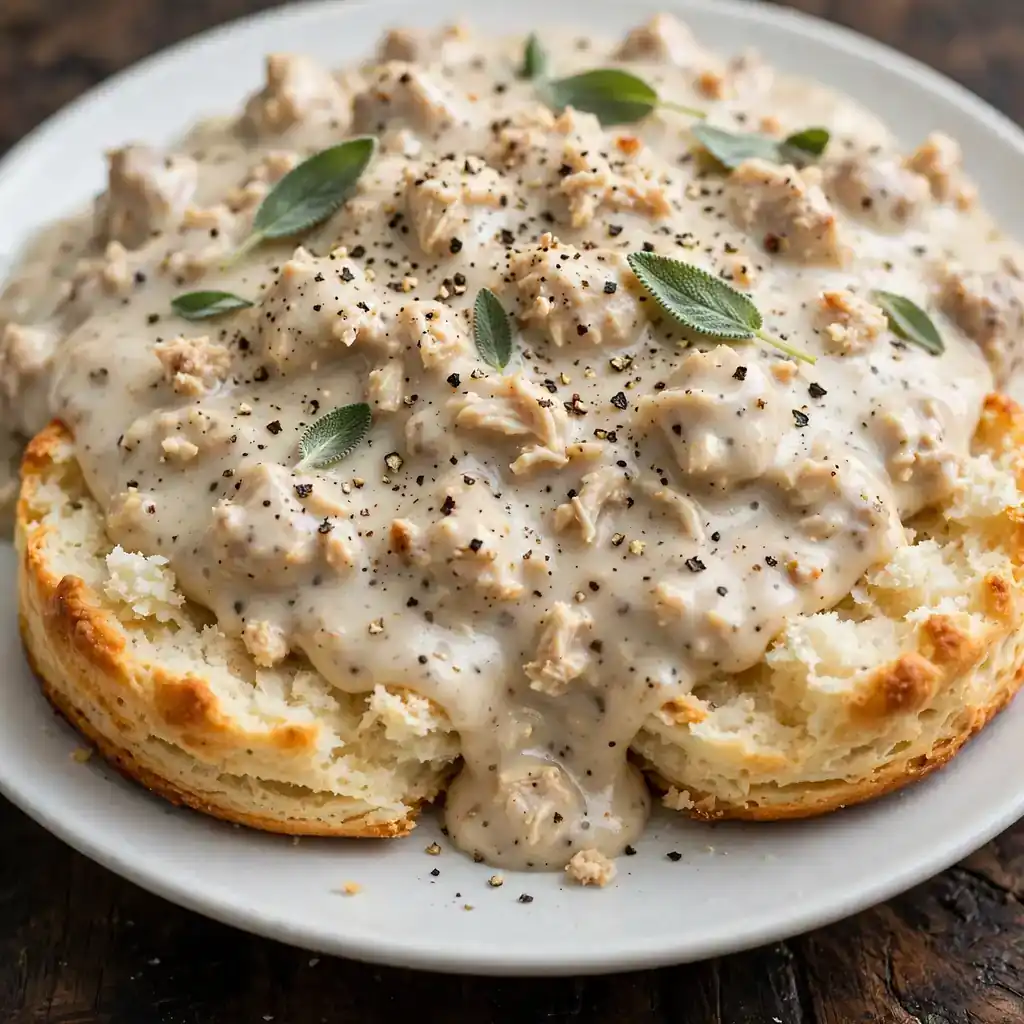
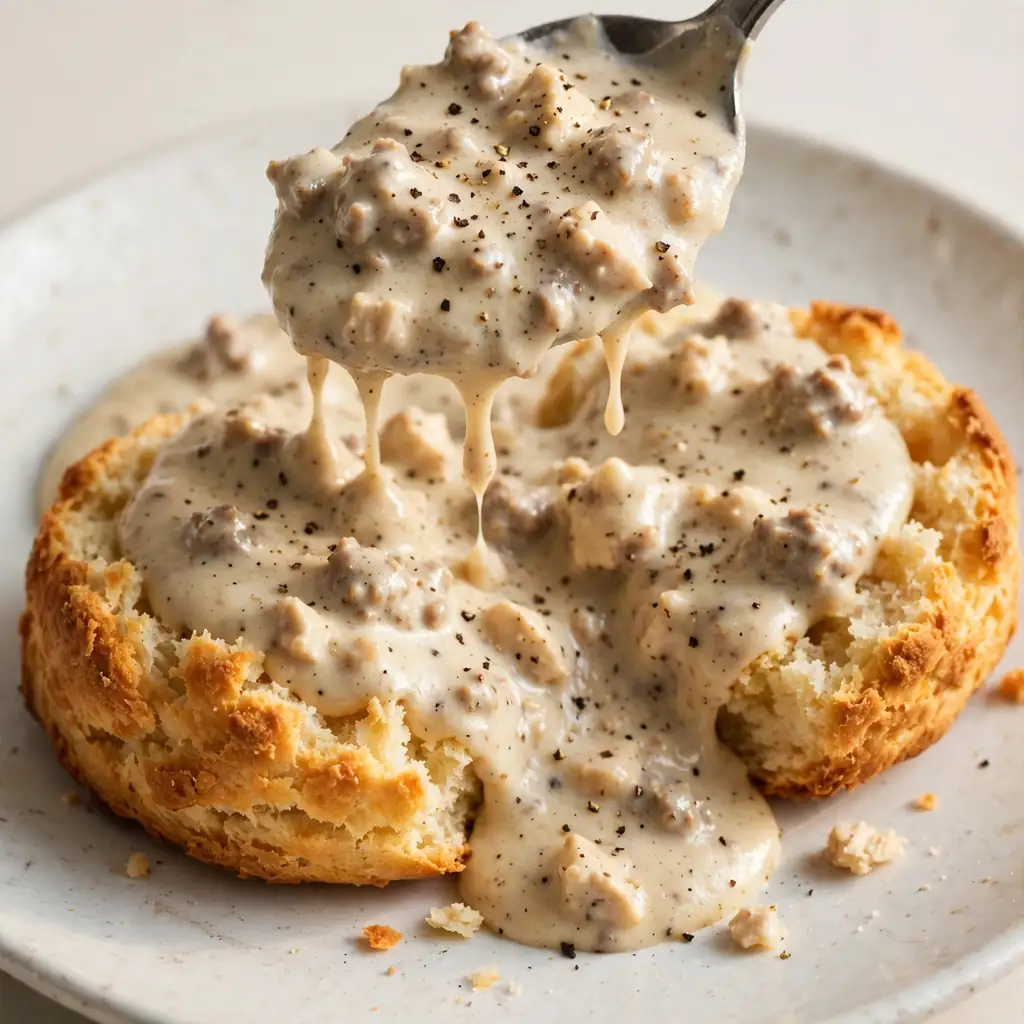
There is something deeply satisfying about a skillet of properly made sausage gravy: the seasoned meat crumbled into small, irregular pieces that hold their shape in a thick, creamy sauce, the smell of sage and black pepper filling the kitchen, and the way the gravy coats a split biscuit from the edges inward so every bite has the right ratio of bread to sauce to meat. It’s a breakfast dish that eats like a proper meal, and once you’ve made it from scratch you understand exactly why it has such devoted followers.
This sausage gravy recipe uses seasoned ground chicken cooked with sage, garlic, and a generous amount of cracked black pepper, then pulled together into a cream-colored, deeply savory gravy thickened with flour and whole milk. The chicken is seasoned aggressively before going into the pan so it develops a real flavor of its own rather than disappearing into the sauce. The recipe serves 4 to 6, takes about 25 minutes from start to finish, and produces a gravy thick enough to pile high over biscuits without running off the sides. It works for breakfast, brunch, or a hearty dinner that requires nothing more than a simple biscuit alongside.
Why You’ll Love This Sausage Gravy
- Seasoned meat that actually tastes like something. Ground chicken on its own has a mild flavor; seasoning it with sage, garlic powder, onion powder, smoked paprika, and a heavy hand of black pepper before cooking produces a meat mixture with a bold, complete flavor that carries the entire gravy.
- Thick enough to pile, not pour. The flour-to-milk ratio in this recipe produces a gravy that holds its shape on top of a biscuit rather than flooding the plate; it coats a spoon cleanly and drapes heavily rather than running thin.
- 25 minutes from cold pan to table. Season the meat, cook it, build the roux, add the milk, simmer, serve; there is no resting time, no oven, and no multi-step preparation.
- Scales easily for a crowd. Double the recipe in the same skillet, or a larger one, and the technique and timing stay identical; this is one of the most straightforward recipes to multiply for a large brunch gathering.
- Tastes better than any jarred or powdered version. The fat rendered from cooking the seasoned chicken builds the roux from the inside of the pan outward, carrying the meat’s flavor directly into the thickener; no jarred product replicates this because none starts from a seasoned meat fond.
Ingredients You’ll Need
Recipe Timing
| Detail | Info |
|---|---|
| Servings | 4 to 6 |
| Difficulty | Easy |
| Course | Breakfast, Brunch, Main Course |
| Cuisine | American Southern-inspired |
| Prep Time | 5 minutes |
| Cook Time | 20 minutes |
| Rest Time | 0 minutes |
| Total Time | 25 minutes |
For the ground chicken, choose ground chicken with at least 10 to 15% fat rather than extra-lean breast-only ground chicken. Extra-lean ground chicken renders very little fat during cooking, which means there isn’t enough fat in the pan to build the roux properly; the flour absorbs the fat and creates the thickener, so without adequate rendered fat the roux never comes together correctly. Ground chicken thigh, or a blend of thigh and breast, produces the best result. If only extra-lean ground chicken is available, add 1 tablespoon of unsalted butter to the pan alongside the meat to supplement the fat.
For the sage, dried rubbed sage produces the most pronounced, slightly camphor-like savory note that defines the flavor of this gravy. Fresh sage fried briefly in the fat before the meat is added works equally well; use twice the quantity (1 teaspoon of fresh versus 1/2 teaspoon dried). Dried ground sage is more pungent than rubbed sage; use only 1/4 teaspoon if substituting.
For the milk, whole milk produces the richest, most cohesive gravy. Reduced-fat milk produces a thinner, less creamy result that requires a longer simmer to reach the right consistency; it gets there eventually but takes additional time. Half-and-half produces a noticeably richer, slightly yellower gravy that some people prefer; reduce the quantity to 2 cups and the result is very close to a cream gravy.
The Seasoned Meat:
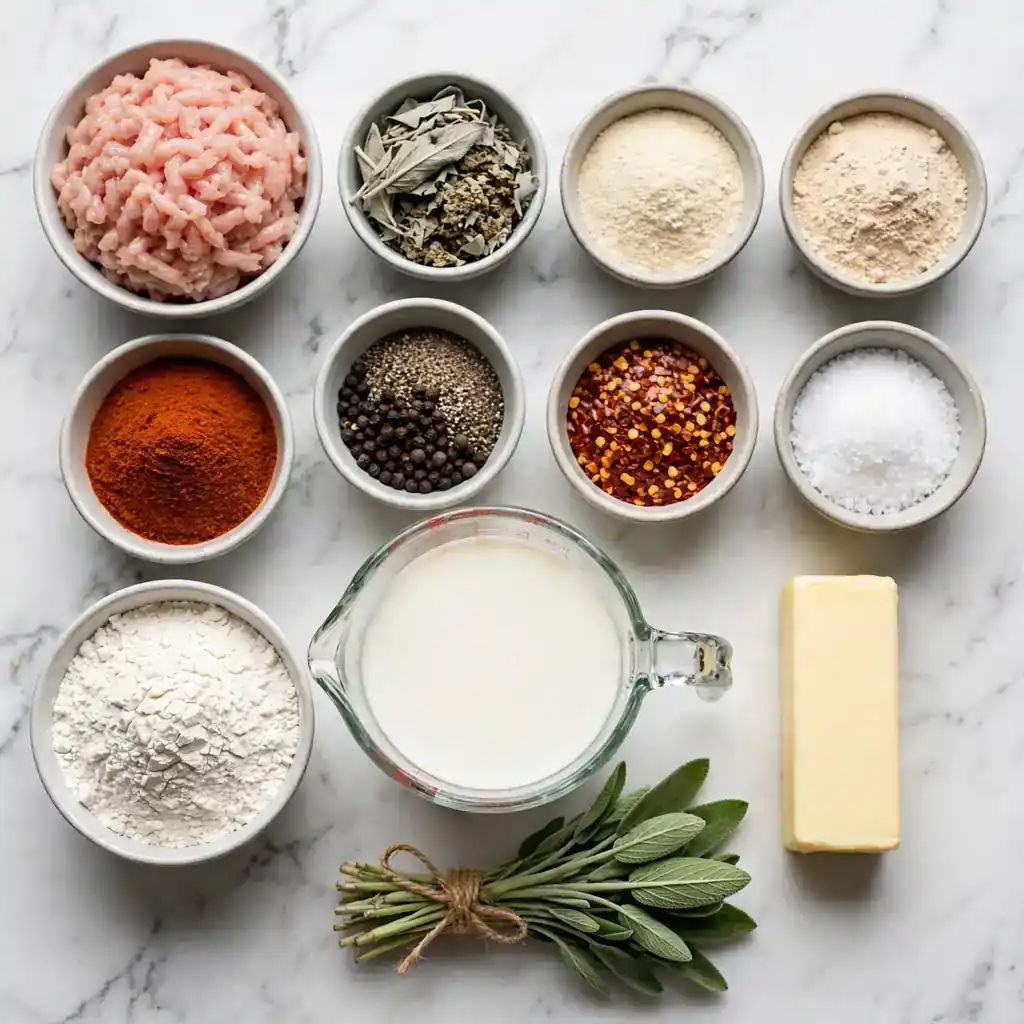
- 500g (about 1 lb) ground chicken, preferably thigh or a thigh-breast blend — the primary protein and the fat source for the roux; food safety note: ground chicken must reach an internal temperature of 74°C (165°F) throughout
- 1/2 teaspoon dried rubbed sage — the defining flavor in sausage gravy; adds warmth and a distinctly savory character
- 1/2 teaspoon garlic powder — builds savory depth without the sharpness of raw garlic in a finished sauce
- 1/2 teaspoon onion powder — adds a rounded, sweet-savory background note
- 1/2 teaspoon smoked paprika — adds warmth, subtle smokiness, and contributes to the color of the meat during browning
- 1 teaspoon freshly cracked black pepper, plus more for serving — the most important spice in the gravy; use more than feels instinctively correct; a good sausage gravy is noticeably peppery
- 1/2 teaspoon fine salt — seasons the meat before cooking; adjust the final gravy after the milk is added since salt concentrates during reduction
- 1/4 teaspoon red chili flakes — optional; adds very mild background heat that cuts through the richness
The Gravy:
- 3 tablespoons all-purpose flour — the roux thickener; added to the cooked meat and fat and cooked briefly to eliminate the raw flour taste before the milk is added
- 480ml (2 cups) whole milk, room temperature or slightly warmed — cold milk added all at once to a hot roux causes lumps; room temperature milk incorporates smoothly
- 240ml (1 cup) additional whole milk — added after the initial thickening to adjust consistency; the gravy thickens as it simmers, so holding some milk back gives you control
- Salt and extra black pepper — for final seasoning after the milk is fully incorporated
- Optional: 1 tablespoon unsalted butter — stirred in at the end for extra richness and a glossy finish
Allergen and Dietary Disclosure
This sausage gravy contains dairy (whole milk and optional butter) and gluten (all-purpose flour). It contains no eggs, tree nuts, or shellfish as written.
For gluten-free: replace the all-purpose flour with a certified gluten-free 1:1 flour blend at the same quantity. Alternatively, use 2 tablespoons of cornstarch dissolved in 3 tablespoons of cold milk, whisked together before adding; cornstarch produces a slightly glossier, less opaque gravy than flour but thickens effectively. Serve over gluten-free biscuits or toast.
For dairy-free: replace the whole milk with full-fat unsweetened oat milk or full-fat coconut milk at the same quantities. Oat milk produces a cleaner-flavored gravy with a similar color to the dairy version; coconut milk adds a very subtle sweetness and richness that pairs well with the sage. Add the dairy-free milk at room temperature to prevent lumping. Replace the optional butter with a vegan butter alternative.
For lower fat: use 2% milk at the same quantity and omit the optional butter. The gravy will be slightly thinner and will require a 3 to 4 minute longer simmer to reach the right coating consistency.
This recipe has not been tested in a certified allergen-free kitchen and cannot be guaranteed safe for any specific allergy.
Equipment Needed
- Large cast iron skillet or heavy stainless steel skillet, 12-inch — for cooking the meat and building the gravy in the same pan. Cast iron retains heat evenly across its entire surface and produces a consistent, moderate heat that cooks the meat through without burning the spices. A 12-inch skillet gives the ground chicken enough surface area to cook in a relatively thin layer, which promotes browning rather than steaming.
- Wooden spoon or heat-resistant silicone spatula — for breaking the ground chicken into small, irregular crumbles as it cooks and for stirring the roux continuously. A wooden spoon allows firm scraping at the pan base where the fond forms; a metal spatula works but requires care not to scratch a non-stick surface if that’s what’s available.
- Whisk — for incorporating the milk into the roux without lumps. Adding milk to flour-coated meat requires vigorous whisking to prevent the flour from clumping into pockets; a whisk breaks these apart more effectively than a spoon.
- Instant-read thermometer — for confirming the ground chicken has reached 74°C (165°F) throughout. Ground poultry reaches safe internal temperature at this point; the meat’s pink color fades completely to opaque white when this temperature is achieved, but a thermometer removes any guesswork.
Step-by-Step Directions
Step 1: Season and Brown the Meat
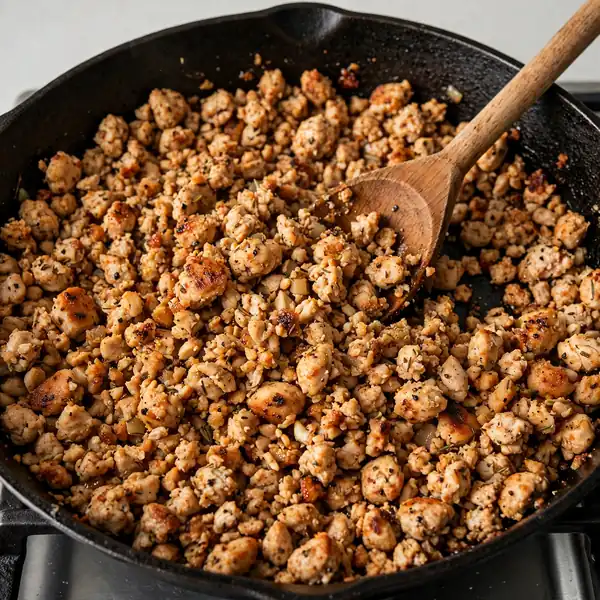
Combine the ground chicken with the sage, garlic powder, onion powder, smoked paprika, black pepper, salt, and optional red chili flakes in a bowl and mix until the spices are evenly distributed through the meat. Don’t be shy with the black pepper; the gravy should taste noticeably peppery in the finished bowl.
Heat the large skillet over medium-high heat until hot throughout, about 90 seconds. Add the seasoned ground chicken to the skillet without any added fat; the chicken will release its own fat as it cooks. Use the wooden spoon to break it into small pieces immediately, working across the pan to keep the crumbles from pressing together into large clumps. Cook for 5 to 7 minutes, stirring every 90 seconds, until the meat is cooked through with no pink remaining and the pieces have developed a light golden-brown color on their exterior surfaces.
Food safety note: Ground chicken must reach an internal temperature of 74°C (165°F) throughout before the next step. Use an instant-read thermometer to confirm if unsure.

Chef’s Note: Breaking the chicken into smaller rather than larger crumbles as it cooks is a deliberate technique decision. Small, irregular crumbles distribute more evenly through the finished gravy, ensuring every forkful of gravy over biscuit contains visible pieces of seasoned meat rather than occasional large chunks. Work the spoon through the pan continuously during the first 2 minutes before the meat sets to establish the crumble size you want.
Step 2: Build the Roux
Reduce the heat to medium. The cooked chicken should still be in the pan with its rendered fat pooled around the meat. If the pan looks very dry with no visible fat, add 1 tablespoon of unsalted butter now and let it melt into the meat before proceeding. Sprinkle the flour evenly over the cooked chicken, distributing it as evenly as possible rather than dumping it all in one spot. Stir the flour through the chicken continuously for 90 seconds to 2 minutes until the flour has fully absorbed the fat in the pan, the raw flour smell has cooked off, and the mixture looks like moist, coated crumbles rather than loose meat in a pool of fat. This brief roux cook is essential; flour added directly before the milk produces a gravy with a distinct raw, starchy flavor.
Chef’s Note: The roux built inside the cooked chicken crumbles rather than made separately from butter and flour alone is what gives this gravy its specific depth. The fat the chicken rendered during cooking contains dissolved flavor compounds from the browning process; those compounds become the fat phase of the roux, which means they distribute into every tablespoon of gravy rather than sitting separately on the meat. This integration is impossible to achieve by making a separate roux and adding cooked chicken to it afterward.
Step 3: Add Milk and Simmer
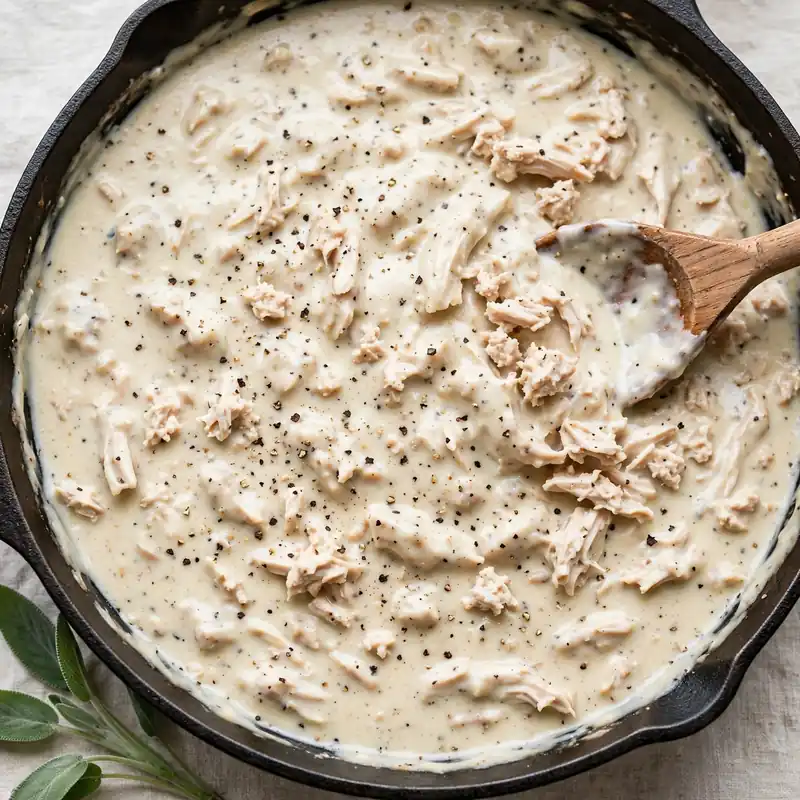
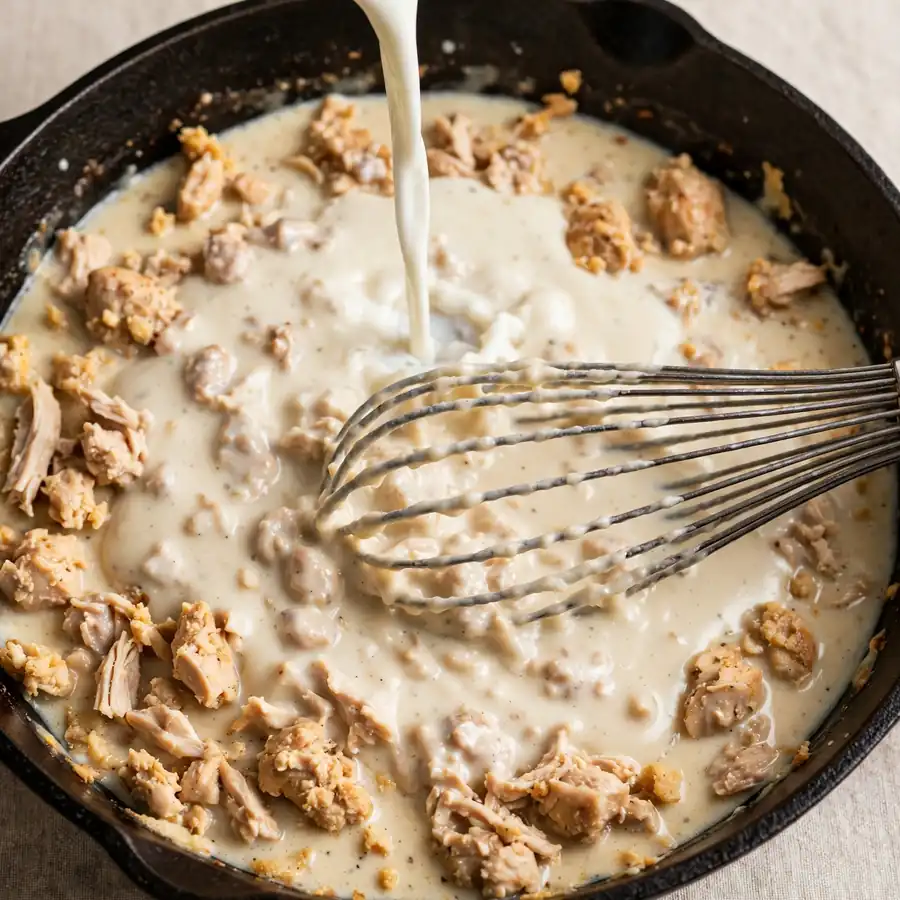
Pour 480ml (2 cups) of the milk into the pan in a slow, steady stream while whisking continuously. The mixture will look very thick, almost paste-like, for the first 30 seconds as the flour absorbs the liquid; keep whisking vigorously and it will thin out as more milk is incorporated. Once the first 2 cups are in, switch from the whisk to the wooden spoon and stir continuously over medium heat for 3 to 4 minutes until the gravy begins to thicken visibly and bubble gently at the edges.
Add the remaining 1 cup of milk in a steady stream, stirring as it goes in. Continue cooking over medium-low heat for 4 to 5 more minutes, stirring frequently, until the gravy reaches the right consistency: thick enough to coat the back of the spoon in a solid, visible layer that holds a finger-drawn line clearly for 3 to 4 seconds.
Chef’s Note: Adding the milk in two stages rather than all at once gives you control over the final consistency. Gravy thickens further as it cools and as it sits on the biscuit, so it should look slightly thinner in the pan than the final table consistency you want. If the gravy is already at the right coating thickness after the first 2 cups of milk, stop there; if it’s too thick, use some or all of the remaining cup to thin it. A gravy finished to the right pan consistency will be noticeably thicker by the time it reaches the table.
Step 4: Season and Finish
Remove the skillet from the heat. Taste the gravy carefully and season with additional salt and black pepper. The black pepper is the flavor note to focus on; a properly seasoned sausage gravy tastes distinctly peppery, and the pepper should be noticeable but not sharp. If using, stir the tablespoon of cold butter through the hot gravy until it melts completely; this last addition makes the gravy noticeably glossier and slightly richer without changing its texture.
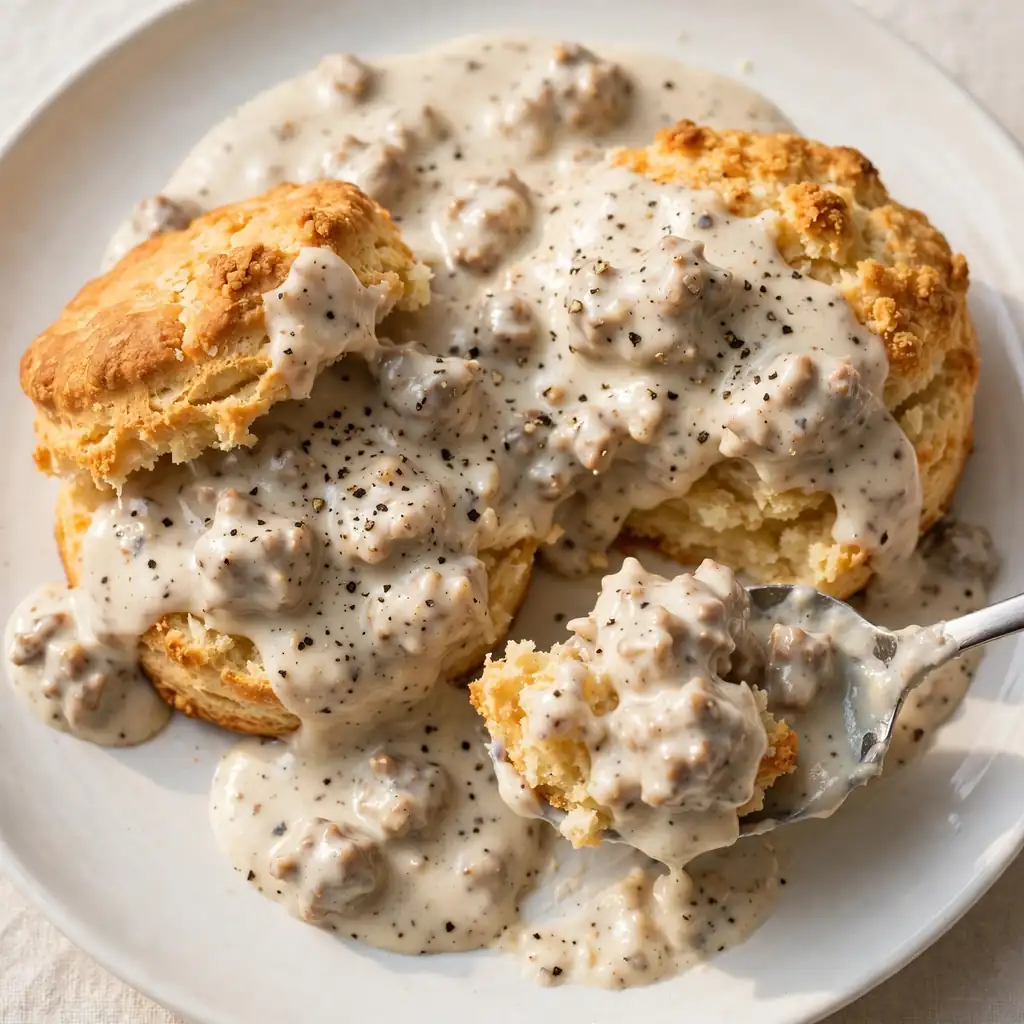
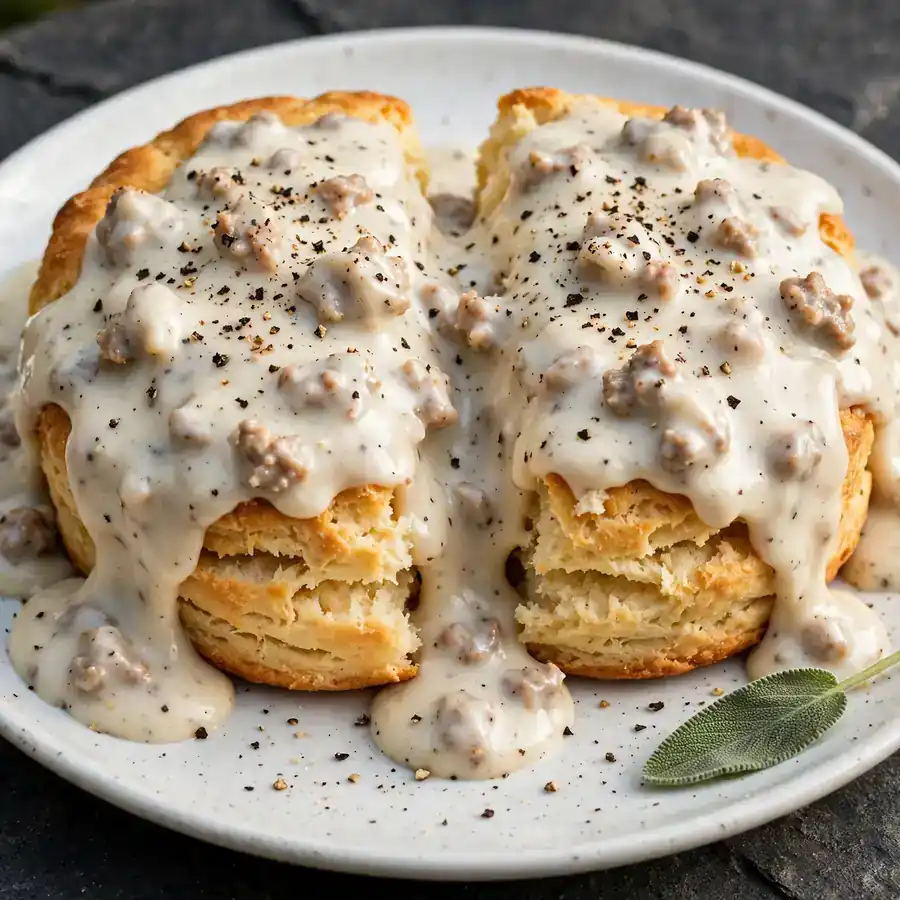
Serve immediately, ladled generously over split biscuits, toast, or potatoes, with an extra crack of black pepper over each serving.
Common Mistakes and Troubleshooting
| Problem | Cause | Solution |
|---|---|---|
| Gravy lumpy after adding milk | Flour not evenly distributed before milk was added, or cold milk added all at once | Distribute flour evenly over the meat and stir for the full 2 minutes before any milk; use room-temperature milk and whisk vigorously |
| Gravy too thin and watery | Insufficient simmer time, or too much milk added | Simmer over medium-low for the full 4 to 5 minutes; hold back the third cup of milk until the initial amount thickens |
| Gravy too thick and gluey | Too much flour, or too little milk | Thin with additional warm milk in 2 to 3 tablespoon increments while stirring over low heat |
| Meat flavor bland and flat | Ground chicken under-seasoned before cooking, or extra-lean meat used | Season aggressively before cooking; use a higher-fat ground chicken; a bland gravy cannot be fixed with seasoning after the milk is in |
| Gravy tastes of raw flour | Roux not cooked long enough before milk was added | Cook the flour-coated meat for the full 90 seconds to 2 minutes until the raw flour smell is gone before adding any liquid |
| Gravy separates or looks greasy | Heat too high during simmering, or too much fat in the pan | Keep the heat at medium-low during the milk addition; drain excess fat from the cooked chicken if the pan has visibly more than 2 to 3 tablespoons before adding flour |
Variations and Substitutions
- Spicy sausage gravy: Double the red chili flakes to 1/2 teaspoon and add 1/2 teaspoon of cayenne pepper to the seasoning mix. For a different heat profile, add 1 tablespoon of your preferred hot sauce directly to the finished gravy and stir through before serving. The hot sauce adds heat plus a vinegar brightness that makes the heavy cream sauce taste lighter and more lively.
- Herb-forward gravy: Add 1/2 teaspoon of dried thyme and 1/4 teaspoon of dried rosemary to the seasoning mix alongside the sage. Add 1 tablespoon of finely chopped fresh flat-leaf parsley to the finished gravy just before serving. The additional herbs produce a more aromatic, complex version that works well over roasted potatoes or a savory breakfast bowl rather than the classic biscuit format.
- Mushroom sausage gravy: Add 200g of finely diced cremini mushrooms to the pan alongside the seasoned chicken in step 1. The mushrooms release moisture as they cook, which will extend the browning time by 3 to 4 minutes; cook until the mushroom moisture has fully evaporated and the mushrooms are golden before proceeding to the roux. The mushrooms add an earthy umami depth and a meaty texture that makes the gravy noticeably more substantial.
- Cream gravy finish: Replace 1 cup of the whole milk with an equal amount of heavy cream. The heavy cream produces a richer, slightly yellower, more indulgent gravy with a silkier mouthfeel than the all-milk version. This version is the one to make for a special brunch occasion where the richness is the point.
- Gluten-free version: Replace the all-purpose flour with 2 tablespoons of cornstarch dissolved in 3 tablespoons of cold milk, added to the cooked meat and fat in place of the flour. Stir the cornstarch slurry through the meat for 60 seconds until it begins to thicken slightly, then add the milk. Cornstarch-thickened gravy is glossier and slightly more transparent than flour-thickened; the flavor is comparable and the technique is otherwise identical.
- Over biscuit casserole style: Prepare the full batch of gravy. Split 8 biscuits and arrange the bottom halves in a 9×13 baking dish. Pour the gravy evenly over the biscuit halves. Top with the biscuit lids and bake at 175°C (350°F) for 12 to 15 minutes until the assembly is heated through and the top biscuits are golden. This format works for a large brunch gathering where individual plating isn’t practical.
Serving Suggestions
- Ladle generously over split, freshly baked or store-bought biscuits: this is the classic and the reason the recipe exists. Use at least 1/3 cup of gravy per biscuit half; the gravy-to-biscuit ratio is not a place to be restrained.
- Pour over thick slices of toasted white sandwich bread or brioche toast for a quick version that requires no biscuit-making; the toast provides a sturdy base that holds up under the weight of the gravy better than lighter bread.
- Serve over scrambled eggs with the gravy poured directly over a mound of softly scrambled eggs in a wide bowl. The combination is rich and satisfying; the gravy’s pepper and sage flavors work naturally alongside the soft eggs.
- Use as a base sauce for a savory breakfast bowl: place roasted diced potatoes, a fried egg, and the gravy in a wide bowl with fresh chives scattered over; the potatoes absorb the gravy and the yolk from the fried egg adds an extra richness when broken.
- Serve alongside a simple fresh fruit salad of sliced oranges, strawberries, and mint to provide a clean, acidic contrast to the rich, creamy gravy. The fruit refreshes the palate between bites in a way that makes the meal feel less heavy overall.
- Pair with strong black coffee or a cold glass of whole milk; both are classic breakfast beverage pairings that complement rather than compete with the savory, peppery gravy.
Tips for the Best Results
- Season the ground chicken aggressively before it touches the pan. Seasoning after cooking produces uneven flavor because the spices sit on the surface of already-cooked meat rather than being incorporated during the browning process. Seasoning before cooking means the spices bloom in the fat as the meat renders, carrying their flavor compounds into the fat that becomes the roux base. A well-seasoned meat mixture is the foundation that makes or breaks the gravy.
- Use more black pepper than feels comfortable. The distinctively peppery flavor of a good sausage gravy is not incidental; it’s the defining character note that separates it from a plain cream sauce with meat in it. The recipe calls for 1 teaspoon, which already feels like a lot; taste the finished gravy and if the pepper doesn’t come through as a forward, noticeable flavor, add more.
- Cook the flour-coated meat for the full 2 minutes before adding milk. Two minutes is the minimum time needed to cook the raw starch flavor out of the flour in a roux. Under-cooked roux produces a gravy with a distinct, unpleasant raw flour taste that doesn’t cook away after the milk is added because the milk’s moisture effectively stops the flour from continuing to cook past a certain point. The 2-minute step at medium heat eliminates this completely.
- Add the milk in stages and whisk vigorously during the addition. Room-temperature milk added in a steady stream with continuous whisking produces smooth gravy; cold milk added all at once to a hot roux produces lumpy gravy that is very difficult to smooth out after the fact. If lumps appear early in the addition, remove the pan from heat briefly and whisk aggressively before returning it; lumps at this early stage can usually be beaten out, but lumps allowed to cook in become structural.
- Serve the moment it reaches the right consistency. Sausage gravy continues thickening as it cools; a gravy that looks ideal in the skillet will be noticeably thicker by the time it has been carried to the table and plated. Pull it from the heat 30 seconds before it looks “done” and serve immediately.
Storage Tips
Refrigerator
Sausage gravy keeps in the refrigerator in a sealed container for up to 3 days. The gravy thickens significantly during refrigeration as the starch continues to absorb moisture from the sauce; what went into the refrigerator as a thick, pourable gravy will emerge as a very firm, almost solid mass. This is normal and corrects easily on reheating.
Freezer
Sausage gravy freezes well for up to 2 months. Cool completely before freezing; freeze in individual portion-sized containers so you can thaw only what’s needed. Cream-based sauces can separate slightly during the freeze-thaw cycle; thorough reheating on the stovetop with constant stirring restores the emulsion in most cases. Thaw overnight in the refrigerator before reheating.
Reheating
The stovetop is strongly preferred over the microwave for reheating sausage gravy. Transfer the refrigerated gravy to a small saucepan over medium-low heat. Add 3 to 4 tablespoons of whole milk per cup of gravy being reheated and stir from the moment the heat goes on, scraping the bottom of the pan. The gravy will look broken and lumpy for the first minute; continue stirring and it will smooth back out into a cohesive sauce. Microwave reheating at 60% power in 60-second intervals with stirring between works for a single portion but tends to produce slightly uneven heating and occasional hot spots that can cause the fat to separate.
Make-ahead note: The full gravy can be made up to 3 days in advance and reheated to order. For a brunch gathering, make the gravy the day before, refrigerate, and reheat on the stovetop with a splash of milk the morning of the event; the whole reheating process takes about 5 minutes and the result is indistinguishable from fresh.
Nutrition Information
Per serving, approximately 1/5 of the recipe, gravy only without biscuits:
| Nutrient | Amount |
|---|---|
| Calories | 285 kcal |
| Protein | 22g |
| Total Carbohydrates | 12g |
| Dietary Fiber | 0.5g |
| Total Sugar | 5g |
| Total Fat | 16g |
| Saturated Fat | 5g |
| Cholesterol | 95mg |
| Sodium | 480mg |
| Vitamin C | 1mg |
| Calcium | 140mg |
| Iron | 1.4mg |
| Potassium | 380mg |
Nutrition values are approximate and may vary based on ground chicken fat content, milk fat percentage, and serving size. Biscuits or toast not included.
Why This Recipe Works
The depth of flavor in sausage gravy depends almost entirely on one mechanism: cooking the spice-coated ground meat at sufficient heat to initiate Maillard reactions on the exterior of the crumbles, which produces flavor compounds that then become the fat phase of the roux. When ground chicken is cooked in a hot skillet with sage, garlic powder, and black pepper applied beforehand, two things happen simultaneously. The meat’s surface proteins undergo Maillard browning, producing hundreds of savory aromatic compounds including pyrazines and furanones. The fat rendering from the meat dissolves many of these aromatic compounds (which are primarily fat-soluble) and carries them throughout the liquid fat pooling in the pan. When flour is added to this aromatic fat, it absorbs the flavored fat rather than neutral cooking oil, creating a roux that already carries the entire flavor profile of the cooked meat. Every tablespoon of gravy thickened by this roux therefore contains the flavor compounds from the browned meat in every molecule rather than having them concentrated only in the meat pieces.
The two-stage milk addition is a deliberate technique that provides control over the final consistency in a way that a single addition cannot. When flour-thickened roux meets liquid, starch gelatinization begins immediately: the starch granules absorb water and swell, increasing the viscosity of the surrounding liquid. The rate of this gelatinization is temperature-dependent; at full medium heat the thickening happens faster and can go further than intended before you have a chance to assess the consistency. Adding the first 2 cups of milk and allowing the gravy to simmer to its initial consistency before deciding whether the third cup is needed gives you a meaningful control point. The third cup is held back specifically because consistency calibration after all the liquid is in is limited to either longer simmering (which concentrates and thickens further) or diluting with more liquid; holding back a cup before that point is easier.
The black pepper in this recipe functions as both a seasoning and a flavor-forward component rather than a background note. Black pepper contains piperine as its primary pungent compound, along with numerous volatile terpenes including sabinene, limonene, and beta-caryophyllene that contribute aromatic complexity. In a cream-based sauce, piperine provides a sharp, clean heat that contrasts the fat’s richness and prevents the gravy from tasting heavy and one-dimensional. The aromatic terpenes contribute a subtle citrus-and-wood note that makes the finished gravy smell more complex than its short ingredient list would suggest. Using a full teaspoon of cracked black pepper (rather than the quarter teaspoon typical of most cream sauces) is the single flavor decision that most distinguishes a well-made sausage gravy from a plain cream sauce with meat.
The sage in the seasoning blend contributes thujone and camphor, two aromatic compounds that produce sage’s characteristic warm, slightly medicinal, deeply savory flavor. These compounds are fat-soluble and bloom most effectively when the dried sage is cooked in fat at moderate heat rather than being added to a water-based liquid. By adding the sage to the meat before cooking, it blooms in the rendered chicken fat during the browning stage and its aromatic compounds dissolve into the fat phase, distributing through every drop of the resulting gravy. Sage added to the milk directly would provide a superficial herbal note that didn’t integrate; sage bloomed in the cooking fat provides a background flavor present in every bite.
I’ve tested this recipe with three fat levels in the ground chicken: extra-lean (less than 5% fat), regular (10 to 15% fat), and higher-fat (above 15% fat). Extra-lean ground chicken required supplemental butter every time to produce enough fat for a functional roux; the resulting gravy was cohesive but had less depth because the chicken’s own rendered flavor compounds were absent. The regular fat level rendered enough fat for the roux without supplementation and produced a complete, well-flavored gravy. The higher-fat version required draining excess fat before adding flour, and the resulting gravy had the most pronounced depth of flavor but was noticeably richer and heavier. The regular fat blend is the right balance for a gravy that tastes complete without being heavy.
Frequently Asked Questions
Can I make sausage gravy ahead of time?
Yes, and it reheats very well. Make the complete gravy, cool it fully, and refrigerate for up to 3 days in a sealed container. Reheat on the stovetop over medium-low heat with 3 to 4 tablespoons of whole milk added per cup of gravy, stirring continuously from the start until smooth and hot throughout. The make-ahead version is practical for a brunch gathering: everything is done the day before and the morning requires only a 5-minute reheat.
Why is my sausage gravy lumpy?
Lumps in sausage gravy almost always come from one of two causes. First, cold milk added all at once to a hot roux causes the starch to seize into clumps rather than dispersing evenly. Use room-temperature milk and add it in a steady stream with continuous whisking. Second, the flour wasn’t evenly distributed over the meat before the milk was added, leaving pockets of dry flour that clump when liquid hits them. Spread the flour across the entire pan surface and stir it through the meat for the full 2 minutes before any milk goes in.
Can I use turkey instead of chicken?
Yes. Ground turkey works identically to ground chicken in this recipe at the same quantity and with the same seasoning. Choose ground turkey with at least 10% fat content for the same roux-building reasons that apply to chicken; extra-lean ground turkey requires a tablespoon of butter supplementation. The flavor profile is nearly identical; ground turkey produces a slightly milder, less rich gravy that some people prefer. The food safety temperature target of 74°C (165°F) applies equally to ground turkey.
How do I know when the gravy is thick enough?
The spoon-coating test is the most reliable indicator. Dip a large spoon into the gravy and hold it horizontally; well-thickened gravy coats the back of the spoon in a continuous, opaque layer that holds a clean finger-drawn line for 3 to 4 seconds rather than immediately flowing back in. A secondary visual indicator: the gravy should move slowly when the pan is tilted rather than flowing quickly like a thin liquid. Remember that it thickens further as it cools, so target a consistency slightly thinner than what you want on the plate.
Is sausage gravy gluten-free?
The standard recipe contains gluten from the all-purpose flour roux. To make a fully gluten-free version, replace the flour with 2 tablespoons of cornstarch dissolved in 3 tablespoons of cold milk to form a slurry. Add the slurry to the cooked meat and fat, stir for 60 seconds until it begins to thicken, then add the milk in the same two-stage manner. The cornstarch version produces a glossier, slightly more translucent gravy; the flavor is very similar. Serve over certified gluten-free biscuits or toast. Verify all other ingredients are labeled gluten-free.
Why does my gravy taste flat even with all the seasonings?
Flat-tasting gravy usually means the ground chicken was under-seasoned before cooking, or the meat didn’t develop enough browning before the flour was added. Both problems are pre-cooking issues that can’t be fixed after the milk is in. The black pepper and sage need to be in the fat at the cooking stage to bloom properly; sprinkled into finished gravy they taste raw and sharp rather than integrated and savory. For the current batch, add extra black pepper and a pinch of garlic powder directly to the finished gravy and cook over medium heat for 2 minutes to partially bloom them. For future batches, season the meat more aggressively before cooking.
Can I make this without a cast iron skillet?
Yes. A 12-inch stainless steel skillet produces an excellent result, particularly for the fond development during the meat browning stage; stainless steel generates and maintains a clean, concentrated fond at the pan base that dissolves into the roux and adds flavor. A non-stick skillet works for the cooking steps but produces less fond and therefore a slightly less developed-flavor gravy. Whatever pan you use, it needs to be large enough to hold all the meat in a relatively thin layer; a too-small pan causes the meat to steam rather than brown, which prevents the Maillard reactions that build the gravy’s flavor foundation.
Conclusion
Sausage gravy rewards the decision to season the meat properly before it hits the pan. That single step, done with real generosity of hand on the black pepper and sage, is what separates a gravy that tastes fully developed from one that tastes like cream sauce with meat in it. The technique from that point is straightforward: brown the meat, cook the roux, add the milk in stages, serve immediately.
Once the base is familiar, the variations come naturally. A spicy version for one meal, a mushroom version for the next; the method carries through all of them unchanged. The sausage gravy is the kind of recipe that earns a place in a regular weekend rotation not because it’s impressive but because it’s reliably satisfying and genuinely fast.
If you loved this recipe, save it to your breakfast recipes and Southern comfort food Pinterest board so you can find it easily later. For more same recipes follow Thecookingvibes Pinterest account.
Homemade Sausage Gravy
Ingredients
Equipment
Method
- Mix all seasoning spices into the ground chicken until evenly coated throughout.
- Heat a 12-inch cast iron or stainless steel skillet over medium-high heat until hot. Add the seasoned chicken and break immediately into small crumbles with a wooden spoon. Cook 5 to 7 minutes, stirring every 90 seconds, until the meat is fully cooked with no pink remaining and lightly browned. Confirm 74°C (165°F) internal temperature.
- Reduce heat to medium. Sprinkle flour evenly over the cooked meat. Stir continuously for 90 seconds to 2 minutes until the flour is absorbed into the fat and the raw flour smell cooks off. The mixture should look moist and coated, not dry.
- Pour 480ml of room-temperature milk in a slow steady stream, whisking continuously. The mixture will thicken quickly; keep whisking until smooth. Stir over medium heat for 3 to 4 minutes until the gravy thickens and bubbles gently.
- Add remaining milk gradually, stirring as it goes in. Cook on medium-low for 4 to 5 more minutes until the gravy coats the back of a spoon and holds a clear finger-drawn line for 3 to 4 seconds.
- Remove from heat. Taste and season with extra salt and black pepper. Stir in the optional butter until melted. Serve immediately over split biscuits with an extra crack of black pepper over each serving.
Notes
- Season the ground chicken before cooking, not after; the spices need to bloom in the rendered fat to produce a fully flavored gravy.
- Use ground chicken with at least 10% fat; extra-lean ground chicken requires 1 tablespoon of supplemental butter added before the flour.
- Always use room-temperature milk; cold milk added to a hot roux causes lumps.
- Gravy thickens significantly as it cools and during refrigerator storage; reheat on stovetop with a splash of milk to restore consistency.