Black Forest Cake (Rich Chocolate, Cherry, Whipped Cream)
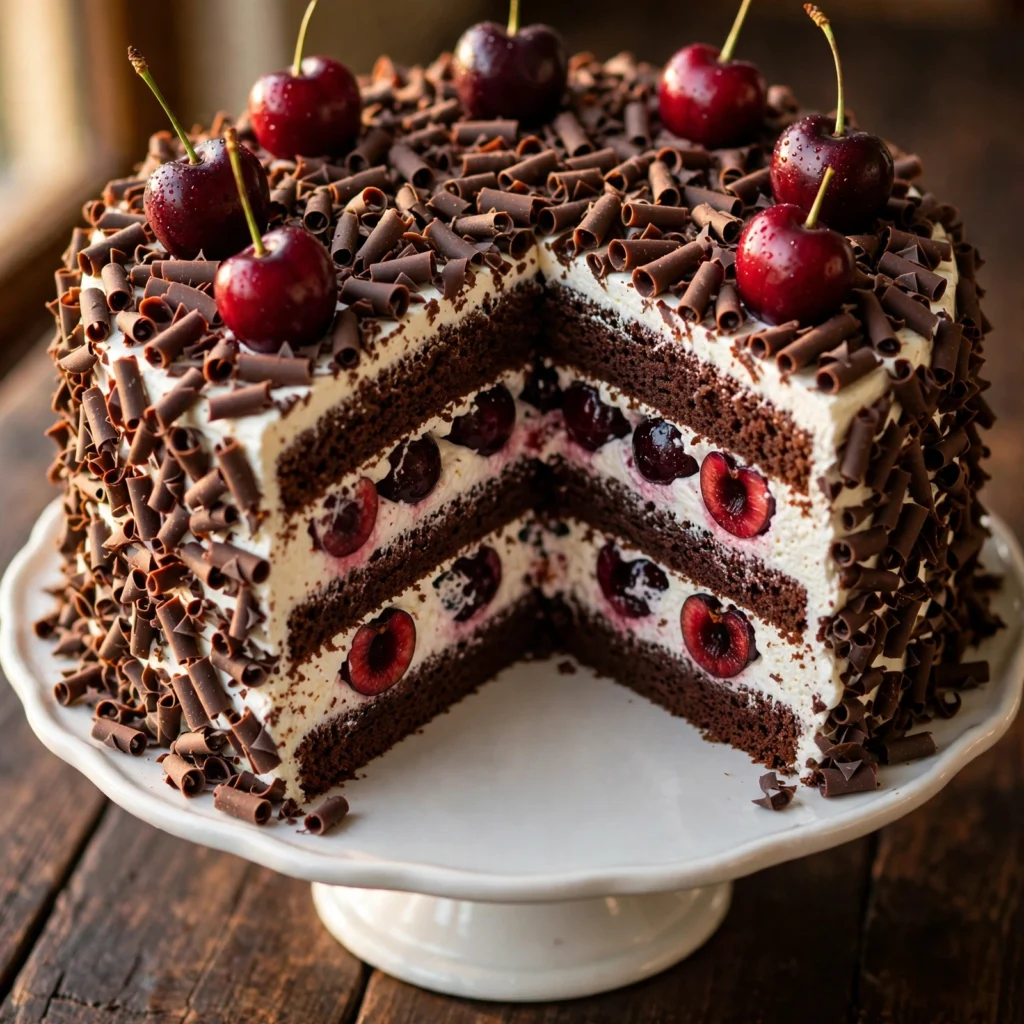
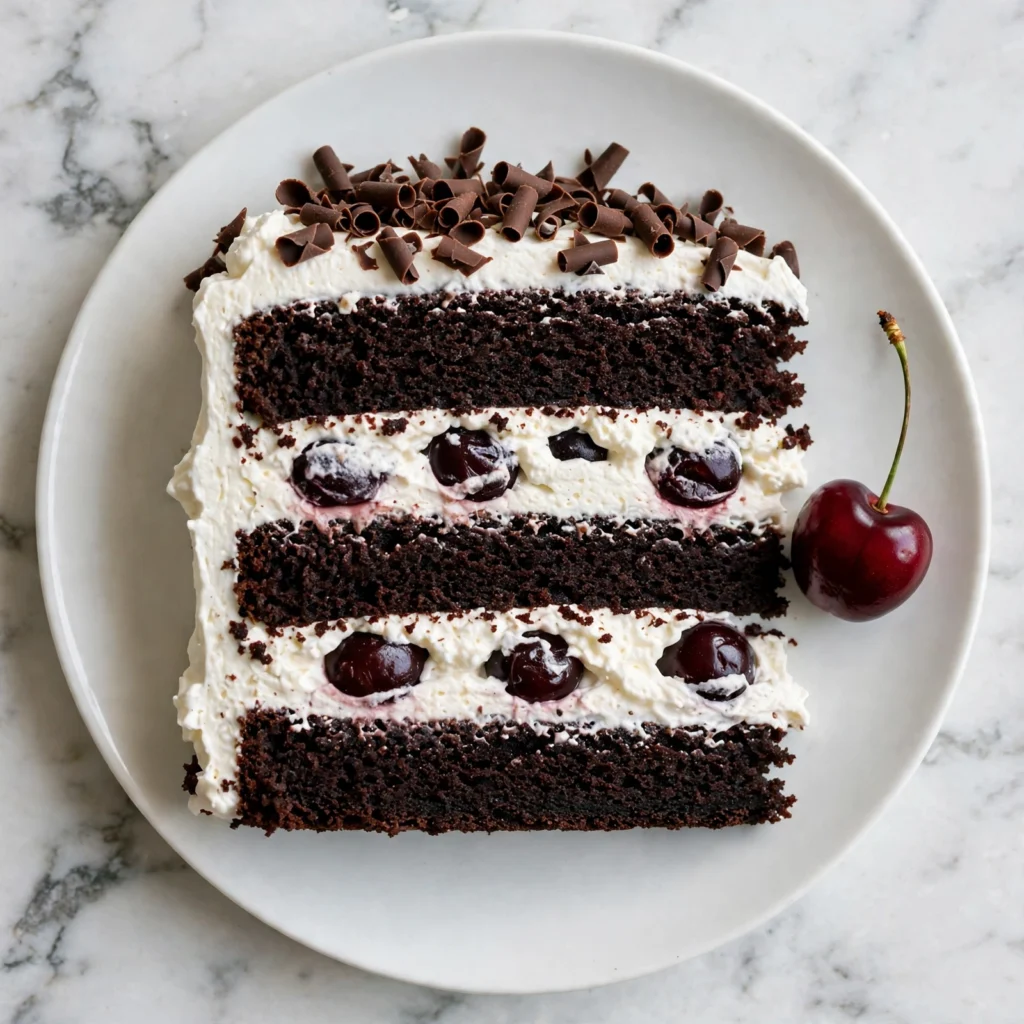
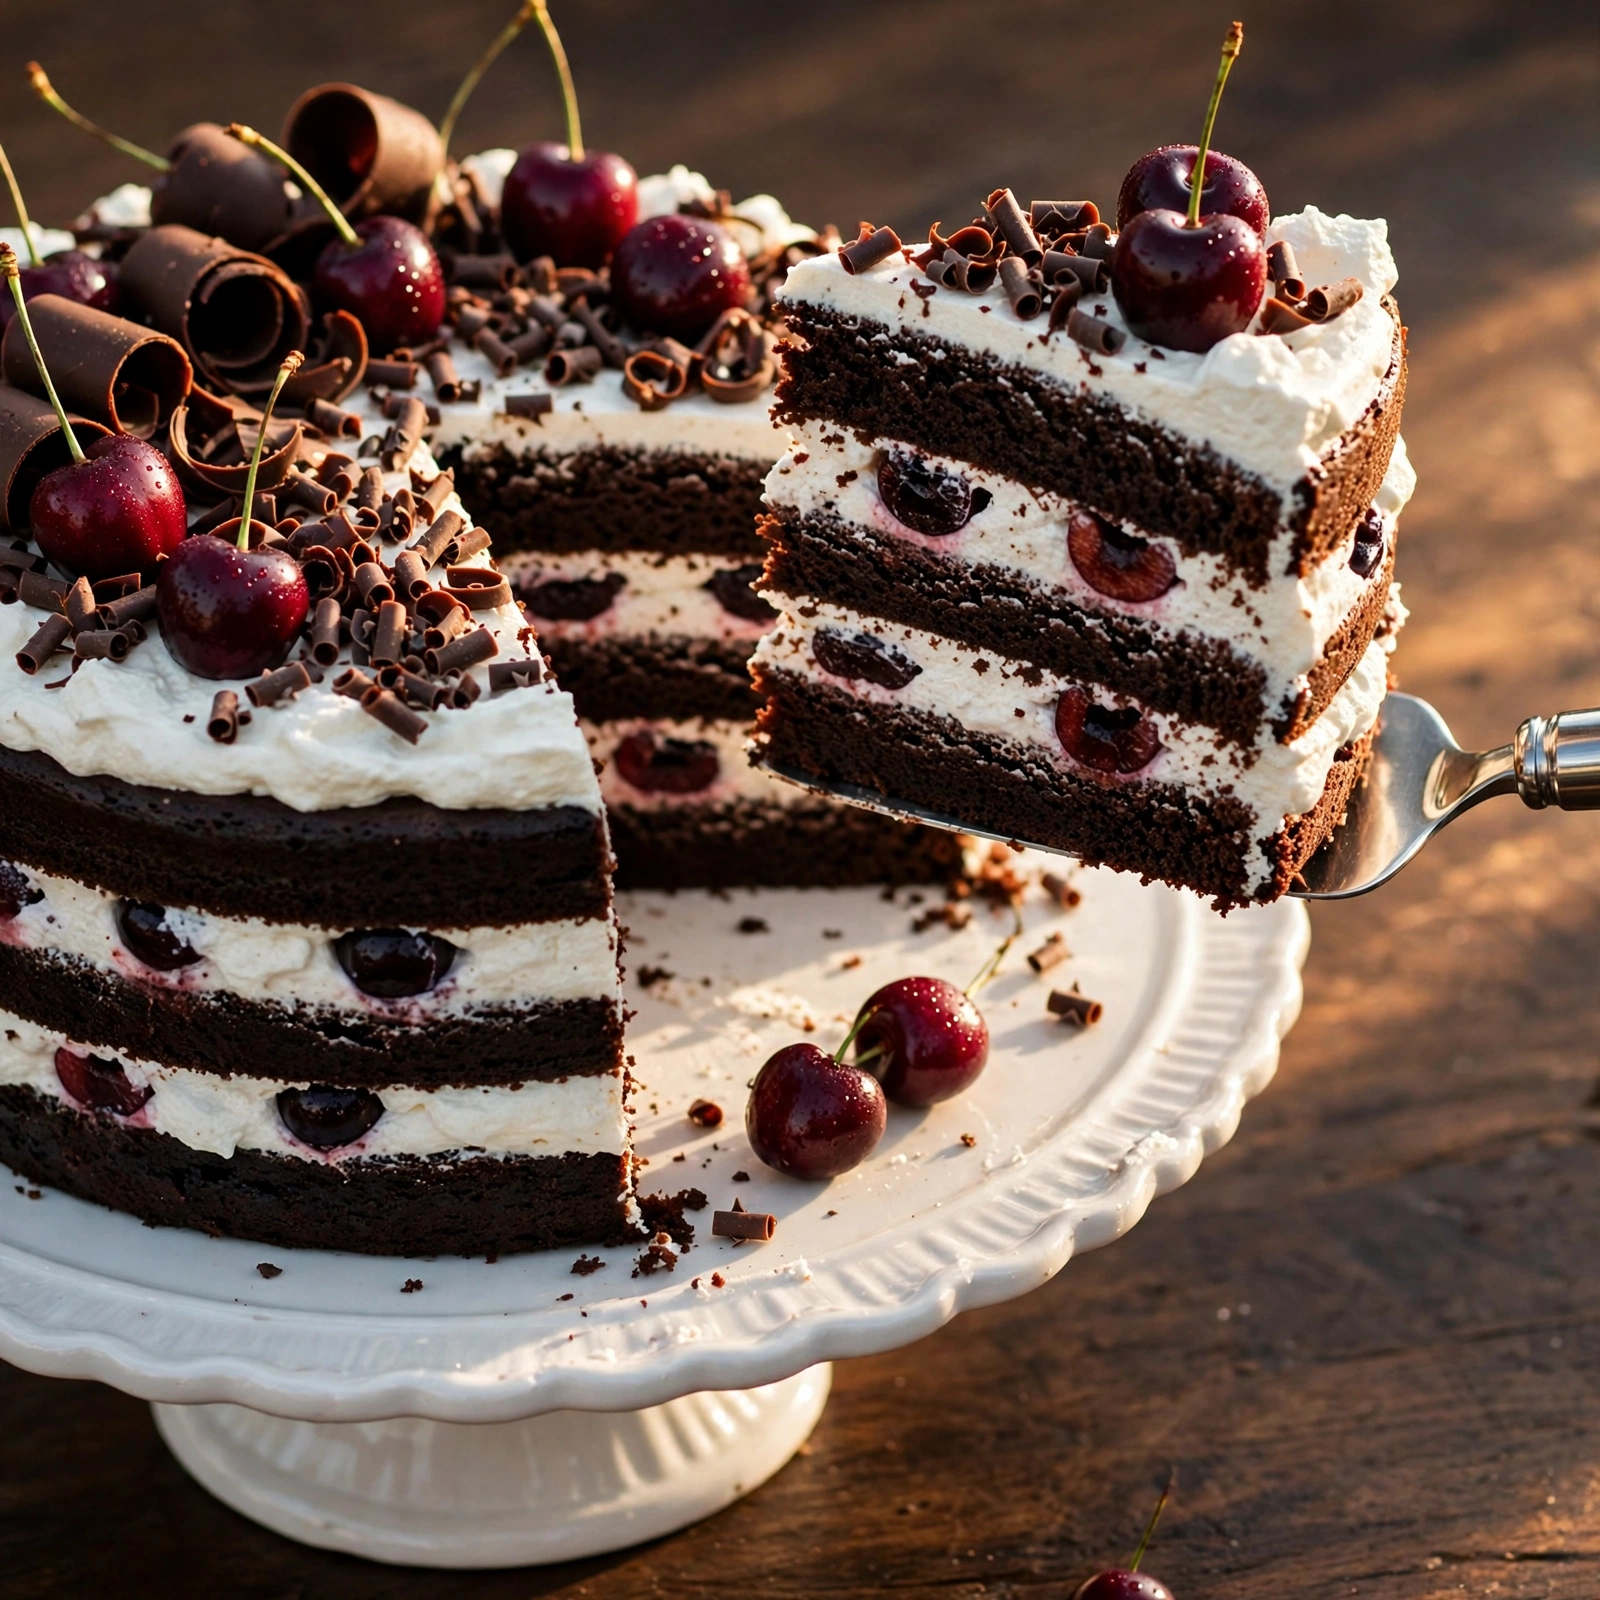
Cut into a black forest cake at the table and the cross-section tells the whole story before anyone takes a bite: dark chocolate sponge, a thick band of cloud-white whipped cream, a layer of glistening dark cherries, another sponge, more cream, more cherries, and the whole thing finished with chocolate curls that catch the light. It is one of those cakes that looks like it requires professional skill until you make it yourself and realize the components are each individually straightforward.
This black forest cake recipe builds three layers of moist, deeply chocolatey sponge using both cocoa powder and a small amount of melted chocolate for rounded flavor. The whipped cream is stabilized with a small amount of icing sugar so it holds its shape through slicing and serving. Morello cherries in syrup provide the filling, and the syrup itself gets brushed onto each sponge layer before assembly, which keeps the cake moist from the inside out. The recipe serves 14 people generously and holds its shape beautifully when refrigerated overnight before the occasion.
Why You’ll Love This Black Forest Cake
- The chocolate sponge is genuinely moist. A combination of cocoa powder and melted dark chocolate, plus oil rather than butter alone, produces a sponge that stays moist through a full day of refrigeration rather than drying out at the edges.
- The cream holds its shape when sliced. A small amount of icing sugar stabilizes the whipped cream so it cuts cleanly rather than squishing out from between the layers when the first slice is served.
- The cherry syrup does double work. Brushed over each sponge layer before assembly, it adds moisture and a deep cherry flavor that runs all the way through the cake rather than being concentrated only in the filling.
- Impressive but manageable. Each component (sponge, cream, cherries) is built separately and assembled once everything is cooled. No special technique is required at any stage; patience and sequencing are the main skills.
- Better after an overnight rest. Assembled and refrigerated the night before serving, the layers have time to settle into each other, the cream firms up, and the whole cake slices more cleanly than it would fresh from assembly.
Ingredients You’ll Need
Recipe Timing
| Detail | Info |
|---|---|
| Servings | 14 slices |
| Difficulty | Intermediate |
| Course | Dessert, Celebration Cake |
| Cuisine | German-Inspired |
| Prep Time | 30 minutes |
| Cook Time | 30 minutes |
| Cooling and Assembly Time | 60 minutes |
| Total Time | 2 hours |
Note: The assembled cake benefits from overnight refrigeration before serving. This adds no active effort but requires advance planning.
The most important ingredient decision in this recipe is the cocoa powder. Use Dutch-process cocoa rather than natural (unsweetened) cocoa wherever possible. Dutch-process cocoa is darker, smoother, and less acidic, which produces a deeper, more rounded chocolate sponge color and flavor. Natural cocoa is more acidic and reacts differently with the leavening agents, which can affect the rise and color of the cake.
For the cherries, use jarred or canned Morello cherries in syrup. Morello cherries are naturally more tart and deeply colored than sweet cherries, which balances the sweetness of the cream and the chocolate. Don’t substitute maraschino cherries: they are far too sweet and lack the flavor complexity the cake needs. Reserve the syrup from the jar or can to use for soaking the sponge layers.
For the whipping cream, use full-fat heavy cream with at least 35% fat content. Reduced-fat cream will not whip to the right consistency and the stabilized whipped cream will be too soft to hold between the layers.
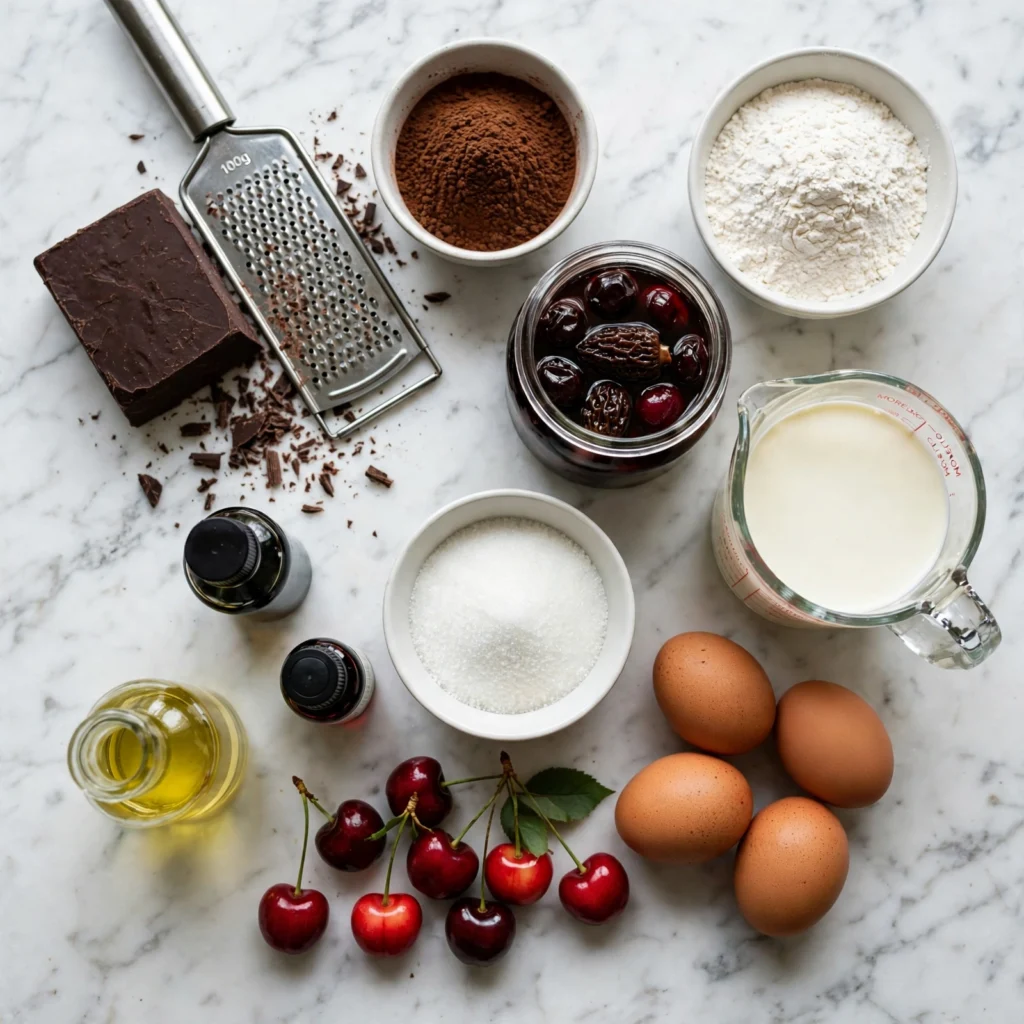
For the Chocolate Sponge (makes 3 layers, 20cm / 8-inch round):
- 1 3/4 cups (210g) all-purpose flour. Sifted before use to prevent lumps in the batter. Spoon into the measuring cup and level off rather than scooping from the bag.
- 3/4 cup (75g) Dutch-process cocoa powder. The primary chocolate flavor in the sponge. Sifted with the flour to distribute evenly through the batter.
- 2 teaspoons baking powder. Provides the main lift for the sponge layers.
- 1/2 teaspoon baking soda. Works alongside baking powder for an even, consistent rise.
- 1/2 teaspoon fine sea salt.
- 1 3/4 cups (350g) granulated sugar.
- 2 large eggs, at room temperature.
- 1 cup (240ml) whole milk, at room temperature.
- 1/2 cup (120ml) neutral vegetable oil. Oil rather than butter keeps the sponge moist through refrigeration. Butter solidifies when cold and makes the crumb firmer and drier.
- 2 teaspoons pure vanilla extract.
- 1 cup (240ml) boiling water. Added last to the batter. The hot liquid blooms the cocoa and produces a richer, deeper chocolate flavor throughout the sponge.
- 80g (3 oz) dark chocolate (70% cocoa), melted and cooled slightly. Stirred in with the wet ingredients for added depth and a slightly fudgy quality to the crumb.
For the Cherry Soak:
- Reserved syrup from the cherry jar (about 1/2 cup / 120ml). Used to brush generously over each sponge layer before stacking, adding moisture and cherry flavor to every layer of the finished cake.
- 1 teaspoon pure cherry extract (optional but recommended). Stirred into the reserved syrup to intensify the cherry character of the soak without adding any liquid. Cherry extract is available in most baking sections.
For the Stabilized Whipped Cream:
- 600ml (2 1/2 cups) cold heavy cream (35% fat minimum). Whipped until it holds firm peaks. Must be very cold before whipping: warm cream will not whip properly.
- 4 tablespoons (30g) icing sugar (powdered sugar), sifted. Sweetens the cream and helps stabilize it so it holds its shape for longer without weeping. Added gradually while whipping.
- 1 teaspoon pure vanilla extract.
For the Filling and Topping:
- 1 jar (680g / 24 oz) Morello cherries in syrup, drained. Reserve the syrup for the soak (above). Pat the cherries dry with paper towels before layering to prevent excess moisture from softening the cream.
- 150g (5 oz) dark chocolate, for making chocolate curls. Alternatively, use a block of room-temperature chocolate and a vegetable peeler to shave it directly over the assembled cake.
- 8 to 10 whole fresh cherries with stems, for garnishing the top.
Allergen and Dietary Disclosure
This recipe contains gluten (all-purpose flour), dairy (whole milk, heavy cream), eggs, and may contain traces of nuts depending on the chocolate used (check the chocolate label).
For a gluten-free version, replace the all-purpose flour with a certified gluten-free 1:1 baking flour blend. The sponge layers may be slightly more delicate; cool them completely in the pans before turning out.
For a dairy-free version, replace the milk with full-fat oat milk (it gives the closest result) and use full-fat coconut cream in place of heavy cream. Coconut cream must be refrigerated overnight before whipping: only the solid portion whips to a stable consistency. Use dairy-free dark chocolate for the decorations.
Free from nuts and soy as written, provided the dark chocolate used is nut-free. Not guaranteed safe for any specific allergy without checking all individual ingredient labels.
Equipment Needed
Three 20cm (8-inch) round cake pans. Baking all three sponge layers simultaneously is significantly more efficient than baking in batches. Light-colored aluminum pans distribute heat most evenly and prevent the edges from over-browning before the center sets. If you only have two pans, bake two layers first and the third separately: wrap the baked layers tightly until the third is ready.
Stand mixer or hand mixer with a whisk attachment. For whipping the heavy cream to a stable, firm consistency. A stand mixer is easier for monitoring the cream since you can step away briefly without the cream over-whipping. A hand mixer works equally well with slightly more attention.
Offset palette knife and cake turntable. For spreading the whipped cream between layers and finishing the exterior. The offset blade lets you apply even pressure without dragging and the turntable makes covering the sides significantly more controlled.
Pastry brush. For brushing the cherry soak onto each sponge layer. A silicone brush distributes the liquid evenly without tearing the surface of the sponge.
Fine mesh strainer or sifter. For sifting the dry ingredients together and the icing sugar into the cream. Both produce smoother results than skipping this step.
Step-by-Step Directions
Step 1: Prepare Pans and Preheat Oven
Position two oven racks to divide the oven into thirds. Preheat to 175°C (350°F). Grease all three 20cm cake pans, line the bases with parchment paper circles, and dust the sides lightly with flour, tapping out any excess. Set them side by side and ready to fill.
Step 2: Mix the Dry Ingredients
Sift together the flour, cocoa powder, baking powder, baking soda, and salt into a large mixing bowl. Add the sugar and whisk everything together until no cocoa clumps remain and the mixture is completely uniform in color. This step ensures the leavening agents and cocoa are evenly distributed before any wet ingredients go in.

Chef’s Note: Sifting the cocoa with the flour is not optional here. Cocoa powder has a tendency to clump, and those clumps do not always dissolve fully when wet ingredients are added. Sifting first eliminates any pockets of concentrated cocoa flavor in the finished sponge.
Step 3: Combine the Wet Ingredients
In a separate bowl or large measuring jug, whisk together the eggs, whole milk, vegetable oil, vanilla extract, and the melted dark chocolate until the mixture is smooth and the chocolate is fully incorporated. The mixture should look glossy and uniform, with no streaks of separated oil or egg white.
Step 4: Combine Wet and Dry, Then Add Boiling Water
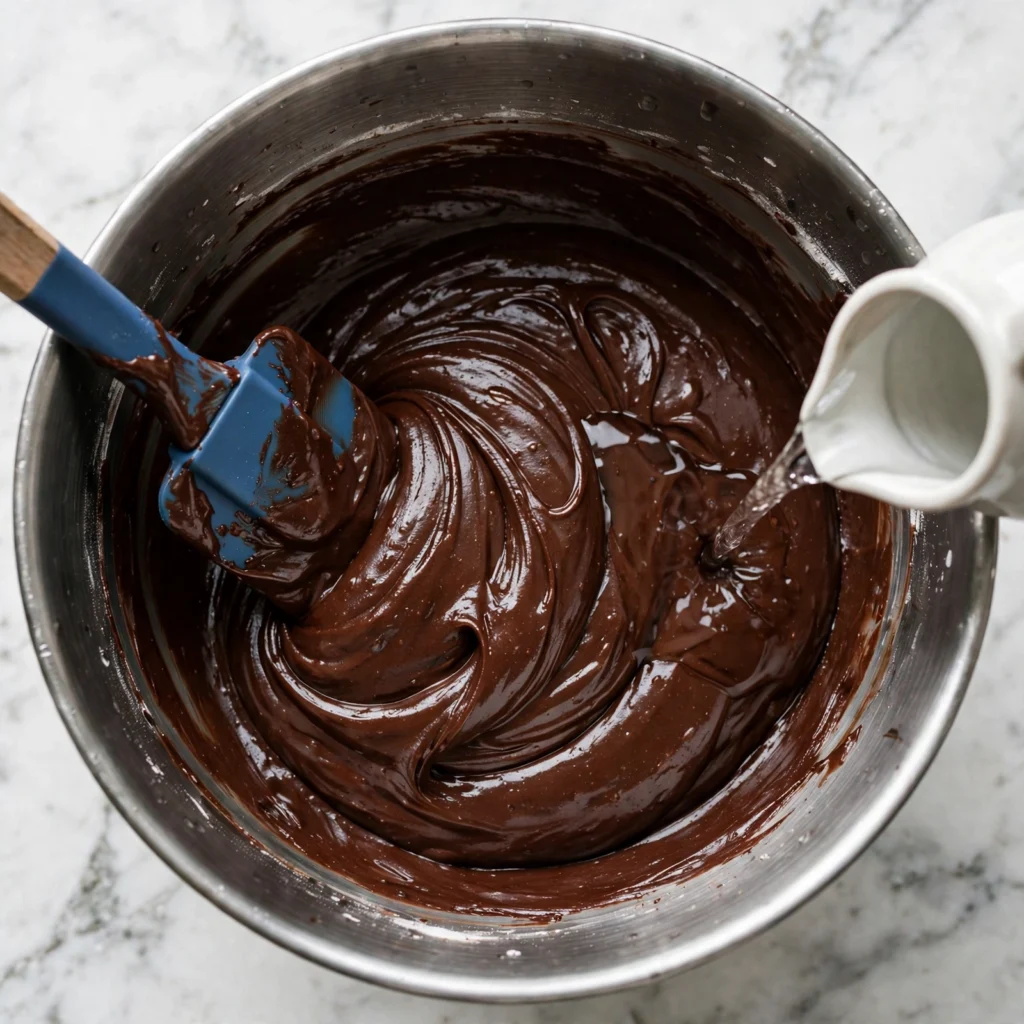
Pour the wet mixture into the bowl of dry ingredients. Whisk together until just smooth with no dry flour streaks remaining, about 60 seconds. The batter will be thick at this point. Pour in the boiling water and whisk for another 20 to 30 seconds until fully incorporated. The batter will thin out significantly: this is correct. Thin batter with bloomed cocoa produces a moist, fine-crumbed sponge rather than a dense one.
Chef’s Note: The boiling water does two things. It blooms the cocoa powder, releasing its fat-soluble flavor compounds and producing a much deeper chocolate flavor than cold liquid would extract. It also thins the batter to a pourable consistency that distributes more evenly into the pan and bakes to a level surface rather than doming in the center.
Step 5: Bake the Sponge Layers
Divide the batter evenly among the three prepared pans: approximately 480ml per pan if you are measuring by volume, or weigh the batter and divide by three if using a scale. Place two pans on the upper rack and one on the lower rack. Bake for 28 to 32 minutes, rotating the pans (swapping upper and lower) at the 15-minute mark for even baking. The sponges are done when a toothpick inserted in the center comes out with only a few dry crumbs, the surface springs back firmly when pressed lightly, and the edges have pulled slightly away from the pan sides. Cool in the pans on wire racks for 15 minutes, then turn out onto the racks, peel off the parchment, and leave to cool completely, at least 45 minutes.
Step 6: Make the Cherry Soak and Prepare the Cherries
Combine the reserved cherry syrup with the cherry extract (if using) in a small bowl or jug and stir. Pat the drained cherries thoroughly dry with paper towels and set them aside. Moisture from the cherries is the most common cause of cream that softens and weeps between the layers, so being thorough here matters.
Step 7: Whip the Stabilized Cream
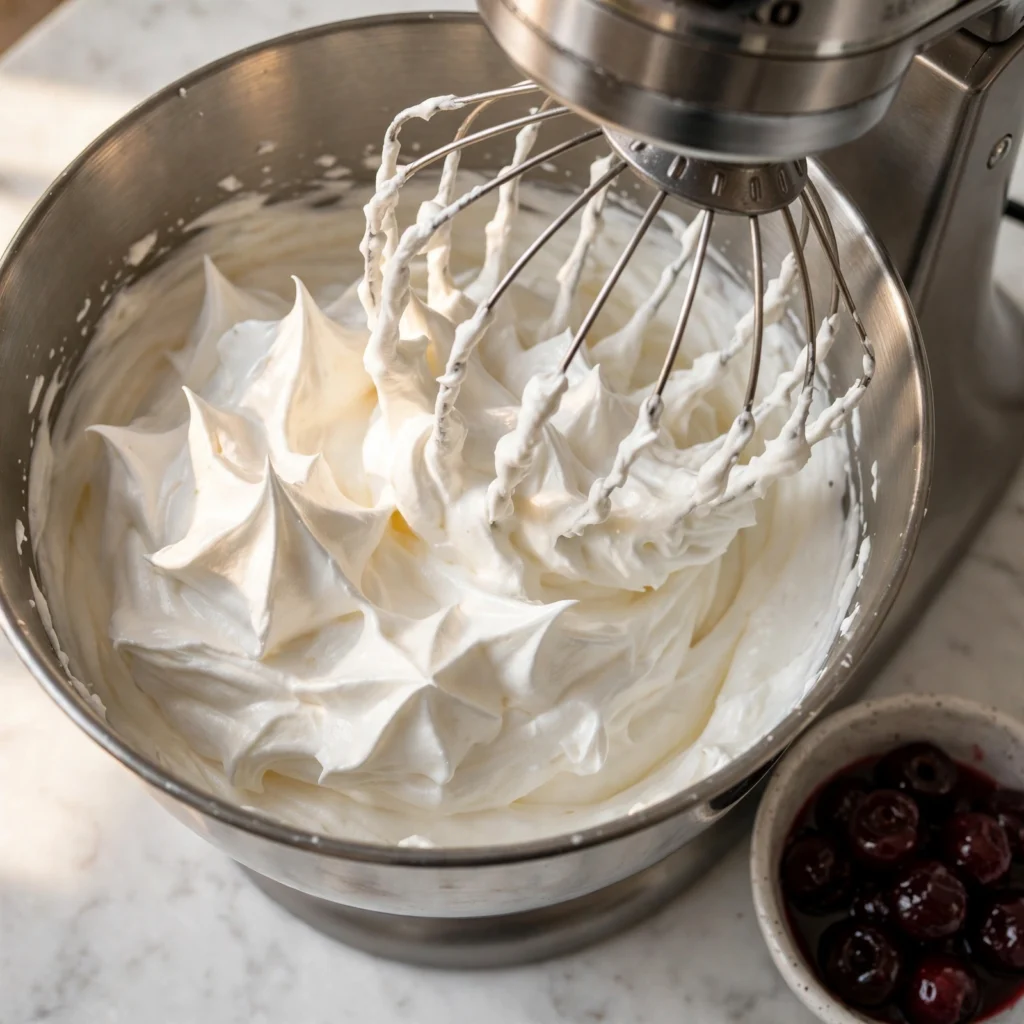
Pour the cold heavy cream into the bowl of a stand mixer or a large mixing bowl. Whip on medium-high speed until the cream begins to thicken and hold soft traces from the whisk. Add the sifted icing sugar one tablespoon at a time and continue whipping until the cream holds firm, glossy peaks: when you lift the beater, the peak should hold its shape without drooping. Add the vanilla and whip for 10 more seconds. Don’t whip past firm peaks or the cream will become grainy.
Chef’s Note: Cold cream and a cold bowl are both important. Warm cream whips more slowly, requires longer beating time, and is more prone to going past the firm peak stage into over-beaten, grainy butter-like texture. If your kitchen is warm, chill the bowl in the freezer for 10 minutes before pouring the cream in.
Step 8: Assemble the Cake
Place one cooled sponge layer on a cake board or serving plate. Using a pastry brush, generously saturate the surface of the sponge with one-third of the cherry soak. Let it absorb for 1 minute. Spread a generous layer of whipped cream (roughly 1 to 1.5cm thick) across the surface, going to the edges. Distribute half the dried cherries in a single layer across the cream, pressing each one lightly so they stay in place.
Place the second sponge layer on top. Repeat the soak and cream layer with another third of the soak, another layer of cream, and the remaining cherries.
Place the third sponge layer on top, soaked side down so the flat base faces up, giving you a level top surface. Brush the remaining cherry soak over the top. Apply a thin crumb coat of whipped cream to the top and sides of the assembled cake: this rough first layer seals loose crumbs. Refrigerate for 15 minutes to firm it. Apply the final, thicker layer of cream to the top and sides, smoothing as you go.
Step 9: Decorate With Chocolate and Cherries
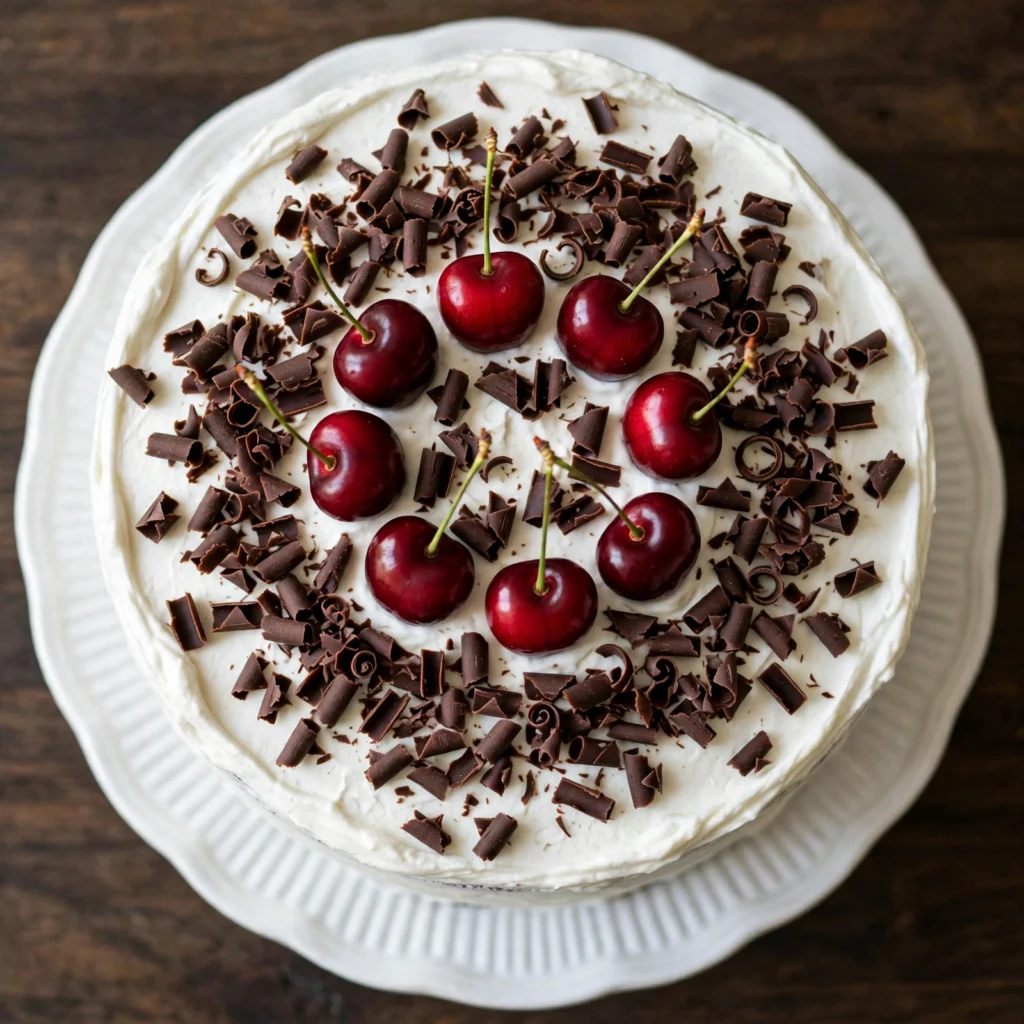
Scatter the chocolate curls or shavings generously over the top and gently press them against the sides of the cream-coated cake. Arrange the fresh whole cherries with their stems decoratively across the top surface. Refrigerate the finished cake for at least 1 hour before serving, or overnight for the cleanest slicing results.
Common Mistakes and Troubleshooting
| Problem | Cause | Solution |
|---|---|---|
| Sponge layers domed or uneven | Batter not divided evenly; oven has hot spots | Weigh the batter into three equal portions; rotate pans at the halfway point |
| Cream softened and slid between layers | Cherries not patted dry; cream over-whipped or under-whipped | Pat cherries completely dry before layering; whip to firm peaks only |
| Sponge is dry at the edges | Not enough cherry soak applied; cooled too long before assembling | Soak generously until the sponge surface looks visibly moistened; assemble same day as sponge is made |
| Chocolate curls melting on the cake | Chocolate too warm when applied; kitchen too warm | Chill the assembled cream-covered cake for 30 minutes before adding chocolate curls; work quickly |
| Cake tilts to one side | Layers not leveled before stacking; crumb coat not chilled | If sponge domed, slice the dome flat with a serrated knife; always chill the crumb coat before the final layer |
| Cream turned grainy and buttery | Over-whipped past firm peaks | Start again with fresh cold cream; watch the texture closely after soft peaks form |
Variations and Substitutions
Fresh Cherry Version: When fresh Morello or sour cherries are in season, pit 300g and briefly cook them with 2 tablespoons of sugar and 1 tablespoon of water in a small saucepan for 4 to 5 minutes until they release their juice and soften slightly. Cool completely before using. The fresh fruit version has a more vivid, brighter flavor than jarred cherries and makes the cake feel more seasonal.
Chocolate Ganache Layer: Spread a thin layer of dark chocolate ganache (100g chopped dark chocolate melted into 100ml warm heavy cream, stirred until smooth and cooled to spreadable consistency) directly onto the sponge before the whipped cream goes on. The ganache adds an extra layer of intense chocolate flavor and provides a slight barrier that prevents the cream from absorbing into the sponge.
Individual Black Forest Trifles: Instead of a layered cake, cube the cooled sponge and layer it in individual glasses with alternating cream and cherries. Finish each glass with chocolate shavings and a cherry. This version serves well at gatherings where slicing and plating a large cake is impractical and looks beautiful in clear glasses.
Black Forest Cupcakes: Pour the same batter into 24 paper-lined muffin cups, filling each three-quarters full. Bake at 175°C (350°F) for 18 to 20 minutes. Once cooled, core the center of each cupcake with a small knife or apple corer, fill with a spoonful of cherries, and pipe the stabilized whipped cream on top. Finish with a chocolate curl and one cherry per cupcake.
Lighter Cream Version: Replace half the heavy cream with full-fat Greek yogurt for a slightly tangier, lighter filling that is less rich per bite. The texture is softer than pure whipped cream, so use it for spreading only, not for any piped decoration.
Mocha Black Forest: Add 2 teaspoons of instant espresso powder to the boiling water before adding it to the batter. The coffee deepens the chocolate flavor significantly without making the cake taste of coffee: it is a supporting note that makes the cocoa richer and more complex throughout every layer.
Serving Suggestions
- Served cold from the refrigerator. Black forest cake is best served cold, not at room temperature. The whipped cream holds its shape cleanly, the chocolate curls stay firm, and the layers slice precisely when the cake has been properly chilled. Remove it from the fridge 10 minutes before cutting, not 30.
- With a hot drink alongside. A strong black coffee, a cup of English breakfast tea, or a warm chai alongside a cold slice of black forest cake is a classic combination that balances the sweetness of the cream and the richness of the chocolate.
- At a celebration table as a centerpiece. The cake is visually striking enough to be the centerpiece of a dessert table rather than one item among many. Present it on an elevated stand before cutting.
- With a scoop of vanilla ice cream. For a more indulgent dessert plating, a small scoop of plain vanilla ice cream beside the slice adds a cold creaminess that complements both the chocolate and the cherry without competing with the whipped cream already in the cake.
- Sliced very thinly for a large group. Because of its richness, this cake serves well in thinner slices than a standard layer cake. Cut 14 to 16 slices from a 20cm cake and most adults will find a single slice satisfying without needing a second.
- The morning after as a refrigerated breakfast treat. Cold leftover black forest cake from the fridge the next morning is an indulgence worth mentioning: the layers have settled, the cream is firm, and the cherry syrup has penetrated the sponge completely.

Tips for the Best Results
- Use Dutch-process cocoa, not natural. The distinction matters here because Dutch-process cocoa reacts differently with the leavening agents and produces a darker, more even crumb with a smoother flavor profile. Natural cocoa is more acidic and produces a lighter, slightly redder sponge. For a true dark, deep chocolate layer, Dutch-process is the right choice.
- Pat the cherries completely dry. Excess moisture from the cherries is the primary cause of cream that weeps and softens between the layers within a few hours of assembly. A thorough paper towel pat on each cherry before use takes two minutes and prevents this problem entirely.
- Soak the sponge generously. The cherry soak is what transforms a standard chocolate cake into black forest cake. Don’t be conservative: brush the soak until the surface of each sponge layer looks visibly wet and slightly glistening. The soak absorbs rather than making the cake soggy.
- Assemble on the day of serving, or the night before. A black forest cake assembled more than 24 hours ahead starts to lose the distinction between layers as the cream, soak, and sponge continue to merge. Assembled 12 to 18 hours before serving is the sweet spot.
- Chill the cake before applying chocolate curls. Chocolate curls applied to warm or uncovered cream adhere better and stay in place longer when the cream surface is cold and slightly set. A 20-minute refrigeration after the final cream coat before decorating is all it takes.
Storage Tips
Refrigerator
Cover the assembled cake with a cake dome or loosely with plastic wrap, taking care not to press the wrap against the chocolate curls or cream surface. It keeps in the refrigerator for up to 3 days. The first two days are the best: after day three, the cream begins to absorb further into the sponge and the texture shifts. Store individual slices in airtight containers to maintain the cream’s texture for longer.
Freezer
The unassembled, unsoaked sponge layers freeze very well. Cool them completely, wrap each tightly in two layers of plastic wrap, and freeze for up to 2 months. Thaw overnight in the refrigerator still wrapped, then bring to room temperature for 30 minutes before assembling. The assembled and decorated cake can also be frozen: freeze uncovered until the cream and chocolate are solid (about 2 hours), then wrap carefully in plastic and foil. Freeze for up to 1 month. Thaw overnight in the refrigerator, unwrap gently, and allow to come to temperature for 10 minutes before serving.
Reheating
Black forest cake is served cold and is not reheated. If the cream has firmed too much in the refrigerator, the 10 minutes at room temperature before serving is sufficient to soften it slightly without affecting the cake’s structure or the chocolate curls.
Nutrition Information
Per serving (1 slice, approximately 1/14 of the full cake with cream and cherries)
| Nutrient | Amount |
|---|---|
| Calories | 490 kcal |
| Protein | 5g |
| Carbohydrates | 52g |
| Fiber | 2.5g |
| Sugar | 38g |
| Total Fat | 29g |
| Saturated Fat | 15g |
| Cholesterol | 85mg |
| Sodium | 190mg |
| Vitamin C | 3mg |
| Calcium | 65mg |
| Iron | 2.5mg |
| Potassium | 210mg |
Nutrition values are approximate and may vary based on brands and portion sizes.
Why This Recipe Works
The boiling water addition to the batter is the technique that most directly affects the quality of the chocolate sponge. Cocoa powder contains fat-soluble flavor compounds that are only fully released in the presence of heat and fat. Hot liquid blooms the cocoa in the same way that hot water blooms coffee or tea: it opens the cellular structure of the powder and releases flavor that cold or warm liquid cannot extract. A sponge made with cold milk and cocoa tastes less chocolatey than one made with the same quantity of cocoa and hot water, even though the ingredient amounts are identical.
Using oil rather than butter as the primary fat in the sponge is a deliberate texture decision for a refrigerated cake. Butter contains solid saturated fat that re-solidifies when chilled and makes the crumb noticeably firmer and drier at refrigerator temperature. Oil stays liquid at any temperature a refrigerator produces, which keeps the crumb soft, moist, and yielding even when the cake has been cold for 12 hours. For a cake that is always served cold and often made the night before, this is an important practical choice.
Adding melted dark chocolate alongside the cocoa serves a different purpose than simply increasing the chocolate quantity. Cocoa powder provides color and sharp chocolate flavor but very little fat. Melted chocolate provides cocoa solids plus cocoa butter, which is a fat that contributes to a slightly fudgy, dense-in-the-best-way quality to the finished crumb. The combination of cocoa for flavor intensity and melted chocolate for texture is why bakery-style chocolate sponges taste more complex than home versions that use only one or the other.
The icing sugar stabilization of the whipped cream works through hygroscopy. Icing sugar absorbs moisture from the surrounding environment and from the cream itself, which slows the cream’s natural tendency to weep liquid as time passes. Cream whipped without any stabilizer begins to weep within 30 to 45 minutes at room temperature and even faster when it encounters the moisture from soaked sponge and wet cherries. Icing sugar extends that window to several hours, which is why the cake can be assembled and refrigerated overnight without the cream becoming liquid.
The crumb coat technique in Step 8 serves a practical purpose that goes beyond aesthetics. When you apply the first thin, rough layer of cream and chill it, the loose crumbs from the sponge’s cut edges get sealed under a set layer of cream. The final smooth coat then goes onto a crumb-free surface, which is how professional bakers produce a clean, uniform exterior without dark crumbs showing through the white cream.
Frequently Asked Questions
Can I make black forest cake ahead of time?
Yes. The sponge layers can be baked up to 2 days ahead and wrapped tightly at room temperature, or frozen for up to 2 months. The assembled and decorated cake can be refrigerated overnight and served the following day, which is actually the best approach: the layers settle together, the soak absorbs fully, and the cream firms up for cleaner slicing. Assemble no more than 18 to 24 hours before serving for the best texture.
Why is my whipped cream soft and weeping?
Weeping cream in a black forest cake comes from one of three sources: the cream was not whipped to firm enough peaks before use, the cherries were not dried properly and released moisture into the cream layer, or the assembled cake was left at room temperature for too long before refrigerating. Use firm-peak cream, pat cherries dry before layering, and refrigerate the assembled cake within 30 minutes of completing the decoration.
Can I use fresh cherries instead of jarred Morello cherries?
Yes, when they are in season. Fresh Morello or sour cherries are the traditional choice and taste brighter than jarred. Pit 300g and briefly simmer with 2 tablespoons of sugar and a tablespoon of water for 4 to 5 minutes to soften them slightly and create a small amount of syrup. Cool completely before using, and reserve the cooking syrup for the soak. Sweet dark cherries can also be used but the result is sweeter and less complex than the tart Morello version.
How do I make chocolate curls for the decoration?
Let a bar of dark chocolate come to room temperature (it should be firm but not cold, around 18 to 20°C / 65 to 68°F). Press a vegetable peeler firmly along the flat surface of the chocolate bar and draw it toward you in one steady stroke. The chocolate will curl as it comes off. Colder chocolate will shatter into shards; warmer chocolate will smear rather than curl. Practice on the edge of the block first and adjust the angle of the peeler until you find the right pressure for consistent curls.
Is black forest cake gluten-free?
As written, no: the sponge uses all-purpose wheat flour. To make a gluten-free version, replace the flour with an equal weight of a certified gluten-free 1:1 baking flour blend that contains xanthan gum. The sponge layers will be more delicate and should be cooled fully in their pans before being turned out. Confirm the dark chocolate used is also certified gluten-free, as some bars contain wheat-based ingredients.
How many people does a 20cm black forest cake serve?
Sliced into 14 portions, a 20cm (8-inch) three-layer cake gives each person a satisfying slice that includes all three sponge layers, the cream, and the cherries. Because the cake is rich from the combination of chocolate, cream, and fruit, most adults are satisfied with a single slice. You can cut 16 thinner slices for a larger gathering without any portion feeling too small.
Why did my sponge crack across the top during baking?
A cracked top on a chocolate sponge is usually caused by oven temperature that is slightly too high, causing the surface to set and firm before the interior has finished rising. A crack or dome is also common in a thicker batter distributed across only two pans rather than three. Both are purely cosmetic: a cracked or domed layer works perfectly well in the assembled cake. If the dome is too pronounced to stack evenly, slice it flat with a long serrated knife before assembly.
Conclusion
Black forest cake is one of those layered desserts where the sum is genuinely greater than its parts. The chocolate sponge alone would be a good cake. The cherries alone would be a pleasant compote. The cream alone would be a simple topping. Together, assembled with the soak pulling them into a single cohesive thing, the result is a cake that delivers a distinct, layered experience in every slice and holds that quality for the full day after assembly. The components are individually straightforward. The sequence is what creates the result. Make this black forest cake once and it becomes the recipe you reach for whenever an occasion calls for something that looks and tastes genuinely special.
If you loved this recipe, save it to your celebration cake recipes Pinterest board so you can find it easily later. For more same recipes follow Thecookingvibes Pinterest account.
Black Forest Cake
Ingredients
Equipment
Method
- Preheat oven to 175°C (350°F). Grease, line, and flour three 20cm round cake pans.
- Sift flour, cocoa, baking powder, baking soda, and salt into a large bowl. Whisk in sugar until uniform.
- In a separate bowl, whisk together eggs, milk, oil, vanilla, and melted chocolate until smooth.
- Pour wet mixture into dry and whisk until just combined. Add boiling water and whisk 20 to 30 seconds until smooth: batter will be thin.
- Divide evenly among pans and bake 28 to 32 minutes, rotating pans at 15 minutes, until a toothpick comes out with dry crumbs. Cool in pans 15 minutes, then on wire racks completely.
- Mix reserved cherry syrup with cherry extract. Pat drained cherries dry with paper towels.
- Whip cold heavy cream with a mixer on medium-high, adding icing sugar gradually, until firm glossy peaks form. Add vanilla and whip 10 seconds more.
- Place one sponge layer on a board. Brush with one-third of the cherry soak. Spread a generous cream layer and distribute half the dried cherries across it. Repeat with the second sponge. Top with the third sponge, soaked side down, and brush with remaining soak. Apply a thin crumb coat of cream all over; chill 15 minutes. Apply the final cream coat smoothly.
- Cover with chocolate curls and arrange fresh cherries on top. Refrigerate at least 1 hour before serving.