Classic Apple Crisp — Spiced Apples, Golden Oat Topping
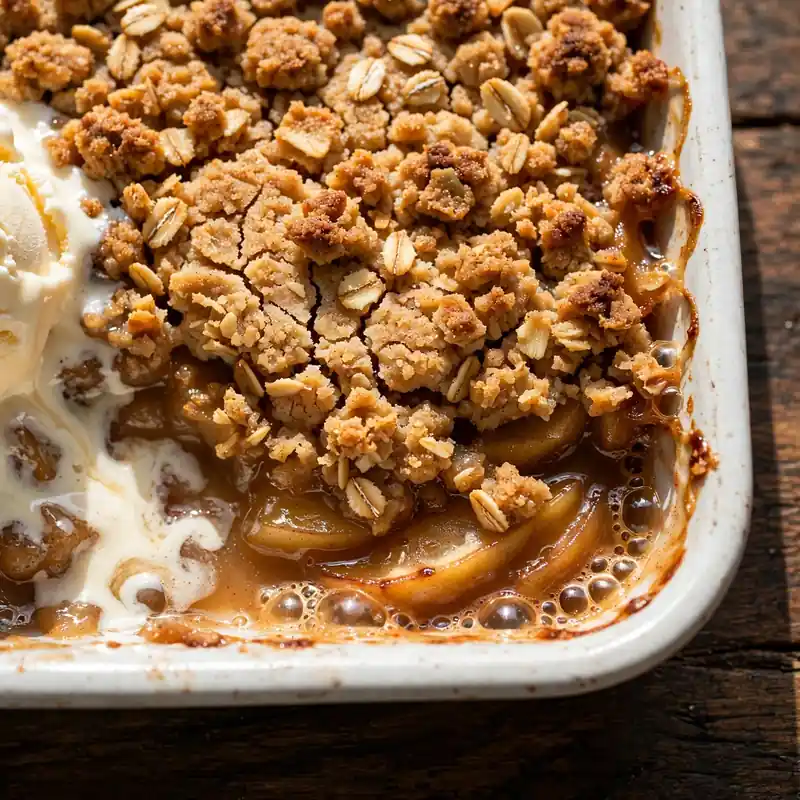
Pull an apple crisp from the oven when the topping has turned a deep amber brown and the filling is bubbling at the edges, and set it on a wire rack for just five minutes before you serve it. That’s the whole recipe in one sentence, really: tender spiced apples underneath a buttery, oat-flecked streusel that shatters at the spoon and then soaks into the apple juices below. It’s one of the easiest desserts you can make from scratch and one of the most satisfying to eat while it’s still warm.
Apple crisp is a classic American baked fruit dessert built on two components: a spiced apple filling seasoned with cinnamon and brown sugar, and a crisp oat-and-butter topping that bakes into a textured, golden crust without any pastry work. It comes together in about 20 minutes of active prep and bakes for 40 to 45 minutes. It works for weeknight dinners, weekend gatherings, or any autumn afternoon that calls for something warm from the oven. The topping in this recipe uses a higher ratio of oats to flour than most versions, which produces a genuinely crunchy streusel rather than a soft, cake-like one.
Why You’ll Love This Apple Crisp
- No pastry work needed. The topping is pressed together by hand in one bowl. No rolling, no chilling, no special technique; it comes together in about 4 minutes and delivers a better texture-to-effort ratio than most baked desserts.
- Topping that genuinely crunches. A higher oat-to-flour ratio produces a streusel with real texture: distinct oat clusters that stay crispy even after sitting in warm apple juices for 20 minutes.
- Filling that holds together when scooped. A small amount of flour or cornstarch tossed with the apples thickens the released juice into something cohesive rather than watery, so the filling scoops cleanly rather than flooding the bowl.
- Works with multiple apple varieties. This recipe produces a good result with a range of apple types because the spice and brown sugar are calibrated to work alongside both tart and sweet fruit rather than depending on one specific variety.
- Better the same day, still good the next. The topping softens slightly overnight but the flavor deepens and the filling sets more firmly, which makes leftovers worth planning for.

Ingredients You’ll Need
Recipe Timing
| Detail | Info |
|---|---|
| Servings | 8 |
| Difficulty | Easy |
| Course | Dessert |
| Cuisine | American |
| Prep Time | 20 minutes |
| Cook Time | 45 minutes |
| Rest Time | 10 minutes (after baking) |
| Total Time | 75 minutes |
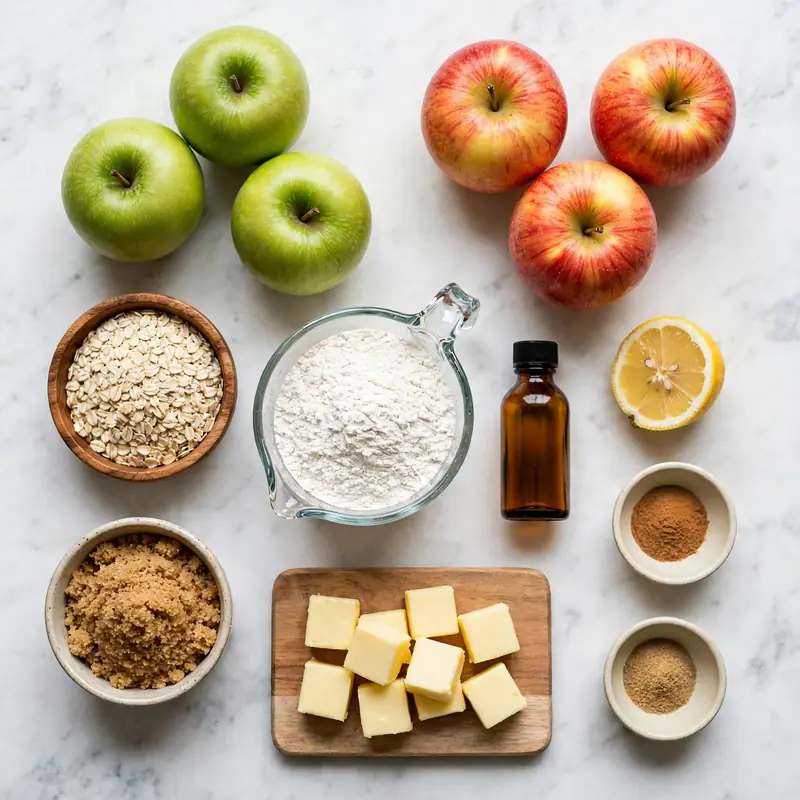
For the apples, a firm variety that holds its shape through 45 minutes of baking is the most important selection criterion. Granny Smith is the classic choice because its firm flesh and pronounced acidity hold up well under heat and provide a natural tartness that balances the brown sugar. Honeycrisp apples produce a slightly sweeter, softer result that many people prefer. Fuji or Braeburn are good middle-ground choices. Avoid Red Delicious and McIntosh; both turn mushy during baking and produce a filling with a texture closer to applesauce than to distinct tender slices.
For the oats, old-fashioned rolled oats are the right choice here. Quick-cooking oats absorb moisture faster and produce a softer, almost pasty topping; instant oats dissolve almost completely during baking and disappear into the streusel rather than providing texture. Old-fashioned rolled oats keep their shape and produce the distinct clusters and crunch that define a good crisp topping.
For the butter in the topping, cold straight from the fridge is better than softened. Cold butter worked into the oat and flour mixture stays in small, irregular pieces that create distinct pockets of fat in the baked topping. Softened or melted butter distributes too evenly and produces a more uniform, less textured result.
The Apple Filling:
- 1.2 kg (about 2.5 lbs) firm apples, peeled, cored, and sliced into 5mm wedges — the primary ingredient; firm varieties hold their shape through baking; approximately 6 to 7 medium apples
- 3 tablespoons light brown sugar, packed — adds sweetness and a faint molasses depth; adjust up to 4 tablespoons for sweeter apples or a sweeter filling preference
- 1 tablespoon granulated sugar — adds clean sweetness alongside the brown sugar
- 2 tablespoons all-purpose flour — thickens the juice released during baking into a light syrup that coats the apple pieces; cornstarch at 1 tablespoon substitutes directly
- 1 1/2 teaspoons ground cinnamon — the dominant spice; add more or less to taste
- 1/4 teaspoon ground nutmeg — adds a warm, slightly aromatic depth that cinnamon alone doesn’t provide; freshly grated nutmeg is noticeably more complex than pre-ground
- 1/4 teaspoon fine salt — sharpens and balances the sweetness
- 1 tablespoon fresh lemon juice — prevents early browning of the cut apples and adds a brightness that keeps the filling from tasting flat
- 1 teaspoon pure vanilla extract — rounds the spiced filling and adds warmth
The Oat Crisp Topping:
- 1 cup (90g) old-fashioned rolled oats — the primary texture element; creates the distinct clusters and crunch of a good topping
- 1/2 cup (65g) all-purpose flour — provides structure to the topping so it bakes into distinct clusters rather than staying loose
- 1/2 cup (100g) light brown sugar, packed — sweetens the topping and caramelizes during baking, deepening the color and adding a toffee-like finish
- 1/4 teaspoon fine salt — balances the sweetness
- 1/2 teaspoon ground cinnamon — a light echo of the filling’s spice to tie both components together
- 1/2 cup (115g) cold unsalted butter, cubed into small pieces — the fat that creates the crumbly texture; must be cold for best results
Allergen and Dietary Disclosure
This apple crisp contains gluten (all-purpose flour in both the filling and topping), dairy (butter in the topping), and potentially oats which, while naturally gluten-free, are frequently processed in facilities that handle wheat. Individuals with celiac disease or gluten sensitivity should use certified gluten-free oats and a certified gluten-free flour blend.
For gluten-free: replace the all-purpose flour in both the filling and the topping with a 1:1 certified gluten-free flour blend, and use certified gluten-free rolled oats. The topping texture is very close to the standard version; the filling behaves identically.
For dairy-free and vegan: replace the cold butter in the topping with very cold refined coconut oil in the same quantity. Scoop it into the oat mixture and work it in the same way as butter. The topping bakes to a comparable golden color and clusters well. The flavor is slightly different but still very good. The filling contains no dairy in the base recipe.
For lower sugar: reduce the brown sugar in the filling to 2 tablespoons and the brown sugar in the topping to 1/3 cup. The result is less sweet overall but the apple flavor becomes more pronounced, which many people prefer particularly with tart apple varieties.
This recipe has not been tested in a certified allergen-free kitchen and cannot be guaranteed safe for any specific allergy.
Equipment Needed
- 9×13-inch (23x33cm) baking dish or equivalent — the surface area determines how evenly the topping distributes across the filling. A deeper, smaller dish produces a thicker filling layer and a thicker topping, which takes longer to bake through; an 8×8-inch dish works but reduce the topping quantity by one quarter and add 5 minutes to the bake time.
- Large mixing bowl — one large bowl for the apple filling and a second for the topping. Having both ready before you start peeling apples keeps the workflow organized and prevents the cut apples from sitting exposed long enough to oxidize significantly.
- Pastry cutter or clean fingertips — for working the cold butter into the oat mixture. The goal is to leave irregular, pea-sized pieces of butter throughout rather than a fully uniform mixture; fingertips work well here as long as you work quickly so the butter doesn’t warm.
- Apple peeler and sharp paring knife — a Y-peeler removes apple skin faster and with less waste than a standard peeler. A sharp knife produces clean, even slices that cook uniformly; a dull knife crushes the apple flesh at the cut edges, which releases more moisture prematurely.
- Wire cooling rack — for the baked crisp to rest on after coming out of the oven. Placing a hot baking dish directly on a counter surface traps heat underneath and can cause the bottom of the filling to over-concentrate and darken.
Step-by-Step Directions
Step 1: Preheat and Prepare the Dish
Set the oven to 175°C (350°F) and allow it to fully preheat before the crisp goes in. Grease the baking dish lightly with butter or a neutral oil spray; this prevents the apple filling from sticking to the sides and makes cleanup significantly easier. A greased dish also means the edges of the topping brown rather than burning where they make contact with the dish walls.
Step 2: Prepare and Season the Apple Filling
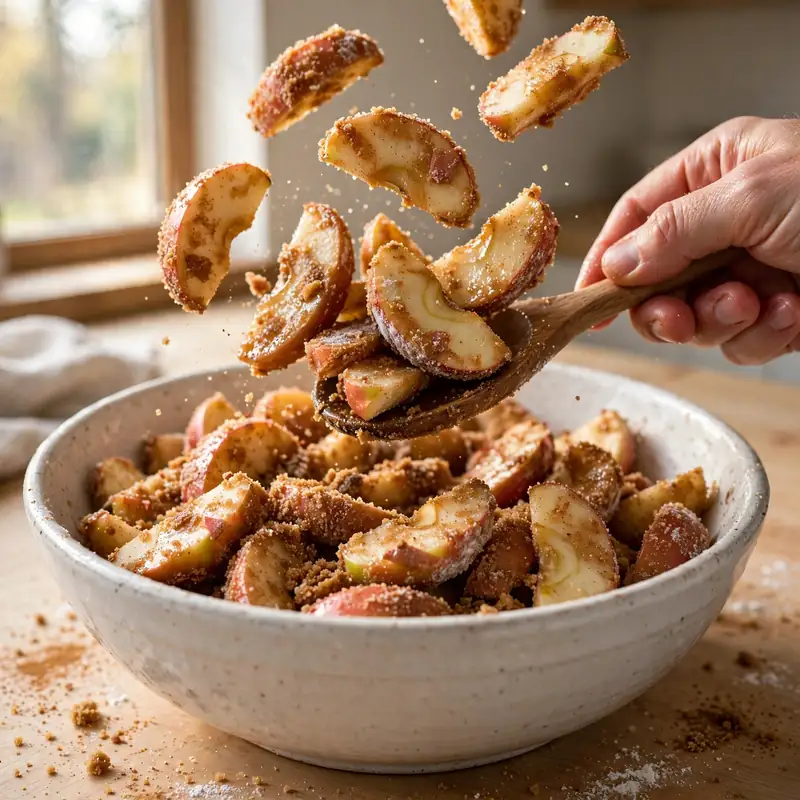
Peel, core, and slice the apples into 5mm wedges. Uniform thickness is worth the extra 3 to 4 minutes of careful knife work because it means all the apple slices reach their ideal tender texture at the same moment. Combine the sliced apples in a large bowl with the brown sugar, granulated sugar, flour, cinnamon, nutmeg, salt, lemon juice, and vanilla extract. Toss everything together until each apple slice has a visible coating of the spice and sugar mixture. The flour will look slightly dusty on the apple surfaces at this stage; it dissolves into the released juice during baking.

Chef’s Note: Tossing the apples with lemon juice immediately after slicing does two things: it inhibits the enzymatic browning that causes cut apples to turn buff-colored within minutes of exposure to air, and it adds a brightness to the finished filling that the sweetness of the brown sugar needs as a counterpoint. A filling without acid from the lemon juice tastes flatter and more uniformly sweet, even at the same sugar quantity.
Step 3: Make the Oat Crisp Topping
Combine the rolled oats, flour, brown sugar, salt, and cinnamon in a separate bowl and stir briefly to distribute everything evenly. Add the cold cubed butter. Work the butter into the dry mixture using a pastry cutter or your fingertips, pressing each piece flat and then crumbling it through the oats and flour. Continue until the mixture forms irregular, rough clumps with no large pieces of unmixed dry ingredients remaining but with visible distinct pieces of butter throughout. The topping should look like it could barely hold together rather than like a smooth, uniform crumble; those irregular clumps become the crunchy clusters after baking.
Chef’s Note: Resist the urge to fully incorporate the butter until the mixture looks smooth. Topping mixed until uniform produces a soft, cake-like layer after baking rather than distinct crunchy clusters. Stop when the mixture holds together in clumps when squeezed but falls apart readily when released.
Step 4: Assemble and Distribute
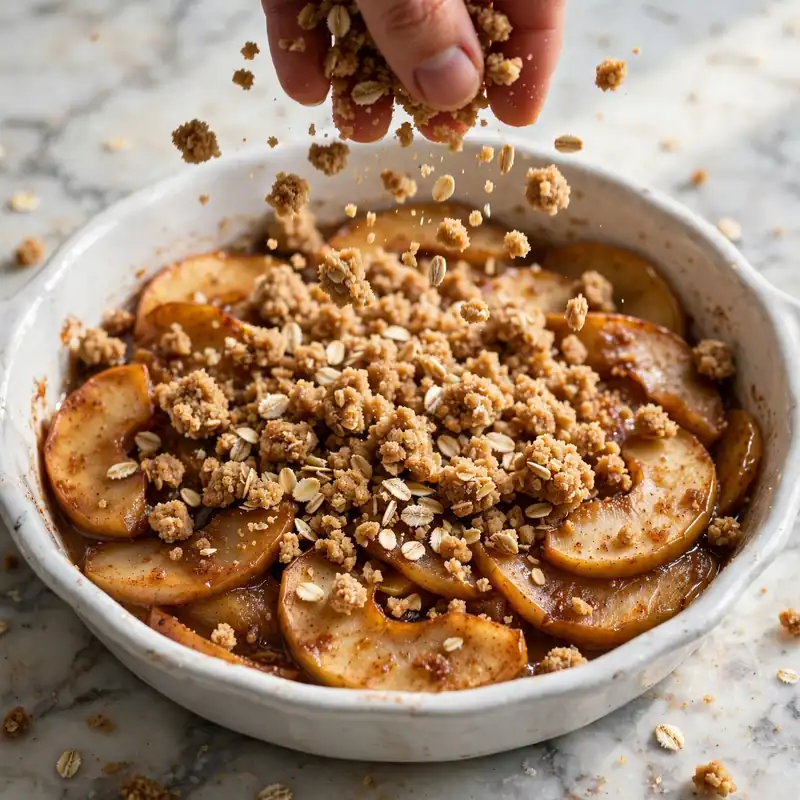
Pour the seasoned apple filling into the prepared baking dish and spread it into an even layer. Scatter the oat topping over the apples in loose handfuls, distributing it evenly all the way to the edges of the dish. Don’t press the topping down into the apples; it should rest loosely on the surface so hot air can circulate between the filling and the topping during baking, which keeps the topping from becoming soggy in its lower layer.
Step 5: Bake Until Deep Golden and Bubbling
Place the dish on the center rack of the preheated oven. Bake at 175°C (350°F) for 40 to 45 minutes. The crisp is done when the topping is a deep, even golden-brown across the entire surface with darker amber at the edges, and the apple filling is actively bubbling around the edges of the dish. The bubbling indicates that the apple juice has heated enough to thicken properly; a crisp pulled before the filling bubbles will have a thinner, waterier filling when served.
Chef’s Note: If the topping browns to your satisfaction before the filling starts bubbling, loosely tent the dish with aluminum foil and continue baking for the remaining time. The foil prevents the topping from darkening further while the filling finishes. Remove the foil for the last 5 minutes to re-crisp any areas that softened under the foil.
Step 6: Rest Before Serving
Transfer the baked crisp to a wire rack and allow it to rest for 10 minutes before scooping. The filling continues to thicken from the residual heat during this time; a crisp served immediately from the oven has a looser, more liquid filling than one given 10 minutes to settle. The topping also hardens slightly as it cools from very hot to warm, which is when the crunch is at its most noticeable.
Common Mistakes and Troubleshooting
| Problem | Cause | Solution |
|---|---|---|
| Topping is soft and cake-like rather than crunchy | Butter was too soft or fully incorporated into the topping | Use cold butter and stop mixing when irregular clumps form; don’t smooth the mixture to uniformity |
| Filling is watery when served | Flour or cornstarch was skipped, or crisp was cut before the filling bubbled | Always include the flour in the filling; wait for active bubbling before removing from oven and rest 10 minutes |
| Apple slices mushy rather than tender | Apples sliced too thin, or a variety prone to softening used | Slice apples at least 5mm thick; choose Granny Smith, Honeycrisp, Braeburn, or Fuji |
| Topping burnt before filling is done | Oven temperature too high, or dish placed on upper rack | Bake at 175°C (350°F) on center rack; tent with foil if topping browns before filling bubbles |
| Filling tastes flat or too sweet | Lemon juice skipped, or apple variety too sweet without enough acid | Always include lemon juice; balance with a splash more if using a particularly sweet apple variety |
| Topping sinks into the filling during baking | Topping was pressed down before baking | Scatter topping loosely over the filling without pressing; it should rest on the surface, not be embedded in it |
Variations and Substitutions
- Apple and pear crisp: Replace half the apples with firm, slightly underripe Bosc or Anjou pears cut to the same thickness. Pears release more moisture than apples during baking, so increase the flour in the filling to 3 tablespoons to account for the extra liquid. The flavor combination is more complex and slightly floral, which pairs particularly well with the cinnamon-spiced topping.
- Apple crisp with pecans: Add 1/2 cup of roughly chopped pecans to the oat topping mixture along with the flour and oats. The nuts toast in the butter during baking and add a savory, slightly bitter depth that contrasts with the sweet apple filling. This version is particularly good served at room temperature the next day when the pecan flavor has had time to meld into the topping.
- Spiced apple crisp with cardamom: Add 1/4 teaspoon of ground cardamom to the apple filling alongside the cinnamon and nutmeg. Cardamom adds a floral, almost citrusy warmth that lifts the spice blend considerably. This version works especially well if you’re using sweeter apple varieties that need a more complex spice counterpoint.
- Maple brown sugar topping: Replace half the brown sugar in the topping with 2 tablespoons of pure maple syrup worked into the butter before it’s added to the dry ingredients. The maple syrup produces a topping that’s slightly stickier during mixing but produces deeper caramel notes and a slightly more cohesive cluster structure after baking.
- Gluten-free version: Substitute certified gluten-free rolled oats and replace the all-purpose flour in both the filling and topping with an equal quantity of certified gluten-free 1:1 flour blend. The texture and flavor are very close to the standard version; the topping may be slightly more fragile when scooping but holds together well during baking.
- Individual ramekin crisps: Divide the filling and topping equally among 6 to 8 individual 240ml ramekins. Reduce the baking time to 28 to 32 minutes and check at 28 minutes; individual portions bake faster than a single large dish. This version is easier to serve at a dinner party and presents more elegantly with a scoop of ice cream placed directly on top at the table.
Serving Suggestions
- Serve warm directly from the oven while the topping is at its crunchiest. The contrast between the warm, slightly soft apple filling and the crisp topping is the defining texture of this dessert; it diminishes as the dish cools, so timing the serving close to when it comes out of the oven matters.
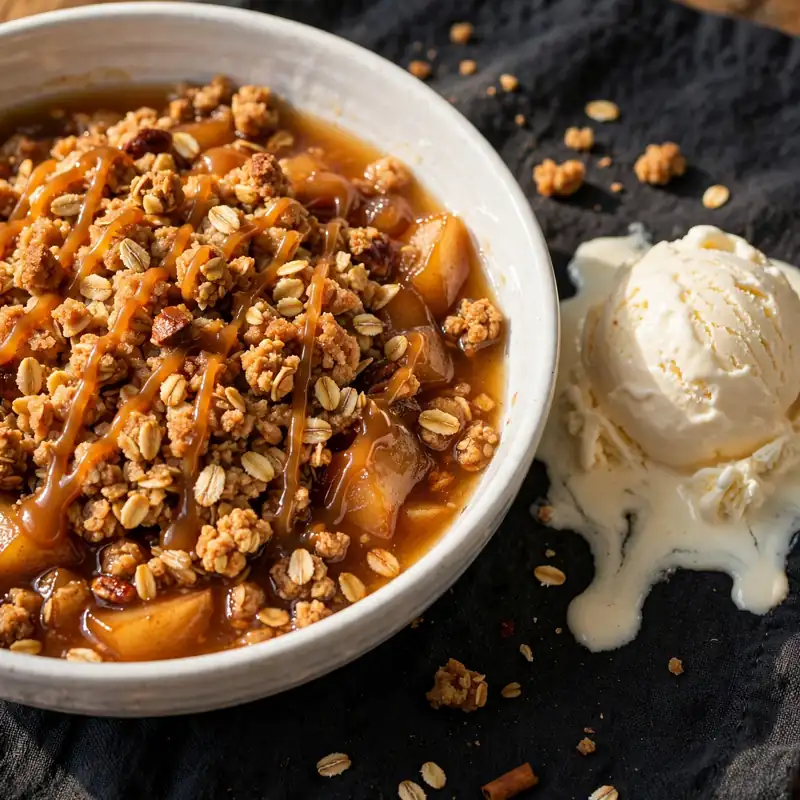
- A generous scoop of good vanilla ice cream placed alongside or directly on top of the warm crisp is the most common and most satisfying pairing. The cold ice cream melts into the hot apple juices and creates a sauce at the bottom of the bowl that tastes of cream and cinnamon together.
- Lightly sweetened whipped cream dolloped over each serving adds richness without the cold temperature contrast of ice cream, which is the better choice if the crisp has cooled to room temperature.
- A drizzle of cold caramel sauce over the topping just before serving adds an extra layer of sweetness and visual appeal. The caramel flavor complements both the brown sugar in the topping and the apple filling naturally.
- Pair with a hot cup of black coffee or a chai with milk. The warmth and slight bitterness of both beverages work well against the sweet spiced filling and make the dessert feel more complete.
- For a fall dinner party, serve individual portions in small cast iron skillets that have been warmed briefly in the oven so they’re still faintly sizzling when they reach the table. The presentation is dramatic and the cast iron retains heat long enough that the ice cream melts gradually rather than immediately.
Tips for the Best Results
- Keep the butter cold all the way through topping assembly. If your kitchen is warm or you’ve been working with the butter for more than 4 to 5 minutes, put the mixing bowl in the freezer for 5 minutes before continuing. Cold butter in the topping mixture produces distinct fat pockets that bake into crunchy clusters; warm butter distributes too evenly and produces a softer result.
- Don’t slice the apples too thin. Slices thinner than 5mm become fully tender in the first 20 minutes of baking and continue cooking into mush for the remaining 25 minutes. The 5mm thickness means the apples finish cooking at exactly the right moment relative to the topping: tender and holding their shape, with a light firmness at the center of each slice.
- Bake until the filling bubbles, not just until the topping is golden. The topping often reaches its ideal color before the filling has thickened properly. Active bubbling at the edges of the dish signals that the juice has heated enough to activate the flour thickening agent and will set properly as the crisp cools. A topping that looks done but sits over a still-cold filling produces a watery serving.
- Rest the baked crisp for the full 10 minutes. This is the instruction most likely to be skipped in the excitement of pulling something that smells that good from the oven. Serving immediately produces a looser filling and a topping that’s almost too hot to taste properly. Ten minutes produces a filling that scoops cleanly and a topping that has had time to form its final crunchy texture as it cools.
- Scatter the topping loosely, don’t press it down. This is counterintuitive but important. Topping pressed into the filling gets saturated with apple juice from below and steams rather than bakes, losing its crunch entirely. Topping resting loosely on the surface bakes in dry oven air on top and stays crispy throughout.
Storage Tips
Refrigerator
Cover the baked and cooled apple crisp tightly with foil or plastic wrap and refrigerate for up to 4 days. The topping softens overnight as it absorbs moisture from the filling, but the flavor of both components deepens and the filling sets more firmly. Leftover apple crisp is genuinely worth eating cold from the refrigerator with a scoop of ice cream, or reheated in the oven to restore some of the topping’s texture.
Freezer
Apple crisp freezes well both baked and unbaked. For freezing unbaked: assemble the crisp completely in a freezer-safe dish, cover tightly with plastic wrap and then foil, and freeze for up to 3 months. Bake directly from frozen at 175°C (350°F) for 55 to 65 minutes, adding about 15 minutes to the standard bake time. For freezing baked: cool completely, cover tightly, and freeze for up to 3 months. Thaw overnight in the refrigerator before reheating.
Reheating
The oven restores the topping’s crunch better than any other reheating method. Place leftover servings or the whole dish in a preheated 175°C (350°F) oven for 10 to 15 minutes for individual portions or 20 to 25 minutes for a full dish, until the filling is hot at the center and the topping has crisped at the edges. Microwave reheating warms the filling adequately but leaves the topping soft and slightly soggy; use it for a quick lunch portion but accept the texture trade-off.
Make-ahead note: The filling and topping can both be prepared separately up to 24 hours in advance and refrigerated. Keep them in covered containers and assemble just before baking. The assembled unbaked crisp can also be refrigerated for up to 8 hours before baking; add 5 minutes to the bake time since it starts from cold.
Nutrition Information
Per serving, approximately 1/8 of the recipe:
| Nutrient | Amount |
|---|---|
| Calories | 320 kcal |
| Protein | 3g |
| Total Carbohydrates | 52g |
| Dietary Fiber | 4g |
| Total Sugar | 34g |
| Total Fat | 13g |
| Saturated Fat | 8g |
| Cholesterol | 30mg |
| Sodium | 130mg |
| Vitamin C | 6mg |
| Calcium | 35mg |
| Iron | 1.2mg |
| Potassium | 220mg |
Nutrition values are approximate and may vary based on apple variety, brands, and portion sizes. Ice cream or whipped cream toppings not included.
Why This Recipe Works
The crunch of a good apple crisp topping depends entirely on how the butter is incorporated into the oat and flour mixture. When cold butter is worked into the dry ingredients by pressing and crumbling rather than creaming or stirring, it stays in distinct, irregular pieces distributed throughout the mixture. Those pieces behave differently in the oven than evenly distributed fat does. As the oven heat reaches the topping, the water in the cold butter converts rapidly to steam, which creates small air pockets in the surrounding flour and oat mixture. When the butter’s water has evaporated and the remaining fat coats the starch granules, the mixture sets into the rigid, crunchy clusters that define a good crisp. Warmer or more fully incorporated butter distributes its water more evenly and doesn’t create the same localized steam pockets, producing a softer, more uniformly textured bake.
The flour in the apple filling works through starch gelatinization. When the apple slices release moisture during baking, that juice dissolves the flour coating on each piece and becomes a starch suspension that heats rapidly in the oven. Above about 65°C (150°F), the starch granules absorb the surrounding water and swell, thickening the liquid around them into a light gel. The result is an apple filling that holds together when scooped rather than flooding the bowl with thin liquid. Using 2 tablespoons of flour in a filling this size produces a lightly thickened result that’s still pourable when hot but sets firmly enough to hold its shape at serving temperature. More flour produces a filling that feels gluey; less produces one that’s watery.
The lemon juice in the filling addresses two separate issues. Raw apple flesh contains polyphenol oxidase, an enzyme that catalyzes the reaction between apple phenolic compounds and oxygen, producing the brown discoloration visible on cut apple surfaces within minutes of exposure to air. Citric acid from lemon juice inhibits this enzyme directly. But the more important function in this recipe is flavor. Apples release significant amounts of fructose and other sugars when they cook, and a filling made without any acid can taste one-dimensionally sweet regardless of how well-spiced it is. The small amount of lemon juice adds an acidity that activates the other flavors in the filling and prevents the sweetness from sitting flat.
Using old-fashioned rolled oats over quick oats is a structural decision with a direct textural consequence. Rolled oats are whole oat groats that have been steamed and rolled into flat flakes roughly 4 to 5mm across. They maintain their shape and structural integrity at oven temperature and produce the visible oat clusters in the finished topping. Quick oats have been pre-cut and rolled thinner; they absorb moisture faster, lose their shape during baking, and produce a topping that’s soft and more homogeneous in texture. The difference in the finished crisp is immediate and obvious.
I’ve tested this recipe using three different baking temperatures: 165°C (325°F), 175°C (350°F), and 190°C (375°F). At 165°C, the filling cooks through well but the topping takes 55 minutes to reach the right color and the oats don’t develop the same toasted flavor they do at higher heat. At 190°C, the topping browns beautifully in 30 minutes but the outer edges of the filling overcook and become slightly jammy before the center reaches the same tenderness. At 175°C, both components finish at the same time with a 40 to 45-minute bake, the topping develops a deep golden color with genuine toasted oat flavor, and the filling cooks evenly from edge to center.
Frequently Asked Questions
Can I make apple crisp ahead of time?
Yes, and there are two practical approaches. The filling and topping can be prepared separately, covered, and refrigerated up to 24 hours in advance; assemble and bake on the day of serving. Alternatively, assemble the full crisp, cover tightly, and refrigerate for up to 8 hours before baking; add 5 minutes to the bake time since it starts cold. You can also bake it the day before and reheat it in the oven at 175°C (350°F) for 20 to 25 minutes before serving. The topping softens overnight but reheating in the oven restores most of its crunch.
Why is my topping soft and not crunchy?
Two things cause a soft topping most often. The butter was too warm when worked into the oat mixture, or the topping was pressed down into the filling before baking. Warm butter incorporates too evenly and doesn’t create the steam-driven air pockets that produce crunch. Topping pressed into the apples gets saturated with juice from below and steams rather than bakes. Always use cold butter worked to irregular clumps, and scatter the topping loosely over the filling without any pressing.
What apples are best for apple crisp?
Firm apples that hold their shape through 40 to 45 minutes of baking produce the best result. Granny Smith is the most reliable choice because of its firm texture and natural tartness. Honeycrisp produces a sweeter, slightly softer result. Braeburn and Fuji are good alternatives with a nice balance of sweetness and structure. Using a combination of two varieties adds complexity; Granny Smith and Honeycrisp together is a particularly good pairing. Avoid McIntosh and Red Delicious, both of which soften into an applesauce-like texture during the full bake time.
How do I know when the apple crisp is done?
The two reliable signs are a deep, even golden-brown color across the topping with no pale patches remaining, and active bubbling of the apple filling visible around the edges of the dish. The bubbling indicates the filling has reached a high enough temperature for the starch to thicken properly. If the topping looks done but the filling isn’t bubbling, tent the dish loosely with foil to prevent further browning and continue baking. A crisp without active bubbling will have a thinner, waterier filling when served.
Can I use frozen apples?
Frozen apples produce an acceptable result but with some texture compromise. Thaw them completely and drain thoroughly before using; frozen apples release considerably more moisture than fresh as they thaw, and excess liquid produces a very wet filling. Increase the flour in the filling to 3 tablespoons to account for the additional moisture. The texture of the apples will be softer than fresh, closer to well-cooked applesauce in the filling layer, but the overall dish still tastes good. For the best result, use fresh firm apples whenever available.
Is this recipe gluten-free?
The standard recipe contains gluten in the all-purpose flour used in both the filling and the topping. To make a fully gluten-free version, replace the flour in both components with a certified gluten-free 1:1 baking flour blend, and use certified gluten-free rolled oats. Standard oats are naturally gluten-free but are frequently processed on shared equipment with wheat, making them unsafe for those with celiac disease. With both certified gluten-free substitutions in place, the texture and flavor are very close to the standard version.
Can I make apple crisp without oats?
Yes. Replace the oats with an equal weight of additional all-purpose flour, which produces a classic streusel topping rather than a crisp one. The texture will be more crumbly and less crunchy; the topping bakes into a sandy, buttery layer over the apples. Some people strongly prefer this version, particularly for its softer texture after resting. For a streusel-style topping, use 1 cup of flour total in the topping instead of the oat-and-flour combination, and keep the butter, sugar, salt, and cinnamon quantities the same.

Conclusion
Apple crisp is a recipe that rewards understanding why each element is there rather than just following the steps. Cold butter in the topping, flour in the filling, lemon juice against the sweetness, loose topping over the apples rather than pressed in: each detail produces a specific, noticeable result, and skipping any of them produces a specific, noticeable problem. That understanding makes the recipe reliable across different ovens, apple varieties, and kitchen conditions.
Once you’ve made apple crisp a few times, it becomes the kind of dessert you make on a weeknight without looking at the recipe because the method is simple enough to hold in memory. It requires almost no equipment, forgives slight variations in apple quantity or sugar level, and produces something that smells like autumn every time it’s in the oven.
If you loved this recipe, save it to your fall desserts and easy baking Pinterest board so you can find it easily later! For more recipes and daily food inspiration, follow TheCookingVibes on Pinterest.
Classic Apple Crisp
Ingredients
Equipment
Method
- Preheat oven to 175°C (350°F). Lightly grease a 9×13-inch baking dish.
- Peel, core, and slice apples into 5mm wedges. Place in a large bowl with brown sugar, granulated sugar, flour, cinnamon, nutmeg, salt, lemon juice, and vanilla. Toss until each apple slice is evenly coated. Transfer to the prepared baking dish.
- In a separate bowl, combine rolled oats, flour, brown sugar, salt, and cinnamon. Stir briefly to distribute. Add cold cubed butter and work it into the dry mixture by pressing and crumbling with a pastry cutter or clean fingertips until irregular clumps form and no large pieces of unmixed flour remain. Stop before the mixture becomes uniform.
- Scatter the topping loosely over the apple filling in even handfuls, covering edge to edge without pressing down.
- Bake on the center rack for 40 to 45 minutes until the topping is deep golden-brown and the filling is actively bubbling at the sides of the dish. If the topping browns early, tent with foil for the remaining bake time, then uncover for the last 5 minutes.
- Transfer to a wire rack and rest for 10 minutes before serving. Serve warm with vanilla ice cream or whipped cream.