Homemade Cake Pops — Moist Centers, Smooth Candy Shell
There’s something about a cake pop that makes even the most ordinary occasion feel a little more intentional. They’re the kind of thing that shows up on a dessert table and disappears first, not because they’re elaborate, but because the ratio of soft cake center to thin candy shell in one bite is genuinely hard to resist. Once you understand the technique, which is mostly about temperature and dipping speed rather than pastry skill, they’re one of the more forgiving confections you can make at home.
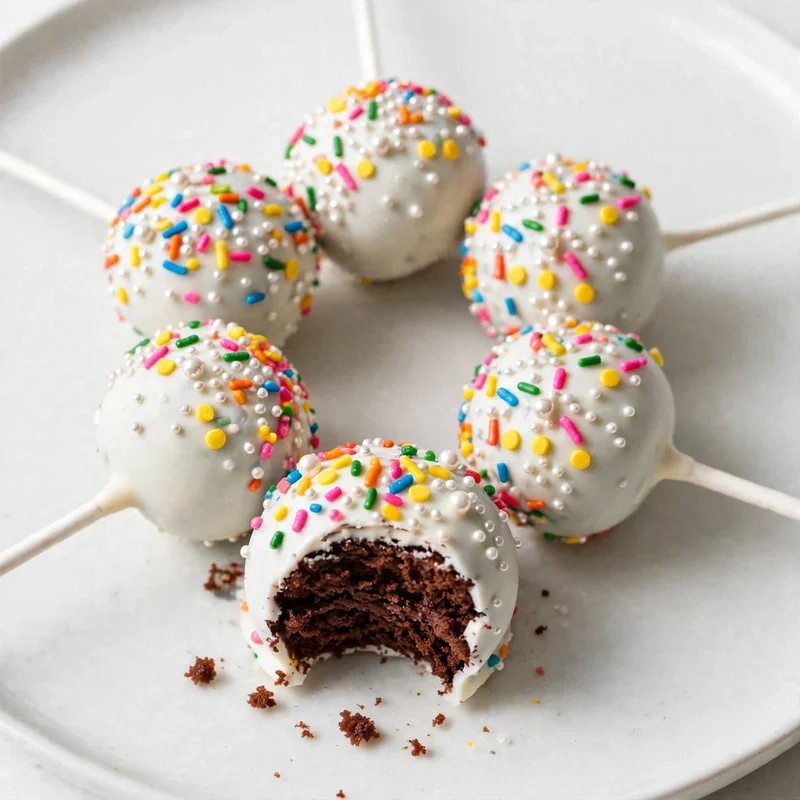
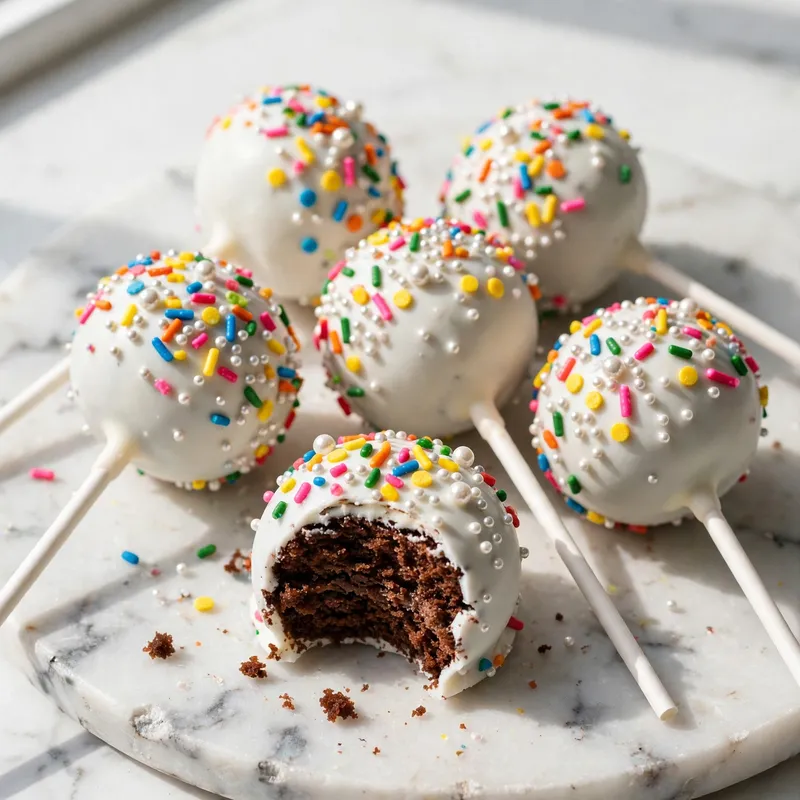
This cake pops recipe builds on a classic crumbled cake and cream cheese frosting base, shaped into balls, attached to lollipop sticks, and dipped in melted candy coating. The method works whether you’re starting from a scratch-baked vanilla or chocolate cake or using a leftover layer cake that needs a second life. The results are consistent, and the coating stays smooth and crack-free when you follow the temperature guidelines. They work for birthdays, baby showers, bake sales, or any occasion where individual handheld desserts make more sense than sliced cake.
Why You’ll Love This Cake Pops Recipe
- Forgiving method with room to adjust. The cake-to-frosting ratio is adjustable by feel, not by strict measurement, which means you can correct the texture before shaping if the mixture is too wet or too dry.
- Smooth coating every time. Thinning the candy melts with a small amount of coconut oil produces a coating that flows evenly over the cold cake ball and sets without cracking or pooling at the base of the stick.
- No specialty baking skill required. The technique relies on temperature management and a steady dipping hand, not on pastry training. Once the logic clicks, the process becomes fast and repeatable.
- Infinitely customizable. Every color of candy melt, every type of sprinkle, and every flavor combination works with the same base method. Change the cake flavor, the coating color, or the decorations and you have a completely different product.
- Make-ahead friendly. Shaped, undipped cake balls freeze for up to 6 weeks. Dip and decorate the morning of the event and the coating sets firm within 20 minutes.
Ingredients You’ll Need
Recipe Timing
| Detail | Info |
|---|---|
| Servings | 24 cake pops |
| Difficulty | Easy to Moderate |
| Course | Dessert, Snack |
| Cuisine | American |
| Prep Time | 40 minutes |
| Cook Time | 30 minutes (baking the cake) |
| Rest Time | 60 minutes (cooling and chilling) |
| Total Time | 130 minutes |
For the cake, any flavor of fully baked and completely cooled cake works here. Vanilla, chocolate, red velvet, lemon, or carrot cake all produce excellent cake pops. The cake must be fully cooled before crumbling; warm cake holds too much steam, which makes the finished mixture too wet and produces pops that crack during coating. If you’re using a leftover cake that’s been stored at room temperature, this is an ideal application.
For the frosting, full-fat cream cheese frosting works better than a standard buttercream for this recipe because it binds the crumbled cake with a slightly tangy flavor that prevents the finished cake pop from tasting cloyingly sweet. It also produces a firmer mixture at cold temperatures, which means the shaped balls hold their shape more reliably during the dipping process. If you prefer a sweeter result, vanilla buttercream is a workable substitute; use it sparingly since it’s looser and can make the mixture too soft.
For the candy melts, temperature is everything. Overheated candy melts turn thick, grainy, and difficult to work with. The target working temperature is between 40 to 43°C (104 to 110°F): fluid enough to coat smoothly but not so thin that it slides off in a pool before setting.
The Cake Base:
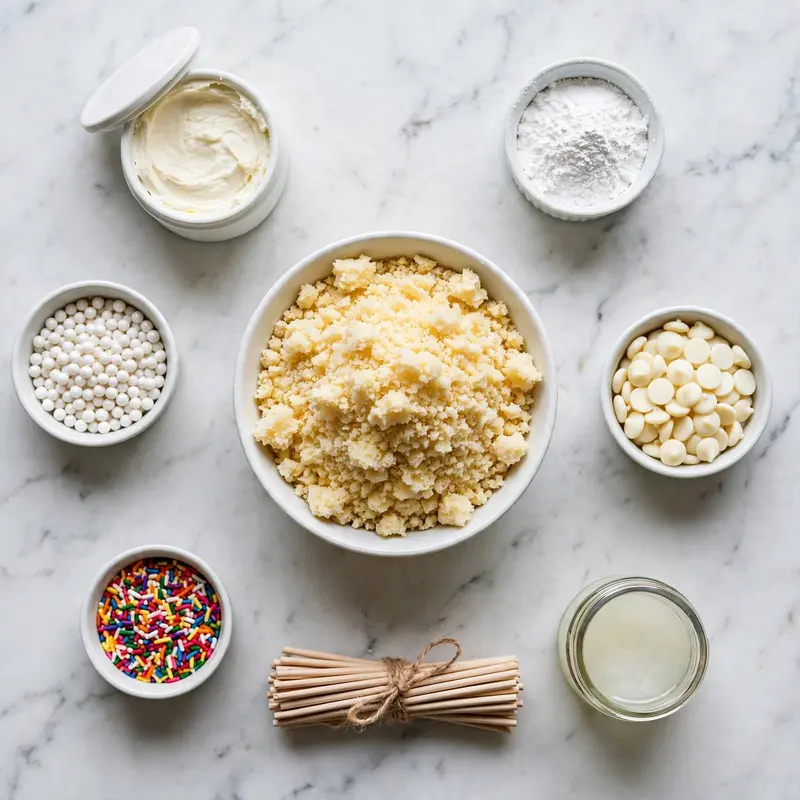
- 1 baked 9-inch round vanilla or chocolate cake layer, fully cooled — the structural and flavor base; any fully baked cake works; stale cake crumbles more easily and evenly
- 3 to 4 tablespoons full-fat cream cheese frosting — the binder; adds moisture and flavor while firming up when cold; start with 3 tablespoons and add more only if needed
- 1/2 teaspoon pure vanilla extract — optional but adds warmth to the base flavor of vanilla cake; omit if the cake is already strongly flavored
Cream Cheese Frosting (makes slightly more than needed):
- 115g (4 oz) full-fat block cream cheese, softened — the binding fat; must be block-style, not tub, for the right consistency
- 1 cup (120g) powdered sugar, sifted — sweetens without adding moisture
- 1/2 teaspoon pure vanilla extract — adds flavor
- Pinch of fine salt — sharpens the sweetness
For Coating and Decorating:
- 400g (about 14 oz) candy melts or white chocolate wafers — the outer shell; candy melts are more forgiving than real chocolate because they don’t require tempering; choose any color
- 1 to 2 teaspoons refined coconut oil or neutral vegetable shortening — added to thin the coating to a dipping consistency; coconut oil produces a slightly glossier finish
- 24 lollipop sticks — standard 6-inch paper or plastic sticks; paper sticks are sturdier for heavier pops
- Sprinkles, sanding sugar, edible glitter, or other decorations — applied immediately after dipping before the coating sets
Allergen and Dietary Disclosure
Cake pops contain gluten (from the cake flour), dairy (cream cheese frosting and butter in the cake), eggs (in the cake), and potentially tree nuts depending on the candy melt brand. Candy melts frequently contain dairy as well; check the label if dairy sensitivity is a concern.
For gluten-free: bake the cake using a certified gluten-free 1:1 flour blend. The frosting and coating steps remain identical. Verify that the candy melts are processed without shared wheat equipment if celiac disease is a concern.
For dairy-free: use a dairy-free cake recipe baked with plant-based milk and vegan butter. Replace the cream cheese frosting with a dairy-free cream cheese alternative using the same quantities. Use dairy-free chocolate chips or a dairy-free candy coating product. The method stays the same; the setting time may be slightly longer depending on the coating’s fat composition.
For egg-free: bake the cake using an egg-free cake recipe. Many egg-free cake recipes use flax eggs or a commercial egg replacer; both produce a crumbly cake suitable for cake pops.
This recipe has not been tested in a certified allergen-free kitchen and cannot be guaranteed safe for any specific allergy.
Equipment Needed
- Large baking sheet lined with parchment paper — for chilling the shaped cake balls before dipping and for placing finished dipped pops while the coating sets. Parchment prevents sticking without leaving any marks on the coating’s surface.
- Foam block or styrofoam stand — for standing the finished pops upright while the coating sets. Setting a dipped pop flat on parchment creates a flat spot on the underside; a foam block allows the coating to dry completely round. A tall glass or mug filled with uncooked rice works equally well.
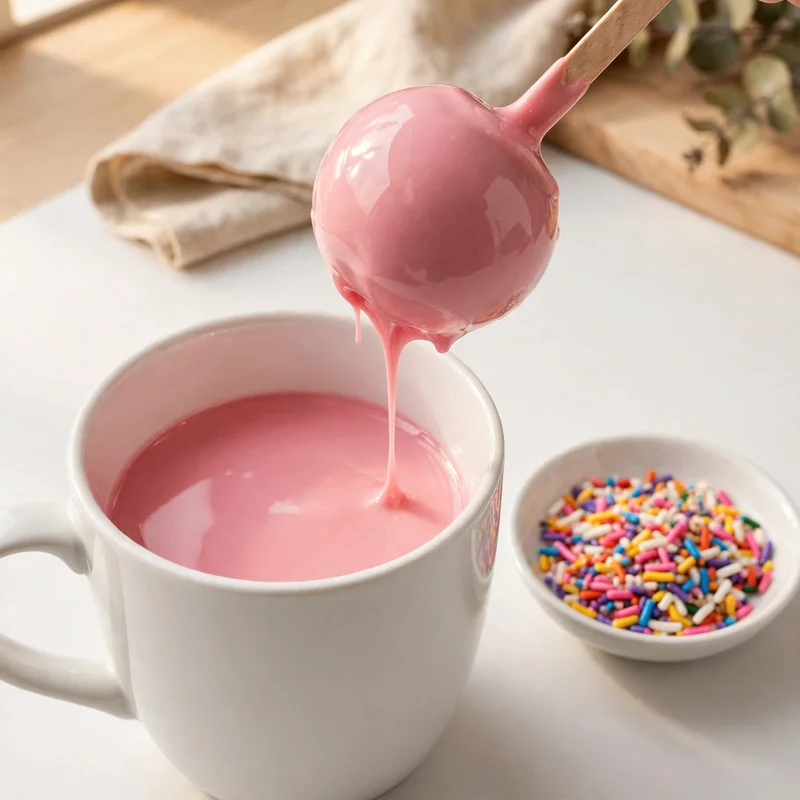
- Deep, narrow microwave-safe container — for melting the candy coating. A tall, narrow mug or a deep cereal bowl allows you to fully submerge the cake ball in one smooth dip rather than trying to coat it in a wide shallow bowl. The coating needs to be deep enough to cover the ball completely in one motion.
- Cookie scoop or tablespoon measure — for portioning the cake mixture into equal-sized pieces before rolling. Consistent size ensures the pops cook evenly on each stick and look uniform on a display. A 1.5 tablespoon cookie scoop produces a pop of about 3.5 to 4cm diameter, which is the standard size.
- Small offset spatula or spoon — for tapping off excess coating during dipping and for smoothing any drips at the base of the stick before the coating sets.
Step-by-Step Directions
Step 1: Bake and Cool the Cake
Bake your chosen cake recipe in a 9-inch pan according to its instructions. Once out of the oven, allow it to cool in the pan for 15 minutes, then transfer to a wire rack and cool completely to room temperature. This takes at least 45 minutes for a standard layer; shortcut it in the refrigerator if needed by placing the rack over a baking sheet and chilling for 20 minutes. A cake that’s even slightly warm when crumbled will produce a mixture that’s too wet and sticky to roll cleanly.

Chef’s Note: Stale cake actually crumbles more cleanly than fresh cake because the structure has set more fully overnight. If you bake the cake the day before and leave it loosely covered at room temperature, the crumbling step the next morning is noticeably easier and produces more even, dry crumbs.
Step 2: Make the Cream Cheese Frosting
Beat the softened cream cheese on medium speed for 90 seconds until completely smooth and lump-free before adding anything else. Add the sifted powdered sugar in two additions, beating briefly after each. Add the vanilla extract and pinch of salt and beat on medium-high for 60 seconds until the frosting is light, creamy, and holds a soft shape when scooped. Set aside at room temperature while you crumble the cake.
Step 3: Crumble and Combine
Break the cooled cake into large chunks and place them in a large bowl. Use clean hands or two forks to crumble the cake into fine, even crumbs with no lumps larger than a pea remaining. Add 3 tablespoons of the cream cheese frosting to the crumbs and work it through with your hands, squeezing and pressing until the mixture holds together firmly when pressed into a ball. Test it: squeeze a small amount in your palm; it should hold a clean shape without cracking and without sticking to your hand or feeling wet on the surface. If it cracks when you squeeze, add another half tablespoon of frosting. If it sticks or feels wet, the mixture is overworked or the frosting quantity was too high; chill for 15 minutes and test again.
Chef’s Note: The cake-to-frosting ratio is the variable that affects everything downstream. Too much frosting produces pops that are heavy and dense, crack during coating from the weight, and taste overly sweet. Too little frosting produces pops that crumble off the stick or develop visible cracks when chilled. The right mixture feels like a firm, workable dough: pliable but not sticky.

Step 4: Shape and Chill the Balls
Use a cookie scoop or tablespoon measure to portion the mixture into 24 equal pieces. Roll each piece firmly between your palms into a smooth, even ball. The rolling motion should take about 10 to 15 seconds per ball; pressing too hard compacts the mixture and produces a dense, heavy pop, while too little pressure leaves the surface rough and porous, which makes coating difficult. Place each ball on the parchment-lined baking sheet as you finish it. Once all 24 are shaped, refrigerate the tray for 30 minutes minimum, or freeze for 15 minutes. The balls must be cold and firm before the sticks go in and before dipping.
Step 5: Insert the Lollipop Sticks
Melt a small amount of the candy coating, about 2 tablespoons, in the microwave in 15-second bursts until just fluid. Dip the tip of each lollipop stick approximately 1.5cm into the melted coating, then push it directly into the center of a chilled cake ball, going about halfway through the ball’s depth. The coating on the stick tip acts as an edible glue that bonds the stick to the cake interior; without it, the stick will pull free during dipping. Return all the sticked balls to the refrigerator for 10 minutes until the coating around the stick has fully set.
Chef’s Note: Pushing the stick in too far, more than halfway through the ball, causes the coating to show through the opposite side when you dip it. Not deep enough, less than one third of the way through, and the stick won’t have enough surface area bonded into the cake to support the weight of the coating during dipping.

Step 6: Melt and Thin the Coating
Place the candy melts in a deep, narrow microwave-safe container. Microwave in 30-second intervals at 50% power, stirring after each interval, until about 90% of the wafers are melted. Stir vigorously; the residual heat in the container will melt the remaining pieces without additional microwave time. If the coating is too thick to flow smoothly from a spoon in a thin, even stream, add coconut oil half a teaspoon at a time and stir until the desired consistency is reached. The coating should flow like a slightly thickened heavy cream, not like a paste. Check the temperature with a thermometer; the ideal working range is 40 to 43°C (104 to 110°F).
Step 7: Dip and Decorate
Hold a cake pop by the stick and lower it straight down into the coating in one smooth motion until the ball is fully submerged. Lift it straight up and let the excess coating drip back into the container for 3 to 4 seconds, then gently tap the stick against the container rim in short, light taps while rotating it slowly. This helps the excess coating fall away without disturbing the layer that’s already adhering to the ball’s surface. Do not shake or spin the pop vigorously; this causes the coating to slide off or creates uneven streaks. Add sprinkles or decorations immediately before the coating begins to set, which happens within 30 to 60 seconds. Stand the finished pop upright in a foam block or rice-filled cup.
Step 8: Set and Display
Stand all finished cake pops upright in the foam block and allow the coating to set completely at room temperature for 20 to 30 minutes. Don’t refrigerate immediately after dipping; the temperature change causes condensation on the coating’s surface, which produces white streaks or a dull, spotty finish called “bloom.” Once the coating is fully set and matte rather than glossy-wet, transfer the display piece to the refrigerator if needed.
Common Mistakes and Troubleshooting
| Problem | Cause | Solution |
|---|---|---|
| Coating cracks after setting | Cake balls were too cold when dipped, causing thermal shock | Remove balls from freezer 5 minutes before dipping; they should be cold but not frozen solid |
| Cake ball falls off the stick during dipping | Not enough candy coating used to anchor the stick, or ball wasn’t chilled enough | Use enough coating on the stick tip and chill for 10 full minutes after inserting sticks before dipping |
| Coating is lumpy or streaky on the surface | Coating was overheated and seized, or the pop was tapped too aggressively | Melt at 50% power in short bursts; tap gently during dripping rather than shaking |
| White streaks on finished coating (bloom) | Pops were refrigerated immediately after dipping | Always set at room temperature for 20 to 30 minutes before chilling; avoid cold drafts during setting |
| Mixture too soft and won’t hold a ball shape | Too much frosting added, or cake was warm when combined | Add the frosting gradually; chill the mixture for 20 minutes and try shaping again before adding more |
| Coating pools at the base of the stick | Too much excess coating, or stick held at an angle during dripping | Hold stick perfectly vertical during dripping; use the offset spatula to remove excess before setting |
Variations and Substitutions
- Chocolate cake pops with dark coating: Use a baked chocolate cake and coat with dark chocolate candy melts. The deep cocoa flavor of the interior against the slightly bitter dark coating produces a more adult, less sweet result than the white or milk chocolate versions.
- Red velvet cake pops: Use a baked red velvet cake and a full-fat cream cheese frosting binding. Coat in white candy melts, which shows the pop’s signature red interior dramatically when someone bites into it. Decorate with red sanding sugar or white sprinkles.
- Funfetti birthday cake pops: Fold 2 tablespoons of rainbow sprinkles into the cake-and-frosting mixture before rolling. The sprinkles remain visible as colorful flecks inside the finished pop, which makes it ideal for birthday displays.
- Lemon cake pops: Use a lemon-flavored cake and add 1 teaspoon of fresh lemon zest to the frosting. Coat in yellow candy melts and decorate with white sugar pearls. The brightness of the lemon against the sweet coating makes this version feel lighter than chocolate or vanilla.
- Oreo cookie pops: Replace the crumbled cake entirely with 24 finely crushed chocolate sandwich cookies (filling included) combined with 85g of softened cream cheese. No frosting is needed. Shape, chill, and coat as usual. The mixture produces a truffle-like interior that sets firmer than cake and holds the stick more securely.
- Gluten-free cake pops: Bake the base cake using a certified gluten-free 1:1 flour blend and verify that the candy melts are labeled gluten-free. All other steps in the recipe remain identical. The texture of the finished pop is nearly indistinguishable from the standard version.
Serving Suggestions
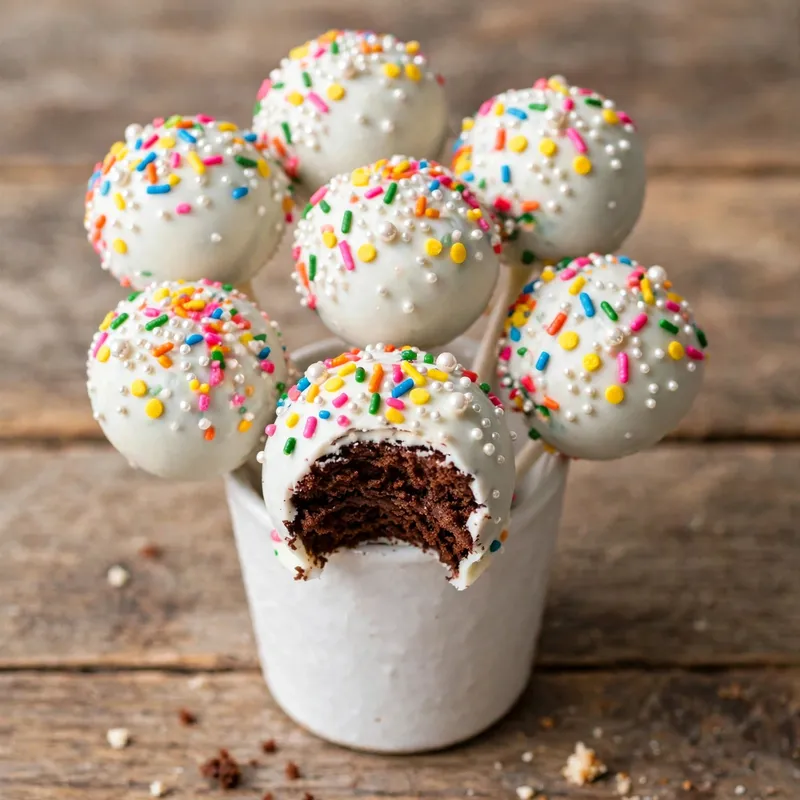
- Display finished cake pops standing upright in a foam block covered with decorative paper, a wide glass vase filled with colored rice or sugar pearls, or a small terracotta pot filled with floral foam. The upright display shows the decorations from every angle and keeps the coating from developing flat spots.
- Wrap individual cake pops in small cellophane bags tied with a ribbon for favors, bake sale packaging, or party bags. Once wrapped, keep them at room temperature and serve within 48 hours for the best coating texture.
- Serve as part of a dessert table alongside full-sized cake, cupcakes, and cookies for a celebration. Cake pops add visual height and variety without requiring utensils, which makes them practical for events where guests are standing and mingling.
- For a display at a children’s birthday party, arrange cake pops in height order in a rectangular foam block to create a grid pattern. Use two or three coordinating colors and consistent decoration style for a finished, cohesive look.
- Dip the tips of finished cake pops in a second color of candy melt to create a two-tone effect, then add sprinkles to the second-color section only. This technique adds a decorative detail that looks complex but takes only about 5 extra seconds per pop.
- For a holiday table, make cake pops in seasonal colors: red and green for winter celebrations, pastels for spring events, orange and black for autumn gatherings. The base recipe stays exactly the same; only the coating color and sprinkle choice change.
Tips for the Best Results
- Temperature is the most important variable in this recipe. Cold cake balls coat cleanly and hold their shape; warm ones produce soft spots or slide along the stick during dipping. Fully melted coating at the right working temperature flows smoothly; overheated coating seizes and streaks. Build the habit of checking both temperatures before each dipping session rather than guessing.
- Add frosting to the crumbled cake gradually. The correct amount varies depending on the cake’s moisture level, which changes with every recipe and every baking session. Start with 3 tablespoons, test the mixture’s cohesion by squeezing a small ball in your palm, and only add more if the mixture cracks. Too much frosting is harder to correct than too little.
- Use a deep, narrow container for dipping, not a wide bowl. The coating needs to be deep enough to fully submerge the ball in one fluid, downward motion. A wide, shallow container forces you to tilt the pop at an angle to coat the sides, which causes uneven dripping and coating runs. A tall mug or a deep dessert bowl works far better.
- Decorate each pop within 30 seconds of dipping. Candy coating begins setting within 45 to 60 seconds of leaving the container, and sprinkles won’t adhere to a surface that’s already set. Work on one pop at a time from dipping through decoration before moving to the next.
- Let the coating set at room temperature, not in the refrigerator. Moving dipped pops directly into the cold fridge causes the coating to contract rapidly and develop condensation on the surface, which produces white spots and streaks called “bloom” that can’t be reversed. A room-temperature rest of 20 to 30 minutes produces a smooth, glossy, uniform coating.
Storage Tips
Refrigerator
Finished, fully coated cake pops keep in the refrigerator for up to 5 days in a sealed container or wrapped individually in plastic wrap. The coating protects the interior from drying out and keeps the cake pop fresh and moist throughout the storage period. Remove from the refrigerator 15 minutes before serving; cold coating can feel slightly waxy, and room-temperature pops taste better and have a more pleasant texture.
Freezer
Uncoated, shaped cake balls freeze very well for up to 6 weeks in a sealed freezer bag. Freeze them in a single layer on the baking sheet first for 1 hour until solid, then transfer to the bag to prevent sticking. Thaw overnight in the refrigerator before inserting sticks and dipping. Fully finished, coated cake pops can also be frozen for up to 2 months; thaw at room temperature for 30 minutes before serving to allow the coating to warm without condensation forming.
Reheating
Cake pops don’t require reheating. If you want to refresh a room-temperature pop that’s been sitting for a day, 8 to 10 seconds at 50% microwave power warms the interior slightly without affecting the coating. Full-power microwave time melts the coating and ruins the finish.
Make-ahead note: The most practical approach for events is to shape and freeze the cake balls up to 6 weeks in advance, thaw them the day before the event, insert sticks, and dip and decorate the morning of. This spreads the work across multiple days and ensures the coating is fresh and glossy on the day.
Nutrition Information
Per serving, approximately one cake pop (1/24 of the recipe):
| Nutrient | Amount |
|---|---|
| Calories | 145 kcal |
| Protein | 1.5g |
| Total Carbohydrates | 20g |
| Dietary Fiber | 0.5g |
| Total Sugar | 16g |
| Total Fat | 7g |
| Saturated Fat | 4g |
| Cholesterol | 22mg |
| Sodium | 75mg |
| Vitamin C | 0mg |
| Calcium | 20mg |
| Iron | 0.4mg |
| Potassium | 45mg |
Nutrition values are approximate and may vary significantly based on cake recipe, frosting quantity, coating type, and decoration used.
Why This Recipe Works
The structural logic of cake pops is simple once you understand it: crumbled cake mixed with a small amount of binding fat forms a workable dough that sets firm when chilled, holds its shape through the dipping process, and provides enough interior moisture to stay soft inside the hardened candy shell. The cream cheese frosting is the better binder for this application compared to standard buttercream because its protein content and lower fat-to-sugar ratio produces a mixture that sets more firmly at cold temperatures. Standard buttercream, which is primarily fat and sugar, remains softer at refrigerator temperature and produces cake balls that are more likely to deform or slide along the stick during dipping.
The candy melt coating works through a simpler chemistry than real tempered chocolate. Candy melts are confectionery coatings that contain vegetable fat rather than cocoa butter as their primary fat, which means they melt and solidify through a straightforward fat crystallization process rather than the multi-stage crystal form transitions that chocolate requires for tempering. This makes them significantly more stable during dipping and more forgiving of temperature fluctuation. Adding a small amount of coconut oil to the melted coating works by introducing additional liquid fat that lowers the mixture’s viscosity without affecting its setting behavior, producing a coating fluid enough to flow into every surface contour of the cake ball without creating a thick, heavy shell.
The thermal management principles in this recipe, cold cake balls, coating at 40 to 43°C, room-temperature setting, are not arbitrary. Cold cake balls create a temperature differential when they contact the warm coating that causes the coating to begin setting quickly and evenly from the inside surface outward. This produces a thin, smooth layer rather than a thick, uneven shell. If the cake balls are too cold, specifically frozen solid, the differential is too great and the coating contracts rapidly as it sets, pulling away from the ball surface in fine cracks. If the balls are too warm, the coating takes too long to set and either slides off or drips into an uneven, thick layer at the base of the stick.
Dipping in a deep, narrow container rather than a wide, shallow bowl ensures that the entire surface of the ball, including the top area where the stick exits, is coated in one smooth downward pass. When a ball is only partially submerged and must be tilted or rotated to coat the sides, the already-coating top begins setting while the sides are still being coated, producing an uneven double-layer effect where the coating is thicker in some areas. The single-pass, full-submersion method eliminates this entirely.
Frequently Asked Questions
Can I make cake pops ahead of time?
Yes, and the make-ahead approach is actually the most practical way to handle this recipe. Shape the cake balls and freeze them uncoated for up to 6 weeks. Thaw overnight in the refrigerator the day before the event. Insert sticks and dip on the day of the event, or at most the morning before. Fully finished cake pops keep at room temperature for up to 48 hours, or in the refrigerator for up to 5 days. Allow refrigerated pops to come to room temperature for 15 minutes before serving.
Why do my cake pops crack after dipping?
Cracking after dipping almost always means the cake balls were too cold, typically frozen solid, when they went into the warm coating. The thermal shock causes the coating to contract rapidly as it sets against the frozen surface, creating hairline cracks. Remove cake balls from the freezer 5 to 10 minutes before dipping so they’re cold and firm but not frozen through. If the balls were refrigerated rather than frozen and still cracking, the coating temperature may be too high; check that it’s in the 40 to 43°C range before dipping.
Can I use real chocolate instead of candy melts?
Yes, but real chocolate requires tempering to set with a glossy, firm finish. Untempered chocolate sets with a dull, slightly soft surface that melts quickly at room temperature and doesn’t hold decorations as cleanly. If you want to use real chocolate, melt it and bring it to tempered working temperature: 31 to 32°C (88 to 89°F) for dark chocolate, 29 to 30°C (84 to 86°F) for milk chocolate. Alternatively, add 1 to 2 teaspoons of refined coconut oil to melted chocolate; this doesn’t fully temper it but produces a firmer, more stable coating than untempered chocolate alone.
How much frosting should I add to the crumbled cake?
Start with 3 tablespoons and test the mixture before adding more. Squeeze a small amount in your palm; it should hold a clean, smooth ball shape without cracking when you open your hand. If it cracks or crumbles, add another half tablespoon. If it sticks to your skin or feels wet and heavy, you’ve added too much; chill the mixture for 20 minutes to firm the fat in the frosting and test again. The correct mixture feels like a workable dough, firm but not stiff.
Why does my coating look streaky and dull rather than smooth and glossy?
Streaking and bloom on candy coating have two common causes. The first is refrigerating the pops immediately after dipping; the rapid temperature change causes condensation and uneven contraction in the coating. Always set at room temperature for 20 to 30 minutes first. The second cause is overheated coating; candy melts that have been heated past about 49°C (120°F) lose their smooth emulsification and produce a grainy, streaky finish. Melt at 50% microwave power in short bursts and keep the working temperature between 40 and 43°C.
Can I use box cake mix instead of baking from scratch?
Yes, and box cake mix produces a perfectly good cake pop. The crumble structure and moisture level of a box cake are consistent and well-suited to the cake pop method. Bake the cake according to the box instructions, allow it to cool completely, and proceed with the recipe exactly as written. The finished cake pops are virtually indistinguishable from scratch-baked in terms of texture and binding behavior.
How do I prevent the cake ball from sliding down the stick during dipping?
Two things prevent sliding. First, the stick tip must be dipped in melted coating and pushed into the ball before the coating sets; this creates an anchoring bond between the stick and the cake interior. Second, the cake ball must be sufficiently chilled and firm before dipping. A ball that’s at room temperature doesn’t grip the stick firmly and slides under the weight of the coating during dipping. Chill for the full 30 minutes before inserting sticks and 10 additional minutes after inserting sticks before dipping.

Conclusion
Cake pops reward a systematic approach more than they reward baking experience. The mixing ratio, the chilling stages, the coating temperature, and the setting method are each individual decisions with specific, predictable outcomes. Once you’ve worked through the logic of each step and understand why each one matters, the process stops feeling fussy and becomes reliable. A second or third batch is noticeably faster and more confident than the first.
What makes cake pops worth making at home rather than buying is the combination of flavor control and visual customization that a store-bought version can’t offer. The same base recipe in six different coating colors with six different decoration styles produces a dessert display that feels genuinely original.
If you loved this recipe, save it to your desserts and party food Pinterest board so you can find it easily later. For more recipes and daily food inspiration, follow TheCookingVibes on Pinterest.
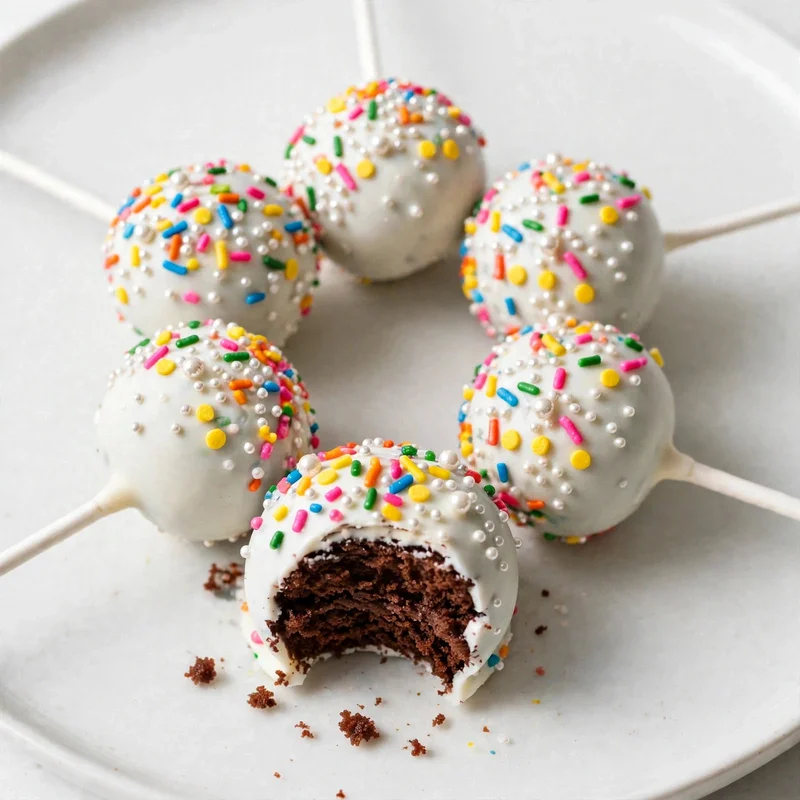
Homemade Cake Pops
Ingredients
Equipment
Method
- Bake your cake and cool completely on a wire rack.
- Make the cream cheese frosting: beat softened cream cheese until smooth, add sifted powdered sugar in two additions, then vanilla and salt. Beat until light and creamy.
- Crumble the cooled cake into fine, even crumbs in a large bowl. Add 3 tablespoons of frosting and work through with clean hands until the mixture holds together firmly when squeezed into a ball. Add more frosting in half-tablespoon increments only if the mixture cracks when pressed.
- Portion the mixture with a cookie scoop into 24 equal pieces. Roll each between your palms into a smooth ball and place on a parchment-lined baking sheet. Refrigerate for 30 minutes until cold and firm.
- Melt 2 tablespoons of candy coating. Dip each stick tip 1.5cm into the melted coating and push halfway into the center of each chilled ball. Return to the refrigerator for 10 minutes to set the anchor coating.
- Melt the remaining candy coating at 50% microwave power in 30-second intervals, stirring between each, until fluid. Thin with coconut oil as needed to reach a flowing consistency. Working temperature should be 40 to 43°C (104 to 110°F).
- Dip each cake pop fully into the coating in one smooth downward motion. Lift straight up and gently tap the stick against the container rim while rotating slowly to shed excess coating. Add decorations immediately and stand upright in a foam block. Allow coating to set completely at room temperature for 20 to 30 minutes before refrigerating or serving.
Notes
- Never refrigerate dipped cake pops immediately after coating; always allow 20 to 30 minutes at room temperature to prevent bloom (white streaking) on the surface.
- Cake balls should be cold but not frozen when dipped; frozen balls cause the coating to crack as it sets.
- Use a deep, narrow container for dipping so the entire ball can be submerged in one smooth motion.
- Shaped, uncoated cake balls freeze for up to 6 weeks; thaw overnight in the refrigerator before inserting sticks and dipping.