Classic Chocolate Cake — Deep Cocoa Flavor, Incredibly Moist
Pull a slice from a properly made chocolate cake and the crumb should hold its shape just long enough for you to lift it onto a plate, then give slightly under a fork with that dense, tender resistance that tells you the texture is exactly right. The frosting should be smooth, not sweet-heavy, with enough cocoa to match the layers underneath. That specific combination, two things made well and balanced against each other, is what makes chocolate cake one of those recipes worth learning from scratch.
This recipe makes a classic two-layer chocolate cake with a Dutch-process cocoa batter and a silky chocolate buttercream. It works for birthdays, weekend baking, or any occasion that could use something properly good. The method is straightforward and the ingredients are things most home kitchens already have. What makes it stand out is the technique at each step: room-temperature dairy, hot coffee in the batter, and a specific frosting ratio that keeps the buttercream rich without becoming cloying.

Why You’ll Love This Chocolate Cake
- Deep, genuine chocolate flavor. Dutch-process cocoa and hot coffee in the batter together pull out a darker, richer cocoa taste than standard supermarket cake mixes can replicate.
- Stays moist for days. Oil in the batter instead of butter keeps the crumb tender even after the cake has been sliced and stored for 48 hours.
- No complicated technique. Both the cake batter and the buttercream come together in one bowl each. You don’t need a stand mixer for the batter at all.
- Scales up cleanly. Need a three-layer cake? The batter divides across three pans without adjusting any quantities, just reduce the bake time by 5 minutes.
- Frosting that actually tastes like chocolate. The buttercream uses a higher cocoa-to-sugar ratio than most recipes, which means it deepens the overall flavor rather than just adding sweetness.
Ingredients You’ll Need
Recipe Timing
| Detail | Info |
|---|---|
| Servings | 12 slices |
| Difficulty | Easy to Moderate |
| Course | Dessert |
| Cuisine | American |
| Prep Time | 25 minutes |
| Cook Time | 35 minutes |
| Rest Time | 60 minutes (cooling before frosting) |
| Total Time | 120 minutes |
For the cocoa, Dutch-process is worth using here. It has a darker color and less acidity than natural cocoa, which produces a deeper flavor in the finished cake. Natural cocoa will work, but the batter will taste slightly sharper and the color will be lighter. If you can only find natural cocoa, reduce the baking soda by 1/4 teaspoon to account for the extra acidity it carries.
For the eggs and buttermilk, room temperature matters. Cold eggs incorporated into oil emulsify unevenly, which can leave the batter slightly curdled-looking before baking. Pull them from the fridge 30 minutes before you start. If you don’t have buttermilk, measure 1 cup of whole milk, stir in 1 tablespoon of white vinegar or lemon juice, and let it sit for 5 minutes. The result isn’t identical but it’s very close.
Chocolate Cake Layers:
- 2 cups (250g) all-purpose flour — the structural base; cake flour produces a slightly more delicate crumb if you want a softer texture
- 2 cups (400g) granulated sugar — balances the bitterness from the cocoa; reduce to 1 3/4 cups if you prefer less sweetness
- 3/4 cup (75g) Dutch-process cocoa powder, sifted — the primary chocolate flavor; sifting prevents bitter lumps
- 2 teaspoons baking soda — the main leavening; reacts with the buttermilk to create lift
- 1 teaspoon baking powder — secondary lift that activates from heat in the oven
- 1 teaspoon fine salt — amplifies every other flavor, including the chocolate
- 2 large eggs, room temperature — provide structure and help emulsify the batter
- 1 cup (240ml) full-fat buttermilk, room temperature — tenderizes the crumb through acidity and adds a faint tang that balances the sweetness
- 1 cup (240ml) hot strong brewed black coffee — amplifies cocoa flavor without adding a coffee taste; use hot water if you prefer, though the flavor will be slightly flatter
- 1/2 cup (120ml) neutral oil, such as sunflower or vegetable — keeps the crumb moist after baking in a way that butter cannot, since oil stays liquid at room temperature
- 2 teaspoons pure vanilla extract — rounds out the overall flavor
Chocolate Buttercream:
- 1 cup (225g) unsalted butter, softened to room temperature — the base; must be soft enough to beat, not melted
- 3 cups (360g) powdered sugar, sifted — provides sweetness and body; sifting prevents lumps in the finished frosting
- 2/3 cup (65g) Dutch-process cocoa powder, sifted — more cocoa than most recipes use; this is what makes the frosting taste genuinely chocolatey rather than just sweet
- 1/3 cup (80ml) heavy cream, room temperature — loosens the frosting to a spreadable consistency; add a tablespoon at a time to control thickness
- 2 teaspoons pure vanilla extract — adds warmth
- 1/4 teaspoon fine salt — cuts the sweetness and sharpens the cocoa

Allergen and Dietary Disclosure
This chocolate cake contains gluten (all-purpose flour), dairy (buttermilk, butter, heavy cream), and eggs. It may also be processed near facilities handling nuts, depending on your cocoa and chocolate brands.
For a dairy-free version, replace the buttermilk with unsweetened oat milk plus 1 tablespoon of lemon juice. Replace the butter in the frosting with a good-quality vegan butter stick and the heavy cream with full-fat coconut cream. The frosting will be slightly less stable at warm room temperature, so keep the assembled cake refrigerated until 30 minutes before serving.
For gluten-free, a 1:1 gluten-free baking flour blend with xanthan gum works reasonably well here. The texture will be slightly denser and the layers may not rise as tall, but the flavor holds up well. Avoid gluten-free flours that are mostly rice flour alone; they tend to produce a gritty crumb in baked goods with this much moisture.
This recipe has not been tested in a certified allergen-free kitchen and cannot be guaranteed safe for any specific allergy.
Equipment Needed
- Two 9-inch (23cm) round cake pans — the recipe is calibrated for this size. An 8-inch pan will produce thicker layers that need 5 to 8 more minutes in the oven; a 9×13-inch pan works for a sheet cake, baked for about 40 minutes.
- Parchment paper circles — cut rounds to fit the base of each pan. A sprayed-and-floured pan alone often results in layers that stick at the center and break when you try to turn them out.
- Large balloon whisk — the batter is thin enough that a whisk works better than a wooden spoon; it incorporates the dry ingredients without overworking the flour.
- Hand or stand mixer — for the buttercream. The cream and butter need sustained beating to reach the right airy consistency. A whisk by hand can work but takes considerable effort.
- Offset spatula — for frosting. A straight butter knife leaves drag marks in the buttercream. An offset spatula gives you more control over the angle and lets you smooth the sides cleanly.
- Wire cooling rack — both layers need to cool completely before frosting. A rack lifts them off the surface so the bottom doesn’t steam and soften.
Step-by-Step Directions
Step 1: Prepare the Pans and Preheat
Set your oven to 175°C (350°F). Grease both 9-inch cake pans with butter or neutral oil spray, line the base of each with a parchment circle, then grease the parchment too. Dust the sides with a light coating of cocoa powder and tap out the excess. Using cocoa instead of flour means no white residue on the finished cake edges.
Step 2: Mix the Dry Ingredients
Whisk together the flour, sugar, cocoa powder, baking soda, baking powder, and salt in a large mixing bowl for about 30 seconds, until the mixture looks evenly combined with no visible streaks of cocoa. Sift the cocoa if you see any lumps.
Step 3: Add the Wet Ingredients
Make a well in the center of the dry ingredients. Add the eggs, buttermilk, oil, and vanilla. Whisk from the center outward, gradually pulling in the dry ingredients as you go, until you have a smooth, thick batter.

Chef’s Note: The batter at this stage will feel quite thick. That’s correct. The coffee comes next and thins it considerably.
Step 4: Add the Hot Coffee
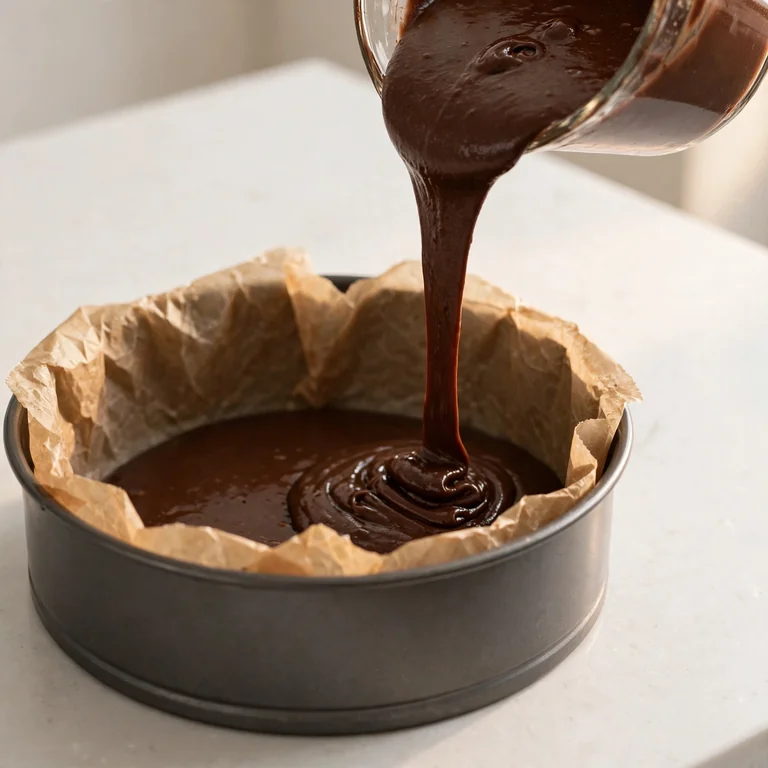
Pour the hot coffee into the batter slowly while whisking. The batter will thin out significantly and become almost pourable. This is normal and expected. Hot liquid blooms the cocoa, deepening its color and flavor in a way that adding cold liquid doesn’t. The finished batter should be slightly thicker than heavy cream.
Step 5: Bake the Layers
Divide the batter evenly between the two prepared pans. Tap each pan firmly on the counter two or three times to release any large air bubbles. Bake on the center rack at 175°C (350°F) for 30 to 35 minutes.
The cake is done when a toothpick inserted into the center comes out with just a few moist crumbs attached, not wet batter. The top should spring back lightly when pressed with a fingertip. Pull the pans from the oven even if the center looks barely set; carryover heat continues cooking the layers for several minutes on the counter.
Chef’s Note: Both pans should sit on the same oven rack rather than stacking on two separate racks. Splitting them across racks means uneven heat and one layer often bakes faster than the other. If your oven is too small for both pans side by side, rotate the pans halfway through baking.
Step 6: Cool the Layers Completely
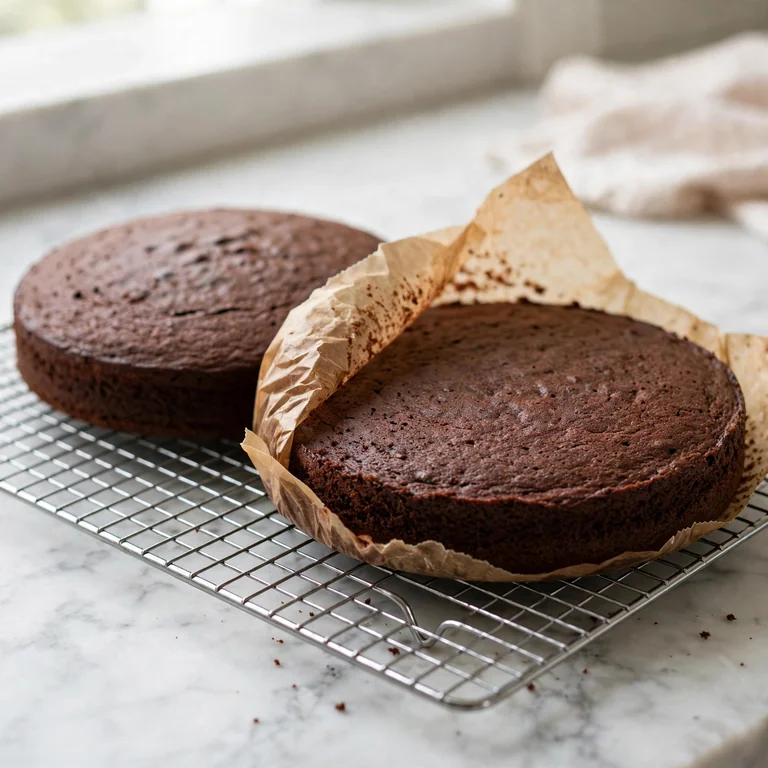
Let the layers cool in their pans on a wire rack for exactly 15 minutes, then run a thin knife around the edge of each pan and turn the layers out onto the rack. Peel away the parchment immediately. Allow them to cool completely to room temperature before frosting, at least 45 minutes. A warm layer will melt the buttercream on contact.
Step 7: Make the Buttercream
Beat the softened butter in a large bowl on medium-high speed for 3 full minutes until it looks pale and slightly fluffy. Add the sifted cocoa powder and beat for another minute. Add the sifted powdered sugar in two additions, beating after each until incorporated. Add the vanilla, salt, and heavy cream one tablespoon at a time, beating on medium speed until the frosting reaches a smooth, spreadable consistency.
Chef’s Note: Beat the frosting for at least 4 to 5 minutes total after all the ingredients are in. The extended beating whips air into the butter and changes the texture from dense and stiff to light and creamy. Under-beaten buttercream smears rather than spreading cleanly.
Step 8: Assemble and Frost
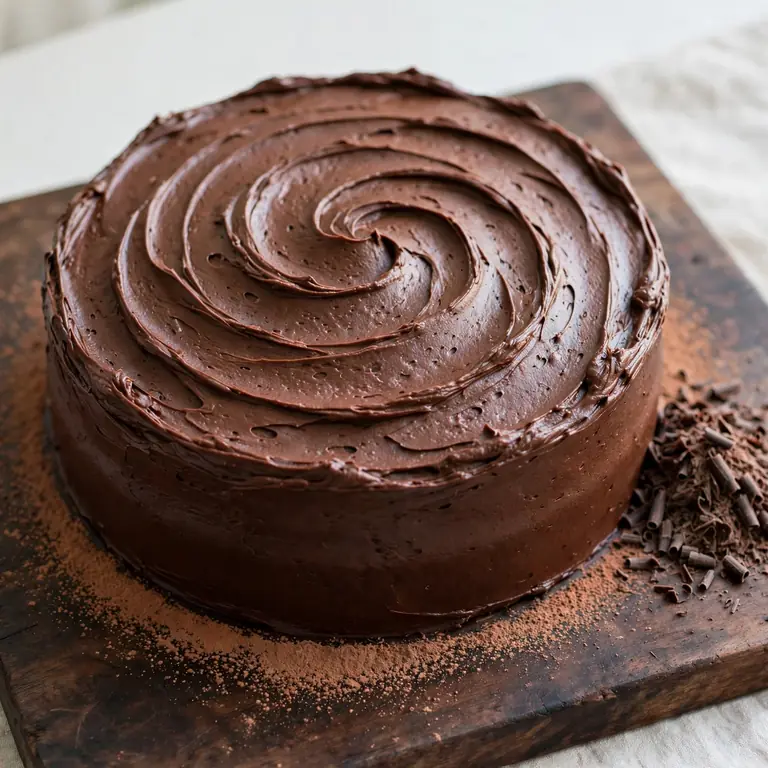
Place one cooled layer on a cake board or serving plate. Spread a generous layer of buttercream over the top, reaching the edges evenly. Set the second layer on top, pressing gently to level it. Apply a thin “crumb coat” of frosting over the entire outside of the cake and refrigerate for 20 minutes. This seals in the crumbs so the final coat stays clean. Apply the remaining frosting in smooth strokes with an offset spatula. Swirl the top however you like.

Common Mistakes and Troubleshooting
| Problem | Cause | Solution |
|---|---|---|
| Layers sink in the center | Oven temperature too low, or pans opened too early | Use an oven thermometer to verify actual temp; don’t open the oven in the first 20 minutes |
| Dry, crumbly crumb | Overbaked or too much flour measured by scooping directly | Spoon flour into the measuring cup and level it; pull layers when toothpick shows moist crumbs, not when completely clean |
| Buttercream is too stiff | Not enough liquid, or butter too cold | Add heavy cream a tablespoon at a time and beat; butter must be genuinely soft, not just slightly cool |
| Buttercream looks greasy and separated | Butter was too warm or partially melted | Refrigerate the bowl for 10 minutes and then beat again on medium speed until it comes back together |
| Layers stick to the pan | Parchment not used, or pan not greased properly before parchment | Always use parchment circles, greased on both sides, in addition to greasing the pan walls |
| Frosting tears the cake surface | Crumb coat was skipped, or layers weren’t fully cool | Always apply a thin crumb coat first and chill for 20 minutes before the final layer of frosting |
Variations and Substitutions
- Mocha cake: Add 1 teaspoon of espresso powder directly to the dry buttercream ingredients. It deepens the chocolate flavor in the frosting without making it taste strongly of coffee, and pairs well with the coffee already in the batter.
- Chocolate orange: Stir 1 tablespoon of orange zest into the cake batter along with the vanilla. Replace 1 tablespoon of the heavy cream in the buttercream with fresh orange juice. The citrus cuts through the richness in a way that feels deliberate.
- Sheet cake: Pour all the batter into a greased and parchment-lined 9×13-inch pan. Bake at 175°C (350°F) for 38 to 42 minutes. Frost directly in the pan once cool. This version is easier to transport and serves up to 20.
- Cupcakes: Line a standard 12-cup muffin tin and fill each cup about 2/3 full. Bake at 175°C (350°F) for 18 to 22 minutes. This batter makes 22 to 24 cupcakes total.
- Gluten-free: A 1:1 gluten-free baking blend with xanthan gum produces a denser but still moist cake. Expect the layers to be slightly shorter and the crumb slightly tighter.
- Less sweet: Reduce the sugar in the batter to 1 3/4 cups and the powdered sugar in the frosting to 2 1/2 cups. The flavor shifts toward more bitter cocoa, which some people genuinely prefer.
Serving Suggestions
- Serve at room temperature for the best texture. Cold buttercream straight from the fridge is firmer and waxy; let the cake sit out for 30 minutes before slicing if it’s been refrigerated.
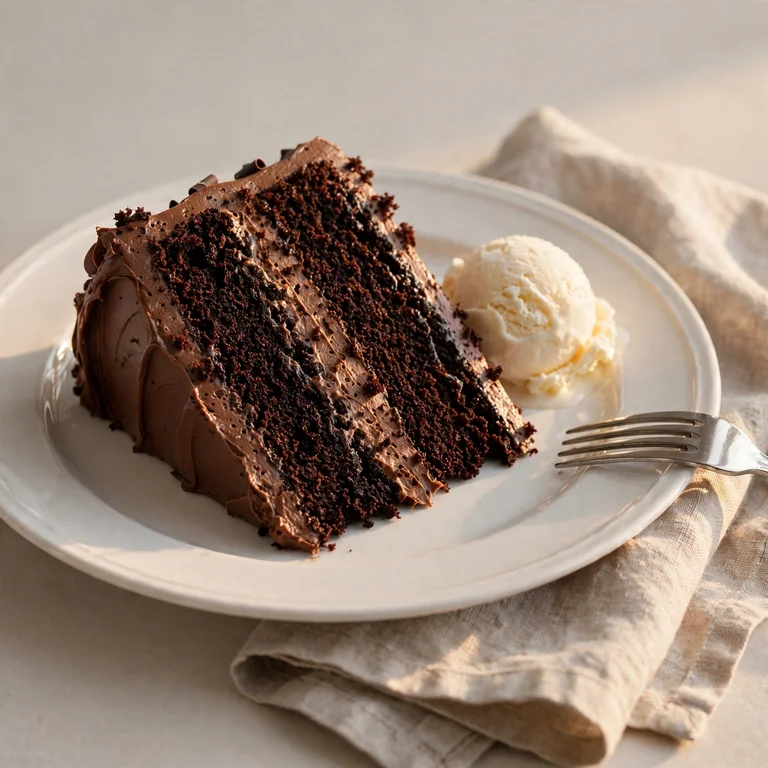
- A scoop of vanilla ice cream alongside a slice turns this from an everyday dessert into a dinner-party one without any extra effort.
- A cup of strong black coffee or a glass of cold whole milk are the two best things to drink with this. Both balance the richness without competing with the flavor.
- For a birthday table, press a ring of fresh raspberries around the top edge of the cake after frosting. The tartness of the berries against the chocolate is one of those combinations that’s hard to improve on.
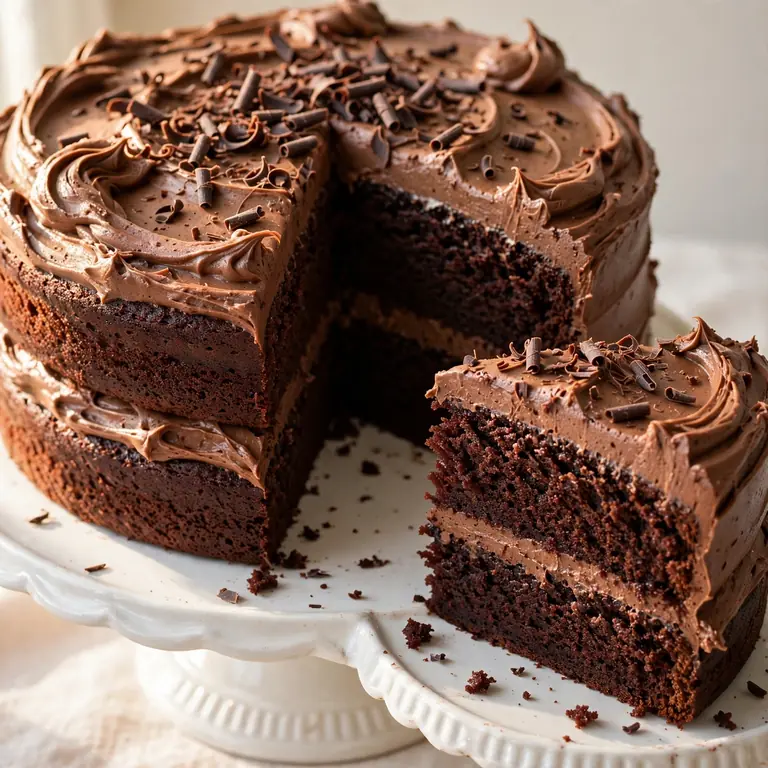
- If you’re serving this as a celebration cake, slice it at the table rather than pre-cutting. The clean reveal of the two layers and the frosting between them is half the appeal.
Tips for the Best Results
- Measure flour by spooning, not scooping. Scooping the measuring cup directly into the flour bag compacts it and can add up to 30% more than the recipe calls for. Use a spoon to fill the cup, then level it off with a straight edge.
- The coffee is worth using. It doesn’t make the cake taste like coffee — it makes it taste more deeply of chocolate. The compounds in coffee share molecular similarities with cocoa and they amplify each other. Hot water is a workable substitute, but the flavor difference is noticeable.
- Don’t rush the cooling. Frosting a warm layer causes two problems: the buttercream melts on contact, and any trapped heat continues to create moisture, which softens the crumb under the frosting. 60 minutes is the minimum. Overnight at room temperature under a loose cover is fine too.
- Beat the butter first, always. Adding powdered sugar to un-beaten butter produces a dense, heavy frosting. Three minutes of beating the butter alone before adding anything else is what creates the base of an airy buttercream.
- Taste the frosting before it’s finished. Cocoa bitterness varies by brand. If the frosting tastes sharp rather than balanced, add another tablespoon of powdered sugar and beat again. If it tastes too sweet, a small pinch more of salt often corrects it without changing the texture.
Storage Tips
Refrigerator
A frosted cake keeps well in the refrigerator for up to 5 days. Press a sheet of plastic wrap directly against any cut surfaces to prevent the crumb from drying out. The buttercream forms a protective layer over the outside of the cake, so the frosted exterior doesn’t need to be covered tightly. Bring slices to room temperature for 20 to 30 minutes before eating.
Freezer
Unfrosted cake layers freeze well for up to 3 months. Wrap each cooled layer tightly in two layers of plastic wrap and then in foil. Thaw overnight in the fridge, then bring to room temperature before frosting. A fully frosted and assembled cake can also be frozen: chill it uncovered in the freezer for 1 hour until the frosting is firm, then wrap the whole cake. Thaw overnight in the fridge.
Reheating
This cake doesn’t need reheating in the traditional sense, but if a refrigerated slice tastes dry or the frosting is too firm, 10 to 12 seconds in the microwave at 50% power restores the texture without melting the buttercream. Full power overheats the frosting and makes it oily.
Make-ahead note: Bake the layers up to 2 days ahead, wrap them tightly, and store at room temperature. Make the buttercream up to 3 days ahead and refrigerate in a covered container. Beat it again for 2 minutes before using to restore its texture.
Nutrition Information
Per serving, approximately one slice (1/12 of the assembled cake):
| Nutrient | Amount |
|---|---|
| Calories | 520 kcal |
| Protein | 6g |
| Total Carbohydrates | 68g |
| Dietary Fiber | 3g |
| Total Sugar | 52g |
| Total Fat | 27g |
| Saturated Fat | 13g |
| Cholesterol | 75mg |
| Sodium | 320mg |
| Vitamin C | 0mg |
| Calcium | 55mg |
| Iron | 2.8mg |
| Potassium | 220mg |
Nutrition values are approximate and may vary based on brands and portion sizes.
Why This Recipe Works
The most common problem with homemade chocolate cake is a dry crumb that hardens after a day. This recipe uses oil rather than creamed butter as the primary fat, and the difference matters over time. Butter is about 80% fat and 20% water; the water evaporates during baking and leaves behind a crumb that firms up as it cools. Oil is 100% fat and stays liquid at room temperature, which means the crumb retains its moisture even after the cake has been stored overnight.
The hot coffee in the batter works through a process called “blooming.” When cocoa powder comes into contact with hot liquid, its aromatic compounds become more volatile and more evenly distributed through the batter. The result is a darker, deeper cocoa flavor that cold liquid can’t replicate. The coffee itself doesn’t register as a distinct taste in the finished cake because its flavor is masked by the sugar and vanilla, but its effect on the cocoa is clear.
Buttermilk tenderizes the crumb through acidity. The lactic acid in buttermilk breaks down some of the gluten strands formed when flour gets wet and mixed, producing a softer, more delicate texture than you’d get from plain milk. The acidity also reacts with the baking soda to produce carbon dioxide bubbles, contributing to the lift in the layers.
The frosting uses a higher cocoa-to-sugar ratio than standard recipes. Most chocolate buttercreams start from a base of 4 cups powdered sugar to 1/2 cup cocoa, which produces something sweet first and chocolatey second. This recipe inverts that priority to 3 cups sugar and 2/3 cup cocoa, which produces a frosting that tastes like the cake it’s going on. The salt in the frosting is not decorative — it sharpens the perception of chocolate the same way salt in a brownie does.
I’ve tested this recipe with both Dutch-process and natural cocoa at the same quantities. Dutch-process produces a darker, smoother, more balanced flavor. Natural cocoa produces a slightly sharper, more acidic result that some tasters describe as more “old-fashioned” in character. Both are legitimate, but Dutch-process is the better default for a classic layer cake where you want the chocolate flavor to read as rich rather than sharp.
Frequently Asked Questions
Can I make this chocolate cake ahead of time?
Yes, and it actually benefits from resting. Bake the layers a day or two ahead, wrap them tightly in plastic wrap, and keep them at room temperature. The crumb softens slightly overnight and the flavor deepens. Assemble and frost on the day you plan to serve it, or refrigerate the fully assembled cake for up to 5 days. Bring it to room temperature for 30 minutes before serving so the buttercream softens and the crumb loosens back up.
Why did my cake layers sink in the middle?
Two things cause this most often: the oven temperature was too low, or the layers were disturbed before they had a chance to set. Use an oven thermometer rather than trusting the dial — many home ovens run 15 to 25°F cooler than their display shows. Don’t open the oven door before the 25-minute mark. Also make sure both chemical leaveners (baking soda and baking powder) are fresh; leaveners older than 6 months often lose enough potency to affect rise.
Can I replace the buttermilk with regular milk?
You can make a substitute that works well enough. Stir 1 tablespoon of white vinegar or fresh lemon juice into 1 cup of whole milk and let it sit for 5 minutes until it curdles slightly. This mimics the acidity of buttermilk closely enough that the batter behaves similarly. The texture of the finished cake is very close, though genuine buttermilk produces a slightly more tender crumb because of its higher lactic acid content. Low-fat milk works in a pinch but produces a slightly drier result.
How do I know when the cake is done baking?
The most reliable test is a toothpick or thin wooden skewer inserted into the very center of the layer. It should come out with a few moist crumbs stuck to it. If it comes out wet with raw batter, the layers need more time. If it comes out completely clean with no crumbs at all, the layers may be slightly overbaked and the crumb will be drier than it should be. The surface of the cake should also spring back gently when you press the center lightly with a fingertip rather than staying compressed.
My buttercream is lumpy. How do I fix it?
Lumpy buttercream almost always comes from powdered sugar that wasn’t sifted before adding, or from butter that wasn’t beaten long enough before the sugar went in. If you notice lumps in the finished frosting, continue beating on medium-high speed for another 3 to 4 minutes. Most of the lumps will work out. If any remain, press the frosting through a fine-mesh sieve and beat again. For future batches, sift both the powdered sugar and cocoa powder before they go into the bowl.
Can I use salted butter in the frosting?
Yes, but reduce the additional salt in the frosting recipe to a small pinch rather than the full 1/4 teaspoon. Salted butter adds a variable amount of sodium depending on the brand, so tasting as you go matters more when you use it. The overall effect is similar — the salt still cuts through the sweetness — but you have less control over the final balance.
How do I get clean, even slices when cutting the cake?
Use a long sharp knife dipped in hot water and wiped dry between each cut. The warmth prevents the frosting from dragging, and a dry blade prevents the crumb from sticking. Press straight down through the layers rather than sawing back and forth. Chilling the fully assembled cake for 30 minutes before cutting also helps the frosting firm up enough to hold its shape as you slice.

Conclusion
A chocolate cake made properly is one of those recipes you stop looking for alternatives to. The oil-based batter stays moist past day one, the coffee amplifies the cocoa in a way that’s hard to pinpoint but easy to taste, and the frosting has enough cocoa in it to feel like it belongs on the cake rather than just covering it. Those three things, made carefully in order, are what separate this from a box mix version.
Once you’ve baked this chocolate cake a couple of times, the method becomes fast and reliable. You’ll know what the batter should look like before the coffee goes in, what the toothpick should show when the layers are ready, and exactly how long the buttercream needs to beat to go from stiff to creamy. That familiarity is worth building.
If you loved this recipe, save it to your chocolate desserts Pinterest board so you can find it easily later. For more same recipes follow Thecookingvibes Pinterest account.
Classic Chocolate Cake
Ingredients
Equipment
Method
- Preheat oven to 175°C (350°F). Grease two 9-inch round cake pans, line with parchment circles, grease the parchment, and dust the sides with cocoa powder.
- In a large bowl, whisk together flour, sugar, cocoa, baking soda, baking powder, and salt until no streaks remain.
- Add eggs, buttermilk, oil, and vanilla to the dry ingredients. Whisk from the center outward until a smooth, thick batter forms.
- Pour in the hot coffee while whisking slowly. The batter will thin noticeably. Whisk until fully incorporated and uniform.
- Divide the batter evenly between the two pans. Tap each pan on the counter twice to release air bubbles. Bake on the center rack for 30 to 35 minutes, until a toothpick comes out with just a few moist crumbs.
- Cool in pans on a wire rack for 15 minutes, then turn out, peel away the parchment, and cool completely, at least 45 minutes.
- For the buttercream: beat softened butter for 3 minutes until pale. Add sifted cocoa and beat 1 minute more. Add powdered sugar in two additions, beating after each. Add vanilla, salt, and cream one tablespoon at a time, beating until smooth and spreadable, about 4 to 5 minutes total.
- Place one cooled layer on a serving plate. Spread buttercream evenly on top. Place the second layer on. Apply a thin crumb coat over the entire cake and refrigerate 20 minutes. Apply remaining frosting in smooth strokes. Serve at room temperature.