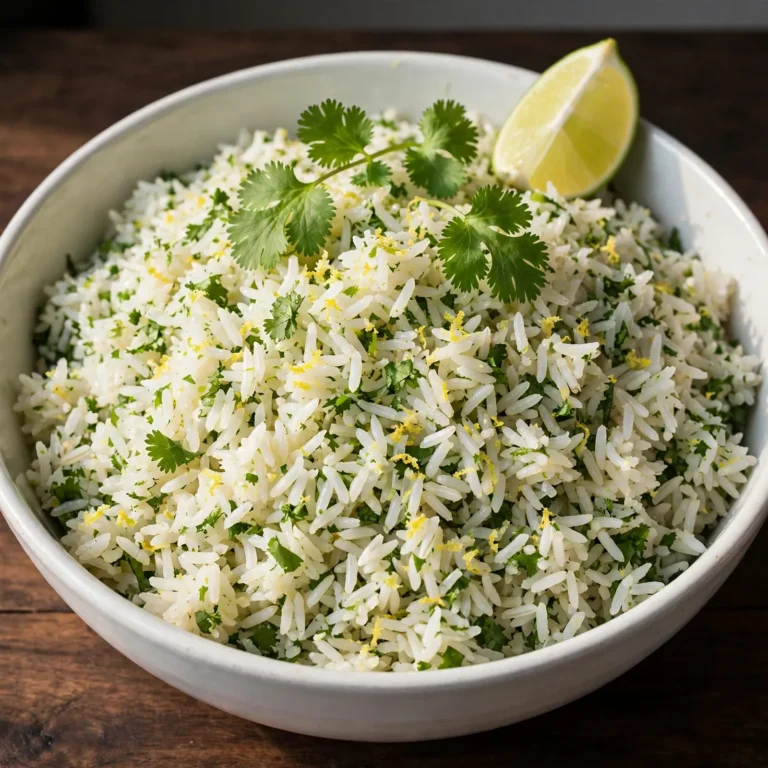
Easy Spanish Rice — Toasted, Fluffy, Deeply Tomato-Seasoned
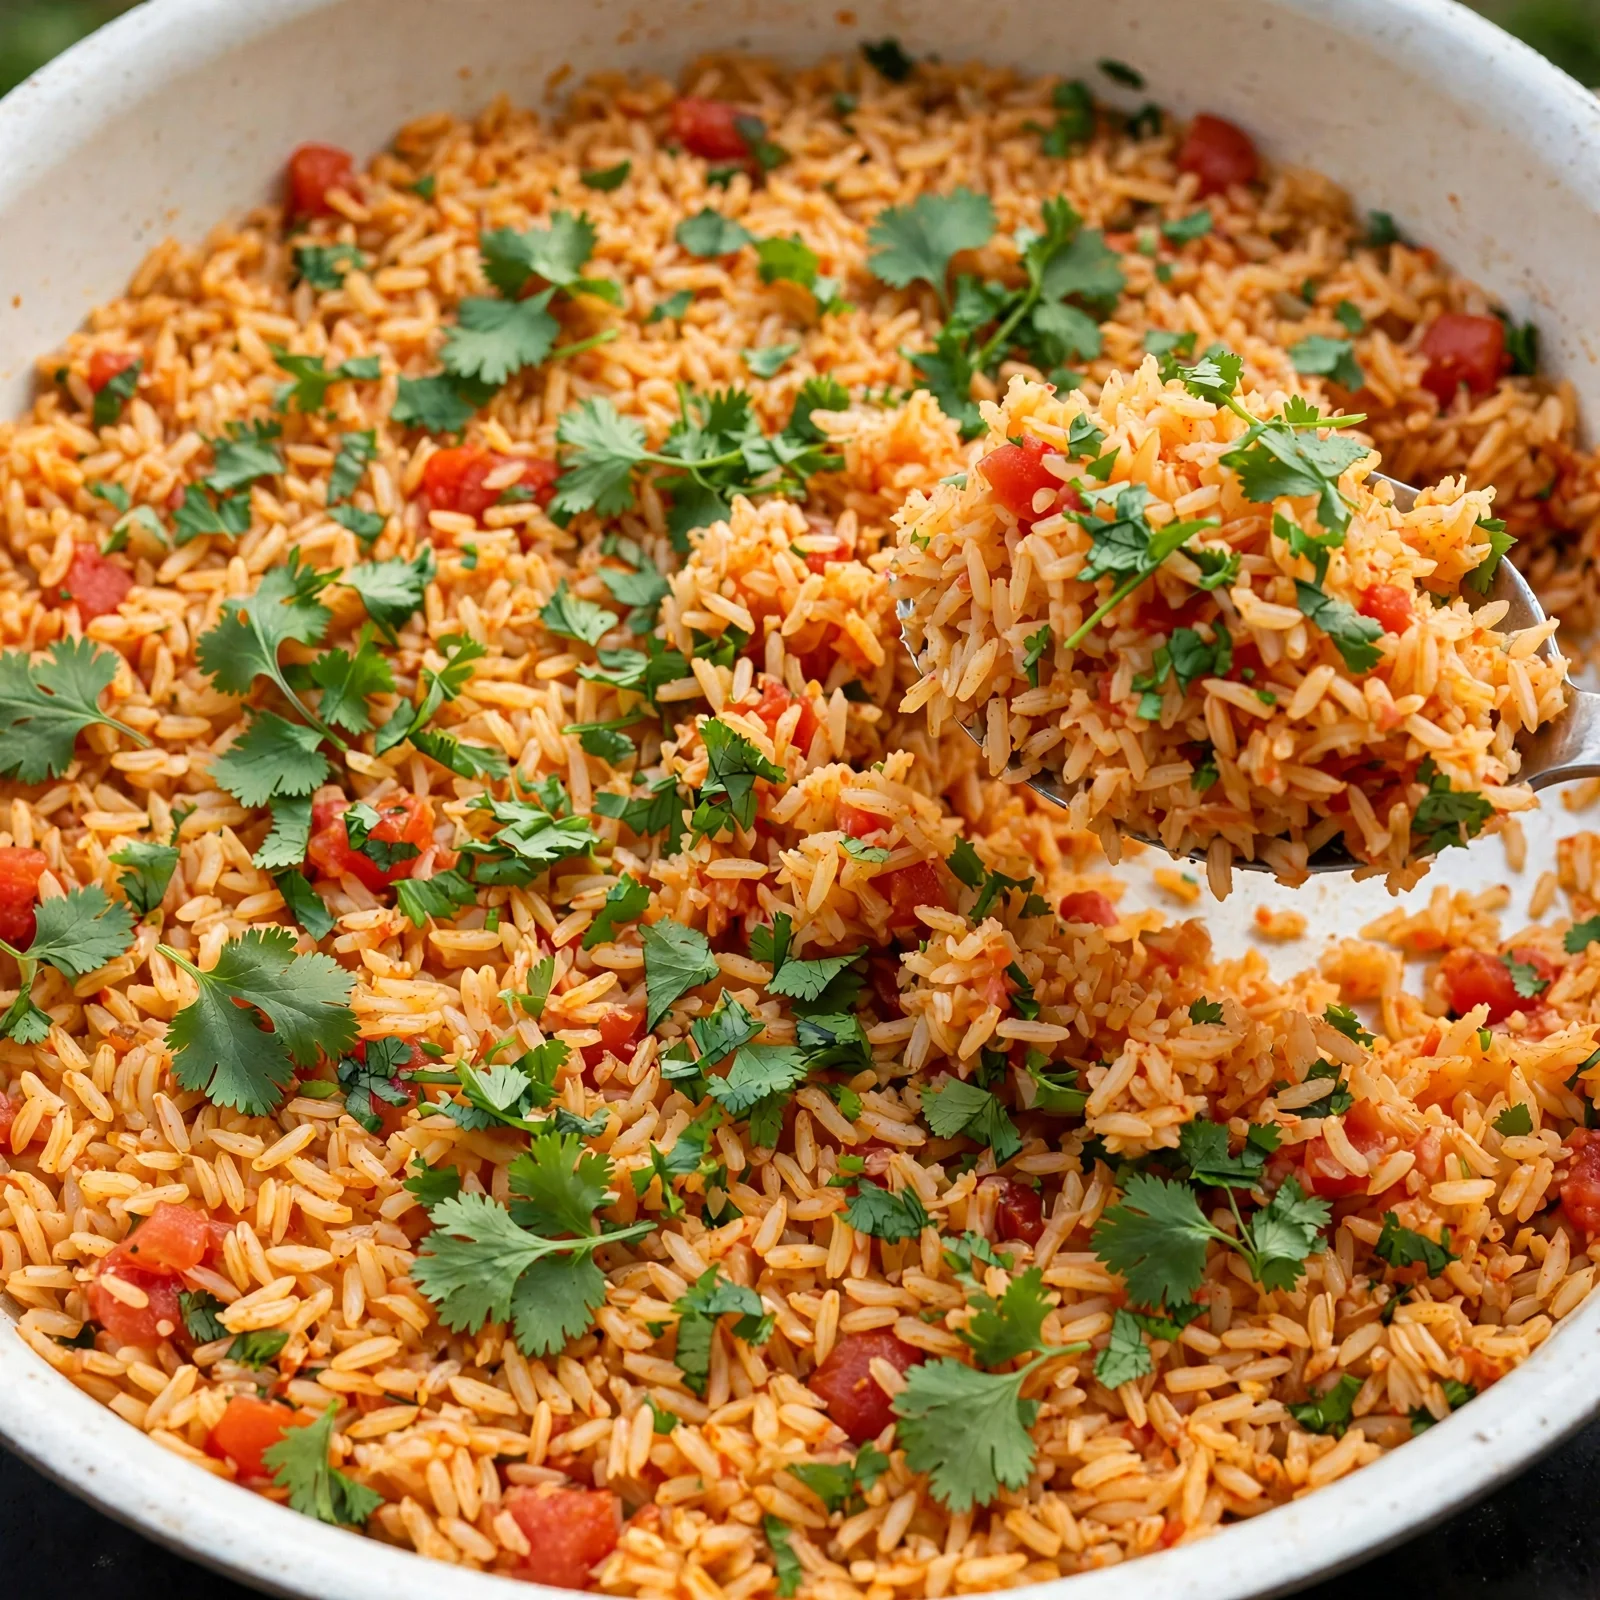
The version of Spanish rice that most people grew up eating was something between a side dish and an afterthought: pale orange, slightly sticky, with a vague tomato flavor that had more to do with ketchup than anything genuinely spiced. The version worth making is different. It starts with dry rice toasted in oil until the grains turn a warm golden color and smell nutty, which builds a flavor foundation into the rice before a drop of liquid has been added. Combined with a deeply seasoned tomato base, garlic, cumin, and chili, the resulting dish is fluffy-grained, deeply flavored, and genuinely worth making rather than opening a boxed mix.
This Spanish rice recipe uses long-grain white rice toasted in a wide skillet, then simmered in a mixture of tomato sauce, low-sodium chicken broth, garlic, cumin, chili powder, and onion until every grain is tender and separate rather than clumped. The whole recipe takes 35 minutes from start to finish, serves 6 as a side, and makes the best rice accompaniment to tacos, enchiladas, grilled chicken, or any Mexican-inspired dinner that deserves a properly seasoned base.
Why You’ll Love This Spanish Rice Recipe
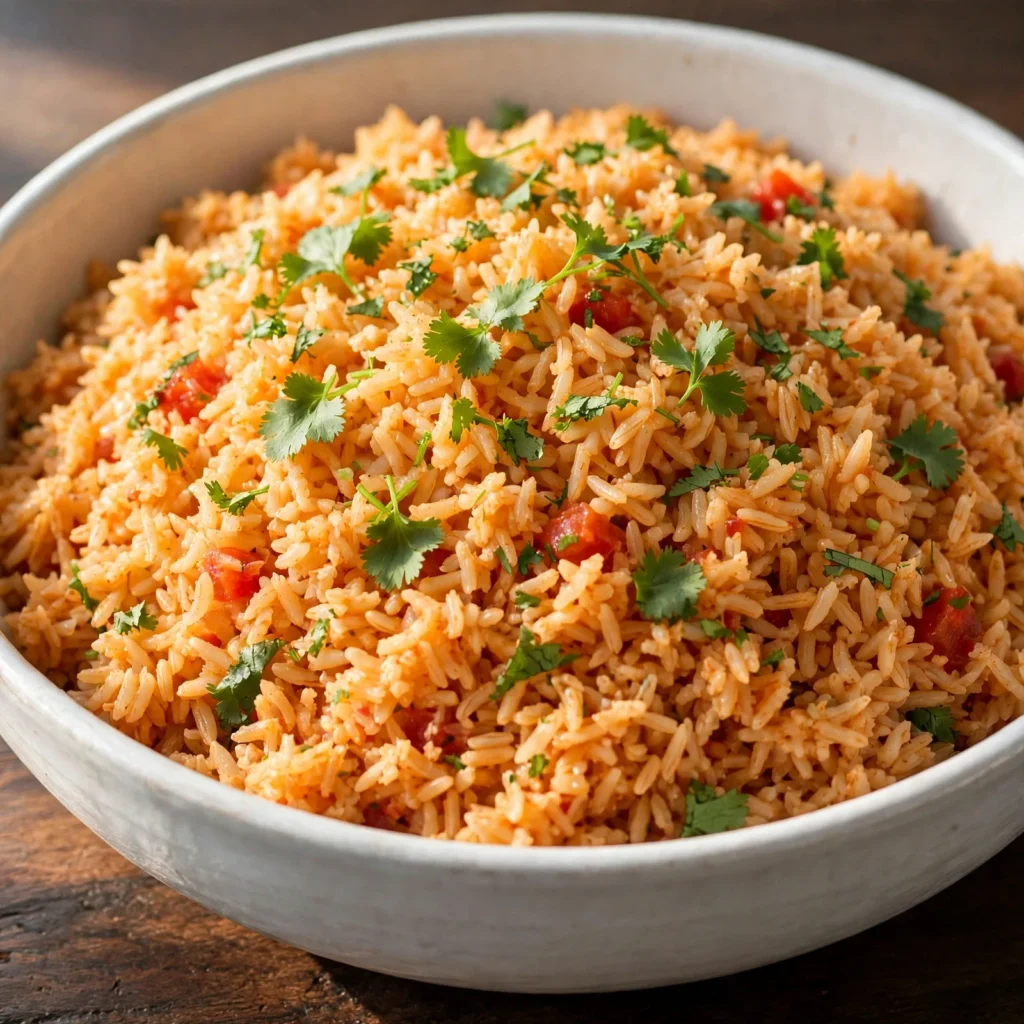
- Toasting the rice before liquid goes in changes everything. The 3 to 4 minutes of dry toasting in oil produces nutty aromatic compounds in the outer starch layer that make the finished rice taste deeper and more complex than raw-to-liquid rice ever can.
- Grains stay separate, not sticky or clumped. The toasting step seals the outer surface of each grain and reduces the starch that leaches into the cooking liquid; the result is distinct, individual grains rather than a sticky mass.
- Ready in 35 minutes with minimal active work. Most of the cook time is hands-off simmering; the total active work is under 10 minutes.
- Genuinely versatile as a side. The seasoning profile suits tacos, enchiladas, grilled chicken or fish, stuffed peppers, and grain bowls without any adjustment.
- Better than boxed mix without complicated ingredients. Everything in this recipe is a standard pantry ingredient; the technique is what makes it taste notably better than a premixed version.
Ingredients You’ll Need
Recipe Timing
| Detail | Info |
|---|---|
| Servings | 6 as a side |
| Difficulty | Easy |
| Course | Side Dish |
| Cuisine | Mexican-American |
| Prep Time | 5 minutes |
| Cook Time | 30 minutes |
| Rest Time | 5 minutes (covered, off heat) |
| Total Time | 40 minutes |
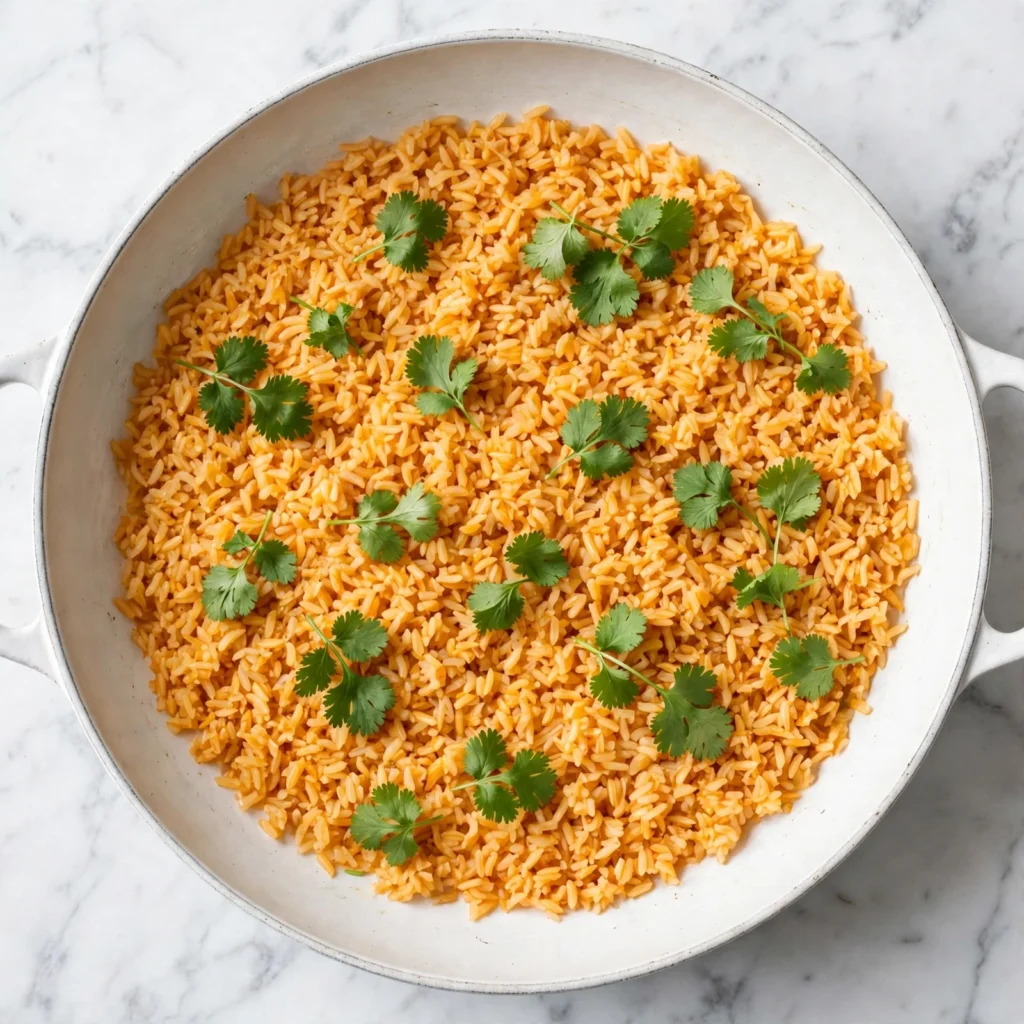
For the rice, long-grain white rice is the specific variety that produces the best Spanish rice texture. Long-grain rice contains a higher ratio of amylose (a linear starch molecule) to amylopectin (a branched starch molecule) compared to medium-grain or short-grain varieties. Amylose gelatinizes at a higher temperature and doesn’t swell as dramatically during cooking, which keeps the grains firm, separate, and distinct rather than soft and sticky. Medium-grain rice like Calrose or sushi rice produces an acceptable result but tends toward stickiness; short-grain rice is not suitable for this application. Rinsing the rice is specifically NOT recommended for this recipe; the surface starch on unwashed long-grain rice is what allows the outer layer to toast and seal during the dry-cook step.
For the tomato sauce, canned plain tomato sauce produces the most reliable, deeply colored base because it has already been cooked down and concentrated during processing; fresh tomatoes blended to the same volume produce a thinner, more acidic sauce that takes longer to reduce to the right consistency during cooking. Crushed tomatoes work well as a substitute at the same quantity if tomato sauce isn’t available; blend briefly until smooth before using.
For the broth, low-sodium chicken broth produces a noticeably richer, more savory rice than water or vegetable broth at the same volume. The gelatin and amino acids in a good-quality chicken broth add body to the cooking liquid and season the rice from the outside in as it absorbs the liquid during simmering.
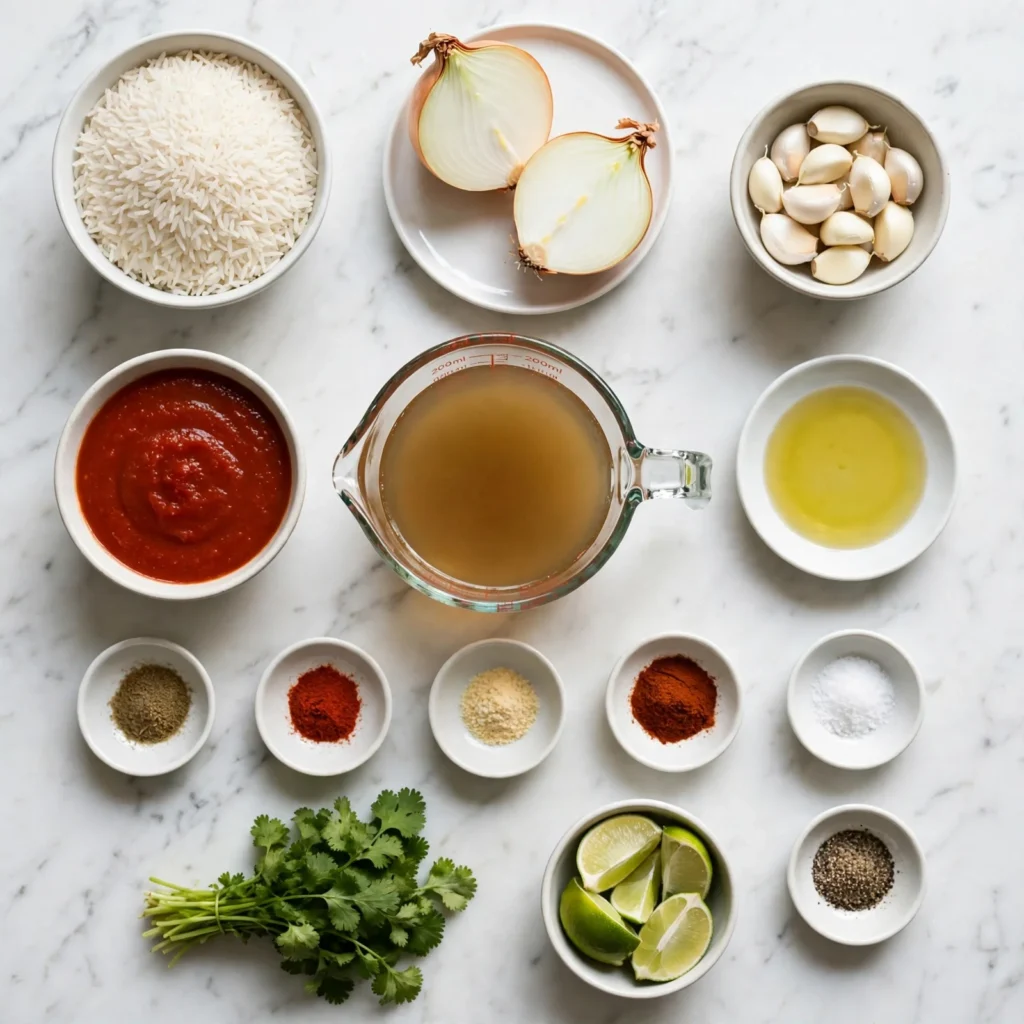
- 360g (2 cups) long-grain white rice, unrinsed — the base; unrinsed to preserve the surface starch needed for toasting; long-grain only
- 3 tablespoons neutral oil (vegetable, grapeseed, or refined sunflower) — for toasting the rice; enough to coat each grain and conduct the toasting heat evenly
- 1 medium yellow onion, finely diced (about 1 cup) — adds savory depth and sweetness; diced small so it cooks through completely during the initial sauté
- 4 garlic cloves, finely minced — the aromatic backbone of the dish; added after the onion has softened so the garlic doesn’t burn before the onion is ready
- 1 can (225g, about 1 cup) plain tomato sauce — the primary liquid flavor and the source of the characteristic orange color; plain, unseasoned tomato sauce only
- 480ml (2 cups) low-sodium chicken broth — the primary cooking liquid; provides savory depth the tomato sauce alone can’t supply
- 1.5 teaspoons ground cumin — the dominant warm spice note; contributes the earthy, slightly smoky flavor that defines the dish’s character
- 1 teaspoon chili powder — a blend spice that adds warmth and complexity; use a mild variety unless heat is desired
- 1 teaspoon garlic powder — amplifies the fresh garlic’s savory note; combined with fresh garlic, it creates a layered garlic flavor rather than a single sharp note
- 1 teaspoon fine salt — season at the start rather than at the end; salt added to uncooked rice seasons the grains as they absorb the cooking liquid
- 1/4 teaspoon freshly ground black pepper
- Optional: 1/2 teaspoon smoked paprika — adds a subtle smokiness that works particularly well for rice served alongside grilled proteins
For serving:
- Fresh cilantro, roughly chopped — adds brightness and color
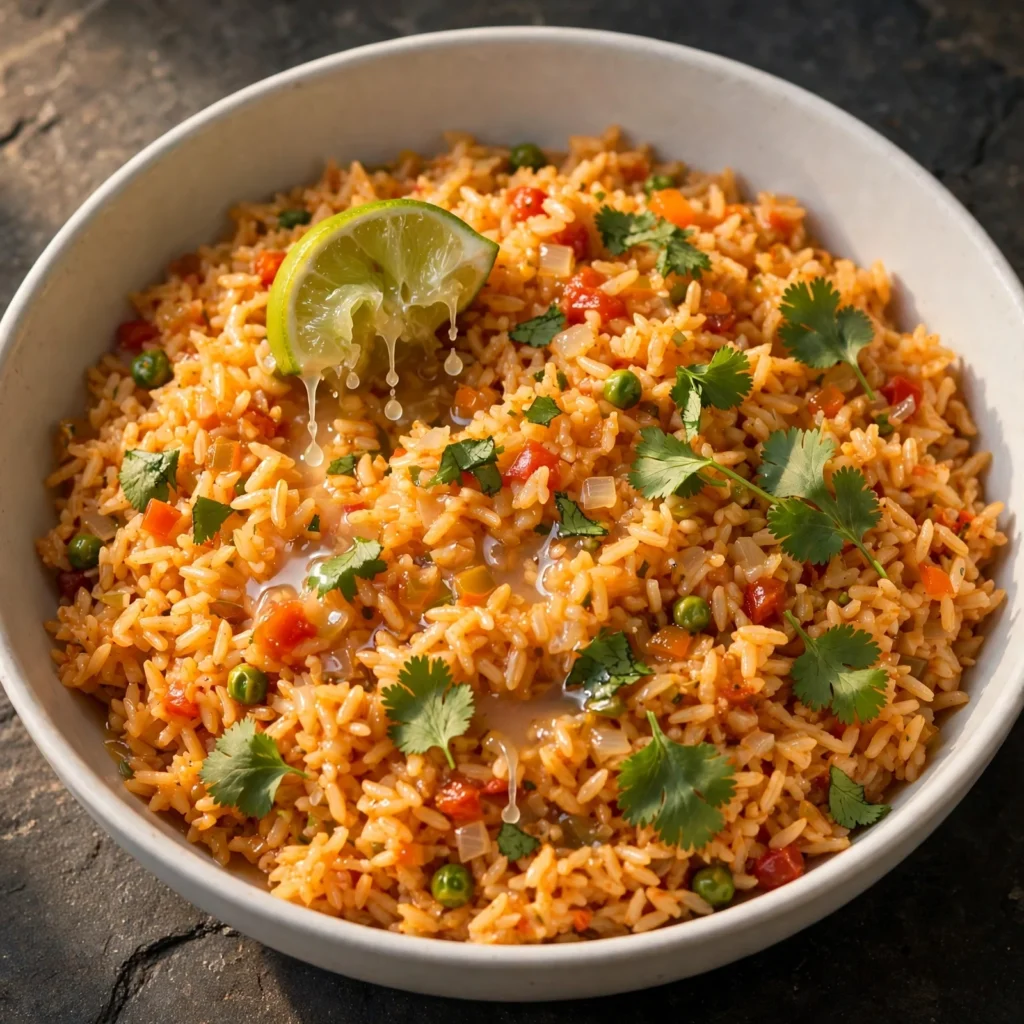
- Lime wedges — a squeeze of lime juice over the finished rice adds an acid note that makes all the spice flavors taste more vivid
Allergen and Dietary Disclosure
This Spanish rice is naturally gluten-free (all ingredients including rice, tomato sauce, and spices are inherently gluten-free; verify the chicken broth brand if strict gluten-free certification is needed), dairy-free, and egg-free as written. It contains no nuts.
For vegetarian or vegan: replace the chicken broth with an equal quantity of good-quality vegetable broth. The rice absorbs the same volume and the cooking method is identical; the flavor will be slightly lighter and less savory than the chicken broth version. Adding a teaspoon of soy sauce to the vegetable broth compensates for some of the savory depth the chicken broth provides without changing the overall flavor profile.
For lower sodium: reduce the fine salt to 1/2 teaspoon and use a no-sodium-added chicken broth or vegetable broth. The tomato sauce contributes its own sodium; taste the finished rice before adding any extra salt at the table.
This recipe has not been tested in a certified allergen-free kitchen and cannot be guaranteed safe for any specific allergy.
Equipment Needed
- Wide 12-inch skillet with a tight-fitting lid, or a wide heavy-bottomed saucepan — the skillet format, wide and relatively shallow, allows the rice to cook in a thinner, more even layer than a tall saucepan, which produces more uniform grain cooking from edge to center. A tight-fitting lid is essential for the simmering stage; steam that escapes through a loose lid reduces the available liquid and produces undercooked, dry rice. If the lid doesn’t fit tightly, place a sheet of aluminum foil across the pan before closing the lid to create a better seal.
- Wooden spoon — for stirring the rice during the toasting stage without scratching a non-stick surface if that’s the pan being used. Avoid silicone spatulas for the toasting step; they tend to fold the rice rather than agitating it, which produces uneven toasting.
- Measuring cups and a kitchen scale (optional but useful) — rice-to-liquid ratios are more sensitive to measurement error than most other cooking; a cup of loosely poured rice differs significantly from a packed cup. Weighing at 360g eliminates this variable entirely.
Step-by-Step Directions
Step 1: Sauté the Onion
Heat the neutral oil in the wide skillet over medium heat until it shimmers actively across the surface, about 90 seconds. Add the finely diced onion and stir to coat it in the oil. Cook over medium heat for 4 to 5 minutes, stirring every 60 to 90 seconds, until the onion has turned translucent and softened throughout with no visible firm or opaque white centers remaining. The onion should look glossy and slightly reduced in volume; avoid browning at this stage since browned onion can produce a bitter note that competes with the spices.
Add the minced garlic and stir through the softened onion. Cook for 60 seconds until the raw garlic smell softens and the garlic turns very faintly golden at the edges. Don’t leave the garlic in the pan without stirring; it burns in under 90 seconds at this heat and produces a bitter, acrid flavor that can’t be corrected once it’s in the dish.

Chef’s Note: Softening the onion fully before adding the rice is an important sequencing decision. The goal is for the onion to be cooked through and sweet-savory when the finished dish is served; if the rice goes in alongside a barely-softened onion, the onion has only the brief remaining sauté time plus the simmering stage to soften. During the simmering stage the lid is closed and no evaporation occurs; the onion essentially steams rather than sautéing, which produces a less developed, more raw-tasting onion flavor in the finished rice.
Step 2: Toast the Rice
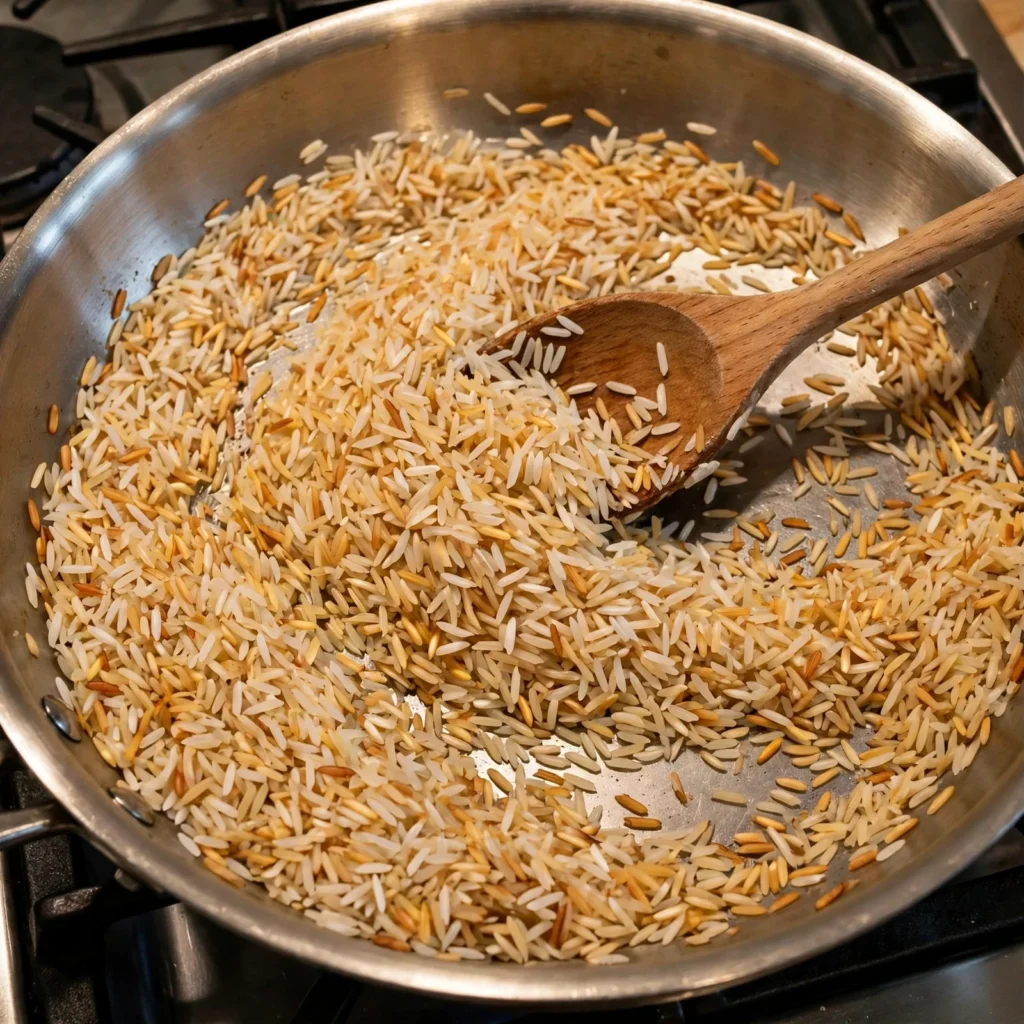
Add the unrinsed long-grain rice directly to the skillet with the softened onion and garlic. Stir vigorously to coat every grain in the oil, spreading the rice into a relatively even layer across the pan base. Toast over medium to medium-high heat for 3 to 4 minutes, stirring every 30 to 45 seconds, until the majority of the rice grains have turned a warm golden color and the skillet smells noticeably nutty rather than starchy or raw. Some grains will be more golden than others; this variation is normal and even desirable, producing a slight variation in texture in the finished rice.
The color change is the reliable doneness indicator for toasted rice; the smell becomes nutty and grain-like rather than neutral and raw-floury.
Chef’s Note: The toasting step is the single technique that most distinguishes from-scratch Spanish rice from plain boiled rice finished with tomato paste or ketchup. When dry rice grains are heated in oil, the starch on the outer surface of each grain undergoes a dry-heat reaction: some of the starch molecules break down into dextrins, shorter-chain carbohydrates that have a characteristic toasted, nutty flavor that raw starch doesn’t have. These dextrins also partially seal the outer surface of the grain, reducing the amount of starch that leaches into the cooking liquid during simmering, which is what produces distinct, separate grains in the finished dish rather than a sticky, cemented mass.
Step 3: Add the Spices
Add the ground cumin, chili powder, garlic powder, salt, black pepper, and optional smoked paprika directly to the toasted rice. Stir continuously for 30 to 60 seconds until the spices coat the rice grains and the skillet smells fragrant and warm. The spices should not burn at this point; if they smell sharp or acrid rather than toasted and warm, the heat is too high. This brief dry-bloom of the spices in the residual oil allows their fat-soluble aromatic compounds to release into the cooking fat before the liquid goes in, distributing their flavor more evenly through the finished dish than adding spices to the liquid alone would produce.
Step 4: Add Tomato Sauce and Broth
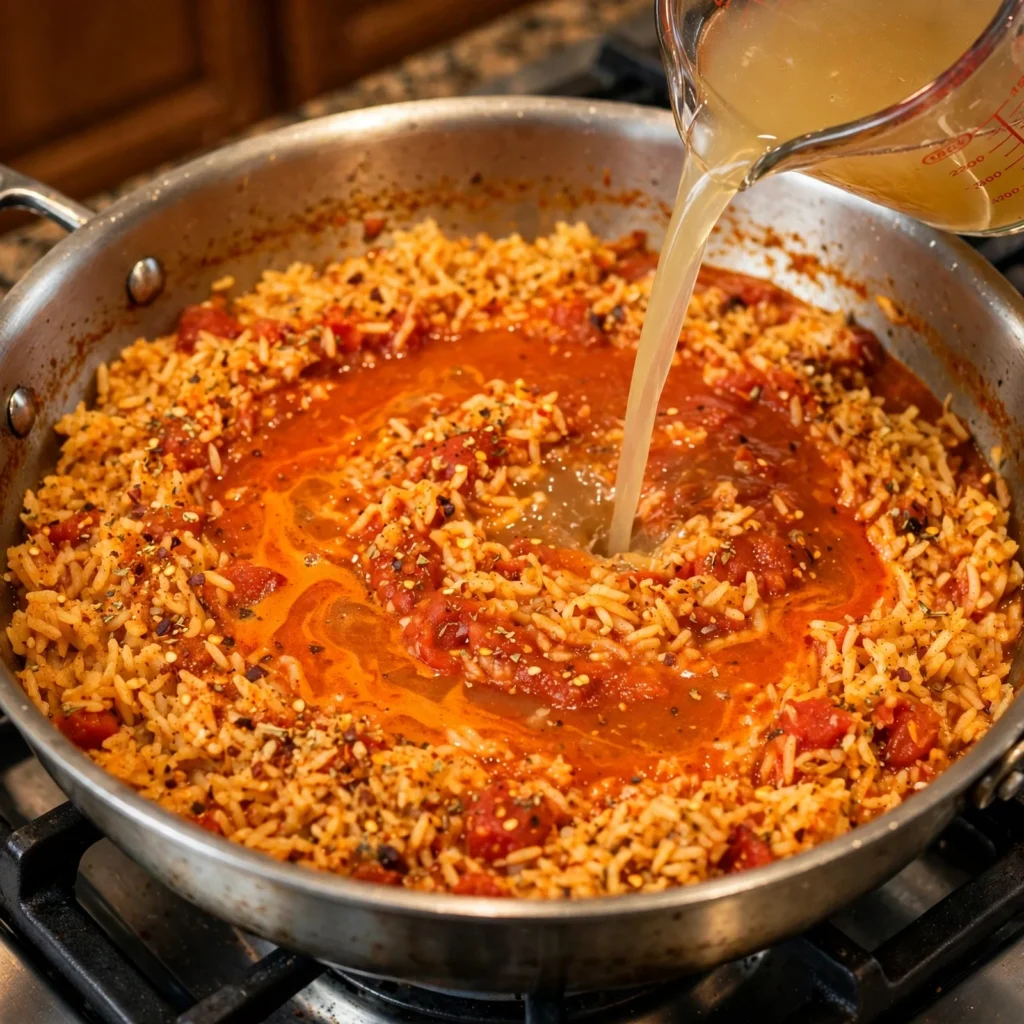
Pour the tomato sauce into the skillet and stir it through the spiced rice for 30 seconds; it will sizzle and reduce slightly as it hits the hot pan. Pour the chicken broth in a steady stream while stirring to combine everything into a uniform, seasoned liquid surrounding the rice. The liquid should look a consistent rusty orange-red throughout with no dry patches of rice visible above the surface.
Increase the heat to bring the liquid to a full, steady boil, stirring once as it heats.
Chef’s Note: Letting the tomato sauce hit the hot, dry-spiced rice for 30 seconds before the broth goes in allows the tomato to caramelize slightly against the pan base and the rice grains, deepening its flavor from bright and acidic to something slightly sweeter and more concentrated. This step takes less than a minute and produces a noticeably more complex tomato flavor in the finished rice compared to adding tomato sauce and broth simultaneously.
Step 5: Simmer Covered Until Absorbed
The moment the liquid reaches a full boil, reduce the heat to low, cover the skillet tightly with the lid, and do not lift the lid again for 18 minutes. The low simmer is essential; at medium heat the liquid boils too aggressively, evaporating faster than the rice can absorb it and producing dry, under-cooked grains. At low heat, the liquid simmers gently and the rice absorbs it evenly throughout the layer. After 18 minutes, check whether the liquid is fully absorbed by tilting the pan slightly and observing whether any visible liquid pools at the edge; if any liquid remains, cover and cook for 2 to 3 more minutes before checking again.
Step 6: Rest and Fluff
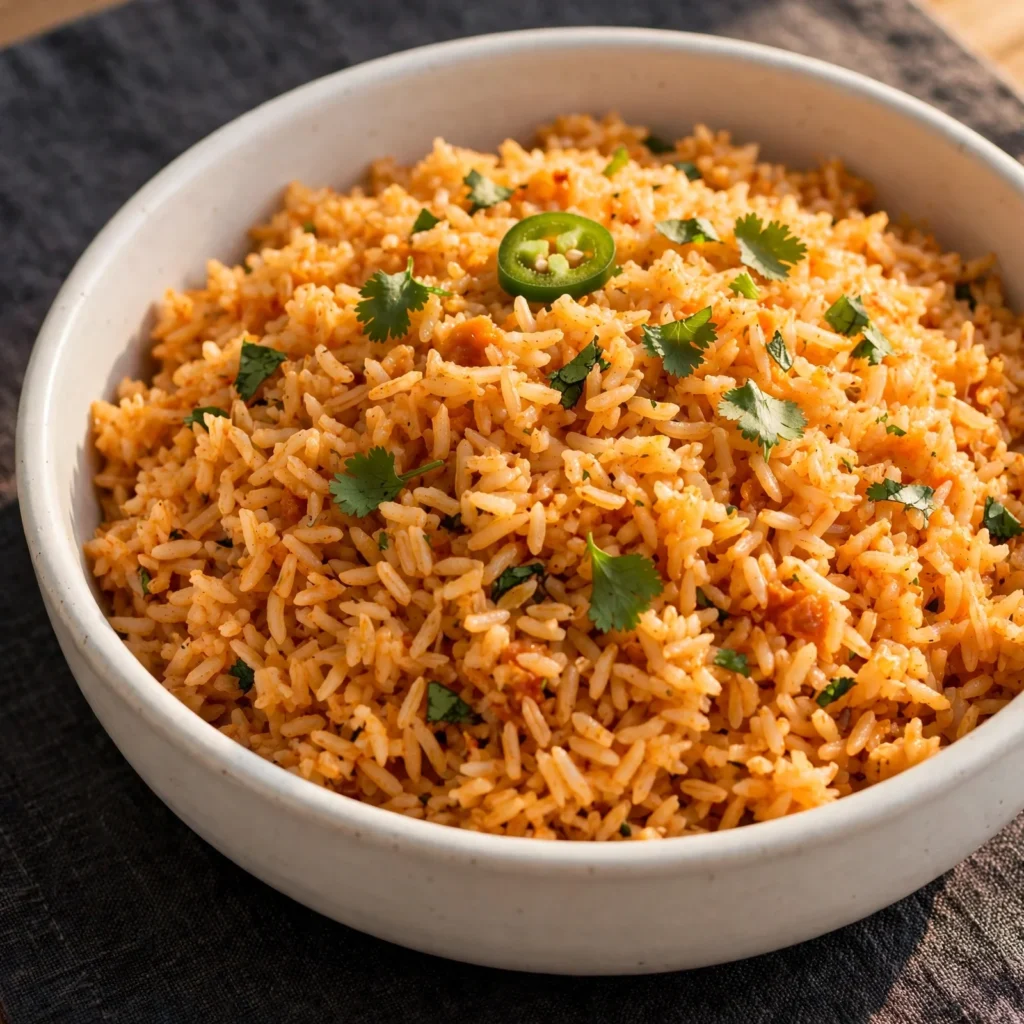
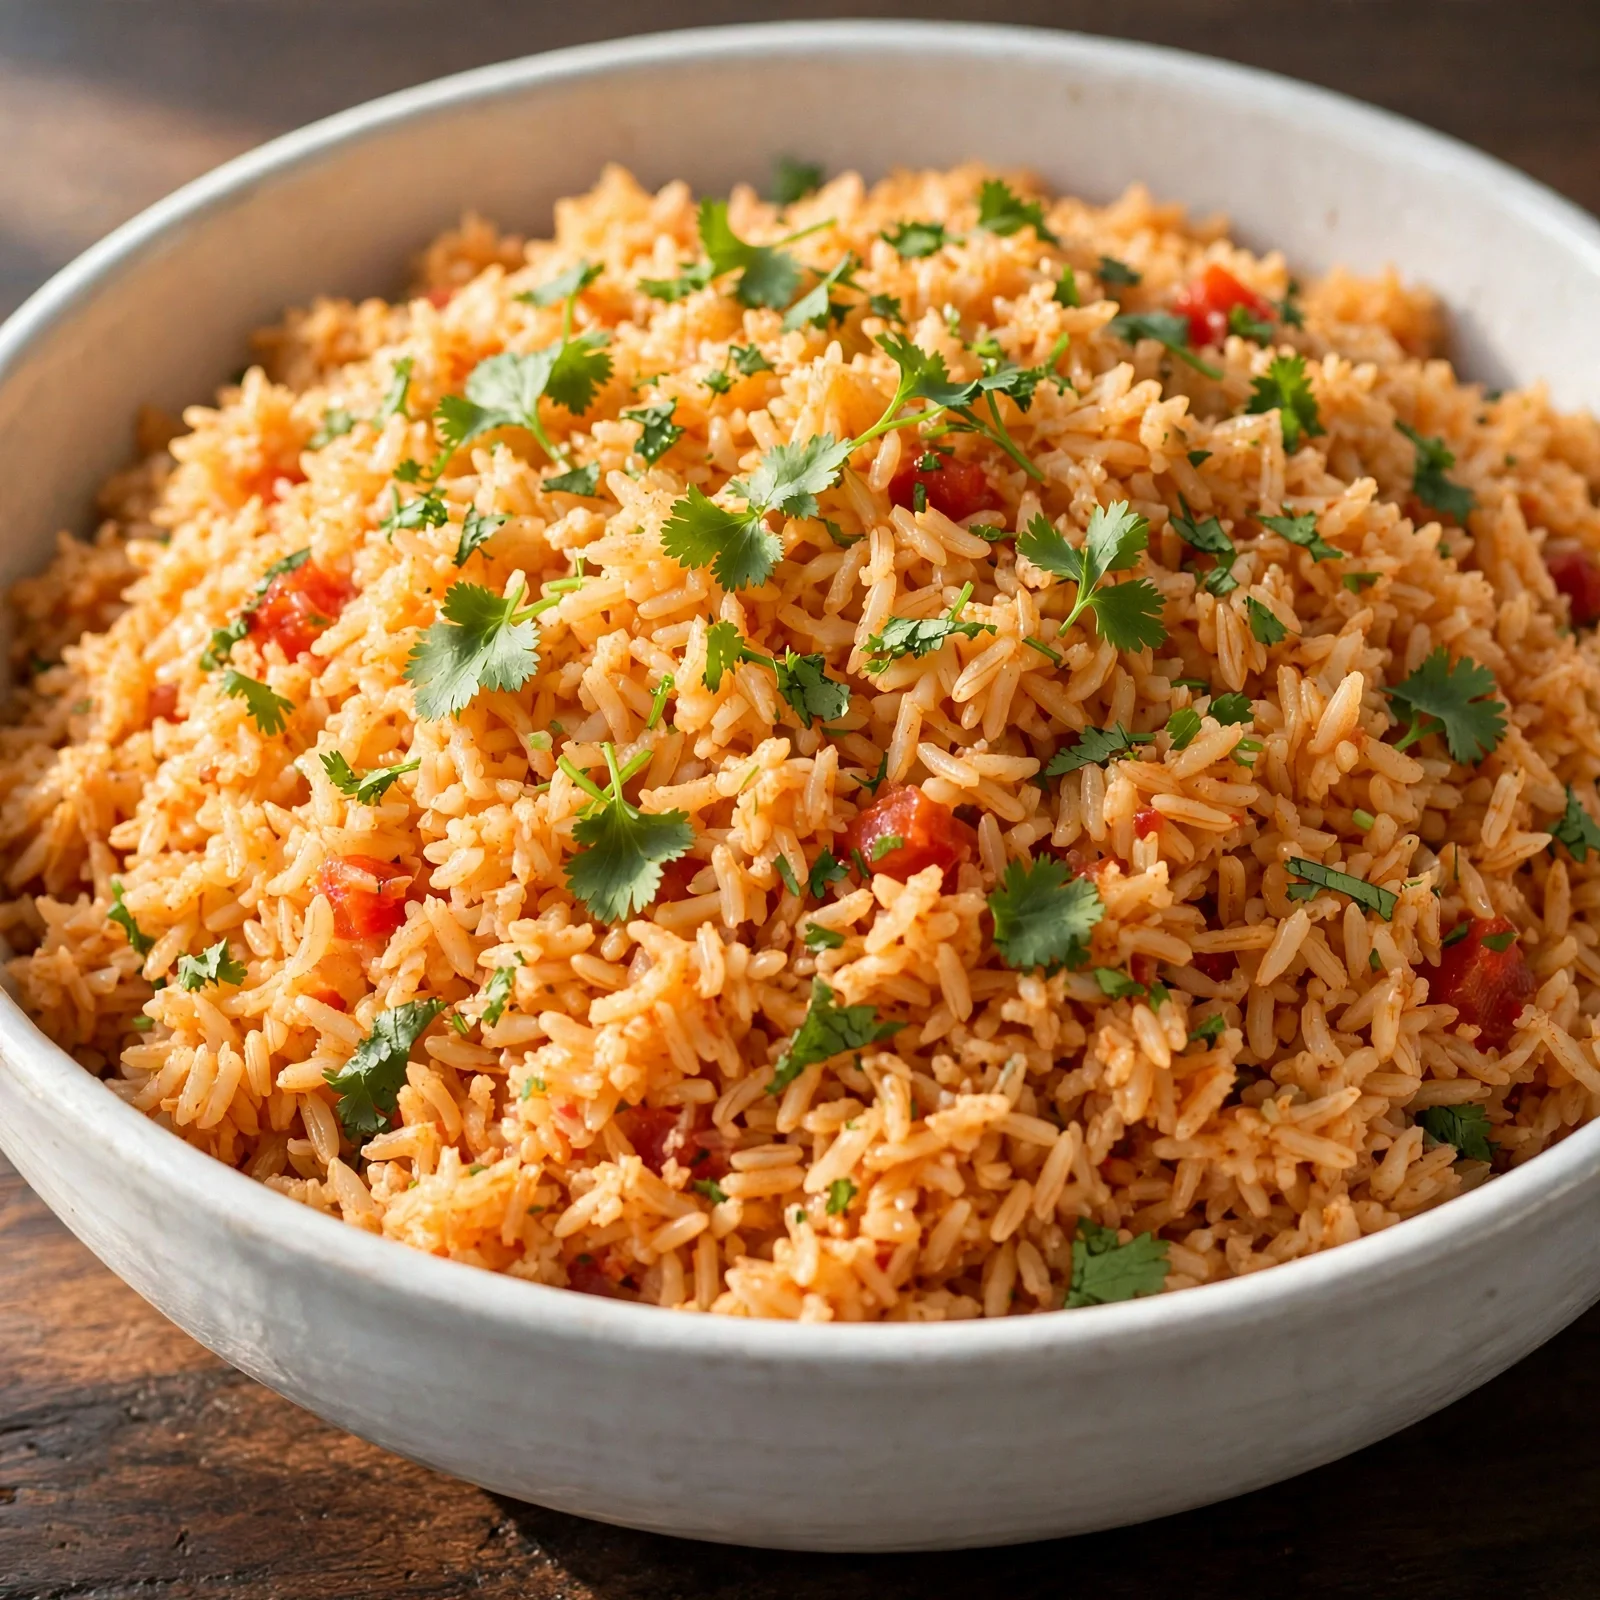
Remove the skillet from the heat and leave the lid in place for 5 minutes without lifting it. This resting period allows the steam trapped inside the pan to continue penetrating the top layer of rice, which may be slightly firmer than the bottom layer since it was farther from the heat source during simmering. After 5 minutes, remove the lid, fluff the rice gently with a fork using light, lifting strokes rather than pressing and stirring, which would break the grains. Scatter the fresh cilantro over the top and serve with lime wedges.
Common Mistakes and Troubleshooting
| Problem | Cause | Solution |
|---|---|---|
| Rice mushy and stuck together | Rice was rinsed before toasting, or medium-grain rice used | Never rinse long-grain rice for this recipe; use long-grain white rice specifically |
| Rice undercooked and hard | Heat too high during simmering causing liquid to evaporate before rice could absorb it | Keep heat at a true low simmer during the covered cooking stage; the lid must fit tightly |
| Toasting uneven or skipped | Rice not spread into an even layer, or pan not hot enough | Spread into an even layer and stir every 30 to 45 seconds; medium to medium-high heat is correct for toasting |
| Rice tastes bland despite spices | Spices added after the liquid rather than dry-bloomed in oil before the liquid | Add and stir spices through the dry toasted rice before any liquid goes in |
| Scorched bottom layer | Heat too high during simmering, or not enough liquid | Reduce heat to the lowest setting once covered; don’t peek or stir during the 18-minute simmer |
| Liquid pools and rice is wet after the 18 minutes | Rice-to-liquid ratio off, or lid lost steam | Measure liquid accurately; re-cover and cook on low for 3 more minutes; then rest off heat with the lid on |
Variations and Substitutions
- Vegetable Spanish rice (vegan): Replace the chicken broth with an equal quantity of vegetable broth and add 1/2 cup of finely diced red bell pepper to the onion during the initial sauté. The bell pepper adds a mild sweetness and color that the rice absorbs during cooking. Add 1 teaspoon of soy sauce to the broth for additional savory depth.
- Spicy Spanish rice: Add 1 to 2 finely diced chipotle peppers in adobo sauce alongside the garlic. The chipotle adds a smoky, earthy heat that’s more complex than chili powder alone and deepens the tomato flavor simultaneously. Start with 1 pepper if the heat level of your chipotles is unknown; the heat builds significantly in the finished dish.
- Mexican street corn Spanish rice: After fluffing, stir in 1 cup of corn kernels (fresh, frozen-thawed, or canned-drained) and 2 tablespoons of crumbled cotija cheese. Add a pinch of smoked paprika and a small squeeze of lime directly into the rice. The corn adds a natural sweetness and the cotija adds a salty, crumbly contrast that makes the rice substantial enough to serve as a light main rather than only a side.
- Spanish rice with black beans: Stir 1 can (400g) of drained and rinsed black beans into the finished, fluffed rice directly before serving. The beans add protein and fiber, making the dish a complete, satisfying base for a burrito bowl or a light vegetarian main. Season the beans with a pinch of extra cumin and salt before adding.
- Brown rice Spanish rice: Replace the long-grain white rice with an equal weight (360g) of long-grain brown rice. Add an additional 120ml (1/2 cup) of chicken broth to account for brown rice’s greater liquid requirement. Increase the covered simmer time to 40 to 45 minutes and check for doneness (the grain should be tender throughout with no chalky center) before resting. The flavor is nuttier and more complex; the texture is chewier.
- Tomato-free version: Replace the tomato sauce with an extra 240ml (1 cup) of chicken broth and add 2 tablespoons of tomato paste plus 1/2 teaspoon of turmeric instead. Turmeric provides a golden color without the tomato flavor; the result is a more neutral yellow rice that works well alongside dishes with their own bold sauce.
Serving Suggestions
- Serve as the base component of a taco night spread: place the Spanish rice in a wide serving bowl in the center of the table alongside seasoned ground beef or chicken, warmed tortillas, shredded cheese, salsa, sour cream, and guacamole. The rice and the other components require no specific coordination since Spanish rice is served at any temperature from warm to room-temperature.
- Spoon into burrito bowls as the grain base under seasoned chicken or beef, black beans, roasted corn, shredded lettuce, diced tomato, and a drizzle of chipotle mayo or plain sour cream. The rice’s tomato-cumin seasoning provides enough flavor that the bowl needs no additional sauce specifically for the grain component.
- Serve alongside grilled chicken thighs seasoned simply with cumin, garlic, and lime juice. The simplicity of the protein lets the Spanish rice’s flavor come through rather than competing with an equally complex seasoning profile.
- Stuff into bell peppers as a base filling: combine the finished Spanish rice with cooked ground chicken and 1/2 cup of shredded Monterey Jack cheese, fill hollowed bell pepper halves, top with extra cheese, and bake at 190°C (375°F) for 20 minutes until the peppers are tender and the cheese is melted.
- Serve as a side alongside grilled fish, particularly a simply seasoned white fish like tilapia, cod, or snapper. The rice’s warm spice profile complements mild fish without overwhelming it, and the lime wedge served alongside works for both.
- Pair with cold sparkling water with lime or a cold fresh-squeezed lemonade; both provide a clean, acidic contrast to the warm cumin and chili flavors in the rice.
Tips for the Best Results
- Don’t rinse the rice before toasting. This is counterintuitive because rinsing is recommended for most rice dishes to remove surface starch and prevent stickiness. For Spanish rice specifically, the surface starch is what toasts and seals the outer grain surface during the dry-toasting step; removing it before toasting produces rice that absorbs more liquid and becomes sticky rather than producing the distinct, separate grains that characterize a good Spanish rice.
- Bloom the spices in the dry toasted rice before adding any liquid. Cumin, chili powder, and garlic powder all contain fat-soluble aromatic compounds that dissolve and distribute into oil much more effectively than into water. Adding them to the dry, oil-coated rice and stirring for 30 to 60 seconds allows those compounds to release into the residual cooking oil, so when the liquid goes in the spice flavor is already distributed throughout rather than being diluted into the cooking liquid before it has a chance to bloom properly.
- Keep the simmer genuinely low and don’t lift the lid. The two most common causes of failed Spanish rice are lifting the lid during the simmer (releasing the steam needed to cook the top layer) and simmering at medium heat rather than low (evaporating the liquid faster than the rice can absorb it). Set the timer for 18 minutes, turn the heat to its lowest setting, and don’t touch the lid until the timer goes off.
- Rest off the heat for the full 5 minutes. The resting period with the lid on and the heat off is a continuation of the cooking process, not simply waiting time. The trapped steam is still significantly hotter than the finished rice temperature; it penetrates the uppermost grains, which received less direct heat during the simmering stage, and brings them to the same level of doneness as the grains closer to the heat source. Without the rest, the top layer is often slightly firmer than the bottom.
- Fluff with a fork, not a spoon. A spoon applies pressure to the rice when it’s moved through the pan, which breaks the grains and mashes the edges together into a sticky texture regardless of how well the toasting and simmering went. A fork’s tines lift the grains individually and separate them without compression; use it with a light hand and a lifting motion rather than a stirring one.
Storage Tips
Refrigerator
Cooked Spanish rice keeps in the refrigerator in a sealed container for up to 4 days. The rice absorbs any residual moisture during storage and becomes slightly firmer and drier than fresh-cooked; this is normal and corrects easily on reheating with a small amount of added liquid. Store with a piece of paper towel pressed against the top of the rice inside the container to absorb excess condensation and prevent the top layer from becoming soggy during storage.
Freezer
Spanish rice freezes very well for up to 3 months. Cool completely before freezing; freeze in single-portion flat packages inside sealed freezer bags rather than a single large block so individual portions can be thawed quickly. Cooked rice frozen and thawed is very close to the original texture because the starch gelatinization that occurred during cooking is preserved through freezing. Thaw overnight in the refrigerator or directly in the microwave from frozen.
Reheating
Stovetop reheating produces the best result: add the refrigerated or thawed rice to a skillet with 2 to 3 tablespoons of water or chicken broth per cup of rice, cover, and heat over medium-low for 4 to 5 minutes until the liquid is absorbed and the rice is steaming throughout. The added liquid replaces the moisture lost during storage and refrigeration. Microwave reheating at 60% power with a damp paper towel placed over the top of the rice works well for single portions; heat in 60-second intervals until steaming throughout.
Make-ahead note: Spanish rice is one of the most practical make-ahead side dishes available. It reheats so well that making a full batch at the beginning of the week and reheating portions for each meal is a genuinely good strategy. The flavor actually improves slightly after 24 hours in the refrigerator as the spice flavors continue to permeate the rice; day-2 Spanish rice often tastes better than the fresh batch.
Nutrition Information
Per serving, approximately 1/6 of the recipe:
| Nutrient | Amount |
|---|---|
| Calories | 290 kcal |
| Protein | 6g |
| Total Carbohydrates | 52g |
| Dietary Fiber | 2g |
| Total Sugar | 3g |
| Total Fat | 7g |
| Saturated Fat | 0.8g |
| Cholesterol | 0mg |
| Sodium | 480mg |
| Vitamin C | 6mg |
| Calcium | 30mg |
| Iron | 2.2mg |
| Potassium | 280mg |
Nutrition values are approximate and may vary based on chicken broth brand, tomato sauce sodium content, and oil quantity used.
Why This Recipe Works
The texture superiority of toasted-then-simmered Spanish rice over raw-to-liquid Spanish rice is traceable to the specific chemical changes that occur in the rice starch during the dry-toasting stage. Long-grain white rice grains contain a surface layer of starch composed primarily of amylose and amylopectin molecules. When these starch molecules are heated in a dry environment (oil without water present), above approximately 160°C, some of the amylose molecules undergo pyrodextrinization: they break into shorter-chain dextrin molecules with distinctly different properties from the original starch. Dextrins are less hygroscopic than intact starch, meaning they absorb water less readily and swell less dramatically when the cooking liquid is later introduced. This reduced swelling is what keeps the grains physically smaller, denser, and more separated in the finished dish rather than swelling together and cementing into a sticky mass. The dextrins also carry characteristic nutty, roasted aromatic compounds that the original amylose molecules lacked, contributing the flavor depth that makes toasted Spanish rice taste noticeably more complex.
The tomato sauce’s role in Spanish rice extends beyond flavor and color. Tomato sauce has a pH of approximately 4.0 to 4.5 from its natural citric and malic acid content. At this acidity, the starches in the rice grain’s outer surface gelatinize at a slightly higher temperature than they would in a neutral liquid, which delays the onset of starch swelling during the early simmering stage. This delay allows the outer grain surface to absorb the cooking liquid more slowly and evenly, producing a rice grain that cooks from the outside in at a more controlled rate. The practical result is fewer burst or mushy grains in the finished dish than would appear if the same rice were cooked in a neutral liquid at the same simmer temperature.
The specific sequencing of spice addition, dry-blooming in the oil-coated rice before liquid is added, is not an optional garnish to the technique; it fundamentally changes how the spice flavor distributes through the finished dish. Ground cumin, chili powder, and garlic powder all contain their primary aromatic compounds in forms that are substantially more soluble in fat than in water. Cumin’s cuminaldehyde, chili powder’s capsaicin and various carotenoid pigments, and garlic powder’s allicin breakdown products all dissolve readily in the cooking oil coating the toasted rice grains. When these spice-laden oil-coated grains are then submerged in the cooking liquid, the flavor compounds move from the oil coating into the surrounding liquid by gradual diffusion, distributing evenly throughout the entire volume of rice rather than remaining concentrated in the liquid and failing to penetrate the already-cooked outer grain surfaces. Spices added directly to the liquid, by contrast, dissolve into the water phase and are absorbed by the rice primarily from the outside as the liquid is absorbed; the distribution is more concentrated at the grain surfaces and less present in the interior.
The brief period of tomato sauce caramelization before the broth is added, the 30 seconds in step 4 where the tomato sauce contacts the hot pan alone, produces Maillard browning reactions between the tomato’s amino acids and its reducing sugars. Tomatoes contain glutamic acid, the amino acid responsible for umami, and significant quantities of glucose and fructose that react with amino acids above approximately 140°C to produce new aromatic compounds including furanones and pyrazines associated with roasted, caramelized, and savory flavors. These compounds are absent from tomato sauce simply poured into a room-temperature liquid and present in tomato sauce that has briefly contacted a hot pan; the 30 seconds of caramelization produces a noticeably deeper, less sharp tomato flavor in the finished rice.
I’ve tested this recipe with rinsed and unrinsed long-grain rice at the same quantities and cook times. The rinsed version produced slightly stickier rice with less distinct grain separation even after full toasting; the removed surface starch meant less material was available for the dextrinization step, which reduced the sealing effect on the grain surface. The unrinsed version produced the clearly separated, individually distinct grains that make Spanish rice look and feel like a properly made restaurant side dish rather than a home-cooked sticky approximation.
Frequently Asked Questions
Can I make Spanish rice ahead of time?
Yes, and it reheats very well. Make the full batch, cool completely, and refrigerate in a sealed container for up to 4 days. Reheat on the stovetop with 2 to 3 tablespoons of chicken broth or water added per cup of rice, covered over medium-low heat for 4 to 5 minutes. The flavor actually improves after 24 hours in the refrigerator as the cumin and chili spices continue to permeate the rice. Spanish rice also freezes well for up to 3 months in single-portion bags for quick weeknight reheating.
Why is my Spanish rice mushy?
Mushy Spanish rice almost always comes from rinsed rice or from using a medium-grain or short-grain variety rather than long-grain. Rinsing removes the surface starch needed for the toasting step to work effectively; medium and short-grain rice have a higher amylopectin content that makes them stickier by nature. A second cause is too much liquid; if the ratio is off by even a small amount with medium-grain rice, the result is mushy. Use only long-grain white rice, don’t rinse it, and measure the liquid accurately.
Can I use chicken stock instead of chicken broth?
Yes, and chicken stock produces an even richer, more deeply flavored rice than broth. Stock has a higher gelatin content from the collagen-rich bones used in its preparation; this gelatin adds body to the cooking liquid and produces a slightly more cohesive, flavorful finished rice. Use at the same 480ml quantity. The finished rice will have a slightly shinier appearance and a more pronounced savory quality than broth-cooked Spanish rice. Low-sodium stock is preferred to maintain control over the final salt level.
How do I know when Spanish rice is fully cooked?
The two indicators used together are the most reliable. First, visually confirm that the cooking liquid is fully absorbed: tilt the pan and check that no liquid pools at the edge. Second, taste a few grains from the center of the pan after the 5-minute rest; fully cooked long-grain rice should be tender all the way through with no chalky or firm center and no excess moisture that makes the grain feel slippery. If the grains are still slightly firm, re-cover and cook on low for 2 to 3 more minutes without adding liquid; if the grains are tender but liquid remains, uncover and cook on medium-low for 2 minutes to evaporate the excess.
Is Spanish rice gluten-free?
Yes, this recipe is naturally gluten-free as written. Rice, tomato sauce, spices, and oil are all inherently gluten-free. The variable that requires checking is the chicken broth; some commercially produced chicken broths contain maltodextrin or other wheat-derived thickeners. Look for a brand specifically labeled gluten-free if you need strict compliance. All the dry spices used in this recipe (cumin, chili powder, garlic powder, smoked paprika) are naturally gluten-free but may be processed in facilities that handle wheat; look for certified gluten-free spice brands if that is a concern.
What’s the difference between Spanish rice and Mexican rice?
The terms are used interchangeably in most home cooking contexts and both refer to tomato-seasoned, long-grain white rice cooked with cumin and other spices. The dish is not a traditional Spanish recipe from Spain; it’s a Mexican-American creation that became associated with the broader category of “Spanish” cuisine in the American Southwest. Some recipes labeled Mexican rice include more tomato content, fresh tomatoes rather than tomato sauce, or slightly different spice profiles with more chili; some labeled Spanish rice are seasoned more simply. The technique in this recipe, dry-toasting followed by tomato-broth simmering, applies to both.
Can I cook Spanish rice in a rice cooker?
Yes, with adjustments. Toast the rice with the onion and spices in a skillet on the stovetop first, using the method in steps 1 to 3, then transfer the toasted spiced rice to the rice cooker. Add the tomato sauce and chicken broth, stir to combine, and cook on the standard white rice setting. The rice cooker handles the simmering and auto-switches to warm when the liquid is absorbed. The result is comparable to the stovetop method, though the rice cooker produces a slightly firmer bottom crust that many people enjoy. Use the same liquid ratios as the stovetop recipe.
Conclusion
Spanish rice earns its place in a weekly meal rotation because the technique, once understood, takes the same 35 minutes regardless of which direction you take the flavor. Toast the rice until golden, bloom the spices in the oil coating, let the tomato sauce caramelize briefly, simmer covered without lifting the lid, rest off the heat. That sequence produces consistently good Spanish rice every time and transfers cleanly to any variation you build from the base.
The day-2 version being better than the day-1 version is a genuine reason to make it in advance rather than the morning of the meal. The spices have time to continue permeating the rice during refrigerator storage, and what tasted slightly sharp from the garlic and cumin when fresh tastes fully integrated and mellow the next day.
If you loved this recipe, save it to your easy side dishes and Mexican dinner recipes Pinterest board so you can find it easily later. For more recipes and daily food inspiration, follow TheCookingVibes on Pinterest.
Easy Spanish Rice
Ingredients
Equipment
Method
- Heat oil in a wide 12-inch skillet over medium heat until shimmering. Add diced onion; cook 4 to 5 minutes stirring regularly until fully translucent and softened throughout. Add minced garlic; stir 60 seconds until fragrant and very faintly golden.
- Add unrinsed long-grain rice. Stir vigorously to coat each grain in the oil. Toast over medium to medium-high heat for 3 to 4 minutes, stirring every 30 to 45 seconds, until the majority of grains are warm golden and the pan smells nutty rather than raw.
- Add cumin, chili powder, garlic powder, salt, pepper, and smoked paprika directly to the toasted rice. Stir continuously for 30 to 60 seconds until the spices coat the rice and the skillet smells fragrant and warm.
- Add tomato sauce and stir through the spiced rice for 30 seconds, allowing it to caramelize slightly against the hot pan. Pour in chicken broth in a steady stream while stirring to combine. Bring to a full boil.
- Reduce heat to low. Cover with a tight-fitting lid. Simmer undisturbed for 18 minutes without lifting the lid.
- After 18 minutes, check whether liquid is fully absorbed by tilting the pan. If liquid remains, cover and cook 2 to 3 more minutes. Remove from heat. Leave covered and undisturbed for 5 minutes.
- Uncover. Fluff with a fork using light lifting strokes. Scatter fresh cilantro over the top. Serve with lime wedges.
Notes
- Never rinse the rice before toasting; the surface starch is essential for the toasting step and for keeping the grains separate.
- Keep the heat at a true low simmer during the covered cooking stage; medium heat evaporates the liquid too fast.
- Do not lift the lid during the 18-minute simmer; lost steam produces undercooked top-layer rice.
- The rice tastes even better the next day as the spices continue permeating the grains during refrigerator storage.
- Allergens: Naturally gluten-free (verify chicken broth brand), dairy-free, egg-free, and nut-free.
- This recipe has not been tested in a certified allergen-free kitchen and cannot be guaranteed safe for any specific allergy.