Brown Butter Chocolate Chip Cookies — Nutty, Chewy, Deep Flavor
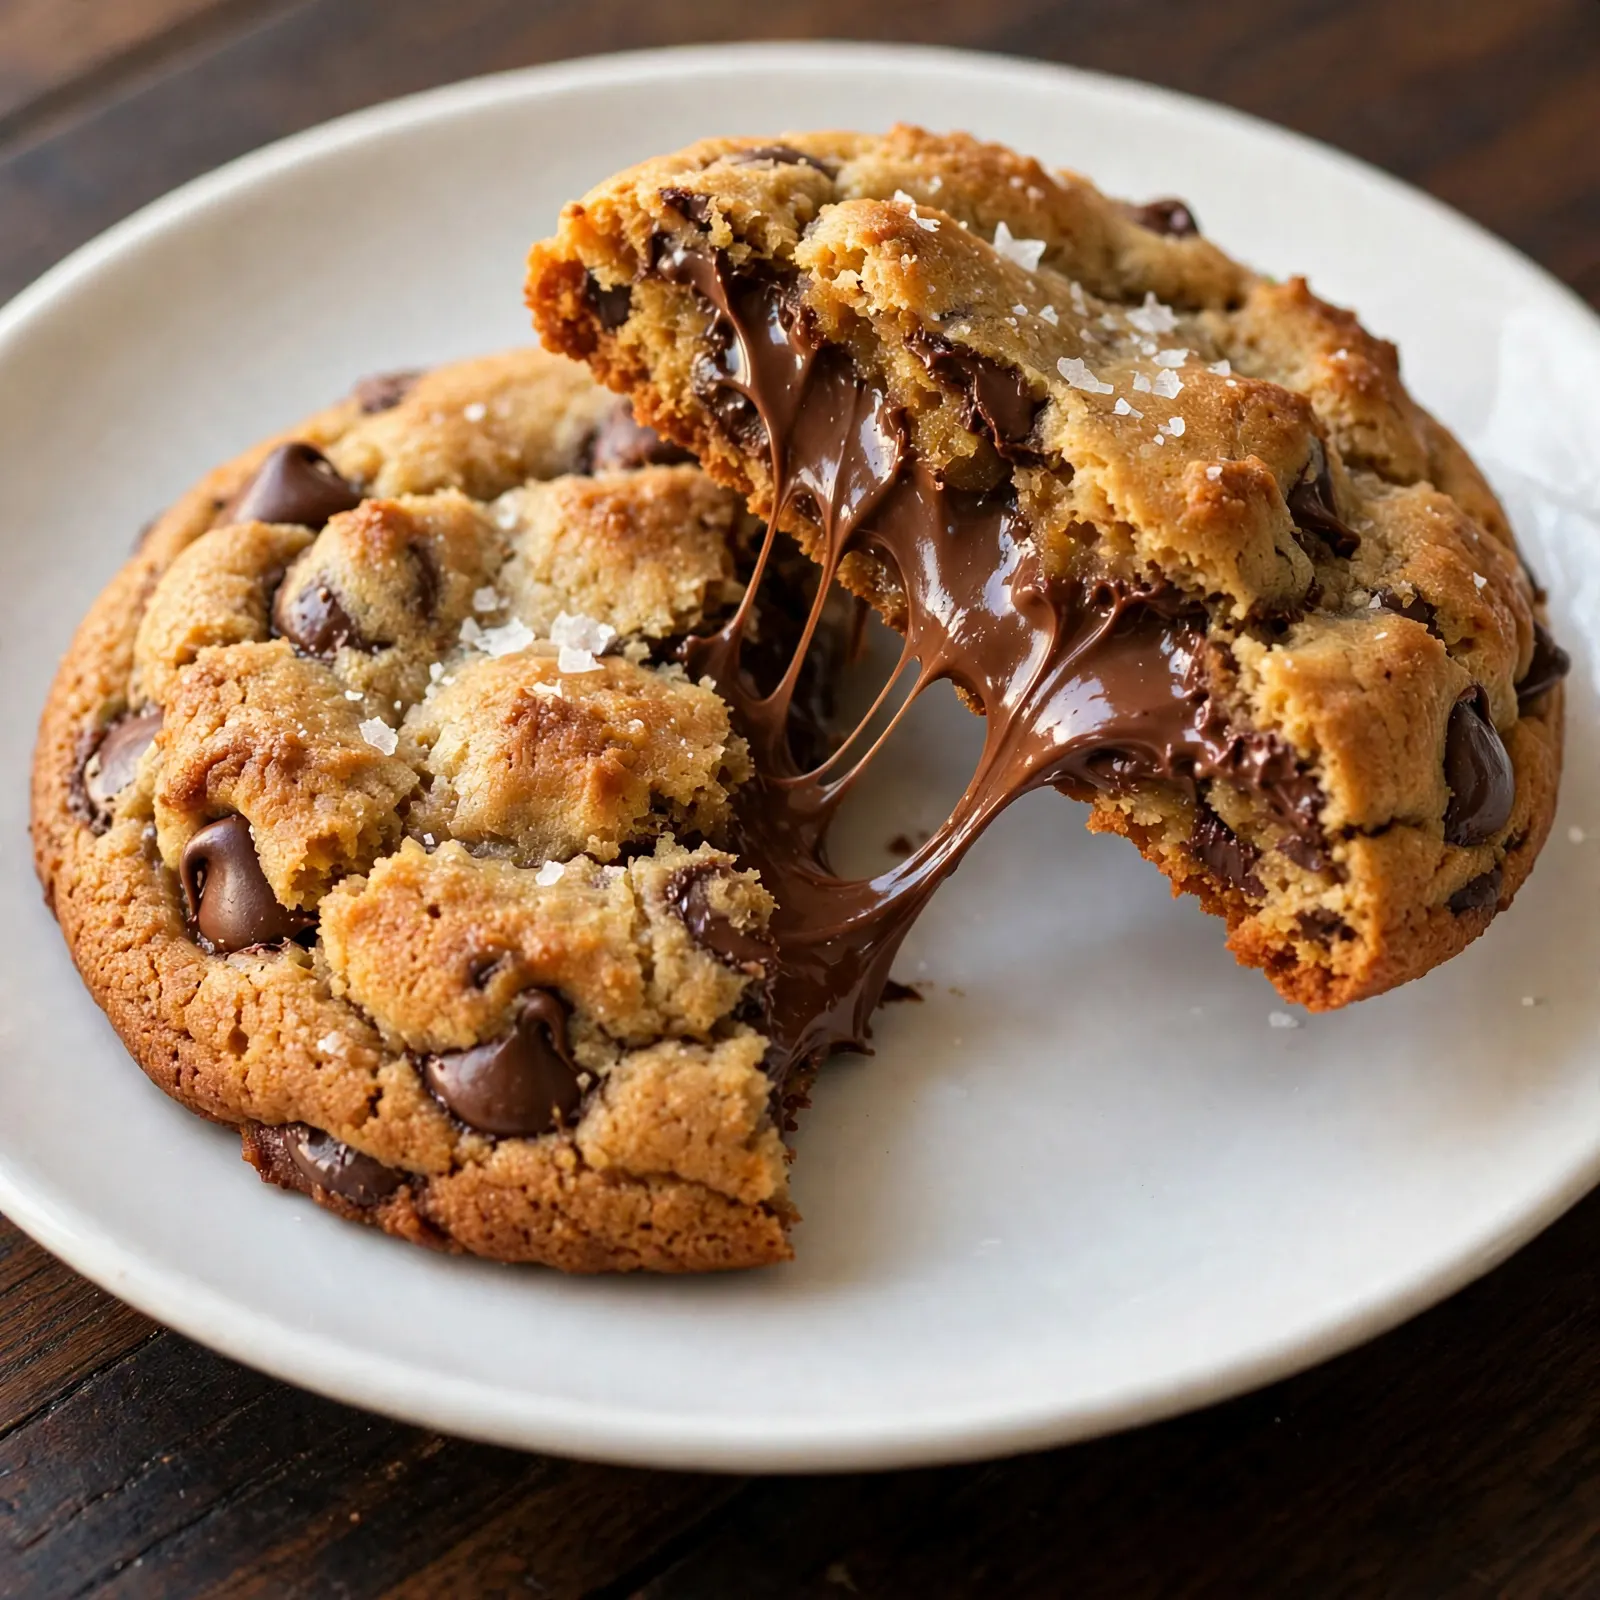
The difference between a standard chocolate chip cookie and one made with brown butter is immediate and specific: the browned butter adds a toasted, nutty, almost caramel-like depth that plain melted butter simply doesn’t have. It happens because of what butter actually contains. The milk solids in butter, when cooked past the melting point into a liquid amber state, undergo Maillard browning and produce hundreds of new aromatic compounds that smell like hazelnuts, toffee, and warm caramel. That smell transfers directly into the dough, and it survives the bake.
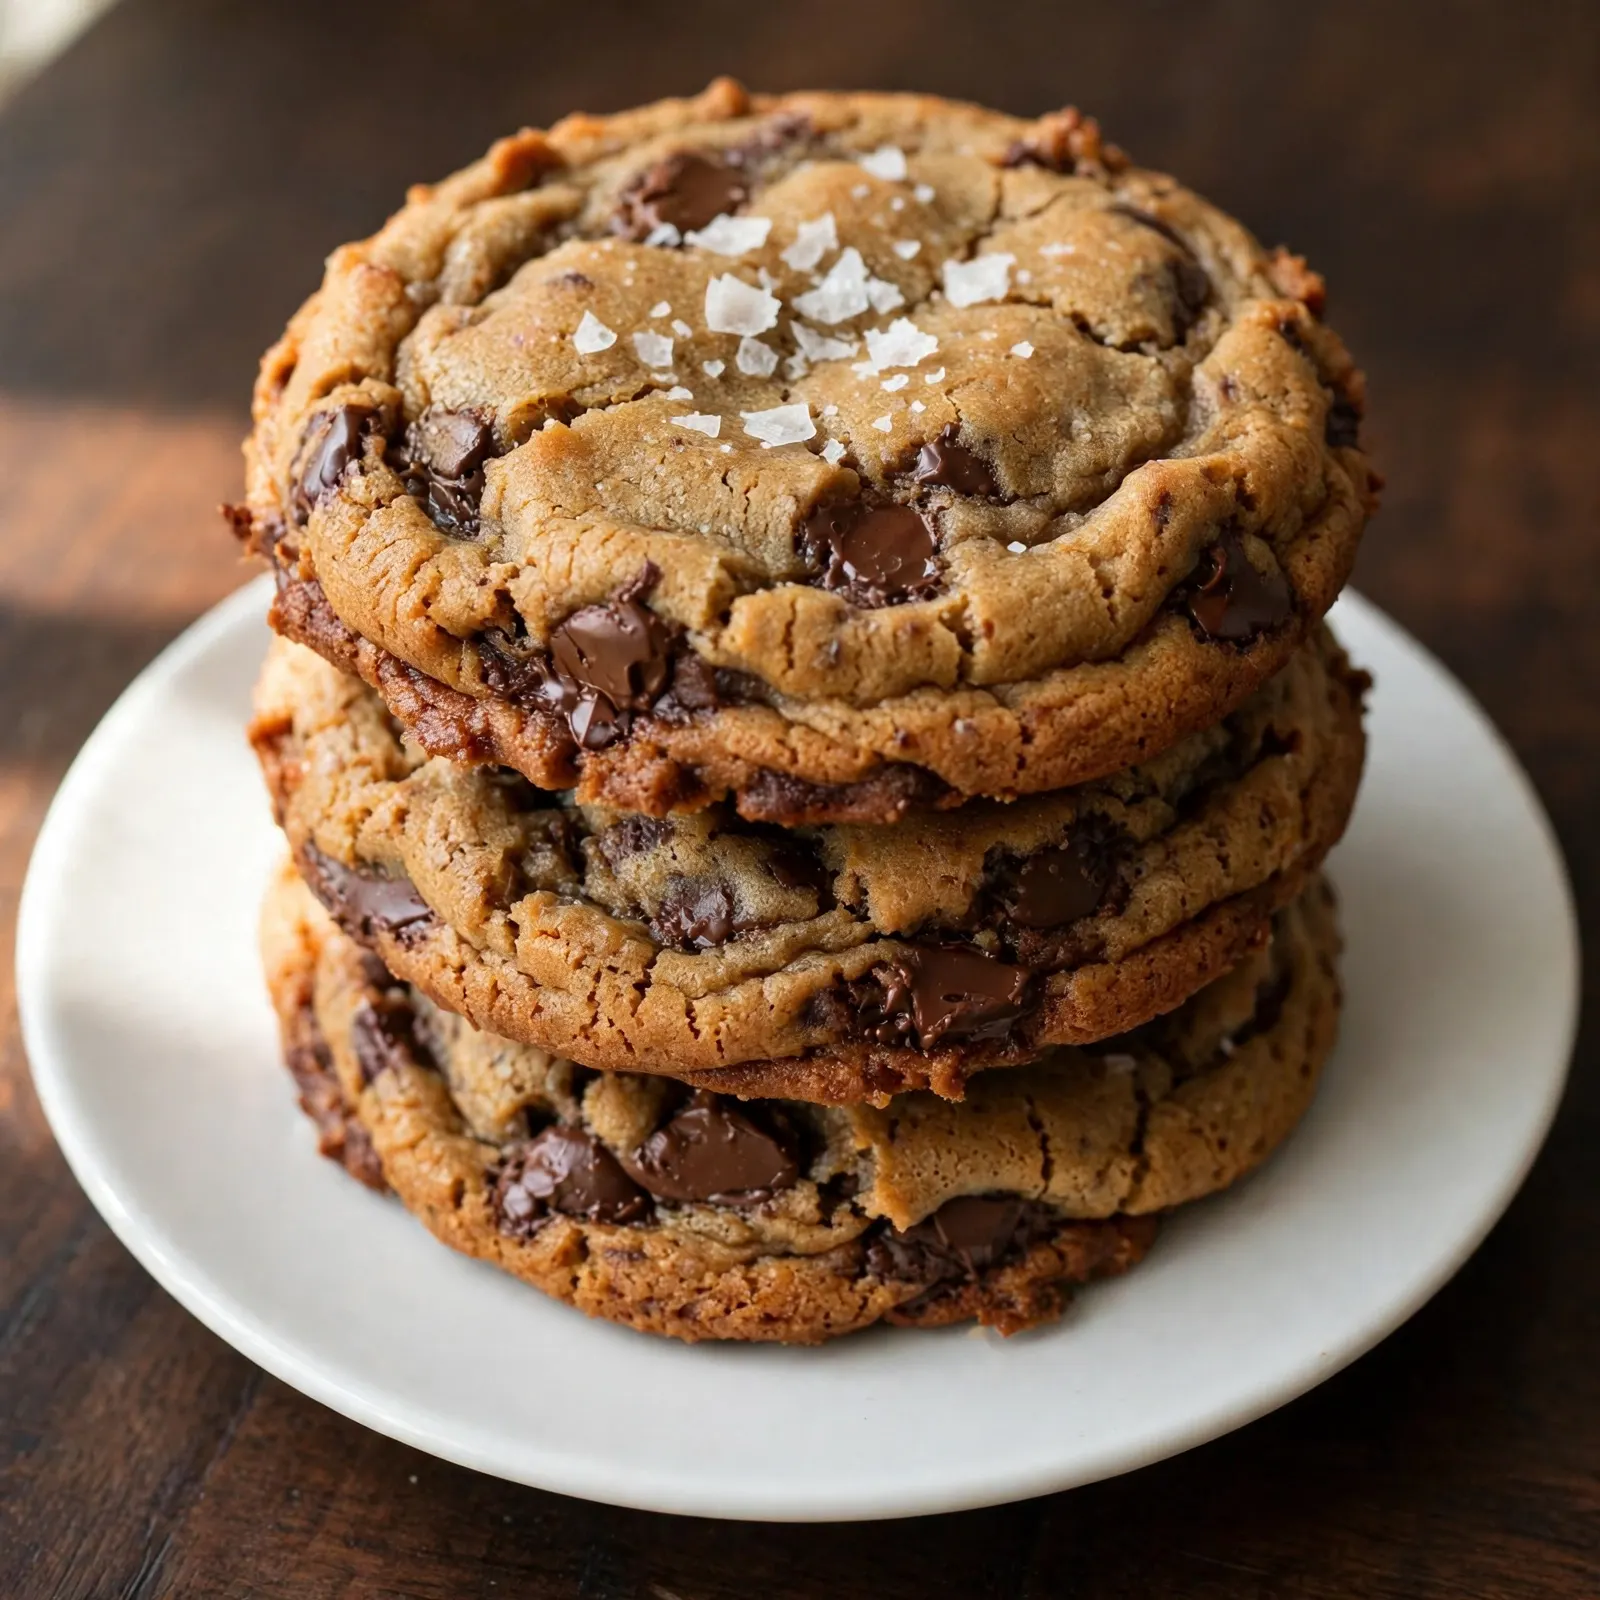
This brown butter chocolate chip cookies recipe uses browned butter combined with both light brown and granulated sugar, one whole egg plus one yolk for structure and richness, and a high ratio of chocolate chips. The result is a cookie with crisp, slightly lacy edges, a chewy, fudgy center, and a flavor that tastes noticeably more developed than a standard butter cookie. No stand mixer, no chilling overnight required (though chilling improves them further), and the whole recipe comes together in one bowl in under an hour.
Why You’ll Love These Brown Butter Chocolate Chip Cookies
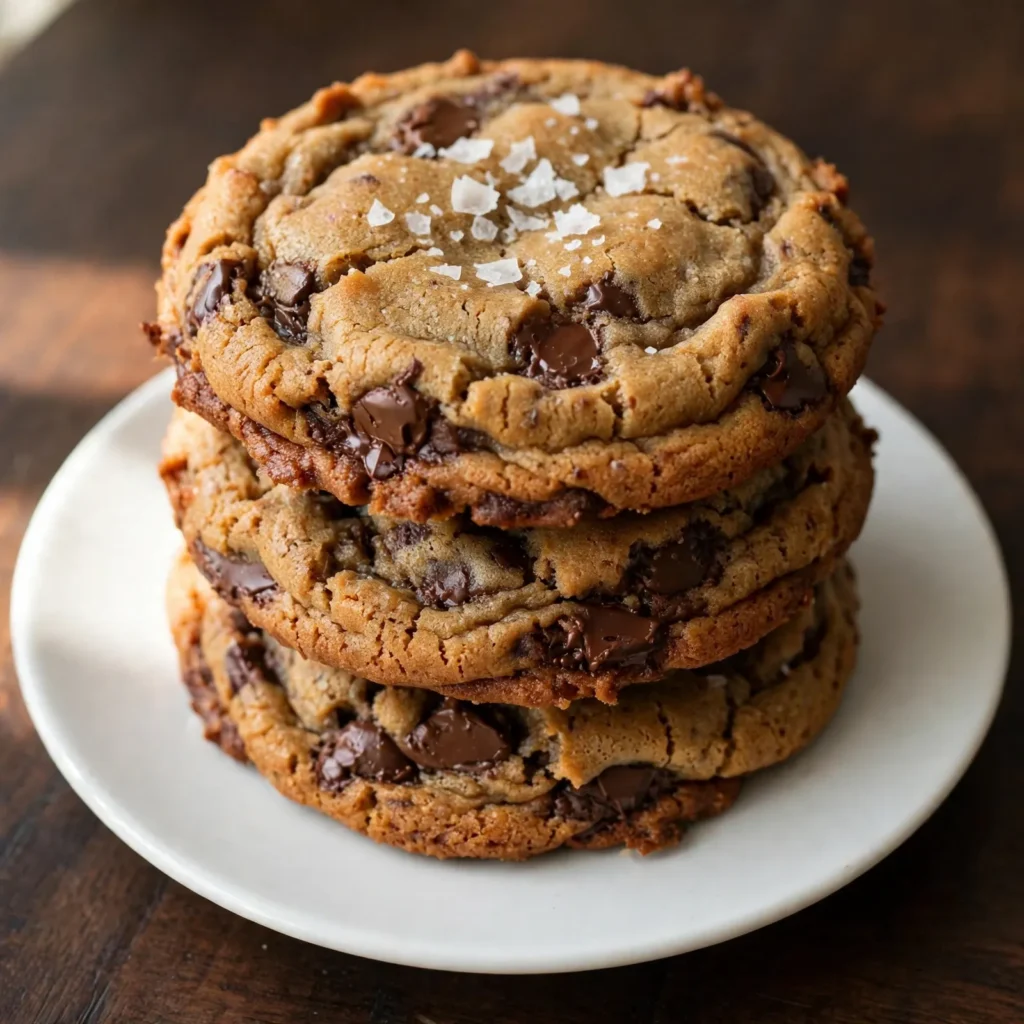
- Flavor that’s noticeably more complex than standard. Browning the butter before adding it to the dough creates a base with a toasted, nutty depth that plain melted or softened butter can’t produce; every bite has a background warmth that makes the cookie taste like something from a bakery rather than a standard home batch.
- No mixer needed. The browned butter is already liquid and fully melted, so it combines with the sugars and eggs by hand with a whisk; no stand mixer, no waiting for butter to soften, no creaming step.
- Crisp edges and chewy centers in the same cookie. The higher sugar content and melted fat produce a cookie that spreads just enough to develop lacy, caramelized edges while the center stays soft and fudgy at room temperature.
- Ready in under an hour without chilling. The baked cookies are ready within 45 to 50 minutes of starting; optional chilling for 30 to 60 minutes deepens the flavor further, but it’s not a requirement.
- Flaky sea salt on top changes everything. A pinch of flaky salt on each cookie immediately before baking contrasts the sweetness of the chocolate and caramelized sugar and makes every flavor in the cookie taste more distinct and more pronounced.
Ingredients You’ll Need
Recipe Timing
| Detail | Info |
|---|---|
| Servings | 18 to 20 cookies |
| Difficulty | Easy |
| Course | Dessert, Snack |
| Cuisine | American |
| Prep Time | 20 minutes |
| Cook Time | 12 minutes per tray |
| Rest Time | 10 minutes cooling |
| Total Time | 42 minutes |
For the butter, use unsalted butter specifically so you can control the salt level in the dough. European-style butter, which has a higher fat content (82 to 84% versus the standard 80%), browns faster and produces a slightly more pronounced nutty aroma because of its higher concentration of milk solids. Standard unsalted butter works perfectly; the brown butter flavor is noticeable with either variety. Always brown more butter than you think you need; some water evaporates during browning and you’ll lose approximately 15 to 20% of the original volume.
For the flour, measure by spooning into the measuring cup and leveling rather than scooping directly from the bag. Scooping compacts the flour and can add 20 to 30% more than intended, producing cookies that are thick, cakey, and underspread rather than chewy and flat. A kitchen scale eliminates this variable entirely; 220g is the target weight.
For the chocolate, a combination of semi-sweet chocolate chips and roughly chopped dark chocolate (70% cocoa) produces better results than chips alone. The chopped chocolate creates irregular shards and pools that distribute differently through the cookie; when the chocolate melts during baking, the pooled pieces create large, visible chocolate patches rather than individual evenly-spaced chips. The visual and flavor difference is significant. That said, standard semi-sweet chips alone produce a reliably good result if that’s what’s on hand.
For the sugars, the combination of light brown sugar and granulated sugar is deliberate and specific. Brown sugar contributes hygroscopicity (moisture retention) and molasses flavor that keeps the center chewy and adds depth. Granulated sugar promotes spread and crispness at the edges. The ratio in this recipe (more brown than white) tips the balance toward chewiness without losing the caramelized edge.
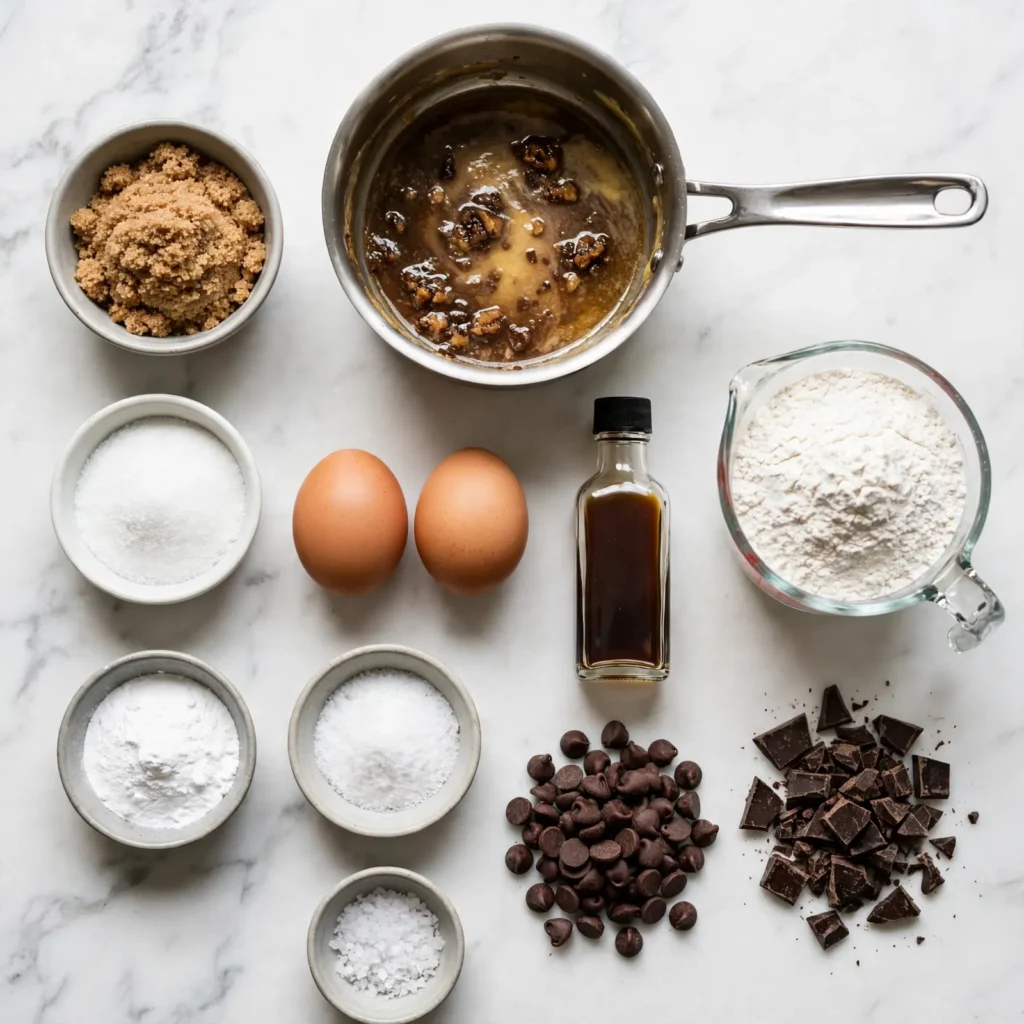
- 170g (3/4 cup, 1.5 sticks) unsalted butter — browned; this produces approximately 140 to 150g of browned butter after water evaporation, which is the intended quantity
- 200g (1 cup packed) light brown sugar — the primary sweetener; contributes chewiness, molasses flavor, and moisture retention
- 50g (1/4 cup) granulated white sugar — contributes crispness at the edges and aids in the cookie’s spread
- 1 large egg, room temperature — provides structure and moisture
- 1 large egg yolk, room temperature — extra yolk adds richness and fat without the extra water from a full second egg; produces a fudgier center
- 2 teaspoons pure vanilla extract — rounds the sweetness and complements the browned butter’s toasty notes
- 220g (1 3/4 cups, spooned and leveled) all-purpose flour — the structural base; do not pack
- 1 teaspoon baking soda — the leavening agent; reacts with the acids in the brown sugar and produces lift and spread
- 3/4 teaspoon fine salt — seasons the dough; the browned butter has a concentrated flavor that benefits from a slightly higher salt level than standard cookie recipes
- 280g (1 3/4 cups) semi-sweet chocolate chips, or a mix of chips and roughly chopped dark chocolate — the primary flavoring alongside the browned butter
- Flaky sea salt — for finishing each cookie immediately before baking; optional but strongly recommended
Allergen and Dietary Disclosure
These brown butter chocolate chip cookies contain dairy (butter), eggs (whole egg and yolk), and gluten (all-purpose flour). Semi-sweet chocolate chips may contain traces of dairy; verify the brand if strict dairy-free compliance is needed.
For gluten-free: replace the all-purpose flour with a certified gluten-free 1:1 baking flour blend that includes xanthan gum. The cookies will be slightly more tender and may spread more than the standard version; chill the dough for 30 minutes before baking to help them hold their shape. Bake at the same temperature but start checking at 10 minutes.
For dairy-free: brown butter cannot be replicated with dairy-free alternatives, as the milk solid browning is what produces the characteristic flavor. You can use a dairy-free butter alternative and brown it using the same method; it will produce a toasted fat flavor but not identical to dairy brown butter. Use dairy-free chocolate chips. The method stays unchanged.
For egg-free: replace the egg and egg yolk with 3 tablespoons of full-fat Greek yogurt or 2 tablespoons of plain unsweetened applesauce. The cookies will spread slightly differently and the center texture will be more cakey than fudgy, but they bake successfully.
This recipe has not been tested in a certified allergen-free kitchen and cannot be guaranteed safe for any specific allergy.
Equipment Needed
- Light-colored stainless steel or aluminum saucepan, 2 quart — for browning the butter. A light-colored pan is essential for monitoring the color of the milk solids as they brown; a dark non-stick pan makes it nearly impossible to see when the butter has gone from golden to amber to dangerously close to burnt. Never use a non-stick pan for browning butter if it has a dark interior.
- Large heatproof mixing bowl — for combining the browned butter with the sugars immediately; the hot butter will melt and partially dissolve the sugars on contact, starting the mixing process as it cools.
- Baking sheets, rimmed, light-colored — for baking the cookies. Light-colored aluminum sheets reflect heat rather than absorbing it, which produces cookies with even, golden-brown bottoms rather than darkened, over-baked undersides. Dark baking sheets bake cookie bottoms faster than the tops, producing an uneven result.
- Parchment paper or silicone baking mat — for lining the baking sheets. Parchment produces a slightly crispier cookie bottom than a silicone mat; silicone mats produce a slightly softer, more even bottom. Both work well.
- Medium cookie scoop (3-tablespoon capacity) — for portioning the dough into consistent, even balls. Consistent size ensures all cookies finish baking at the same time; hand-portioned dough produces cookies that vary in size and bake unevenly on the same tray.
- Instant-read thermometer (optional) — for checking the browned butter temperature; removing it from the heat promptly when the temperature reaches 150 to 160°C and the solids are amber prevents burning.
Step-by-Step Directions
Step 1: Brown the Butter
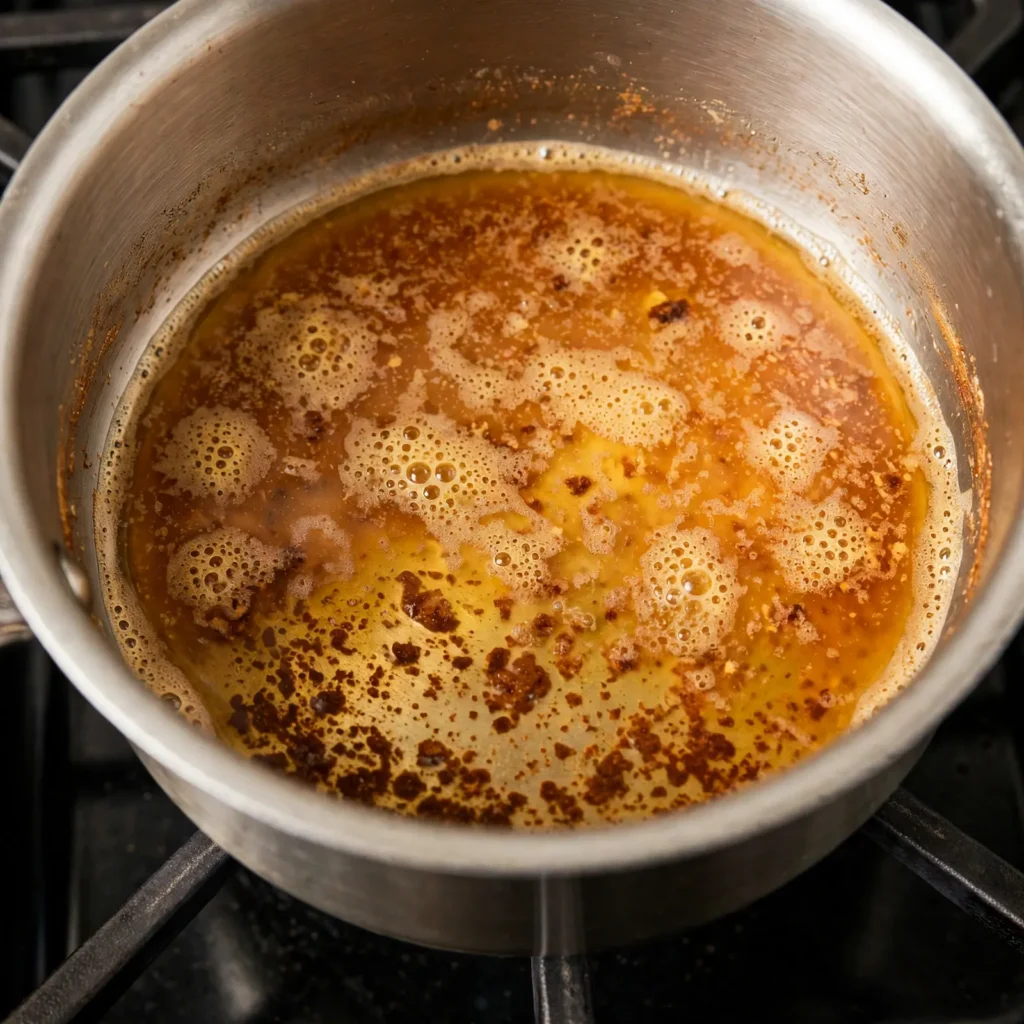
Cut the cold butter into rough tablespoon-sized pieces and place them in the light-colored saucepan over medium heat. As the butter melts, it will foam on the surface; continue cooking, swirling the pan occasionally rather than stirring, for 4 to 6 minutes total. The foam will subside after the first 2 minutes and then reform as a finer, denser foam as the water evaporates and the milk solids begin to brown. Watch for the color change beneath the foam: the solids should progress from white to pale gold to amber brown. The butter is ready when it smells unmistakably like hazelnuts or toffee and the solids visible at the bottom and sides of the pan are a warm, deep amber color.
Remove from the heat immediately and pour the browned butter, including every bit of the dark amber milk solid specks, into the large heatproof mixing bowl. Those dark specks are the entire source of the brown butter flavor; leaving them in the pan wastes the most flavorful part.

Chef’s Note: The window between perfectly browned and burnt butter is narrower than it sounds but wider than most people expect. At medium heat, the amber stage lasts approximately 60 to 90 seconds before the solids begin to darken toward black. Watch for the color change beneath the foam and remove the pan from the heat the moment the solids reach a deep amber; the residual heat in the pan will continue to cook the butter for another 30 to 40 seconds even off the heat, which is why pouring it immediately into the mixing bowl is important.
Step 2: Combine Butter and Sugars
Add both sugars, the light brown and granulated white, directly into the bowl of hot browned butter. Whisk vigorously for 60 to 90 seconds until the sugars are fully incorporated and the mixture looks smooth and slightly grainy rather than separated. The hot butter partially dissolves the sugars on contact, and this brief whisking creates a more cohesive base than simply stirring; it also begins incorporating a small amount of air, which contributes a slight lift in the finished cookie. Allow the mixture to cool until warm to the touch but no longer hot, approximately 5 to 8 minutes; adding the eggs to a too-hot mixture risks scrambling them.
Chef’s Note: The reason this recipe combines the sugars into the hot browned butter rather than waiting for the butter to cool completely is that the residual heat accelerates the partial dissolution of the sugar crystals, which produces a denser, more cohesive dough base. Cookies made with pre-cooled browned butter have slightly more distinct sugar crystal texture in the raw dough and can spread marginally differently during baking.
Step 3: Add Eggs and Vanilla
Once the butter-sugar mixture has cooled to warm, add the whole egg, the extra yolk, and the vanilla extract. Whisk vigorously for 60 seconds until the mixture is smooth, glossy, and slightly thickened; it should look similar to a caramel sauce, pulling from the bowl sides cleanly. The glossy, ribbon-like texture at this stage indicates the egg proteins have begun emulsifying with the fat, which is what produces the chewy, fudgy center texture in the baked cookie rather than a dry, crumbly one. Allow the mixture to sit undisturbed for 30 seconds, then whisk again for another 30 seconds; repeat this process a total of three times over about 5 minutes. This intermittent whisking creates a shinier dough and a slightly crisper edge on the baked cookie.
Step 4: Add Dry Ingredients
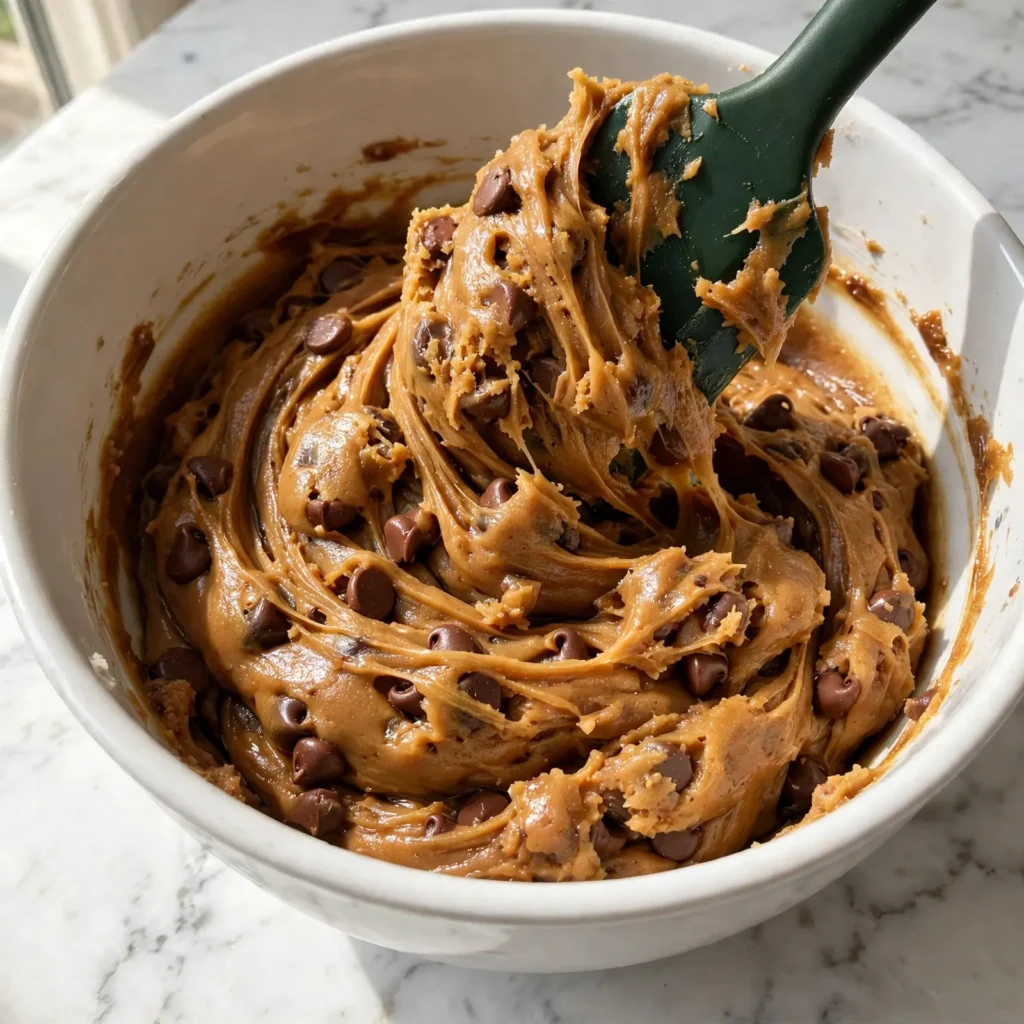
Spoon the flour into the measuring cup and level it off, or weigh directly. Add the flour, baking soda, and fine salt to the bowl. Using a spatula or wooden spoon rather than the whisk, fold the dry ingredients into the wet ingredients with broad, deliberate strokes, stopping as soon as no visible flour streaks remain. Over-mixing at this stage develops gluten and produces tough, dense cookies; the moment the flour is fully incorporated, the folding stops. The dough will look thick and slightly sticky.
Step 5: Fold In the Chocolate
Add the chocolate chips and any chopped chocolate to the dough and fold them through with the same broad spatula strokes until evenly distributed throughout. The dough should be thick enough that the chips don’t fall to the bottom when the spatula lifts through it; if the dough seems very thin or runny at this point (which can happen if the butter was still hot when the eggs went in), refrigerate for 20 minutes before scooping.
Step 6: Portion and Prepare for Baking
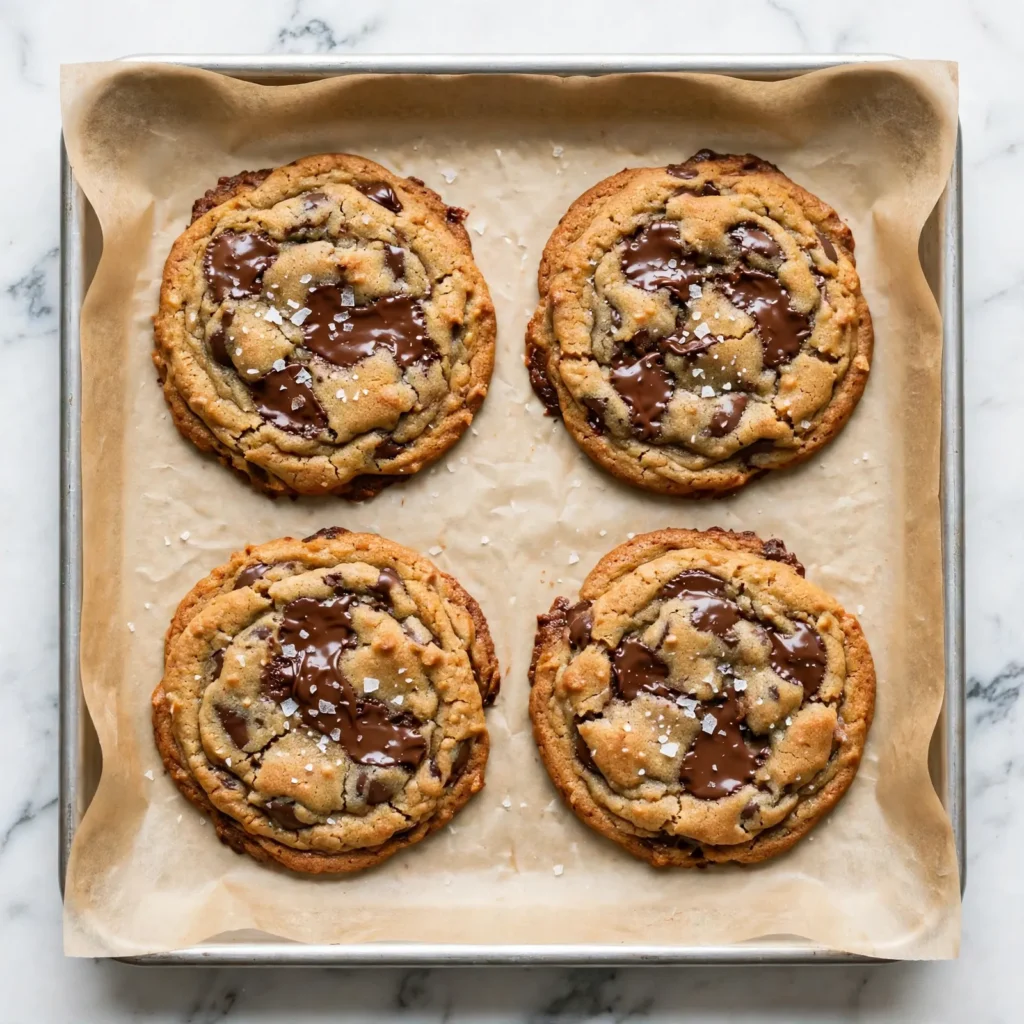
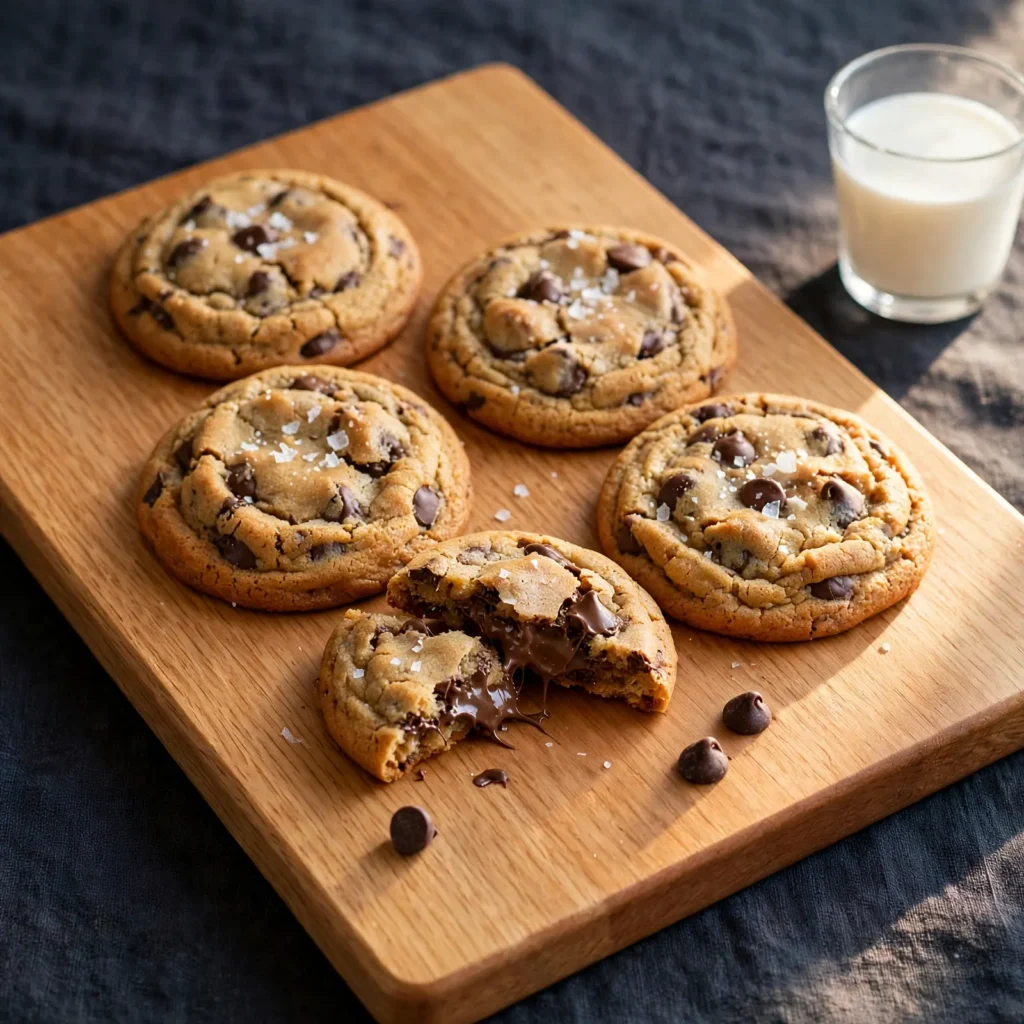
Preheat the oven to 190°C (375°F). Line the baking sheets with parchment paper. Using the 3-tablespoon cookie scoop, portion the dough into balls and place them on the prepared baking sheets with at least 6cm of space between each cookie; they spread significantly during baking and need room. If you want taller, thicker cookies, roll each portion between your palms into a smooth ball; for wider, flatter cookies with more caramelized surface area, leave the scooped shape as-is without rolling. Immediately before placing in the oven, press 2 to 3 additional chocolate chips gently onto the top surface of each cookie and add a small pinch of flaky sea salt.
Chef’s Note: Placing the extra chips on top of the dough balls rather than relying entirely on the chips folded into the dough produces two results. First, it guarantees visible, photogenic chocolate on the surface of every cookie rather than the random chance that a chip happened to be near the top of that particular scoop. Second, the chips on the surface of the cookie melt and pool into irregular, visible puddles rather than being enclosed in dough, which creates the visual and textural contrast that makes bakery-style cookies look the way they do.
Step 7: Bake, Rest, and Serve
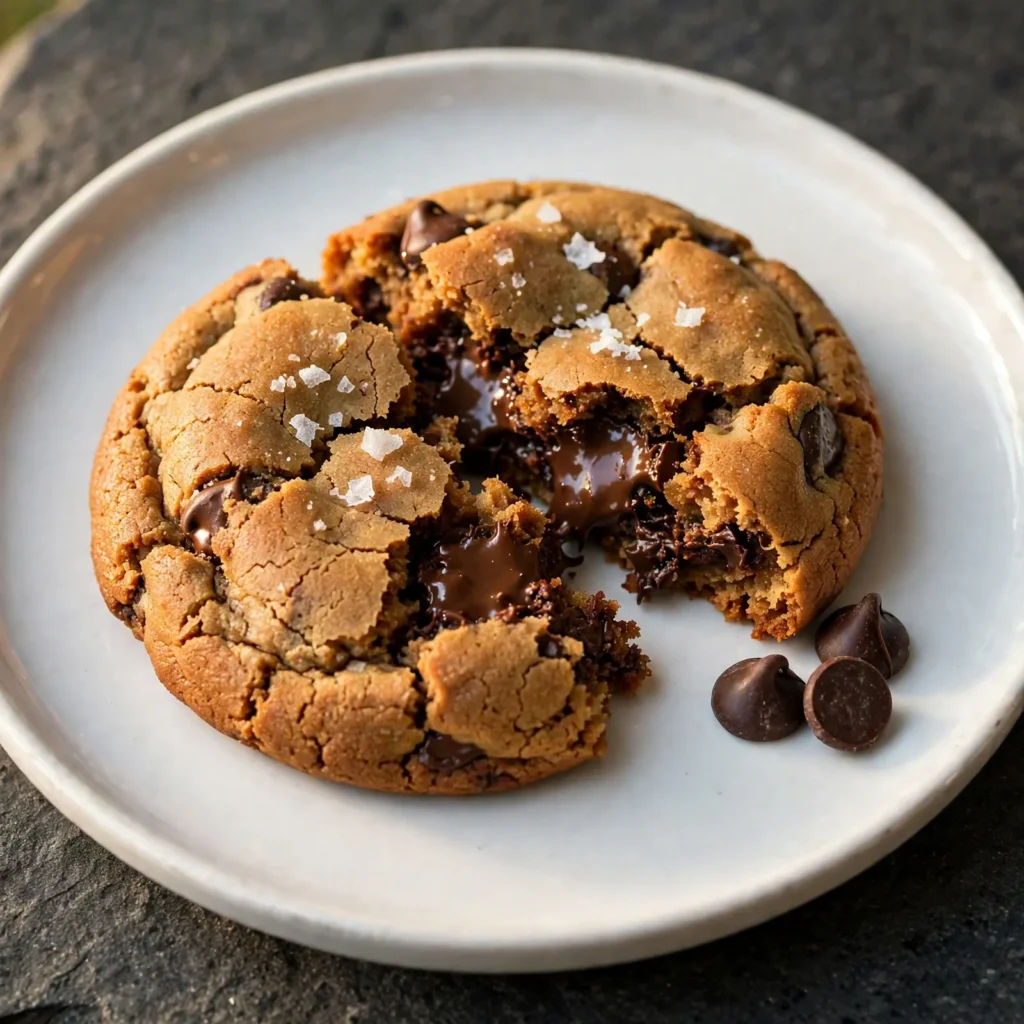
Bake one tray at a time on the center rack for 10 to 12 minutes. The cookies are done when the edges are set and visibly golden-brown but the centers still look slightly underdone, slightly puffed, and matte rather than dry and glossy across their entire surface. This is the correct state; the centers will continue setting from the residual heat of the pan for the 5 to 10 minutes they rest there after coming out of the oven. A cookie that looks fully done in the oven is overdone by the time it has cooled.
Remove the tray from the oven and immediately bang it once firmly on the countertop; this deflates the slightly puffed centers and creates the wrinkled, crinkled surface that distinguishes a bakery-style cookie from a cakey puffed one. Allow the cookies to cool on the baking sheet for 8 to 10 minutes before transferring; they’re too fragile to move cleanly until the edges have fully set.
Common Mistakes and Troubleshooting
| Problem | Cause | Solution |
|---|---|---|
| Butter burnt rather than browned | Heat too high, or left unattended at the critical amber stage | Use medium heat throughout; watch continuously once the foam subsides the second time; remove from heat at first amber color |
| Cookies flat and greasy | Butter still hot when eggs were added, causing them to scramble or fat to separate | Always cool the butter-sugar mixture to warm before adding eggs; if greasy dough forms, refrigerate 20 minutes before baking |
| Cookies too thick and cakey | Too much flour from scooping rather than spooning into the cup | Always spoon flour into the measuring cup and level; never scoop directly from the bag; use a kitchen scale if possible |
| Cookies spread too much and go paper-thin | Dough too warm, or butter over-browned and too liquid | Chill the dough for 30 minutes before baking; measure flour accurately |
| Centers taste dry rather than chewy | Overbaked; centers fully set in the oven | Pull cookies when centers look underdone and matte; they set fully on the hot pan over 8 to 10 minutes of resting |
| No brown butter flavor in the finished cookie | Milk solids left behind in the pan, or butter only melted rather than browned | Pour every drop including all dark amber milk solid specks into the mixing bowl; ensure the butter reaches amber, not just melted |
Variations and Substitutions
- Dark chocolate and sea salt version: Replace all the semi-sweet chips with roughly chopped 70% dark chocolate bars. The darker chocolate provides a more intense, slightly bitter counterpoint to the sweet caramelized dough and the browned butter’s nuttiness; the combination with flaky salt is the most fully developed flavor variation in this recipe.
- Espresso brown butter cookies: Add 1 teaspoon of good-quality instant espresso powder to the hot browned butter before adding the sugars. The espresso enhances the Maillard compounds in the browned butter and deepens the nutty, caramel flavor without producing a coffee-flavored cookie; the espresso simply amplifies what’s already there. Use dark chocolate chips to complement the deeper base.
- Toasted walnut and chocolate chip: Toast 100g of walnut halves in a dry skillet over medium heat for 4 to 5 minutes until fragrant and very lightly colored, then roughly chop and fold into the dough alongside the chocolate chips. Reduce the chocolate by 80g to compensate. The toasted walnut adds a parallel nutty crunch that echoes the browned butter and provides textural contrast to the chewy center.
- Brown butter snickerdoodle style: Omit the chocolate chips entirely and replace the brown sugar with all granulated white sugar at 250g total. Roll each portioned dough ball in a mixture of 50g granulated sugar and 1.5 teaspoons of ground cinnamon before placing on the baking sheet. The browned butter produces an exceptionally deep snickerdoodle base that’s noticeably more complex than the standard cream-butter version.
- Matcha and white chocolate: Replace 30g of the all-purpose flour with 2 tablespoons of sifted ceremonial-grade matcha powder. Replace the semi-sweet chocolate chips with white chocolate chips. The green tea bitterness pairs with the browned butter’s nuttiness in a combination that tastes earthy, sweet, and complex simultaneously.
- Thicker, bakery-style cookies: Increase the flour to 240g, chill the dough for 60 minutes before baking, and portion into larger 4-tablespoon scoops. Bake at 175°C (350°F) for 13 to 15 minutes. The lower temperature and extra flour produce a thicker, more bakery-style cookie that’s less crisp at the edges and more uniformly chewy from edge to center.
Serving Suggestions
- Serve warm, 5 to 8 minutes after coming off the baking sheet, when the chocolate is still fluid and the center has just barely set. At this temperature, the cookie pulls apart rather than breaking cleanly, which is the ideal eating experience.
- Place a single warm cookie in a wide, shallow bowl and add a small scoop of vanilla ice cream directly on top. The heat from the cookie begins melting the ice cream immediately; eat quickly. The contrast of the warm nutty cookie with the cold cream makes both taste considerably more vivid than either would alone.
- Stack three cookies with a piece of parchment between each layer and wrap in a twist of parchment tied with twine for a simple homemade gift; browned butter chocolate chip cookies hold their texture well for 4 to 5 days, making them practical for gifting or delivery.
- Alongside a glass of cold whole milk or a strong black coffee. The milk provides a clean, neutral contrast that refreshes the palate between the rich bites; black coffee amplifies the browned butter’s toasty notes.
- Set out a platter of warm cookies at a gathering with a small bowl of extra flaky salt beside them; some people want more, some don’t, and providing it separately is a small detail that shows attention to flavor preference.
- For a more composed dessert, sandwich two completely cooled cookies around a thin layer of room-temperature cream cheese frosting or plain vanilla buttercream. The cookie sandwich format works particularly well with the dark chocolate and sea salt variation.
Tips for the Best Results
- Use a light-colored pan and watch the butter the entire time it’s browning. This is not a step to multitask through. The window between amber-browned and black-burnt is about 60 seconds at medium heat, and the difference in flavor between the two is the difference between a complex, nutty cookie and one that tastes bitter and acrid throughout. Stand at the stove, swirl the pan, and pull it the moment the solids turn amber and the smell turns distinctly nutty.
- Include all the dark milk solid specks when you pour the butter into the bowl. It’s tempting to pour carefully and leave the darker bits in the pan, but those specks are the concentrated source of the brown butter flavor. The recipe’s entire premise depends on their presence in the dough; leaving them behind produces a cookie that tastes like a good plain butter cookie rather than a brown butter cookie.
- Whisk the butter-sugar-egg mixture in intervals rather than continuously. The repeated whisking and resting over 5 minutes builds the emulsion in the dough base more effectively than one long continuous whisk, producing a slightly shinier, denser dough that results in crisper edges and a more pronounced chewy center. This is the technique detail most recipes for this style of cookie skip or underexplain.
- Pull the cookies while the centers still look underdone. The 8 to 10 minutes of resting on the hot baking sheet after the oven is not just for cooling; it’s a continuation of the baking process. A cookie that looks 80% done when the tray comes out will look and taste 100% done after resting. Baking until the centers look fully set produces dry, crumbly cookies by the time they’ve cooled.
- Bang the tray on the counter immediately out of the oven. This single movement deflates the puffed centers and creates the wrinkled, textured surface associated with bakery-quality cookies. A cookie left to cool undisturbed on the tray retains its puffed dome shape and produces a cakey, thick texture; one tray-banged immediately flattens into the crisp-edge, chewy-center profile the recipe is built around.
Storage Tips
Refrigerator
Baked brown butter chocolate chip cookies keep at room temperature in an airtight container for up to 5 days. Refrigerating baked cookies accelerates staling; room temperature storage is better for maintaining the chewy texture. If refrigerating baked cookies, place a half-slice of bread in the container to maintain moisture; the cookies will absorb the bread’s humidity and stay softer for longer. Unbaked portioned dough balls keep in the refrigerator for up to 3 days; the extended cold rest develops a more complex flavor in the dough through continued Maillard reactions at lower temperatures.
Freezer
Unbaked portioned dough balls freeze very well for up to 3 months. Place the portioned scoops on a parchment-lined baking sheet, freeze until solid (about 1 hour), then transfer to a sealed freezer bag. Bake from frozen at 190°C (375°F) for 13 to 15 minutes, adding 2 to 3 extra minutes to account for the frozen center. Fully baked cookies freeze adequately for up to 2 months, but the texture of the edges softens slightly after thawing compared to fresh-baked; room temperature thawing for 20 minutes produces the best result.
Reheating
A baked cookie reheated in the microwave at 50% power for 12 to 15 seconds is very close to a freshly baked warm cookie; the chocolate softens, the center warms through, and the edge re-crisps slightly. Don’t exceed 15 seconds at any power level; an overheated cookie becomes tough and rubbery as the sugar recrystallizes. Reheating in a 150°C (300°F) oven for 4 to 5 minutes on a baking sheet produces a crispier edge than the microwave method and is the better approach when reheating multiple cookies at once.
Make-ahead note: The most practical approach for fresh warm cookies on demand is to freeze the portioned raw dough balls and bake directly from frozen. A bag of frozen dough balls in the freezer means you can have freshly baked brown butter chocolate chip cookies in 15 minutes on any day without making the full batch from scratch.
Nutrition Information
Per serving, approximately 1 cookie (1/18 of the recipe):
| Nutrient | Amount |
|---|---|
| Calories | 220 kcal |
| Protein | 3g |
| Total Carbohydrates | 28g |
| Dietary Fiber | 1g |
| Total Sugar | 18g |
| Total Fat | 11g |
| Saturated Fat | 6.5g |
| Cholesterol | 42mg |
| Sodium | 135mg |
| Vitamin C | 0mg |
| Calcium | 25mg |
| Iron | 1.4mg |
| Potassium | 95mg |
Nutrition values are approximate and may vary based on chocolate chip brand, butter fat content, and cookie size.
Why This Recipe Works
The flavor difference between a brown butter cookie and a standard butter cookie is entirely attributable to the Maillard reaction occurring in the butter’s milk solids during the browning process. Butter is approximately 80% fat, 18% water, and 2 to 3% milk solids; those milk solids contain proteins and lactose, the natural milk sugar. When the butter is heated past its melting point and the water begins to evaporate, the proteins and lactose in the milk solids reach temperatures above approximately 140 to 150°C, at which point the Maillard reaction initiates between the amino acid groups in the proteins and the reducing sugars. The products of this reaction include hundreds of new aromatic compounds: furanones, pyrazines, and diacetyl, among others, which individually smell like caramel, toasted nuts, and warm toffee and collectively produce the unmistakable brown butter aroma. These compounds are fat-soluble, which means they dissolve completely into the surrounding butter fat and distribute evenly through the dough when the butter is combined with the other ingredients.
The technique of whisking the butter-sugar-egg mixture in intervals over 5 minutes rather than in a single continuous mix produces a noticeably different dough texture through a process related to crystallization and emulsification. Each cycle of whisking and resting allows the hot butter to partially dissolve the sugar crystals into the liquid fat and also allows the egg proteins time to partially unfold and begin emulsifying with the fat molecules. When whisking resumes, more air is incorporated into an already partially emulsified system, which produces a denser, more stable emulsion than a single whisk would. In the baked cookie, this denser emulsion produces a slightly shinier, more cohesive crumb that reads as “chewier” than cookies from a dough where all the ingredients were combined once and quickly.
The combination of one whole egg and one additional yolk instead of two whole eggs produces a specifically different texture outcome in the finished cookie. A whole egg contributes approximately equal parts yolk and white; the white adds water and protein that produce structure and lift in the baked cookie, while the yolk adds fat and lecithin that contribute richness and chewiness. The extra yolk in this recipe adds a second portion of fat and lecithin without the second white’s additional water and protein. The result is a cookie that has more fat than a two-whole-egg version (producing a richer, fudgier center) without the extra protein and water that would make the cookie puff and set more firmly (which would produce a cakey texture). The dough is wetter and softer than a two-white dough, which contributes to the spread that creates the crisp edges.
The intermittent tray-banging technique immediately after the oven produces the characteristic wrinkled, flat surface associated with this style of cookie through a specific physical mechanism. Freshly baked cookies removed from the oven have a set outer crust but a still-liquid interior center where the fats and sugars haven’t fully crystallized. When the tray is struck against the counter, the liquid interior of each cookie collapses downward, pushing the set outer crust inward and creating the wrinkled, folded surface pattern. This collapse simultaneously increases the contact surface between the cookie and the pan, which promotes caramelization of the underside during the resting period and contributes to the crisp edge that develops as the cookie cools. Cookies left undisturbed retain their dome shape because the inner liquid sets in place before it has a chance to collapse.
I’ve tested this recipe at four browning levels: just-melted (no browning), light golden, medium amber, and deep amber. The just-melted version tastes like a standard butter cookie with melted fat. The light golden version has a faint toasted note that’s noticeable but subtle. The medium amber version produces the full hazelnut and caramel depth that defines the brown butter cookie flavor profile. The deep amber version, taken one step further, produces a slightly bitter, more pronounced flavor that some people prefer but that risks crossing into acrid if not immediately removed from heat. Medium amber is the target for the most universally appealing result.
Frequently Asked Questions
Can I make brown butter chocolate chip cookie dough ahead of time?
Yes, and chilling the dough for at least 30 minutes, or up to 3 days in the refrigerator, produces a noticeably better cookie. The cold rest allows the flour to fully hydrate, which produces a denser, more flavorful dough, and the low temperature slows the Maillard reactions that began in the sugar when the hot browned butter was added, creating additional flavor compounds over time. The cold dough also spreads less during baking, producing a thicker, chewier cookie. Scoop the dough into balls before refrigerating so they’re ready to bake immediately.
Why did my butter burn instead of browning?
Burnt butter happens most commonly from heat that is too high or from leaving the pan unattended at the critical browning stage. At medium heat, the window between amber-browned and black-burnt is about 60 seconds; at medium-high it can be 20 seconds. Use medium heat throughout, swirl the pan rather than walking away, and remove it from the heat the moment the milk solids at the bottom turn amber and the smell becomes distinctly nutty. If the butter smells sharp, acrid, or like popcorn cooked too long, it has gone past the ideal point. Start with a fresh batch.
Can I use salted butter instead of unsalted?
Yes, with a small adjustment. Reduce the fine salt in the recipe from 3/4 teaspoon to 1/4 teaspoon to account for the salt already in the butter. The flaky salt finish on top remains unchanged. Salted butter contains approximately 1.5 to 2% salt by weight; in a recipe using 170g of butter, this adds about 2.5 to 3.4g of additional salt to the dough before the recipe’s own salt, which is enough to make the cookies taste over-salted if the full 3/4 teaspoon is also used.
How do I know when the cookies are done?
The visual indicator for properly baked brown butter chocolate chip cookies is specific: the edges should be set, golden-brown, and no longer shiny, while the centers should still look underdone, slightly puffed, and matte rather than glossy and fully set. This looks like under-baking to most people, which is why over-baked cookies are so common. At 10 to 12 minutes in a properly preheated 190°C oven, the cookies should look about 80% done; the remaining 20% of setting happens on the hot pan during the 8 to 10-minute rest after the oven.
Are brown butter chocolate chip cookies gluten-free?
The standard recipe contains gluten from the all-purpose flour. To make a gluten-free version, replace the all-purpose flour with a certified gluten-free 1:1 baking flour blend that includes xanthan gum. The dough texture will be slightly stickier; chilling it for 30 minutes before scooping makes it easier to handle. Bake at the same temperature and check from 10 minutes. The brown butter flavor and the chocolate chip quantity remain unchanged; the cookies may spread slightly more than the standard version.
Why are my cookies coming out cakey and thick?
Cakey, thick cookies almost always mean too much flour was added. Scooping flour directly from the bag compresses it into the cup and can add 20 to 30% more flour than intended. The correct method is to spoon flour lightly into the measuring cup with a separate spoon and level the top with a flat edge. Better still, use a kitchen scale and measure 220g directly. A secondary cause can be dough that was too cold when baked; very cold dough doesn’t spread as much during baking, producing thicker cookies.
Can I substitute the chocolate chips with other mix-ins?
Yes. The dough base is versatile and pairs well with any mix-in that can withstand the 10 to 12 minute bake. Toffee bits, dried cranberries, toasted nuts, and white chocolate chips all work well. The total quantity of mix-ins should stay around 280g to maintain the right dough-to-inclusion ratio; adding significantly more mix-ins than the recipe calls for makes the dough difficult to scoop cleanly and produces cookies that don’t hold their shape well during baking.
Conclusion
Brown butter chocolate chip cookies are a direct upgrade from the standard version with a very small increase in active time: browning the butter takes about 6 minutes and the flavor it contributes to the finished cookie is entirely out of proportion to that investment. The technique is worth learning independently of this recipe because the same browned butter can go into brownies, blondies, cakes, and sauces with equally significant results.
The intermittent whisking, the slightly underdone pull time, the tray-bang right out of the oven: these are the three technique details that separate a good batch from a great one. Each takes 10 seconds of awareness. Combined, they produce brown butter chocolate chip cookies that hold up against any bakery version.
If you loved this recipe, save it to your cookie recipes and baking from scratch Pinterest board so you can find it easily later. For more same recipes follow Thecookingvibes Pinterest account.
Brown Butter Chocolate Chip Cookies
Ingredients
Equipment
Method
- Cut butter into pieces and melt in a light-colored saucepan over medium heat, swirling occasionally. Cook 4 to 6 minutes until the foam subsides, the milk solids turn deep amber, and the butter smells like hazelnuts or toffee. Immediately pour all the butter and amber milk solid specks into a large heatproof bowl.
- Add both sugars to the hot browned butter. Whisk vigorously 60 to 90 seconds until incorporated and smooth. Let cool until warm to the touch, 5 to 8 minutes.
- Add the whole egg, extra yolk, and vanilla. Whisk for 60 seconds until smooth and glossy. Rest 30 seconds, whisk again 30 seconds. Repeat this cycle a total of 3 times over 5 minutes.
- Add flour, baking soda, and fine salt. Fold with a spatula using broad strokes until no flour streaks remain; stop immediately once incorporated.
- Fold in the chocolate chips until evenly distributed. Preheat oven to 190°C (375°F).
- Scoop 3-tablespoon portions onto parchment-lined baking sheets with 6cm spacing. Press 2 to 3 extra chips on top of each. Add a small pinch of flaky salt to each.
- Bake one tray at a time on the center rack for 10 to 12 minutes until edges are golden-brown and set but centers still look slightly underdone and matte.
- Remove from oven. Immediately bang the tray once firmly on the counter to deflate the centers. Rest on the tray 8 to 10 minutes before transferring. Centers will set fully during this time.
Notes
- Use a light-colored pan for browning butter; dark pans make it impossible to see the milk solid color change.
- Include every amber milk solid speck when pouring the butter into the bowl; they carry all the brown butter flavor.
- Pull cookies when centers look underdone; they set fully on the hot tray during the 8 to 10-minute rest.
- Dough can be chilled for 30 minutes to 3 days for improved flavor; frozen dough balls bake from frozen at the same temperature with 2 to 3 extra minutes.