Easy Homemade Pizza Dough Recipe (Crispy, Chewy Every Time)
There is something genuinely satisfying about sliding a pizza into the oven knowing you made the dough yourself. It smells different from anything store-bought yeasty, slightly tangy, with that warm flour scent that fills the whole kitchen before a single topping even goes on.
This pizza dough recipe uses five pantry staples, takes about 15 minutes of actual hands-on time, and produces a crust that’s crispy on the bottom and chewy in the middle. It works for thin-crust pizzas, thicker pan-style pies, and even calzones. The 1-hour rise does most of the work for you.

Why You’ll Love This Pizza Dough Recipe
- Only 5 ingredients. Flour, yeast, water, olive oil, and salt. No eggs, no dairy, nothing unusual to track down.
- No stand mixer needed. You can knead this by hand in about 8 minutes. A mixer works too if you have one, but it is not required.
- Reliable yeast activation. The recipe uses a simple warm water test so you know your yeast is alive before mixing everything together.
- Freezer-friendly. This recipe makes two dough balls. Use one tonight and freeze the other for a quick weeknight pizza later.
- Genuinely flexible texture. Roll it thin for a cracker-style crust or leave it thicker and let it puff into something closer to a pan pizza. The same dough does both.

Ingredients You’ll Need
Recipe Timing
| Detail | Info |
|---|---|
| Servings | Makes 2 dough balls (each serves 2-3, total 4-6 servings) |
| Difficulty | Easy |
| Course | Main |
| Cuisine | Italian-American |
| Prep Time | 15 minutes |
| Rest Time (Rise) | 1 hour |
| Cook Time | 12-15 minutes |
| Total Time | 1 hour 30 minutes |
For the best results, use bread flour if you have it. The higher protein content (around 12-14%) builds more gluten, giving the crust that chewy, slightly elastic bite you get from a good pizzeria. All-purpose flour works well and gives a slightly softer, more tender result. Either way, make sure the water is warm, not hot: aim for around 110°F (43°C), which is comfortably warm on your wrist but not scalding. Anything above 120°F (49°C) will kill the yeast.
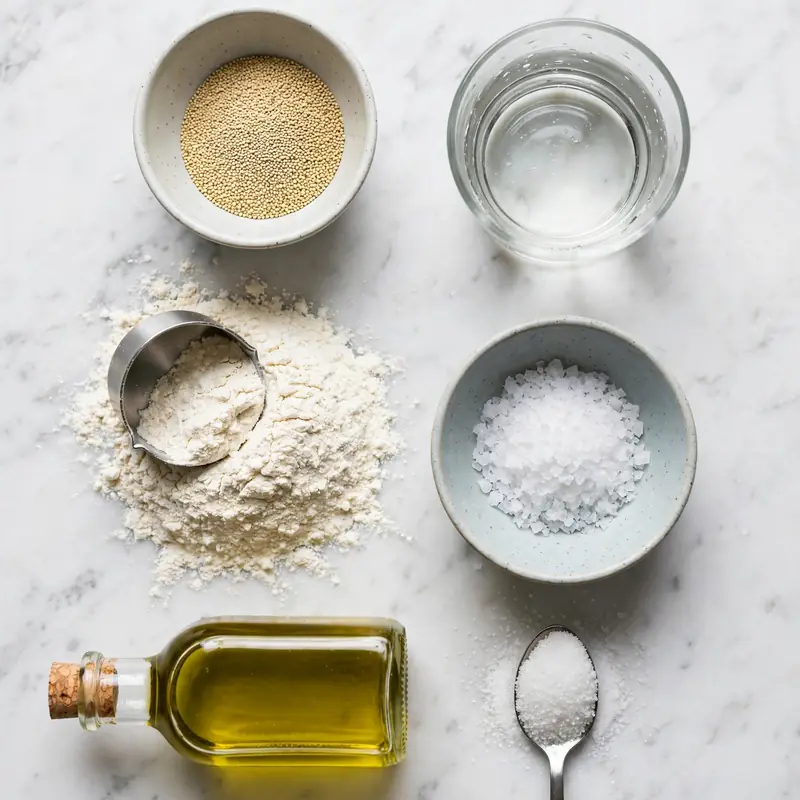
- 3 cups (360g) bread flour or all-purpose flour, plus extra for dusting. Bread flour gives you chewiness; all-purpose gives you softness. Weigh it if you can for consistent results.
- 2 1/4 teaspoons (7g) active dry yeast (one standard packet). This is the leavening agent. Check the expiry date before you start.
- 1 cup (240ml) warm water (110°F / 43°C). Too cold and the yeast won’t activate; too hot and you’ll kill it.
- 2 tablespoons (30ml) olive oil. This lubricates the gluten strands, making the dough easier to stretch and adding a subtle richness.
- 1 1/2 teaspoons (9g) fine sea salt. Salt controls yeast activity and develops flavor. Don’t add it directly on top of dry yeast.
- 1 teaspoon (4g) sugar. Feeds the yeast during activation. It burns off during baking.
Allergen and Dietary Disclosure
This recipe contains gluten (wheat flour). It is naturally free from dairy, eggs, and nuts.
For a gluten-free version, a 1:1 gluten-free flour blend (one with xanthan gum already included) works reasonably well. The texture will be less chewy and the dough won’t stretch as elastically, but the result is still genuinely pizza-like. Let that dough rest 30 minutes longer before shaping.
Step-by-Step Directions
Step 1: Activate the Yeast
Add the warm water and sugar to a large bowl or measuring jug and stir briefly. Sprinkle the yeast over the top and leave it undisturbed for 8 to 10 minutes. When it is ready, the surface will look visibly foamy and slightly domed. If nothing happens after 10 minutes, the yeast is likely dead or the water was the wrong temperature. Start again with a fresh packet.
Chef’s Note: This step tells you the yeast is alive before you invest time in mixing and kneading. It takes 2 minutes of effort and saves you from a flat, disappointing crust.
Step 2: Combine the Dry Ingredients
Whisk together the flour and salt in a large mixing bowl. Make a well in the center. Keeping salt away from the yeast at this stage is a habit worth keeping.
Step 3: Bring the Dough Together
Pour the yeast mixture and olive oil into the flour well. Stir with a wooden spoon or your hand until the shaggy dough starts pulling away from the sides of the bowl and forms a rough ball. It will look scrappy at this point.
Step 4: Knead Until Smooth
Turn the dough onto a lightly floured surface and knead for 8 to 10 minutes by hand, pushing the dough away with the heel of your palm, folding it back, and rotating it a quarter turn each time. When it’s ready, the dough will be smooth, slightly tacky (not sticky), and spring back quickly when you poke it. With a stand mixer fitted with a dough hook, this takes 5 to 6 minutes on medium speed.
Chef’s Note: The dough should feel like soft, warm clay. If it keeps sticking to your hands, add flour one tablespoon at a time, but be conservative. Too much flour makes the crust tough.

Step 5: First Rise
Drizzle a clean bowl with a little olive oil, place the dough inside, and turn it once to coat the surface. Cover tightly with plastic wrap or a clean damp kitchen towel. Leave it in a warm spot for 1 hour, or until the dough has doubled in size. A switched-off oven with just the light on is a good spot, especially in cooler kitchens.
Chef’s Note: Doubling in size is your cue, not the clock. On a cold day, this may take 75 to 90 minutes. On a warm summer afternoon, it may be done in 45.
Step 6: Punch Down and Divide
Press down on the dough with your fist to release the gas built up inside. Turn it onto a floured surface and divide it into two equal portions. Shape each piece into a smooth ball by tucking the edges underneath.
Step 7: Rest Before Shaping
Let the dough balls rest on the floured surface, loosely covered, for 10 to 15 minutes. This relaxes the gluten and makes the dough stretch without snapping back like a rubber band. This rest is short but matters.
Step 8: Shape and Bake
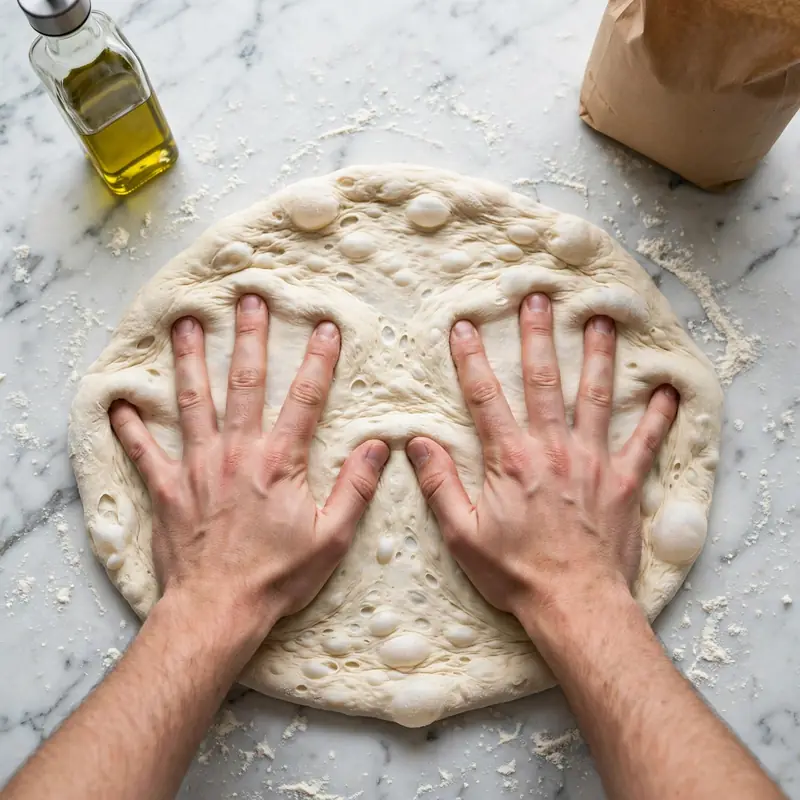
On a floured surface, press and stretch one dough ball into a round (roughly 30-32cm / 12 inches for a thin crust). Use your hands rather than a rolling pin to keep the air inside. Transfer to a lightly oiled baking tray or a preheated pizza stone. Add your toppings and bake at 240°C (475°F) for 12 to 15 minutes, until the crust edges are deep golden brown and the bottom sounds hollow when tapped.
Common Mistakes and Troubleshooting
| Problem | Cause | Solution |
|---|---|---|
| Yeast didn’t foam | Water too hot/cold or expired yeast | Use a thermometer; replace yeast packet |
| Dough won’t stretch, keeps snapping back | Gluten too tight, not rested enough | Cover and rest 10-15 more minutes |
| Crust is dense and flat | Insufficient rise or dead yeast | Ensure dough doubles; test yeast first |
| Dough is sticky and hard to work with | Too much water or under-floured surface | Add flour 1 tablespoon at a time while kneading |
| Crust is tough and chewy (not in a good way) | Over-kneaded or too much flour | Knead just until smooth; weigh flour |
| Soggy bottom | Oven not hot enough or toppings too wet | Preheat baking stone/tray; pat wet toppings dry |
Variations and Substitutions
Whole Wheat Pizza Dough: Replace up to half the bread flour with whole wheat flour. The crust will be slightly denser with a nuttier flavor. More than 50% whole wheat tends to make the dough stiff and hard to stretch.
Herbed Dough: Mix 1 teaspoon dried oregano and 1/2 teaspoon garlic powder directly into the flour before adding the liquid. Works especially well for a plain garlic bread or a white pizza.
Thin and Crispy Version: After the first rise, roll the dough out thinner than usual (about 6-7mm) and bake on a preheated stone at 250°C (480°F) for 10 to 11 minutes.
Thick Pan Pizza: After shaping, press the dough into an oiled deep baking tray, cover, and let it rise for another 20 minutes before adding toppings. This gives you a pillowy, focaccia-like base.
No-Yeast Version (Quick Dough): Combine 2 cups flour with 1 tablespoon baking powder, 1/2 teaspoon salt, and 3/4 cup warm water. Mix, knead briefly, and use immediately. No rise needed. The texture is dougher and less complex, but it works when you’re short on time.
Serving Suggestions
- Classic Margherita: Tomato sauce, fresh mozzarella, fresh basil, olive oil. The simplest way to taste how good the dough is on its own.
- Garlic bread base: Brush the shaped dough with garlic butter, scatter flaky salt on top, and bake straight. No tomato sauce.
- Calzone: Fold the dough over a filling of your choice, seal the edges, brush with egg wash (or a little olive oil), and bake at 220°C (425°F) for 18 to 20 minutes.
- Sheet-pan pizza: Press one dough ball into a rimmed baking sheet, let it rest 20 minutes, then top it with ingredients that go well with a slightly thicker base — roasted vegetables, caramelized onions, crumbled paneer.
- Flatbreads: Divide the dough into four pieces, roll each thin, and cook in a dry cast iron skillet over medium-high heat for 2 to 3 minutes per side. Serve with hummus or labneh.
- Pizza rolls: Flatten the dough, spread with sauce and cheese, roll it up like a log, slice into rounds, and bake at 200°C (400°F) for 18 to 20 minutes.

Tips for the Best Results
- Weigh your flour. A cup of flour can range from 120g to 160g depending on how it’s scooped. 360g on a scale is always 360g.
- Don’t rush the rise. The 1-hour window is a minimum. A longer, slower rise in the fridge (overnight, up to 72 hours) develops a more complex flavor and a slightly more open crumb. Just let the cold dough come back to room temperature for 30 minutes before shaping.
- Preheat your baking surface. A hot pizza stone or a preheated heavy baking tray makes a real difference to the crust. Put it in the oven when you turn the oven on.
- Less topping, better pizza. Overloaded pizzas steam instead of bake. A light hand with sauce, cheese, and toppings gives you a better crust.
- Semolina for launching. If using a pizza stone, dust the peel or a flat tray with semolina flour (not regular flour) before putting the shaped dough on it. It acts like ball bearings and the pizza slides off cleanly.
Storage Tips
Refrigerator
After the first rise, wrap individual dough balls tightly in plastic wrap and refrigerate for up to 3 days. Cold fermentation actually improves the flavor. Take it out 30 minutes before you plan to shape it.
Freezer
Wrap each dough ball in plastic wrap, then place it in a zip-lock bag. It keeps well in the freezer for up to 3 months. To use: transfer to the fridge the night before and let it thaw slowly overnight, then rest at room temperature for 30 minutes before stretching.
Reheating Baked Pizza
Reheat leftover baked pizza in a dry skillet over medium heat for 3 to 4 minutes. Cover the pan with a lid for the last minute. The crust goes crispy on the bottom and the cheese melts back to life. The microwave works for speed but the crust softens.
Nutrition Information
Per serving (1/4 of one dough ball, roughly 90g of raw dough, without toppings)
| Nutrient | Amount |
|---|---|
| Calories | 210 kcal |
| Protein | 6g |
| Carbohydrates | 40g |
| Fiber | 1.5g |
| Sugar | 1g |
| Total Fat | 3g |
| Saturated Fat | 0.5g |
| Cholesterol | 0mg |
| Sodium | 440mg |
| Iron | 2.5mg |
| Calcium | 10mg |
| Potassium | 75mg |
Nutrition values are approximate and may vary based on brands and portion sizes.
Why This Recipe Works
The ratio here 3 cups flour to 1 cup water gives you a dough with around 63-65% hydration, which is on the lower end of the Neapolitan range. That makes it manageable for home bakers without a bench scraper or professional dough experience, while still producing a crust with enough moisture to blister properly in a hot oven.
The olive oil tenderizes the gluten network, which is why this dough stretches more forgivingly than a zero-fat dough would. The sugar is a small quantity enough to give the yeast an immediate food source for a reliable rise, but not enough to make the crust taste sweet or affect browning in any significant way.
I’ve tested this recipe with both active dry yeast and instant yeast, and both work. Instant yeast can be mixed directly into the flour without the activation step, shaving off 10 minutes, but the bloom test is genuinely useful if you’re not certain about your yeast’s freshness. The recipe keeps the activation step for that reason.
Specific temperatures matter here: the oven should be as hot as it will go, ideally 240-250°C (475°F). Pizza bakes fast at high heat. A lower oven temperature results in a paler, tougher crust because the dough dries out before it gets any color.
Frequently Asked Questions
Can I make this pizza dough ahead of time?
Yes, this is actually one of the best ways to use this recipe. After the initial rise, punch it down, wrap each ball tightly, and refrigerate for up to 3 days. The slow cold fermentation improves the flavor noticeably. Take it out 30 minutes before shaping so the gluten relaxes enough to stretch properly. For longer storage, freeze it for up to 3 months.
Why isn’t my dough rising?
The most common cause is yeast that didn’t activate properly. Either the water was too hot (above 120°F/49°C kills yeast), too cold (below 100°F/38°C slows activation significantly), or the yeast itself was old. Always do the foam test first. If you see no activity after 10 minutes, start with fresh yeast. Also check that your resting spot is warm enough; a drafty countertop in a cold kitchen can stall the rise considerably.
Can I use all-purpose flour instead of bread flour?
Absolutely. All-purpose flour produces a softer, slightly more tender crust, while bread flour gives you more chew because of its higher protein content. Both work fine for this recipe. If you use all-purpose flour, the dough may feel slightly less elastic, which actually makes it a little easier to stretch.
How do I know when the pizza is done baking?
The crust edges should be deep golden brown with some darker spotting, and the bottom should sound hollow when you knock on it. The cheese should be fully melted, bubbling, and have light golden patches. If the edges are pale and the crust feels soft when you lift it with a spatula, give it 2 to 3 more minutes. Under-baked pizza is a much more common problem than over-baked.
Does this dough contain gluten or dairy?
This pizza dough recipe contains gluten from the wheat flour. It is dairy-free, egg-free, and nut-free as written. For a gluten-free version, use a 1:1 gluten-free flour blend that contains xanthan gum and extend the rest time to 90 minutes. The texture won’t be identical but it is a workable substitute.
Can I skip the oil or use a different oil?
Olive oil is the best choice here for flavor and texture, but a neutral oil like sunflower or canola works fine if that’s what you have. Don’t skip it entirely: the fat is what makes this dough extensible and forgiving. Without it, the crust is noticeably tougher.
How thin should I roll the dough?
For a classic thin-crust pizza, aim for 5 to 6mm thick after stretching. For a thicker, chewier crust, stop at around 1 to 1.5cm. The easiest way to keep it even is to work from the center outward with your hands rather than a rolling pin, which tends to push all the air out and make the crust flat and cardboard-like.

Conclusion
Once you’ve made this pizza dough recipe a couple of times, it becomes one of those things you can do without even looking at the recipe. The yeast bloom takes 10 minutes, kneading takes another 8, and the oven does the rest. The crust you get is genuinely better than most supermarket bases and holds up under toppings without going limp. Keep one dough ball in the freezer and you’re always 90 minutes away from a proper homemade pizza.
If you loved this recipe, save it to your pizza recipes Pinterest board so you can find it easily later. For more healthy recipes and daily food inspiration, follow TheCookingVibes on Pinterest.
Easy Homemade Pizza Dough
Ingredients
Equipment
Method
- Combine warm water and sugar in a bowl. Sprinkle yeast over the top and let it sit 8 to 10 minutes until foamy.
- Whisk flour and salt together in a large bowl. Make a well in the center.
- Pour the yeast mixture and olive oil into the flour well. Mix until a shaggy dough forms.
- Knead on a floured surface for 8 to 10 minutes until the dough is smooth and springs back when poked.
- Place in an oiled bowl, cover, and let rise in a warm spot for 1 hour or until doubled.
- Punch the dough down and divide into two equal balls. Let rest, covered, for 10 to 15 minutes.
- Stretch each ball into a round, add toppings, and bake at 240°C (475°F) for 12 to 15 minutes until the crust is golden and the bottom sounds hollow.