Creamy No Bake Cheesecake — Firm Enough to Slice, Rich Enough to Remember
The first time most people attempt a no bake cheesecake and it comes out soft, wobbly, and impossible to slice cleanly, they assume they did something wrong. Usually, they didn’t. The recipe just didn’t give them the right ratios. A properly made no bake cheesecake should hold a clean edge when the knife comes out of it, have a filling that’s dense and silky rather than mousse-like, and sit on a crust that doesn’t crumble when you lift a slice.
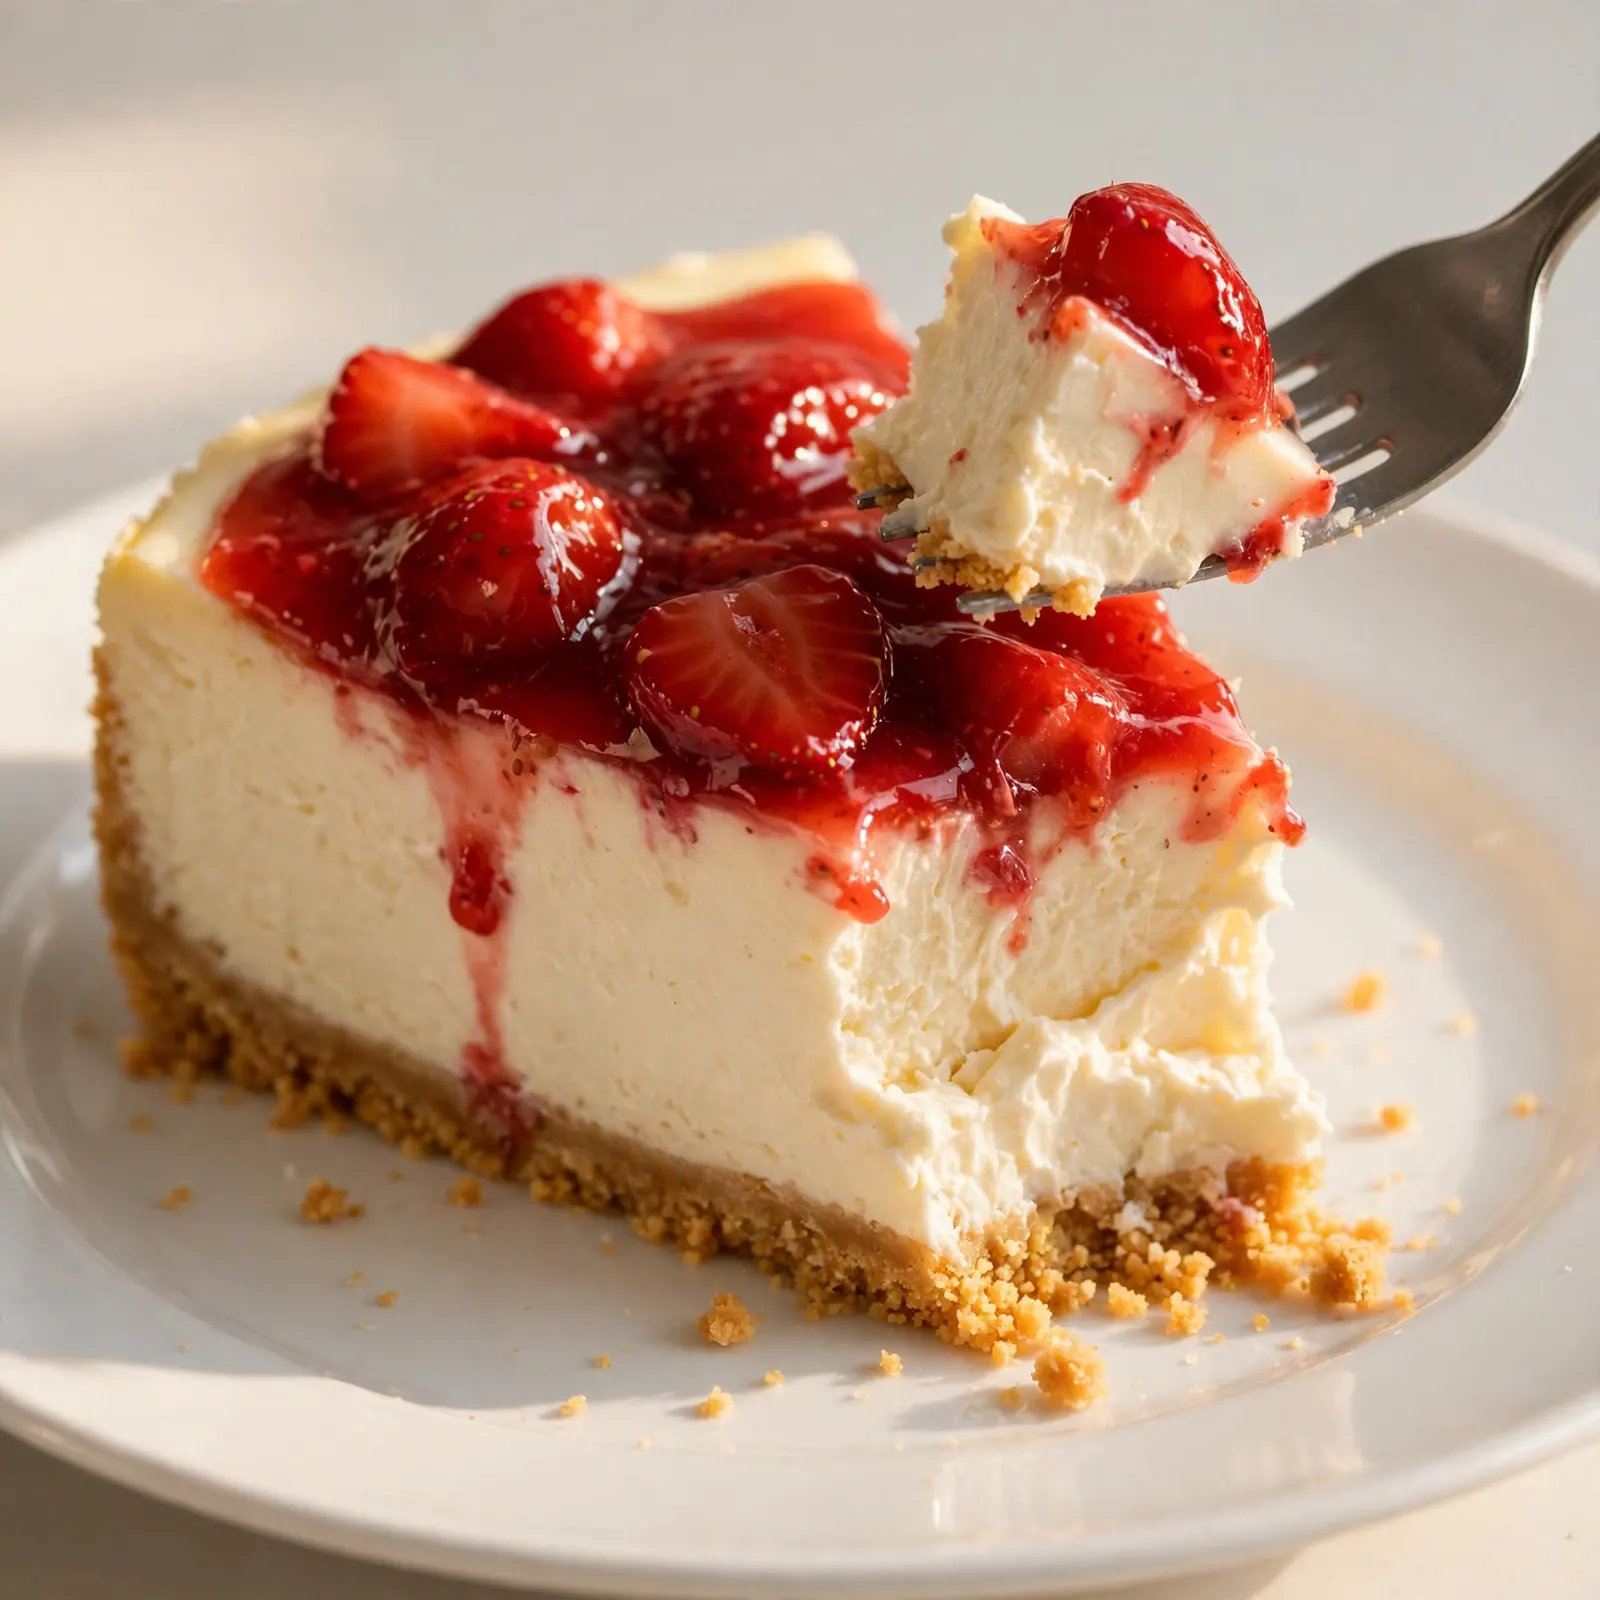
This no bake cheesecake gets there through two decisions: the right cream cheese to heavy cream ratio, and overnight chilling rather than the 2-hour minimum most recipes suggest. The crust uses a full 6 tablespoons of melted butter, which presses into a firm, compact base that doesn’t fall apart when sliced. The filling is rich, slightly tangy from the lemon juice and cream cheese, and sweet without tasting like frosting. No oven, no water bath, no cracked top. Just a properly chilled cheesecake that looks and tastes like it came from a bakery case.
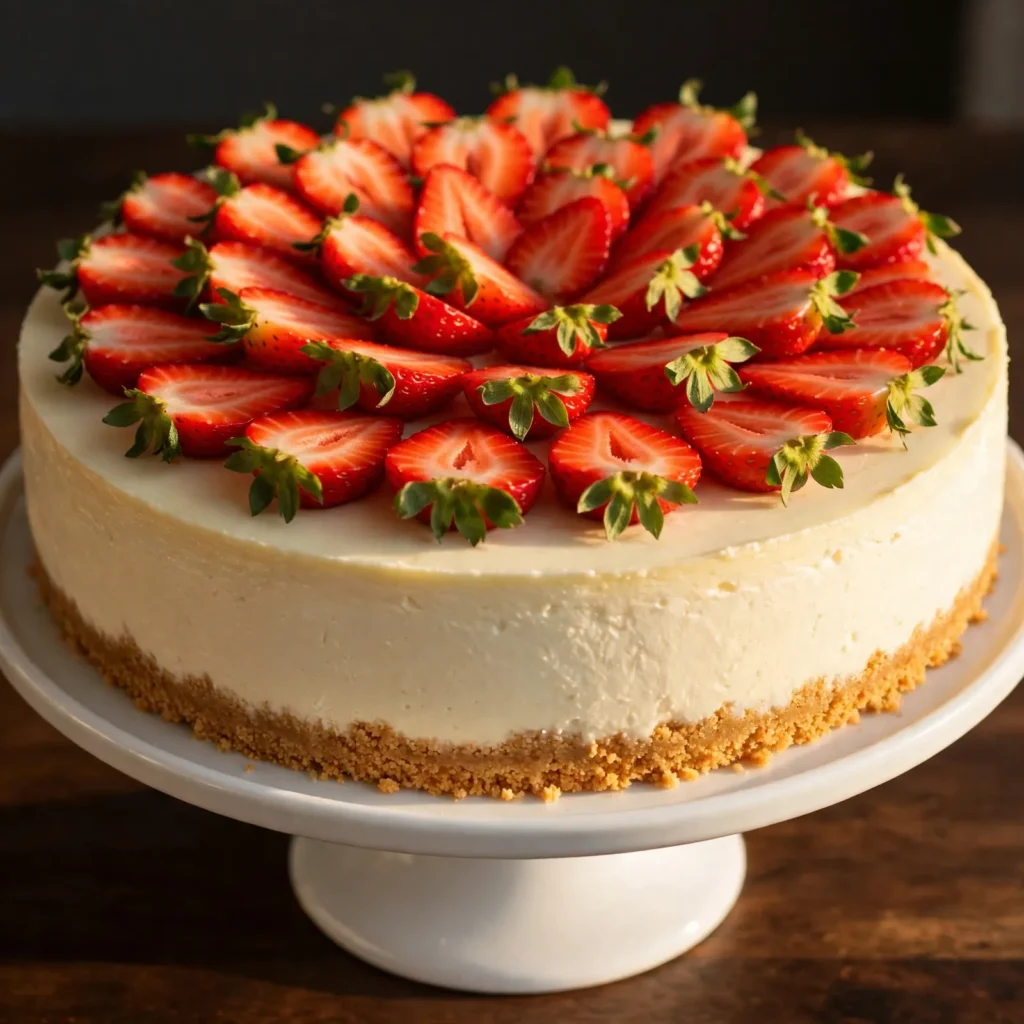
Why You’ll Love This No Bake Cheesecake
- Slices cleanly without collapsing. The ratio of cream cheese to whipped heavy cream is calibrated so the filling sets firm enough to hold a clean edge. This is the detail most no bake recipes get wrong, and it’s the difference between a presentable dessert and a soft mess on the plate.
- No oven required, ever. Not for the crust, not for the filling. The entire recipe happens at room temperature and in the refrigerator. That makes it genuinely practical in summer, for anyone without oven access, or for days when you already have the oven occupied.
- Tangy rather than cloying. Full-fat cream cheese and a measured amount of lemon juice keep the filling from tasting like sweetened condensed filling. The tang gives it the depth that makes you want a second slice rather than feeling overwhelmed after one.
- Works with any topping. The plain ivory filling is a neutral canvas for fresh fruit, fruit compote, lemon curd, chocolate ganache, or a simple dusting of powdered sugar. The base recipe doesn’t change regardless of which direction you take it.
- Makes 12 slices from one 9-inch cheesecake. This is a full-size dessert that serves a crowd, holds in the refrigerator for 5 days, and freezes well, which makes it one of the most practical make-ahead desserts for gatherings and celebrations.
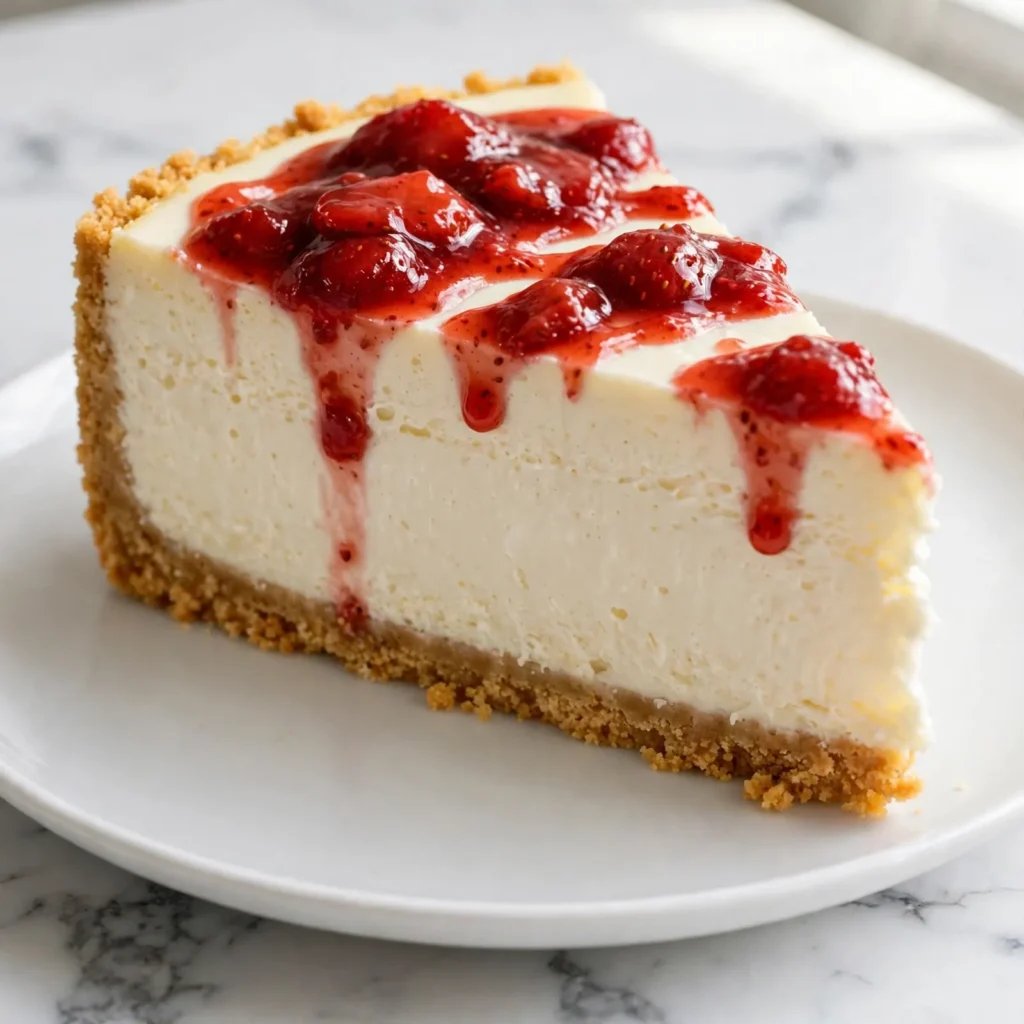
Ingredients You’ll Need
Recipe Timing
| Detail | Info |
|---|---|
| Servings | 12 slices |
| Difficulty | Easy |
| Course | Dessert |
| Cuisine | American |
| Prep Time | 25 minutes |
| Chill Time | 8 hours (or overnight) |
| Total Time | 8 hours 25 minutes |
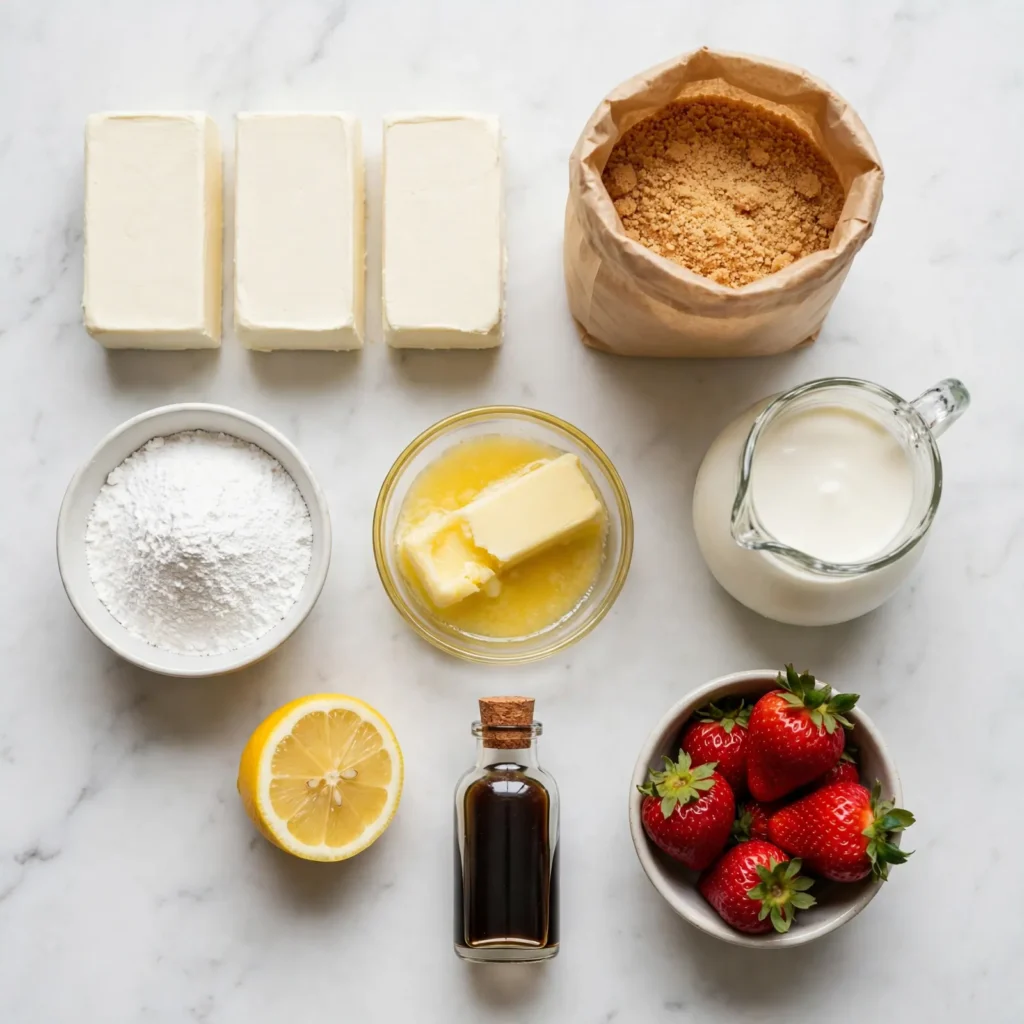
Use full-fat cream cheese exclusively for this recipe. The reduced-fat versions contain more water and stabilizers, which prevent the filling from setting to a firm, sliceable texture. Buy your cream cheese a day ahead and set it on the counter for an hour before you start: cold cream cheese creates lumps in the filling that no amount of mixing will fully smooth out.
For the heavy cream, use heavy whipping cream with a fat content of at least 36%. Lower-fat creams don’t whip to stiff peaks reliably, and a filling built on under-whipped cream sets soft and loose rather than firm.
For the Graham Cracker Crust:
- 2 cups (200g) graham cracker crumbs — Fine crumbs, either from pre-made crumbs or from 14 to 16 full graham crackers processed in a food processor. The crumbs should resemble coarse sand with no large pieces; big chunks create a crust that doesn’t press evenly and breaks apart when sliced.
- 1/4 cup (50g) granulated white sugar — Sweetens the crust and helps it bind. Brown sugar can be substituted for a slightly more caramel-like flavor.
- 6 tbsp (85g) unsalted butter, melted — The binding agent that holds the crust together. Six tablespoons is on the higher end for a 9-inch crust and intentionally so; the extra butter produces a denser, more compact base that stays together cleanly when sliced. Less butter gives you a looser, crumblier crust.
For the Cheesecake Filling:
- 680g (24 oz, three 8-oz blocks) full-fat cream cheese, softened to room temperature — This is the structural foundation of the filling. Three blocks ensure a firm, dense result. Two blocks produces a softer, mousse-like texture that is harder to slice. Don’t compromise on quantity here.
- 1 cup (120g) powdered sugar, sifted — Sifting is important. Unsifted powdered sugar clumps in the cold cream cheese and creates a gritty texture in the finished filling. Sift directly into the bowl.
- 1 tsp pure vanilla extract — Rounds out the flavor and prevents the cream cheese tang from feeling too sharp.
- 2 tbsp fresh lemon juice — The acidity brightens the filling and reinforces the natural tang of the cream cheese. Bottled lemon juice is a functional substitute but tastes noticeably more processed. Fresh is worth the extra minute of squeezing.
- 1 tsp lemon zest (optional) — Adds a concentrated citrus note that the juice alone doesn’t fully convey. Skip it if you’re topping with a strong flavored sauce that would cover it.
- 1 cup (240ml) cold heavy whipping cream — Whipped to stiff peaks and folded into the cream cheese base. The volume from the whipped cream lightens the filling slightly without making it foamy. Cold cream whips significantly faster and more stably than cream at room temperature.
Optional Topping (Choose One):
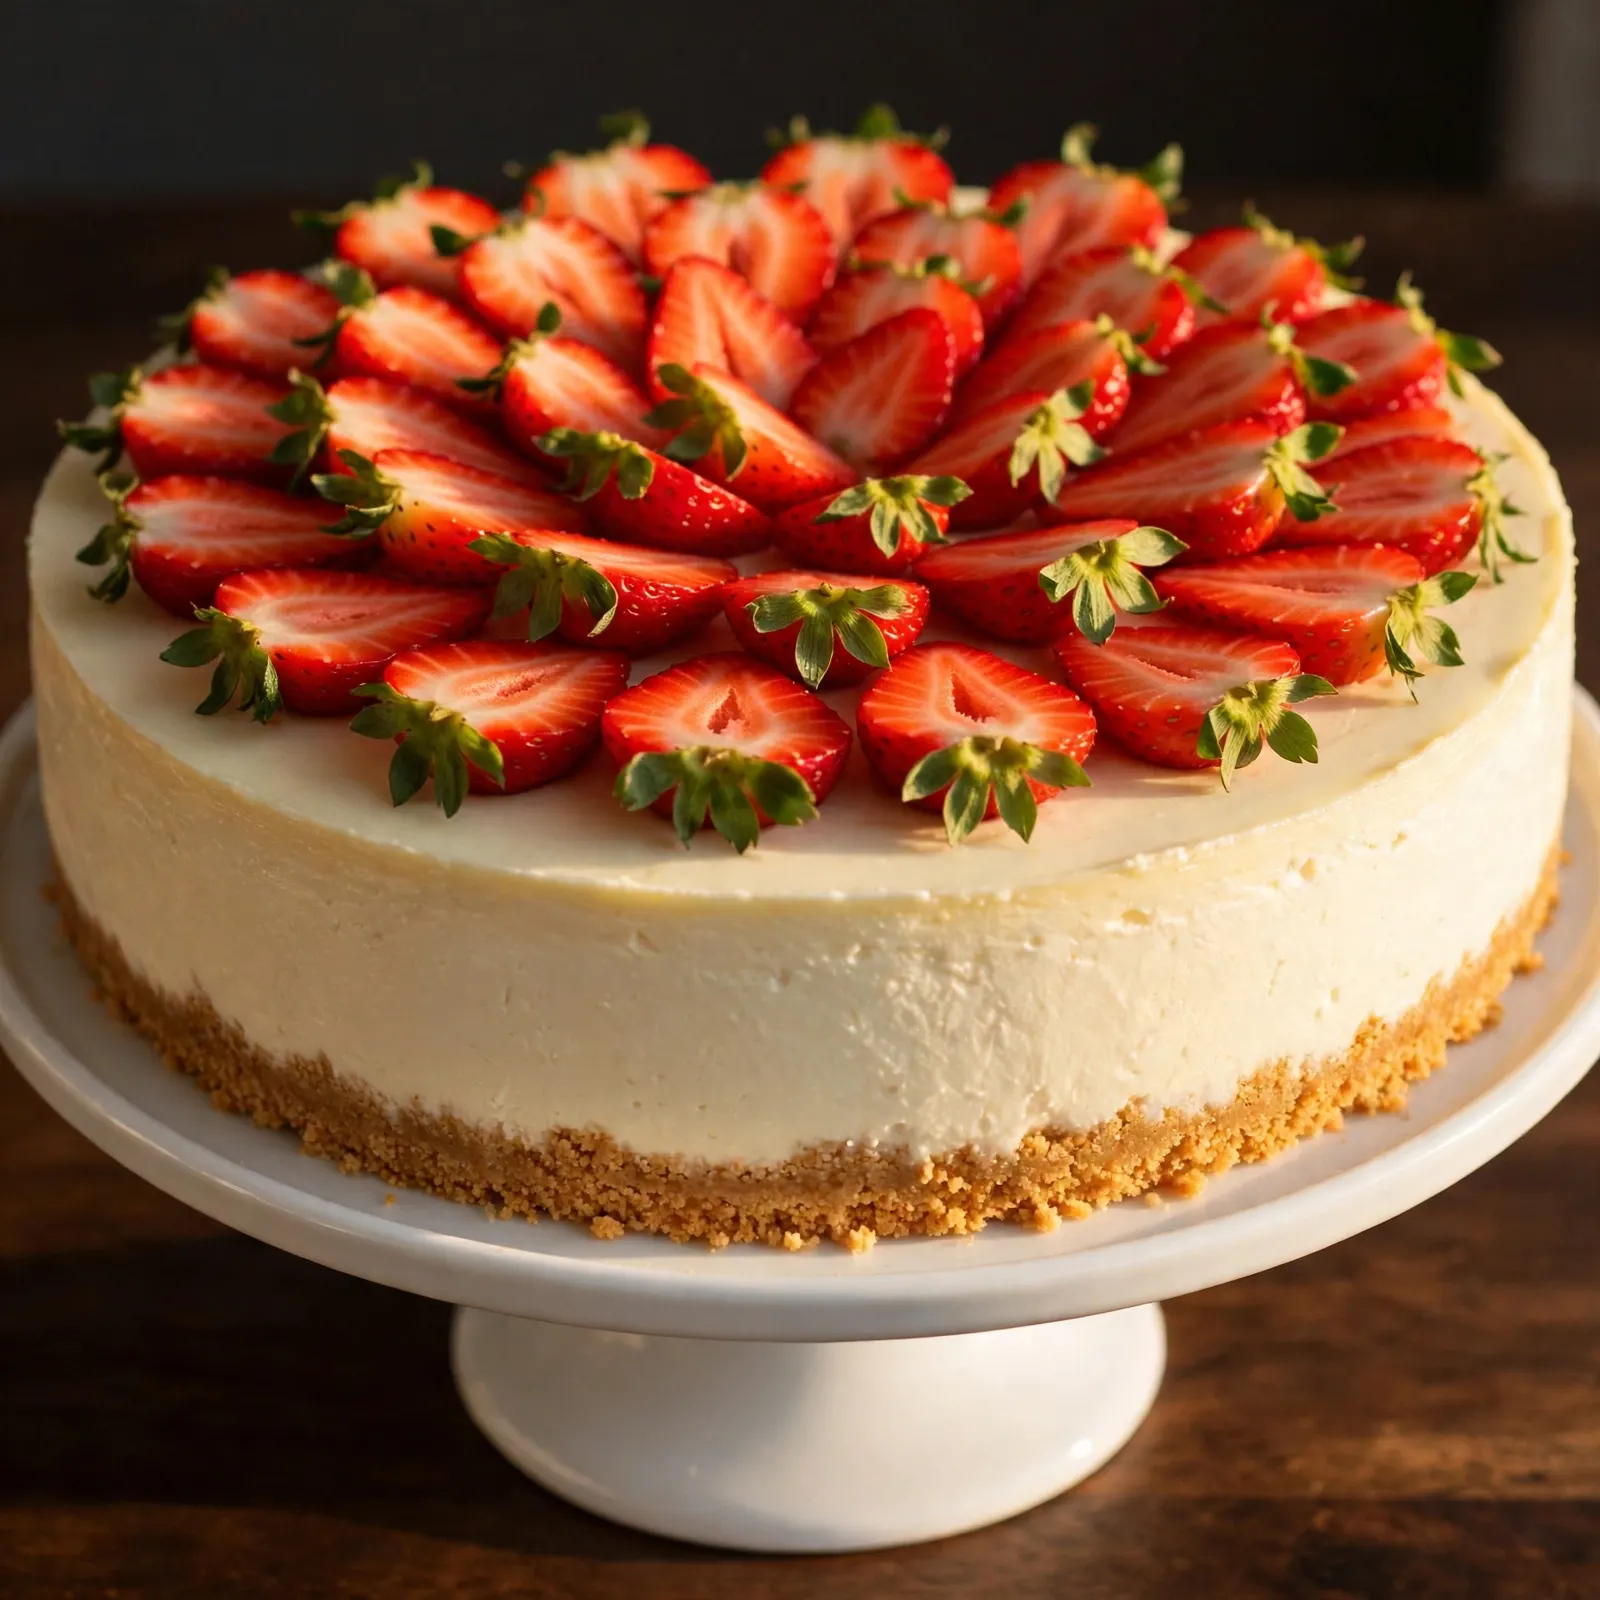
- Fresh strawberries, sliced, arranged across the top
- Strawberry or blueberry compote (1 cup of berries cooked with 2 tablespoons of sugar and 1 teaspoon of lemon juice until jammy)
- Lemon curd, spooned and spread across the surface
- Semi-sweet chocolate ganache (heat 1/2 cup of heavy cream and pour over 100g of finely chopped dark chocolate, stir until smooth, cool until pourable)
Allergen and Dietary Disclosure
This recipe contains dairy (cream cheese, butter, and heavy cream) and gluten (graham crackers). It does not contain eggs.
For a gluten-free version, use certified gluten-free graham-style crackers or replace the crust entirely with finely crushed gluten-free digestive biscuits or gluten-free oat-based cookies at the same weight. The filling needs no adjustments.
For a dairy-free version, use a solid plant-based cream cheese block (cashew-based varieties set the most similarly to regular cream cheese) and replace the heavy cream with full-fat coconut cream that has been refrigerated overnight and then whipped. The crust butter can be replaced with refined coconut oil, melted and cooled slightly. The texture will be slightly softer but still sliceable after overnight chilling.
This recipe has not been prepared in an allergen-free facility. Always verify individual product labels if you are managing a serious allergy.
Equipment Needed
- 9-inch (23 cm) springform pan — A springform pan with a removable bottom is essential for releasing the cheesecake cleanly without damaging the crust or the filling. A regular cake pan does not work for this recipe; you cannot lift the cheesecake out without it breaking. Wrap the outside of the pan with plastic wrap before filling to prevent any moisture from the fridge condensing under the crust.
- Stand mixer or hand mixer — You need a mixer for two jobs: beating the cream cheese base until completely smooth, and whipping the heavy cream to stiff peaks. By hand you can beat the cream cheese, but whipping cream by hand to stiff peaks is a prolonged process that most people find impractical.
- Large mixing bowl — For the cream cheese filling and for whipping the heavy cream separately before folding it in. Both need room to increase in volume.
- Flat-bottomed measuring cup or glass — For pressing the graham cracker crust firmly and evenly into the pan. The flat bottom compresses the crumbs into a dense, compact layer that holds its shape. Pressing with fingers alone leaves an uneven surface with gaps.
- Fine mesh sieve — For sifting the powdered sugar. This takes 30 seconds and eliminates the clumping that creates texture issues in the filling.
- Offset spatula — For smoothing the filling surface perfectly flat in the pan. A flat surface makes the finished cheesecake look clean and professional when presented on the stand.
Step-by-Step Directions
Step 1: Make and Press the Crust
Combine the graham cracker crumbs, sugar, and melted butter in a medium bowl. Stir until every crumb is moistened and the mixture has the texture of wet sand that holds its shape when you press a handful together. If it looks dry and falls apart, add half a tablespoon more of melted butter.
Pour the crumb mixture into the springform pan and use the flat bottom of a measuring cup to press it firmly and evenly across the bottom and about 2 cm up the sides. Press harder than you think necessary; a densely packed crust is what keeps it from crumbling when sliced.

Chef’s Note: Pressing the crust up the sides rather than keeping it flat on the bottom gives the finished cheesecake a more defined edge when released from the pan and makes each slice look cleaner. It also prevents the filling from seeping under the crust during chilling. Refrigerate the crust for at least 20 minutes while you prepare the filling. This short chill firms the butter enough to stabilize the crust so it doesn’t shift when the filling goes in.
Step 2: Beat the Cream Cheese Base
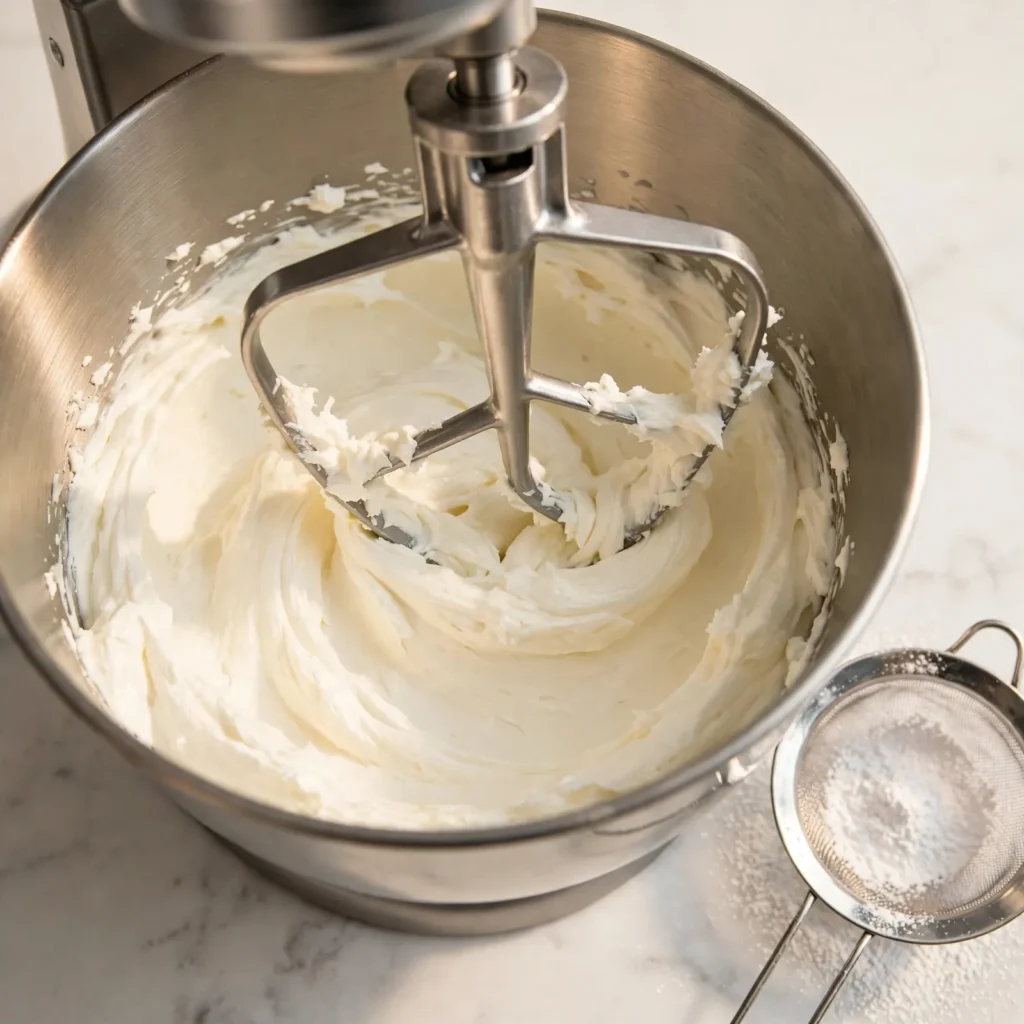
Place the softened cream cheese in your large mixing bowl. Beat on medium speed for 2 to 3 minutes until the cream cheese is completely smooth, no lumps visible, and slightly lighter in color. Don’t skip this step even though the mixer looks like it’s doing very little; a smooth cream cheese base is the foundation of a smooth finished filling.
Add the sifted powdered sugar in two additions, beating on low after each until incorporated. Scrape the sides and bottom of the bowl between additions because cream cheese clings to the bowl surface and doesn’t incorporate on its own.
Chef’s Note: Adding the powdered sugar in two additions rather than all at once prevents a cloud of fine sugar from escaping the bowl and distributes the sweetness more evenly through the cream cheese before the next addition goes in.
Step 3: Add the Flavorings
Add the vanilla extract, fresh lemon juice, and lemon zest (if using) to the cream cheese mixture. Beat on medium speed for 60 seconds until fully combined. Taste the base at this point: it should be pleasantly tangy, sweet, and creamy. If it tastes too bland, add a few more drops of lemon juice and a small pinch of salt and beat again briefly.
Step 4: Whip the Heavy Cream to Stiff Peaks
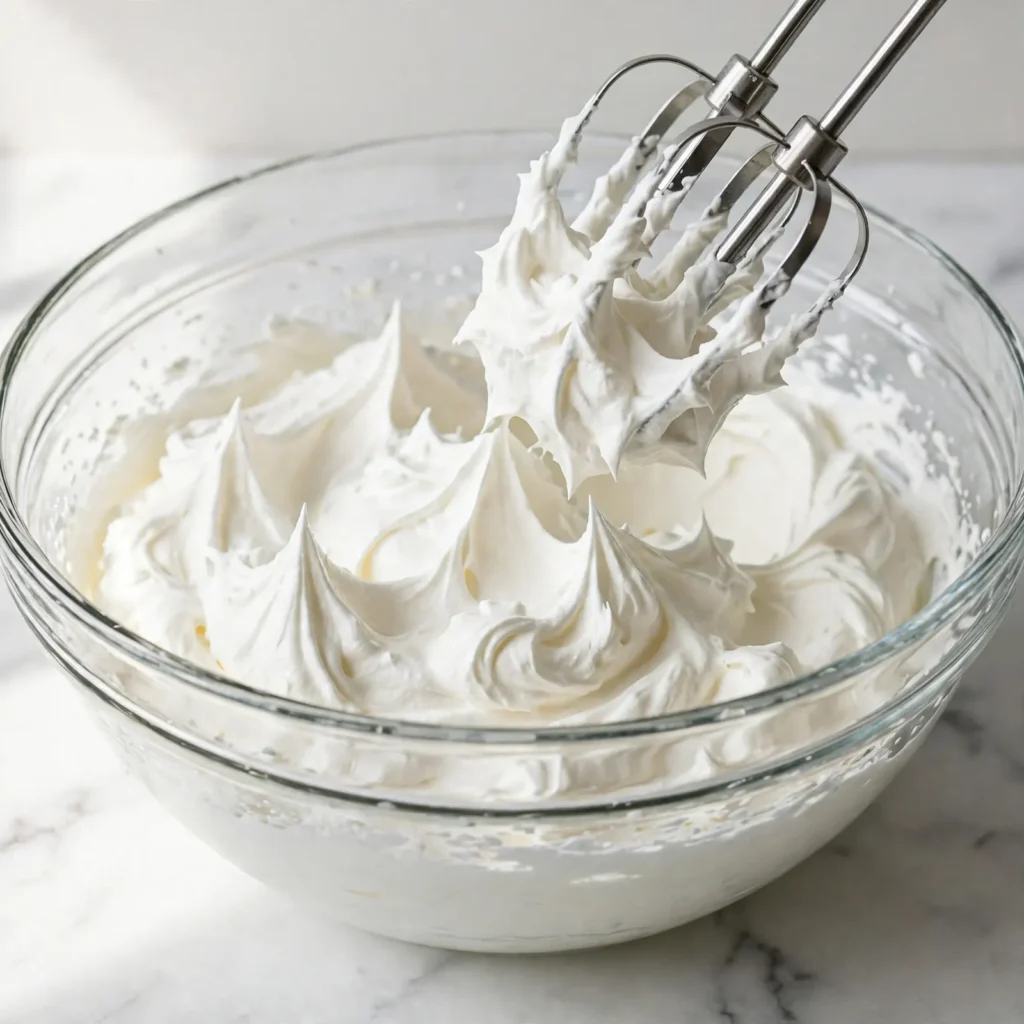
Pour the cold heavy whipping cream into a clean, separate bowl. Beat on medium-high speed until the cream holds stiff peaks that stand straight up without drooping when you lift the beaters. This takes about 3 to 4 minutes with a hand mixer. Stop as soon as the peaks are stiff; overwhipped cream starts to look grainy and yellow, which indicates the fat has begun to separate.
Chef’s Note: The bowl and beaters should be clean and completely dry before whipping. Even a small amount of residual moisture or fat prevents the cream from whipping properly. Some bakers chill the bowl in the freezer for 10 minutes before whipping; this isn’t necessary with cold cream, but it can speed up the process in a warm kitchen.
Step 5: Fold Cream into the Filling
Add the whipped cream to the cream cheese mixture in two additions. Using a large rubber spatula, fold gently with wide, sweeping motions: cut down through the center, sweep along the bottom, and bring the spatula up and over the top. Rotate the bowl a quarter turn and repeat. Fold only until no white streaks of cream are visible. Overfold and you deflate the whipped cream, making the filling dense and heavy instead of silky.
Chef’s Note: Folding in two additions is worth the extra pass. The first addition loosens the thick cream cheese base slightly, which makes the second addition incorporate more evenly without requiring as much vigorous folding that would knock out the volume.
Step 6: Fill and Smooth
Remove the chilled crust from the refrigerator. Pour the filling into the pan in a single motion and use an offset spatula to spread it into the corners and smooth the surface completely flat. Tap the pan gently on the counter two or three times to release any large air pockets trapped at the bottom of the filling.
Step 7: Chill Overnight
Cover the springform pan tightly with plastic wrap, pressing it gently onto the surface of the filling to prevent a dry skin forming on top. Refrigerate for a minimum of 8 hours. Overnight chilling is genuinely better; a fully chilled cheesecake at 8 to 12 hours sets significantly firmer than one pulled at 6 hours and slices with a cleaner edge.
Before releasing the springform ring, run a thin knife around the inside edge of the pan to loosen any spots where the filling may have adhered to the metal. Release the springform clasp slowly and lift the ring straight up. Add your chosen topping immediately before serving rather than before the final chilling; fresh fruit placed before overnight chilling releases moisture into the top of the filling.
Common Mistakes and Troubleshooting
| Problem | Cause | Solution |
|---|---|---|
| Filling won’t set firm and stays soft | Cream not whipped to true stiff peaks, or insufficient chilling time | Whip cream until peaks stand completely upright. Chill for a full 8 hours minimum, not 4 to 6. Overnight is the safest approach. |
| Filling has lumps throughout | Cream cheese was too cold when beaten, or powdered sugar wasn’t sifted | Always soften cream cheese fully at room temperature for at least 1 hour. Sift powdered sugar before adding. Beat cream cheese alone first until completely smooth. |
| Crust crumbles when slicing | Not enough butter, or crust wasn’t pressed firmly enough | Use 6 full tablespoons of butter. Press with a flat-bottomed cup using significant pressure. Chill the crust for at least 20 minutes before adding filling. |
| Filling surface has cracks or dips | Filling wasn’t smoothed flat before chilling, or pan was moved while setting | Smooth the surface completely before covering and chilling. Once in the fridge, don’t move the pan for the first 2 hours. |
| Cheesecake sticks to the pan sides | Springform wasn’t run with a knife before releasing | Before releasing the clasp, slide a thin-bladed knife all the way around the inside edge of the pan to loosen the filling from the metal. |
Variations and Substitutions
Lemon No Bake Cheesecake: Increase the lemon juice to 4 tablespoons and the zest to 2 teaspoons. Reduce the vanilla extract to 1/2 teaspoon. Top the finished cheesecake with a thin, even layer of store-bought or homemade lemon curd. The brightness of the lemon comes through in every bite without competing with the creamy base.
Chocolate No Bake Cheesecake: Replace the graham cracker crust with an Oreo cookie crust: process 24 Oreo cookies (filling included) into fine crumbs and bind with only 4 tablespoons of melted butter. For the filling, fold 3/4 cup of cooled, melted dark chocolate into the cream cheese base before folding in the whipped cream. The chocolate must be fully cooled before it contacts the cream cheese or it will seize.
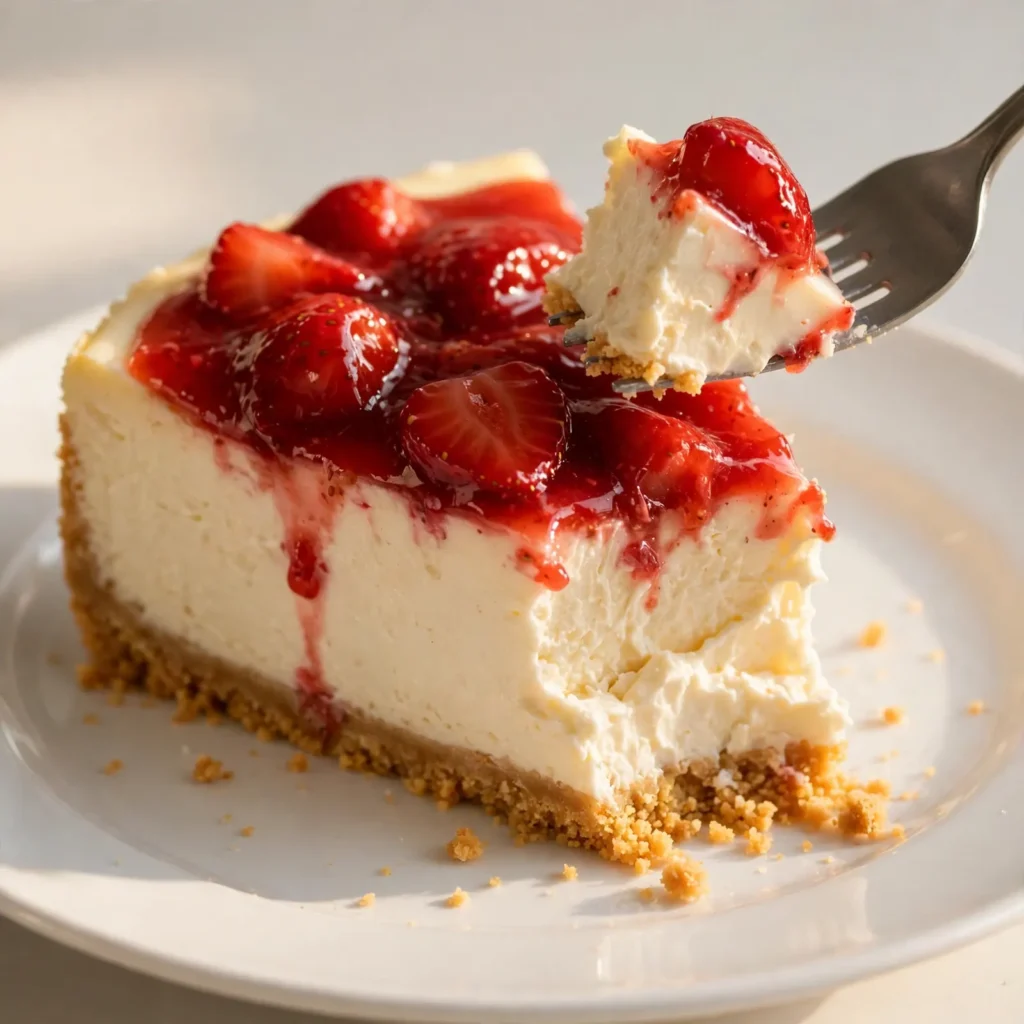
Strawberry No Bake Cheesecake: Fold 1/2 cup of finely diced fresh strawberries into the finished filling before pouring into the pan. Top the chilled cheesecake with a simple strawberry compote: simmer 2 cups of halved strawberries with 3 tablespoons of sugar and 1 teaspoon of lemon juice over medium heat for 8 to 10 minutes until thick and jammy. Cool completely before spooning over the cheesecake.
Mini No Bake Cheesecakes: Press the crust into a lined standard 12-cup muffin tin using a tablespoon per cup. Fill each with the cheesecake mixture to just below the rim. Chill for 6 hours. These individual portions are practical for gatherings where clean slicing of a full cheesecake isn’t possible. Top with a single fresh berry on each.
Gluten-Free Version: Replace the graham crackers with the same weight of certified gluten-free digestive biscuits, processed to fine crumbs. Use the same butter quantity. Everything else in the recipe needs no adjustment.
Serving Suggestions
- Serve each slice with a spoonful of fresh berry compote on the side rather than only on top. It gives people control over how much fruit accompanies each bite and prevents the fruit from softening the crust underneath during serving.
- Pair with a small cup of strong black coffee or espresso. The bitterness of the coffee cuts cleanly through the rich, creamy filling in a way that lighter beverages don’t manage.
- Dust lightly with powdered sugar immediately before serving if you’re not using a sauce topping. The white powder against the ivory filling looks clean and minimal, and it adds a faint extra sweetness without committing to a full topping.
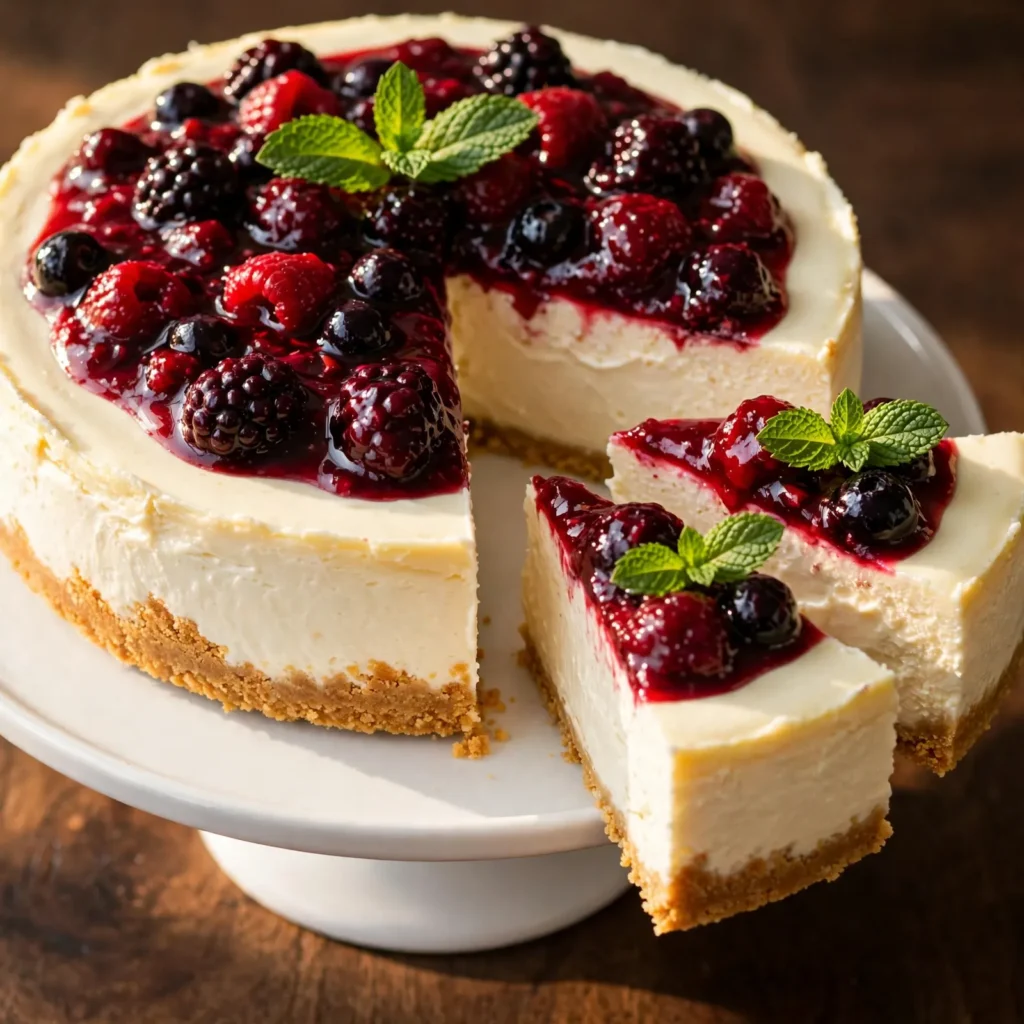
- Present the whole cheesecake on a cake stand before slicing. The smooth, unadorned surface looks elegant as a centerpiece, and adding the fruit topping at the table gives the presentation moment that a pre-sliced plate can’t match.
- Serve at refrigerator temperature rather than fully room-temperature for best sliceability. A cheesecake that has been sitting out for more than 30 minutes starts to soften at the edges and loses the clean structure that makes each slice look intentional.
Tips for the Best Results
Room temperature cream cheese is not optional. The single most common cause of lumpy, grainy no bake cheesecake filling is cream cheese that wasn’t soft enough before mixing. It should feel like thick peanut butter when you press your finger into it: soft all the way through, not just on the surface. Pull it from the fridge at least an hour before you start, or up to two hours in a cool kitchen.
Whip the cream to true stiff peaks, not soft peaks. Soft peaks (the kind that fold over when you lift the beater) produce a filling that sets too soft to slice cleanly. The cream needs to hold a straight, firm peak that doesn’t move when you tilt the bowl. Those extra 60 seconds of beating make a real difference in how the cheesecake slices the next day.
Press the crust harder than feels necessary. A loosely packed graham cracker crust falls apart the moment you try to lift a slice. Use a flat-bottomed glass or the bottom of a measuring cup and press firmly across the entire surface, including the edges and corners. The crust should feel dense and compacted, almost like solid shortbread, not like loose crumbs.
Chill for the full 8 hours. A 4-hour chill produces a cheesecake that sets but doesn’t slice cleanly. Eight hours to overnight allows the filling to firm completely and the crust to bond fully with the filling above it. If you’re making this for a gathering, prepare it the night before and don’t slice it until the moment you’re ready to serve.
Add toppings at serving, not before. Fresh fruit placed on the cheesecake more than a few hours before serving releases juice into the top layer of the filling, softening it and creating a wet, discolored surface. Compotes and curd are more stable and can be added a few hours ahead, but even these are better added at serving time for the best visual presentation.
Storage Tips
Refrigerator
Store the cheesecake loosely covered with plastic wrap or in the springform pan with a sheet of plastic wrap pressed against the filling surface to prevent it from absorbing refrigerator odors. It keeps well for up to 5 days. The crust softens slightly over multiple days as it absorbs moisture from the filling, which is expected and doesn’t affect the flavor. Individual wrapped slices stored in airtight containers fare slightly better over several days than an open cut cake.
Freezer
No bake cheesecake freezes exceptionally well for up to 3 months, making it one of the best make-ahead desserts for events. Freeze the cheesecake without any toppings: release it from the springform pan, cut into individual slices, and freeze each slice on a parchment-lined baking sheet until solid (about 2 hours). Wrap each frozen slice individually in plastic wrap, then place in a zip-lock freezer bag. Thaw overnight in the refrigerator and add toppings fresh before serving. The texture after thawing is nearly identical to fresh.
Reheating
No bake cheesecake is served cold and does not require any reheating. If slices come directly from the freezer, thaw them in the refrigerator for 6 to 8 hours or overnight; don’t thaw at room temperature or the filling softens unevenly from the outside in, creating a partially melted surface texture. If a slice needs to be quickly thawed, 15 to 20 minutes on the counter is the maximum before the texture starts to compromise.
Make-Ahead Note: This is one of the best recipes in the dessert category for advance preparation. Making it 24 to 48 hours ahead actually improves the texture slightly over the 8-hour minimum because the flavors meld and the filling continues to firm. Prepare it two nights before a gathering, cover tightly, and add toppings right before the guests arrive.
Nutrition Information
Per serving, based on 12 slices, filling and crust only, without topping. Values are approximate.
| Nutrient | Amount |
|---|---|
| Calories | 450 kcal |
| Protein | 6g |
| Carbohydrates | 34g |
| Fiber | 0.5g |
| Sugar | 24g |
| Total Fat | 33g |
| Saturated Fat | 19g |
| Cholesterol | 95mg |
| Sodium | 295mg |
| Potassium | 115mg |
| Calcium | 85mg |
| Iron | 0.8mg |
| Vitamin C | 1mg |
Nutrition values are approximate and may vary based on brands and portion sizes.
Why This Recipe Works
The structural failure of most no bake cheesecake recipes is a filling ratio that prioritizes lightness over firmness. Many recipes use only two blocks of cream cheese and a full cup of whipped cream, which produces a filling closer to a chilled mousse than a proper cheesecake. It sets and it tastes pleasant, but it doesn’t slice cleanly and it deflects under the knife rather than holding its edge.
This recipe uses three blocks of cream cheese, which shifts the ratio decisively toward density. The whipped cream is still there and still necessary: it lightens the filling from paste-thick to silky, and the air incorporated during whipping contributes to the smooth texture rather than the grainy one a non-whipped filling produces. But the cream cheese is the dominant structural ingredient, and the quantity is non-negotiable for a filling that slices cleanly.
The crust butter quantity is also deliberate. Six tablespoons for a 9-inch pan is on the higher end, and it produces a crust that compresses into something dense and firm rather than crumbly. The crust-to-filling bond that develops during the 8-hour chill is also important: the butter in the crust firms against the cold cream cheese filling and creates a cohesive base rather than two separate components that separate when sliced.
Overnight chilling rather than a 4 to 6 hour minimum is the other structural choice in this recipe. At 6 hours, the outside of the filling has set but the center is still slightly soft. At 8 to 12 hours, the filling reaches a uniform firmness from edge to center that allows clean slicing without the center bulging out when the knife cuts through.
Across multiple test batches comparing different cream cheese quantities, chill times, and crust butter ratios, the three-block, overnight-chill, six-tablespoon-butter combination produced the most consistent, cleanest result. The two-block version consistently produced a softer filling that required careful plating rather than clean plating.
Frequently Asked Questions
Can I make no bake cheesecake the day before?
Yes, and this is actually the best approach. Making it the night before serving gives the filling a full 8 to 12 hours to chill and set, which produces a firmer, more cleanly sliceable cheesecake than one made the morning of. Cover tightly with plastic wrap and add toppings right before serving. The cheesecake holds perfectly in the refrigerator for up to 5 days, so 24 hours of advance preparation is well within a safe window.
Why did my no bake cheesecake not set properly?
The two most common causes are under-whipped cream and insufficient chilling time. If the heavy cream was only whipped to soft peaks rather than stiff peaks, the filling doesn’t have the structural support to set firm. If the cheesecake was pulled from the refrigerator before the 8-hour minimum, the center may still be soft regardless of how the outer edges feel. Always whip to true stiff peaks and always chill for at least 8 hours, ideally overnight.
Can I use reduced-fat cream cheese?
Technically yes, but the filling will not set as firmly and may be difficult to slice cleanly. Reduced-fat cream cheese contains more water and fewer fat molecules, which means less structural density in the finished filling. The texture is also often slightly gummy rather than silky. For a cheesecake that holds its shape and slices cleanly, full-fat cream cheese is the right ingredient. If lower fat content is a priority, a smaller slice of the full-fat version is a better practical choice.
How do I know when the cheesecake is fully set?
The surface should feel firm to a gentle press from your fingertip and should not leave an indentation. The filling should not jiggle when you gently move the pan. A set filling stays completely still rather than rippling from the center. If the center still moves when the pan is nudged, return it to the refrigerator for at least 2 more hours and test again.
Can I make this without a springform pan?
A springform pan is strongly recommended because releasing the cheesecake cleanly from a standard pan is extremely difficult without damaging the crust or filling. If you don’t have one, use a 9-inch deep-dish pie plate and serve the cheesecake directly from the plate in wedges without attempting to lift pieces out. You can also use a deep 9-inch round cake pan lined with parchment with overhang on two sides to lift the cheesecake out as a whole once set.
Is no bake cheesecake safe without eggs?
Yes, completely. The concern about raw eggs in traditional baked cheesecake is that the eggs need to reach a safe internal temperature during baking. No bake cheesecake contains no eggs at all, so there is no food safety concern on that front. The filling does contain cream cheese and cream, which are both dairy products; keep the finished cheesecake refrigerated at all times and don’t leave it out at room temperature for more than 2 hours.
Can I freeze no bake cheesecake?
Yes. No bake cheesecake freezes very well for up to 3 months. Freeze individual slices wrapped in plastic wrap after the initial overnight chill, then store in a freezer bag. Thaw overnight in the refrigerator rather than at room temperature for the best texture. Add any fresh fruit toppings after thawing, not before freezing.
Conclusion
No bake cheesecake is one of those recipes where the technique matters more than the ingredient list. The ingredients are simple and widely available; the results vary enormously based on how the cream cheese is softened, how thoroughly the cream is whipped, and how patiently the cheesecake is chilled. Get those three things right and the result is a dessert that looks bakery-quality and tastes genuinely better than most baked versions for richness and creaminess.
It also holds up through the week, freezes without quality loss, and adapts to any topping you put on it. No bake cheesecake deserves a permanent spot in the make-ahead dessert rotation, and this version is the recipe that earns it that place.
If you loved this recipe, save it to your no bake desserts Pinterest board so you can find it easily later. For more same recipes follow Thecookingvibes Pinterest account.
No Bake Cheesecake
Ingredients
Equipment
Method
- Stir graham cracker crumbs, sugar, and melted butter together in a bowl until the mixture resembles wet sand that holds its shape when pressed. Press firmly and evenly into the bottom and 2 cm up the sides of a 9-inch springform pan using a flat-bottomed glass. Refrigerate for 20 minutes.
- Beat softened cream cheese in a large bowl on medium speed for 2 to 3 minutes until completely smooth with no lumps. Add sifted powdered sugar in two additions, beating on low after each. Scrape the bowl between additions.
- Add vanilla extract, lemon juice, and lemon zest. Beat on medium for 60 seconds until fully combined.
- In a separate clean bowl, whip the cold heavy cream on medium-high speed until stiff peaks form that stand straight up without drooping, about 3 to 4 minutes.
- Fold the whipped cream into the cream cheese mixture in two additions using a rubber spatula with wide, gentle sweeping strokes. Fold only until no white streaks remain.
- Pour the filling into the chilled crust and smooth the surface completely flat with an offset spatula. Tap the pan gently twice on the counter.
- Press plastic wrap gently onto the filling surface. Refrigerate for a minimum of 8 hours or overnight until fully set and firm to the touch.
- Before releasing the springform ring, run a thin knife around the inside edge. Release the clasp slowly and lift the ring. Add chosen topping just before serving. Slice with a clean knife wiped between cuts.
Notes
- Full-fat cream cheese is required. Reduced-fat varieties don’t set firm enough to slice cleanly.
- Whip cream to true stiff peaks, not soft peaks. The firmness of the finished cheesecake depends on it.
- Chill for the full 8 hours minimum. Overnight is better. Don’t cut this time short.
- Add fresh fruit toppings at serving, not before chilling, to prevent moisture from softening the filling surface.