Stranger Things Cake — Dark Chocolate Layers, Upside Down Design
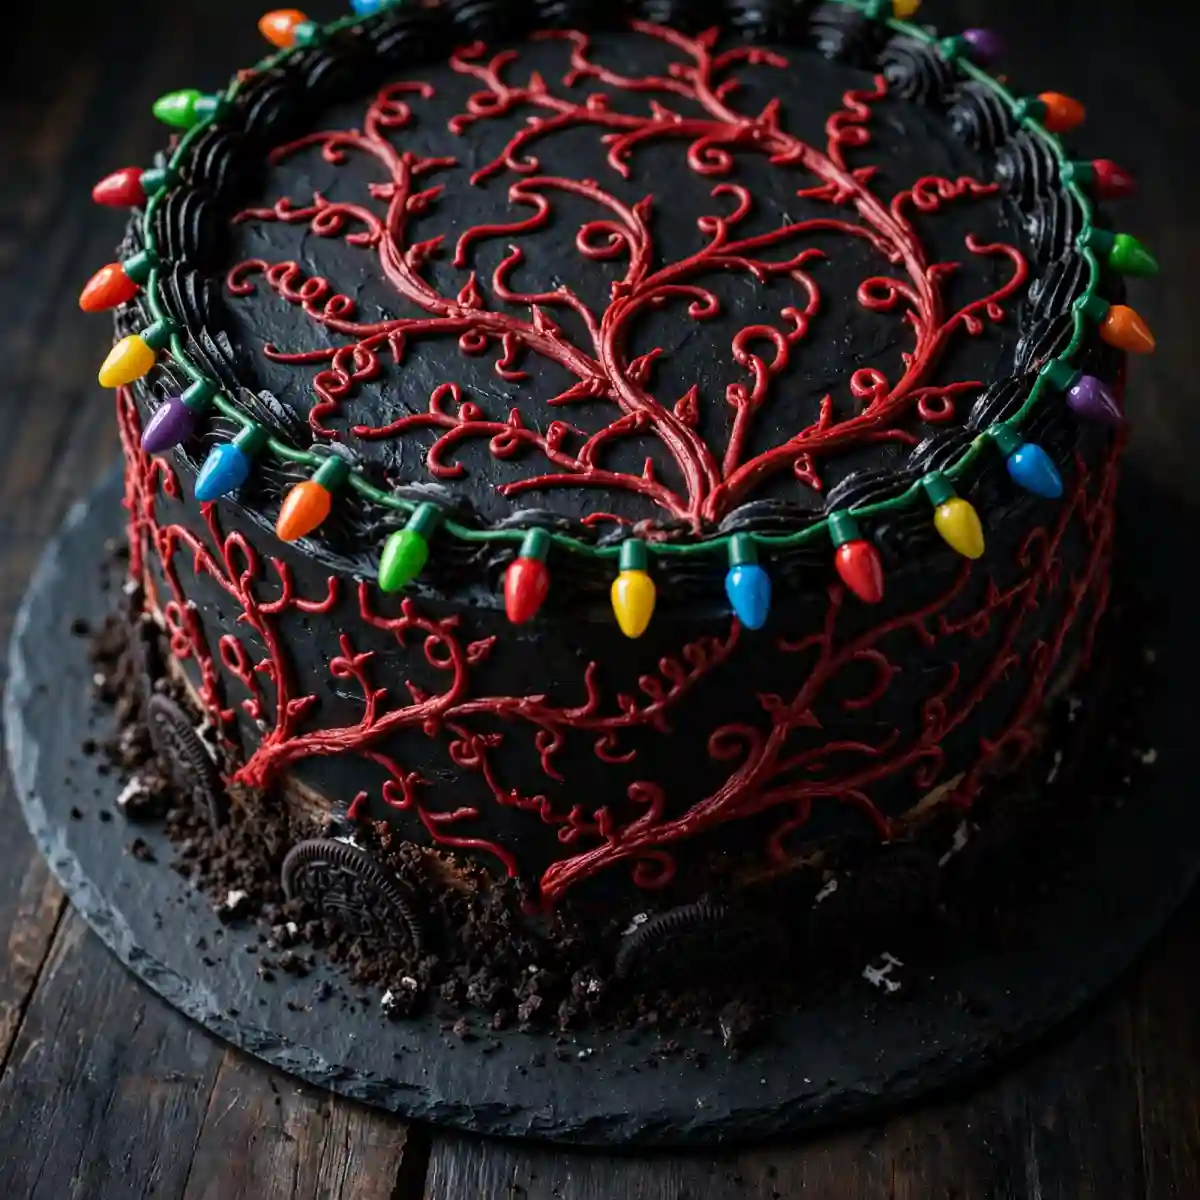
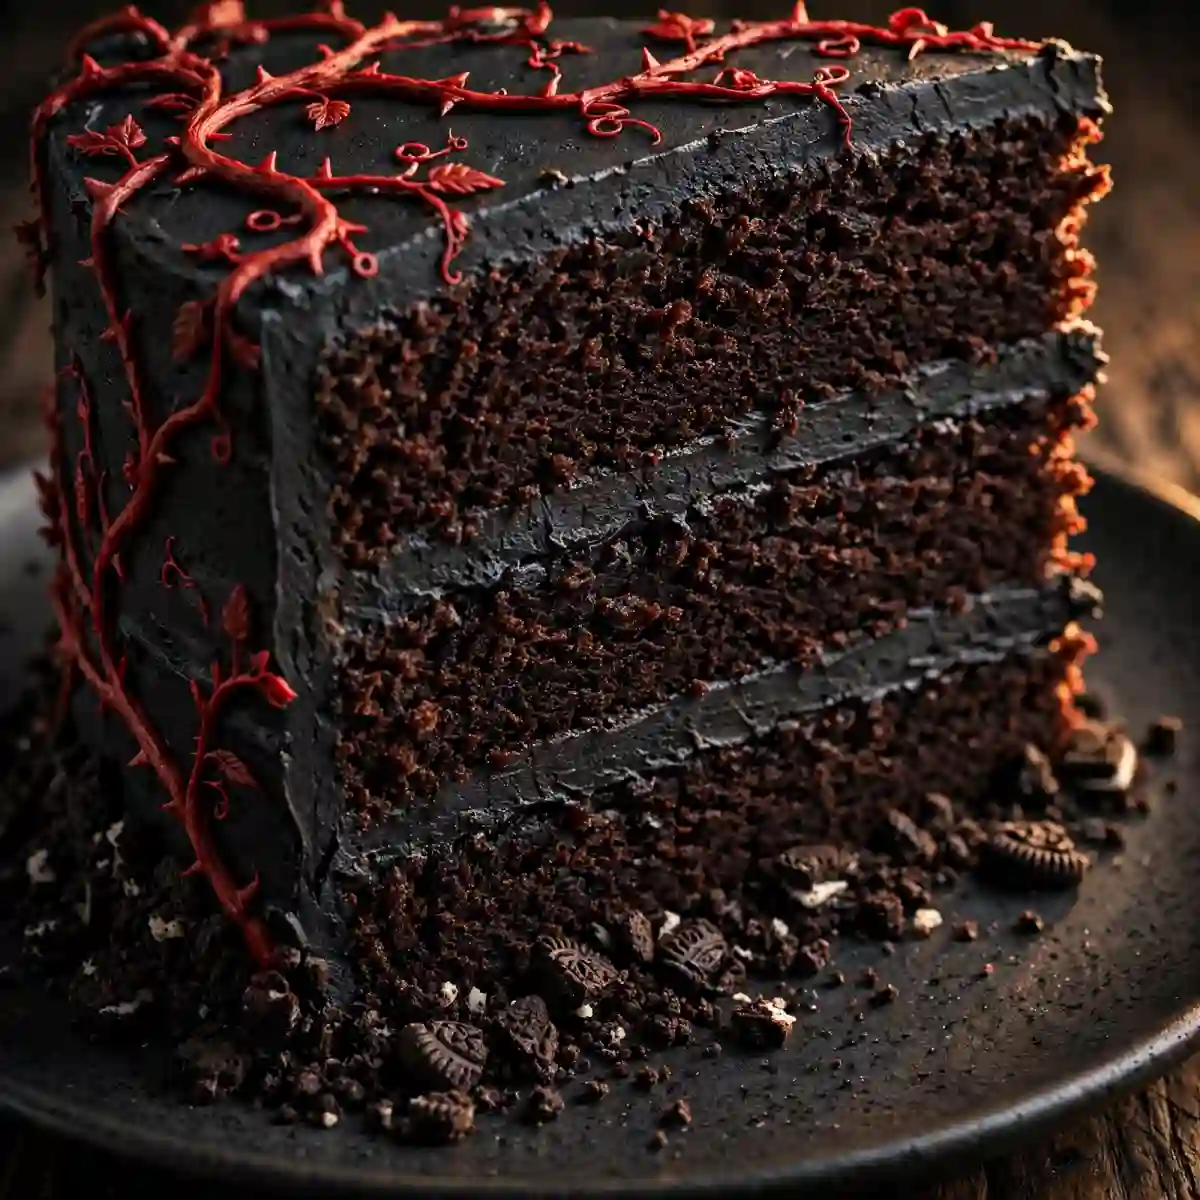
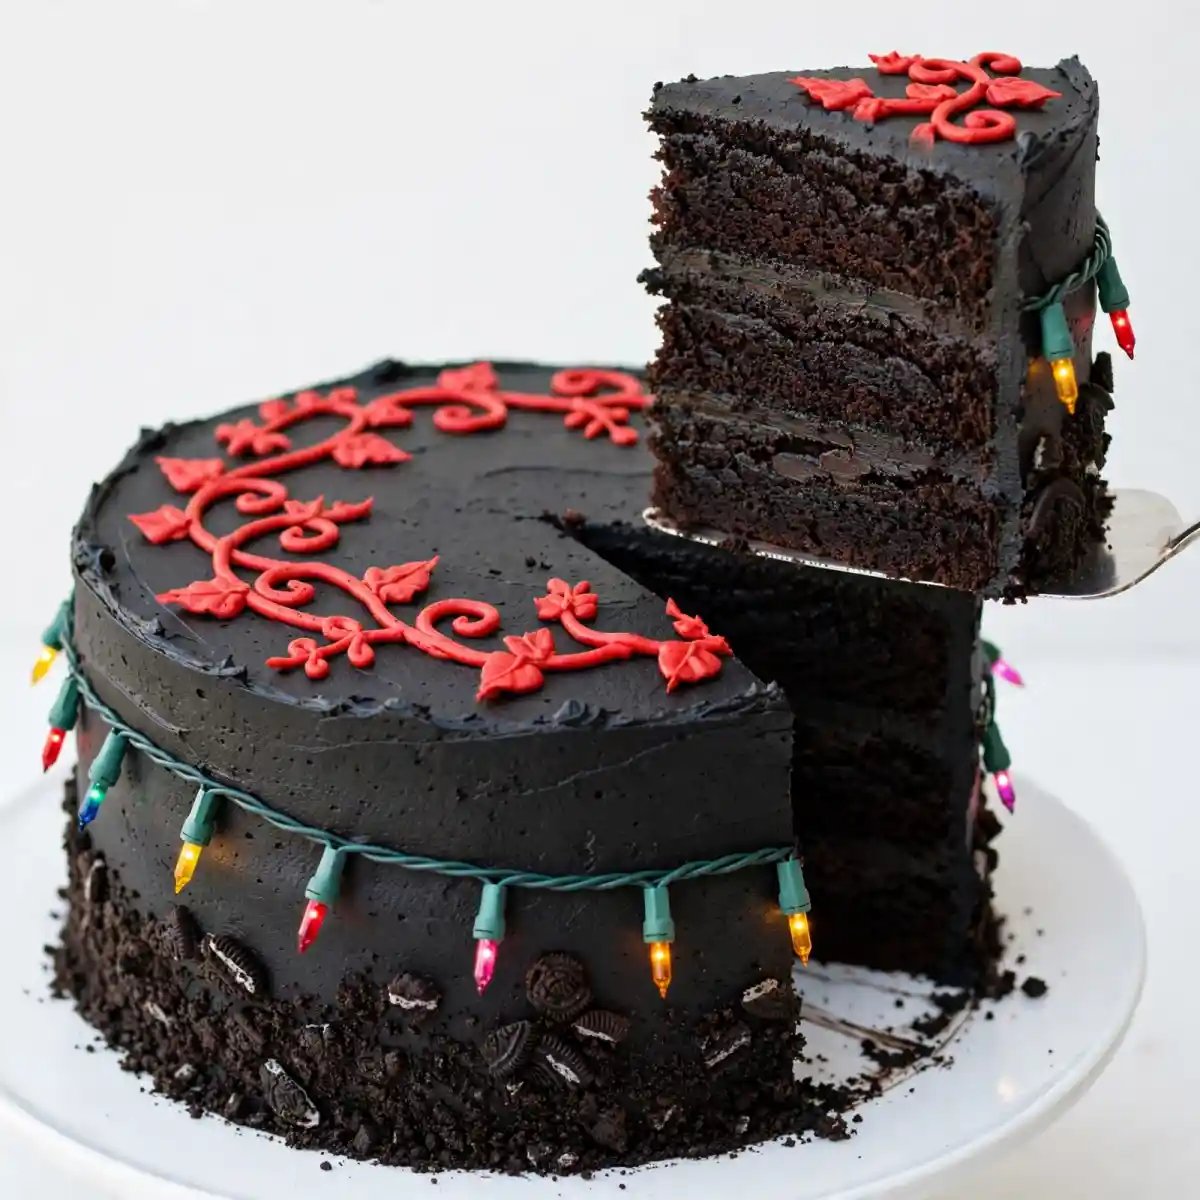
The moment someone who loves the show sees this cake, the reaction happens before they even take a bite. The dark, almost black buttercream surface with red tendril vines creeping across it, the colorful candy string lights arranged in a winding line, and the Stranger Things-style lettering piped across the top make it unmistakably the Upside Down rendered in cake form. It looks complex, but the design elements are mostly piping and candy placement, and the dark color palette is surprisingly forgiving of small imperfections.
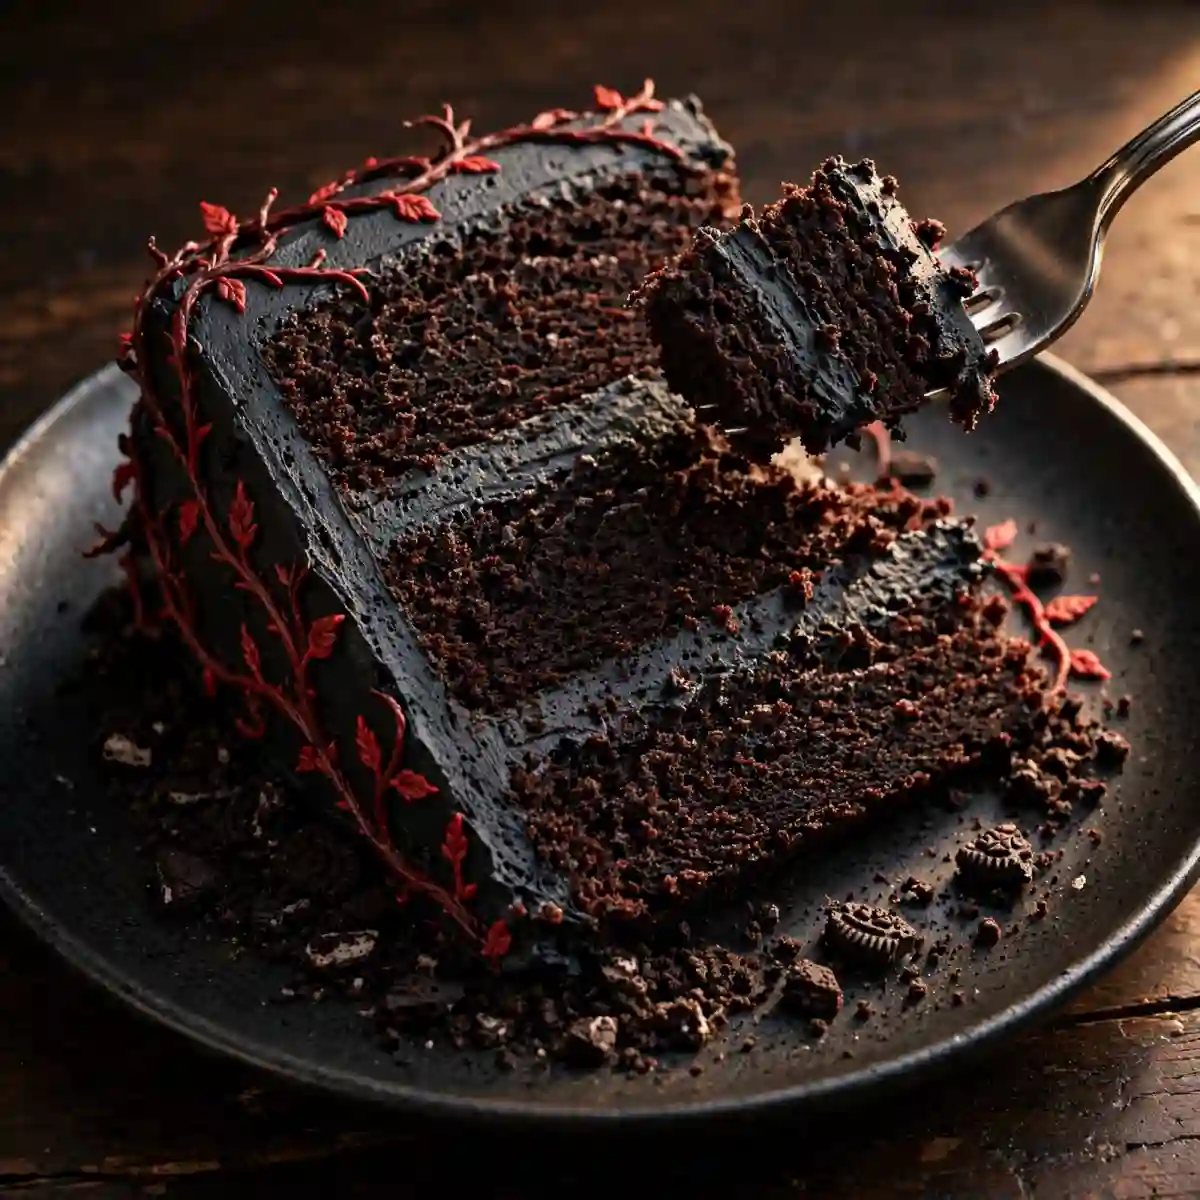
The base of this Stranger Things cake is a deeply flavored dark chocolate layer cake, baked in three 8-inch rounds and frosted with a jet-black cocoa buttercream. The red Upside Down vine design is piped with a small round tip using red-tinted buttercream, and colorful candy pieces create the string lights effect along the top border. Crushed dark Oreo crumbs pressed into the lower third of the sides add texture and reinforce the murky, underground atmosphere. It makes 12 generous slices and is a natural centerpiece for a fan birthday party, Halloween, or a themed movie night celebration.
Why You’ll Love This Stranger Things Cake
- Unmistakably themed without advanced skills. The black buttercream, red piped vines, and candy string lights do all the visual storytelling. None of these elements requires professional decorating experience; they just need patience and the right color gel.
- Deep, genuinely rich dark chocolate flavor. This isn’t just a vanilla cake tinted black. Dutch-process cocoa and a small amount of brewed coffee in the batter produce a bittersweet, intensely chocolatey base that makes every slice as satisfying to eat as it is to look at.
- Black buttercream that actually looks black. Using black cocoa powder as the base instead of relying entirely on black gel food coloring gives you a true, deep black from the start rather than a dark grey that never quite gets there no matter how much coloring you add.
- Twelve servings from one three-layer cake. Large enough to be the centerpiece of a birthday party table, with enough slices to serve a full group without cutting portions too thin.
- Customizable for different skill levels. The vine design can be as simple or as elaborate as you want. Even a few loose swirls of red on a black surface immediately reads as the Upside Down, so the design works at any piping skill level.
Ingredients You’ll Need
Recipe Timing
| Detail | Info |
|---|---|
| Servings | 12 slices |
| Difficulty | Intermediate |
| Course | Dessert, Celebration Cake |
| Cuisine | American |
| Prep Time | 45 minutes |
| Cook Time | 35 minutes |
| Cooling and Decorating Time | 60 minutes |
| Total Time | 2 hours 20 minutes |
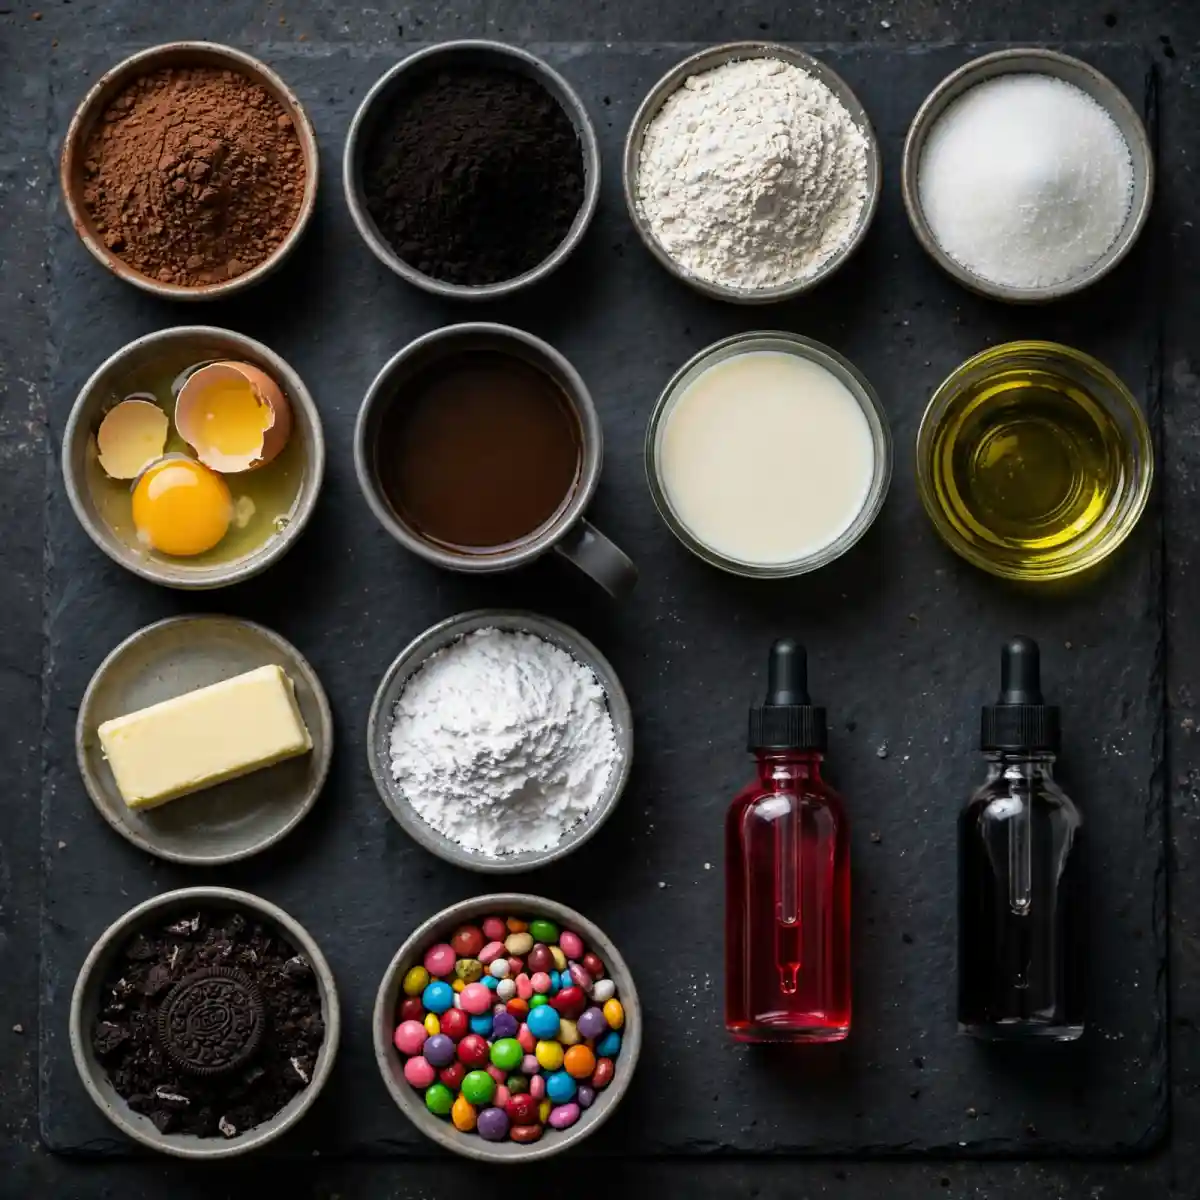
The two most important ingredient decisions in this recipe are the cocoa powders. Use Dutch-process (or “dark”) cocoa powder for the cake layers: it’s smoother and less acidic than natural cocoa, and it produces a deeper brown in the batter that bakes to a nearly black crumb. For the buttercream, use black cocoa powder specifically (sometimes labeled as “ultra-Dutch process” cocoa), which is so heavily alkalized that it’s genuinely black rather than brown. Combined with a small amount of black gel food coloring, this produces a buttercream that is visually indistinguishable from pure black.
For the Dark Chocolate Cake Layers:
- 2 cups (250g) all-purpose flour — Measured by weight for consistency. Scooping from the bag adds 20 to 30 extra grams and dries the crumb.
- 2 cups (400g) granulated white sugar
- 3/4 cup (75g) Dutch-process cocoa powder — This is the dark, smooth-flavored variety. Don’t substitute with natural cocoa; the flavor and color are both noticeably different.
- 2 tsp baking soda
- 1 tsp baking powder
- 1 tsp fine salt
- 2 large eggs, at room temperature
- 1 cup (240ml) full-fat buttermilk, at room temperature — Adds acidity, moisture, and tenderness. Quick substitute: 1 tablespoon of white vinegar in a 1-cup measure, filled to the line with whole milk, left for 5 minutes.
- 1 cup (240ml) strong brewed coffee, cooled to room temperature — Deepens the chocolate flavor significantly without producing any detectable coffee taste. Hot water works as a direct substitute; the flavor will be slightly less complex.
- 1/2 cup (120ml) vegetable oil — Keeps the crumb moist at room temperature because oil stays liquid as the cake cools, unlike butter, which firms up and tightens the crumb.
- 1 tsp pure vanilla extract
For the Black Cocoa Buttercream:
- 1.5 cups (340g) unsalted butter, softened to room temperature — The base of the frosting. Must be soft enough to hold a thumbprint but not shiny or greasy.
- 5 cups (600g) powdered sugar, sifted
- 1/2 cup (50g) black cocoa powder, sifted — This is what makes the buttercream genuinely black rather than dark grey. Find it at specialty baking stores or online. Regular dark cocoa gives deep brown; black cocoa gives true black.
- 4 to 5 tbsp heavy cream — Added one tablespoon at a time to reach the right consistency for both spreading and piping.
- 1 tsp pure vanilla extract
- 1/4 tsp fine salt
- 1/2 tsp black gel food coloring (optional) — Deepens the color of the buttercream if the black cocoa alone produces a slightly dark-brown rather than true black result. Add after the full batch is mixed and beat for 2 more minutes.
For the Red Vine Design:
- 1/2 cup (115g) unsalted butter, softened
- 1.5 cups (180g) powdered sugar, sifted
- 1 to 2 tbsp heavy cream
- 1 tsp red gel food coloring — Use gel, not liquid. Liquid coloring produces a duller, more orange-red and adds excess moisture.
For Decoration:
- 1.5 cups crushed dark Oreo cookies (about 15 cookies) — Pressed into the lower third of the cake sides to create the earthy, underground texture. Process in a food processor to coarse crumbs; don’t go too fine or they lose their texture against the frosting.
- Assorted small colorful candy (M&Ms, Skittles, or similar round candies) — For the string lights effect along the top border and sides. Use individually sorted colors for the most visible contrast against the black frosting.
- Red writing gel or red buttercream in a piping bag — For the Stranger Things-style lettering across the top.
Allergen and Dietary Disclosure
This recipe contains dairy (butter and heavy cream in the buttercream, buttermilk in the cake), eggs, and gluten (all-purpose flour). The Oreo cookie decoration also contains dairy and gluten. Colorful candy toppings may contain milk, soy, or other allergens depending on the brand; check individual candy labels.
For a dairy-free version, replace the buttermilk with unsweetened oat milk plus 1 tablespoon of apple cider vinegar, the vegetable oil stays as-is, and use a solid plant-based butter block for the frosting with full-fat coconut cream in place of the heavy cream. The black color may be slightly less deep with plant-based butter.
For a gluten-free version, use a 1:1 gluten-free baking flour blend at the same weight in the cake layers, and use gluten-free sandwich cookies for the crumb decoration. The buttercream and candy decorations need no adjustments.
This recipe has not been prepared in an allergen-free facility. Always verify individual product labels if you are managing a serious allergy.
Equipment Needed
- Three 8-inch (20 cm) round cake pans — The recipe is calibrated for three equal layers from this pan size. Two 9-inch pans also work but the layers are thinner and the bake time reduces by about 4 minutes; check at 28 minutes.
- Stand mixer or hand mixer — Essential for beating the butter to the right light, fluffy base before the black cocoa and sugar go in. Black buttercream needs more beating time than regular buttercream because the black cocoa is very dry and can make the frosting stiff initially.
- Cake turntable — Not strictly necessary but significantly easier for applying the crumb coat and final black frosting smoothly. A lazy Susan works as a substitute.
- Offset spatula — For spreading buttercream between layers and across the outside. The angled blade gives you control when working against the dark frosting.
- Bench scraper — For smoothing the sides of the cake to a clean, even surface before the Oreo crumbs and decoration go on.
- Piping bags and tips — A small round piping tip (Wilton #3 or #4) for the red vine design and lettering. A larger star or round tip for any border work.
- Parchment paper circles — Placed in each greased pan to guarantee clean release of the dark, slightly sticky chocolate layers.
Step-by-Step Directions
Step 1: Preheat Oven and Prepare Pans
Set your oven to 175°C (350°F). Grease all three 8-inch cake pans, line each bottom with a parchment circle, and grease the parchment as well. Dark chocolate cakes are stickier than lighter batters, and the double layer of protection (greased pan plus greased parchment) is what gives you a clean release.
Step 2: Mix the Dry Ingredients
Sift the flour, Dutch-process cocoa powder, baking soda, baking powder, and salt together into a large bowl. Whisk for 30 seconds after sifting to distribute the leavening evenly. Cocoa powder clumps badly and creates dense, dark pockets in the finished cake if added unsifted.
Step 3: Combine Wet Ingredients and Make Batter
In a large measuring jug or separate bowl, whisk together the eggs, buttermilk, cooled brewed coffee, vegetable oil, sugar, and vanilla extract until fully blended. Pour the wet mixture into the dry ingredients and stir gently with a rubber spatula or whisk until the batter is smooth and no dry streaks remain. The batter will be quite thin and pourable, which is intentional for this style of dark chocolate cake.

Chef’s Note: The batter’s thin consistency is what produces the moist, fine-crumbed texture after baking. Thicker batters trap larger air bubbles and produce a coarser, drier crumb. Don’t be tempted to add more flour to thicken it.
Step 4: Bake the Cake Layers
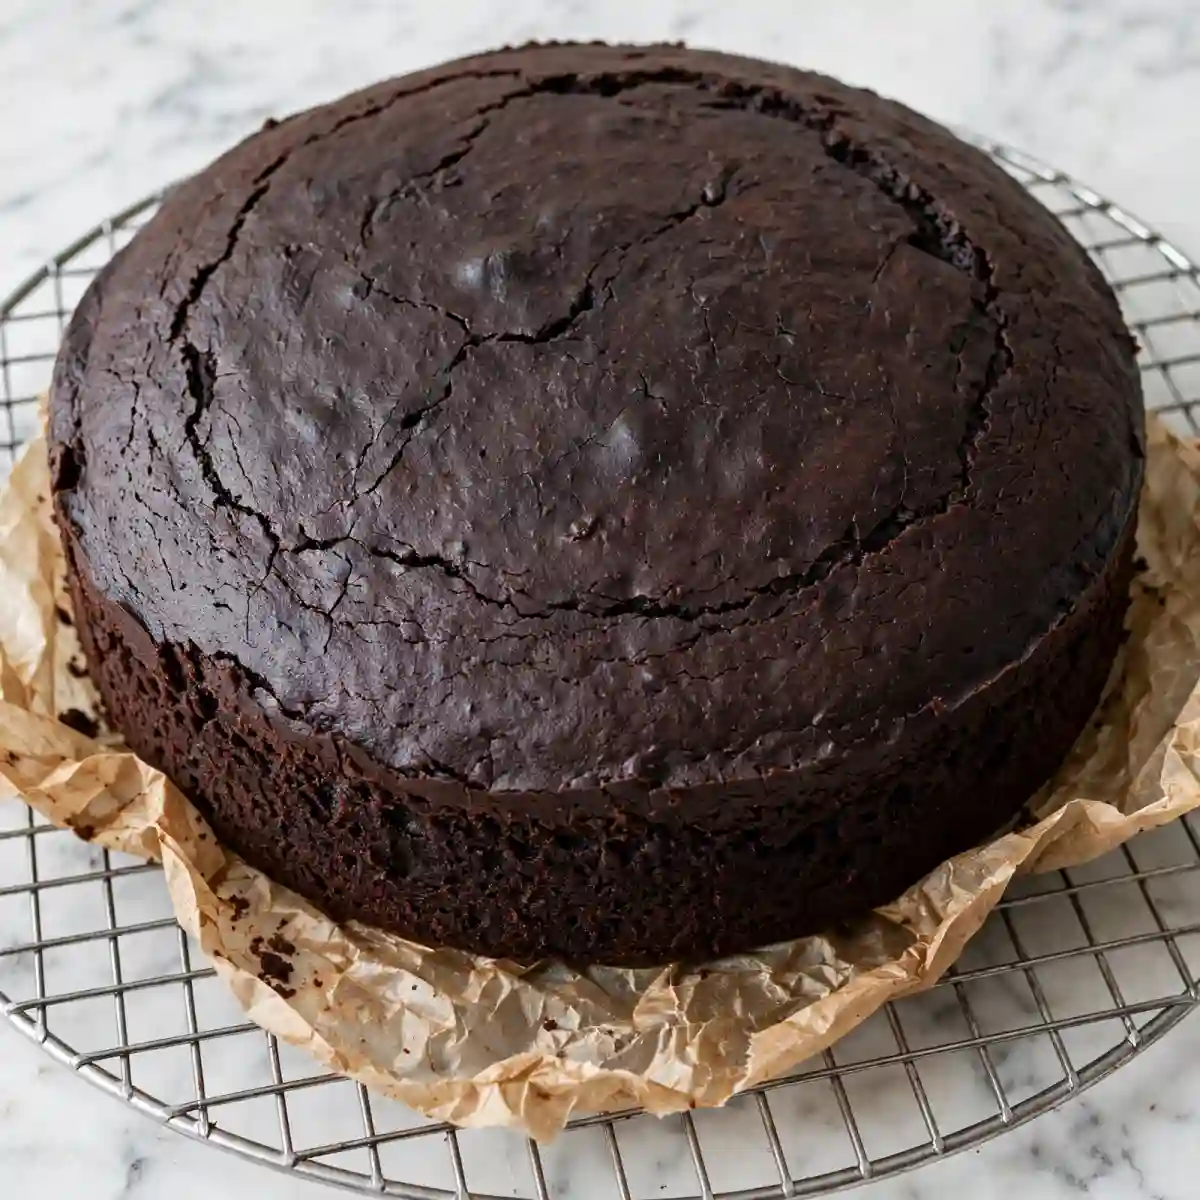
Divide the batter evenly among the three prepared pans; use a kitchen scale to ensure equal portions for even layers. Tap each pan twice on the counter to release any trapped air bubbles. Bake at 175°C (350°F) for 30 to 35 minutes, rotating the pans halfway through if your oven has hot spots. The layers are done when a toothpick inserted into the thickest part of the center comes out with just one or two dry crumbs attached. The tops will spring back lightly when pressed. Cool in pans for 15 minutes, then turn out onto wire racks, peel away the parchment, and cool completely for at least 45 minutes before any frosting goes on.
Step 5: Make the Black Buttercream
Beat the softened butter in your stand mixer on medium-high for 3 to 4 minutes until it is pale and visibly fluffy. Reduce to low speed and add the sifted powdered sugar in three additions, mixing on low after each until incorporated. Add the sifted black cocoa powder, vanilla extract, salt, and 4 tablespoons of heavy cream. Increase to medium-high and beat for 3 full minutes. The frosting should be smooth and very dark, almost black. If it still looks dark brown rather than true black, add the black gel food coloring a few drops at a time and beat for 2 more minutes. The color deepens as the air is incorporated; let the frosting rest for 5 minutes and check the color again before adding more coloring.
Chef’s Note: Black buttercream often looks slightly purple or dark brown when first mixed and deepens to true black after resting for 10 to 15 minutes as the gel coloring continues to develop. Don’t add excessive extra coloring in the first 5 minutes; wait and check before continuing.
Step 6: Assemble and Crumb Coat
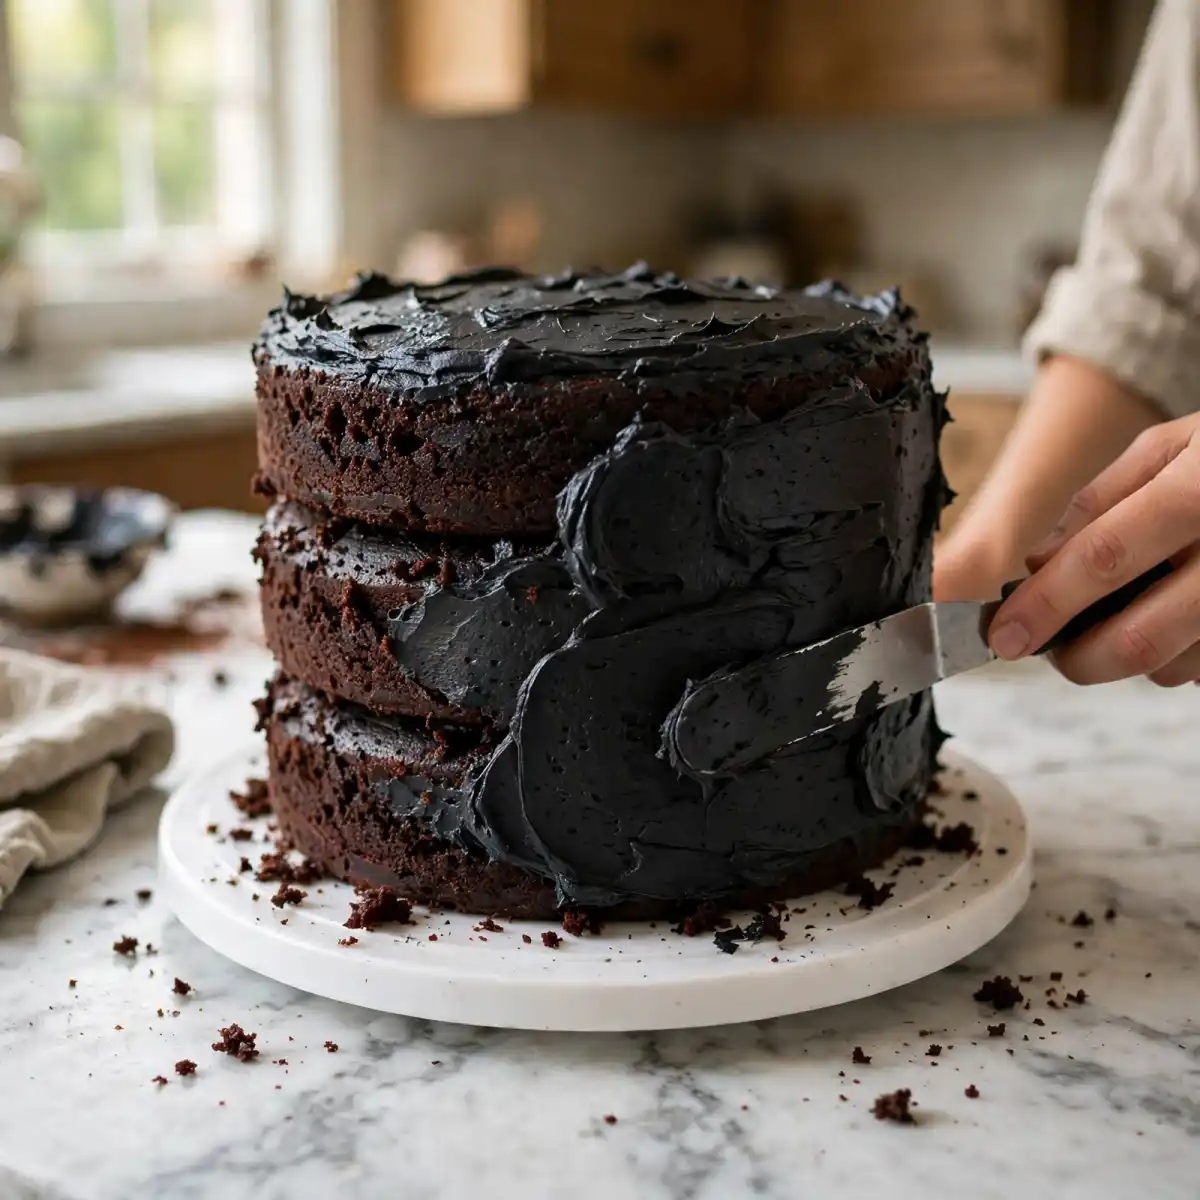
Place one cooled cake layer on your cake board or serving plate. Spread a generous, even layer of black buttercream across the top using your offset spatula. Place the second layer directly on top and repeat. Add the third layer. Apply a thin crumb coat (a very thin initial layer of frosting that seals in the loose crumbs) across the entire outside surface. Refrigerate for 15 to 20 minutes until the crumb coat is cold and set. Apply the final, thicker layer of black buttercream to the top and sides, using your bench scraper against the sides for a smooth, even finish.
Step 7: Apply Oreo Crumbs and Candy Lights
While the outer frosting is still slightly tacky (not fully set), press the coarsely crushed Oreo crumbs against the lower third of the cake sides. Work in small sections, pressing the crumbs gently but firmly so they adhere to the black frosting. The crumbs should cover this section fairly densely to create the earthy, textured look of the Upside Down ground.
For the string lights: select your colorful candy pieces and arrange them in a loose, winding horizontal line around the upper side of the cake, slightly below the top edge. Press each piece gently into the frosting so it stays in place. Use different colors in a random, alternating sequence to replicate the look of a string of Christmas lights.
Step 8: Pipe the Red Vine Design and Lettering
Make the red buttercream by beating the softened butter until fluffy, then adding the sifted powdered sugar, red gel food coloring, and 1 tablespoon of cream. Beat until the color is fully uniform and deeply red. Transfer to a piping bag fitted with a small round tip (Wilton #3 or #4).
Pipe the vine design across the top and upper sides of the cake by drawing long, sweeping organic lines that branch off in irregular directions, like plant tendrils spreading outward. Some lines should cross; some should curl at the ends. The design doesn’t need to be symmetrical or precise; irregular, organic shapes look more authentic to the show’s aesthetic than a perfectly even pattern.
For the lettering across the top, pipe “STRANGER THINGS” in large, spaced-out letters using the same red buttercream. The font doesn’t need to match exactly; a slightly irregular, hand-piped lettering style actually suits the hand-drawn feel of the design better than a perfectly clean script.
Chef’s Note: If piping the vine design feels intimidating, practice the lines on a sheet of parchment paper first. After 3 to 4 practice runs, the motion becomes natural. You can also use a toothpick to sketch the vine lines into the frosting surface as a guide before piping over them.
Common Mistakes and Troubleshooting
| Problem | Cause | Solution |
|---|---|---|
| Buttercream looks dark brown instead of black | Regular dark cocoa used instead of black cocoa, or insufficient black gel coloring | Use black cocoa powder specifically. After full mixing, let the frosting rest 10 to 15 minutes before evaluating the color; it deepens as the gel develops. Add black gel in small increments after resting. |
| Cake layers sank in the center | Oven not fully preheated, batter overmixed, or opened the oven before 25 minutes | Always preheat fully. Mix batter only until combined. Don’t open the oven until the 28-minute mark. |
| Oreo crumbs falling off the sides | Frosting was too dry or already fully set when crumbs were applied | Apply crumbs while the outer frosting is still slightly tacky. If the frosting has set, use a dry pastry brush to lightly dampen the lower section with a tiny amount of water and press the crumbs on immediately. |
| Red vine piping bleeding into the black frosting | Frosting was too warm when piping began | Refrigerate the frosted, decorated cake for 10 minutes before piping the red design. A cold, firm surface holds the piped lines cleanly without the colors blending at the edges. |
| Candy lights sliding off the sides | Applied when the outer frosting was too cold and set | The candy should be pressed in while the outer frosting is freshly applied and still slightly sticky. If it has set, dab a tiny amount of fresh frosting behind each candy piece before pressing it on. |
Variations and Substitutions
Demogorgon Cake Top: Instead of the flat vine design across the top, use the red buttercream to pipe a large Demogorgon face (the petal-like, opening mouth pattern from the show) as the central focal point on top of the cake, with vines radiating outward from it. This takes more precision but creates an even more striking centerpiece.
Red Velvet Upside Down Cake: Replace the dark chocolate layers with red velvet cake layers (see the red velvet cookies recipe’s batter scaled up for a layer cake). The vivid red crumb against the black exterior creates a dramatic visual when sliced, reinforcing the Upside Down color contrast even before the decorating details go on.
Simpler Flat Design: For a less time-intensive decoration, skip the vine piping entirely and use only the Oreo crumb sides, candy lights, and a simple lettering across the top. The black surface with the colorful candy lights and crumb texture is immediately recognizable without the vine details.
Gluten-Free Version: Use a 1:1 gluten-free baking flour blend at the same weight for the cake layers and gluten-free chocolate sandwich cookies for the crumb decoration. The cake batter is already thin; the gluten-free version may spread slightly more during baking, so check at 28 minutes.
Cupcake Version: Pour the batter into lined standard cupcake tins, filling each about two-thirds full. Bake at 175°C (350°F) for 18 to 22 minutes. Frost each with a swirl of black buttercream and pipe a small red vine design on each one. Add two or three candy pieces to each cupcake as the lights. This version serves 24 and is easier to distribute at a party.
Serving Suggestions
- Serve on a dark slate board or a black cake drum rather than a white one; the dark surface extends the Upside Down aesthetic from the cake to the table and photographs very well for party photos.
- Cut slices carefully with a clean knife wiped between each cut to keep the black frosting clean at the edges and prevent smearing into the dark crumb. A warm, dry knife makes the cleanest cuts.
- Pair with a serving of red-colored fruit punch in a dark cup or glass alongside each slice. The red drink reinforces the color palette of the design and makes the whole dessert table feel intentional.
- Set the cake out as the centerpiece of a larger dessert spread for a themed party, surrounded by other themed elements: Eggo waffle stacks, red velvet cookies, and small bowls of candy in Stranger Things’s signature colors.
- For younger children who might be overwhelmed by the dark aesthetic, cut slices from the inside of the cake and plate them without the black exterior frosting visible, so the focus is on the delicious dark chocolate layers rather than the design.
Tips for the Best Results
Use black cocoa powder as the base for the buttercream, not just gel coloring. Black cocoa powder (heavily alkalized cocoa) is so dark it appears black in powdered form. Starting with this as the cocoa in your buttercream means you’re beginning with a naturally very dark base that only needs a small amount of black gel to reach true black. Trying to achieve black purely from gel coloring in a standard buttercream requires excessive amounts of coloring, which can make the frosting taste slightly chemical and leave a staining residue.
Cool the cake layers completely before any frosting. Dark chocolate cake layers are denser and retain heat longer than lighter cakes. Even a slightly warm layer will melt the black buttercream on contact. The black frosting shows any imperfections more clearly than white frosting; melted areas are especially visible. Give the layers a full 45 minutes on the rack.
Let the crumb coat refrigerate for a full 15 to 20 minutes. The crumb coat on a black cake is doing double duty: trapping crumbs so they don’t contaminate the final layer, and creating a cold, firm surface that the final black coat adheres to without streaking. A properly chilled crumb coat gives the final layer a significantly more even, smooth finish.
Apply the Oreo crumbs and candy while the outer frosting is still tacky. This is the optimal window, usually within 10 to 15 minutes of applying the final coat. After that window, the frosting firms and the decorations won’t bond as securely. If you need a break between frosting and decorating, refrigerate the frosted cake and let it warm for 5 minutes at room temperature before pressing on the decorations.
Pipe the red design last, after the candy lights. The red piped vines should go on after everything else because they’re the most visible design element and frame the finished cake visually. Placing the candy first gives you fixed reference points to pipe the vines around, which produces a more intentional composition than placing everything at once.
Storage Tips
Refrigerator
Store the decorated cake covered loosely with plastic wrap or in a large cake box in the refrigerator for up to 4 days. The black buttercream firms significantly when cold. Pull the cake from the fridge 30 to 45 minutes before serving so the frosting softens and the dark chocolate layers return to their best moist texture. The Oreo crumbs on the sides will soften slightly over multiple days as they absorb moisture from the frosting, which is expected.
Freezer
The unfrosted cake layers freeze well for up to 3 months. Wrap each cooled layer tightly in two layers of plastic wrap, then foil, and freeze flat. Thaw overnight in the refrigerator before frosting. The fully assembled and decorated cake can be frozen for up to 2 months: freeze uncovered until the frosting is firm (about 2 hours), then wrap carefully in plastic wrap and foil. The candy lights may lose some color saturation after thawing, but the overall design holds well.
Reheating
This cake doesn’t require reheating. Cold individual slices can be brought to room temperature on the counter for 20 to 30 minutes before eating, which returns the crumb to its full moistness and the buttercream to its smooth, soft texture. Microwaving is not recommended as it melts the black buttercream and makes the candy decorations sticky and misshapen.
Make-Ahead Note: The dark chocolate cake layers can be baked, cooled, wrapped, and refrigerated for up to 2 days before decorating. The black buttercream keeps in an airtight container in the fridge for up to 2 weeks; re-beat with a hand mixer for 2 minutes before using. The red vine buttercream can also be made ahead and refrigerated. This staging approach makes the full cake achievable across two shorter sessions rather than one long one.
Nutrition Information
Per serving, based on 12 slices. Values are approximate.
| Nutrient | Amount |
|---|---|
| Calories | 720 kcal |
| Protein | 7g |
| Carbohydrates | 98g |
| Fiber | 3g |
| Sugar | 76g |
| Total Fat | 36g |
| Saturated Fat | 18g |
| Cholesterol | 95mg |
| Sodium | 435mg |
| Potassium | 220mg |
| Calcium | 60mg |
| Iron | 3.1mg |
| Vitamin C | 0mg |
Nutrition values are approximate and may vary based on brands and portion sizes.
Why This Recipe Works
The challenge with a black-themed cake is that the visual goal (true black) and the flavor goal (a genuinely good chocolate cake) can work against each other if the ingredients aren’t chosen carefully. Standard approaches to black buttercream, adding large amounts of black gel food coloring to a plain or cocoa-based frosting, often produce a frosting that tastes slightly bitter or metallic from the dye concentration, turns dark grey rather than black, and stains anything it touches for hours.
Using black cocoa powder as the base solves this from the flavor side. Black cocoa (ultra-Dutch processed) has a very low acidity and a smooth, mild flavor that is actually less intense than regular cocoa. It contributes almost no additional bitterness to the frosting; the deep black color comes from the extreme alkalization of the cocoa solids rather than from chemical dye. Only a small amount of black gel food coloring is needed to deepen the color to true black, which keeps the dye concentration low enough to avoid off-flavors.
The dark chocolate cake base uses Dutch-process cocoa and brewed coffee together for the same layering principle. Dutch-process cocoa is less acidic than natural cocoa and contributes a smoother, more rounded chocolate flavor without sharp bitterness. The coffee doesn’t add coffee flavor but instead increases the pH of the batter slightly, which shifts certain flavor compounds in the cocoa toward more complex, roasted notes. The thin batter from the high liquid content (coffee, oil, and buttermilk together) produces a fine-crumbed, very moist interior that stays that way at room temperature because the vegetable oil doesn’t solidify when the cake cools.
The crumb coat before the final black layer is structurally more important on a dark cake than on a light one. Any crumbs that contaminate the final black layer show up as brown or pale streaks that are extremely visible against the uniform dark surface. The cold, firm crumb coat creates a clean, crumb-free base for the final coat and allows the bench scraper to glide smoothly without lifting crumbs from the cake surface.
Across multiple test batches using different cocoa combinations (black cocoa alone, Dutch cocoa alone, and black gel coloring in a standard cocoa base), the black cocoa plus small amount of black gel approach consistently produced the most visually dramatic and best-tasting result. Black cocoa alone produced a very dark brown; standard cocoa plus gel produced a dark grey that never fully reached black regardless of coloring quantity.
Frequently Asked Questions
Can I make the Stranger Things cake layers the day before assembling?
Yes, and this is actually the most practical approach for a cake with this many decorating steps. Bake and cool the layers, wrap each one tightly in two layers of plastic wrap, and refrigerate for up to 2 days. The black buttercream can also be made ahead and refrigerated; re-beat for 2 minutes before using. Making the layers and frosting a day ahead means your decorating session the next day is focused and unrushed.
Why is my black buttercream turning out grey instead of black?
Using regular dark cocoa or insufficient black gel coloring is the most common cause. Standard dark cocoa produces a deep brown that looks almost black in the bowl but grey on the cake. You need specifically black cocoa powder (sometimes labeled as ultra-Dutch process) as the base, plus a small amount of black gel food coloring to push it to true black. Also, let the mixed frosting rest for 10 to 15 minutes before evaluating the color; black gel food coloring develops and deepens significantly as it sits, and many bakers add too much coloring in the first 5 minutes before the full color has developed.
Can I use a different type of cocoa powder in the cake layers?
Dutch-process cocoa gives the cake its deep, rich brown color and smooth flavor and is strongly recommended. Natural (regular) unsweetened cocoa can be substituted but it’s more acidic, which changes the leavening balance (baking soda reacts differently with natural cocoa than with Dutch-process). If you use natural cocoa, reduce the baking soda to 1.5 teaspoons and increase the baking powder to 1.5 teaspoons to compensate for the different acidity. The flavor will be slightly sharper and the color slightly lighter.
How do I get the red vine design to look like the show?
The key is making organic, imperfect lines that branch irregularly. The Upside Down vines in the show are irregular, creeping, and slightly chaotic rather than symmetrical or perfectly spaced. Use a small round piping tip and practice on parchment paper first to get comfortable with the pressure and speed. Pipe each vine line in a single continuous motion without lifting the tip; lines drawn in multiple sections look choppy. Some lines should curl at the ends; some should fork into two branches. The more irregular and organic the design, the more authentic it looks.
Is the black food coloring safe to eat?
Yes. Food-grade black gel food coloring uses dye combinations approved for food use (typically a mix of blue, red, and yellow certified food dyes). The quantities used in this recipe are well within normal consumption ranges. Black cocoa powder, which does most of the color work here, is simply heavily processed cocoa and contains no synthetic dyes at all. The main practical concern with black buttercream is that it can temporarily stain lips and teeth; this is a cosmetic effect that fades within an hour.
Can I make this as cupcakes instead of a full cake?
Yes. Pour the batter into lined standard cupcake tins, filling each cup about two-thirds full. Bake at 175°C (350°F) for 18 to 22 minutes until a toothpick comes out with a few dry crumbs. The full recipe makes 24 cupcakes. Frost each with a large swirl of black buttercream, pipe a small red vine design on each, and press two or three colorful candy pieces into each swirl as the lights. This version is easier to serve at a party and requires no slicing.
How do I prevent the candy string lights from sliding off the cake?
Apply the candy while the outer coat of frosting is still fresh and slightly tacky, within about 10 to 15 minutes of applying the final black layer. Press each candy piece gently but firmly into the frosting surface at a slight angle so gravity doesn’t pull it straight down. If the frosting has already set, dab a small amount of fresh black buttercream behind each candy piece as adhesive before pressing it on.
Conclusion
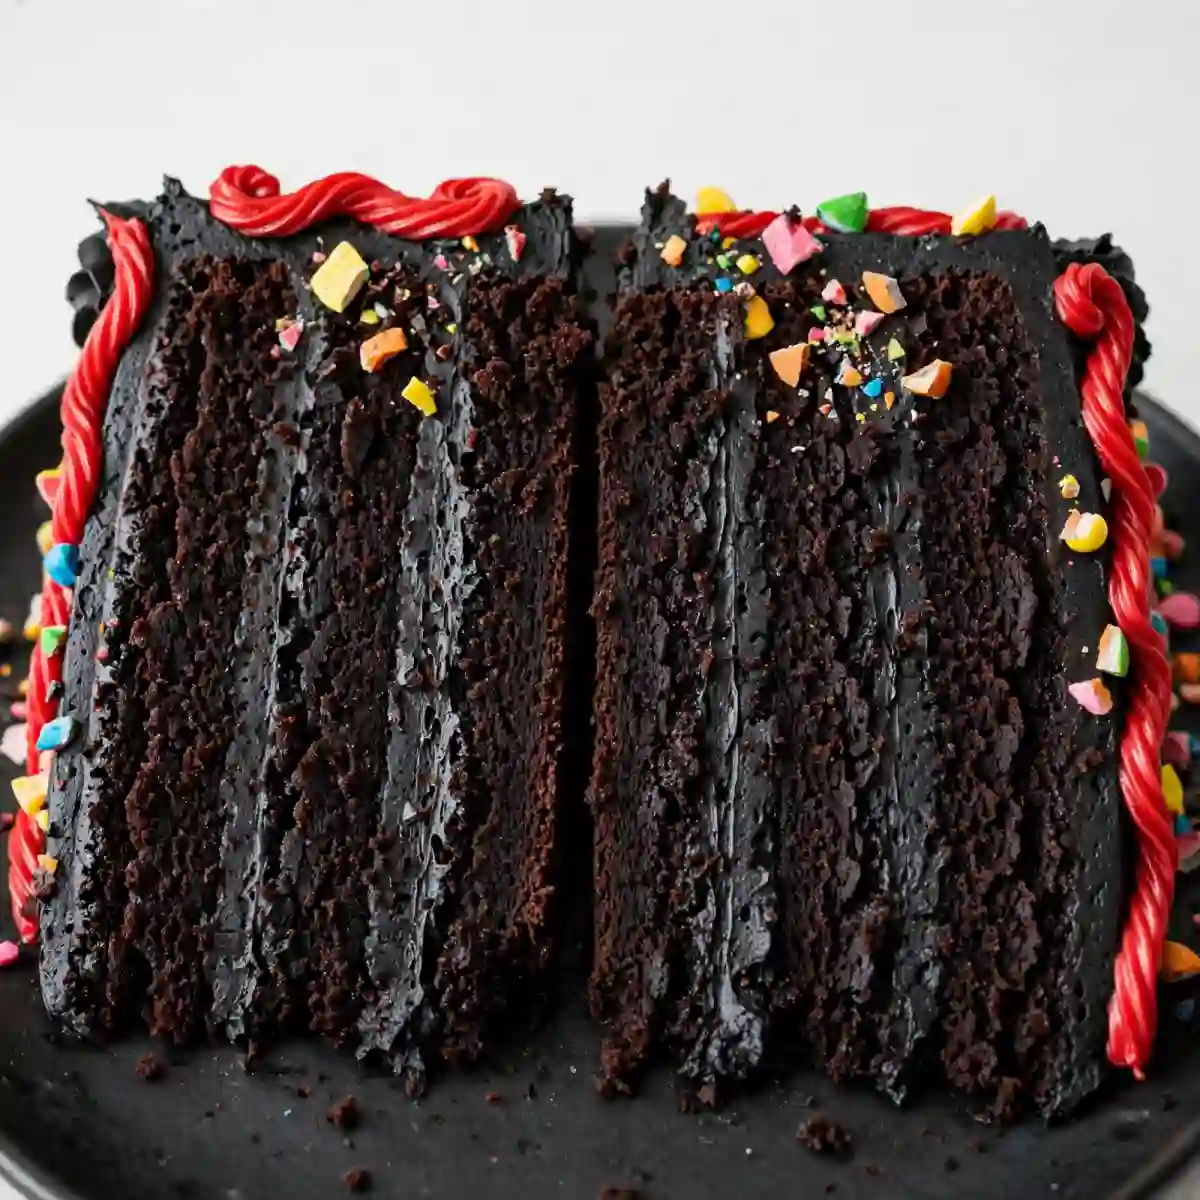
A Stranger Things cake earns its place as a party centerpiece before anyone even cuts into it. The black surface, the red vine design, and the colorful candy string lights communicate the theme immediately without needing any explanation. And then the slice goes on the plate, and the dark, fudgy chocolate layers and smooth black cocoa buttercream make the visual pay off with flavor.
The techniques here are layered but logical: dark layers from Dutch-process cocoa, true black frosting from black cocoa powder, red piped decoration applied after a cold crumb coat, and decorative elements pressed on while the frosting is still fresh. Work through each step in sequence, give yourself enough time, and the finished Stranger Things cake will look exactly like what it’s meant to be.
If you loved this recipe, save it to your themed birthday cake ideas Pinterest board so you can find it easily later. For more new recipes follow thecookingvibes pinterest account.
Stranger Things Cake
Ingredients
Equipment
Method
- Preheat oven to 175°C (350°F). Grease three 8-inch cake pans, line each with parchment, and grease the parchment.
- Sift flour, Dutch-process cocoa, baking soda, baking powder, and salt into a large bowl. Whisk to combine.
- In a separate bowl, whisk together eggs, buttermilk, cooled coffee, vegetable oil, sugar, and vanilla until blended. Pour into the dry ingredients and stir until smooth and uniform. Batter will be thin.
- Divide evenly among the three pans. Tap each pan twice. Bake for 30 to 35 minutes until a toothpick in the center comes out with just dry crumbs. Cool in pans 15 minutes, then transfer to wire racks. Cool fully, at least 45 minutes, before frosting.
- Beat softened butter for the black buttercream on medium-high for 3 to 4 minutes. Add sifted powdered sugar in three additions on low speed. Add sifted black cocoa, vanilla, salt, and 4 tablespoons cream. Beat on medium-high for 3 minutes. Add black gel coloring if needed and beat for 2 more minutes. Rest 10 to 15 minutes to allow color to deepen before evaluating.
- Stack the cooled layers with generous black buttercream between each. Apply a thin crumb coat over the entire outside. Refrigerate 15 to 20 minutes until set. Apply a final, thicker layer of black buttercream. Smooth with a bench scraper.
- While the outer frosting is still slightly tacky, press coarsely crushed Oreo crumbs against the lower third of the cake sides. Arrange colorful candy in a winding line around the upper side as string lights.
- Make the red vine buttercream by beating the butter, adding powdered sugar, cream, and red gel coloring. Pipe vine and tendril designs across the top and upper sides using a small round tip. Pipe “STRANGER THINGS” lettering across the top. Refrigerate 10 minutes before serving.
Notes
- Use black cocoa powder specifically, not regular dark cocoa. It is what makes the buttercream genuinely black rather than dark grey.
- Let the black buttercream rest 10 to 15 minutes after mixing; the gel color continues to deepen as it sits.
- Apply the Oreo crumbs and candy lights while the outer frosting is still slightly tacky for the best adhesion.
- The cake layers can be baked 2 days ahead and refrigerated, tightly wrapped.
- Allergens: Contains dairy (butter, cream, buttermilk), eggs, and gluten (flour, Oreo cookies, candy). Check all candy labels for additional allergens. For gluten-free, use 1:1 GF flour blend and GF sandwich cookies. For dairy-free, use plant-based butter and oat milk with vinegar. Not prepared in an allergen-free facility.
- Always check individual product labels.