Stuffed Chicken Breast — Juicy, Creamy Spinach and Cheese Filling
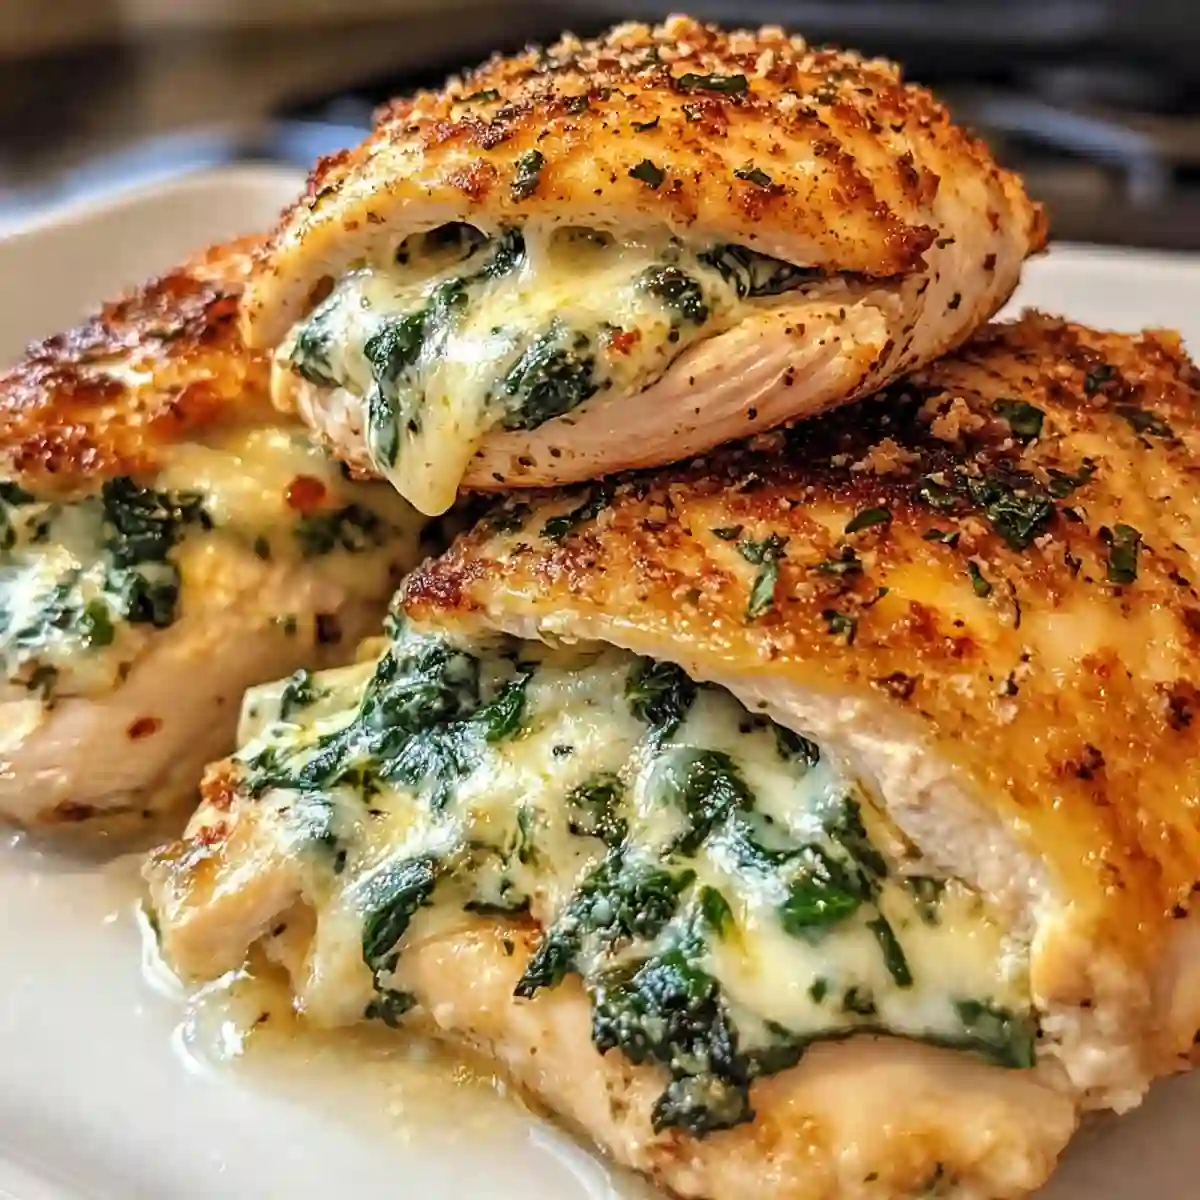
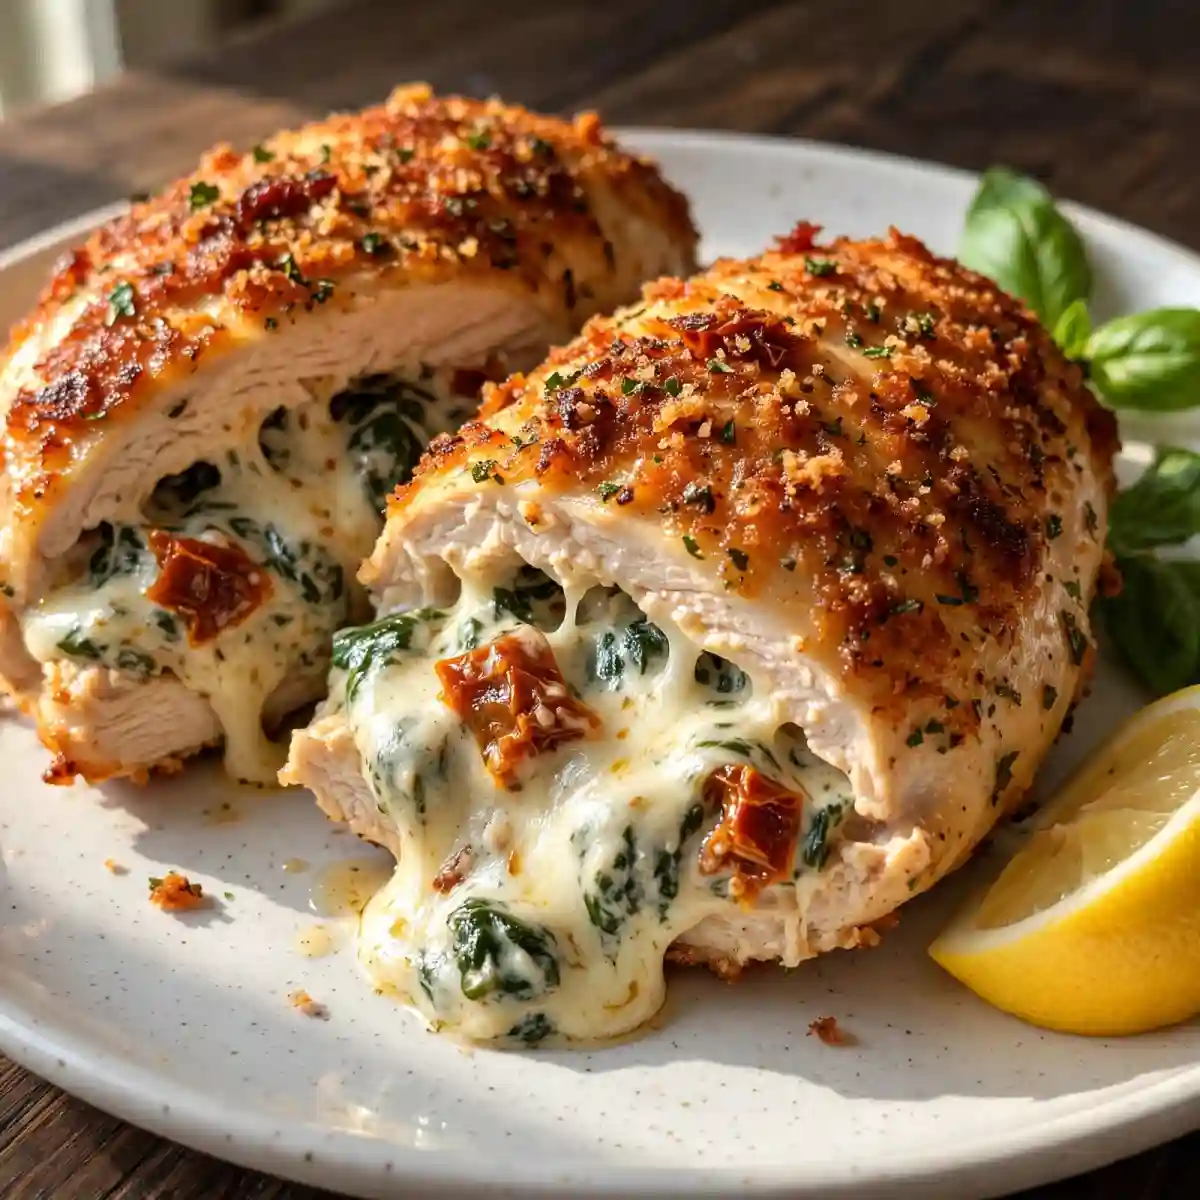
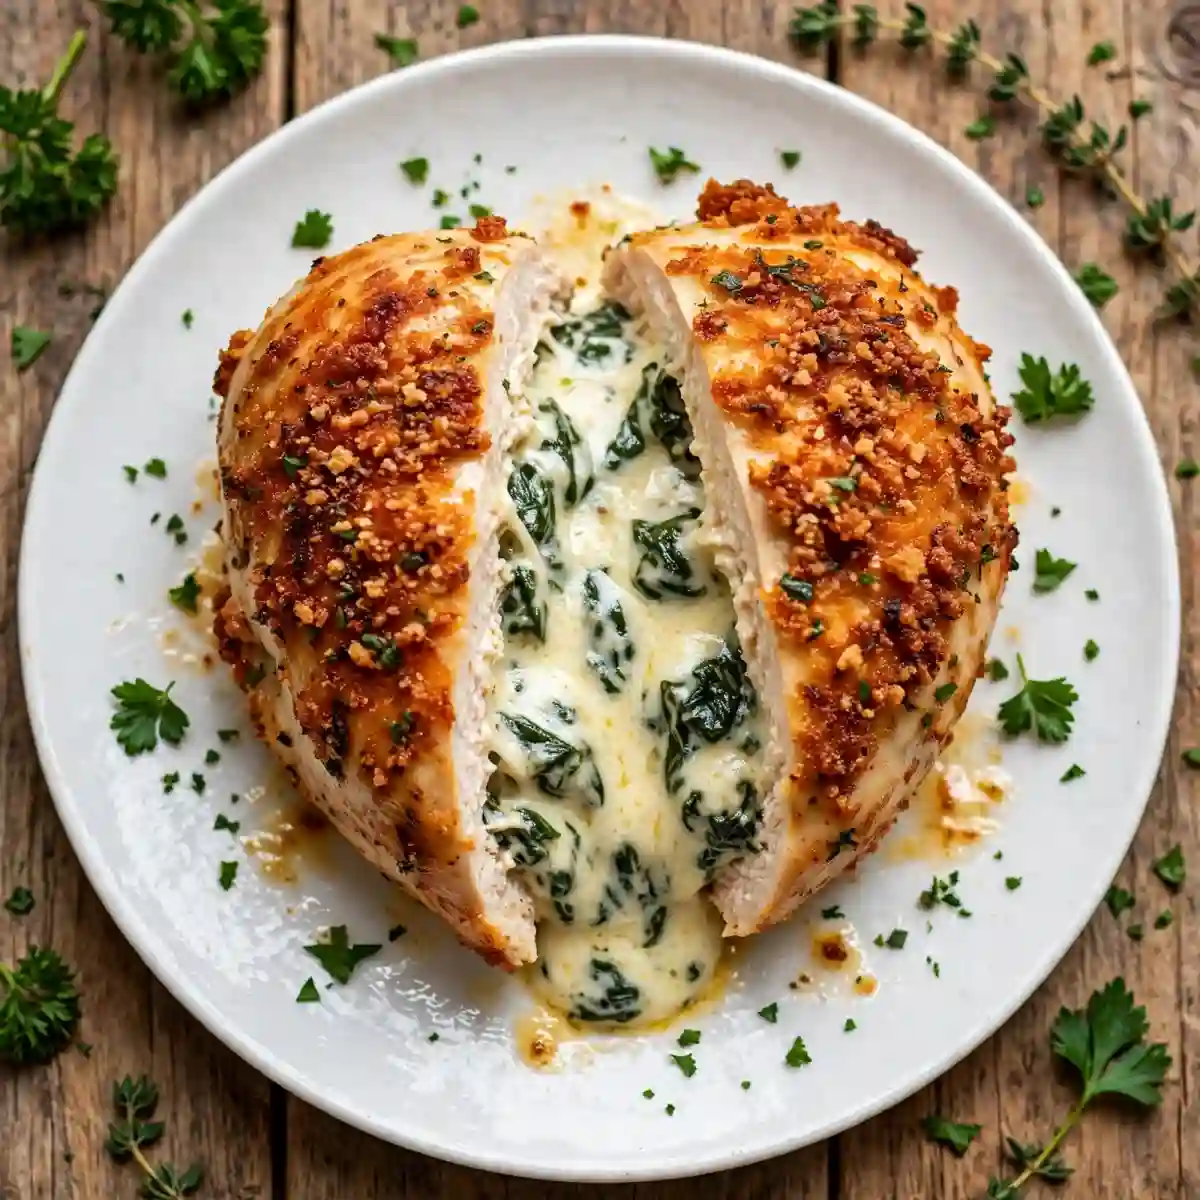
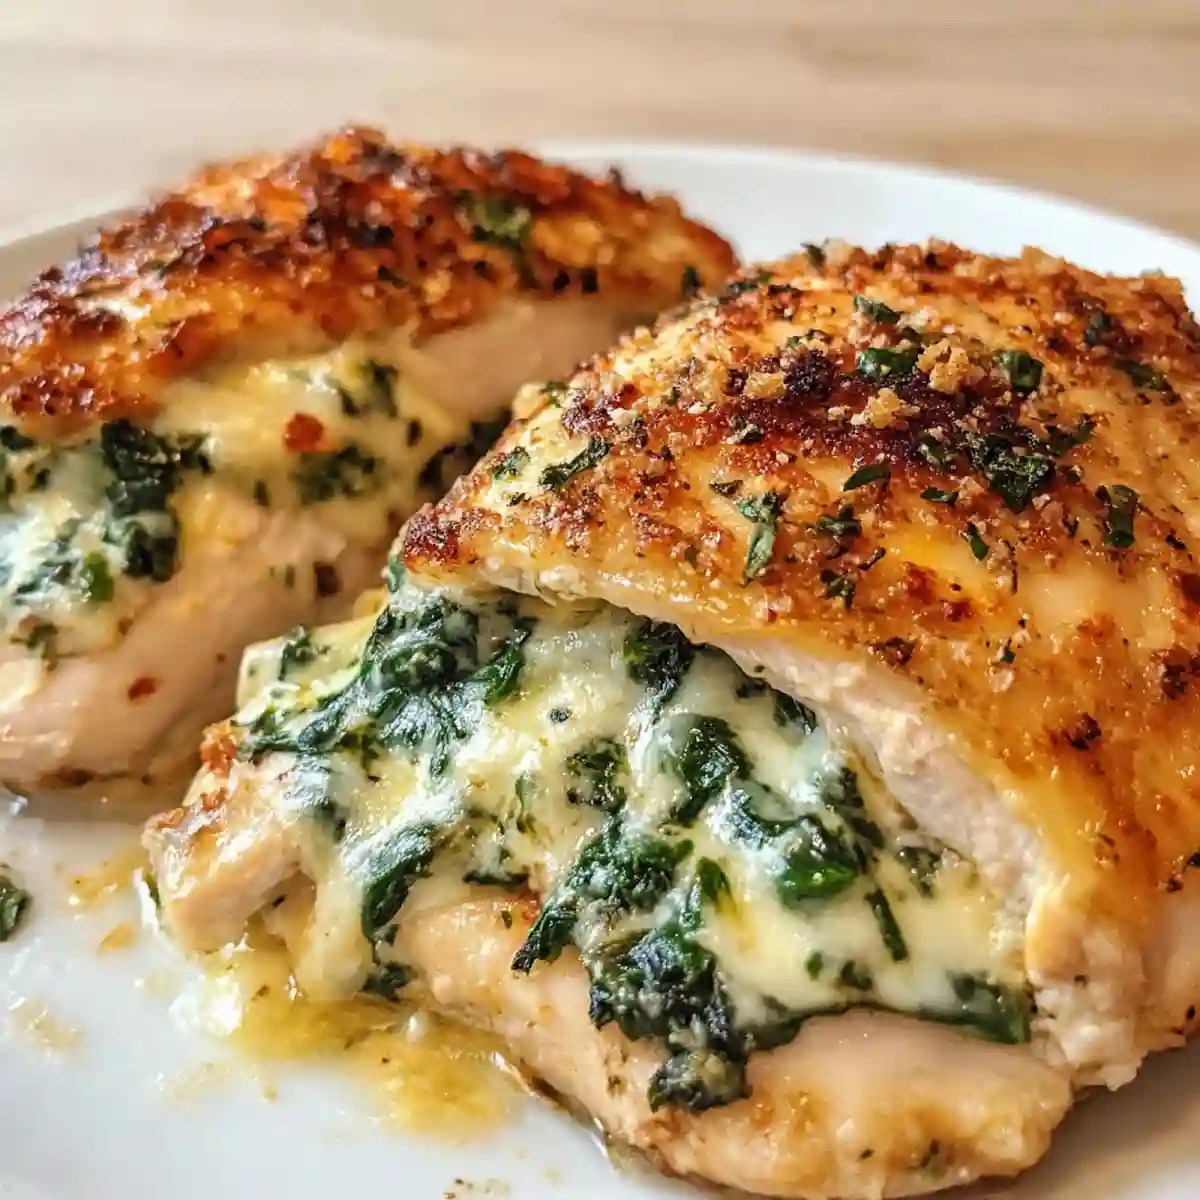
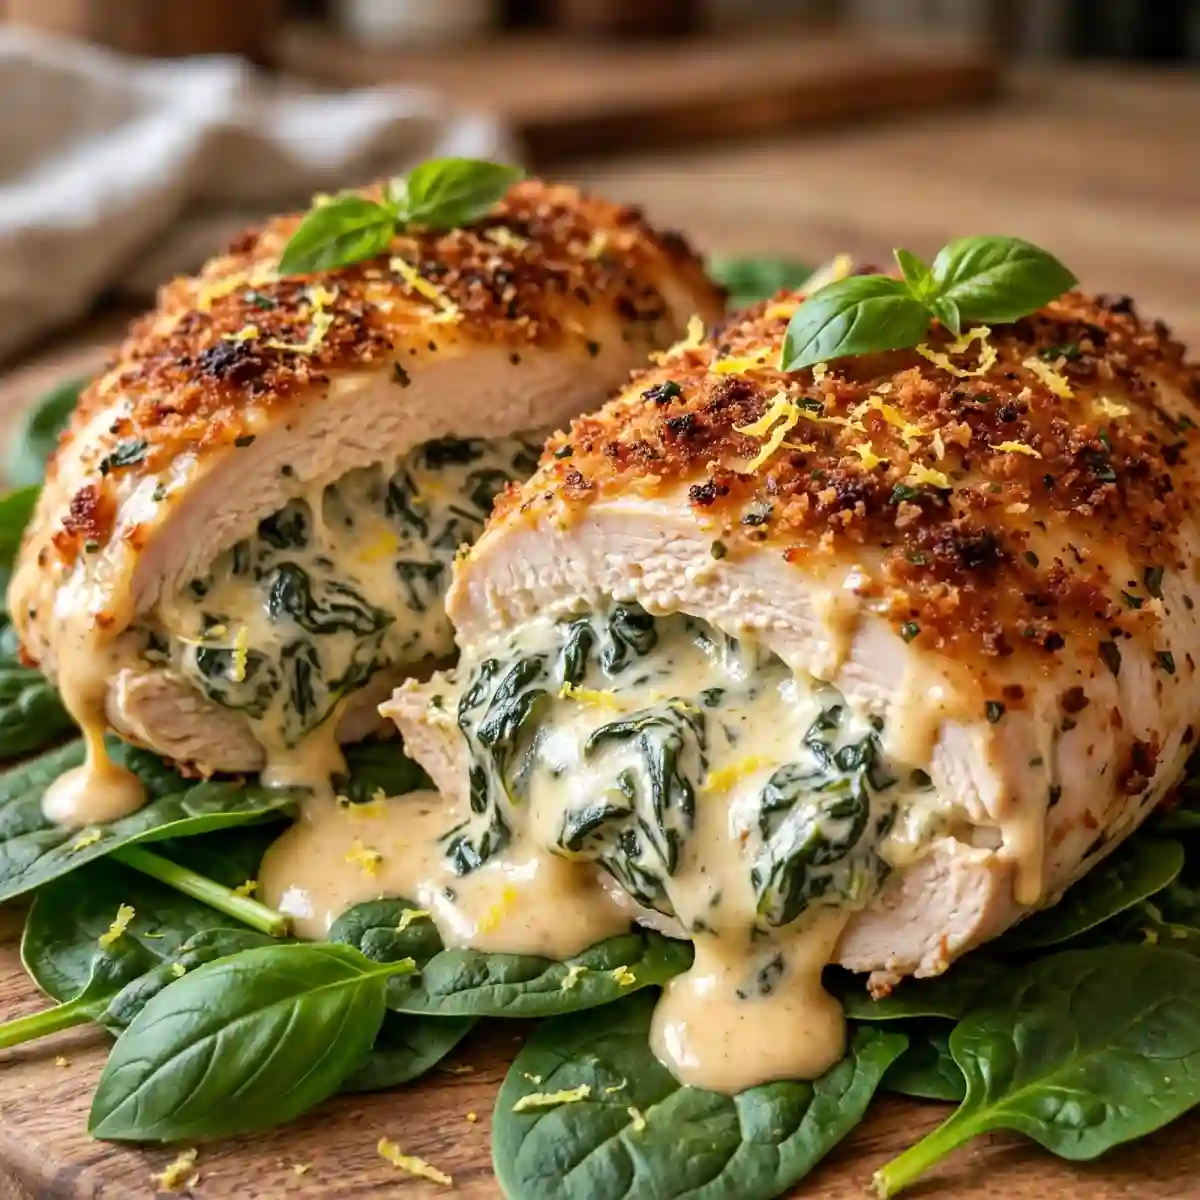
Cut into a properly stuffed chicken breast and the filling should still be slightly molten, creamy and hot, pooling at the cut edge of each slice rather than dried out or sealed into a rubbery pocket. The exterior is a deep golden-brown from the sear that happened before the oven, the chicken itself is fully cooked through without being dry, and the whole thing took 45 minutes from start to finish. This is the version that looks like restaurant effort with home cooking reality.
This stuffed chicken breast recipe uses boneless skinless chicken breasts filled with a mixture of cream cheese, fresh spinach, sun-dried tomatoes, garlic, and mozzarella, sealed with toothpicks, seared in a cast iron skillet, and finished in a 200°C oven until the internal temperature reaches 74°C throughout. The sear-then-oven method produces the golden exterior and even internal doneness that oven-only or pan-only methods can’t achieve simultaneously. It serves 4, the filling takes 10 minutes to prepare, and the whole recipe works for a weeknight dinner that looks significantly more composed than the effort involved.
Why You’ll Love This Stuffed Chicken Breast
- Golden seared exterior with a fully cooked interior. The sear-then-oven method gives you the dark, Maillard-browned exterior that looks deliberately cooked alongside even internal doneness that oven-only baking struggles to achieve without drying the outer layer.
- Filling stays molten rather than drying out. Cream cheese acts as the filling’s binder and moisture reservoir; it melts during baking but doesn’t leak aggressively because its fat content keeps it emulsified and cohesive rather than running out of the pocket during cooking.
- Ready in 45 minutes without complicated technique. The pocket-cutting and filling are the only steps that require attention; the rest is searing, transferring to the oven, and resting.
- Impressive enough for a dinner party, practical enough for Tuesday. The presentation, a whole seared chicken breast sliced at the table to reveal a hot, creamy filling, requires no plating skill; the reveal does the visual work automatically.
- Filling combinations are endlessly flexible. The technique and timing in this recipe work with any filling that bakes in the same 15 to 18 minute oven window; the spinach and cheese version below is just the starting point.
Ingredients You’ll Need
Recipe Timing
| Detail | Info |
|---|---|
| Servings | 4 |
| Difficulty | Easy to Moderate |
| Course | Main Course |
| Cuisine | American |
| Prep Time | 15 minutes |
| Cook Time | 25 minutes |
| Rest Time | 5 minutes |
| Total Time | 45 minutes |
For the chicken, choose large boneless skinless chicken breasts, each weighing 220 to 280g. Smaller breasts don’t have enough depth to cut a pocket without piercing through the other side; very large breasts over 300g take longer in the oven and risk drying the filling before the chicken reaches temperature. If only small breasts are available, butterfly them open fully rather than cutting a pocket, place the filling on one half, and fold the breast closed, securing firmly with toothpicks.
For the cream cheese, it must be softened to full room temperature before the filling is mixed. Cold cream cheese doesn’t combine with the other filling ingredients and leaves visible lumps that don’t fully melt during the bake; room-temperature cream cheese mixes to a smooth, uniform filling in under a minute.
For the spinach, fresh baby spinach wilted in a dry skillet for 60 to 90 seconds and then squeezed very dry between paper towels or in a clean cloth produces the best filling. Frozen spinach thawed and squeezed very dry substitutes directly but tends to produce a slightly waterier filling if any excess moisture is left in; squeeze it more aggressively than you think necessary.
For the mozzarella, low-moisture mozzarella grated fresh from a block produces a filling that stretches and holds together when the breast is cut rather than separating into watery puddles. Fresh mozzarella balls have too much moisture; they release water into the filling during baking and can make the pocket soggy. Pre-shredded mozzarella from a bag works but contains anti-caking agents that slightly reduce its meltability compared to freshly grated block.
The Chicken:
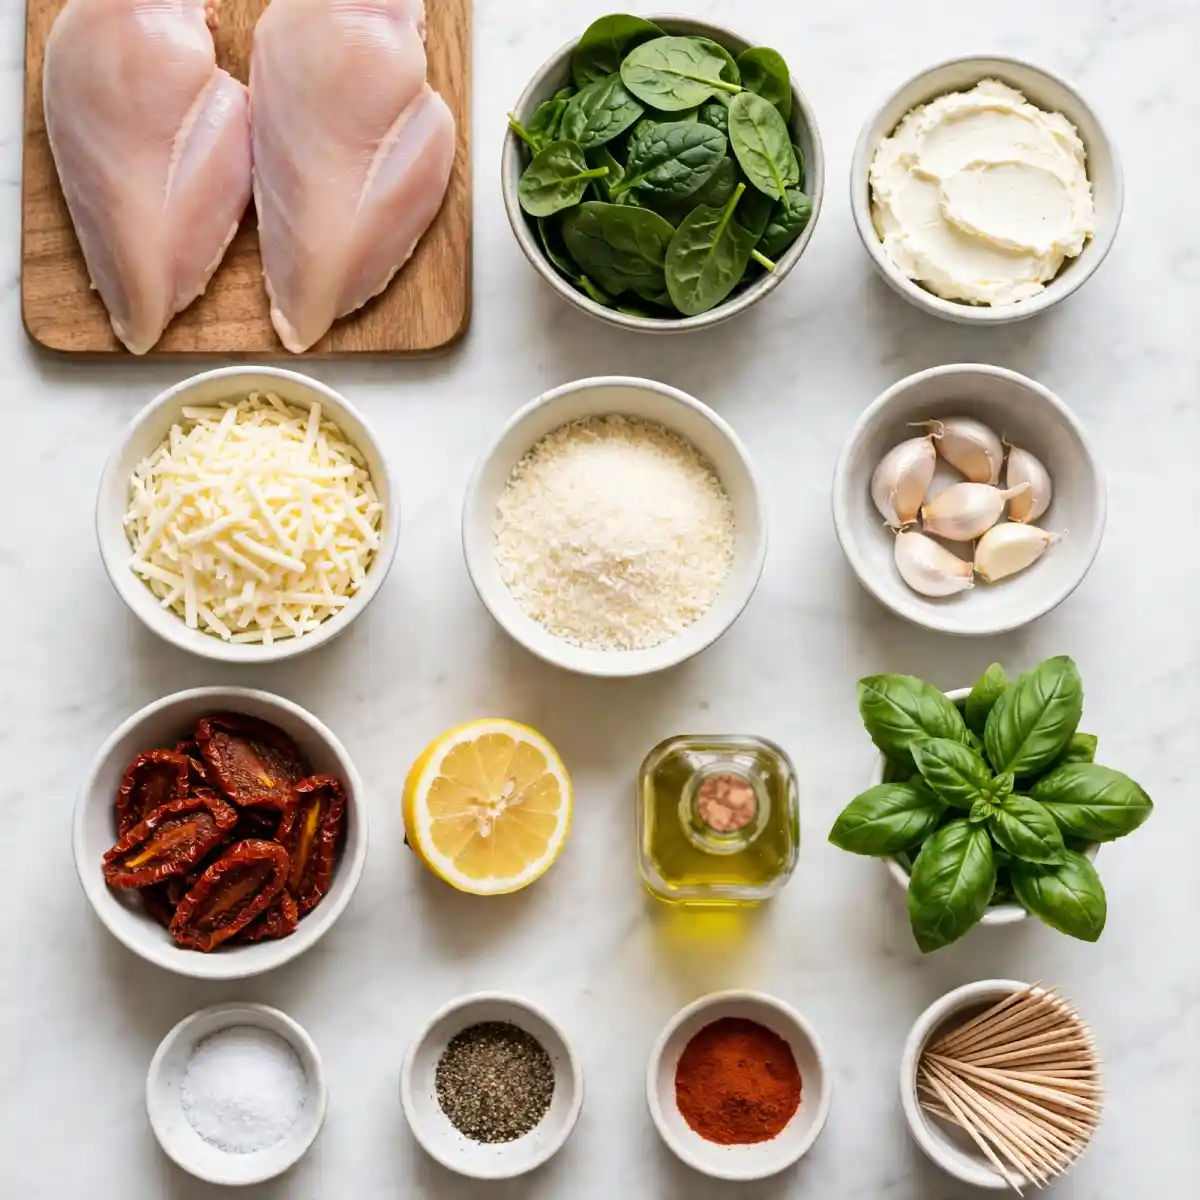
- 4 large boneless skinless chicken breasts (220 to 280g each) — the main protein; food safety note: boneless skinless chicken breast must reach 74°C (165°F) internal temperature throughout before serving
- 2 tablespoons olive oil — for searing; produces the highest surface temperature contact without burning at the sear time needed
- 1 teaspoon garlic powder — for the exterior seasoning
- 1 teaspoon smoked paprika — adds color to the seared exterior and a subtle smokiness to the crust
- 1 teaspoon Italian seasoning — seasons the chicken surface to match the filling’s herbal character
- 1 teaspoon fine salt — for the exterior seasoning
- 1/2 teaspoon freshly ground black pepper
The Spinach and Cheese Filling:
- 115g (4 oz) full-fat block cream cheese, fully softened — the binding base of the filling; keeps everything cohesive and provides richness
- 100g (about 1 cup loosely packed) fresh baby spinach, wilted and very thoroughly squeezed dry — adds color, mild flavor, and body; must be very dry or the filling becomes watery
- 80g (about 3/4 cup) low-moisture mozzarella, freshly grated — melts into stringy, creamy pockets throughout the filling; stretches attractively when the breast is sliced
- 40g (about 1/3 cup) freshly grated Parmesan — adds a sharp, salty, umami depth that the mild mozzarella alone doesn’t provide
- 60g (about 1/4 cup) oil-packed sun-dried tomatoes, drained and roughly chopped — adds concentrated, slightly sweet-acidic tomato flavor and color; oil-packed tomatoes are more pliable and flavorful than dry-packed for this application
- 3 garlic cloves, finely minced — the filling’s aromatic backbone; raw minced garlic mellows into a sweet, savory note during the bake
- 1/4 teaspoon red chili flakes — adds a mild background heat that elevates the filling without making it spicy
- 1/4 teaspoon fine salt
- 8 to 12 toothpicks — for sealing the pocket openings before searing; remove before serving
Allergen and Dietary Disclosure
This stuffed chicken breast contains dairy (cream cheese, mozzarella, and Parmesan in the filling). It is naturally gluten-free and egg-free as written. It contains no nuts.
For dairy-free: replace the cream cheese with dairy-free block-style cream cheese alternative at the same quantity, the mozzarella with a melting dairy-free mozzarella, and the Parmesan with 2 tablespoons of nutritional yeast for a comparable savory depth. The filling will set and hold adequately; the stretch and melt characteristics will be slightly different depending on the specific dairy-free products used.
For lower fat: replace the full-fat cream cheese with Neufchâtel cheese (reduced-fat cream cheese) at the same quantity. Neufchâtel has approximately 30% less fat than full-fat cream cheese and produces a slightly less rich filling that still binds and bakes well. Use part-skim mozzarella at the same quantity.
This recipe has not been tested in a certified allergen-free kitchen and cannot be guaranteed safe for any specific allergy.
Equipment Needed
- Oven-safe 10 to 12-inch cast iron skillet or heavy stainless steel skillet — the skillet must go from stovetop to oven without issue; a cast iron skillet is ideal because it retains heat exceptionally well and produces the most consistent, even sear across the entire breast surface. A regular non-stick skillet cannot go into a 200°C oven and must not be used for the oven phase.
- Sharp chef’s knife or boning knife — for cutting the pocket into the breast. A sharp knife cuts cleanly through the meat without tearing; a dull knife forces you to use more pressure, which increases the risk of cutting through the wrong wall of the pocket. The blade should be narrow enough to maneuver inside the breast without widening the opening excessively.
- Instant-read thermometer — the only reliable doneness indicator for stuffed chicken. The filling’s moisture and thermal mass mean the filling and the chicken can be at different temperatures at the same point; the thermometer inserted into the thickest part of the chicken (not the filling) confirms the meat is at 74°C. Visual color of the meat is not reliable for stuffed chicken because the steam from the filling can produce a visually cooked appearance in undercooked meat.
- Toothpicks — for sealing the pocket openings before searing; count them when you put them in and remove the same number before serving.
Step-by-Step Directions
Step 1: Prepare the Spinach and Mix the Filling
Place the fresh baby spinach in a dry skillet over medium-high heat and stir for 60 to 90 seconds until fully wilted and reduced dramatically in volume. Transfer to a plate lined with paper towels or a clean kitchen cloth and squeeze aggressively to remove as much water as possible; the spinach should feel nearly dry between your palms. Roughly chop the squeezed spinach into 1 to 2cm pieces.
In a medium bowl, combine the room-temperature cream cheese, squeezed and chopped spinach, grated mozzarella, Parmesan, sun-dried tomatoes, minced garlic, chili flakes, and salt. Mix thoroughly with a fork or spatula until all the filling components are evenly distributed and the cream cheese has absorbed the other ingredients into a cohesive, slightly chunky mixture. Taste it at this point; it should taste savory, slightly garlicky, and well-seasoned.

Chef’s Note: Squeezing the spinach as dry as possible is not about flavor; it’s about filling stability during baking. Fresh spinach contains 92% water by weight, almost all of which releases when heat is applied; spinach that isn’t squeezed dry releases this water into the cream cheese filling during baking, turning it from a cohesive, creamy filling into a watery puddle that leaks through the pocket and produces soggy chicken rather than a well-sealed, creamy interior. Squeeze until it seems like nothing more can come out, then squeeze again.
Step 2: Cut the Pockets
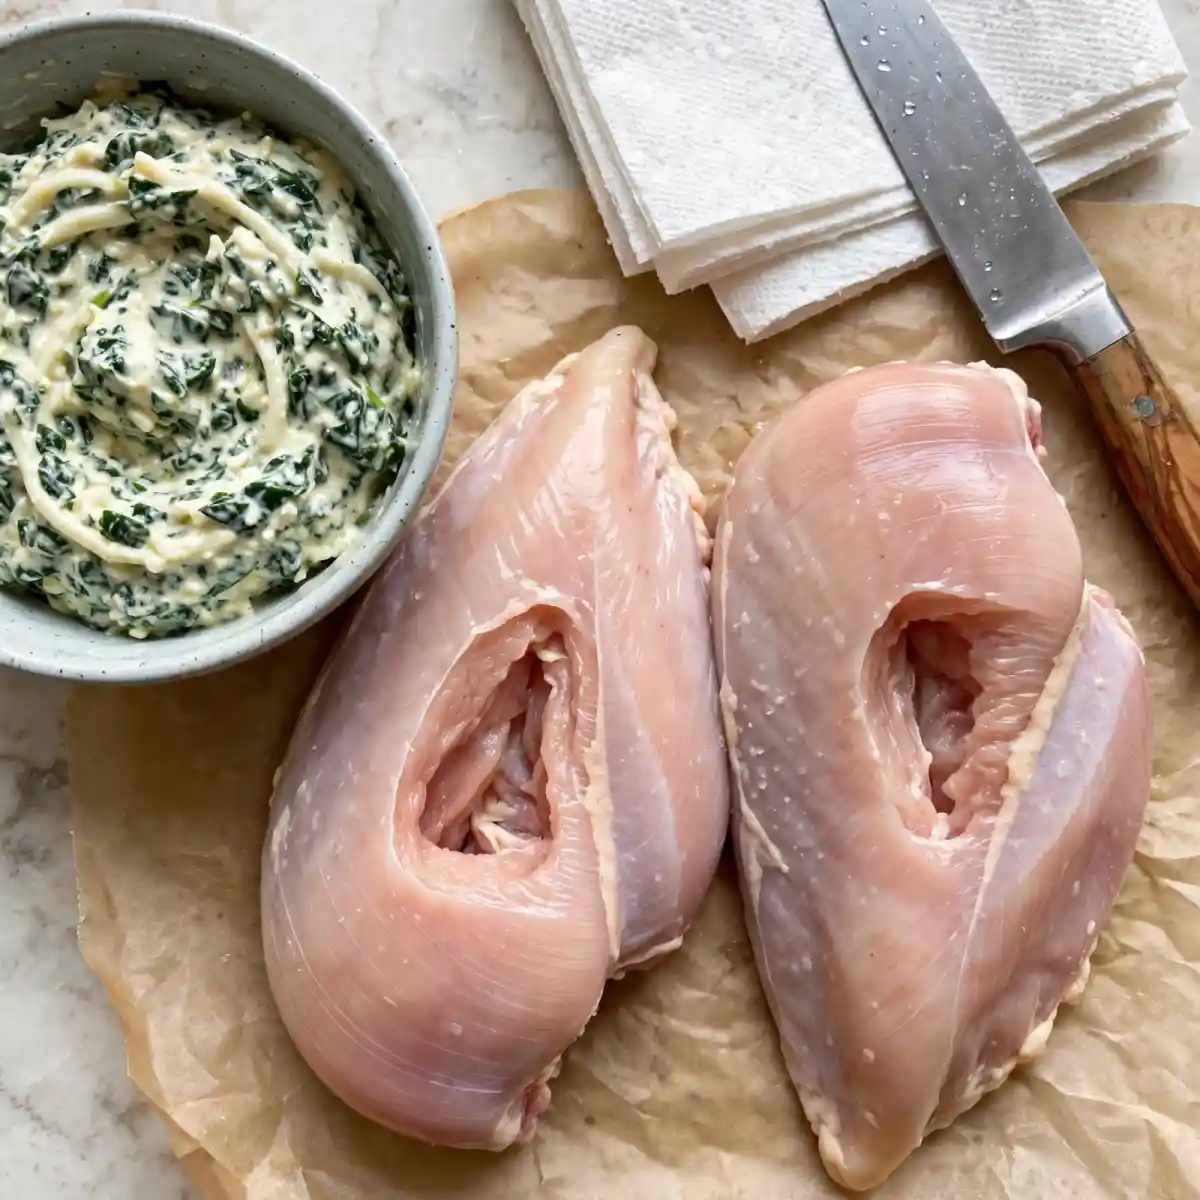
Preheat the oven to 200°C (400°F). Pat each chicken breast completely dry on both sides with paper towels; a wet surface produces steaming rather than searing during the skillet step and prevents the golden-brown crust from forming.
Place one chicken breast flat on the cutting board. Hold it flat with one hand and insert the sharp knife into the thickest side of the breast, cutting horizontally through the interior to create a deep pocket that extends almost to the opposite side without cutting all the way through. The pocket opening should be just wide enough for a spoon or small spatula; the goal is a pocket that extends through 75 to 80% of the breast’s depth with the three remaining sides intact.
Repeat for all four breasts.
Chef’s Note: The key to a successful pocket is restraint at the opening. A small opening at the entry point forces you to work the filling deeper into the breast rather than piling it at the mouth; filling concentrated at the entry point falls out during searing even when toothpicked. Work the knife forward in small, controlled strokes rather than sawing, which tears the meat rather than cutting it cleanly.
Step 3: Fill and Seal the Breasts
Divide the filling into four equal portions. Using a small spoon, fill each pocket firmly but without over-stuffing; the goal is a pocket that closes naturally with the toothpick rather than bulging and straining at the opening. Too much filling forces the pocket open during the sear and allows the filling to escape into the pan rather than staying inside the breast.
Seal each pocket by threading 2 to 3 toothpicks across the opening, weaving them through both sides of the meat to hold the pocket closed. The toothpicks don’t need to be decorative; they just need to prevent the pocket from gaping during the sear.
Mix the garlic powder, smoked paprika, Italian seasoning, salt, and black pepper together in a small bowl. Season the exterior of each filled breast generously on both sides with this spice mixture, pressing it gently to adhere.
Step 4: Sear the Breasts
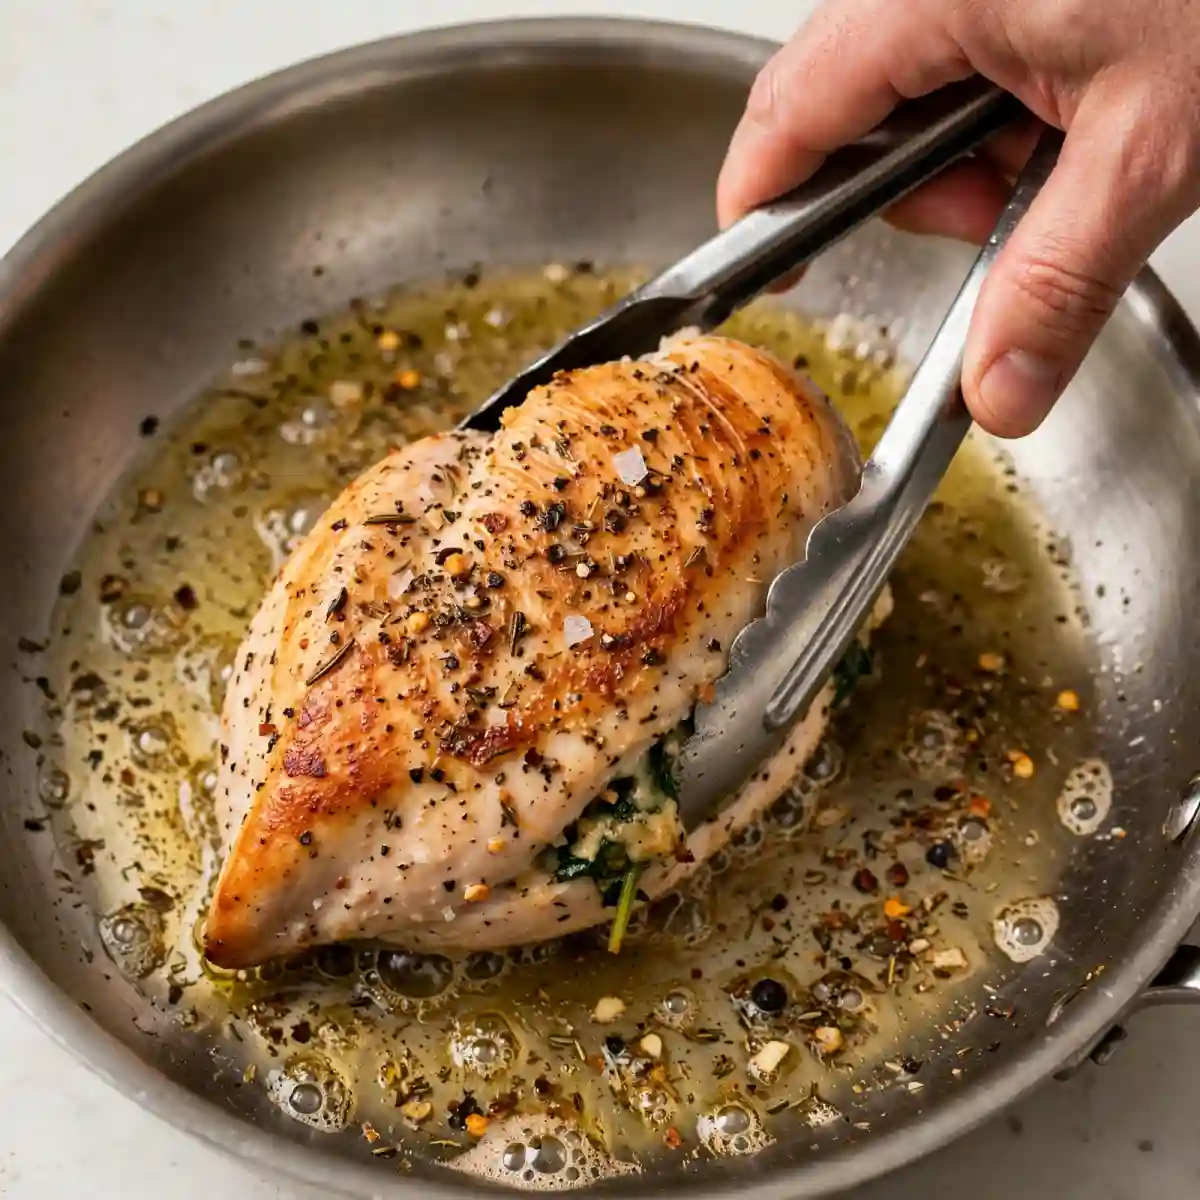
Heat the olive oil in the oven-safe cast iron skillet over medium-high heat until the oil shimmers actively and a small drop of water flicked into the pan evaporates immediately on contact, about 2 minutes. Place the seasoned stuffed breasts carefully in the hot pan, sealed side down first; this side has the toothpicks and placing it down first ensures the pocket stays sealed under the weight of the breast during the sear.
Sear without moving for 3 to 4 minutes until the bottom surface is a deep golden-brown and releases cleanly from the pan without sticking. Turn carefully using tongs, avoiding pressure on the filling area, and sear the second side for 2 to 3 minutes until similarly golden.
Food safety reminder: raw chicken should not contact other surfaces or food after handling; wash hands thoroughly after the filling and sealing steps.
Chef’s Note: The sear’s purpose extends beyond appearance. At the skillet temperatures needed for Maillard browning (above 140°C at the meat surface), the sear dehydrates and cross-links the outer protein layer of the breast into a firmer crust that physically seals the pocket’s opening. Even if a toothpick gap exists, the seared protein crust around the opening reduces filling leakage during the subsequent oven phase far more effectively than the toothpicks alone.
Step 5: Finish in the Oven
Transfer the entire cast iron skillet, with the seared breasts still inside, to the preheated 200°C oven. Bake for 15 to 18 minutes until an instant-read thermometer inserted into the thickest part of the chicken (not into the filling) reads 74°C (165°F). The filling will be visibly bubbling at the sealed edges in some cases; this is normal and means the filling is fully hot throughout.
If the seared breasts have been placed in a different oven-safe dish for the oven phase, that is also fine; the residual heat in the cast iron simply carries over well.
Step 6: Rest and Remove Toothpicks
Transfer the finished stuffed chicken breasts to a cutting board or plate. Rest uncovered for 5 minutes before cutting; resting allows the muscle fibers, which contracted during the high sear and oven heat, to relax and reabsorb some of the expelled moisture back into the meat. Cutting immediately after the oven produces a visibly drier slice than waiting 5 minutes.
Remove every toothpick before serving. Count them against the number inserted; toothpick miscount is a genuine serving concern.
Slice each breast on the diagonal into 3 to 4 pieces and plate, cut-side up to show the filling.
Common Mistakes and Troubleshooting
| Problem | Cause | Solution |
|---|---|---|
| Filling leaks out during searing | Pocket over-filled, or toothpicks not sealing the opening well enough | Fill only to 75% of pocket capacity; use 3 toothpicks across the opening and place sealed side down first |
| Chicken dry and overcooked | Oven temperature too high, or cooked past 74°C internal temperature | Use a thermometer; pull at exactly 74°C and rest 5 minutes |
| Golden sear not forming | Pan not hot enough before the chicken was added, or chicken surface was wet | Pat the breasts completely dry before searing; oil must be shimmering before the chicken goes in |
| Filling watery inside the breast | Spinach not squeezed dry enough before mixing | Squeeze spinach far more aggressively; it must feel nearly dry between palms before chopping |
| Pocket pierced through the wrong side | Knife slipped during pocket-cutting | Use a sharp, narrow knife; cut slowly in small forward strokes; keep the non-knife hand firmly flat on top of the breast |
| Breast doesn’t reach temperature in time | Breast too large or refrigerator-cold when it went into the oven | Allow breasts to sit at room temperature for 15 minutes before cooking; use a thermometer rather than time alone |
Variations and Substitutions
- Feta and roasted red pepper filling: Replace the cream cheese base with 115g of softened feta mixed with 2 tablespoons of plain cream cheese to bind it, and substitute the sun-dried tomatoes with 80g of jarred roasted red peppers, drained and roughly chopped. The feta’s sharp, salty tang and the pepper’s sweetness produce a Mediterranean-inspired filling that pairs particularly well with a side of couscous or a simple green salad.
- Mushroom and Swiss filling: Sauté 200g of finely diced cremini mushrooms in 1 tablespoon of butter until all their moisture has evaporated and they look golden and concentrated, about 8 minutes. Cool slightly, then combine with 115g of softened cream cheese and 80g of grated Swiss cheese. The mushrooms add an earthy, umami depth and the Swiss’s mild nuttiness is a quieter, more savory filling than the mozzarella version.
- Spicy jalapeño and cheese filling: Add 2 finely diced fresh jalapeños (seeds removed for mild, seeds included for significant heat) and 1/2 teaspoon of cumin to the base cream cheese filling in place of the sun-dried tomatoes and spinach. Use cheddar instead of mozzarella for a sharper, more pronounced cheese flavor. This version pairs well with rice and black beans as sides.
- Caprese filling: Use a simple filling of 100g of fresh mozzarella sliced into thin rounds (blotted very dry with paper towels), 8 to 10 large fresh basil leaves, and 60g of well-drained sun-dried tomatoes. This version has no cream cheese binder; the toothpick seal and the sear crust do all the structural work. The filling is simpler but the basil perfumes the breast beautifully from the inside during baking.
- Broccoli and cheddar filling: Steam or microwave 100g of broccoli florets until just tender, chop finely, and mix with 115g of softened cream cheese and 90g of grated sharp cheddar. A pinch of mustard powder in the filling amplifies the cheddar’s sharpness. This is the most kid-friendly version; the familiar broccoli-cheddar combination is accessible and the filling has no heat or assertive adult flavors.
- Gluten-free confirmation: All six filling variations and the base recipe are naturally gluten-free. No wheat-derived ingredient appears in any component; verify the sun-dried tomato jar and the cream cheese label if strict gluten-free compliance is needed.
Serving Suggestions
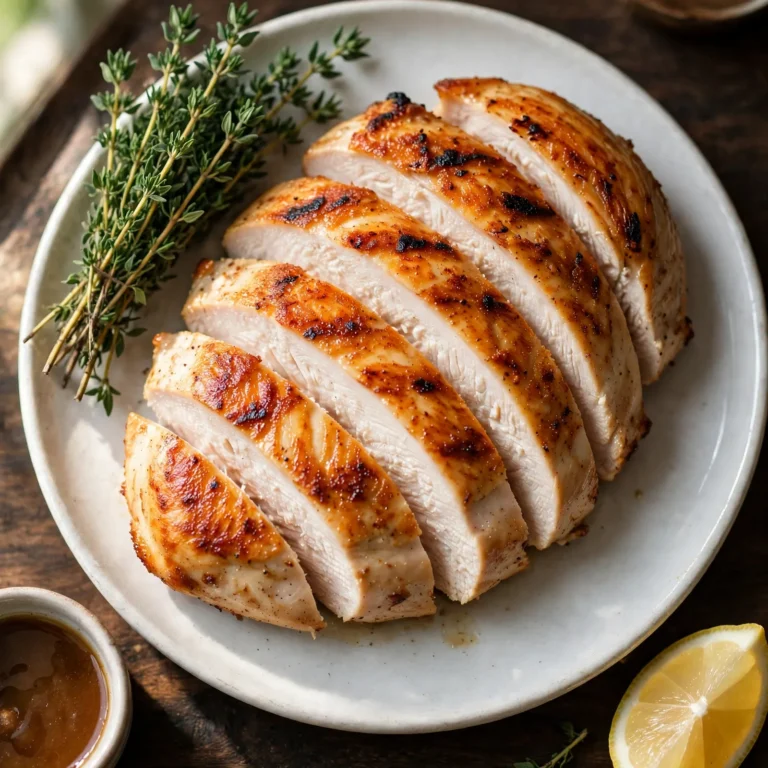
- Slice the rested breast on the diagonal into 3 to 4 pieces and arrange them overlapping, cut-side up, on a wide white plate so the filling is visible in every piece; this presentation requires no effort and communicates the filling composition immediately.
- Serve alongside roasted garlic mashed potatoes or simple boiled new potatoes dressed with butter and parsley; the starchy side provides a neutral base that absorbs the filling’s cream cheese and cheese if any escapes onto the plate.
- A simple green salad dressed with lemon juice and olive oil makes the most practical accompaniment; the acid from the lemon cleanses the palate between bites of the rich, cheese-heavy filling without competing with the chicken’s flavor.
- Serve with steamed or roasted asparagus or green beans; the vegetable’s slight bitterness and green freshness provide a tonal contrast to the golden, savory-rich chicken that makes the plate feel balanced without additional sauce or dressing.
- Spoon a small amount of marinara or fresh tomato sauce on the plate beside each sliced breast; the tomato’s acidity brightens the cheese filling and the combination echoes the sun-dried tomato already inside.
- Pair with cold sparkling water with lemon or a cold pressed apple juice; both clean drinks cut through the richness of the cream cheese filling without overpowering the chicken’s seasoning.
Tips for the Best Results
- Pat the chicken breasts completely dry before seasoning and searing. Surface moisture on raw chicken produces steam when it hits the hot skillet; steam lowers the pan temperature at the contact point and inhibits the Maillard browning reaction that requires dry surface contact above 140°C. A completely dry breast surface sears in 3 minutes to a deep, uniform golden-brown; a wet surface takes longer and still doesn’t produce the same color or crust quality.
- Don’t over-fill the pocket. The filling expands slightly as the cream cheese and mozzarella heat and melt; a pocket filled to capacity before baking becomes over-pressurized during the oven phase and forces the pocket open from the inside. Fill to about 75% of the pocket’s capacity; the filling will feel snug but the pocket will seal cleanly and stay closed.
- Use the thermometer, not the timer. The range of breast sizes available in any given store means that baking time for the same recipe can vary by 5 to 8 minutes between a 220g breast and a 280g breast. A thermometer reading of 74°C at the thickest part of the chicken, not in the filling, is the only reliable doneness indicator across all breast sizes. Set a timer as a minimum guide but always confirm with the thermometer.
- Rest before cutting, every time. Chicken breast muscle fibers contract significantly during the high-heat sear and oven phase; cutting immediately after cooking releases the moisture that those contracted fibers are expelling from the meat. A 5-minute rest at room temperature allows the fibers to relax and partially reabsorb that moisture; the visual difference between a rested and immediately-cut breast is dramatic, with the rested version showing noticeably less liquid loss on the board.
- Season the exterior assertively. The spice rub on the outside of the breast seasons the seared crust that becomes the texture and flavor contrast to the soft filling inside; a timid seasoning produces a crust that tastes bland against the filling’s richness. Use the full quantities of garlic powder, smoked paprika, and Italian seasoning listed, pressing the spice mixture firmly onto the dry surface so it adheres rather than falling into the pan.
Storage Tips
Refrigerator
Stuffed chicken breasts keep in the refrigerator for up to 3 days in a sealed container. Store whole rather than sliced if possible; whole breasts retain their moisture better during storage than pre-sliced pieces because the uncut surface limits the exposed area from which moisture evaporates during refrigerator storage. The filling firms considerably in the refrigerator; this is normal and the cream cheese returns to its molten state on reheating.
Freezer
Stuffed chicken breasts freeze well for up to 2 months. Freeze after cooking and cooling completely; wrap each breast individually in plastic wrap, then in aluminum foil, and place in a sealed freezer bag. Thaw overnight in the refrigerator before reheating. The filling’s cream cheese can separate slightly during freezing and thawing but returns to a creamy consistency once fully heated. For meal prep purposes, the filling can also be made up to 3 days ahead, refrigerated, and used to stuff fresh chicken on the day of cooking.
Reheating
Oven reheating produces the best result for maintaining the seared exterior’s texture: place the refrigerated stuffed chicken breast in a baking dish, cover loosely with foil to prevent the surface from drying, and reheat at 175°C (350°F) for 15 to 18 minutes until the internal temperature returns to 74°C. Remove the foil for the final 3 minutes to re-crisp the seared exterior. Microwave reheating at 60% power in 90-second intervals works for a quicker option but softens the seared crust; it’s the more practical choice for a single portion on a weeknight.
Make-ahead note: The filling can be made up to 3 days ahead and refrigerated in a sealed container; bring it to room temperature for 15 minutes before stuffing the chicken so it spreads smoothly into the pocket without tearing the meat. The filled, sealed, seasoned breasts can also be refrigerated uncooked for up to 24 hours and cooked fresh the next day, which makes the active cooking time on the day of serving just 25 minutes.
Nutrition Information
Per serving, one stuffed chicken breast with filling:
| Nutrient | Amount |
|---|---|
| Calories | 420 kcal |
| Protein | 48g |
| Total Carbohydrates | 6g |
| Dietary Fiber | 1g |
| Total Sugar | 3g |
| Total Fat | 22g |
| Saturated Fat | 10g |
| Cholesterol | 155mg |
| Sodium | 680mg |
| Vitamin C | 8mg |
| Calcium | 220mg |
| Iron | 2.1mg |
| Potassium | 680mg |
Nutrition values are approximate and may vary based on chicken breast size, cream cheese fat content, and cheese quantities used.
Why This Recipe Works
The sear-then-oven method produces results that neither technique alone achieves because they address two different cooking problems simultaneously. High-heat searing at the stovetop generates the Maillard browning reaction on the breast surface; this requires surface temperatures above approximately 140°C and dry surface contact, both conditions that a standard oven set to 200°C doesn’t consistently deliver to the outer surface of a cold, moist chicken breast. The oven, by contrast, provides the sustained, even, penetrating heat needed to bring the entire interior of a 2 to 3cm thick stuffed breast to 74°C without the exterior burning or drying. Using both in sequence, sear for the surface, oven for the interior, produces a breast where the crust is properly Maillard-browned and the inside is fully cooked without over-cooking the exterior.
The cream cheese’s specific role in the filling is structural as well as flavoring. Cream cheese contains approximately 33% fat and 54% moisture at standard composition; when heated, its fat phase maintains a smooth, emulsified consistency up to approximately 60 to 65°C because the stabilizing proteins in the cream cheese keep the fat and water phases from separating. This emulsification stability means the filling remains cohesive and creamy at baking temperatures rather than breaking into separated pools of melted fat and watery liquid as a plain cheese filling might. The cream cheese also provides a sufficient fat content to keep the mozzarella’s proteins from seizing and becoming rubbery; the fat lubricates the mozzarella’s protein strands during melting and produces the characteristic stretchy, creamy texture that plain mozzarella alone can’t maintain in a dry oven environment.
Squeezing the spinach dry before the filling is mixed is not simply a matter of texture preference; it’s a water activity management decision. Fresh spinach’s water, released by the wilting heat, lowers the water activity of the cream cheese filling if it’s incorporated without removal. High water activity in the filling destabilizes the cream cheese emulsion at baking temperatures (the increased water content drives the emulsion toward breaking by overwhelming the protein stabilizers) and produces a noticeably runny, separated filling that leaks through even a well-sealed pocket. Removing the water before mixing maintains the cream cheese’s emulsion stability through the entire bake and produces a filling that retains its creamy consistency from oven to plate.
The 5-minute rest period after cooking is not arbitrary; it corresponds to the time required for the contracted sarcomeres in the cooked chicken’s muscle fibers to partially relax and allow the expelled moisture to redistribute back through the muscle tissue. When muscle fibers are heated above approximately 65°C, their proteins denature and contract, physically squeezing water out of the cellular spaces between the fibers. This expelled water pools at the meat surface and runs onto the cutting board when the meat is cut immediately. At 5 minutes of rest at room temperature, the fibers’ tension partially releases; not all the expelled moisture is reabsorbed but enough returns to the fiber spaces to produce a noticeably less dry, more juicy cut surface. The filling’s retained moisture from the cream cheese also contributes to the perceived juiciness of the finished slice.
I’ve made this recipe with the pocket-cutting direction varying between the thick side, the thin side, and the top. The thick-side approach produces the most consistent results: the knife enters at the breast’s broadest point, which provides the most surface area for the pocket walls, produces the deepest possible pocket without risk of piercing through, and places the filling at the thermal center of the breast where it heats most evenly during the oven phase. Pockets cut from the thin side are shallower by necessity and concentrate the filling near the surface, where it is more likely to escape during searing. Pockets cut from the top require awkward knife angles that increase the risk of uneven walls.
Frequently Asked Questions
Can I make stuffed chicken breast ahead of time?
Yes. The filling keeps refrigerated in a sealed container for up to 3 days; bring it to room temperature for 15 minutes before using to ensure it spreads into the pocket without tearing the meat. The fully filled, sealed, and seasoned uncooked breasts can be refrigerated for up to 24 hours; cook them fresh the next day. Fully cooked stuffed chicken breasts keep refrigerated for up to 3 days and reheat well in a covered dish at 175°C for 15 to 18 minutes.
Why is my stuffed chicken dry?
Dry stuffed chicken breast almost always comes from one of two causes. The first is cooking past 74°C internal temperature; every degree above 74°C squeezes additional moisture from the muscle fibers and cannot be reversed. Use a thermometer and pull at exactly 74°C. The second is not resting the chicken before cutting; immediate cutting releases the expelled moisture onto the board rather than allowing it to redistribute back into the meat. Rest for 5 minutes every time, without exception.
Can I cook stuffed chicken breast without searing it first?
Yes, but the result is noticeably different. Without searing, the exterior remains pale and slightly soft rather than developing the golden, Maillard-browned crust that provides textural contrast to the creamy filling inside. The oven-only version also loses more filling moisture during the longer oven time needed to build surface color at a lower temperature; the filling tends to be drier. For the best result, sear first. If a cast iron skillet isn’t available, a heavy stainless steel skillet that can go into the oven works equally well.
How do I know when stuffed chicken breast is done?
An instant-read thermometer inserted into the thickest part of the chicken, not into the filling, reads 74°C (165°F). Do not use the filling temperature as your reference point; the filling heats faster than the surrounding muscle and will read above 74°C while the chicken itself is still undercooked. Visual cues (clear juices, white meat throughout) are unreliable for stuffed chicken because the filling’s steam produces a visually cooked appearance in undercooked surrounding meat. Use the thermometer every time.
Is stuffed chicken breast gluten-free?
Yes, this recipe is naturally gluten-free as written. Chicken, cream cheese, mozzarella, Parmesan, spinach, sun-dried tomatoes, olive oil, and all the spices listed are naturally gluten-free. The only ingredients worth verifying on the label are the cream cheese (some brands add starch stabilizers that may contain wheat) and the sun-dried tomatoes (some jarred versions add seasonings that may include wheat-derived ingredients). With standard verified-label versions of these two, the recipe is completely gluten-free.
Can I use chicken thighs instead of chicken breasts?
Boneless skinless chicken thighs can be used but require a different technique since they don’t have the same thick, uniform cross-section as a breast and can’t be pocket-cut in the same way. Instead, place the filling in the center of an opened-flat thigh, roll the thigh tightly around the filling, and secure with toothpicks or tie with kitchen twine at 3cm intervals. The sear-then-oven method is identical; bake at 200°C until 74°C internal temperature, which takes about the same time as breasts. Thighs are more forgiving of a couple of degrees over-temperature than breasts.
How much filling should go into each pocket?
A generous heaping tablespoon to 2 tablespoons per breast, depending on breast size, is the right amount. The pocket should feel snug when sealed with toothpicks but not strained; if the pocket resists closing naturally, there’s too much filling. It’s better to have a small amount of leftover filling than to overstuff and have the filling escape into the pan during searing, where it burns against the hot skillet surface and produces a smoky, bitter residue.
Conclusion
Stuffed chicken breast earns its place on a regular dinner rotation because the technique transfers so cleanly to any filling combination you want to try. The pocket-cut, fill, seal, sear, oven sequence doesn’t change; only the filling ingredients do. Once you’ve made it once and understand how the sear creates the crust that holds the filling in place, and how the thermometer removes the guesswork from doneness, every subsequent version is faster and more confident.
The make-ahead options, filling up to 3 days ahead or filled breasts refrigerated overnight, make it one of the more practical dinner party proteins available. The presentation, a whole seared breast sliced open at the table to reveal a hot, creamy filling, does more visual work than anything this straightforward has a right to.
If you loved this recipe, save it to your easy chicken dinner recipes and weeknight meal ideas Pinterest board so you can find it easily later. For more recipes and daily food inspiration, follow TheCookingVibes on Pinterest.
Stuffed Chicken Breast
Ingredients
Equipment
Method
- Preheat oven to 200°C (400°F). Wilt fresh baby spinach in a dry skillet over medium-high for 60 to 90 seconds until fully collapsed. Transfer to paper towels and squeeze aggressively until nearly dry. Roughly chop and set aside.
- Combine softened cream cheese, squeezed spinach, mozzarella, Parmesan, sun-dried tomatoes, minced garlic, chili flakes, and salt in a bowl. Mix until uniform and all components are evenly distributed.
- Pat each chicken breast completely dry on both sides. Using a sharp knife, cut a horizontal pocket into the thickest side of each breast, extending 75 to 80% through the depth without piercing through any other wall.
- Divide filling into four equal portions. Spoon each firmly into the pockets, filling to about 75% capacity. Seal each pocket opening with 2 to 3 toothpicks woven through both sides of the meat. Mix the garlic powder, smoked paprika, Italian seasoning, salt, and pepper; season the exterior of each breast generously on both sides, pressing to adhere.
- Heat olive oil in an oven-safe cast iron skillet over medium-high until shimmering. Add breasts sealed-side down. Sear 3 to 4 minutes without moving until deep golden-brown and releasing cleanly from the pan. Turn and sear the second side 2 to 3 minutes.
- Transfer the skillet directly to the preheated 200°C oven. Bake 15 to 18 minutes until an instant-read thermometer inserted into the thickest part of the chicken reads 74°C (165°F).
- Remove from oven. Rest uncovered on a plate or board for 5 minutes. Remove all toothpicks. Slice diagonally and serve cut-side up.
Notes
- Squeeze the wilted spinach far more aggressively than feels necessary; retained spinach water makes the filling runny during baking.
- Never fill the pocket to more than 75% capacity; the filling expands as it heats and over-stuffed pockets burst open during searing.
- Always use a thermometer; pull at exactly 74°C and rest 5 minutes before cutting.
- The filling can be made up to 3 days ahead, refrigerated, and brought to room temperature before using.
- Allergens: Contains dairy (cream cheese, mozzarella, Parmesan). Naturally gluten-free and egg-free. This recipe has not been tested in a certified allergen-free kitchen and cannot be guaranteed safe for any specific allergy.