Easy Chicken Cordon Bleu (Crispy, Cheesy, Golden Crust)
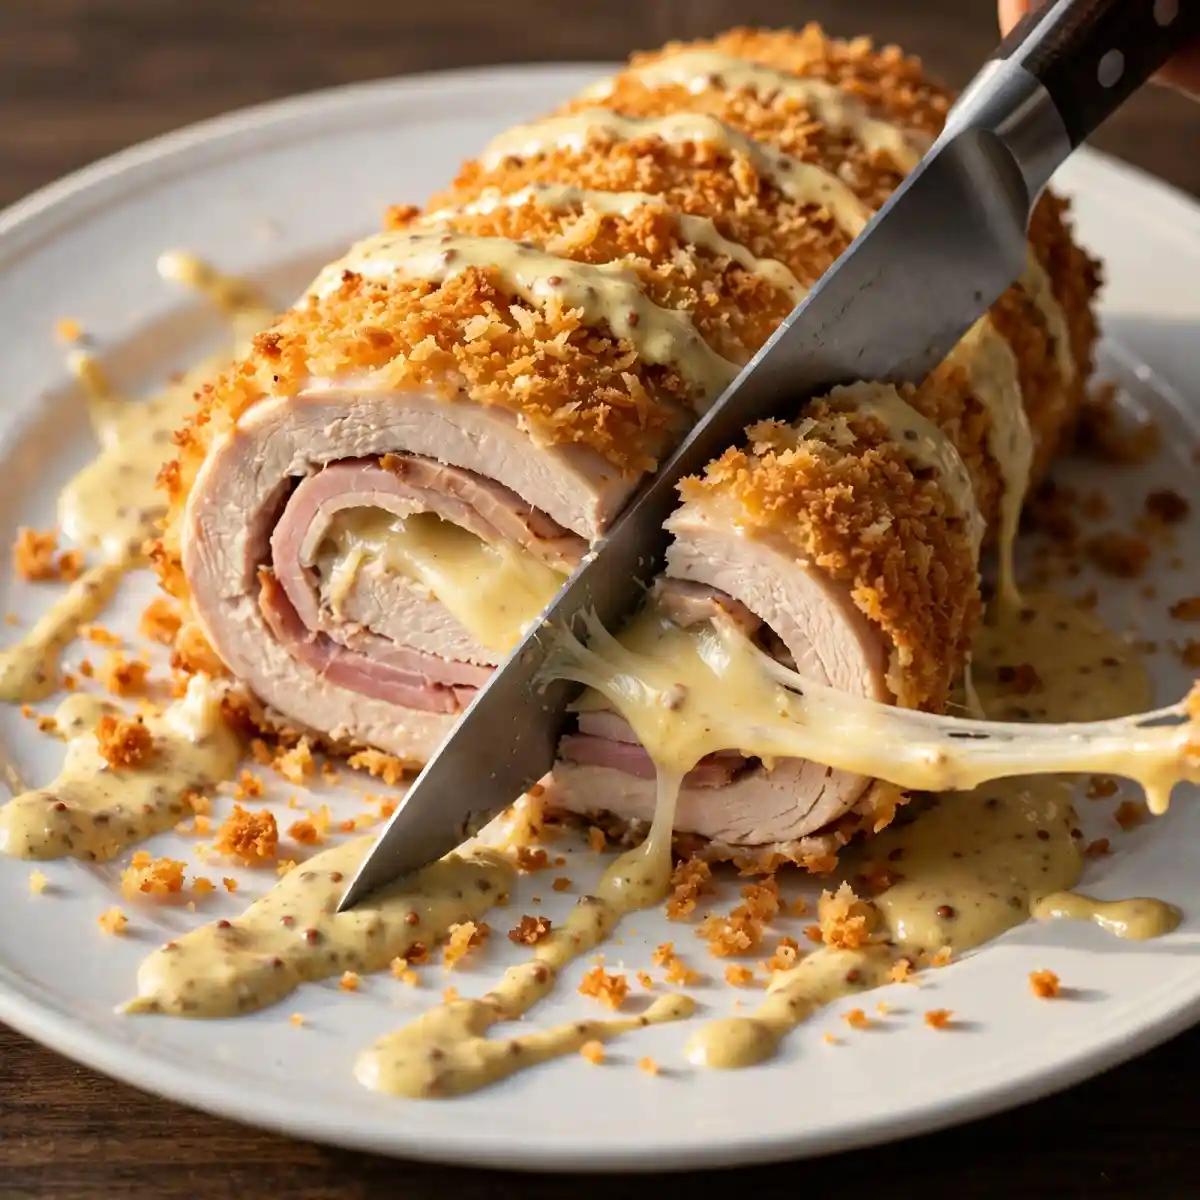
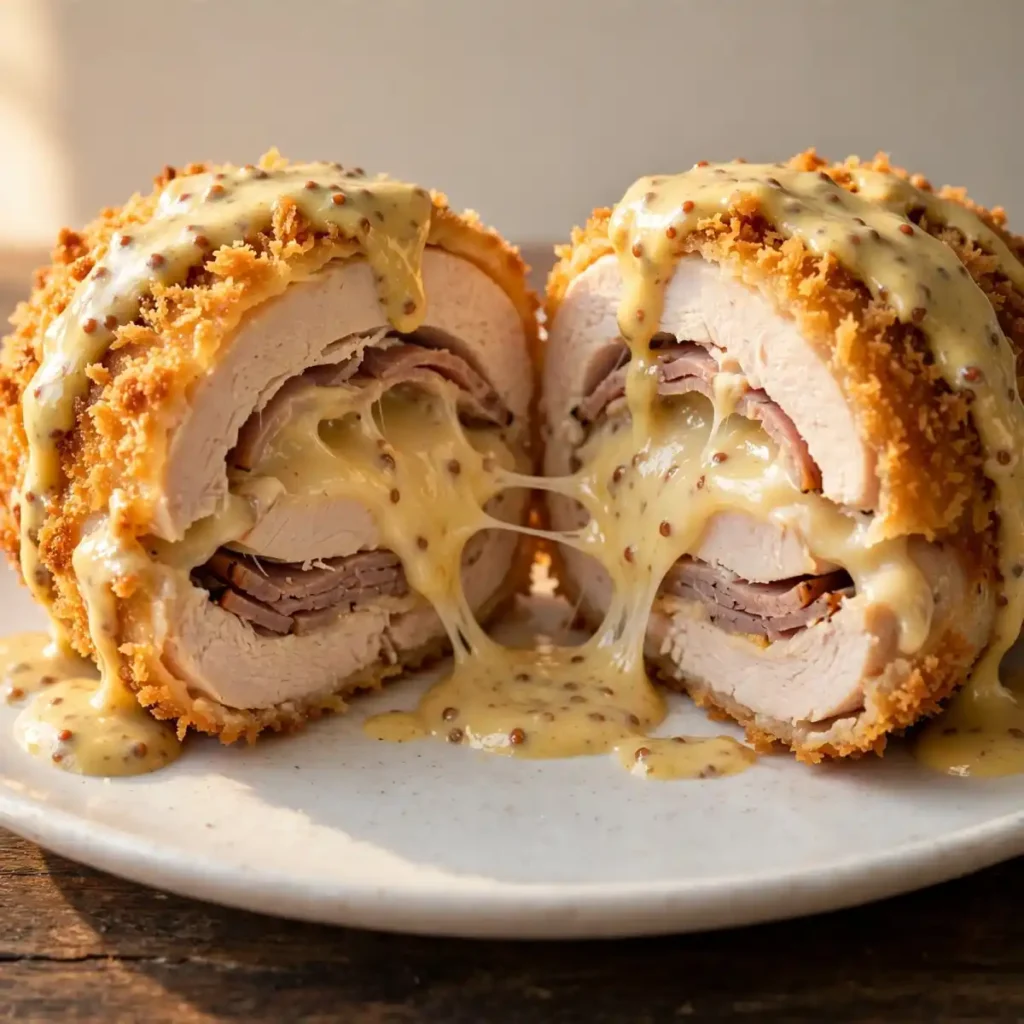
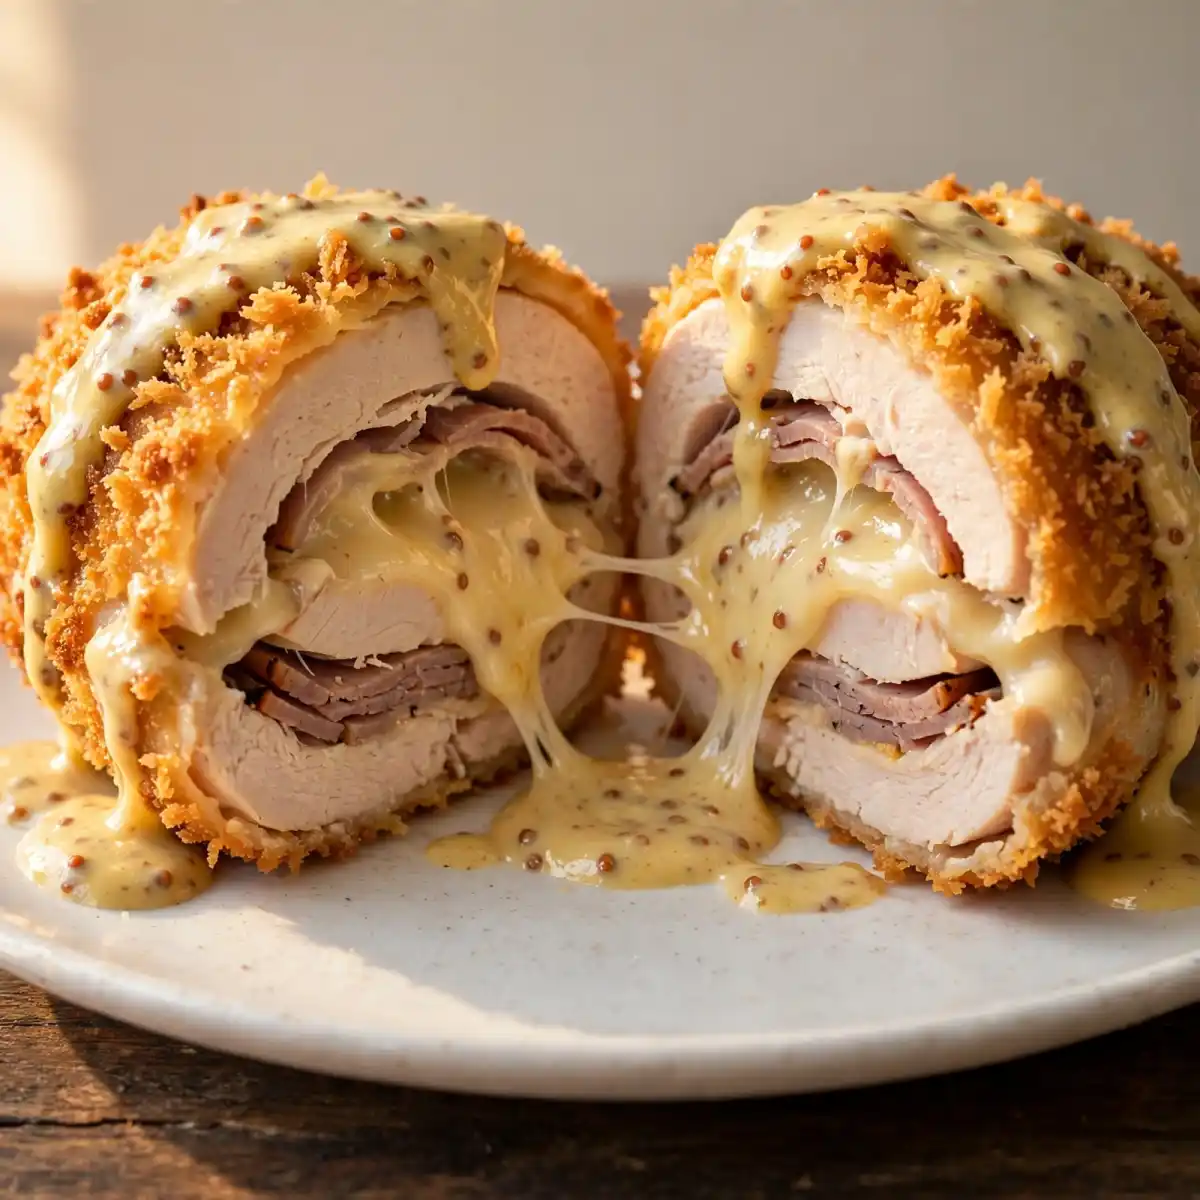
There is something genuinely satisfying about cutting into a breaded chicken roll and watching a ribbon of melted Swiss cheese pull away from the center as the knife goes through. It looks like a dish that required considerable kitchen skill and planning. The reality is that the technique is straightforward once you understand the logic behind each step: pound the chicken thin for even rolling, chill the rolls briefly so they hold their shape during breading, sear before baking for the crust, and make the sauce while the chicken finishes in the oven.
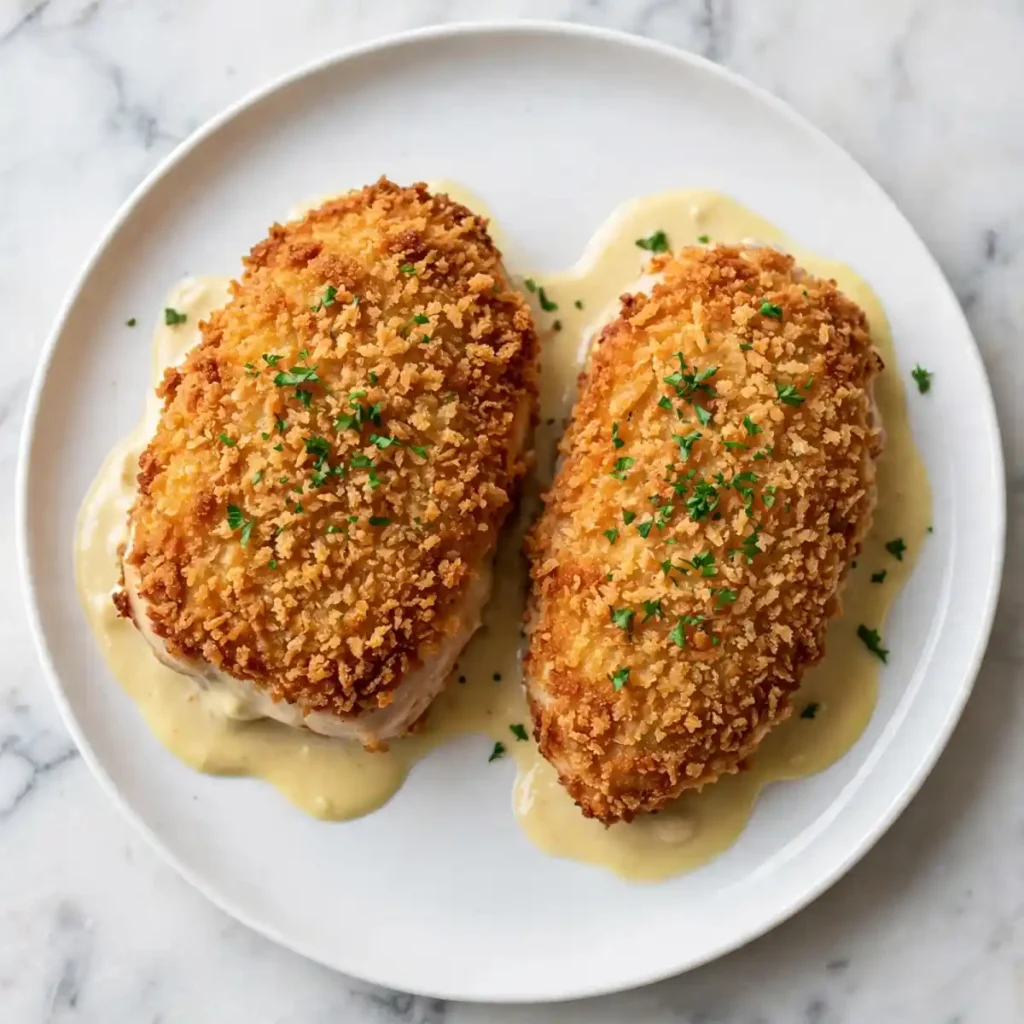
This chicken cordon bleu recipe wraps pounded chicken breasts around thin smoked turkey slices and melted Swiss cheese, coats each roll in a seasoned panko breadcrumb crust, and finishes them in the oven after a quick pan sear. The sear gives the crust a deep golden color and sets it firmly so it stays intact when you slice. A simple creamy Dijon mustard sauce comes together in 5 minutes while the chicken rests. Forty-five minutes total, serves four, and it is the kind of weeknight dinner that people assume was significantly harder to make than it was.
Why You’ll Love This Chicken Cordon Bleu
- Chilling the rolls for 15 minutes is the step most recipes skip. A brief refrigerator rest after rolling and before breading firms the shape of each chicken roll so it holds together cleanly through the breading process and doesn’t unravel when it hits the hot pan.
- Panko breadcrumbs produce a significantly crispier crust than regular breadcrumbs. Panko’s coarser, flakier structure creates a more textured, more visually striking crust that stays crisp through the full bake time and doesn’t go soft the way fine breadcrumbs can.
- The Dijon cream sauce takes 5 minutes and elevates the entire dish. A quick pan sauce built from chicken broth, cream, and Dijon mustard made in the same pan the chicken seared in captures the fond and adds a tangy, rich layer that makes chicken cordon bleu feel genuinely restaurant-worthy.
- Scales easily to any number of servings. Each chicken roll is individually assembled and seared, so doubling or tripling the recipe requires nothing more than a larger baking dish and a few extra minutes of prep time.
Ingredients You’ll Need
Recipe Timing
| Detail | Info |
|---|---|
| Servings | 4 |
| Difficulty | Intermediate |
| Course | Main Course |
| Cuisine | French-American |
| Prep Time | 15 minutes |
| Cook Time | 30 minutes |
| Total Time | 45 minutes |
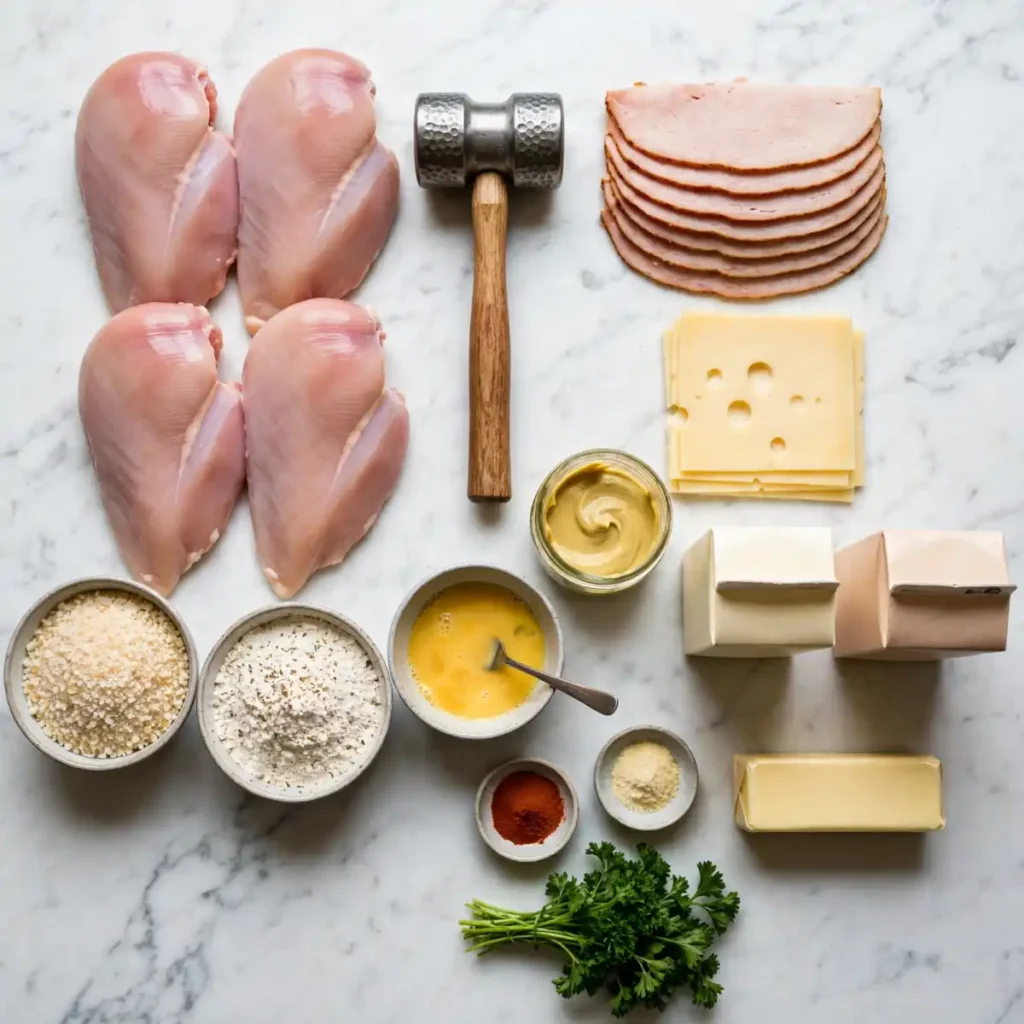
The most important ingredient decision in this recipe is the chicken breast preparation. Each breast needs to be halved horizontally if large and then pounded to an even 6mm (1/4 inch) thickness across the entire piece. Uneven thickness means the thicker edge will still be pink when the thinner edge is overcooked and drying out, and an uneven surface makes rolling the filling into a tight, secure cylinder significantly harder. Take the extra 3 minutes to pound them properly: it determines both the cook result and the visual quality of the finished slice.
For the cheese, Swiss is the classic choice for chicken cordon bleu because its mild, slightly nutty flavor melts cleanly without releasing excess oil or moisture that would make the filling wet and cause the crust to soften during baking. Gruyère is a natural upgrade: it has a more pronounced, complex flavor than standard Swiss and melts into a richer, slightly more luxurious center. Avoid shredded cheese for this application: thin sliced cheese melts more evenly and lays flat inside the roll without creating thick spots that push the chicken open during baking.
For the smoked turkey slices, choose a good-quality deli turkey that is thin and pliable rather than thick-cut. Thin slices fold smoothly inside the pounded chicken without creating bulk that makes rolling difficult. The smoked variety specifically delivers a savory, slightly salty depth that provides a flavorful contrast to the mild chicken and creamy cheese, mirroring the layered savory character the dish is known for.
For the Chicken Cordon Bleu:
- 4 medium boneless skinless chicken breasts (about 175g to 200g each), pounded to 6mm thickness. One per serving. Pound between plastic wrap using a meat mallet, working from center outward.
- 8 thin slices good-quality smoked turkey deli meat. The filling layer. Use 2 overlapping slices per chicken piece for complete coverage without excessive bulk.
- 4 thin slices Swiss or Gruyère cheese (about 90g total). One slice per piece, trimmed to fit within 1cm of the chicken edges to prevent cheese leaking during baking.
- 1/2 cup (60g) all-purpose flour, seasoned with 1/4 teaspoon salt and 1/4 teaspoon black pepper. The first coating layer that helps the egg wash adhere.
- 2 large eggs, beaten with 1 tablespoon of water. The egg wash that binds the breadcrumb layer to the chicken.
- 1 cup (60g) panko breadcrumbs. The outer crust. Panko’s coarser texture produces a crispier, more golden crust than regular fine breadcrumbs.
- 1/2 teaspoon garlic powder.
- 1/2 teaspoon smoked paprika. Adds color and a mild smokiness to the crust.
- 1/4 teaspoon fine sea salt.
- 2 tablespoons (30ml) extra virgin olive oil or neutral oil. For searing.
- 1 tablespoon (15g) unsalted butter. Combined with the oil for the sear to add flavor and promote browning.
- Toothpicks or kitchen twine. To secure the rolls before breading and searing. Remove before serving.
For the Dijon Cream Sauce:
- 1 tablespoon (15g) unsalted butter.
- 1 small shallot, finely diced.
- 1 clove garlic, finely minced.
- 1/2 cup (120ml) low-sodium chicken broth.
- 1/2 cup (120ml) heavy cream.
- 2 tablespoons Dijon mustard. The defining flavor of the sauce. Use a smooth Dijon rather than whole-grain for a uniform, coating consistency.
- 1 teaspoon fresh lemon juice.
- Salt and pepper to taste.
- Fresh flat-leaf parsley, chopped, for serving.
Allergen and Dietary Disclosure
This recipe contains dairy (butter, heavy cream, Swiss cheese), eggs (in the breading), and gluten (all-purpose flour, panko breadcrumbs).
For a gluten-free version, replace the all-purpose flour with rice flour or certified gluten-free all-purpose flour, and replace the panko with certified gluten-free panko or crushed gluten-free crackers. The technique is identical: the crust browns and crisps the same way. Verify that your Dijon mustard and chicken broth are also certified gluten-free.
For a dairy-free version, replace the cheese with a dairy-free sliced cheese alternative (melting varieties work best), replace the butter in the sauce with olive oil, and replace the heavy cream with full-fat coconut cream. The sauce will have a faint coconut note with the coconut cream version, or use a plain unsweetened oat cream for a more neutral result.
Free from nuts and soy as written. Not guaranteed safe for any specific allergy without checking all individual ingredient labels, particularly the smoked turkey slices and Dijon mustard.
Equipment Needed
A meat mallet or the bottom of a heavy skillet. Needed to pound the chicken to an even 6mm thickness. A rolling pin also works but transfers force less precisely. Without even pounding, the chicken will not roll tightly and will cook unevenly.
An oven-safe skillet or cast iron pan (at least 28cm / 11 inches). The chicken sears in this pan and then transfers directly to the oven without being moved to a separate baking dish. Using one pan for both steps reduces cleanup and preserves the fond in the pan for the Dijon sauce afterward. If your skillet is not oven-safe, sear in a regular pan and transfer to a greased baking dish.
Toothpicks or short pieces of kitchen twine. Used to secure each chicken roll at the seam before breading. Without securing, the roll can partially unravel during the sear as the outer edge lifts away from the heat. Use 2 to 3 toothpicks per roll, placed at even intervals along the seam.
A wire rack set over a baking sheet (optional). Resting the breaded, uncooked rolls on a wire rack during the 15-minute refrigerator chill and after breading allows air to circulate around all sides, keeping the breadcrumb coating dry and promoting even crisping during the sear.
Step-by-Step Directions
Step 1: Pound and Prepare the Chicken
Place each chicken breast between two sheets of plastic wrap on a stable, flat surface. Using the smooth side of a meat mallet, pound firmly from the center outward until each piece is a uniform 6mm (1/4 inch) thick across the entire surface. The edges tend to be naturally thinner than the center: pay particular attention to the center-thick area and work it down to match the edges. Season the top surface of each pounded piece lightly with salt and black pepper before adding the filling.
Food Safety Note: Raw chicken must reach an internal temperature of 74°C (165°F). After the sear and bake combined, check the thickest part of each roll with an instant-read thermometer before serving.
Step 2: Add the Filling and Roll
Lay 2 overlapping smoked turkey slices flat across each pounded chicken piece, leaving a 1cm border clear at all four edges. Place one Swiss cheese slice on top of the turkey, again keeping it within the edges: cheese that extends to the edge will melt out of the roll during baking and pool on the pan rather than staying inside the chicken. Starting from the shorter end of the chicken piece, roll it tightly and evenly, keeping the filling tucked in as you go, into a compact cylinder. Use your fingers to tuck the side edges slightly inward as you roll for a neater finish.

Chef’s Note: The 1cm border around the filling is not fussy detail work: it is the practical gap that keeps the cheese contained. Cheese that reaches the edge of the pounded chicken starts melting out the moment it hits the hot pan, leaving you with a hollow roll and a cheesy mess on the pan surface.
Step 3: Secure and Chill
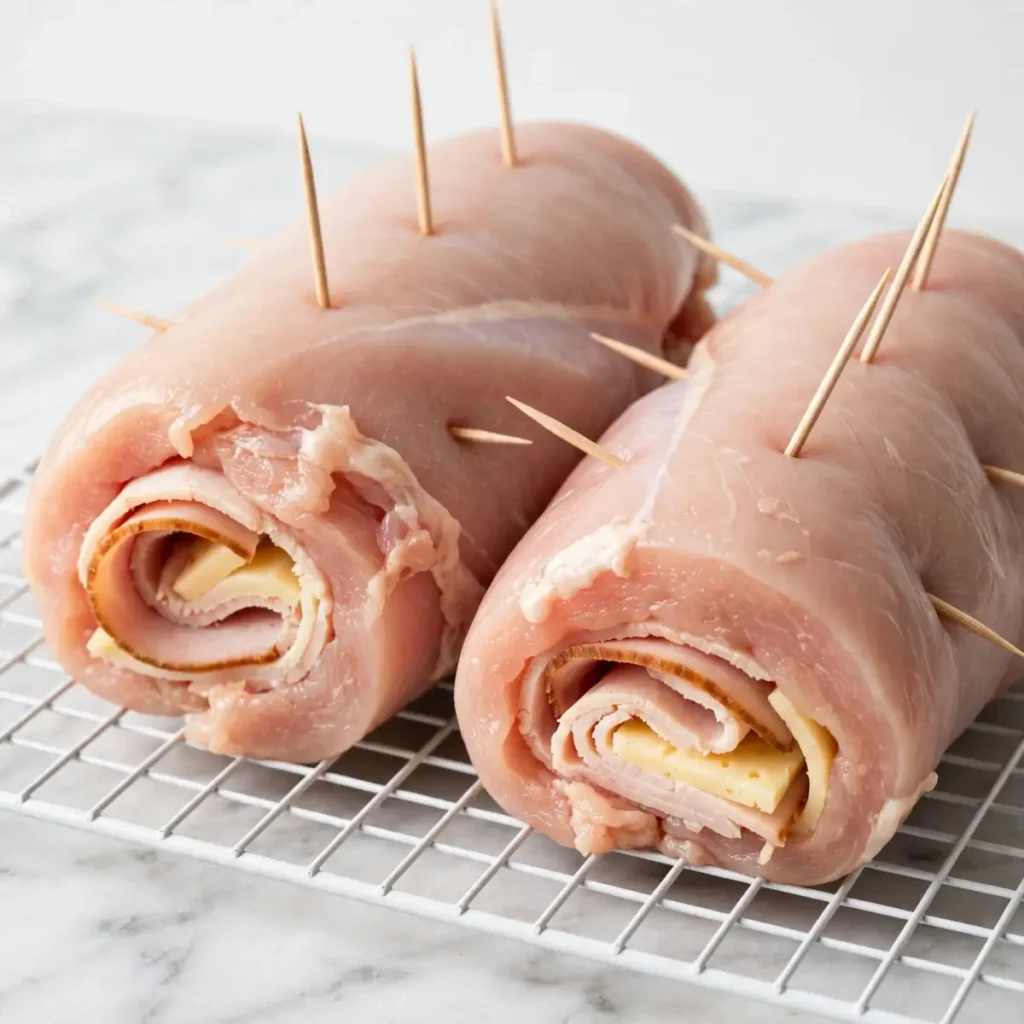
Lay each rolled chicken cylinder seam-side down and press gently to flatten the seam against the surface. Insert 2 to 3 toothpicks along the seam at even intervals to hold it closed, pushing them in at a slight angle so they go through both layers of chicken cleanly. Place the secured rolls on a wire rack set over a small baking sheet and refrigerate uncovered for 15 minutes. The brief chill firms the shape of the roll and helps the breading adhere more evenly during the next step.
Chef’s Note: Skipping the chill step is the most common reason home-made chicken cordon bleu unravels during breading or searing. The refrigerator firms the protein slightly and stabilizes the cylinder shape so the roll doesn’t spread apart when you press it into the breadcrumb coating. Fifteen minutes is enough time, and you can prepare the breading stations while the rolls chill.
Step 4: Bread the Rolls
Set up three shallow dishes in a row: seasoned flour in the first, beaten egg wash in the second, and panko mixed with garlic powder, smoked paprika, and salt in the third. Working one roll at a time, roll it through the flour, pressing gently so the flour coats the entire surface evenly. Shake off any excess, then dip it into the egg wash, turning so every surface is wet. Let any excess egg drip back into the dish for 2 to 3 seconds, then press the roll firmly into the panko, turning it and pressing gently on all sides and both ends until completely covered in an even, fully adhered breadcrumb layer. Place the breaded rolls back on the wire rack while you bread the remaining pieces.
Chef’s Note: The sequence (flour, egg, panko) is not arbitrary. The flour dries the surface of the chicken so the egg wash sticks uniformly rather than beading up and sliding off a wet surface. The egg wash then provides the sticky layer the panko needs to adhere in a solid, consistent coating. Skip the flour step and the breading will be patchy. Skip the egg and the panko falls away in the pan.
Step 5: Sear the Rolls
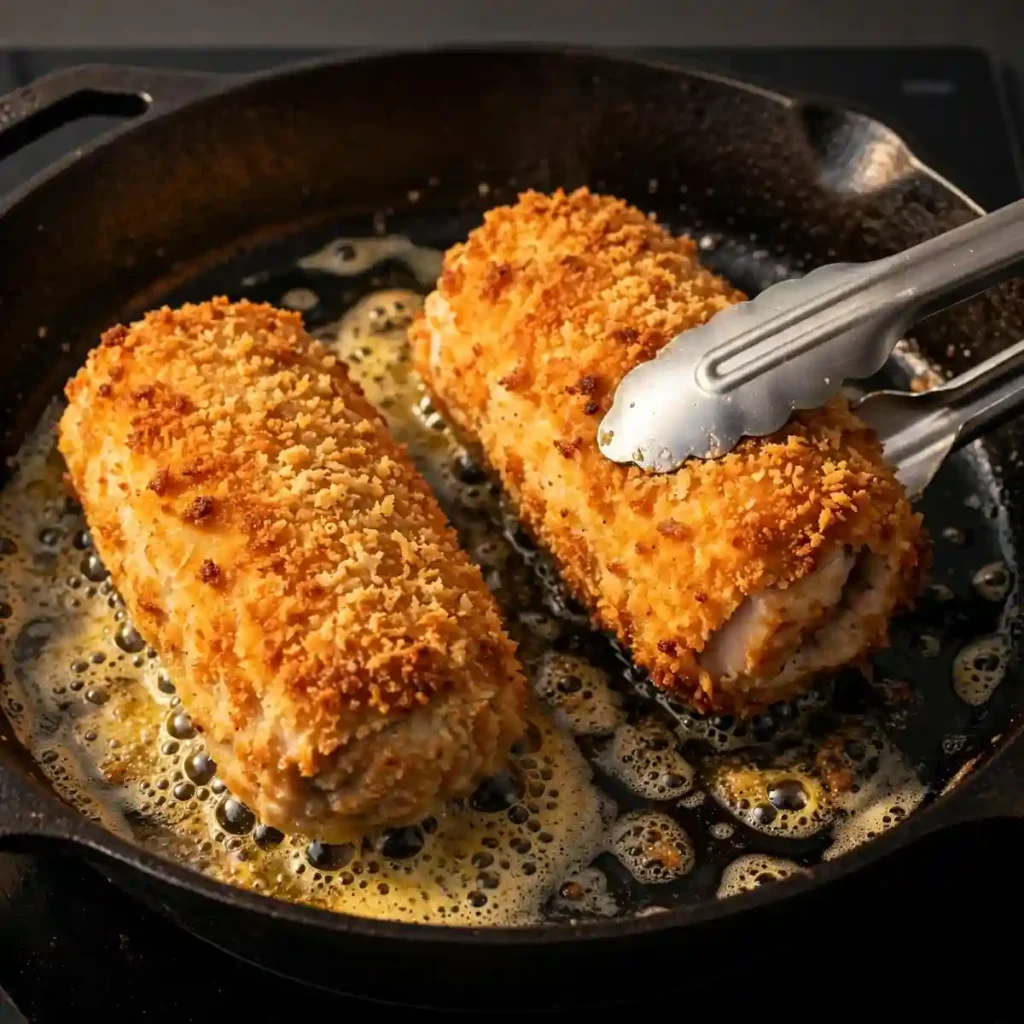
Preheat your oven to 190°C (375°F). Heat the olive oil and butter together in a large oven-safe skillet over medium-high heat until the butter melts, the foam subsides, and the mixture shimmers. Place the breaded rolls seam-side down in the pan without crowding (work in two batches if the pan is not large enough for all four to sit with space between them). Sear for 2 minutes per side, turning carefully with tongs, until the breadcrumb crust is a deep, uniform golden-brown on all sides. The goal is complete surface coverage: a pale or uneven crust at this stage will not darken further in the oven.
Step 6: Bake to Finish
Once all four rolls are golden on all sides, arrange them seam-side down in the same skillet (or transfer to a lightly greased baking dish if your skillet is not oven-safe). Transfer to the preheated oven and bake for 18 to 20 minutes until the thickest part of each roll reads 74°C (165°F) on an instant-read thermometer and the cheese inside has fully melted (you may see a small amount beginning to bubble at the ends). Remove from the oven and let the rolls rest in the pan for 5 minutes before removing the toothpicks and slicing.
Step 7: Make the Dijon Cream Sauce
While the chicken rests, make the sauce in the same skillet (pour off any excess fat, leaving the fond and about 1 teaspoon of the cooking fat). Add the butter and cook the diced shallot over medium heat for 2 minutes until softened. Add the garlic and stir for 30 seconds. Pour in the chicken broth and use a wooden spoon to scrape the golden bits from the pan bottom into the sauce. Let it simmer for 60 seconds until reduced slightly, then add the heavy cream and Dijon mustard. Stir and simmer for 2 to 3 minutes until the sauce thickens enough to coat the back of a spoon. Add the lemon juice, taste, and adjust salt and pepper. Serve immediately over or beside the sliced chicken rolls.
Common Mistakes and Troubleshooting
| Problem | Cause | Solution |
|---|---|---|
| Chicken unravels during searing | Roll not secured with toothpicks; chill step skipped; not enough tension when rolling | Always use 2 to 3 toothpicks per roll; chill for 15 minutes; roll as tightly as possible from the short end |
| Breadcrumb crust falls off during searing | Flour step skipped; egg wash applied to wet chicken; pan not fully preheated | Follow the three-stage breading sequence (flour, egg, panko); ensure pan is visibly shimmering before rolls go in |
| Cheese leaks out during baking | Cheese extended to the edge of the chicken; oven temperature too high | Leave a 1cm border on all sides; bake at 190°C, not higher |
| Chicken dry and overcooked | Pounded too thin; baked too long; oven running hot | Maintain 6mm thickness; check with thermometer at 18 minutes; use an oven thermometer to verify oven temperature |
| Crust pale and soft rather than golden | Pan not hot enough before searing; sear time too short | Heat butter and oil until butter foam fully subsides before rolls go in; sear each side a full 2 minutes |
| Sauce too thin | Not reduced enough; too much broth | Simmer the sauce uncovered for the full 2 to 3 minutes after cream is added until it visibly coats a spoon |
Variations and Substitutions
Chicken Cordon Bleu With Gruyère: Replace the standard Swiss cheese with the same quantity of thinly sliced Gruyère. Gruyère has a noticeably more complex, slightly nutty flavor than mild Swiss and produces a richer, more aromatic center when it melts. The melt behavior and technique are identical. This upgrade costs very little extra but produces a noticeably more sophisticated result that works particularly well for a dinner party.
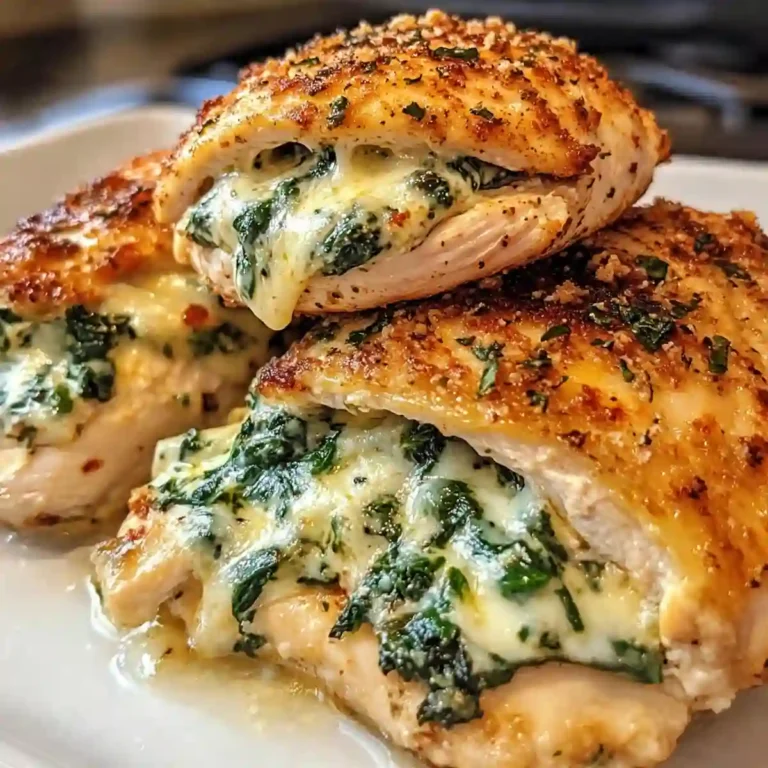
Stuffed With Spinach and Cheese: Replace the smoked turkey slices with a layer of wilted, squeezed-dry spinach (about 1 tablespoon per roll) combined with the Swiss cheese. Add 2 tablespoons of cream cheese to the filling before rolling for extra richness. The result is a vegetarian-friendly version with an earthy, creamy filling that pairs particularly well with the Dijon sauce.
Chicken Cordon Bleu Bake (Deconstructed): Instead of rolling individual pieces, lay the pounded chicken breasts flat in a baking dish, top each with turkey and cheese, fold loosely, and cover entirely with the panko breadcrumb mixture pressed down firmly. Bake at 190°C for 25 to 28 minutes. The result is less visually dramatic than the rolled version but takes half the prep time and is a practical option for a larger group.
Spicy Cordon Bleu: Add 1/4 teaspoon of cayenne pepper to the panko mixture and stir 1 teaspoon of harissa paste into the Dijon cream sauce alongside the mustard. The harissa adds a smoky, complex heat that works surprisingly well against the mild chicken and creamy cheese filling without overwhelming either.
Lemon Herb Cordon Bleu: Add 1 tablespoon of finely chopped fresh thyme and the zest of one lemon to the panko breadcrumb mixture. The herbs and lemon zest perfume the crust during baking and add a bright, aromatic freshness that lightens the richness of the cheese filling. Serve with extra lemon wedges at the table.
Air Fryer Chicken Cordon Bleu: Follow the recipe through the breading step. Instead of searing and baking, place the breaded rolls in a single layer in the air fryer basket. Spray the surface generously with cooking spray to promote browning. Cook at 190°C (375°F) for 20 to 22 minutes, flipping once at the halfway point, until golden and the internal temperature reads 74°C. Make the Dijon sauce separately in a small saucepan.
Serving Suggestions
- With creamy mashed potatoes. The Dijon cream sauce poured over both the chicken and the mashed potatoes on the same plate makes for a cohesive, richly satisfying dinner where every component works together. The sauce soaks into the potato in a way that makes the last bites of potato as good as the first.
- With steamed or roasted asparagus. The slight bitterness of asparagus cuts through the richness of the cheese filling and the cream sauce in a way that keeps the meal feeling balanced rather than heavy. Roasted asparagus with a little lemon oil takes 15 minutes in the same oven the chicken is using.
- With a simple dressed green salad. A crisp salad with a lemony vinaigrette alongside chicken cordon bleu provides a fresh, acidic contrast that the richness of the dish benefits from. Keep the salad simple: the main event is on the other side of the plate.
- With steamed rice. For a more substantial, filling plate, plain steamed jasmine or basmati rice alongside the chicken absorbs the Dijon cream sauce effectively and rounds the meal out into a complete, filling dinner that works for a hungry table.
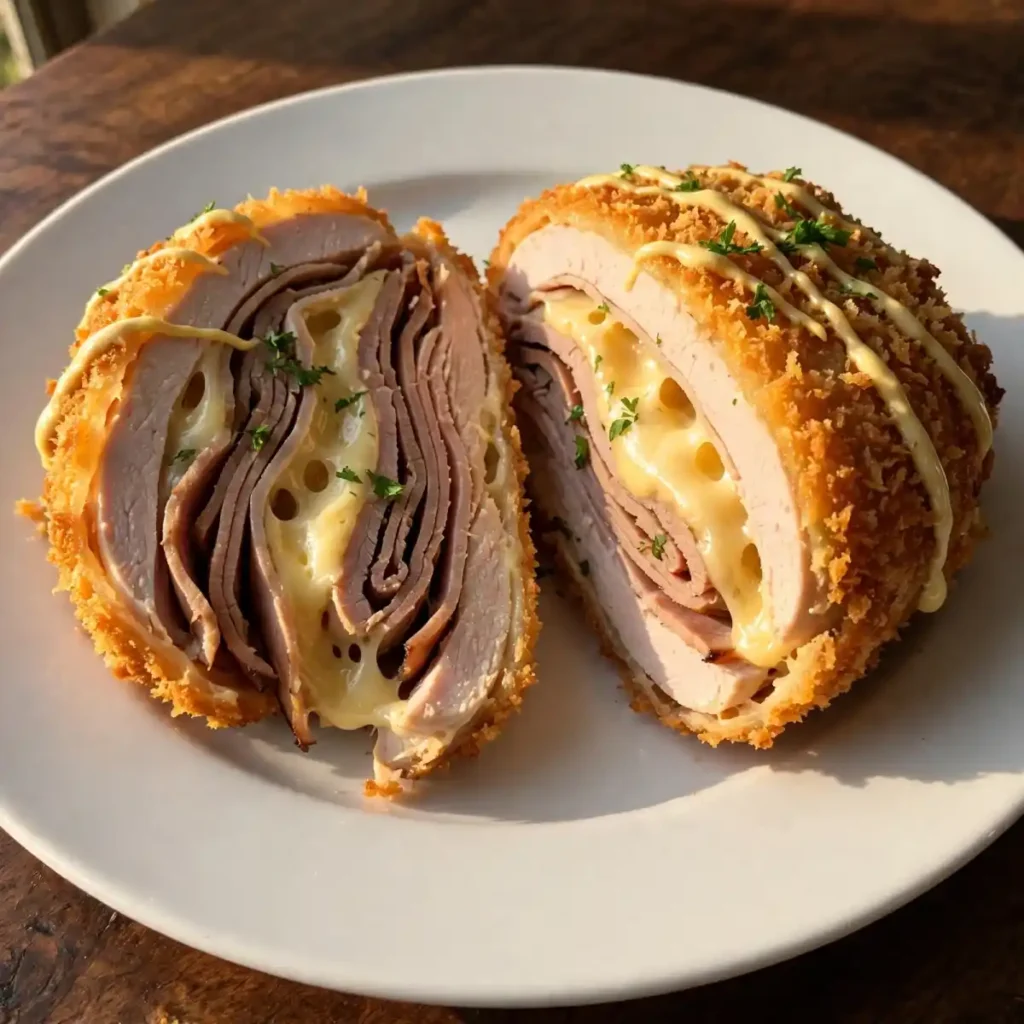
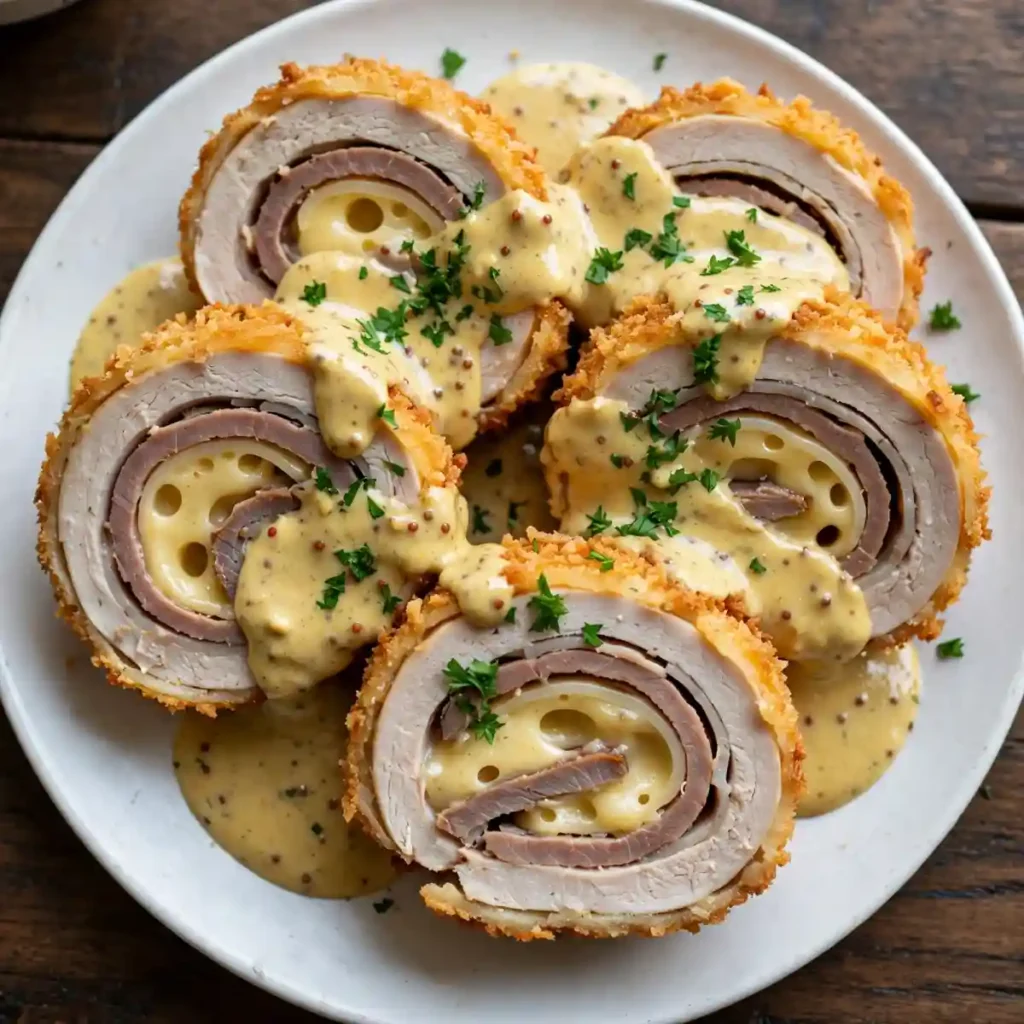
- As a dinner party main course. Chicken cordon bleu assembled and chilled up to 24 hours ahead and seared and baked the day of is a genuinely manageable dinner party recipe. The presentation (a sliced roll revealing the cheese and turkey inside with sauce pooled around it) looks considerably more impressive than the effort involved.
- With roasted baby potatoes. Baby potatoes halved and roasted at 200°C for 25 minutes in olive oil, salt, and rosemary alongside the chicken need almost no hands-on time and pair naturally with the French-American character of the dish.
Tips for the Best Results
- Pound the chicken to a uniform 6mm, not thinner. Thinner than 6mm and the chicken tears when rolled, dries out quickly during the sear, and overcooks before the cheese fully melts. At exactly 6mm, the roll is tight, the chicken stays moist through the full bake, and the internal temperature and the cheese melt reach the right point simultaneously.
- Don’t skip the chill. The 15-minute refrigerator rest between rolling and breading is the difference between a roll that holds its shape cleanly through the entire cooking process and one that partially unravels at the seam the moment it hits the hot pan. Set a timer, chill the rolls, and use the time to prepare the breading stations.
- Press the panko firmly onto every surface. A light, loose breadcrumb coating falls off during searing. Work the panko into the surface of each roll with gentle but firm palm pressure, turning and pressing all sides and both ends until the coating looks fully adhered rather than sitting loosely on the surface. Any spots the panko doesn’t stick to will be pale after searing.
- Remove toothpicks before serving, every time. Mark the number of toothpicks you used (write it on a piece of paper near the pan if needed) and account for every one before the rolls go to the table. This is not a culinary suggestion: it is a safety requirement. Count them in and count them out.
- Rest before slicing. Five minutes of resting after the oven allows the juices inside the chicken to redistribute and the cheese to firm slightly from liquid to a soft, cohesive layer. Slicing immediately from the oven produces juice-releasing cuts and cheese that runs onto the cutting board rather than staying inside the roll.
Storage Tips
Refrigerator
Cooled chicken cordon bleu keeps in an airtight container in the refrigerator for up to 3 days. Store the Dijon cream sauce separately in a small sealed container. The crust softens overnight in the sealed container, losing its crispness, though the flavor of the chicken and filling is fully intact. For the best texture on leftovers, reheat using the oven method rather than the microwave.
Freezer
Uncooked, fully breaded chicken cordon bleu rolls freeze well for up to 1 month. Freeze them on a wire rack uncovered until solid (about 2 hours), then wrap individually in plastic wrap and place in a sealed freezer bag. Cook from frozen at 190°C for 30 to 35 minutes (no searing step needed from frozen: the extra oven time develops the crust sufficiently). The Dijon cream sauce should always be made fresh rather than frozen: it takes 5 minutes and separates when frozen and thawed.
Reheating
From the fridge: place on a wire rack over a baking sheet and reheat in a 175°C (350°F) oven for 12 to 15 minutes until the crust has crisped again and the center is warm throughout. The oven method restores most of the original crust texture that the microwave cannot. For the microwave (less ideal): 50% power in 90-second intervals until heated through, noting the crust will be soft rather than crispy. Reheat the sauce separately in a small saucepan over low heat with a splash of chicken broth to loosen it back to its original consistency.
Nutrition Information
Per serving (1 chicken cordon bleu roll with 2 tablespoons of Dijon cream sauce)
| Nutrient | Amount |
|---|---|
| Calories | 490 kcal |
| Protein | 46g |
| Carbohydrates | 20g |
| Fiber | 1g |
| Sugar | 2g |
| Total Fat | 24g |
| Saturated Fat | 11g |
| Cholesterol | 185mg |
| Sodium | 720mg |
| Vitamin C | 4mg |
| Calcium | 180mg |
| Iron | 2mg |
| Potassium | 560mg |
Nutrition values are approximate and may vary based on brands and portion sizes, particularly the smoked turkey and cheese used.
Why This Recipe Works
The three-stage breading sequence (seasoned flour, egg wash, panko) is a layered adhesion system rather than three redundant coatings. The flour’s primary function is surface preparation: raw chicken is slightly wet and smooth, and both of these properties prevent the egg wash from adhering uniformly. The flour absorbs surface moisture and creates a dry, slightly textured base that the egg wash grips. The egg wash’s proteins then denature and coagulate in the hot pan, acting as the binder that physically fuses the panko to the chicken surface. Without the flour, the egg wash beads up on the smooth, wet chicken and produces a patchy coating. Without the egg wash, the panko has no adhesive and falls away from the surface as soon as the roll is handled.
Panko breadcrumbs produce a crispier crust than regular fine breadcrumbs because of the structural difference between the two. Standard fine breadcrumbs are ground into small, relatively compact particles that pack tightly together when pressed onto a surface and bake into a dense, smooth-textured crust that retains moisture. Panko is made from bread that has been processed differently: the crumb is ground into large, flake-like, irregular pieces with a low density and high surface area. These flakes don’t pack tightly, leaving air pockets throughout the crust. During baking, the exposed surface area of each flake browns and crisps, while the air pockets prevent moisture from being trapped under the crust. The result is a significantly lighter, crunchier, more visually textured crust that stays crisp considerably longer than a fine breadcrumb crust does.
The sear-first-then-bake sequence solves a fundamental problem with breaded proteins: how to develop a deeply golden, fully crisp crust without drying the protein out during the time needed to achieve it. If you place a breaded chicken roll directly in the oven at a temperature high enough to brown the crust (220°C or above), the exterior browns adequately but the sustained surface heat that produced the crust also dries the outer layers of the chicken before the center reaches temperature. The pan sear delivers the browning reactions in 2 minutes of direct contact heat per side, setting the crust definitively at high temperature. The subsequent oven at 190°C then finishes the interior gently and evenly without any further surface browning, keeping the crust at its seared peak while the protein reaches temperature without drying.
The 15-minute refrigerator chill after rolling works through protein structure. At refrigerator temperature (3 to 5°C), the myosin proteins in the chicken stiffen slightly, which increases the structural rigidity of the rolled cylinder. This stiffening means the roll resists deforming under the pressing and turning required during the breading step, and also means that the seam, which is held together by the toothpicks but also by the natural stickiness of the chicken surface, has had time to set against itself. At room temperature, the protein is more pliable and the seam is more likely to open when pressed. The 15-minute chill is a minimal time investment with a meaningful structural payoff.
The Dijon cream sauce built in the same skillet after searing uses the fond (the dark, caramelized protein and breadcrumb remnants on the pan surface) as a flavor foundation. When the chicken broth hits the hot pan, the liquid dissolves those browned particles and lifts them into suspension, turning what would otherwise be cleaning residue into concentrated savory flavor in the sauce. The Dijon mustard’s emulsifying properties (from the mucilage in mustard seeds) help stabilize the fat-water emulsion in the cream sauce, contributing to a smooth, cohesive texture that doesn’t break when the lemon juice is added. Without the Dijon, plain cream sauces reduced quickly can sometimes separate when acid is introduced.
I’ve tested this recipe with both oven-baked-only (no pan sear) and sear-then-bake in side-by-side comparisons. The oven-only version produced a noticeably paler, slightly softer crust despite identical baking temperatures and times. The sear-then-bake version had a significantly deeper golden color, a crunchier surface that held up through cutting and eating, and developed the fond in the pan that made the Dijon sauce possible. For a recipe where the crust is visually and texturally central to the dish, the two extra minutes of searing per batch are worth the effort.
Frequently Asked Questions
Can I make chicken cordon bleu ahead of time?
Yes, in two practical ways. The uncooked, breaded rolls can be assembled, chilled, and refrigerated on a wire rack covered loosely with plastic wrap for up to 24 hours before searing and baking. Remove from the refrigerator 10 minutes before cooking. Alternatively, bake fully, cool, and refrigerate for up to 3 days, reheating in the oven at 175°C for 12 to 15 minutes. The Dijon cream sauce should always be made fresh since it takes only 5 minutes and tastes better freshly made than reheated.
Why is my chicken cordon bleu always unrolling when I cook it?
Unrolling during cooking usually comes from one of three issues: the chicken wasn’t rolled tightly enough from the start, the toothpicks weren’t placed at close enough intervals along the seam, or the chill step was skipped. All three contribute: a tight roll, properly secured with 2 to 3 evenly spaced toothpicks, and rested for 15 minutes in the refrigerator before breading, should hold its shape through both the sear and the bake reliably.
Can I use chicken thighs instead of chicken breasts?
Boneless skinless chicken thighs work well but require extra attention during prep. Thighs are irregular in shape and have natural folds: open them flat, remove any large pieces of fat, and pound to an even 6mm thickness, spreading out any folded sections as you go. The result rolls less uniformly than a breast cutlet but tastes juicier and is more forgiving of a few extra minutes in the oven since the higher fat content resists drying out. Adjust visual doneness to 74°C internal temperature rather than relying on a time rule.
How do I know when the chicken is fully cooked?
The most reliable check is an instant-read thermometer inserted into the thickest part of the roll: 74°C (165°F) confirms doneness. Visually, the crust should be deep golden all over, the cheese inside may be gently bubbling at the ends, and pressing the top of the roll lightly should feel firm rather than soft or spongy at the center. With a 6mm pounded breast and the sear-then-bake method, the thermometer reading is typically reached between 18 and 20 minutes at 190°C.
Is chicken cordon bleu gluten-free?
As written, no: the recipe uses all-purpose wheat flour in the dredge and standard panko breadcrumbs, both of which contain gluten. To make it gluten-free, replace the flour with rice flour or a certified gluten-free all-purpose blend, and replace the panko with certified gluten-free panko (available in most supermarkets). Verify that your Dijon mustard and chicken broth are also certified gluten-free, as both occasionally contain wheat derivatives. The technique is identical with these substitutions.
Can I make chicken cordon bleu in an air fryer?
Yes. Follow the recipe through the breading step, then place the rolls in a single layer in the air fryer basket (do not stack them). Spray the surface generously with cooking spray on all visible sides. Air fry at 190°C (375°F) for 20 to 22 minutes, flipping carefully once at the 11-minute mark, until the crust is deep golden and the internal temperature reads 74°C. No separate pan sear is needed. Make the Dijon cream sauce in a small saucepan on the stove while the chicken air fries.
What can I substitute for Dijon mustard in the sauce?
Dijon is the most flavorful choice for this sauce, but whole-grain mustard produces a more textured, slightly more rustic sauce with the same tangy depth. Yellow mustard works in the same quantity but has a sharper, more vinegary flavor that is noticeable in the finished sauce. If you don’t have any mustard at all, add 1 tablespoon of cream cheese to the finished sauce as a thickener and 1 teaspoon of lemon juice for brightness, and you will have a plain cream sauce that pairs well with the dish even without the mustard character.
Conclusion
Chicken cordon bleu is a recipe where the technique does the talking: a tight roll, a firm chill, a confident sear, and a brief oven stay produce a dish that looks considerably more involved than the 45 minutes it actually takes. The Dijon cream sauce built in the same pan ties everything together and takes less time than any step that came before it. Once you have made chicken cordon bleu once and understand how the steps connect, it becomes genuinely repeatable: a reliable, impressive dinner that works as well for a weeknight as it does for company. The sliced cross-section every time is worth the effort.
If you loved this recipe, save it to your impressive chicken dinner recipes Pinterest board so you can find it easily later. For more same recipes must follow Thecookingvibes Pinterest account.
Easy Chicken Cordon Bleu
Ingredients
Equipment
Method
- Pound chicken breasts to an even 6mm thickness between plastic wrap. Season with salt and pepper.
- Lay 2 overlapping turkey slices on each piece, leaving a 1cm border. Place one cheese slice on top. Roll tightly from the short end into a compact cylinder, keeping edges tucked in.
- Secure each roll with 2 to 3 toothpicks along the seam. Chill on a wire rack uncovered in the refrigerator for 15 minutes.
- Set up breading stations: seasoned flour, beaten egg wash, and panko mixed with garlic powder, paprika, and salt. Dredge each roll in flour, then egg, then press firmly into panko on all sides until completely coated.
- Preheat oven to 190°C (375°F). Heat olive oil and butter in a large oven-safe skillet over medium-high until shimmering. Sear each roll 2 minutes per side until deep golden-brown on all surfaces.
- Transfer skillet to the oven. Bake 18 to 20 minutes until internal temperature reaches 74°C (165°F). Rest 5 minutes, remove toothpicks, then slice.
- For the sauce: pour off excess fat from the skillet. Cook shallot in butter 2 minutes. Add garlic 30 seconds. Add broth, scraping fond. Add cream and Dijon mustard. Simmer 2 to 3 minutes until sauce coats a spoon. Add lemon juice, adjust seasoning, and serve over the chicken.
Notes
- Always leave a 1cm border around the filling: cheese that reaches the edge melts out during baking.
- Chill the rolls for 15 minutes before breading: this firms the shape and prevents unraveling during the sear.
- Press panko firmly onto every surface for complete, even adhesion.
- Remove all toothpicks before serving and count to verify none remain.
- Allergens: Contains dairy (butter, cream, cheese), eggs (in the breading), and gluten (flour, panko). Free from nuts and soy as written.
- Use gluten-free flour and certified gluten-free panko for a gluten-free version. Not guaranteed safe for any specific allergy without checking all individual ingredient labels.
- Nutrition values are approximate and may vary based on brands and portion sizes.