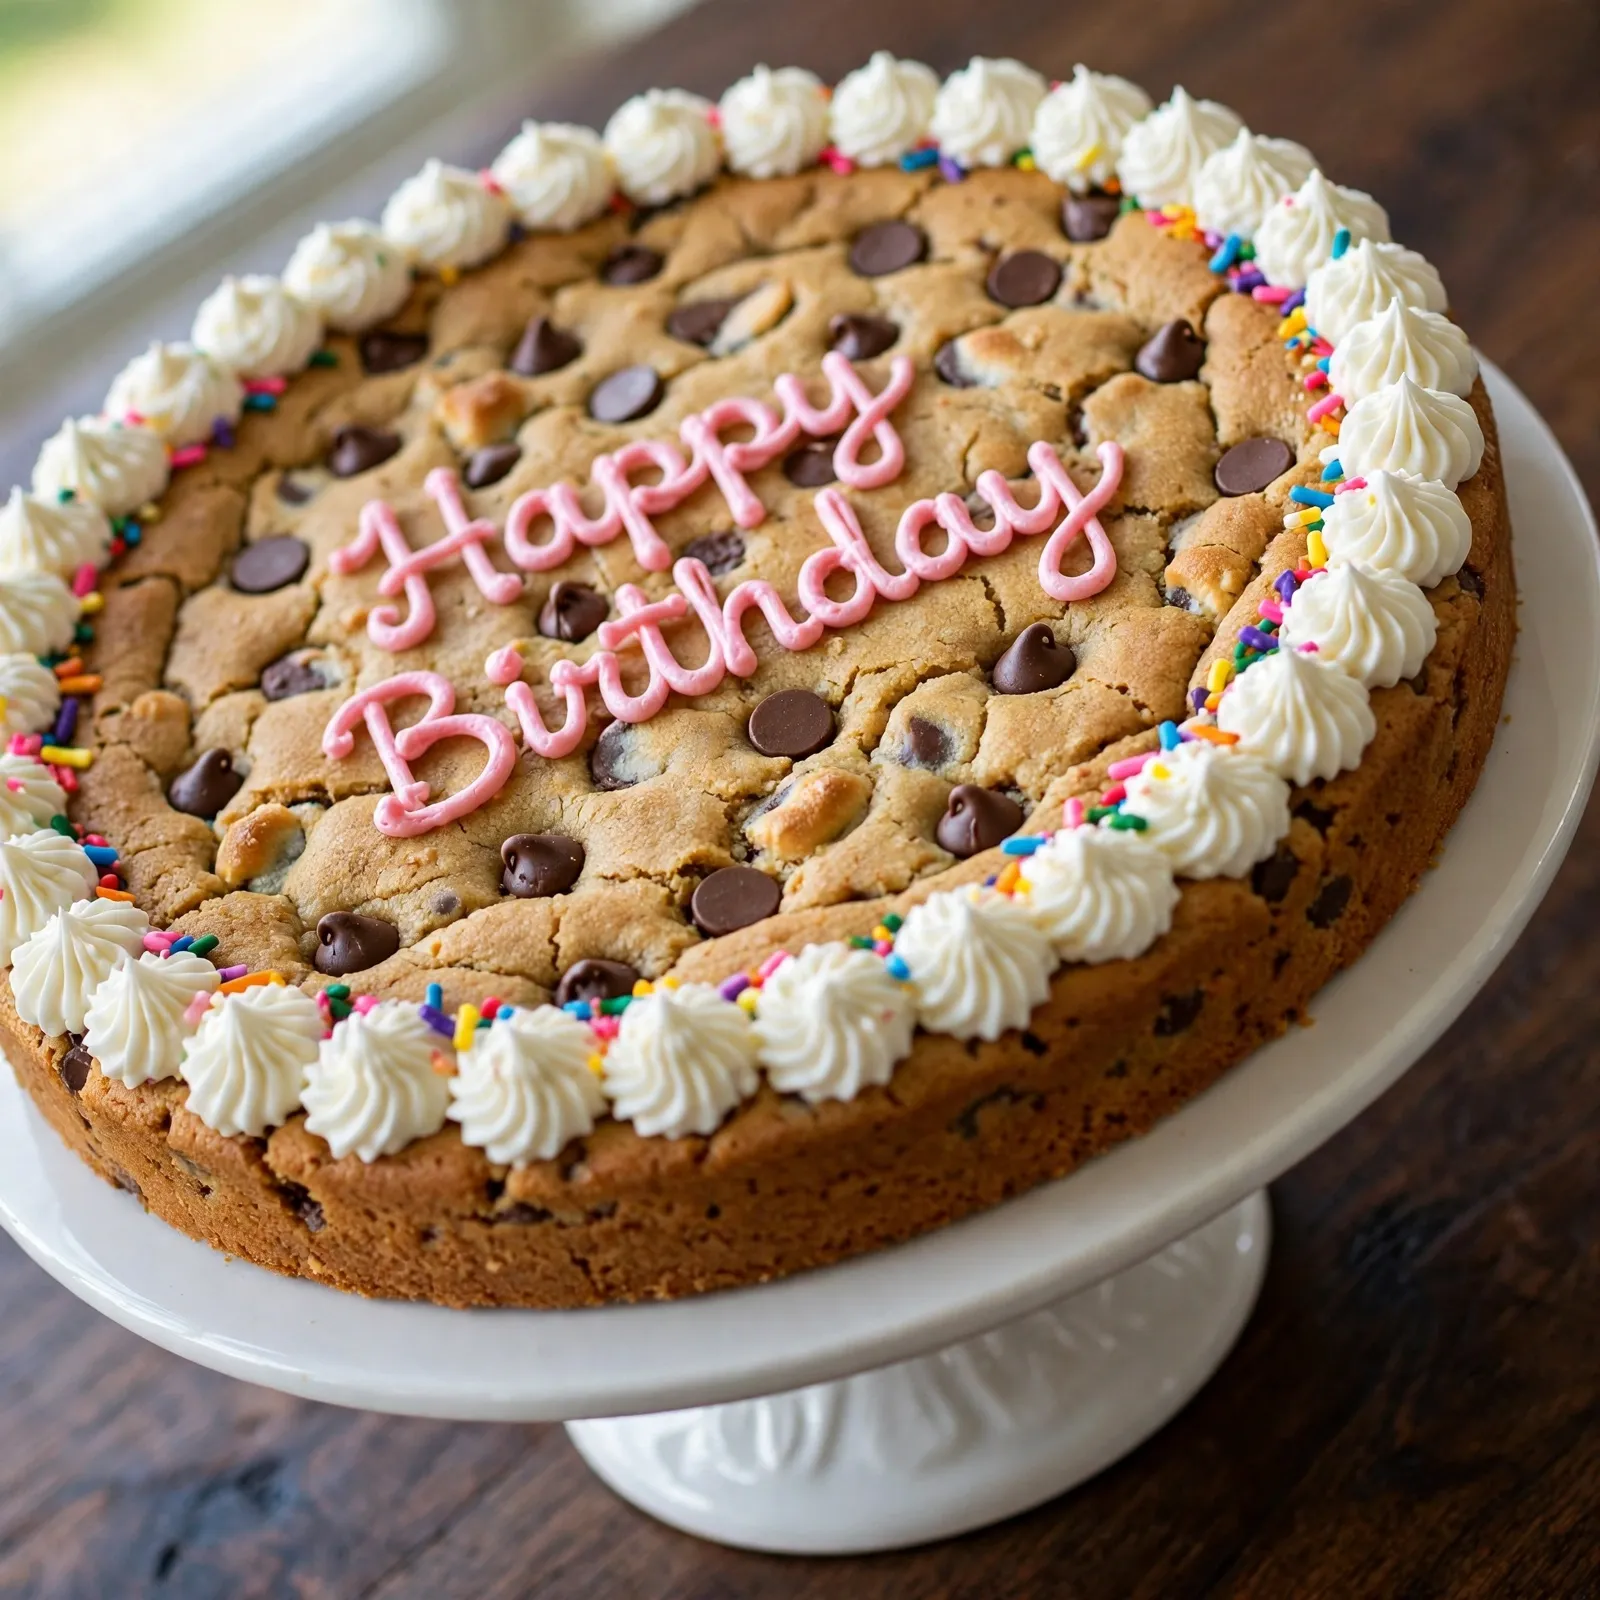
Easy Cookie Cake (Soft, Chewy, Made for Celebrations)
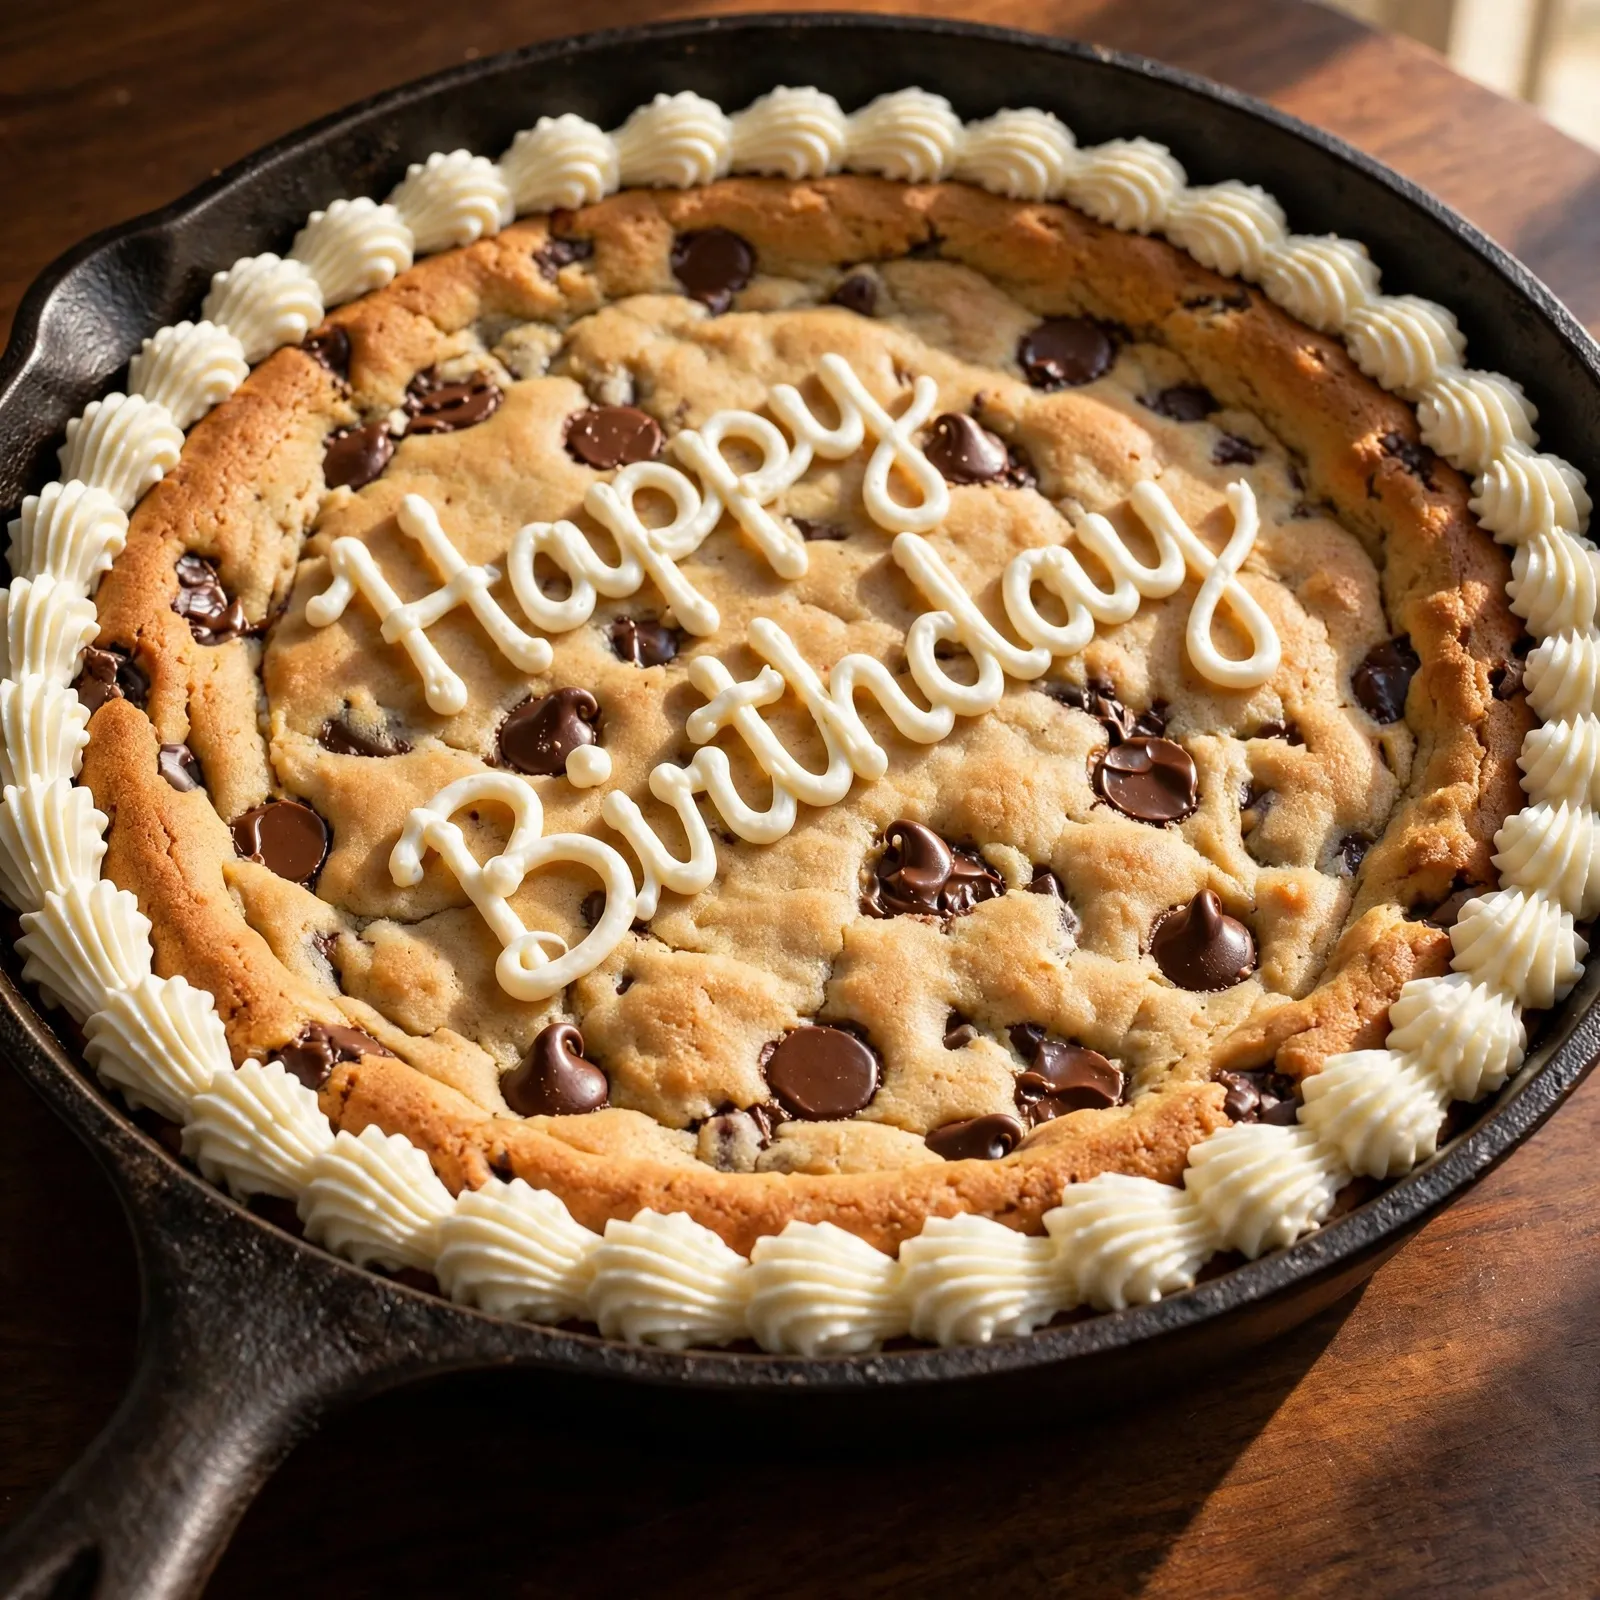
A cookie cake occupies a specific space that neither a regular cookie nor a standard layer cake can fill: it has the familiar, butter-and-brown-sugar chewiness of Brown Butter Chocolate Chip Cookies, scaled up to the size of a cake and served in wedges. The center stays fudgy and soft, the edges develop a thin golden crisp, and the whole thing can be decorated with frosting and written on like a birthday cake without any of the layering, leveling, or structural anxiety that a stacked cake demands.
This cookie cake recipe bakes in a single 30cm (12-inch) cast iron skillet or round cake pan and takes 25 minutes in the oven. The base is a straightforward brown butter chocolate chip cookie dough with more brown sugar than white, which is the ratio that produces chewiness over cakey lift. A touch of cornstarch in the flour gives the center a slightly tender, almost shortbread-adjacent texture that sets it apart from a standard cookie baked large. It serves 16 generous slices, holds beautifully at room temperature for two days, and is genuinely the easiest celebration cake format available.
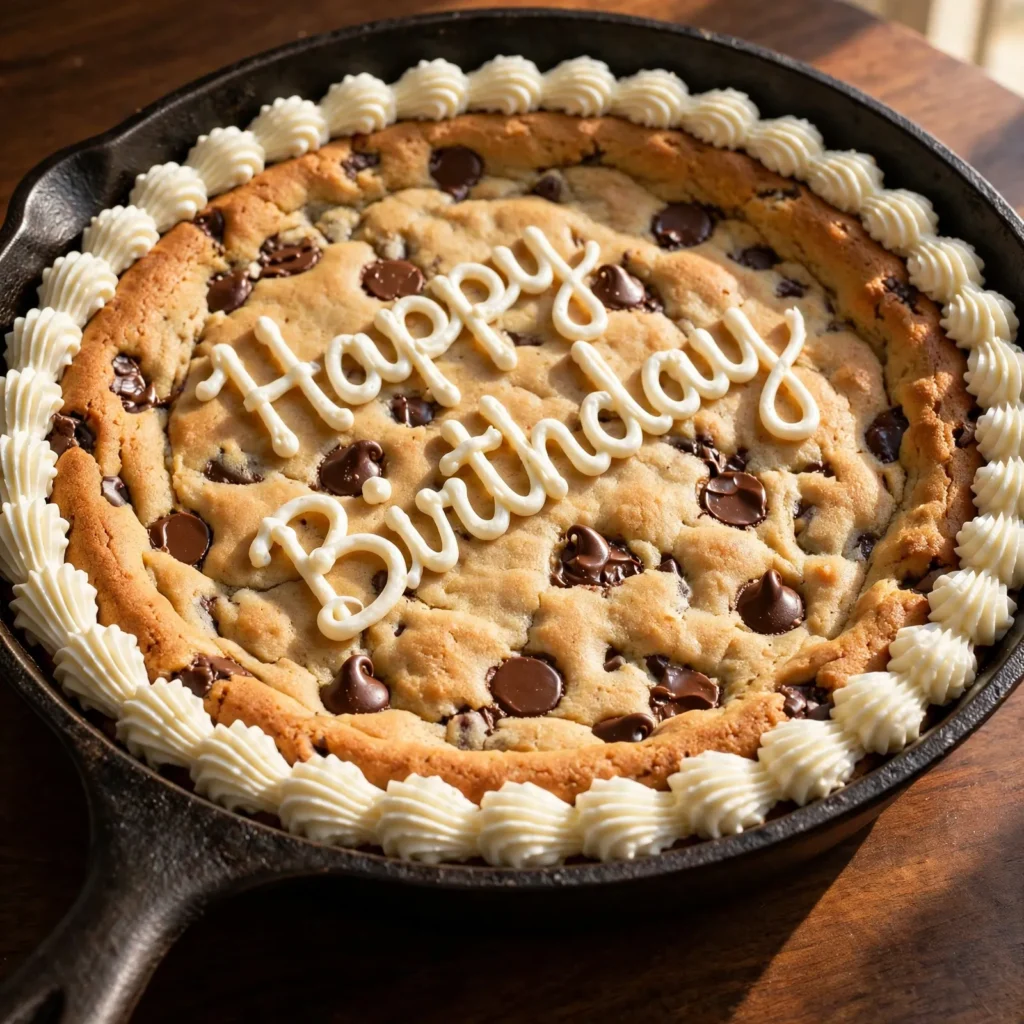
Why You’ll Love This Cookie Cake
- The center stays genuinely soft and chewy. Brown butter, extra brown sugar, and cornstarch work together to keep the center fudgy rather than letting it firm up into a dry, crumbly texture by the time it reaches the table.
- One pan, minimal cleanup. The dough comes together in a single bowl, goes directly into the pan, and bakes in 25 minutes. There are no layers to bake separately, no frosting crumb coats, and no dowels or boards involved.
- Customizable for any occasion. Write a name, pipe a birthday message, scatter sprinkles across the warm surface, or press extra chocolate chips into the top before baking. The flat surface is an easier canvas than any domed layer cake.
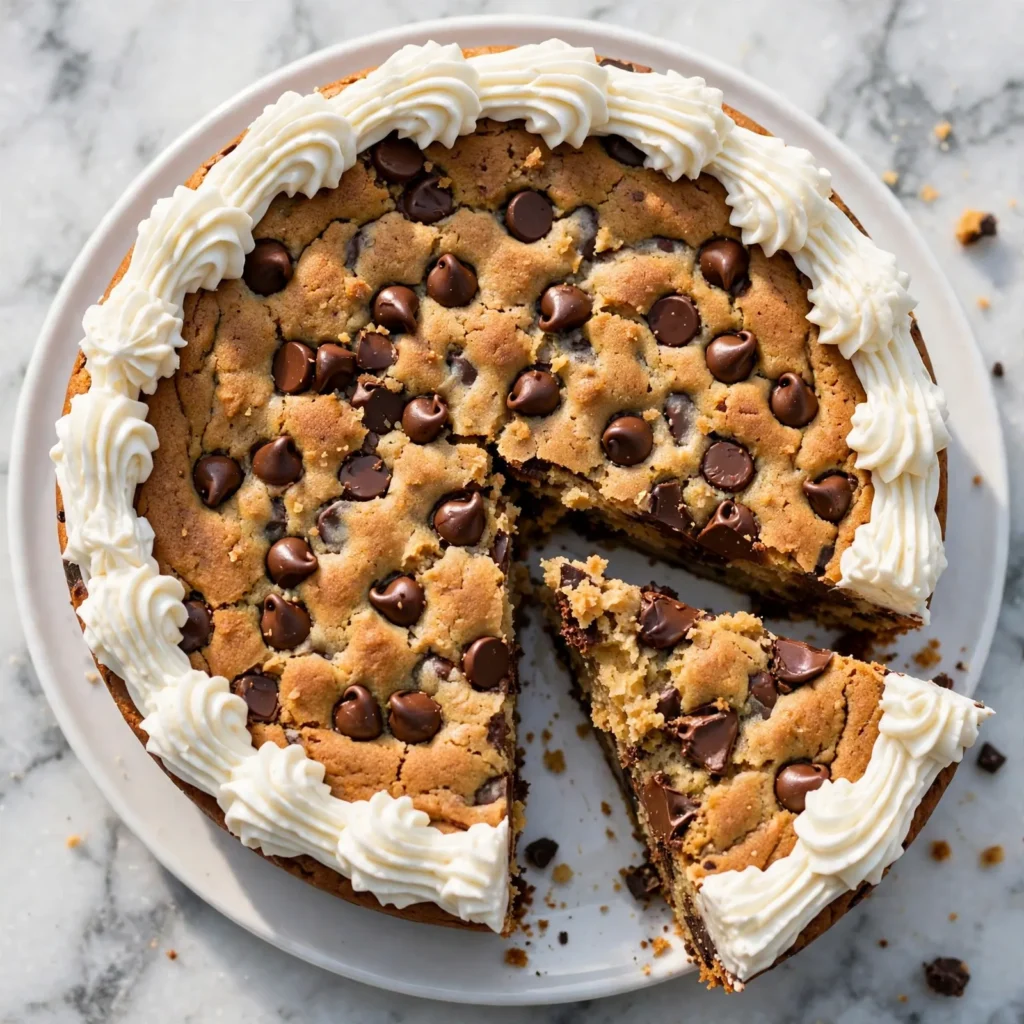
- Serves 16 without the stress of a two-layer cake. Sliced like a pizza into 16 wedges, a 30cm cookie cake feeds a party with portions that feel generous. It also scales down: a 23cm pan makes 12 smaller slices from the same dough.
- Tastes better at room temperature than fresh from the oven. Unlike individual cookies, which are at their peak warm, a cookie cake develops its best texture after cooling completely. The center firms just enough to slice cleanly while remaining soft and chewy throughout.
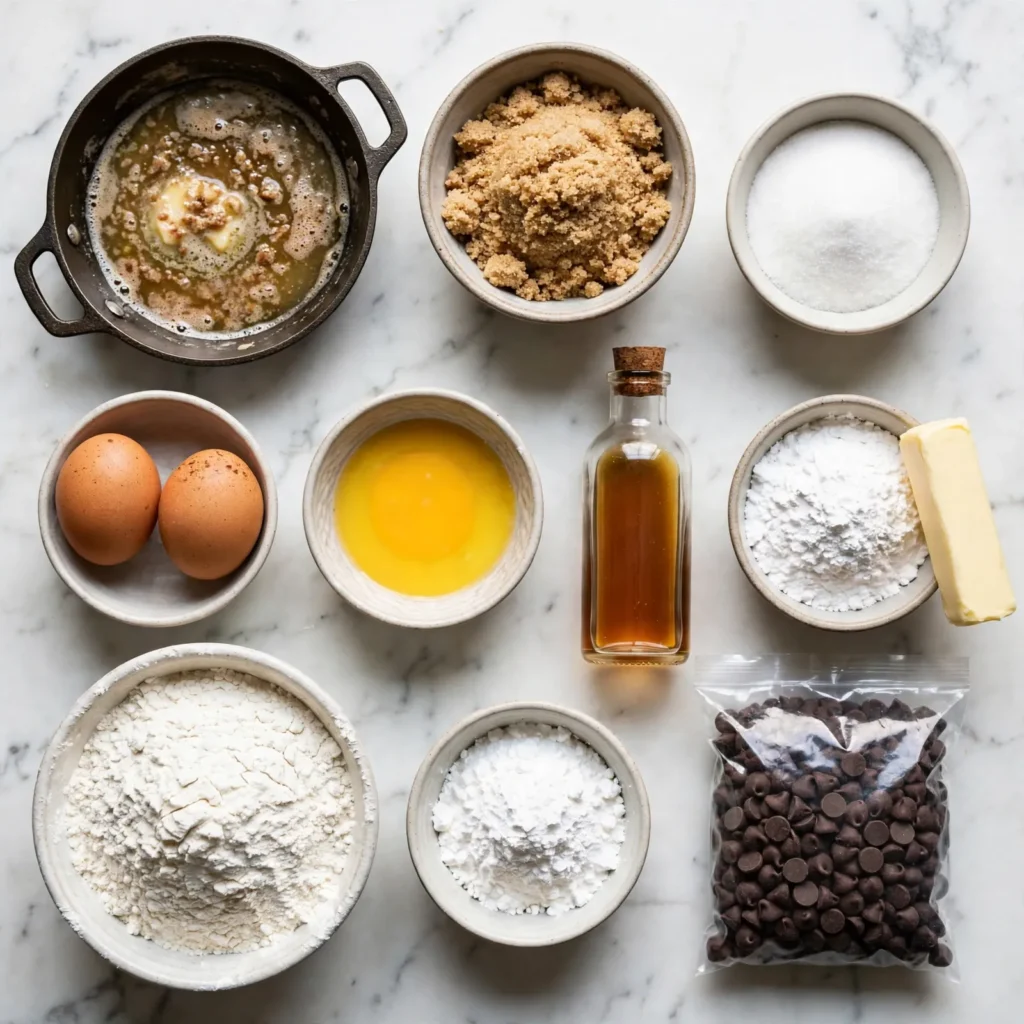
Ingredients You’ll Need
Recipe Timing
| Detail | Info |
|---|---|
| Servings | 16 slices |
| Difficulty | Easy |
| Course | Dessert, Celebration Cake |
| Cuisine | American |
| Prep Time | 15 minutes |
| Cook Time | 22 minutes |
| Cooling Time | 30 minutes |
| Total Time | 37 minutes (plus 30 minutes cooling before decorating) |
The most important ingredient decision in this recipe is the brown sugar to white sugar ratio. Using more brown sugar than white is what produces the chewy, slightly dense center that defines a good cookie cake. Brown sugar contains molasses, which is hygroscopic: it attracts and holds moisture, preventing the dough from drying out during the extended bake time that a large cookie requires. A recipe with equal amounts of both or more white sugar bakes up drier, more cakey, and less distinctively chewy.
For the butter, browning it before using is the single technique step that most elevates the flavor. Brown butter has a toasty, nutty, deeply caramelized quality that plain melted butter doesn’t approach, and in a recipe with this few ingredients, the flavor of the fat comes through clearly in every bite. The brown butter step takes 4 minutes and is worth it every time.
For the chocolate chips, use a combination of semi-sweet and dark chocolate chips if available. The mix provides both the familiar milk-chocolate sweetness that most people associate with a classic cookie cake and pockets of slightly more bitter dark chocolate that add depth. Standard semi-sweet chips alone work perfectly well if that is what you have.
For the Cookie Cake Dough:
- 1/2 cup (115g) unsalted butter. Browned before use. The browned solids give the finished cake a noticeably more complex, almost caramelized flavor than plain butter provides.
- 3/4 cup (150g) light brown sugar, packed. The primary sweetener. The higher proportion of brown sugar is what produces the chewy, moist center rather than a cakey one.
- 1/4 cup (50g) granulated white sugar. A smaller supporting role: adds a slight crisp to the edges without making the center dry.
- 1 large egg plus 1 egg yolk, at room temperature. The whole egg provides structure; the extra yolk adds richness and chewiness. The yolk’s fat content prevents the dough from puffing up too much and maintains the flat, dense profile of a skillet cookie.
- 2 teaspoons pure vanilla extract. A full 2 teaspoons rather than 1: the vanilla is a primary flavor note in a cookie cake, not a background one.
- 1 1/2 cups (180g) all-purpose flour. Measured by spooning into the cup and leveling off. Scooping from the bag compacts the flour and can add up to 30% extra, which makes the dough dry and the finished cake tough.
- 1 tablespoon (8g) cornstarch. Mixed into the flour before adding to the dough. Cornstarch dilutes the gluten-forming proteins in the flour and produces a more tender, slightly soft crumb in the center of the finished cake.
- 1/2 teaspoon baking soda. Provides a small, controlled lift and contributes to the golden-brown color of the edges through browning reactions.
- 1/2 teaspoon fine sea salt. Balances the sweetness and sharpens the chocolate flavor throughout.
- 1 1/4 cups (215g) semi-sweet or dark chocolate chips, divided. 1 cup goes into the dough; the remaining 1/4 cup gets pressed into the surface of the dough after it is spread in the pan for a more intentional, visible top.
For the Vanilla Buttercream (optional but traditional for celebrations):
- 1/2 cup (115g) unsalted butter, softened to room temperature.
- 1 1/2 cups (180g) icing sugar (powdered sugar), sifted.
- 2 tablespoons (30ml) heavy cream or whole milk.
- 1 teaspoon pure vanilla extract.
- Pinch of fine sea salt.
- Gel food coloring (optional). Gel food coloring does not change the consistency of the buttercream the way liquid food coloring can. Use it for colorful piped borders and message writing.
Allergen and Dietary Disclosure
This recipe contains dairy (butter, heavy cream in the buttercream), eggs, and gluten (all-purpose flour). Chocolate chips may also contain dairy and are processed in facilities that often handle nuts.
For a gluten-free version, replace the all-purpose flour with an equal weight of a certified gluten-free 1:1 baking flour that contains xanthan gum. The cornstarch stays the same. The cookie cake will be slightly more fragile at the edges when warm; cool it fully in the pan before slicing.
For a dairy-free version, use a high-quality vegan butter (one that browns, such as a plant-based block rather than a soft spread) in place of dairy butter, dairy-free chocolate chips, and full-fat coconut cream in place of heavy cream in the buttercream.
Free from nuts as written, though chocolate chips are often manufactured alongside nut products. Not guaranteed safe for any specific allergy without checking all individual ingredient labels.
Equipment Needed
A 30cm (12-inch) cast iron skillet or round cake pan. A cast iron skillet is the traditional vessel for a skillet cookie cake: it retains heat exceptionally well and produces a slightly crispier, more golden edge than a standard cake pan while keeping the center soft. A 30cm round cake pan or a 23cm pan (for a thicker cookie cake in a smaller size) both work well. If using a non-cast iron pan, line it with parchment paper for easy removal.
A small saucepan with a light-colored interior. For browning the butter. A light-colored interior (stainless steel or enamel) lets you see the exact moment the milk solids turn golden-brown rather than having to guess because the pan is dark. A dark non-stick pan makes it very easy to accidentally burn the butter before you see the color change.
A piping bag with a star tip (for the buttercream border). Optional, but the traditional cookie cake border requires a large open star tip (1M or 2D size) and a piping bag or a large resealable bag with one corner snipped. A pastry brush and a knife spread the buttercream as a flat layer if piping feels too involved.
Step-by-Step Directions
Step 1: Brown the Butter
Place the butter in a light-colored small saucepan over medium heat. Swirl the pan every 30 seconds as the butter melts, foams, and the foam gradually subsides. Watch the pan closely: after 3 to 4 minutes, the bubbling will slow, the butter will turn golden in color, and small dark brown specks will appear on the bottom of the pan while the surface smells unmistakably nutty and caramelized. Remove the pan from the heat immediately at this point and pour the browned butter, including all the browned solids, into a large mixing bowl. Leave to cool for 5 minutes.

Chef’s Note: Those dark brown specks at the bottom of the pan are the browned milk solids, not burnt butter. They are the source of the toasty, complex flavor that brown butter adds to baked goods. Pour them into the bowl along with the liquid butter: leaving them behind in the pan means leaving the best part of the step behind.
Step 2: Mix the Sugars and Eggs Into the Butter
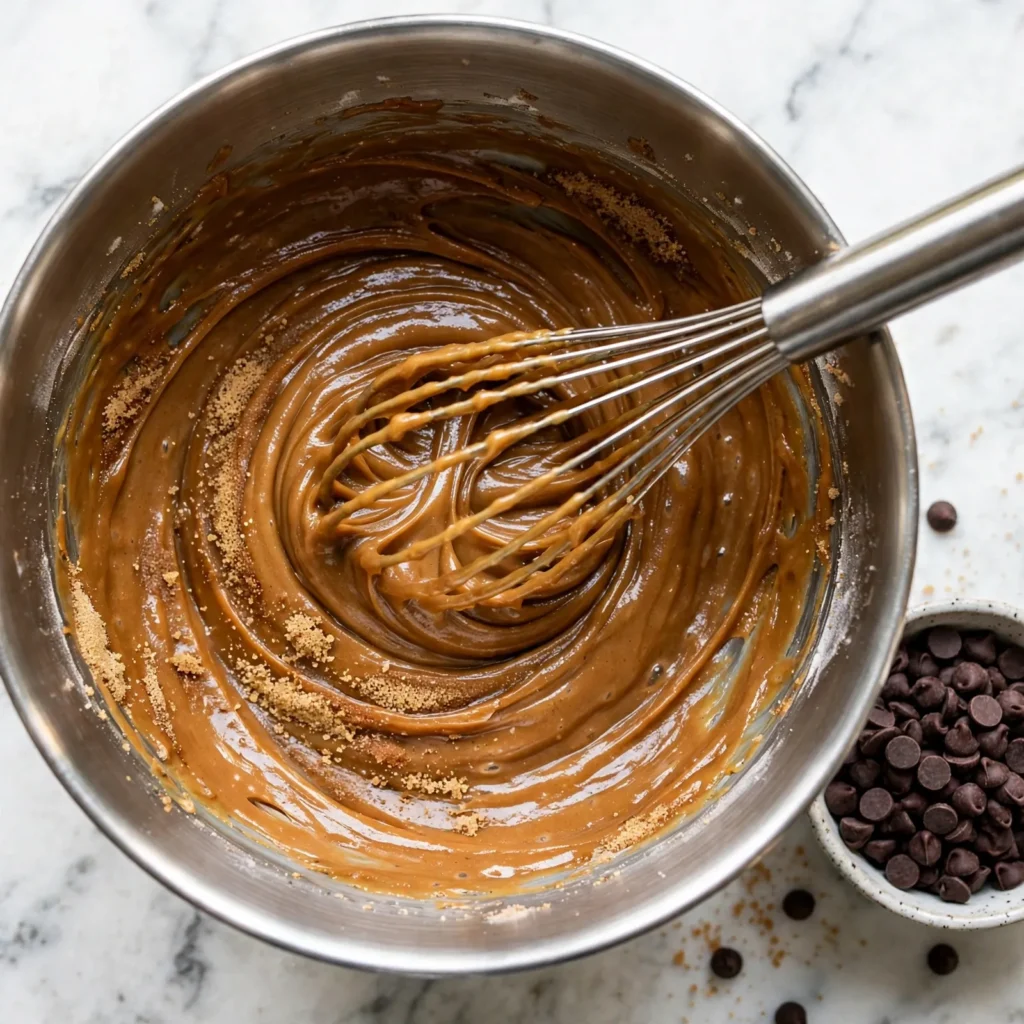
Add both sugars to the warm browned butter and whisk vigorously for 60 seconds until the mixture is smooth, glossy, and slightly lighter in color than the butter alone. The sugar crystals will not fully dissolve at this stage, which is normal: the heat from the warm butter begins the process and the oven finishes it. Add the whole egg, egg yolk, and vanilla extract. Whisk for another 30 to 40 seconds until the batter looks cohesive, slightly thickened, and uniformly pale caramel in color with no separate egg streaks visible.
Step 3: Add the Dry Ingredients
Add the flour, cornstarch, baking soda, and salt to the bowl. Switch from a whisk to a rubber spatula and fold the dry ingredients into the butter-sugar mixture using circular scooping motions, working until no dry flour streaks remain and the dough is cohesive. It will look like thick cookie dough: slightly dense and sticky, not pourable. Fold in 1 cup of the chocolate chips, distributing them evenly through the dough.
Chef’s Note: Switching to a spatula for the dry ingredients prevents the batter from being overworked. Once flour goes into a batter, every additional stir develops gluten, which makes the finished cookie cake tougher. Fold until the flour disappears and stop immediately, even if the dough still looks slightly rough in places.
Step 4: Press the Dough Into the Pan
Preheat the oven to 175°C (350°F). If using a cast iron skillet, grease it lightly with butter. If using a regular round pan, line the base with parchment and grease the sides. Transfer the dough to the center of the prepared pan and use your hands (slightly damp to prevent sticking) or a lightly greased offset palette knife to press it into an even layer all the way to the edges. The dough should fill the pan in an approximately 1.5cm even layer with no thick spots in the center. Scatter the remaining 1/4 cup of chocolate chips across the surface, pressing each one gently so they sit half-embedded rather than resting loose on top.
Chef’s Note: An even layer thickness across the entire pan is the most important preparation step for a cookie cake. A thick center with thinner edges means the edges will be overbaked and crisp before the center is set, producing an uneven texture across the finished cake. Press from the center outward with consistent pressure.
Step 5: Bake Until the Edges Are Golden
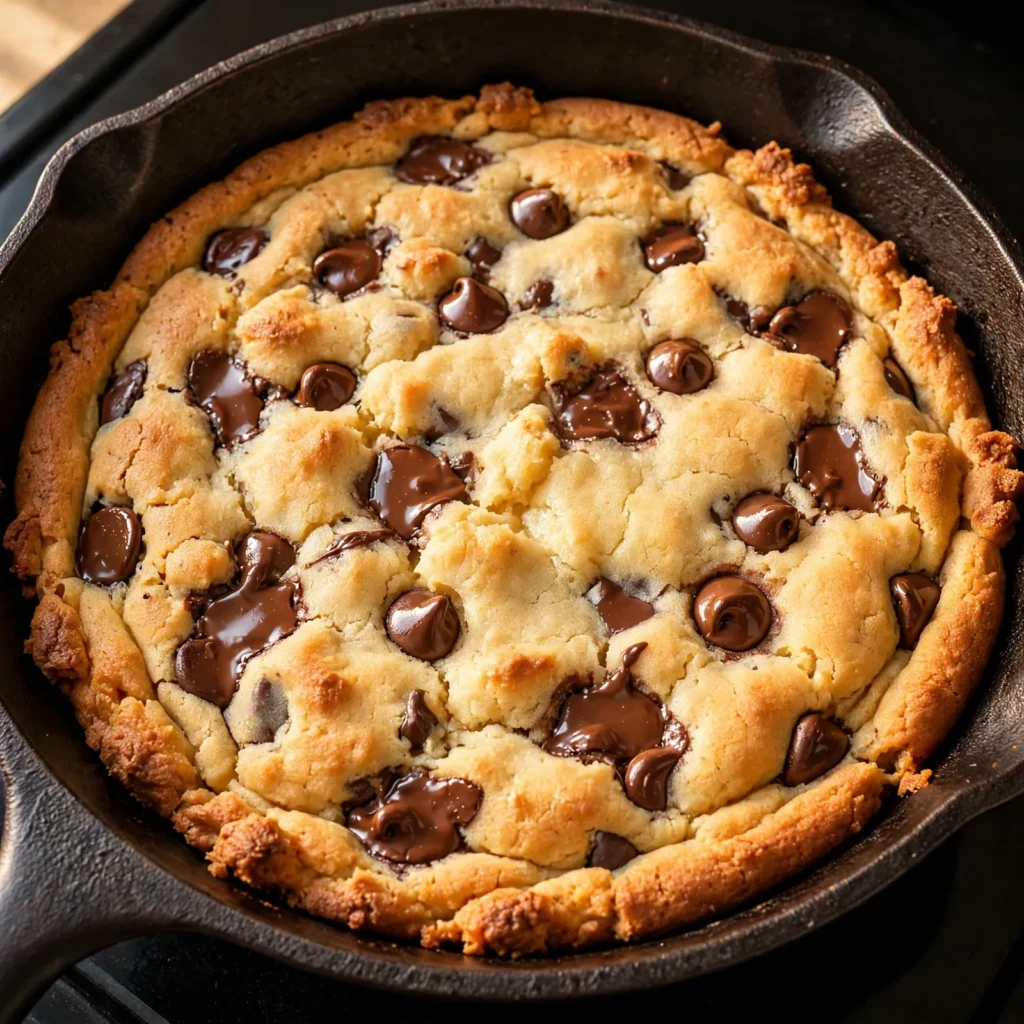
Bake on the center rack at 175°C (350°F) for 20 to 24 minutes. At 20 minutes, the edges should look distinctly golden-brown with a matte surface and the center should still appear slightly underdone: slightly puffed, glossy at the surface, and pale compared to the edges. This is correct. The center continues setting as the cookie cake cools in the pan, and a center that looks fully baked when pulled from the oven will be dry and crumbly once cooled. Remove the pan when the edges are clearly golden, the surface no longer looks wet, and a toothpick inserted 3cm from the edge comes out clean while the center toothpick still shows moist crumbs.
Step 6: Cool Completely Before Decorating
Place the pan on a wire rack and leave the cookie cake undisturbed for a minimum of 30 minutes before decorating or slicing. The center continues setting during this time as the starches cool and firm. Cutting or decorating a warm cookie cake produces crumbling edges and buttercream that melts into the surface rather than sitting cleanly on top. For the cleanest results, especially if piping a detailed border, refrigerate the fully cooled cookie cake for 15 minutes before adding frosting: the cold surface gives piped buttercream a firmer grip.
Step 7: Make the Buttercream and Decorate
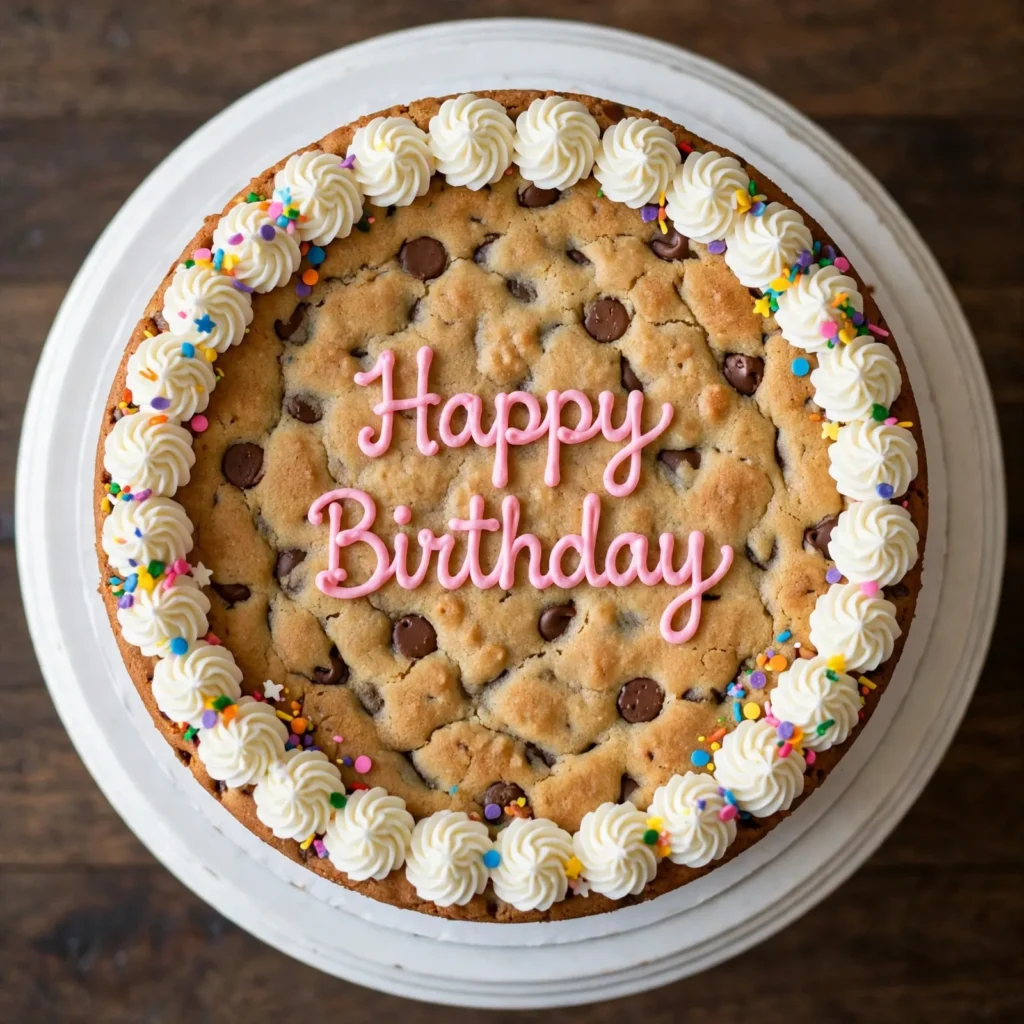
Beat the softened butter in a bowl with a hand mixer on medium-high speed for 90 seconds until pale and fluffy. Add the sifted icing sugar in two additions, beating for 30 seconds after each. Add the heavy cream, vanilla, and salt, then beat for 60 seconds more until the buttercream is smooth, bright white, and holds a peak that stands straight without drooping. If it is too stiff, add cream half a teaspoon at a time. If too soft, add icing sugar one tablespoon at a time. Divide and color with gel food coloring if desired, then pipe a border and any text directly onto the cooled cookie cake.
Common Mistakes and Troubleshooting
| Problem | Cause | Solution |
|---|---|---|
| Cookie cake is dry and crumbly | Overbaked; too much flour; not enough brown sugar | Pull at 20 to 22 minutes when center still looks slightly underdone; spoon flour into measuring cup rather than scooping; use the stated ratio of brown to white sugar |
| Center is completely raw after 22 minutes | Pan too small for the dough volume; oven running cool | Use the stated 30cm pan; check with an oven thermometer; extend to 25 minutes maximum and cover edges loosely with foil if they brown before the center is set |
| Buttercream slides off the surface | Cookie cake was still warm when frosted | Cool completely at room temperature (minimum 30 minutes) and refrigerate 15 minutes before piping for the best grip |
| Edges are overbaked while center is raw | Dough pressed too thin at edges, too thick at center | Press dough into an even 1.5cm layer from center to edges; the thickness must be consistent throughout |
| Cookie cake stuck to the pan | Pan not greased; cast iron skillet used without greasing | Always grease the pan; line a regular pan with parchment for easy unmolding; cast iron greased with butter works fine |
| Buttercream too stiff to pipe | Too much icing sugar; not enough cream; butter too cold | Bring butter to full room temperature; add cream half a teaspoon at a time until the consistency flows smoothly from the piping tip |
Variations and Substitutions
Double Chocolate Cookie Cake: Replace 3 tablespoons of the all-purpose flour with 3 tablespoons of Dutch-process cocoa powder. The base dough becomes a deep chocolate dough that pairs with both white chocolate chips and semi-sweet chips. Frost with a whipped chocolate ganache (equal weights dark chocolate and heavy cream, melted together and whipped once cooled to room temperature) instead of vanilla buttercream.
Peanut Butter Cookie Cake: Add 1/2 cup of smooth peanut butter to the dough alongside the butter, reducing the butter to 3 tablespoons. The peanut butter adds a nutty richness that holds up through baking. Top with a peanut butter buttercream (replace 1/4 cup of the butter in the frosting with smooth peanut butter) and scatter chopped roasted peanuts around the border.
Birthday Funfetti Cookie Cake: Replace 1/4 cup of the chocolate chips with an equal volume of rainbow sprinkles, folded into the dough at the last moment before spreading. Press a few extra sprinkles into the surface before baking. Frost with a rainbow-tinted buttercream border in two or three piped colors. This is particularly good for a children’s birthday where chocolate chips are a secondary interest.
Snickerdoodle Cookie Cake: Omit the chocolate chips entirely. Add 1 teaspoon of ground cinnamon to the dry ingredients. Before baking, press the dough into the pan and scatter a cinnamon-sugar topping (2 tablespoons granulated sugar mixed with 1/2 teaspoon ground cinnamon) over the entire surface. Frost with a cinnamon buttercream (add 1 teaspoon cinnamon to the standard buttercream recipe).
S’mores Cookie Cake: Press the dough into the pan and add a layer of mini marshmallows across the entire surface before baking, pressing them gently into the dough. Scatter 60g of roughly chopped dark chocolate over the marshmallow layer. Bake as directed: the marshmallows will puff, toast slightly at the edges, and melt into the dough. No frosting required.
Brown Butter Toffee Cookie Cake: Replace 1/4 cup of the chocolate chips with an equal amount of toffee bits (plain toffee pieces, not chocolate-covered). The toffee melts during baking and creates small, chewy caramelized pockets throughout the cake that pair with the brown butter base in a way that makes the flavor profile noticeably more sophisticated.
Serving Suggestions
- Sliced into wedges at a birthday party. A 30cm cookie cake cut into 16 slices serves a party of 16 as dessert with enough surface for a name, a message, and a full piped border in one or two colors. Serve from the pan for a casual presentation or transfer to a cake board for a more formal one.
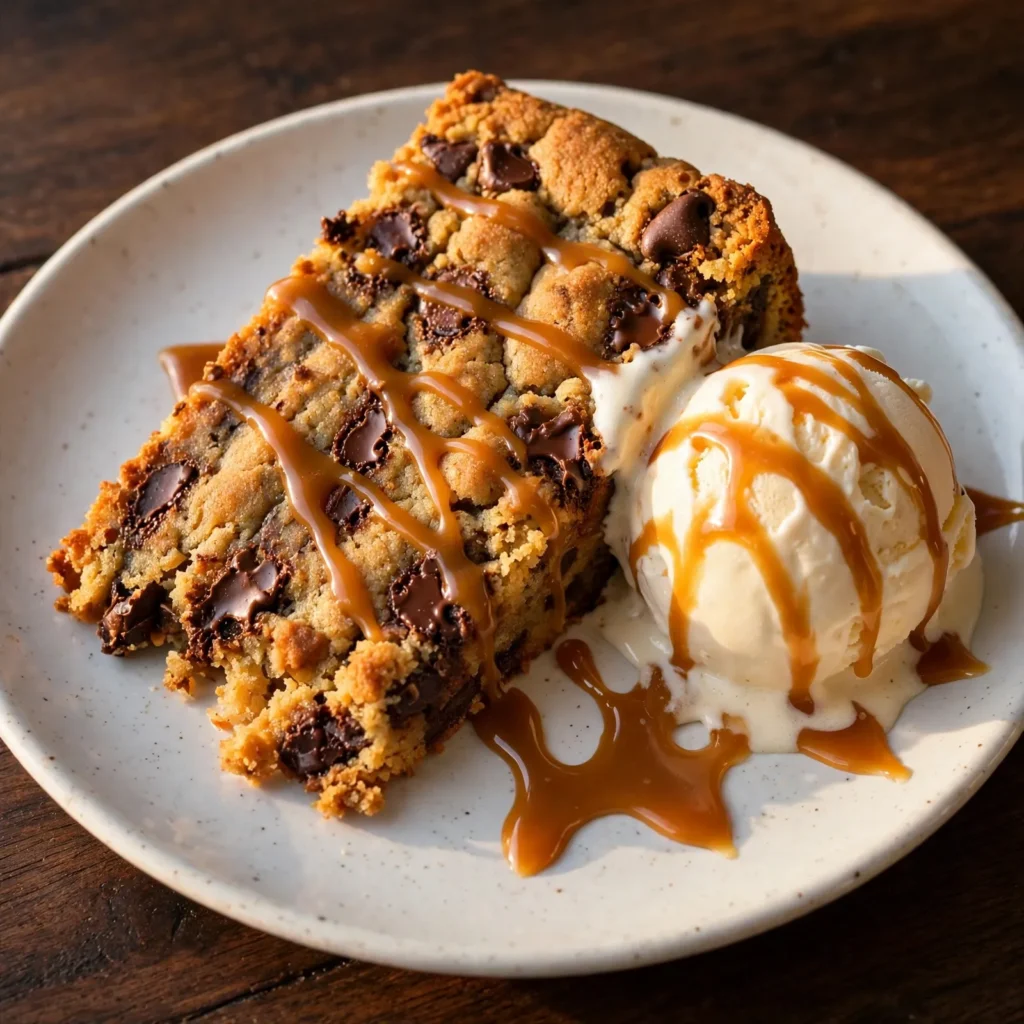
- As a plated dessert with vanilla ice cream. A single warm wedge (10 seconds in the microwave softens the center) with a scoop of vanilla ice cream and a drizzle of caramel sauce plates as a complete restaurant-quality dessert with almost no additional effort.
- On a dessert charcuterie board. Cut the cookie cake into small squares rather than wedges and arrange alongside other cookies, brownies, and chocolate pieces for a dessert board. The flat, decoratable surface makes it a natural centrepiece of any sweet platter.
- As a gift, whole and uncut. A decorated cookie cake travels well in a covered round container and holds its shape for 2 full days at room temperature. It is a more personal and visually striking gift than a box of individual cookies.
- As a simpler alternative to a tiered birthday cake, try my Vanilla Cake. The decorating process (piping a border, writing a name) takes 5 minutes with a piping bag rather than the 30 to 45 minutes that a tiered cake requires for crumb coating, final coat, and smoothing.
- With coffee or a glass of cold milk. The buttery, brown-sugar richness of a cookie cake paired with a cold glass of milk is deliberately simple and completely satisfying in the way that comfort desserts are meant to be.
Tips for the Best Results
- Don’t skip the brown butter. Plain melted butter makes a perfectly acceptable cookie cake. Brown butter makes a noticeably better one. The toasty, caramel-adjacent flavor it adds is worth the extra 4 minutes and one additional pan to wash. Once you make cookie cake with brown butter, going back to plain melted butter is genuinely difficult.
- Pull the cookie cake earlier than feels right. The instinct when baking a large cookie is to keep it in until the center looks fully cooked. That instinct is wrong for a cookie cake. A center that looks slightly pale, slightly underdone, and slightly glossy at the 22-minute mark will be soft and chewy once cooled. A center that looks fully cooked in the oven will be dry and crumbly by the time it reaches the table.
- Press the dough to an even thickness. The single preparation step that most affects the uniformity of the bake is consistent dough thickness across the pan. Use a lightly damp hand to press the dough outward from the center, checking the edges to make sure they are the same depth as the middle.
- Cool before frosting, fully. Thirty minutes minimum at room temperature, and an extra 15 minutes in the refrigerator if you are piping a detailed border. Warm cookie cake is delicious eaten plain but is not ready for decoration: the Buttercream Frosting will melt on contact and slide off within minutes.
- Measure flour by weight or by spooning. Over-flouring is the most common single reason a cookie cake turns out dry and crumbly. Scooping directly from the bag compacts the flour and can add 20 to 30% more than the recipe calls for. Spoon it into the measuring cup and level the top with a straight edge, or use a kitchen scale.
Storage Tips
Refrigerator
Cover the cookie cake with a cake dome or wrap the pan tightly in plastic wrap and refrigerate for up to 5 days. The texture firms up in the refrigerator due to the fat in the butter re-solidifying at cold temperatures. Remove individual slices 10 minutes before eating to allow them to come back to room temperature, which restores the soft, chewy center. The buttercream also firms up in the fridge, which makes pre-cut slices easier to lift cleanly.
Freezer
The undecorated cookie cake freezes very well. Once fully cooled, wrap the entire cake or individual slices in two layers of plastic wrap and a layer of foil. Freeze for up to 2 months. Thaw overnight in the refrigerator or for 1 to 2 hours at room temperature. Decorate after thawing for the freshest possible appearance. The buttercream can also be frozen separately in a sealed container for up to 2 months: thaw in the fridge and re-beat briefly before using.
Reheating
Cookie cake does not need to be reheated before serving, but warming individual slices briefly produces a fudgy, slightly molten center that is a genuinely different (and excellent) eating experience from room-temperature cookie cake. Microwave a single slice at 50% power for 15 to 20 seconds. Any longer and the chocolate chips become too hot and the center loses its structure. Serve immediately: warmed cookie cake cools back to room temperature quickly.
Nutrition Information
Per serving (1 slice, 1/16 of the cookie cake without buttercream)
| Nutrient | Amount |
|---|---|
| Calories | 235 kcal |
| Protein | 3g |
| Carbohydrates | 32g |
| Fiber | 1g |
| Sugar | 20g |
| Total Fat | 11g |
| Saturated Fat | 6.5g |
| Cholesterol | 40mg |
| Sodium | 115mg |
| Vitamin C | 0mg |
| Calcium | 20mg |
| Iron | 1mg |
| Potassium | 80mg |
Nutrition values are approximate, for the cookie base only without buttercream, and may vary based on brands and portion sizes.
Why This Recipe Works
The brown sugar to white sugar ratio is the structural decision that determines the finished texture more than any other single ingredient choice. Sugar behaves differently depending on its form in a baked dough. Granulated white sugar, which is pure sucrose, promotes spread and crispness by dissolving rapidly and providing little hygroscopic activity once baked. Brown sugar contains molasses, which is primarily invert sugar: a mixture of fructose and glucose that does not crystallize the same way sucrose does and is hygroscopic, meaning it actively draws in and retains atmospheric moisture. A dough with a higher proportion of brown sugar bakes up more moist, more dense, and stays chewier for longer after baking. This recipe uses three times as much brown sugar as white precisely because a cookie cake’s large format means it stays on the table for hours rather than being eaten immediately, and the brown sugar’s moisture-retaining properties keep the center from drying out over that time.
The cornstarch addition is a deliberate gluten-dilution technique. When cornstarch replaces a portion of all-purpose flour in a baked dough, it reduces the percentage of gluten-forming proteins (glutenin and gliadin) in the total flour mixture without removing the starch that provides structure. Less gluten means less cross-linking of protein strands during mixing and baking, which produces a more tender, slightly more delicate crumb texture. In a cookie cake, where the center needs to feel fudgy and almost shortbread-tender rather than chewy and springy, this is the correct direction. One tablespoon of cornstarch is a small amount but its effect on the center texture is noticeable in side-by-side testing.
The extra egg yolk alongside the whole egg is a fat and emulsification decision. Egg whites contribute primarily to structure and lift through protein coagulation. Egg yolks contain both fat (in the form of phospholipids) and lecithin, a natural emulsifier. The fat in the yolk contributes richness and a slightly denser, less airy texture in the baked cake. The lecithin helps the fat from the browned butter emulsify more thoroughly into the sugar-egg mixture, producing a more cohesive, uniform dough that bakes into a dense, flat, fudgy center rather than a puffed, cakey one.
Pulling the cookie cake before the center looks fully cooked exploits the carry-over cooking that happens during cooling. When a 30cm cookie cake is pulled from a 175°C (350°F) oven, the outer edges and bottom have been in contact with the highest heat for the entire bake time and are fully set. The center, which has been heated primarily by radiation from the oven walls and conduction through the pan, is less set but still extremely hot internally. As the cake cools in the pan, heat continues flowing from the hotter outer portions toward the cooler center, effectively continuing to cook the center for 10 to 15 minutes after the pan leaves the oven. A center pulled from the oven at the precisely underdone stage sets to exactly the right fudgy texture. A center already fully cooked in the oven arrives at the table dry.
The cold butter rest before piping serves the same function here as in a layer cake: the frosting needs a surface that is cool enough to provide resistance rather than a surface that melts the buttercream on contact. Cookie cake retains heat in its center for longer than a thinner baked good because of its mass, which is why the 15-minute refrigerator rest before piping makes a visible difference in how neatly the border sits.
Frequently Asked Questions
Can I make a cookie cake ahead of time?
Yes. Bake and cool the cookie cake up to 2 days ahead, store covered at room temperature or in the refrigerator, and decorate on the day of serving. The unfrosted base holds its quality well for 48 hours at room temperature and up to 5 days refrigerated. Add the buttercream border and any written message within a few hours of serving for the freshest appearance.
Why is my cookie cake dry and crumbly?
A dry, crumbly cookie cake almost always comes from one of two causes: too much flour, or overbaking. Scooping flour directly from the bag packs it into the cup and can add 20 to 30% more than the recipe needs. Use the spoon-and-level method. Overbaking is the other common cause: pull the cookie cake when the edges are golden and the center still looks pale and slightly glossy rather than waiting for the center to look fully cooked. It will set during cooling.
Can I make a cookie cake without a cast iron skillet?
Yes. A 30cm round cake pan with the base lined with parchment paper works well. A 23cm pan produces a thicker cookie cake that needs 3 to 5 additional minutes of baking time. A square baking pan also works: cut it into rectangular pieces rather than wedges. The cast iron skillet produces slightly crispier edges and a more visually striking presentation for the table, but any oven-safe pan in the right size gives good results.
How do I know when a cookie cake is done baking?
The correct doneness for a cookie cake is when the edges look distinctly golden-brown and matte while the center still appears slightly pale and the surface has lost its raw sheen but is not fully matte across the entire surface. A toothpick inserted 3cm from the edge should come out clean; a toothpick in the center should come out with moist (not wet) crumbs. If both toothpicks come out clean, the cookie cake is past its ideal texture and will be drier than desired once cooled.
Is a cookie cake gluten-free?
As written, no. The recipe uses all-purpose flour. To make a gluten-free cookie cake, replace the flour with the same weight of a certified gluten-free 1:1 baking flour that contains xanthan gum. The cornstarch stays unchanged. The gluten-free version will be slightly more fragile when warm: leave it in the pan to cool completely before removing and slicing.
What piping tip should I use for the border?
A large open star tip in size 1M or 2D is the standard choice for a cookie cake border. Both produce the rosette and shell patterns that most people associate with decorated cookie cakes. If you don’t have piping tips, a large resealable plastic bag with one corner snipped at a 45-degree angle produces a basic round border that works well. The most important thing is a thick enough opening that the buttercream flows without requiring excessive pressure that makes the piping uneven.
Can I use store-bought frosting instead of making buttercream?
Yes. Store-bought vanilla frosting piped from a bag or spread as a flat layer works fine as a shortcut. The flavor and texture of homemade buttercream is noticeably better because it is made with real butter and fresh cream rather than a fat-and-sugar paste, but the visual result can be nearly identical. If using store-bought frosting from a tin, refrigerate it for 15 minutes before piping to firm it up enough to hold a defined shape.
Conclusion
A cookie cake earns its place as a celebration dessert because it delivers everything a birthday cake needs, the visual impact, the writing surface, the piped border, the slice-and-serve format, without any of the structural complexity of a layered cake. The brown butter base gives it more flavor than a standard cookie. The brown sugar-heavy ratio keeps it chewy for days. The cornstarch keeps the center tender in a way that matters at the scale of a large skillet cookie. The key decisions in the recipe, pulling it slightly before the center looks done and cooling fully before frosting, are both counterintuitive but immediately validated the first time you slice a perfectly set, fudgy cookie cake at a table. Make this cookie cake once for a birthday and it will be the request that comes back every year.
If you’d rather not turn on the oven, my No-Bake Biscoff Cheesecake is another celebration-worthy dessert.
If you loved this recipe, save it to your celebration cake recipes Pinterest board so you can find it easily later. For more new recipes follow thecookingvibes pinterest account.
Easy Cookie Cake
Ingredients
Equipment
Method
- Brown the butter in a light-colored saucepan over medium heat, swirling every 30 seconds, until golden with brown specks visible and a nutty aroma, about 3 to 4 minutes. Pour into a large bowl including all browned solids. Cool 5 minutes.
- Whisk both sugars into the warm brown butter for 60 seconds until smooth. Add the whole egg, yolk, and vanilla. Whisk 30 seconds until cohesive and uniform.
- Add flour, cornstarch, baking soda, and salt. Fold with a rubber spatula until just combined with no dry flour streaks. Fold in 1 cup of chocolate chips.
- Preheat oven to 175°C (350°F). Grease a 30cm cast iron skillet or line a 30cm round cake pan with parchment. Press dough to an even 1.5cm layer. Scatter remaining 1/4 cup chips over the top.
- Bake 20 to 24 minutes until edges are golden-brown and center looks slightly underdone and pale. Center toothpick should show moist crumbs. Do not overbake.
- Cool in pan on a wire rack for at least 30 minutes. For buttercream, beat softened butter until fluffy. Add sifted icing sugar in two additions, then cream, vanilla, and salt. Beat until smooth and white. Pipe border and message onto the cooled cookie cake.
Notes
- Brown the butter fully: the nutty browned solids go into the dough and contribute most of the brown butter’s flavor.
- Pull the cookie cake when the center still looks slightly pale: it sets during cooling and a center that looks done in the oven will be dry once cooled.
- Spoon flour into the measuring cup rather than scooping to avoid over-flouring.
- Cool the cookie cake completely before piping buttercream: warm surface melts the frosting on contact.