Easy Garlic Bread Recipe (Crispy Outside, Buttery Inside)
Good garlic bread has two things working simultaneously: a crust that gives a defined crunch when you bite through it and a soft, butter-saturated interior that yields immediately after, which is why it fits a brunch spread next to Cinnamon Rolls just as well as it fits a dinner table. The garlic flavor should be upfront but not sharp, present in every bite rather than concentrated in a few spots. Most homemade versions fail on at least one of these: either the bread comes out soggy because the butter was applied cold, or the garlic tastes faint because garlic powder was used in place of fresh cloves cooked briefly in the butter before spreading.
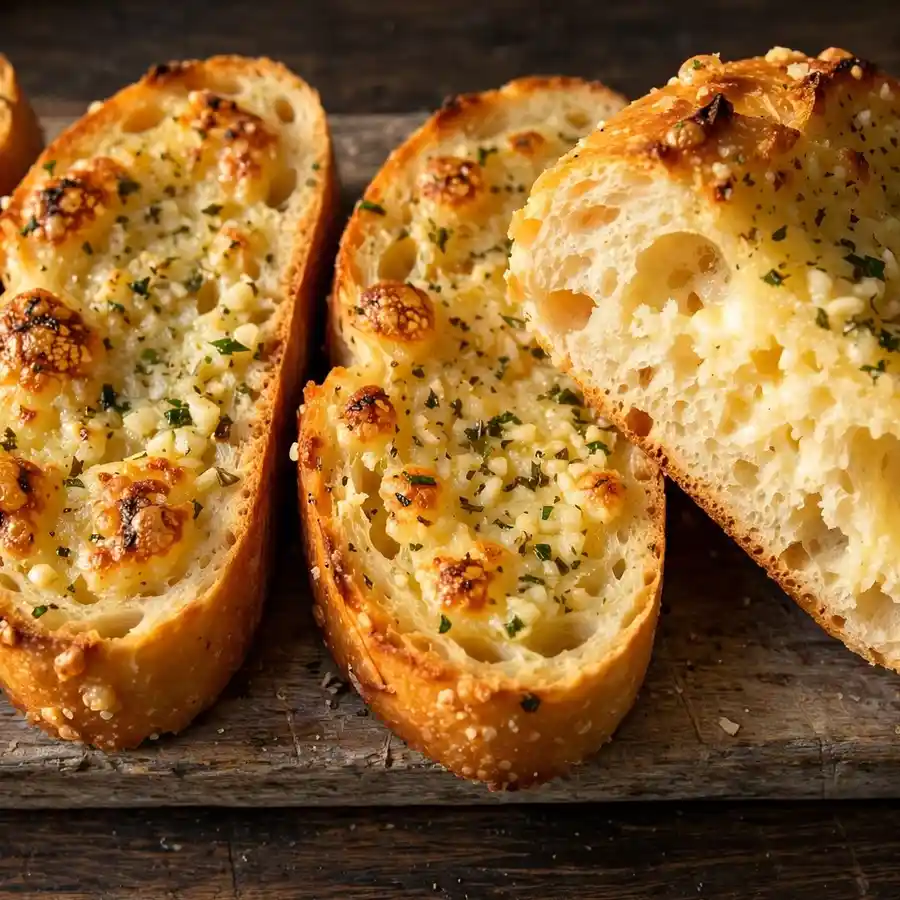
This garlic bread recipe builds the spread by gently cooking minced fresh garlic in butter for 90 seconds, which transforms the raw, pungent edge of the garlic into something mellower, more aromatic, and deeply savory before it ever touches the bread. The spread goes onto a halved Italian or French loaf and the bread bakes open for the first 10 minutes to develop a golden, slightly crisp surface, then optionally goes under the broiler for 2 minutes to finish with a charred, blistered edge that is genuinely the best part. The whole recipe takes 20 minutes and works with any crusty loaf you have on hand, so it can round out a breakfast table next to French Toast without any extra effort.
Why You’ll Love This Garlic Bread Recipe
- Fresh garlic, not powder, cooked in the butter first. Briefly warming minced garlic in melted butter before spreading eliminates the sharp, almost medicinal raw garlic edge and replaces it with a mellow, caramelized savory note that distributes evenly through every bite.
- The crust is genuinely crisp, not just toasted. Baking the bread cut-side-up on an open rack rather than wrapped in foil allows moisture to escape from the surface, which is what produces a crisp outer layer rather than a steamed, soft one.
- Five ingredients you always have. A loaf of bread, butter, garlic, parsley, and salt. That’s it. The recipe works as written and needs nothing extra to be complete.
- 20 minutes from start to finish. The garlic butter comes together in 3 minutes on the stovetop. The rest is assembly and oven time, most of which is hands-off.
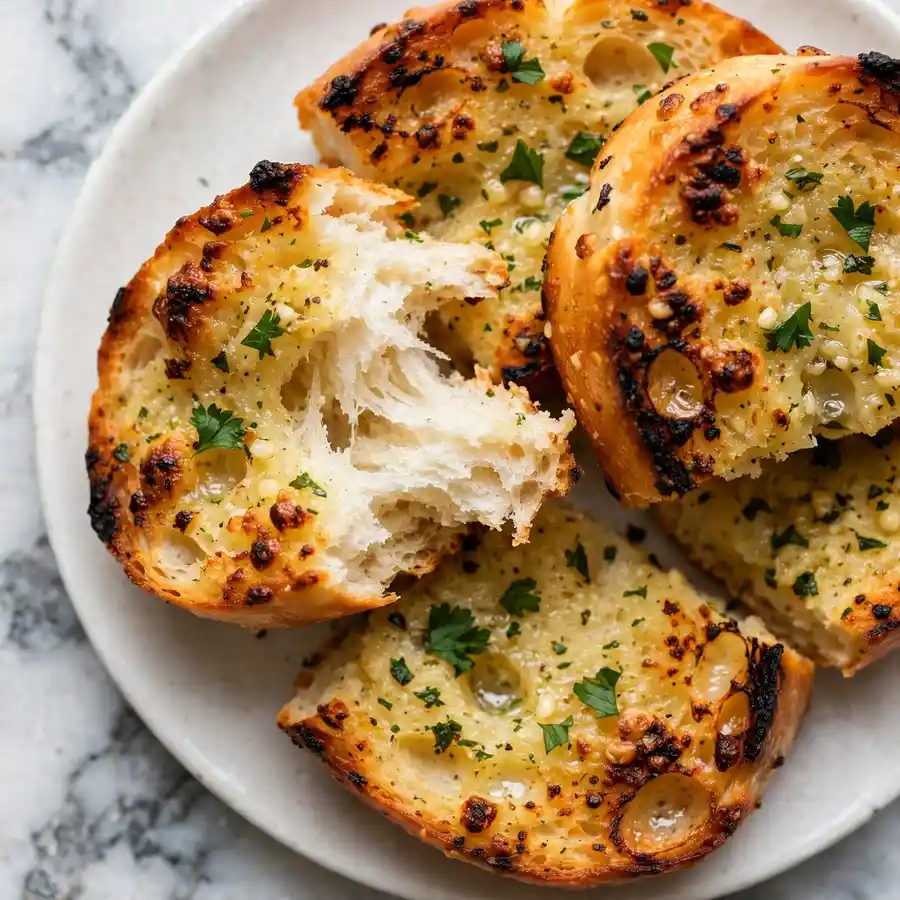
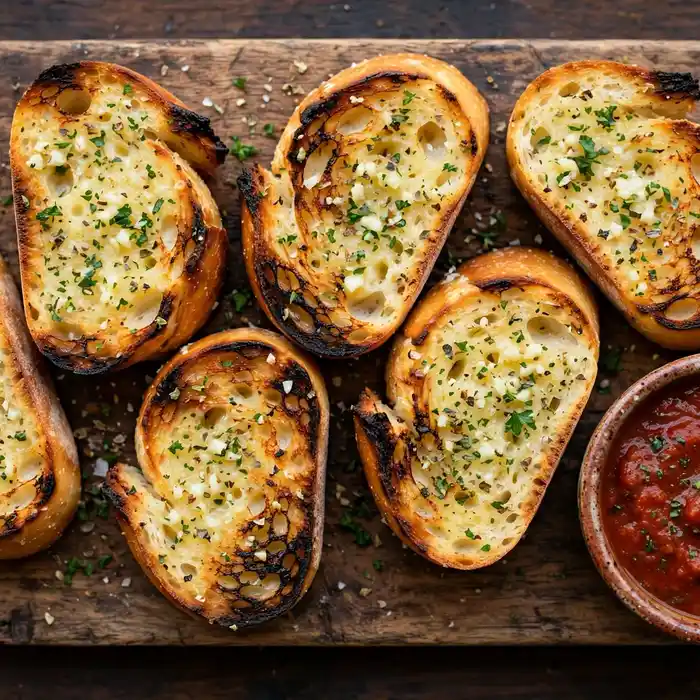
- Broiler finish option that elevates the result. Two minutes under a hot broiler after the initial bake produces a slightly charred, blistered surface with a more complex flavor and a dramatic visual contrast between the dark tips and the golden center.
Ingredients You’ll Need
Recipe Timing
| Detail | Info |
|---|---|
| Servings | 8 pieces (from 1 loaf) |
| Difficulty | Easy |
| Course | Side Dish, Appetizer |
| Cuisine | Italian-American |
| Prep Time | 5 minutes |
| Cook Time | 15 minutes |
| Total Time | 20 minutes |
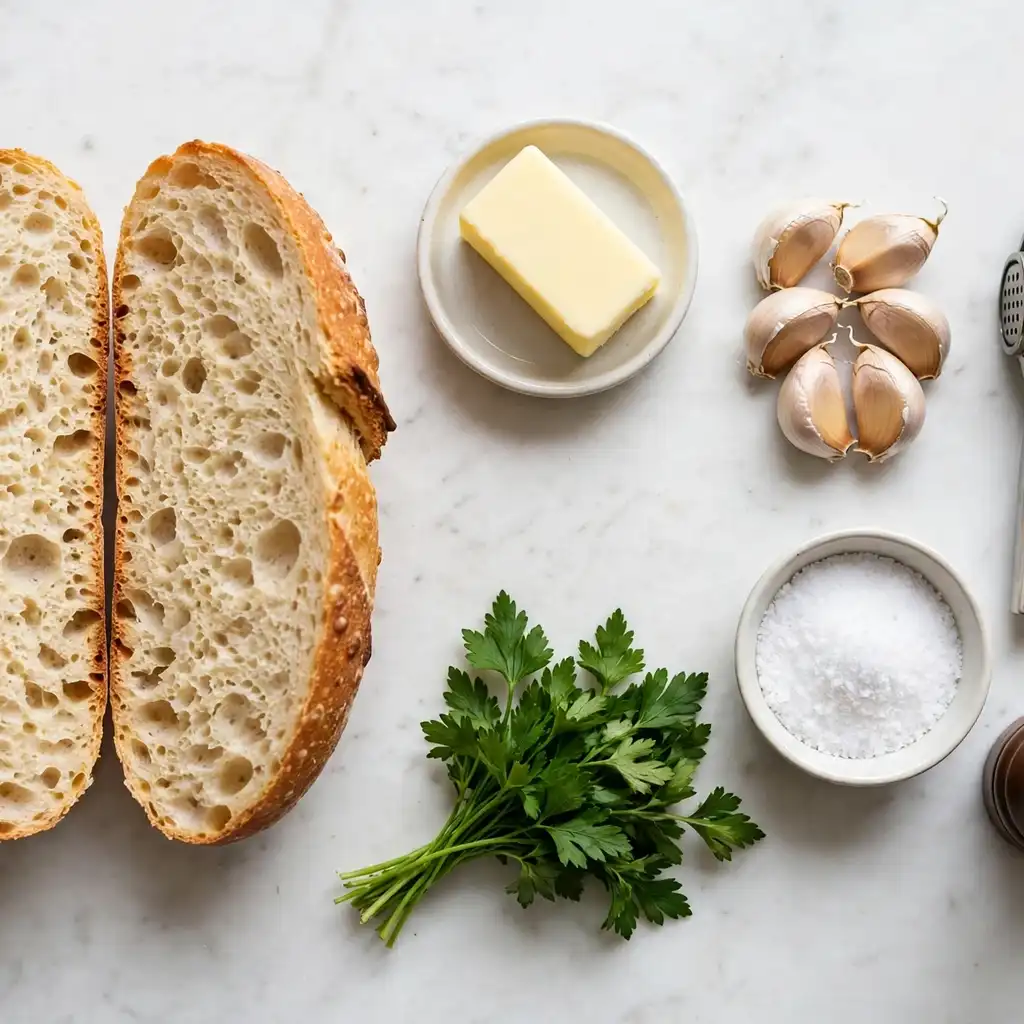
The most important ingredient in this recipe is the bread, and specifically its structure. A loaf with an open, airy crumb and a reasonably thick crust holds up best to the butter without becoming soggy: Italian bread, French baguette, ciabatta, or a standard white deli loaf all work well. Avoid very soft sandwich bread, which has too little structure and becomes paste-like after absorbing the butter during baking. The loaf should be at least one day old if possible: a slightly stale loaf absorbs the garlic butter without the crumb collapsing, and the drier surface crisps more effectively in the oven.
For the garlic, use fresh cloves only. Garlic powder produces a fundamentally different, noticeably flatter flavor. The process of briefly cooking fresh minced garlic in butter activates and mellows the garlic’s volatile sulfur compounds through gentle heat, which is something that dried powder cannot replicate regardless of quantity. Use 4 cloves for a moderate garlic presence; go up to 6 for a more assertive flavor.
For the butter, use unsalted so you control the salt level. The butter should be melted in the pan when the garlic goes in, not just softened: room-temperature butter spread directly onto the bread produces a different result than butter that has had the garlic cooked into it first.
- 1 Italian or French bread loaf (about 400g / 14 oz), halved lengthwise. The structural base. A loaf with a firm crust and open crumb handles the butter and the oven heat better than soft bread.
- 115g (1/2 cup / 8 tablespoons) unsalted butter. The primary carrier of flavor. The garlic blooms in this butter before any bread is touched.
- 4 to 6 cloves garlic, very finely minced or pressed. Fresh garlic only. The finer the mince, the more evenly it distributes through the butter and across the bread surface.
- 2 tablespoons fresh flat-leaf parsley, very finely chopped. Added to the butter off the heat. The parsley adds a fresh green note and color that balances the richness of the butter. Dried parsley works as a substitute but the flavor is noticeably less vibrant.
- 1/4 teaspoon fine sea salt. Added to the garlic butter to season it. Adjust based on how salty your butter is or how much the finished bread needs.
- 1/4 teaspoon black pepper (optional).
- Flaky sea salt, for finishing (optional but recommended). A very light scatter over the finished bread just before serving sharpens the overall flavor and adds a pleasant texture contrast.
Allergen and Dietary Disclosure
This recipe contains dairy (butter) and gluten (bread loaf).
For a dairy-free version, replace the unsalted butter with a high-quality plant-based butter block (not a soft spread, which has too much water). The technique stays identical: melt it in the pan and cook the garlic in it. Vegan butter at a 1:1 substitution works well and the finished garlic bread is nearly indistinguishable from the dairy version.
For a gluten-free version, use a gluten-free loaf with a firm enough crust to hold up through baking: a rice flour-based or chickpea flour-based gluten-free loaf works better than a very soft, crumbly one. The garlic butter and technique are naturally gluten-free.
Free from eggs and nuts as written. Not guaranteed safe for any specific allergy without checking all individual ingredient labels.
Step-by-Step Directions
Step 1: Preheat the Oven and Prep the Bread
Preheat the oven to 200°C (400°F). Line a large rimmed baking sheet with parchment paper or foil. Place the two halves of the loaf cut-side-up on the baking sheet, positioned so they don’t overlap. If the loaf is very round and rocks rather than sitting flat, make a small horizontal cut across the base of each half so they sit stable and level. An unstable half-loaf will slide as you spread the garlic butter, creating uneven coverage.
Step 2: Cook the Garlic in the Butter
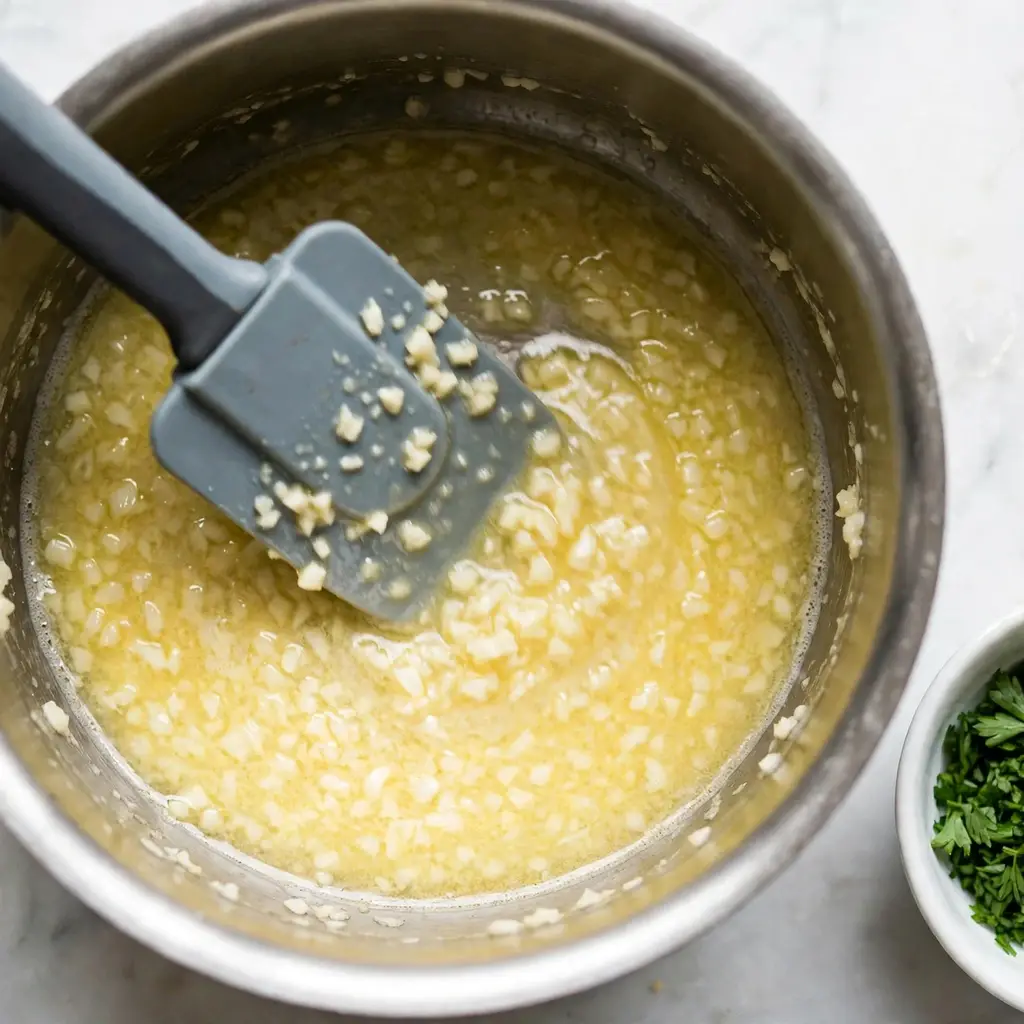
Place the butter in a small saucepan over the lowest heat setting. Once the butter is completely melted and just beginning to shimmer slightly at the surface but is not foaming or browning, add the minced garlic. Stir gently and continuously for 60 to 90 seconds. The garlic should smell intensely fragrant and look very slightly golden at the edges while remaining pale overall. Remove the pan from the heat the moment the garlic smells fully aromatic and before any piece turns brown: browned garlic at this stage will taste bitter in the finished bread. Stir in the salt, pepper, and chopped parsley.

Chef’s Note: The 60 to 90 seconds of garlic in warm butter is the step that separates genuinely good garlic bread from the version that tastes either raw and sharp or flavor-flat from garlic powder. The gentle heat converts the harsh allicin compounds in raw garlic into softer, sweeter sulfur compounds that taste recognizably of garlic but without the raw edge that can be overwhelming in a bread spread.
Step 3: Spread the Garlic Butter Generously
Pour the warm garlic butter evenly over both cut surfaces of the bread halves, using a pastry brush or the back of a spoon to spread it all the way to the edges and into the corners. Don’t be conservative: every part of the exposed crumb should be visibly glistening with butter. If any garlic pieces have settled to the bottom of the pan, scrape them out with a spoon and distribute them across the bread surface rather than leaving them behind.
Chef’s Note: Getting the butter to the very edges of the bread is more important than it sounds. The edges are where the bread is driest and most prone to over-crisping without enough fat. Buttered edges toast to a light golden color that has a pleasant crunch. Unbuttered edges can dry out and turn hard and flavorless. Cover the entire surface, edge to edge.
Step 4: Bake Open Until Golden
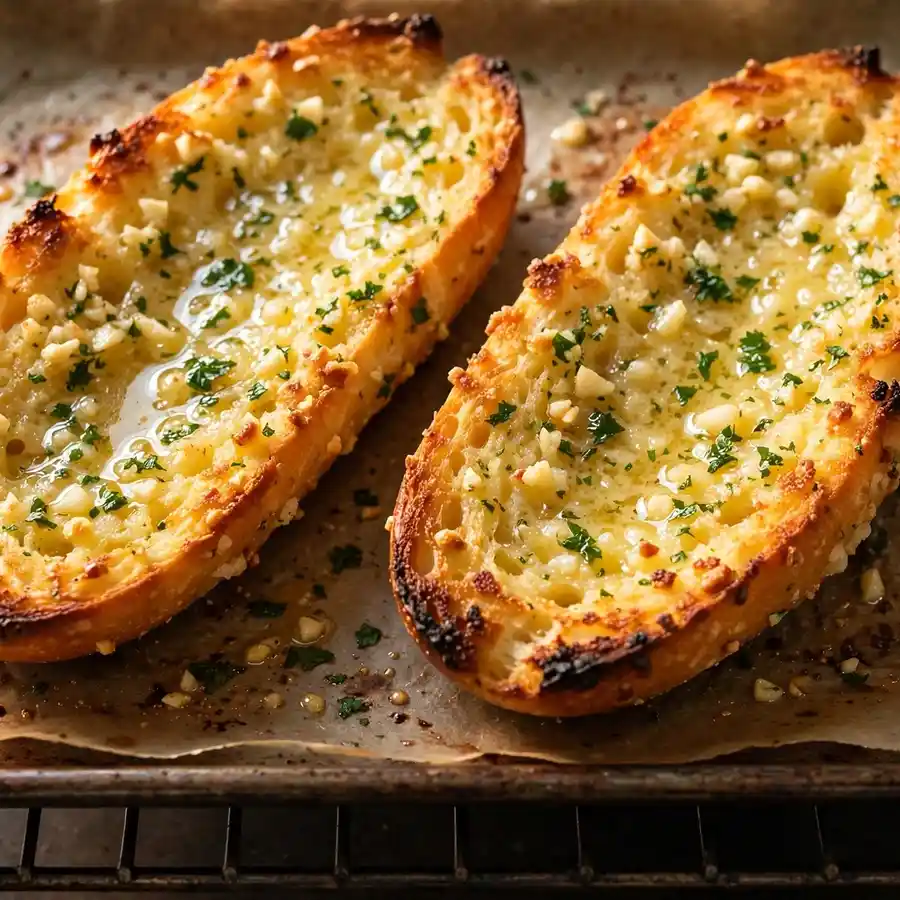
Place the baking sheet in the preheated oven on the center rack and bake, uncovered, for 10 to 12 minutes until the butter has been absorbed into the bread, the surface looks golden and slightly dry rather than shiny, and the edges have taken on a light golden-brown color. The bread should smell intensely of garlic and toasted butter at this stage.
Step 5: Broil for the Optional Charred Finish
If you want the blistered, slightly charred top that elevates garlic bread from good to genuinely excellent, switch the oven to the broil setting immediately after the 10 to 12 minute bake. Position the rack 10 to 12cm below the broiler element. Broil for 1 to 3 minutes, watching the bread constantly without stepping away, until the surface develops scattered dark brown patches and the edges are deeply golden. The difference between perfectly broiled and burnt happens in under 60 seconds at this stage. Pull the pan the moment you see the tips beginning to char and the surface going from golden to dark.
Chef’s Note: The broiler creates a surface-level Maillard browning on the bread that the standard bake alone doesn’t reach. The slightly bitter, toasty character of those dark patches against the rich, sweet garlic butter is the flavor contrast that makes broiled garlic bread taste more complex than the oven-only version. It is worth the 2 minutes of active watching.
Step 6: Slice and Serve Immediately
Remove the baking sheet from the oven and leave the bread to cool for 2 minutes: the butter is extremely hot directly from the broiler and the bread needs a brief moment to firm back up before slicing so it holds a clean edge. Scatter a very light pinch of flaky sea salt over the surface if using. Slice each half into individual pieces (approximately 4 per half for a standard loaf), cutting straight down through the crust with a serrated bread knife in a single decisive motion rather than sawing back and forth, which compresses the soft interior. Serve immediately.
Common Mistakes and Troubleshooting
| Problem | Cause | Solution |
|---|---|---|
| Bread soggy and soft rather than crisp | Bread wrapped in foil; spread applied too thick and cold | Bake uncovered cut-side-up; always melt the butter and cook the garlic before spreading |
| Garlic tastes raw and sharp | Garlic not cooked in the butter before spreading; spread applied without warming | Cook minced garlic in butter for 60 to 90 seconds before it touches the bread |
| Garlic flavor too faint | Garlic powder used instead of fresh; garlic cooked too long before the bread step | Use fresh minced cloves; cook only until aromatic, not golden-brown |
| Bread burnt under the broiler | Walked away; rack positioned too close | Never leave during the broil; position rack 10 to 12cm from element; 1 to 3 minutes maximum |
| Butter pooled at center rather than spreading evenly | Butter spread from center outward; bread not flat on the pan | Use a pastry brush and work from edge to edge; stabilize round loaves with a small base cut |
| Bread surface dry and flavorless at the edges | Not enough butter used; edges left unbuttered | Use the full 115g of butter; ensure every part of the cut surface including the corners is coated |
Variations and Substitutions
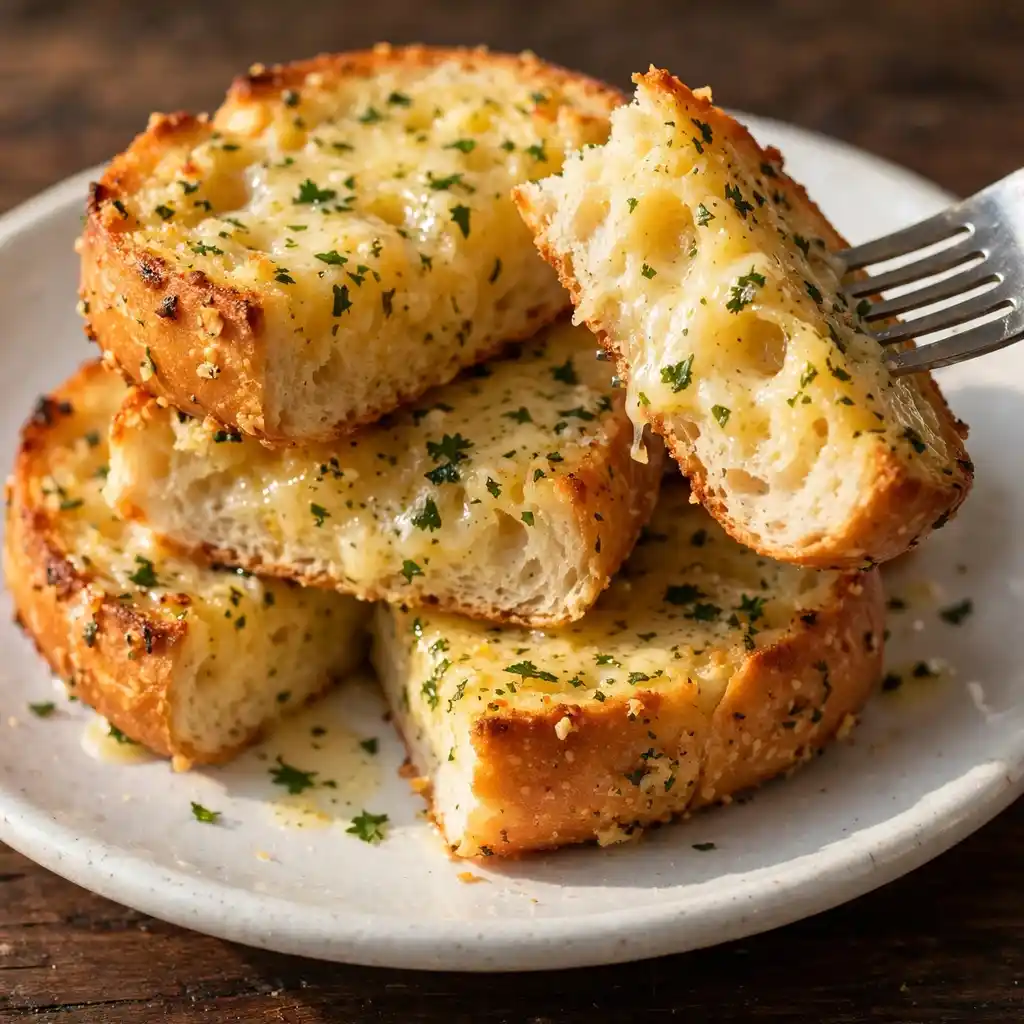
Cheesy Garlic Bread: After spreading the garlic butter, scatter 1 cup of shredded mozzarella and 2 tablespoons of freshly grated Parmesan evenly over both halves before baking. The cheese melts during the 10 to 12 minute bake and bubbles under the broiler into an irresistibly golden, slightly crisp layer, much like the bubbling top of our Cheesy Potatoes. This is the version that most people request by name when they have had it once.
Roasted Garlic Butter Version: Replace the briefly cooked fresh garlic with an entire head of roasted garlic, squeezed from its papery skin after 45 minutes at 200°C (400°F) and mashed into the softened butter. Roasted garlic is sweet, nutty, and mild with none of the sharpness of raw or briefly-cooked fresh garlic. This version is worth making when you have the time and want a softer, more complex garlic character.
Herb and Chilli Garlic Bread: Add 1/4 teaspoon of dried red chilli flakes and 1 teaspoon of dried Italian herb blend (a mix of oregano, basil, and thyme) to the garlic butter alongside the parsley. The chilli adds a mild background warmth and the dried herbs add a more assertive herbal complexity that works particularly well alongside pasta dishes and soups.
Garlic Bread Toast (Baguette Slices): Slice a full baguette diagonally into 2cm pieces rather than halving a larger loaf lengthwise. Brush each slice on the cut face with the garlic butter and bake on a flat baking sheet at 200°C (400°F) for 8 to 10 minutes. The individual slices develop a more pronounced crunch all the way through than the larger half-loaf version, which makes them ideal as a crunchy appetizer alongside dips.
Garlic Flatbread: Substitute the Italian loaf with a large naan or a plain flatbread. Brush with the same garlic butter and bake on a baking sheet at 220°C (425°F) for 5 to 7 minutes until the edges are lightly crisped and the surface is golden. Flatbread garlic bread cooks faster and develops a different, chewier texture that works particularly well alongside soups and curries.
Olive Oil Garlic Bread: Replace the butter entirely with 80ml (1/3 cup) of good-quality extra virgin olive oil. Cook the garlic in the olive oil over the lowest heat for 60 seconds until fragrant, add the parsley and salt, and brush over the bread. The finished result is lighter and slightly more savory than the butter version, with a distinct fruity olive oil flavor that pairs well with Mediterranean-style meals.
Serving Suggestions
- Alongside pasta dishes. Garlic bread is the natural companion to any pasta with a tomato or cream sauce. The bread handles sauce that accumulates at the bottom of the bowl in a way that no other side dish does.
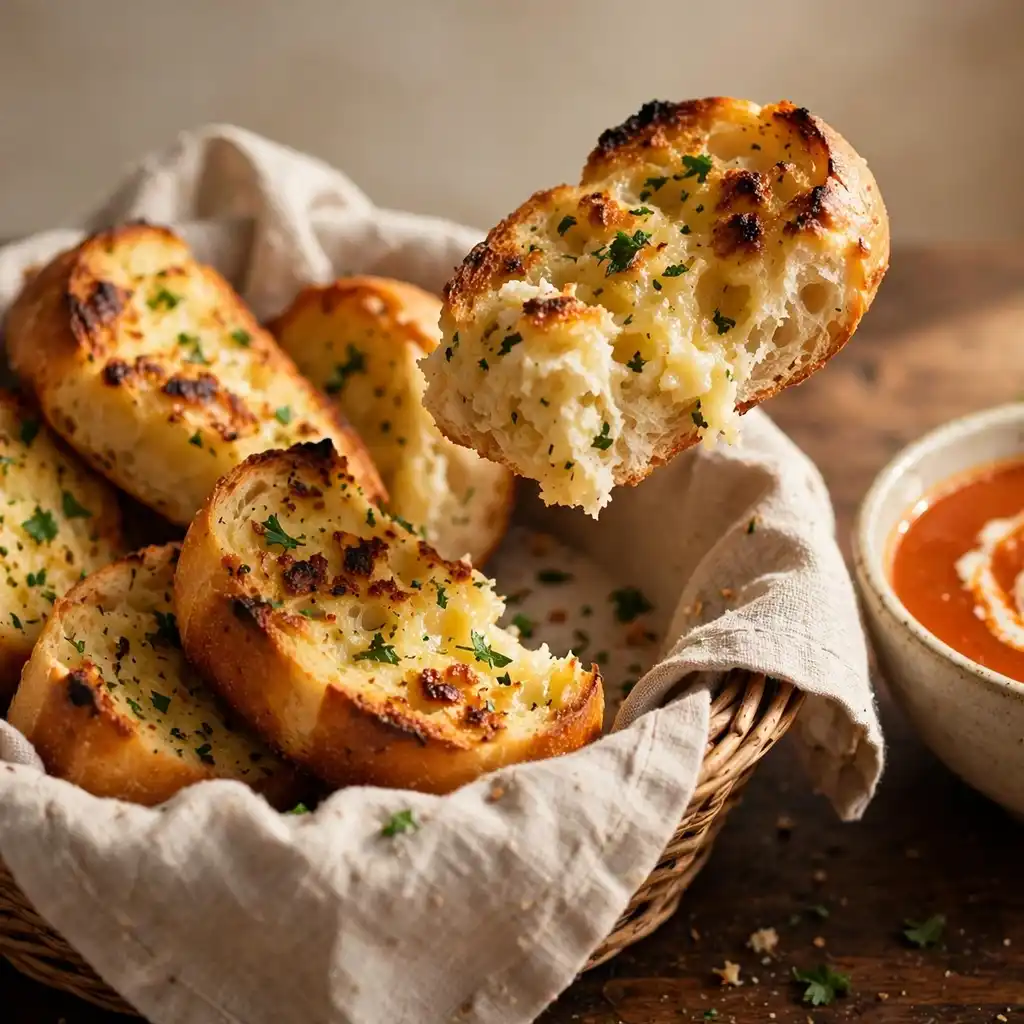
- With soup for a complete meal. A bowl of tomato soup, lentil soup, or vegetable minestrone alongside two pieces of garlic bread is a complete dinner that takes under 30 minutes to put together. The bread provides the substance the soup alone doesn’t.
- As an appetizer before a main course. Set a basket of warm garlic bread on the table before the main arrives. It keeps people satisfied during the wait and sets a warm, casual tone for any dinner.
- With a green salad for a light lunch. A simple romaine salad with a lemon vinaigrette alongside two pieces of garlic bread is a genuinely satisfying light lunch that comes together in the time the bread is in the oven.
- As a pizza alternative. Top the garlic-buttered bread halves before baking with tomato sauce, shredded mozzarella, and any toppings you have available. Bake at 220°C (425°F) for 12 to 15 minutes for an open-faced pizza that is faster than making pizza dough.
- Alongside grilled chicken or beef. Garlic bread alongside a simply grilled piece of chicken or a seared steak turns a two-component dinner into something that feels significantly more complete and considered.
Tips for the Best Results
- Use a slightly stale or day-old loaf. A fresh loaf has high internal moisture, which means the bread surface absorbs the butter more slowly and can become soggy before crisping. A loaf that is 12 to 24 hours old has lost some of that surface moisture through evaporation and absorbs the butter more evenly, producing a more uniformly crisp result.
- Never skip the open bake. Foil-wrapped garlic bread steams rather than bakes: the moisture from the bread has nowhere to go and the surface never develops a crust. Baking the halves cut-side-up with no foil for the first 10 to 12 minutes is what produces a crisp surface rather than a soft, steamed one.
- Watch the garlic constantly while it cooks. The window between perfectly bloomed garlic and burnt garlic in butter is approximately 30 seconds over medium-low heat. Keep the heat very low, stir continuously, and pull the pan the moment the kitchen smells deeply of garlic but before any pieces go past pale gold. Burnt garlic cannot be corrected and will make the entire bread taste bitter.
- Slice with a serrated knife in one motion. A single decisive press-and-draw motion with a good serrated knife cuts through the crisp crust cleanly. A back-and-forth sawing motion compresses the soft interior and drags the garlic butter from the top down through the crumb, making the interior greasy rather than leaving it light and soft.
- Serve within 5 minutes of removing from the oven. Garlic bread is at its best within the first 5 minutes after baking: the exterior is at maximum crunch and the interior is still warm and soft. As it sits, the steam from the interior softens the crust from the inside and the texture degrades. Make it as close to serving time as possible.
Storage Tips
Refrigerator
Leftover garlic bread keeps in an airtight container or sealed bag in the refrigerator for up to 2 days. The crust softens significantly in the fridge because the bread continues releasing moisture that re-softens the surface. Reheat from the fridge rather than eating cold: cold garlic bread has a dense, slightly greasy texture that doesn’t represent the recipe at its best. Wrap individual pieces in foil to prevent them from drying out completely.
Freezer
Garlic bread freezes well, both before and after baking. To freeze unbaked: prepare the buttered bread halves completely, wrap tightly in plastic wrap and then foil, and freeze for up to 2 months. Bake directly from frozen at 200°C (400°F) for 15 to 18 minutes, adding 3 to 5 minutes to the standard bake time, then broil as usual. To freeze baked: cool completely, wrap individual pieces in foil, and freeze for up to 1 month. Reheat from frozen directly in the oven.
Reheating
From the fridge: unwrap and place cut-side-up on a baking sheet. Reheat at 175°C (350°F) for 5 to 7 minutes until warmed through and the crust has crisped back up. The microwave produces soggy garlic bread that bears little resemblance to freshly baked: use the oven every time. From frozen (baked): place foil-wrapped pieces directly on a baking sheet at 190°C (375°F) for 10 to 12 minutes until heated through, then unwrap and return to the oven for 2 to 3 minutes uncovered to re-crisp the surface.
Nutrition Information
Per serving (1 piece, approximately 1/8 of the loaf, without cheese)
| Nutrient | Amount |
|---|---|
| Calories | 210 kcal |
| Protein | 4g |
| Carbohydrates | 25g |
| Fiber | 1g |
| Sugar | 2g |
| Total Fat | 11g |
| Saturated Fat | 6.5g |
| Cholesterol | 30mg |
| Sodium | 280mg |
| Vitamin C | 2mg |
| Calcium | 30mg |
| Iron | 1.5mg |
| Potassium | 65mg |
Nutrition values are approximate and may vary based on brands and portion sizes.
Why This Recipe Works
Cooking the garlic in the butter before applying it to the bread is a flavor chemistry decision with a measurable outcome. Raw garlic contains allicin, a sulfur compound responsible for its sharp, pungent edge. When garlic is exposed to low heat in fat for 60 to 90 seconds, the allicin partially converts into a range of more complex sulfur compounds including ajoene and polysulfides. These conversion products have a softer, sweeter, more complex garlic character than raw allicin, which is why briefly bloomed garlic tastes mellow and aromatic while raw garlic tastes sharp and can even be unpleasant in large quantities. The fat also acts as a carrier for these fat-soluble compounds, distributing them evenly across the entire bread surface when the butter is spread. Garlic powder bypasses this chemistry entirely and provides only a fraction of the flavor complexity that fresh garlic developed in butter produces.
Baking the bread uncovered cut-side-up rather than wrapping it in foil is the technique decision that determines whether the surface becomes crisp or steamed. When bread is wrapped in foil and heated, the moisture from both the butter and the bread’s interior has nowhere to go and condenses back onto the cut surface, which softens rather than crisps it. Open baking allows surface moisture to evaporate into the oven cavity, which means the bread surface dehydrates slightly during the bake and develops a crisp outer layer. The Maillard browning reactions that produce the golden color and complex toasty flavor also require the surface temperature to exceed approximately 140°C (284°F): that temperature is only reached on a dry surface, not a moist one, which is another reason open baking produces a better result.
The broiler finish adds a layer of flavor that the standard bake cannot produce on its own. Broiling exposes the bread surface to radiant heat from directly above at temperatures that exceed 280°C (535°F) at the element. This produces very rapid Maillard browning and a small amount of caramelization at the butter’s sugar content, creating the slightly bitter, charred tips and blistered patches that contrast with the sweet, golden center. The combination of golden baked center and slightly charred tips is why broiled garlic bread tastes more complex and more craveable than a version that only goes through the standard bake.
The butter quantity in this recipe (115g for one standard loaf) is generous by comparison with some versions that use half that amount. The reason is structural: a loaf of Italian or French bread has an open, absorbent crumb that draws in fat readily during baking. A light spread of butter disappears into the bread within the first 5 minutes of baking and leaves the surface dry and flavorless by the time the bread has developed color. A generous amount of butter provides enough fat to both absorb into the crumb and maintain a coating on the surface through the full bake, which is why the finished bread tastes rich and satisfying rather than merely toasted.
I’ve tested this recipe with butter at three stages: straight from the fridge (very cold, applied as a thick paste), softened to room temperature (spreadable), and fully melted with the garlic cooked in it. The cold version was impossible to spread evenly and produced hard, unbuttered patches. The softened version spread more evenly but the garlic needed to be raw in the spread, which produced a sharper, less pleasant garlic flavor. The melted-and-cooked version spread in a thin, completely even layer, carried the bloomed garlic flavor throughout, and produced the most consistently good results across every test batch.
Frequently Asked Questions
Can I make garlic bread ahead of time?
Yes. Prepare the buttered bread halves completely, wrap tightly in plastic wrap, and refrigerate for up to 24 hours before baking. Remove from the refrigerator 10 minutes before baking to take the chill off, then bake as directed. Alternatively, freeze the prepared but unbaked halves for up to 2 months and bake directly from frozen, adding 3 to 5 minutes to the bake time. The make-ahead method works well for dinner parties where oven space is limited at serving time.
Why does my garlic bread come out soggy?
Soggy garlic bread almost always comes from one of two causes: the bread was wrapped in foil during baking, which traps moisture and steams the surface rather than crisping it, or the butter was spread on cold and thick rather than applied warm as a thin, fluid layer. Bake uncovered cut-side-up always, and always melt the butter and cook the garlic into it before it touches the bread. These two steps together are what produce a crisp result every time.
Can I use garlic powder instead of fresh garlic?
Garlic powder produces a noticeably different and less complex result than fresh garlic cooked in butter. If you must use it, stir 1 to 1.5 teaspoons of garlic powder into the melted butter off the heat (no cooking needed since the powder doesn’t need to bloom the same way fresh garlic does) and apply immediately. The flavor will be present but flatter and less aromatic than the fresh version. For the best possible garlic bread, fresh cloves are the right choice.
How do I know when garlic bread is done baking?
Garlic bread is ready when the surface looks golden and slightly dry rather than shiny, the edges have turned a light golden-brown, and the kitchen smells intensely of garlic and toasted butter. This typically takes 10 to 12 minutes at 200°C (400°F) for a standard loaf. If proceeding to the broiler, an additional 1 to 3 minutes produces the blistered, darker top. The most reliable visual cue is the color change at the edges: once the outermost edges have gone from pale to golden-brown, the base bake is complete.
Is garlic bread gluten-free?
As written, no: the recipe uses a regular wheat bread loaf. To make a gluten-free version, use a firm gluten-free loaf, ideally one with a reasonably sturdy crust that won’t collapse under the butter. The garlic butter itself contains no gluten. The baking technique stays identical, though gluten-free bread can go from golden to over-browned faster than wheat bread, so watch the broiler stage particularly closely.
How much garlic should I use?
This recipe uses 4 to 6 cloves for a standard loaf, which produces a moderate to assertive garlic presence. Four cloves delivers garlic that is clearly present but not dominant. Six cloves gives a dish where garlic is unmistakably the lead flavor. For a very mild version suitable for people who are sensitive to garlic, use 2 cloves and extend the cooking time in the butter to 2 minutes, which mellows the flavor further. For maximum garlic intensity, roast a full head of garlic and use all the squeezed cloves in place of the sautéed fresh garlic.
Can I add cheese to garlic bread?
Yes, and it is a popular variation. After spreading the garlic butter, scatter shredded mozzarella and a small amount of freshly grated Parmesan over the cut surfaces before baking. The mozzarella melts during the bake and the Parmesan browns slightly under the broiler, adding a sharp, slightly crispy top layer over the garlic butter. Use about 1 cup of mozzarella and 2 tablespoons of Parmesan for a standard loaf. Add the cheese before the bread goes into the oven rather than partway through.
Conclusion
The difference between garlic bread that people reach for seconds of and a version that disappears politely comes down to two steps: cooking the fresh garlic in the butter before it touches the bread, and baking the bread uncovered so the surface crisps rather than steams. Both take under 2 minutes of active effort. Neither requires any skill beyond paying attention. This garlic bread recipe is something you can make on a weeknight without planning, from ingredients you are likely already keeping in the kitchen, and it will be the most reliably appreciated thing on the table. Make it once properly and you will not go back to the frozen version.
If you loved this recipe, save it to your easy side dish recipes Pinterest board so you can find it easily later, and serve it alongside Avocado Toast for a brunch spread that covers both bases. For more new recipes follow thecookingvibes pinterest account.
Easy Garlic Bread
Ingredients
Equipment
Method
- Preheat oven to 200°C (400°F). Line a baking sheet with parchment. Place loaf halves cut-side-up on the sheet.
- Melt butter in a small saucepan over the lowest heat. Add minced garlic and stir continuously for 60 to 90 seconds until deeply fragrant and very lightly golden at the edges. Remove from heat. Stir in parsley, salt, and pepper.
- Brush warm garlic butter generously over both cut surfaces, working from edge to edge including the corners.
- Bake on center rack uncovered for 10 to 12 minutes until golden and slightly dry at the surface with golden-brown edges.
- Optional: Switch to broil, position rack 10 to 12cm from element, and broil 1 to 3 minutes, watching constantly, until blistered and charred at the tips.
- Cool 2 minutes. Add flaky salt if using. Slice with a serrated knife and serve immediately.
Notes
- Cook garlic in butter over the lowest heat possible: browned garlic tastes bitter and cannot be corrected.
- Always bake uncovered: foil-wrapped garlic bread steams and stays soft rather than crisping.
- Use a slightly stale loaf for the crispest result; fresh bread can become soggy before crisping.
- Serve within 5 minutes of coming out of the oven for maximum crunch.