Creamy Cheesy Potatoes — Bubbling Cheese, Tender Layers, One Dish
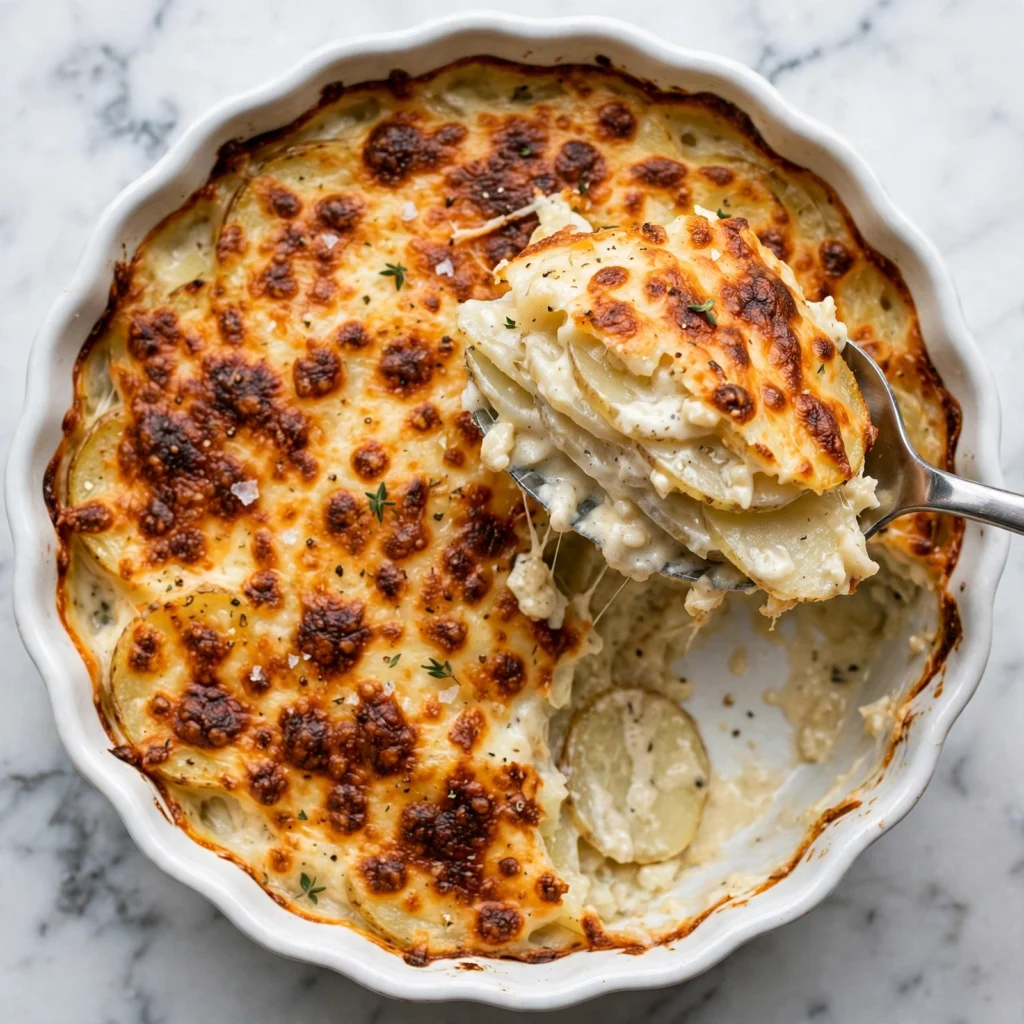
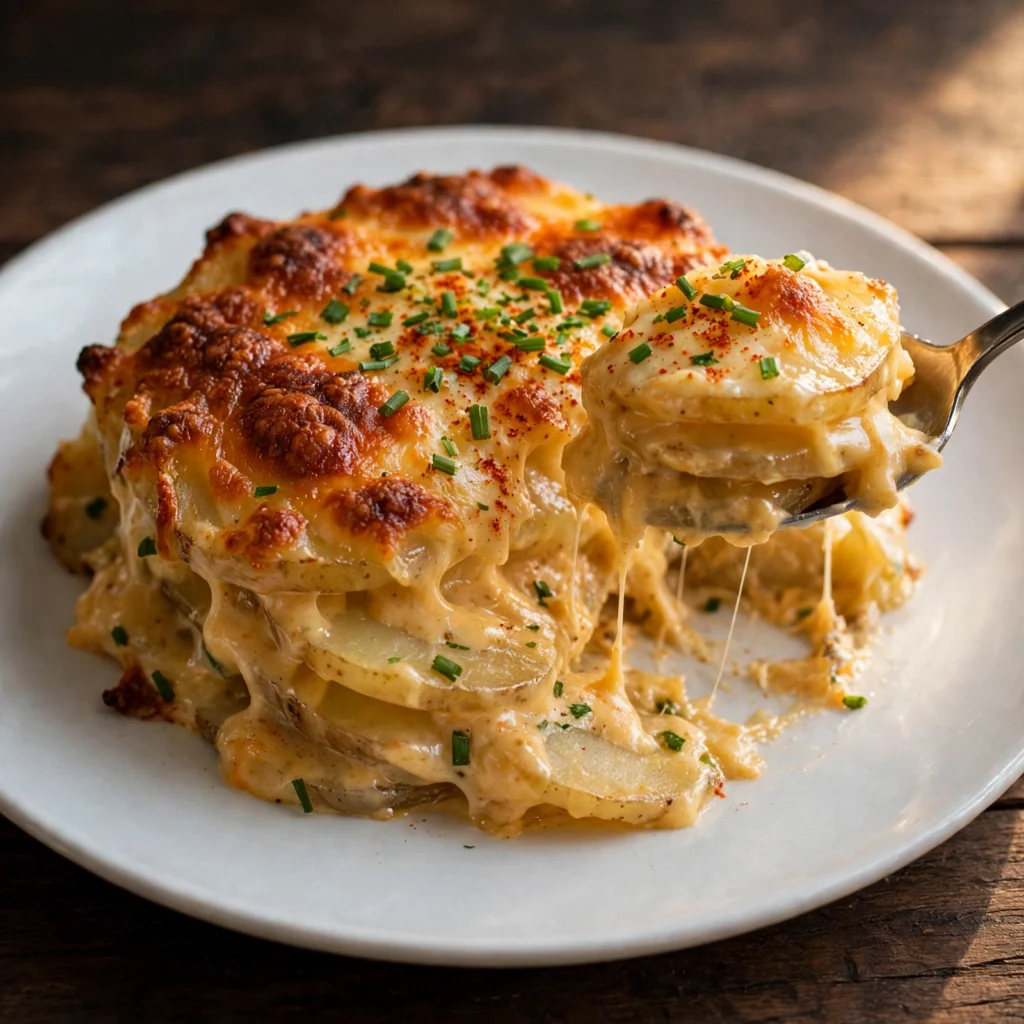
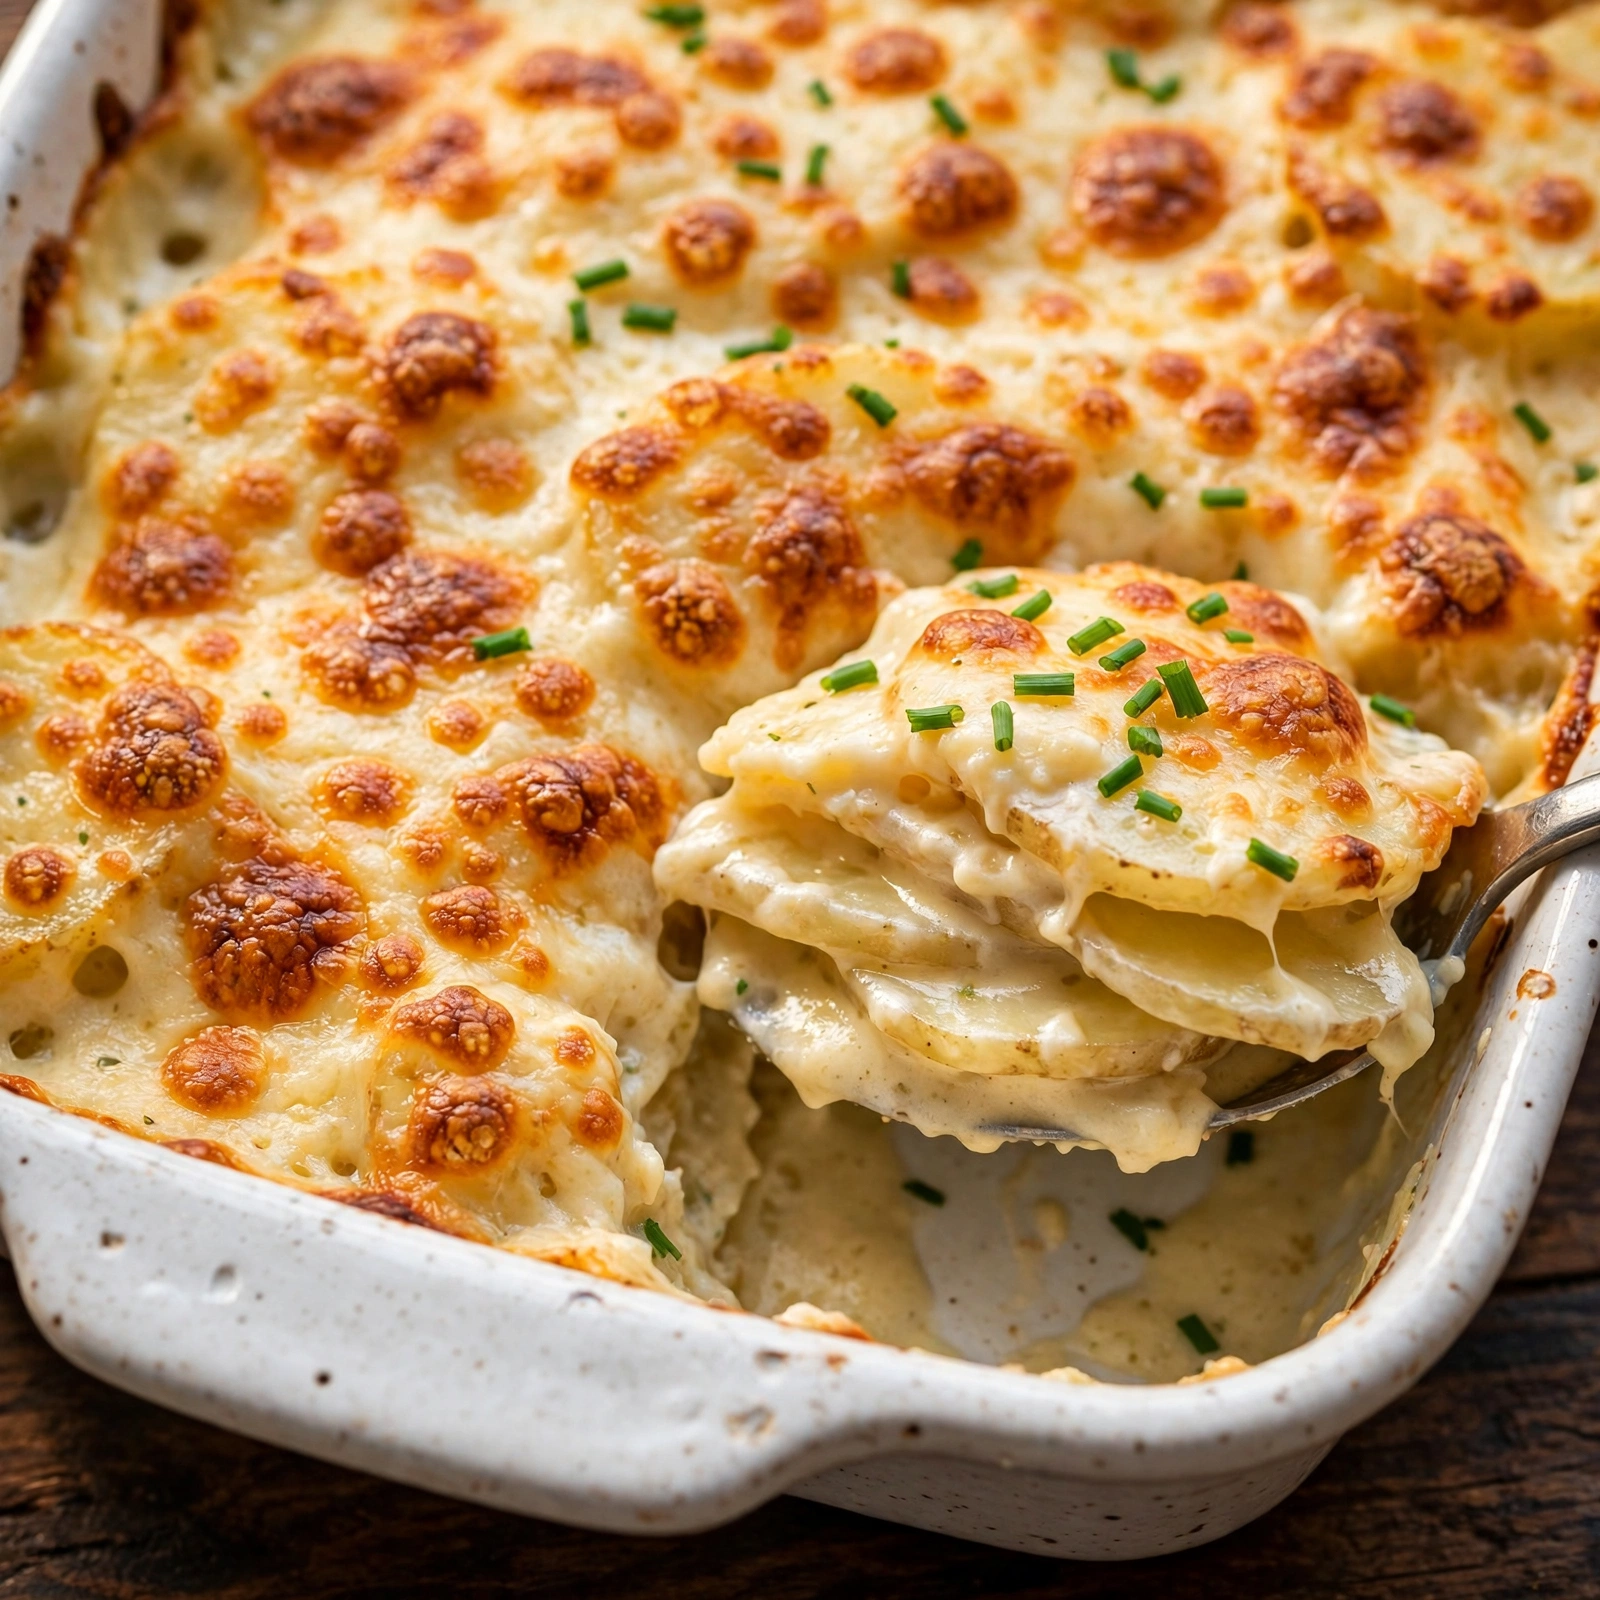
If there’s one side dish that consistently clears a table faster than the main course, it’s a properly made pan of cheesy potatoes. The edges are golden and crisped from the oven heat, the cheese across the top has gone from pale to deeply browned in patches, and underneath all of that the potato layers are so tender and saturated with garlic cream sauce that they almost melt when you press a spoon through them.
This cheesy potatoes recipe builds a full garlic and onion cream sauce on the stovetop first, then layers it with thinly sliced Yukon Gold potatoes and two types of cheese before it goes into the oven. Yukon Golds hold their shape better than russets during the baking process while still becoming completely tender, which means each serving holds together on the plate rather than collapsing into a loose pile. The recipe makes eight generous servings, works for weeknight dinners and holiday tables equally well, and reheats better than almost any other potato dish you can make.
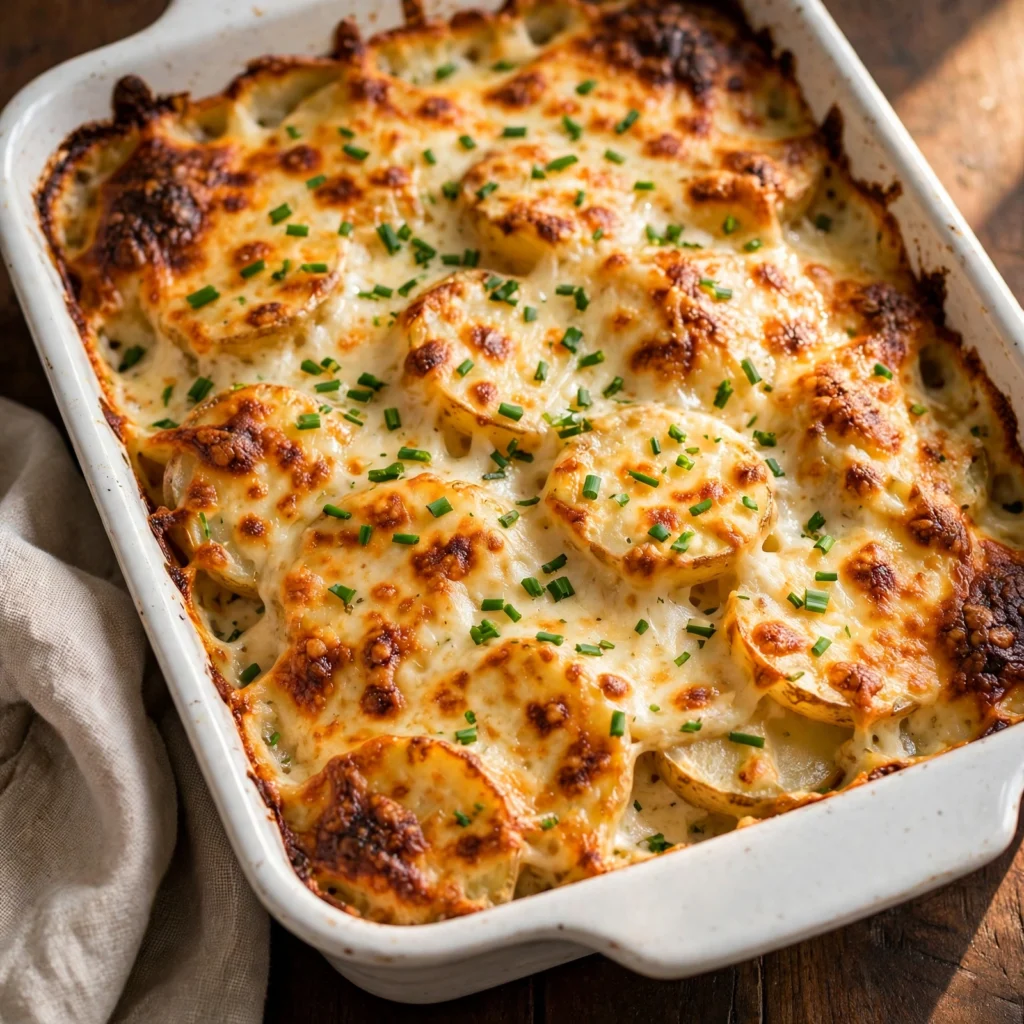
Table of Contents
- Why You’ll Love This Recipe
- Ingredients You’ll Need
- Allergen and Dietary Disclosure
- Equipment Needed
- Step-by-Step Directions
- Common Mistakes and Troubleshooting
- Variations and Substitutions
- Serving Suggestions
- Tips for the Best Results
- Storage Tips
- Nutrition Information
- Why This Recipe Works
- Frequently Asked Questions
- Conclusion
Why You’ll Love These Cheesy Potatoes
- Two-cheese top that browns rather than just melts. Sharp cheddar and Gruyère together produce a surface that caramelizes to a deep golden in the oven rather than simply softening into a white, undistinguished layer. The Gruyère contributes a nutty complexity that shredded mozzarella alone never achieves.
- Built-from-scratch garlic cream sauce in 8 minutes. The sauce is sautéed onion, garlic, heavy cream, and broth with a pinch of nutmeg. It takes less time than opening a can of soup and produces a depth of flavor that condensed soup can’t match.
- Potatoes that hold their shape when served. Yukon Gold potatoes have a naturally waxy texture that keeps each slice intact through 55 minutes of baking. The slices stay layered and visible when you spoon them out rather than breaking into a homogenous mash.
- Eight generous servings from one dish. This is a casserole-format dish that scales to a crowd without any adjustments. Double the recipe in a larger pan for gatherings of 14 to 16 people.
- Better the next day. The cream sauce tightens overnight as it absorbs into the potato layers, and the flavors meld in a way that makes leftovers from this dish genuinely desirable rather than just acceptable.
Ingredients You’ll Need
Recipe Timing
| Detail | Info |
|---|---|
| Servings | 8 |
| Difficulty | Easy |
| Course | Side Dish |
| Cuisine | American |
| Prep Time | 15 minutes |
| Cook Time | 55 minutes |
| Total Time | 70 minutes |
Choose Yukon Gold potatoes over russets for this recipe. Russets have a higher starch content and break down during the long oven time, producing a looser, more mashed texture. Yukon Golds are waxy enough to hold their shape through 55 minutes of baking while still becoming completely tender. For even cooking, slice them to a consistent 3mm thickness; a mandoline slicer is the most reliable tool for this, though a sharp knife and steady hand works well too.
For the cheese, buy blocks and shred them yourself if possible. Pre-shredded cheese contains anti-caking starch that prevents it from melting as smoothly and produces a slightly grainy top layer. Freshly shredded cheddar and Gruyère melt into a glossy, even surface that browns more attractively.
For the Garlic Cream Sauce:
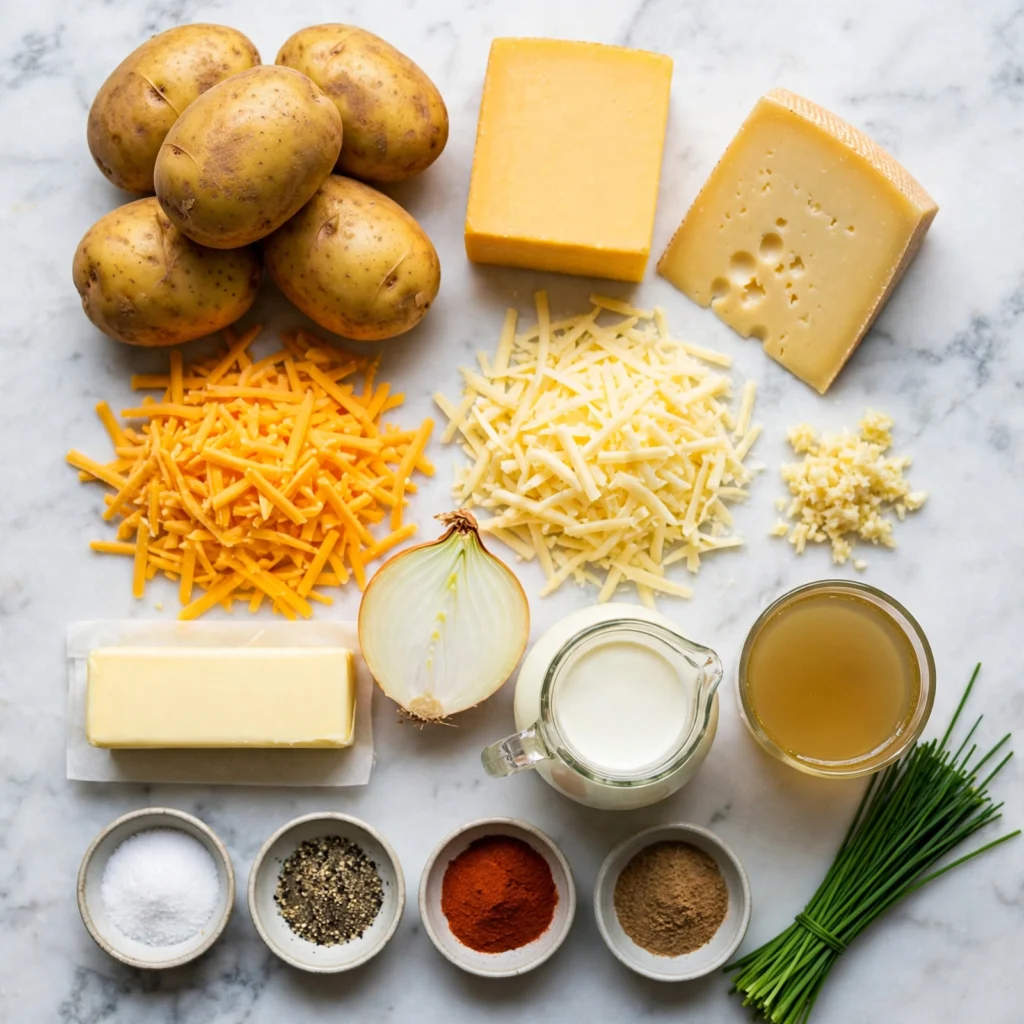
- 2 tbsp unsalted butter — For sautéing the aromatics. It adds a richness to the sauce base that olive oil doesn’t provide at this quantity.
- 1 medium yellow onion, finely diced — Cooked down until soft and translucent, it sweetens and adds body to the cream sauce without remaining identifiable as a separate component in the finished dish.
- 4 cloves garlic, freshly minced — The dominant aromatic flavor. Added after the onion has softened to prevent it from burning before the onion is done.
- 2 cups (480ml) heavy cream — Provides the fat and richness that turns this into a proper cream sauce rather than a thin liquid. Don’t substitute with half-and-half; the sauce needs the fat content of heavy cream to stay rich and thick after 55 minutes in the oven.
- 1 cup (240ml) vegetable broth, low sodium — Thins the cream to a pourable consistency and adds savory depth. Low-sodium broth gives you control over the final salt level.
- 1/4 tsp ground nutmeg — A classic addition to cream-based potato dishes. The amount is small enough that nutmeg won’t be identifiable as a separate flavor, but its absence is noticeable; it rounds out the cream and adds warmth that keeps the sauce from tasting flat.
- 1 tsp fine salt
- 1/2 tsp ground black pepper
- 1/2 tsp smoked paprika — Adds a subtle depth to the sauce and gives the finished dish a faint warmth. Regular sweet paprika is a direct substitute.
For the Potatoes and Cheese Layers:
- 1.5 kg (about 3.3 lbs) Yukon Gold potatoes, peeled and thinly sliced (about 3mm) — The main ingredient. See the selection notes above on why Yukon Gold is the right variety here.
- 2 cups (200g) sharp cheddar cheese, freshly shredded, divided — The primary cheese. Sharp cheddar has enough fat and flavor concentration to hold up through the long bake. Mild cheddar melts cleanly but contributes a noticeably flatter flavor.
- 1/2 cup (50g) Gruyère cheese, freshly shredded — Used in the top layer only. Its slightly nutty, complex flavor and high fat content make it brown beautifully under oven heat. Fontina or Comté are suitable substitutes with a similar flavor profile. Mozzarella works in a pinch but produces a stretchier, less complex top layer.
- 2 tbsp fresh chives or flat-leaf parsley, roughly chopped — For garnish only, scattered over the hot dish immediately before serving.
Allergen and Dietary Disclosure
This recipe contains dairy (butter, heavy cream, cheddar, and Gruyère). It does not contain gluten, eggs, or nuts in its base form. Check the vegetable broth label if you are managing a gluten sensitivity, as some brands add wheat-based thickeners or flavorings.
For a dairy-free version, replace the butter with olive oil, the heavy cream with full-fat unsweetened coconut cream (the thick canned variety, not the drinking variety), and use a plant-based cheddar-style shred. The sauce will be slightly less rich and the top layer won’t brown as deeply, but the dish holds together and tastes good. For a fully vegan version, substitute the vegetable broth for a richer mushroom broth to add more savory depth to compensate for the milder plant-based cheese.
This recipe has not been prepared in an allergen-free facility. Always verify individual product labels if you are managing a serious allergy.
Equipment Needed
- Large saucepan or skillet (at least 3-litre capacity) — For building the garlic cream sauce before it goes into the baking dish. A wide saucepan allows the onion to soften evenly; a narrow, deep pot keeps heat concentrated at the bottom and can cause uneven cooking of the aromatics.
- 9×13 inch (23×33 cm) baking dish — The standard size for a recipe at this volume. A smaller dish stacks the potatoes too deep, which prevents the center layers from cooking through fully in the allotted time. A ceramic or glass dish works well; both retain heat evenly during baking.
- Mandoline slicer or sharp chef’s knife — For cutting potatoes to a consistent 3mm thickness. Even slices are the only way to guarantee that every layer cooks at the same rate. Uneven slices produce a dish where some pieces are overcooked and others are still firm.
- Box grater — For shredding the cheese fresh. Block cheese grated by hand melts more smoothly than pre-shredded, and the difference in the finished top layer is visible.
- Aluminum foil — To cover the dish for the first 35 minutes of baking. The covered phase cooks the potatoes through with trapped steam before the foil comes off for the final cheese-browning stage. Skipping the covered phase risks a browned top with undercooked potato layers underneath.
Step-by-Step Directions
Step 1: Preheat the Oven and Prepare the Dish
Set your oven to 190°C (375°F). Lightly grease the 9×13 baking dish with butter or cooking spray on the bottom and all four sides. A greased dish prevents the potato layers from sticking to the edges and makes serving and cleanup significantly cleaner.
Step 2: Slice the Potatoes
Peel the potatoes and slice them into rounds approximately 3mm thick. Work at a steady pace and aim for as much consistency as possible in thickness. As you slice, drop the rounds into a large bowl of cold water to prevent them from browning before they go into the oven. Drain and pat them thoroughly dry with a clean kitchen towel before layering; excess water on the potato surfaces dilutes the cream sauce and can make the finished dish watery.

Chef’s Note: Patting the potato slices dry before layering is a step that directly affects the final sauce consistency. Water from unwashed or undried slices releases into the cream during baking and thins it from the inside. A dry potato slice absorbs the cream sauce rather than diluting it.
Step 3: Build the Garlic Cream Sauce
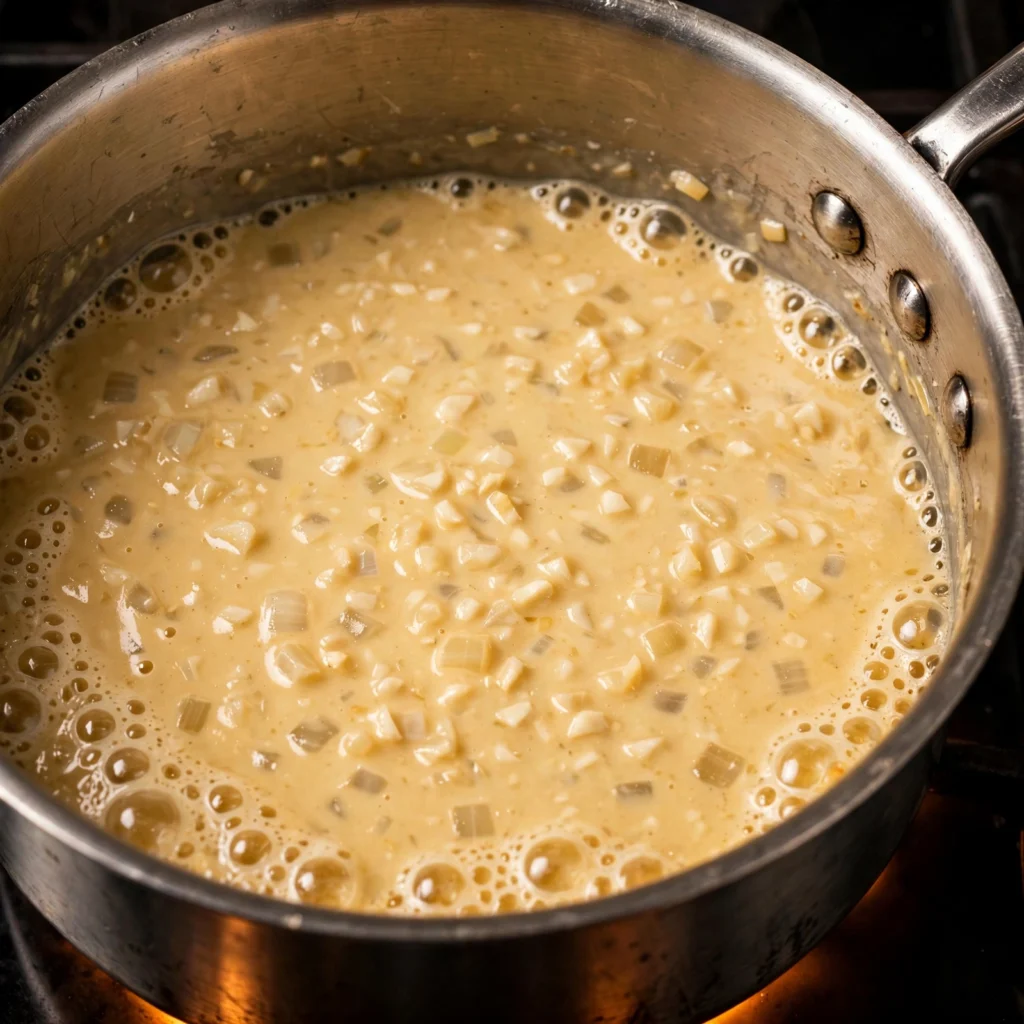
Melt the butter in your large saucepan over medium heat until it stops foaming. Add the finely diced onion and cook, stirring occasionally, for 5 to 6 minutes until the onion is soft and translucent with no raw bite remaining. Add the minced garlic and stir continuously for 60 seconds until fragrant; the garlic should smell sharp and aromatic but not take on any color.
Pour in the heavy cream and vegetable broth together. Add the salt, pepper, smoked paprika, and nutmeg. Stir to combine and increase the heat to medium-high. Bring the sauce to a gentle simmer, which takes about 3 to 4 minutes; small bubbles should break the surface regularly. Remove from heat.
Chef’s Note: Heating the cream sauce before it goes over the potatoes means it begins cooking the potato layers from the very first minute in the oven rather than spending the first 15 minutes just coming up to temperature. This shortens the covered baking time and produces more even cooking through the center layers.
Step 4: Layer the Potatoes and Cheese
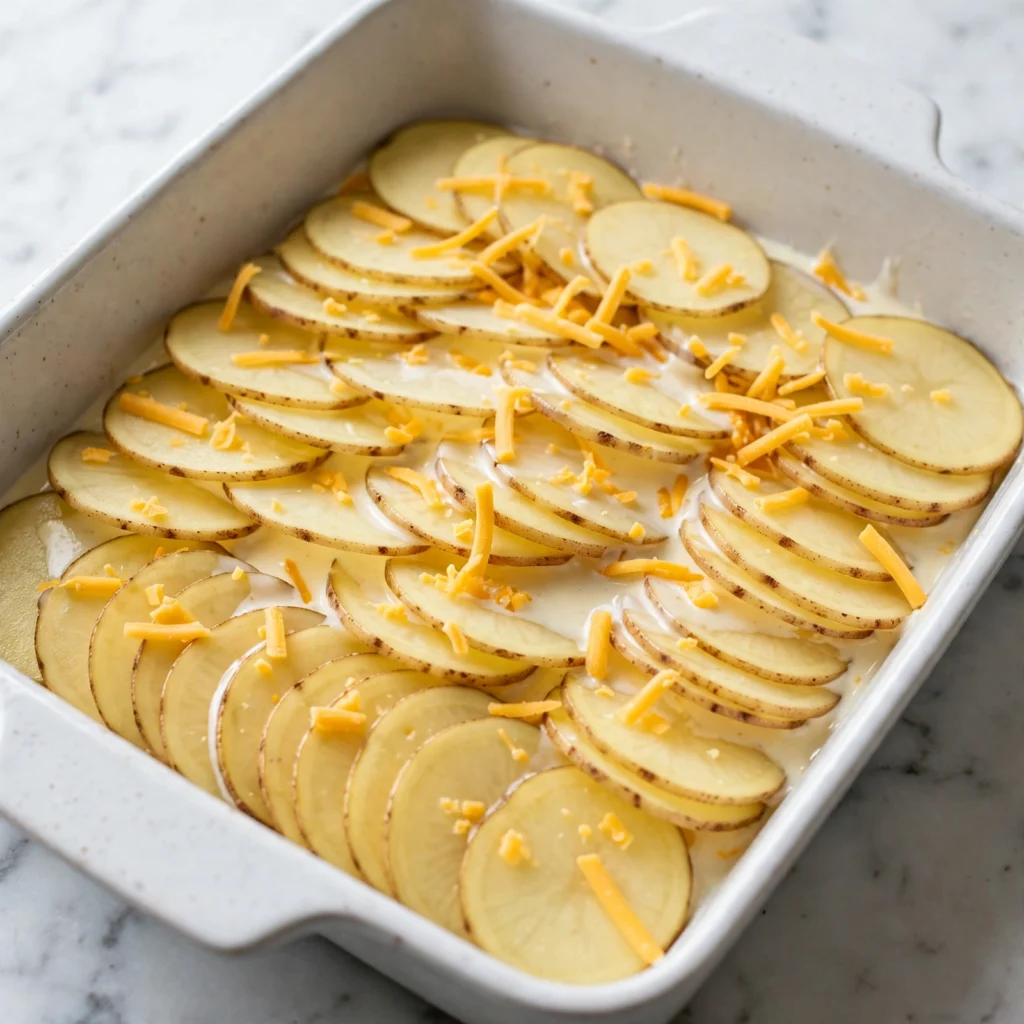
Arrange one-third of the dried potato slices in a single, even layer across the bottom of the prepared baking dish, overlapping them slightly like shingles. Pour one-third of the warm garlic cream sauce evenly over the potatoes. Scatter 1/2 cup of the shredded cheddar across the sauce layer. Repeat this sequence twice more with the remaining potatoes, sauce, and another 1/2 cup of cheddar. The final top layer should be the remaining cream sauce followed by the remaining 1/2 cup of cheddar and all of the Gruyère scattered across the very top.
Chef’s Note: Pouring the warm sauce over each potato layer before adding the cheese, rather than pouring all the sauce in at once at the end, means every layer of potatoes is individually coated and the sauce distributes evenly through the depth of the dish. A single pour over the top leaves the bottom layers undersauced and the top oversauced.
Step 5: Bake Covered
Cover the baking dish tightly with aluminum foil, sealing all four edges so steam cannot escape. Place on the center rack of the preheated oven and bake at 190°C (375°F) for 35 minutes. During this covered phase, the steam generated by the cream sauce cooks the potato layers through and the sauce thickens from the starch the potatoes release as they cook. Don’t open the oven or lift the foil during this phase; the steam pressure inside is doing the work.
At 35 minutes, test one potato slice at the edge of the dish with a thin knife. It should slide in and out with no resistance, indicating the potatoes are fully tender. If there’s still resistance, re-cover and return to the oven for another 5 to 8 minutes before testing again.
Step 6: Uncover and Brown the Top
Remove the foil carefully, as the trapped steam will release in a hot burst when the foil is lifted. Increase the oven temperature to 220°C (425°F). Return the uncovered dish to the oven for 15 to 20 minutes until the cheese surface is deeply golden brown with darker patches at the edges and corners, and the cream sauce is bubbling actively around the perimeter of the dish.
Chef’s Note: The temperature increase when you remove the foil is intentional. At 190°C the cheese melts but doesn’t develop color quickly enough before the sauce over-reduces. The jump to 220°C accelerates browning on the cheese surface in the same time frame that the sauce finishes thickening to a creamy, coating consistency.
Step 7: Rest and Garnish
Remove the dish from the oven and let it rest uncovered for 10 minutes before serving. The sauce is still actively bubbling when the dish comes out and needs time to settle and tighten around the potato layers. Serving immediately produces a loose, runny sauce that pools on the plate; waiting 10 minutes gives you a properly set cream sauce that coats each spoonful. Scatter fresh chives or parsley across the surface immediately before bringing the dish to the table.
Common Mistakes and Troubleshooting
| Problem | Cause | Solution |
|---|---|---|
| Sauce is watery and thin in the finished dish | Potato slices weren’t patted dry, or dish was served immediately without resting | Pat slices completely dry before layering. Always rest the finished dish for 10 minutes before serving; the sauce tightens significantly during that window. |
| Top layer browned before potatoes are cooked through | Foil wasn’t sealed tightly during the covered phase, or covered bake time was too short | Seal the foil edges firmly before baking. Always test potato doneness at the 35-minute mark before removing the foil. If still firm, give it another 5 to 8 minutes covered. |
| Potato layers stuck together in an undivided block | Slices were too thick or the dish was packed too tightly without sauce between each layer | Keep slices at 3mm. Pour sauce over each potato layer before adding the next, not just at the end. |
| Cheese on top is greasy and separated | Pre-shredded cheese was used, or oven temperature was too high during browning | Shred cheese fresh from the block. Keep the uncovered browning phase at 220°C (425°F) maximum; higher temperatures cause the fat in the cheese to separate before the surface can brown. |
| Cream sauce curdled and looks broken in the oven | Cream was brought to a rapid boil rather than a gentle simmer before going into the dish, or it overheated during baking | Bring the cream sauce only to a gentle simmer on the stovetop, not a full boil. If curdling appears during baking, reduce the oven temperature and keep covered for the remaining time. |
Variations and Substitutions
Loaded Cheesy Potatoes: Add 1 cup of drained canned corn, 1/2 cup of diced roasted red peppers (jarred, patted dry), and 1/4 teaspoon of cayenne pepper to the cream sauce before layering. The corn adds sweetness and texture; the roasted pepper adds color and a faint smoky depth.
Spicy Jalapeño Cheesy Potatoes: Fold 2 finely diced fresh jalapeños (seeds removed for mild heat, seeds left in for genuine heat) into the cream sauce before layering. Swap the Gruyère for a pepper jack-style dairy alternative for double heat. This version pairs particularly well alongside grilled chicken.
Cheesy Potatoes with Caramelized Onions: Instead of sautéing the onion until just translucent in Step 3, cook it over medium-low heat for 20 to 25 minutes, stirring occasionally, until it turns a deep golden brown and sweet. Caramelized onions bring a concentrated sweetness that pairs with the sharp cheddar in a noticeably different way than a regular sautéed onion does.
All-Cheddar Version: Skip the Gruyère and use 2.5 cups of sharp cheddar total. This version has a more straightforward, familiar flavor and is the right call when the Gruyère isn’t readily available or when you’re serving a crowd that wants a more classic cheesy potato experience.
Gluten-Free Version: The base recipe is already gluten-free as written, with one exception: verify your vegetable broth is certified gluten-free, as some brands include wheat-based thickeners. Everything else in the recipe needs no adjustment.
Lighter Version: Replace 1 cup of heavy cream with 1 cup of full-fat plain Greek yogurt added off the heat after the sauce simmers. The yogurt adds a tangy note and reduces the fat content noticeably. Don’t let the sauce boil after adding the yogurt; it can curdle at high heat, so stir it in at the end of Step 3 with the heat turned off.
Serving Suggestions
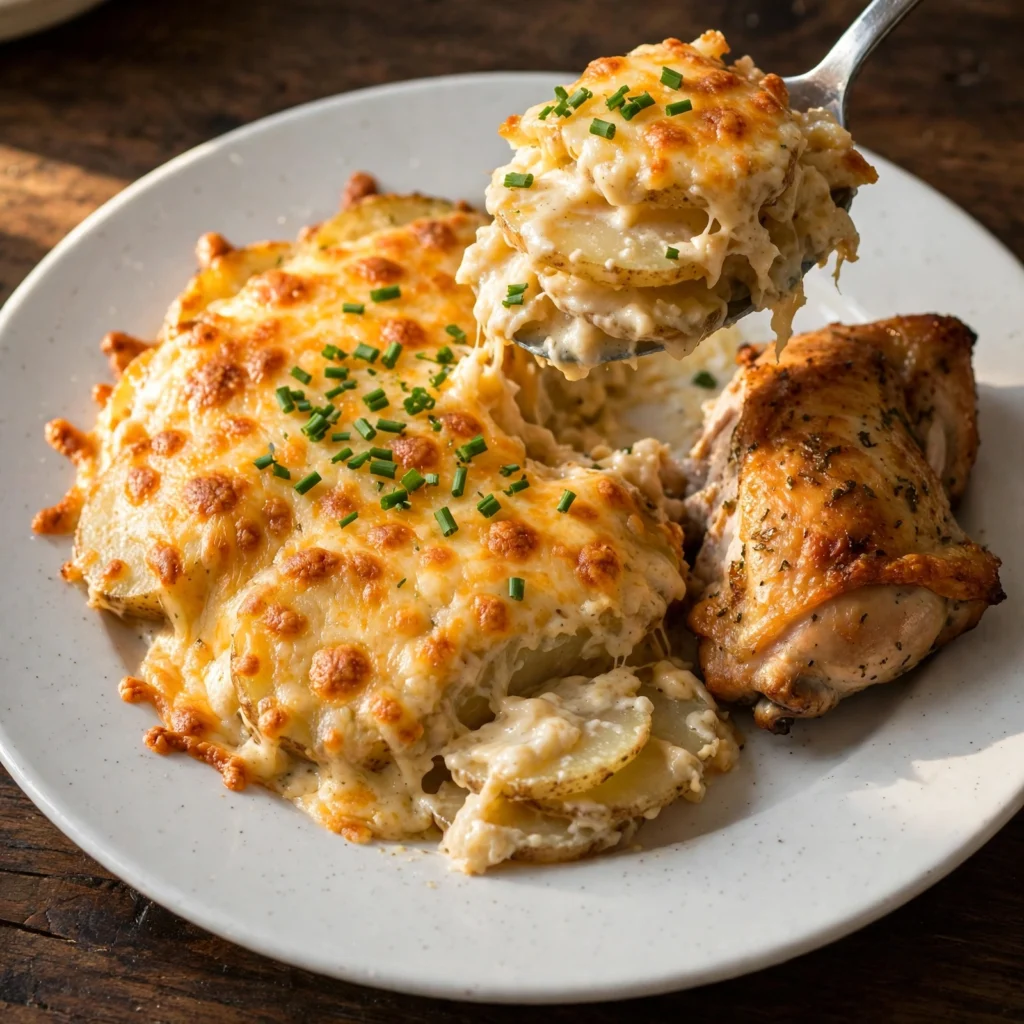
- Serve alongside roasted chicken thighs, a whole roasted chicken, or grilled chicken breast. The rich, creamy sauce and the lean, savory chicken work together in a way that makes both components feel more complete than they would separately.
- Pair with a crisp green salad dressed with lemon vinaigrette. The acidity of the dressing cuts through the richness of the cream sauce in a way that keeps the meal from feeling heavy over a full plate.
- Offer at a holiday table alongside roasted carrots, braised green beans, or honey-glazed parsnips. Cheesy potatoes are filling enough to be a centerpiece side dish; one or two lighter vegetable sides complement it without competing.
- Serve with a warm dinner roll or crusty bread to scoop up any cream sauce left on the plate. The sauce is rich enough to work as a dip for bread on its own.
- Use leftovers as a filling for a savory breakfast dish: scoop cold cheesy potatoes into a skillet over medium heat with a little butter, press flat, and cook until a crispy bottom forms. Flip in sections and serve with a fried or poached egg on top.
Tips for the Best Results
Slice potatoes as evenly as possible. A mandoline slicer at 3mm is the most reliable tool for this. Even thickness isn’t about aesthetics; it directly determines whether all the potato layers finish cooking at the same time. If you’re slicing by hand, aim for coin-sized rounds of equal thickness and cut any significantly thicker slices in half before layering.
Build the sauce on the stovetop before baking. Pouring cold cream and broth directly over raw potatoes in the dish requires the oven to heat both the sauce and cook the potatoes at the same time, which extends the baking time and makes the sauce less likely to reduce properly. A pre-simmered sauce starts cooking the potato layers from the first minute they meet in the oven.
Seal the foil completely during the covered phase. The trapped steam during the first 35 minutes is what cooks the potato layers through before the top is exposed to the browning heat. Loose foil lets steam escape and leaves you with undercooked layers underneath a browned top. Press the foil firmly to all four edges of the dish before it goes in.
Rest the dish for 10 minutes before serving. It’s tempting to serve immediately when the cheese is bubbling and the kitchen smells as good as it does. But the cream sauce is still liquid when the dish comes out and needs 10 minutes to settle around the potato layers. A fully rested dish gives you a creamy, clinging sauce with each serving rather than a pool of cream on the plate.
Taste the cream sauce before layering. The salt level in the sauce sets the seasoning for the entire dish; you can’t adjust it after the potatoes are in the oven. Taste the warm sauce after simmering and add salt gradually until it tastes seasoned but not sharp. Keep in mind that the cheese adds additional saltiness during baking, so stop slightly short of what you’d season a finished sauce to.
Storage Tips
Refrigerator
Cool the cheesy potatoes completely before covering the dish or transferring to airtight containers. The dish keeps well in the refrigerator for up to 4 days. As noted above, the texture actually improves after the first day as the cream sauce absorbs further into the potato layers. Store covered with plastic wrap directly on the surface to prevent a skin from forming on the sauce.
Freezer
Cheesy potatoes freeze adequately for up to 2 months, though the cream sauce can take on a slightly grainy texture after thawing because dairy-based sauces don’t always freeze and thaw cleanly. For the best result, freeze in individual portions in sealed containers rather than as a full dish; individual portions thaw more evenly. Thaw overnight in the refrigerator and reheat as directed below. Add a splash of cream over the top before reheating to restore the sauce’s original richness.
Reheating
For the best reheated texture, spoon a portion into a small oven-safe dish, add a tablespoon of cream or broth over the top to prevent drying, cover tightly with foil, and bake at 180°C (350°F) for 15 to 18 minutes until heated through and the sauce is bubbling at the edges. Microwave reheating works for speed: cover a portion loosely with a damp paper towel and heat at 70% power for 2 to 3 minutes, stirring once at the halfway mark. The microwave version heats unevenly at full power and can make the cream sauce separate if rushed.
Make-Ahead Note: The assembled dish can be covered tightly and refrigerated for up to 24 hours before baking. Add 10 minutes to the covered baking time when starting from a cold, unbaked dish straight from the refrigerator. This is one of the most practical make-ahead options for holiday meals: assemble the night before and bake while the main course rests.
Nutrition Information
Per serving, based on 8 servings. Values are approximate.
| Nutrient | Amount |
|---|---|
| Calories | 410 kcal |
| Protein | 12g |
| Carbohydrates | 32g |
| Fiber | 3g |
| Sugar | 4g |
| Total Fat | 27g |
| Saturated Fat | 17g |
| Cholesterol | 88mg |
| Sodium | 490mg |
| Potassium | 720mg |
| Calcium | 240mg |
| Iron | 1.4mg |
| Vitamin C | 18mg |
Nutrition values are approximate and may vary based on brands and portion sizes.
Why This Recipe Works
The challenge with cheesy potatoes is getting the cream sauce and the potato cooking to finish at exactly the same time, in the same dish, without one outrunning the other. The covered-then-uncovered baking structure in this recipe is the solution to that challenge.
During the covered 35-minute phase, the steam trapped inside the foil creates a pressurized, moist cooking environment that cooks the potato slices through from every direction simultaneously. The sauce thickens during this phase as the starch from the potatoes dissolves into the cream, a process that requires the lid to stay on so the liquid doesn’t evaporate before the starch has time to work. Removing the foil too early produces a browned top but watery sauce and undercooked potato layers in the center of the dish.
The temperature increase to 220°C (425°F) during the uncovered final 15 to 20 minutes is a specific decision. At 190°C, the cheese on top softens and melts but browns slowly, which means the sauce continues to reduce while you wait for the color to develop, and by the time the cheese looks right the sauce is over-reduced. At 220°C, the browning happens quickly enough that the sauce has just enough remaining heat time to reach the right consistency without tipping into a thick, gummy texture.
The two-cheese combination has a structural reason as well. Sharp cheddar is the primary cheese because its strong, familiar flavor comes through clearly even at the quantities used per layer. Gruyère on the top adds a higher-fat, nuttier character that browns more attractively than cheddar alone because of its composition; pure cheddar on top can over-brown or turn slightly rubbery before the deeper golden color develops.
Patting the potato slices dry before layering is the detail that most people skip and most people notice is missing when they compare results. Wet potato slices release moisture into the cream sauce during baking at a rate that the cream can’t absorb and thicken at the same time, producing a looser, waterier final sauce regardless of how much time the dish spends in the oven.
Frequently Asked Questions
Can I make cheesy potatoes ahead of time?
Yes. The assembled, unbaked dish keeps covered in the refrigerator for up to 24 hours before going into the oven. This makes it one of the best make-ahead sides for holiday meals, where oven timing is often a constraint. Add 10 extra minutes to the covered baking phase when starting from cold. Fully cooked cheesy potatoes also reheat well in the oven or microwave for up to 4 days after baking.
Why is my cream sauce watery after baking?
The two most common causes are potato slices that weren’t patted dry before layering, and serving the dish immediately without resting. Moisture from wet potato surfaces releases into the cream during baking faster than it can be absorbed and thickened. The 10-minute rest after baking is when the sauce finishes tightening around the layers; serving immediately produces a much looser consistency than waiting for the full rest.
Can I use a different type of potato?
Yukon Gold is the best choice for this recipe. Red potatoes are another waxy variety that holds up well during baking and produces a similar result. Russet potatoes are starchy and break down during the long oven time, creating a looser texture that falls apart when served. If Yukon Golds aren’t available, red potatoes are the closest substitute; avoid russets for this recipe.
How do I know when the potatoes are fully cooked?
Test with a thin knife or skewer inserted through the center of the dish at the thickest point. It should slide through all the layers with no resistance. If there’s any firmness or drag, the center potatoes need more time covered in the oven. A fully cooked dish will also have cream sauce bubbling actively around the perimeter of the dish, not just at the very edges.
Can I substitute the Gruyère with something more widely available?
Yes. Fontina and Comté are the closest substitutes in terms of melting behavior and flavor profile. Emmental works but has a milder flavor. Mozzarella is the most available substitute and melts well, but it produces a stretchier, whiter top layer that doesn’t brown as distinctively as Gruyère. If you use mozzarella on top, increase the oven temperature to 230°C (450°F) for the final uncovered phase to get more browning in the same time.
Is this recipe gluten-free?
The base recipe contains no gluten. The only ingredient to check is the vegetable broth, as some commercial brands include wheat-based thickeners or flavor additives. Look for a label that specifically states gluten-free if this is important to you. Everything else in the recipe, including the potatoes, cream, butter, and cheese, is naturally free of gluten.
Can I make this in a slow cooker instead of the oven?
Yes. Layer the potatoes and sauce in the slow cooker as directed, finishing with the cheese on top. Cook on LOW for 5 to 6 hours or HIGH for 3 to 3.5 hours until the potatoes are fully tender when tested with a knife. The slow cooker version won’t develop the browned cheese crust that the oven produces, but the potato texture and cream sauce result are very similar. For any browning on top, transfer to a baking dish and place under the broiler for 3 to 5 minutes after cooking.
Conclusion
Cheesy potatoes earn their place on the regular table because the combination of tender layers, rich garlic cream, and a properly browned cheese crust is difficult to improve on without significantly more effort. The technique here is specific enough to produce a consistent result every time: pre-simmer the sauce, dry the potato slices, cover for steam, then uncover at higher heat for color. Those four steps are what separate this from a casserole that just sits in a cream-filled dish and hopes for the best.
Once you’ve made it once and seen how the covered-then-uncovered method works, cheesy potatoes become one of the simplest things you can bring to a table that makes people genuinely happy to sit down.
If you loved this recipe, save it to your side dish recipes Pinterest board so you can find it easily later. For more same recipes follow Thecookingvibes Pinterest account.
Creamy Cheesy Potatoes
Ingredients
Equipment
Method
- Preheat oven to 190°C (375°F). Lightly grease a 9×13 inch baking dish on the bottom and sides.
- Peel and slice potatoes to approximately 3mm thickness. Soak in cold water, then drain and pat each slice thoroughly dry with a clean towel.
- Melt butter in a large saucepan over medium heat. Cook diced onion for 5 to 6 minutes until soft and translucent. Add garlic and stir for 60 seconds until fragrant. Pour in heavy cream and vegetable broth. Add salt, pepper, smoked paprika, and nutmeg. Bring to a gentle simmer over medium-high heat, stirring. Remove from heat.
- Layer one-third of the dried potato slices in the baking dish, slightly overlapping. Pour one-third of the warm cream sauce evenly over the top. Scatter 1/2 cup of cheddar over the sauce. Repeat this sequence two more times with the remaining potatoes, sauce, and cheddar. Pour the final third of sauce over the top layer and scatter the remaining 1/2 cup cheddar plus all the Gruyère across the surface.
- Cover the dish tightly with aluminum foil, sealing all edges. Bake at 190°C (375°F) for 35 minutes. Test potato doneness at the 35-minute mark with a thin knife; if there’s resistance, continue covered for another 5 to 8 minutes.
- Remove foil. Increase oven temperature to 220°C (425°F). Bake uncovered for 15 to 20 minutes until the cheese surface is deeply golden with darker patches at the edges and the sauce is bubbling actively.
- Rest uncovered for 10 minutes before serving. Scatter fresh chives or parsley over the top and bring the dish directly to the table.