15 Halloween Cookies That Are Spooky, Fun, and Delicious to Make
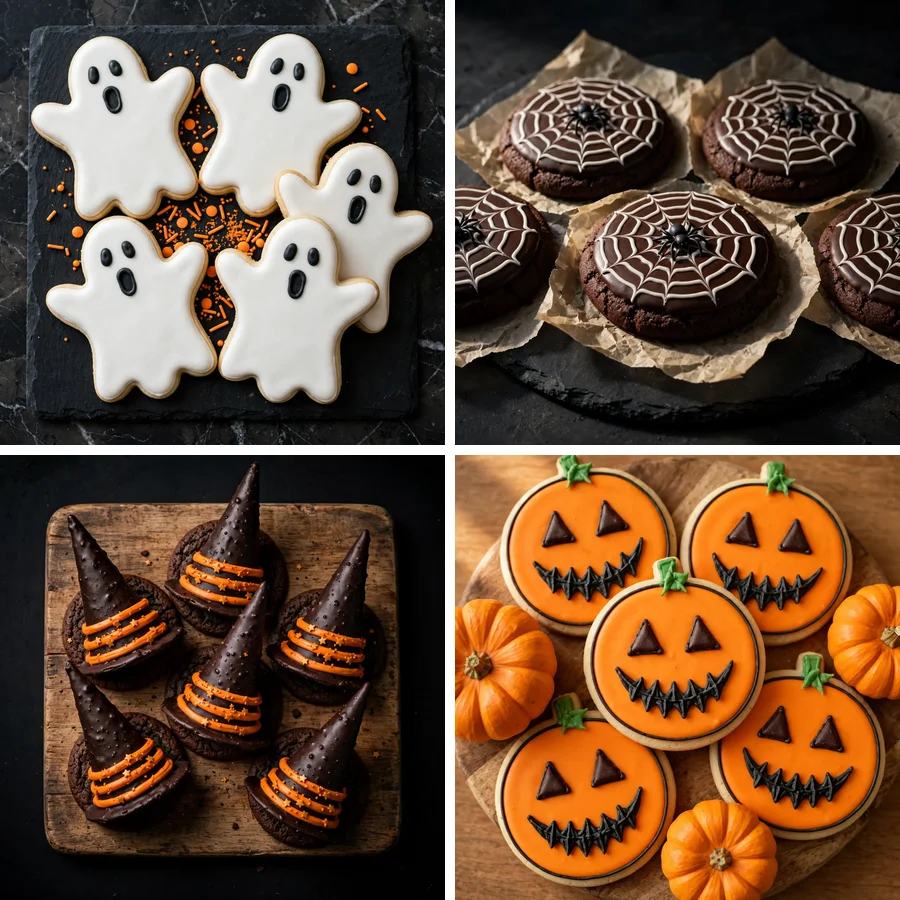
Halloween baking is the most fun you will have in the kitchen all year. These 15 Halloween cookies cover every skill level, every decoration style, and every spooky theme you could want, from classic sugar cookie ghosts and candy corn shortbread to graveyard brownies, mummy cookies, and witch hat treats that genuinely impress. Whether you are baking with kids on a weekend afternoon, filling a party dessert table, or sending something festive to school, this list gives you exactly what you need. In my experience, Halloween cookies do not need to be technically perfect to look amazing. A slightly wobbly ghost or a lopsided spider web actually adds charm. Save this post and pick your favorites before October gets away from you.
Halloween Cookies Ideas for a Spooky Celebration
Ghost Sugar Cookies
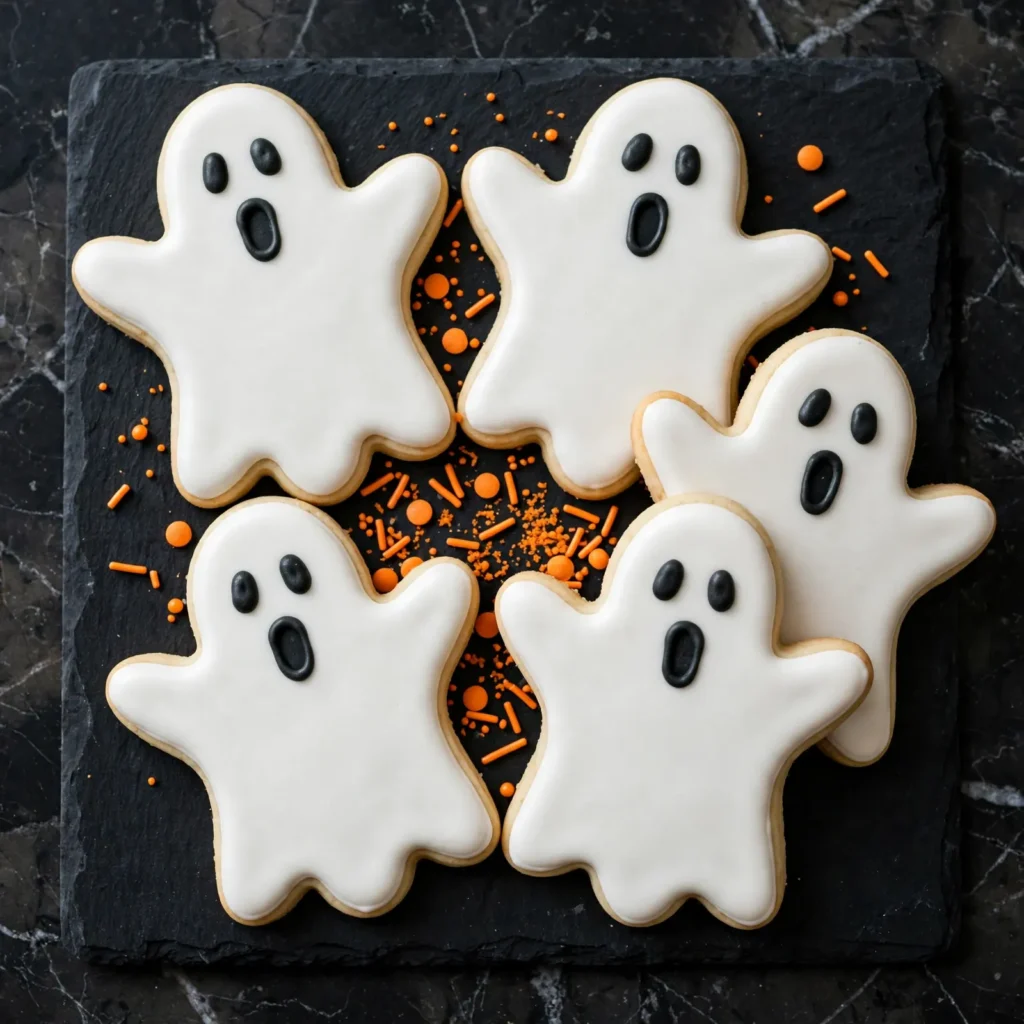
Classic sugar cookies cut into ghost shapes and decorated with white royal icing are a Halloween staple for good reason. They are simple enough to make with kids, easy to customize, and hold up well for days after baking. Soft inside, crisp on the edges, and impossible not to smile at when you see them on a plate.
Ingredients:
- 2 1/2 cups all-purpose flour
- 1 teaspoon baking powder
- 1/4 teaspoon salt
- 1 cup butter, softened
- 1 cup granulated sugar
- 1 large egg
- 1 teaspoon vanilla extract
- 1 teaspoon almond extract
- White royal icing and black gel food coloring for decorating
Instructions:
- Preheat oven to 350°F (175°C) and line baking sheets with parchment paper.
- Whisk together flour, baking powder, and salt in a bowl and set aside.
- Beat butter and sugar until light and fluffy, then add egg, vanilla, and almond extract.
- Gradually mix in the flour mixture until a smooth dough forms.
- Roll dough to 1/4 inch thickness on a lightly floured surface and cut with ghost-shaped cutters.
- Place on baking sheets and bake for 9 to 11 minutes until edges are just set but not browned.
- Cool completely, then decorate with white royal icing and add black dot eyes and an open mouth using a toothpick dipped in black gel food coloring.
In my experience, chilling the cut cookie shapes on the baking sheet for 10 minutes before baking helps them hold their ghost shape cleanly without spreading at the edges.
Pumpkin Spice Cookies
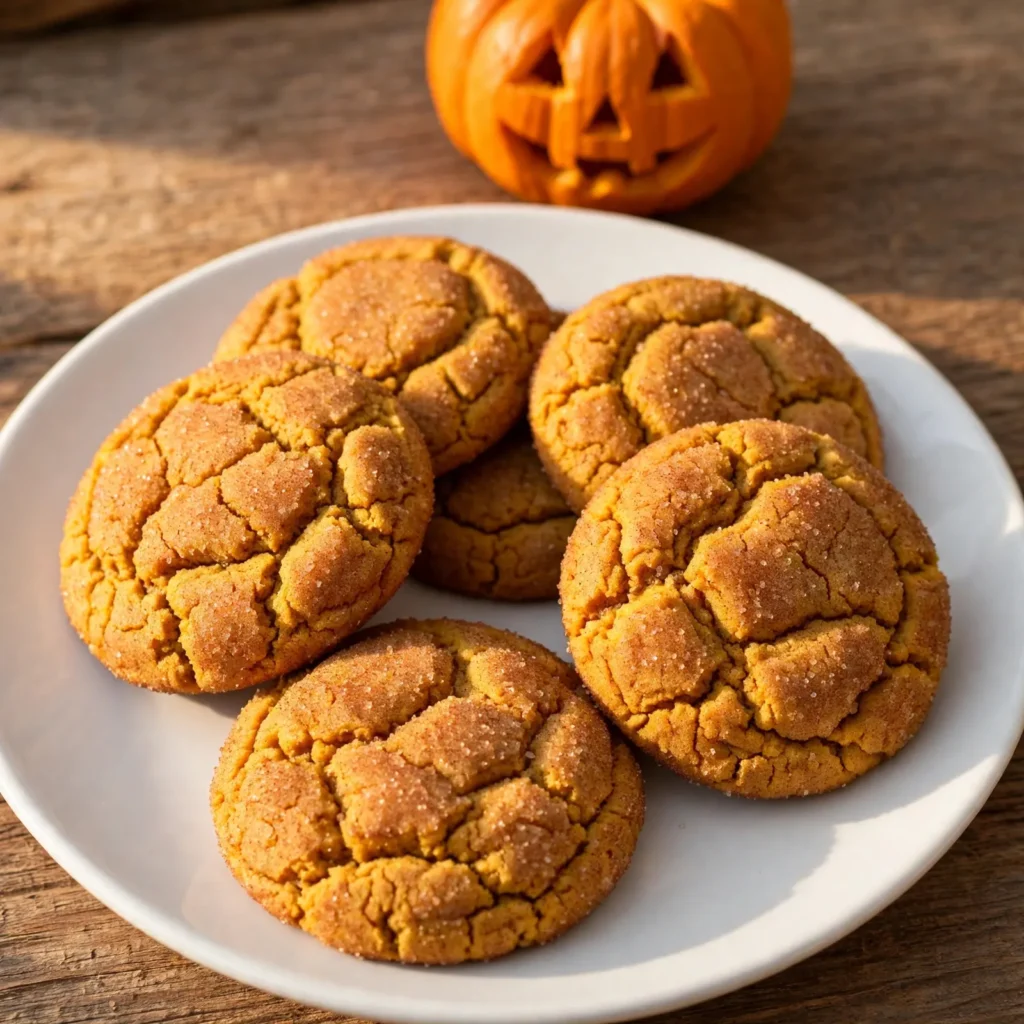
These cookies taste like a pumpkin pie and a spiced cake had a baby. Soft, warmly spiced, and naturally orange-tinted from real pumpkin puree, they are a seasonal treat that works for Halloween parties and fall gatherings equally well. The cinnamon sugar coating on the outside adds a slight crunch that contrasts beautifully with the pillowy center.
Ingredients:
- 2 1/4 cups all-purpose flour
- 1 teaspoon baking soda
- 1/2 teaspoon salt
- 1 teaspoon cinnamon
- 1/2 teaspoon nutmeg
- 1/4 teaspoon ground cloves
- 1/2 cup butter, softened
- 1 cup granulated sugar
- 1/2 cup pumpkin puree
- 1 egg
- 1 teaspoon vanilla extract
- 1/4 cup cinnamon sugar for rolling
Instructions:
- Preheat oven to 350°F (175°C) and line baking sheets with parchment paper.
- Whisk flour, baking soda, salt, and all spices together in a bowl.
- Beat butter and sugar until creamy, then mix in pumpkin puree, egg, and vanilla.
- Fold in the dry ingredients until a soft dough forms.
- Refrigerate the dough for 30 minutes until firm enough to handle.
- Roll dough into balls and coat each generously in cinnamon sugar.
- Place on baking sheets and bake for 11 to 13 minutes until tops are set and slightly crinkled. Cool on the pan for 5 minutes.
Spider Web Chocolate Cookies
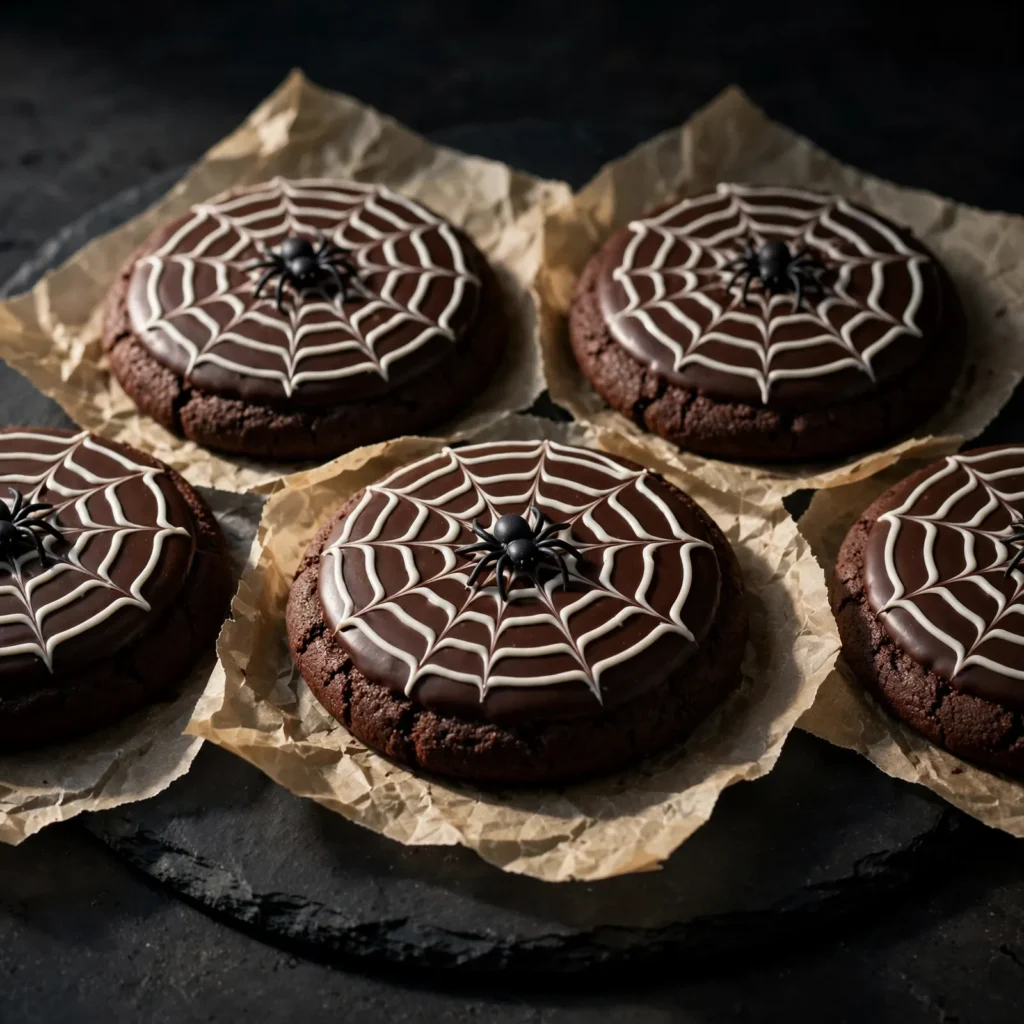
Rich, fudgy chocolate cookies decorated with a classic spider web design are one of the most visually striking Halloween cookie options you can make. The web piping technique looks complicated but is genuinely easy once you understand the method. These are always the first to disappear from any Halloween dessert table.
Ingredients:
- 1 cup all-purpose flour
- 1/2 cup unsweetened cocoa powder
- 1/2 teaspoon baking soda
- 1/4 teaspoon salt
- 1/2 cup butter, softened
- 3/4 cup granulated sugar
- 1/4 cup brown sugar
- 1 egg
- 1 teaspoon vanilla extract
- White royal icing for web decoration
- Small black fondant spiders for topping
Instructions:
- Preheat oven to 350°F (175°C) and line baking sheets with parchment.
- Whisk flour, cocoa, baking soda, and salt together.
- Beat butter and both sugars until fluffy, then add egg and vanilla.
- Stir in the dry ingredients until a smooth chocolate dough forms.
- Roll into balls, flatten slightly, and bake for 9 to 10 minutes until set.
- Cool completely, then flood each cookie with a thin layer of white royal icing and let set for 20 minutes.
- Pipe a spiral of thicker white icing over the flooded surface, then draw a toothpick from the center outward in lines to create the web effect. Place a fondant spider in the center.
A helpful trick is to work quickly when creating the web design. The spiral needs to still be wet when you drag the toothpick through it, otherwise the lines will not pull cleanly.
Witch Hat Cookies
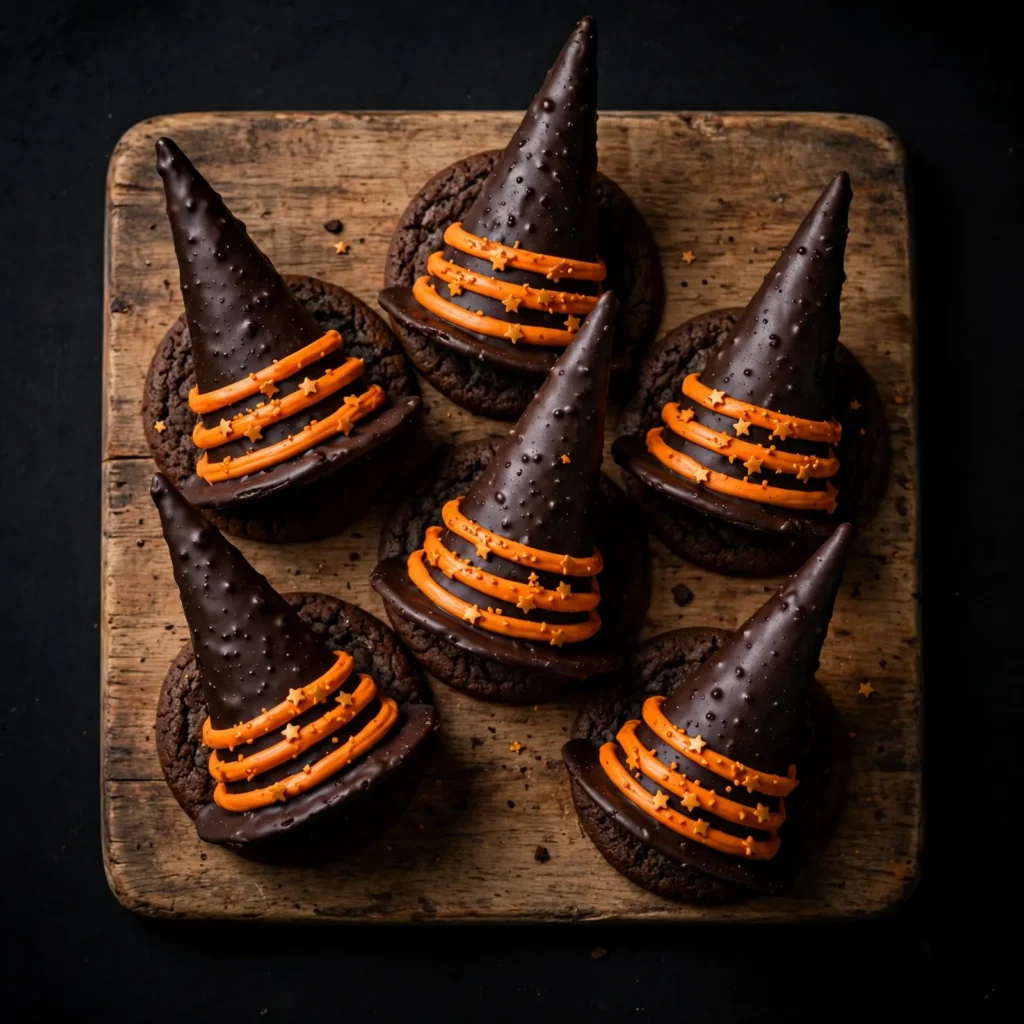
Witch hat cookies are one of the most impressive no-bake Halloween treats you can assemble without turning on the oven. A chocolate-dipped ice cream cone sits on a round cookie base and gets decorated with colored icing and sprinkles. They look stunning on a Halloween dessert table and take less time than people expect.
Ingredients:
- 12 mini sugar ice cream cones
- 1 cup dark chocolate chips, melted
- 12 large round chocolate cookies (store-bought works perfectly)
- Orange and purple gel food coloring
- 1 cup royal icing divided and colored
- Star sprinkles and edible glitter for decoration
- 1 tablespoon coconut oil (to thin the chocolate)
Instructions:
- Melt chocolate chips with coconut oil until smooth and glossy.
- Dip each mini cone completely in melted chocolate, letting excess drip off.
- Place chocolate-dipped cones on a parchment-lined tray and refrigerate for 10 minutes until set.
- Arrange round cookies on a serving board.
- Attach a chocolate-dipped cone to the center of each round cookie using a small dot of melted chocolate as glue.
- Divide royal icing and color portions orange and purple.
- Pipe a band of colored icing around the base of each cone where it meets the cookie, add star sprinkles, and dust lightly with edible glitter. Allow to set for 15 minutes.
Mummy Sugar Cookies
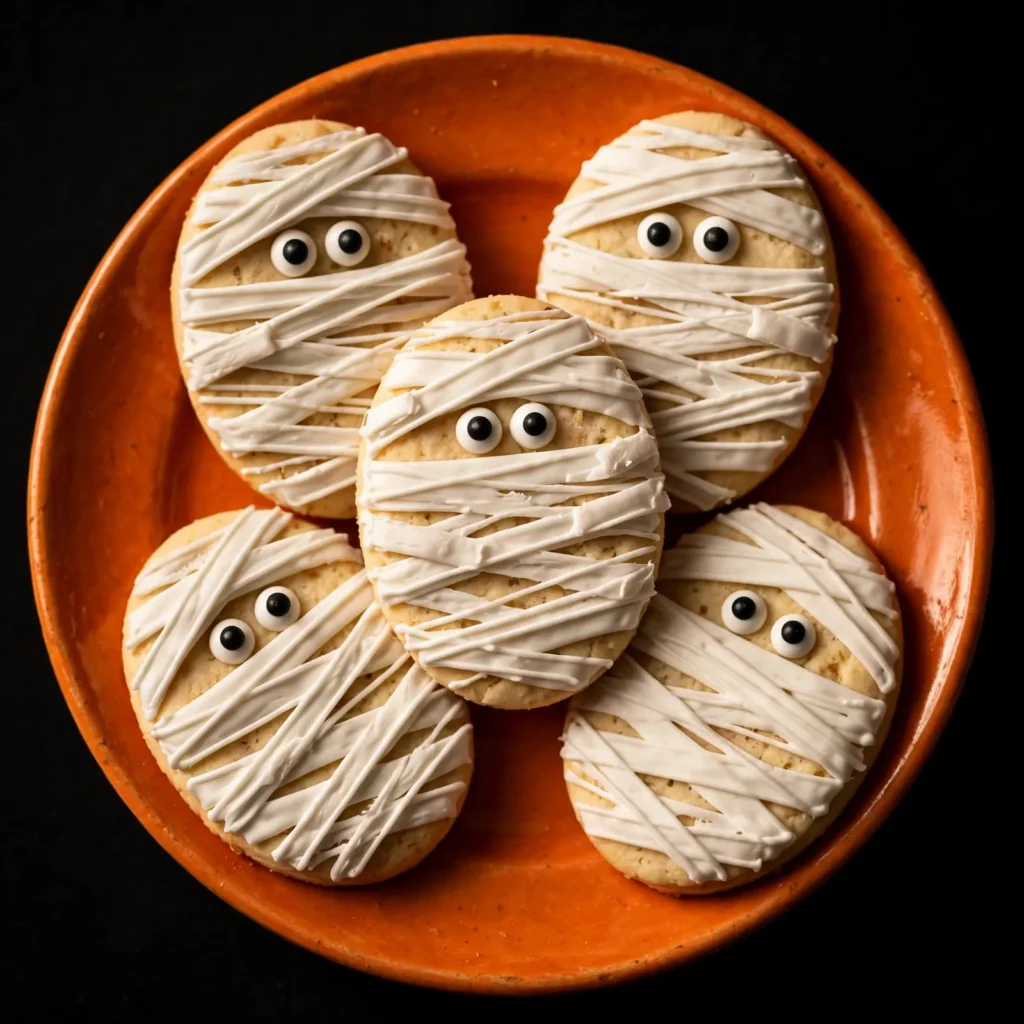
White royal icing piped in overlapping diagonal lines over a shaped cookie creates the bandaged mummy effect that makes these one of the cutest Halloween cookies on any dessert table. Simple enough for beginners to decorate and genuinely charming once they are lined up together. A crowd favorite with children and adults alike.
Ingredients:
- 1 batch sugar cookie dough (see ghost sugar cookie recipe)
- Oval or elongated cookie cutter
- 2 cups white royal icing
- Small candy eyes (available at most baking stores)
- Black gel food coloring for pupils if needed
Instructions:
- Prepare sugar cookie dough and roll to 1/4 inch thickness.
- Cut into oval shapes and bake at 350°F (175°C) for 9 to 10 minutes until just set.
- Cool completely on a wire rack before decorating.
- Flood each cookie with a thin base layer of white royal icing and let set for 30 minutes.
- Fit a piping bag with a small round tip and fill with thicker white royal icing.
- Pipe diagonal lines across the cookie in overlapping directions to create the bandage look, leaving a small area near the top for the eyes.
- Press two small candy eyes into the wet icing before it sets. Let dry completely.
Candy Corn Shortbread
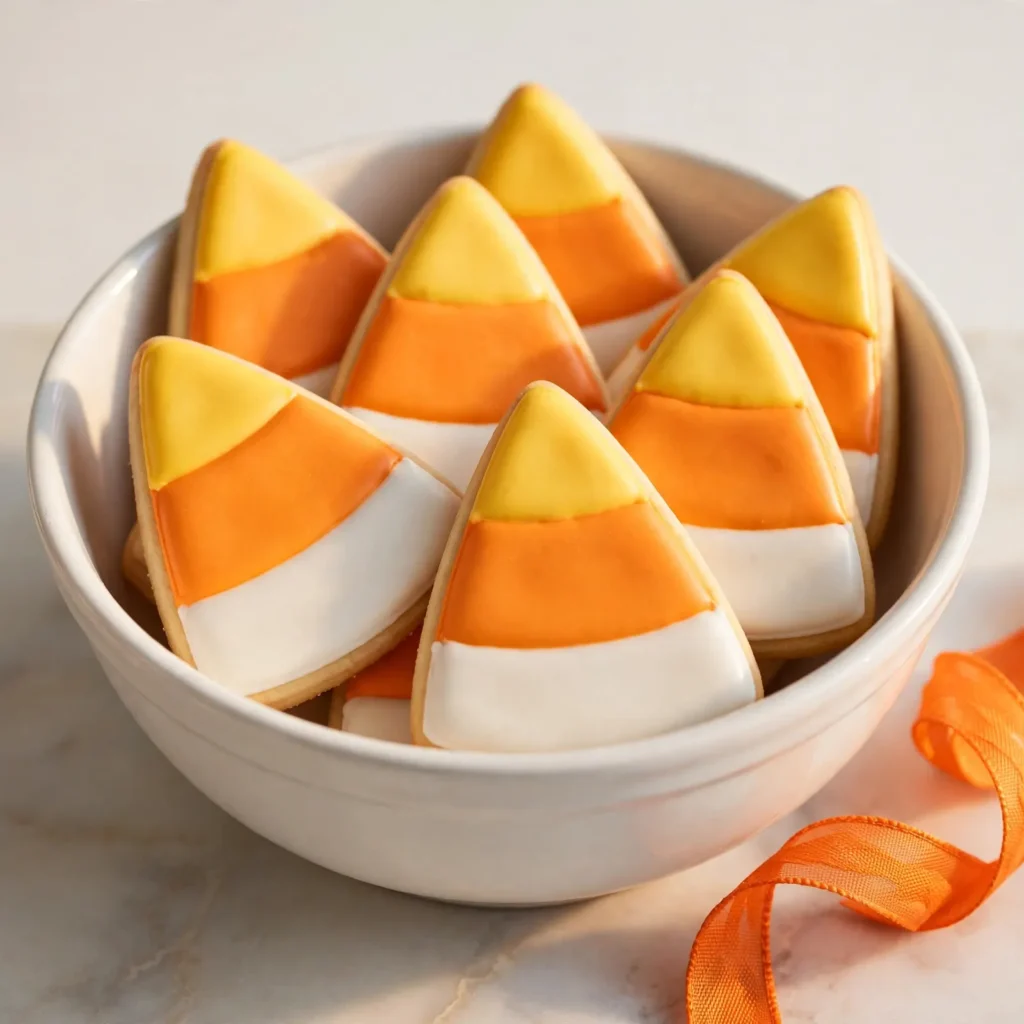
Buttery, crumbly shortbread shaped and decorated to look exactly like candy corn makes a genuinely satisfying Halloween treat that tastes far better than actual candy corn. The shortbread base is rich and simple, and the three-color icing decoration is easier to achieve than it looks when you work in sections.
Ingredients:
- 1 cup butter, softened
- 1/2 cup powdered sugar
- 1 teaspoon vanilla extract
- 2 cups all-purpose flour
- 1/4 teaspoon salt
- Yellow, orange, and white royal icing for decorating
Instructions:
- Preheat oven to 325°F (165°C) and line baking sheets with parchment.
- Beat butter and powdered sugar until smooth and creamy, then mix in vanilla.
- Stir in flour and salt until a soft dough forms.
- Roll dough to 1/4 inch thickness and cut into triangle shapes.
- Place on baking sheets and bake for 12 to 14 minutes until just barely golden at the edges.
- Cool completely, then divide royal icing into three bowls and color yellow, orange, and white.
- Pipe the bottom third of each triangle white, the middle third orange, and the top third yellow, working in sections and letting each color set slightly before adding the next.
I’ve noticed that letting each icing color set for about 10 minutes before applying the next keeps the colors from bleeding into each other and results in clean, sharp divisions.
Frankenstein Cookies
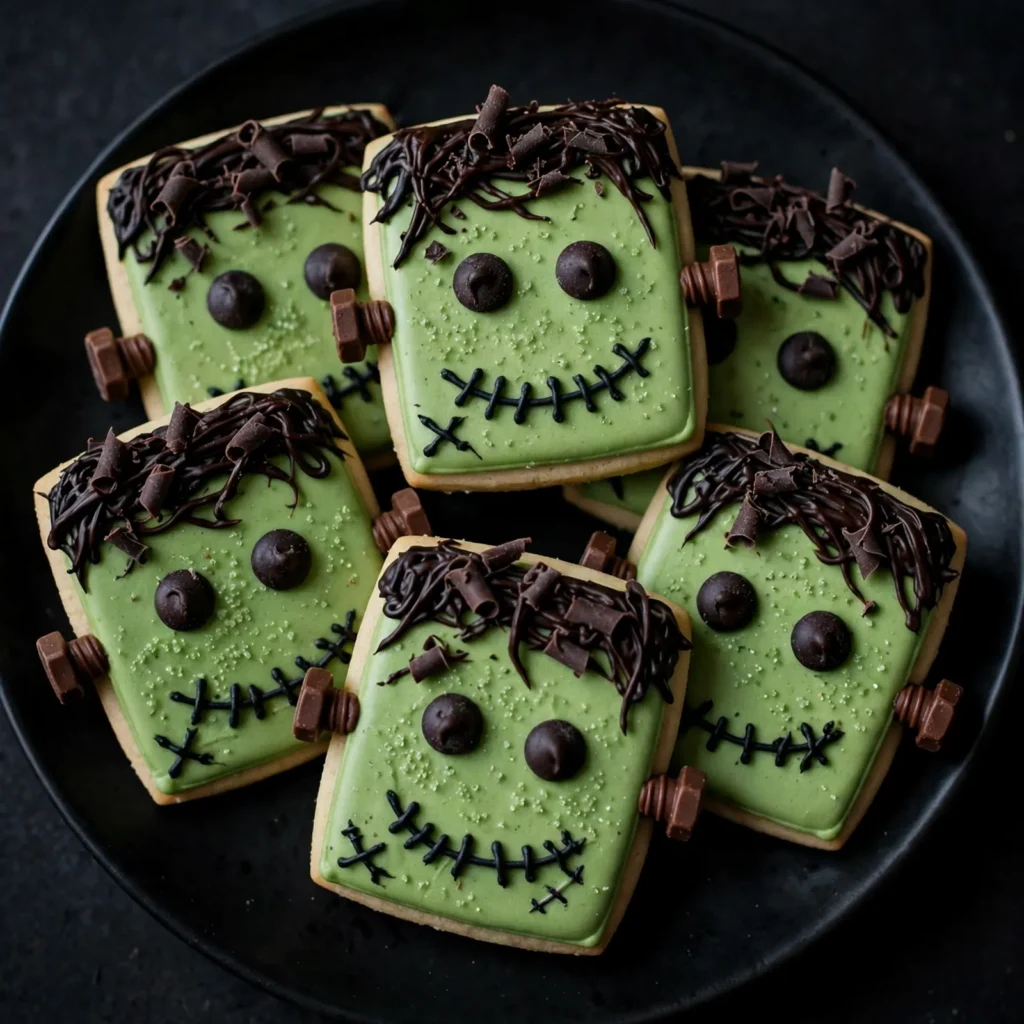
Bright green royal icing, a crooked chocolate chip smile, and two little bolts on the sides are all it takes to turn a plain square sugar cookie into Frankenstein. These are endlessly fun to decorate and always get a reaction when they appear on a Halloween dessert plate. Kids love making them and adults love eating them.
Ingredients:
- 1 batch sugar cookie dough
- Square cookie cutter
- Green royal icing
- Black gel food coloring
- Chocolate chips for eyes
- Small pretzel sticks cut short for neck bolts
- Black piping icing for mouth and hair details
Instructions:
- Prepare and bake sugar cookies in square shapes at 350°F (175°C) for 9 to 10 minutes.
- Cool completely before decorating.
- Color royal icing bright green and flood each cookie completely. Let set for 30 minutes.
- Press two chocolate chips near the top of each cookie as eyes while icing is still slightly tacky.
- Press two short pretzel stick pieces into the sides of each cookie as bolts.
- Fit a small piping bag with black icing and pipe a zigzag line mouth across the lower half.
- Pipe black jagged hair along the top edge and add small black pupils to the chocolate chip eyes. Let dry fully.
Skull Chocolate Cookies
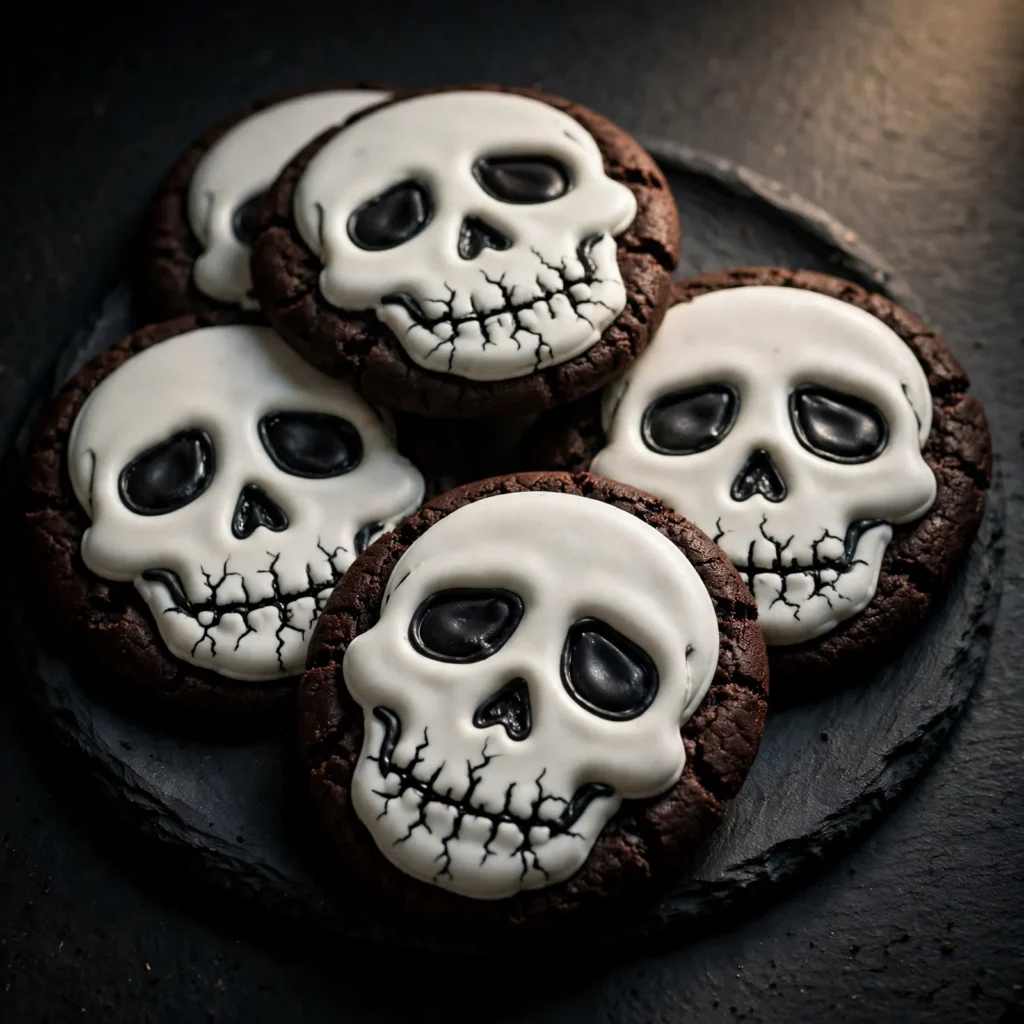
Skull-decorated cookies are perhaps the most classically Halloween design in the whole repertoire. Dark chocolate cookies with white icing skulls look genuinely dramatic and work perfectly for grown-up Halloween parties as well as family celebrations. The contrast of the dark base and white icing decoration is visually striking with almost no effort.
Ingredients:
- 1 batch chocolate cookie dough (see spider web cookie recipe)
- Round cookie cutter
- White royal icing
- Black gel food coloring
- Small piping bag or toothpick for detail work
Instructions:
- Prepare chocolate cookie dough and cut into round shapes.
- Bake at 350°F (175°C) for 9 to 10 minutes and cool completely.
- Flood each cookie with white royal icing and let set fully for at least 1 hour.
- Use a small piping bag or food-safe marker to draw two large hollow ovals for eye sockets near the top of the cookie.
- Add a small heart shape or upside-down triangle below the eyes as the nose cavity.
- Pipe a row of rectangular teeth along the bottom half of the cookie.
- Fill eye sockets and nose with black gel food coloring using a fine brush or toothpick. Let dry completely before serving.
Black Cat Cookies
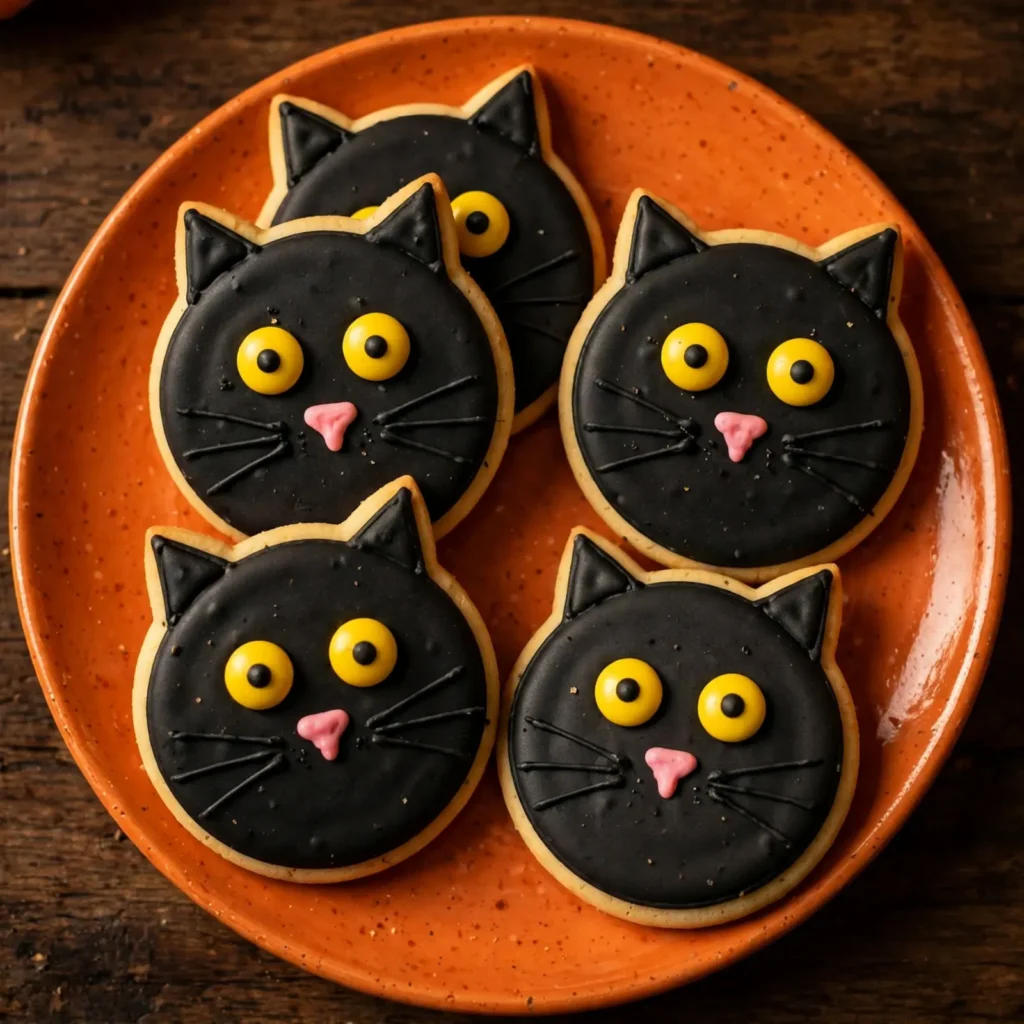
Black cat cookies are one of those Halloween designs that look incredibly finished and put-together without requiring advanced decorating skills. The round sugar cookie base gets simple pointed ears cut in before baking, a flood of black icing, and a few details that bring the face to life in minutes.
Ingredients:
- 1 batch sugar cookie dough
- Round cookie cutter and small knife or extra triangle cutter for ears
- Black royal icing
- Yellow candy eyes
- Pink fondant for the nose
- Black thin piping icing for whiskers and mouth
- White edible paint or white icing for ear details
Instructions:
- Roll and cut round sugar cookies, then use a small knife to cut two small triangular points at the top of each circle to create cat ears.
- Bake at 350°F (175°C) for 9 to 11 minutes and cool completely.
- Flood each cookie with black royal icing and let set for 30 minutes.
- Press two yellow candy eyes into the icing while still slightly wet.
- Roll tiny balls of pink fondant and flatten slightly to create noses. Press in place below the eyes.
- Pipe thin black lines outward from the nose area for whiskers.
- Add a small curved mouth below the nose using black icing. Let dry completely.
I’ve noticed that using gel food coloring rather than liquid gives you a much deeper, truer black icing color. It takes quite a bit of gel to achieve solid black, so do not be afraid to add more than you think you need.
Monster Rice Krispie Cookies
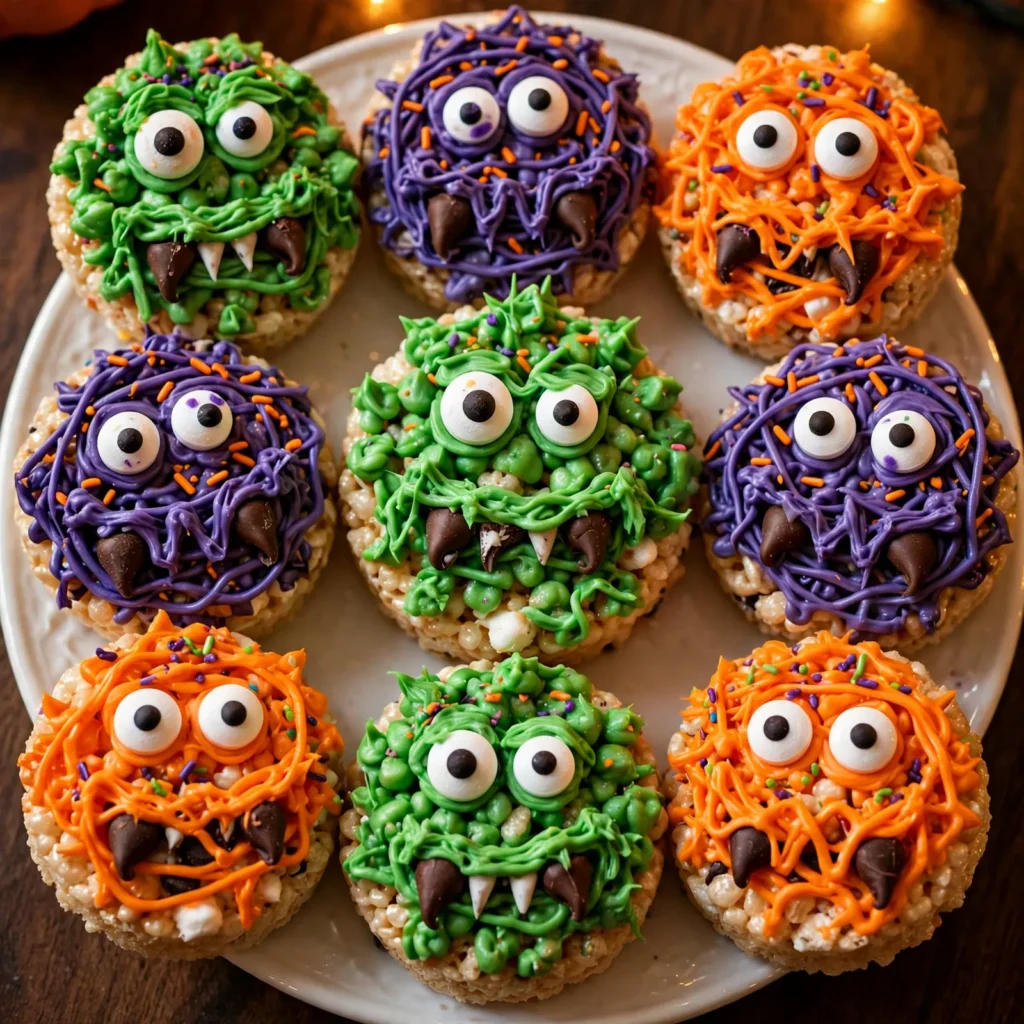
These are not technically baked cookies but they belong on every Halloween treat table. Rice Krispie treat rounds pressed into cookie shapes, dipped in colored melting chocolate, and decorated with candy eyes and chocolate fangs become the most fun and crowd-pleasing option on the dessert spread. Kids can decorate their own and it becomes an activity as much as a recipe.
Ingredients:
- 3 tablespoons butter
- 4 cups mini marshmallows
- 6 cups rice cereal
- Green, purple, and orange candy melts
- Assorted candy eyes in different sizes
- Chocolate chips for fangs and mouths
- Black piping gel for details
Instructions:
- Melt butter in a large pot over low heat, add marshmallows and stir until melted and smooth.
- Remove from heat and quickly stir in rice cereal until fully coated.
- Press mixture firmly into a greased pan and let cool for 20 minutes.
- Cut into rounds using a large cookie cutter or glass.
- Melt candy melts in separate bowls for each color and dip each round completely, letting excess drip off.
- Place on parchment paper and immediately press candy eyes and chocolate chip fangs into the wet coating.
- Pipe black gel details for mouths and additional features. Refrigerate for 10 minutes to set.
Eyeball Peanut Butter Cookies
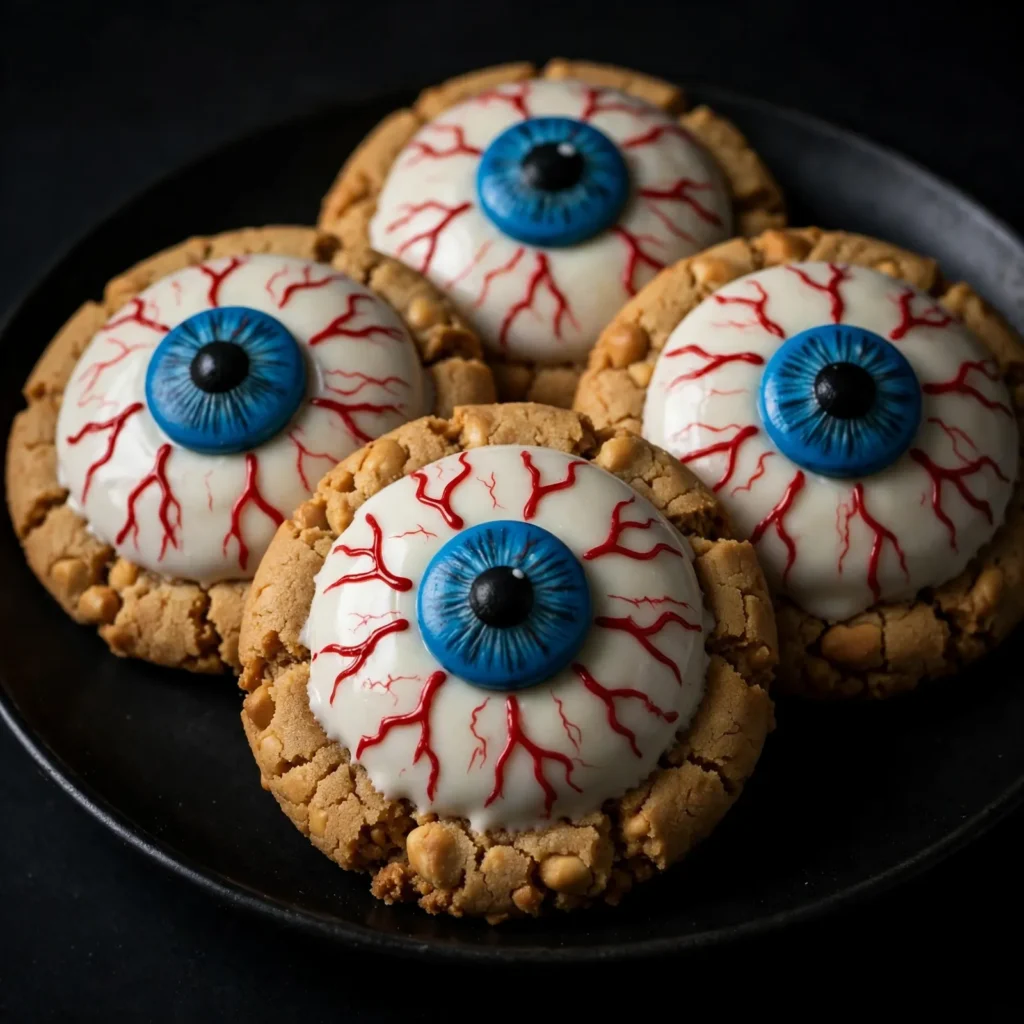
Peanut butter cookies turned into creepy eyeballs with white chocolate coating and red bloodshot vein details are genuinely one of the most memorable Halloween cookies you can bake. The peanut butter base is chewy and rich, and the eyeball decoration is simple enough to do with a toothpick once the base chocolate sets.
Ingredients:
- 1 cup creamy peanut butter
- 1/2 cup butter, softened
- 3/4 cup granulated sugar
- 1/2 cup brown sugar
- 1 egg
- 1 teaspoon vanilla extract
- 1 cup all-purpose flour
- 1 teaspoon baking soda
- 1/4 teaspoon salt
- White candy melts for coating
- Blue and black gel food coloring
- Red piping gel for vein details
Instructions:
- Preheat oven to 350°F (175°C) and line baking sheets with parchment.
- Beat peanut butter, butter, and both sugars until creamy, then mix in egg and vanilla.
- Stir in flour, baking soda, and salt until combined.
- Roll into smooth balls and bake for 10 to 12 minutes. Cool completely.
- Dip each cooled cookie in melted white candy melts and place on parchment to set.
- While coating is still wet, place a blue candy or blue-tinted icing circle in the center as the iris, then add a black dot pupil.
- Once fully set, use a toothpick dipped in red piping gel to drag thin vein lines outward from the iris across the white surface. Let dry.
Broomstick Pretzel Cookies
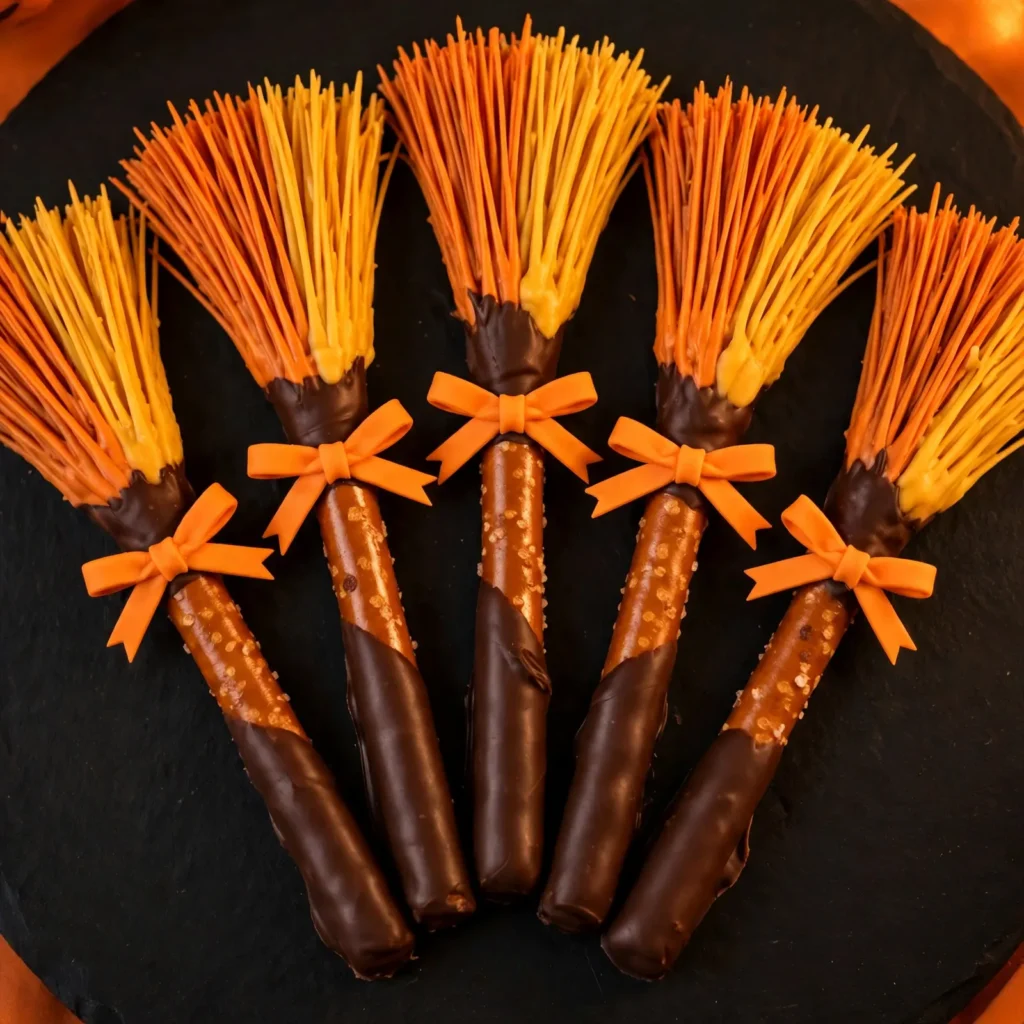
These pretzel broomstick treats require zero baking and come together quickly with pretzel rods, melted chocolate, and a little creative shaping. They look festive and taste like a combination of sweet and salty that most people find completely irresistible. A great option for Halloween parties where you need a large quantity of treats fast.
Ingredients:
- 12 pretzel rods
- 1 cup orange candy melts
- 1 cup yellow candy melts
- 1/2 cup dark chocolate chips melted
- Orange and yellow sprinkles
- Small orange fondant or fruit roll strips for ribbon detail
- Parchment paper for setting
Instructions:
- Melt orange and yellow candy melts in separate bowls until smooth.
- Dip the bottom third of each pretzel rod into the dark chocolate first and let set on parchment for 5 minutes.
- Dip the same end into melted orange candy melt and drag downward to create bristle fringe using a fork.
- Drizzle yellow candy melt in vertical lines over the orange section to add broom texture.
- Add orange and yellow sprinkles while coating is wet.
- Cut small strips of orange fondant or fruit roll and wrap around the joint where the chocolate handle meets the broom head.
- Let set completely on parchment before arranging on a serving board.
A helpful trick is to work with one pretzel rod at a time so each one gets its decoration applied before the candy coating sets. Moving too slowly results in hardened chocolate that will not hold the detail work.
Dracula Sandwich Cookies
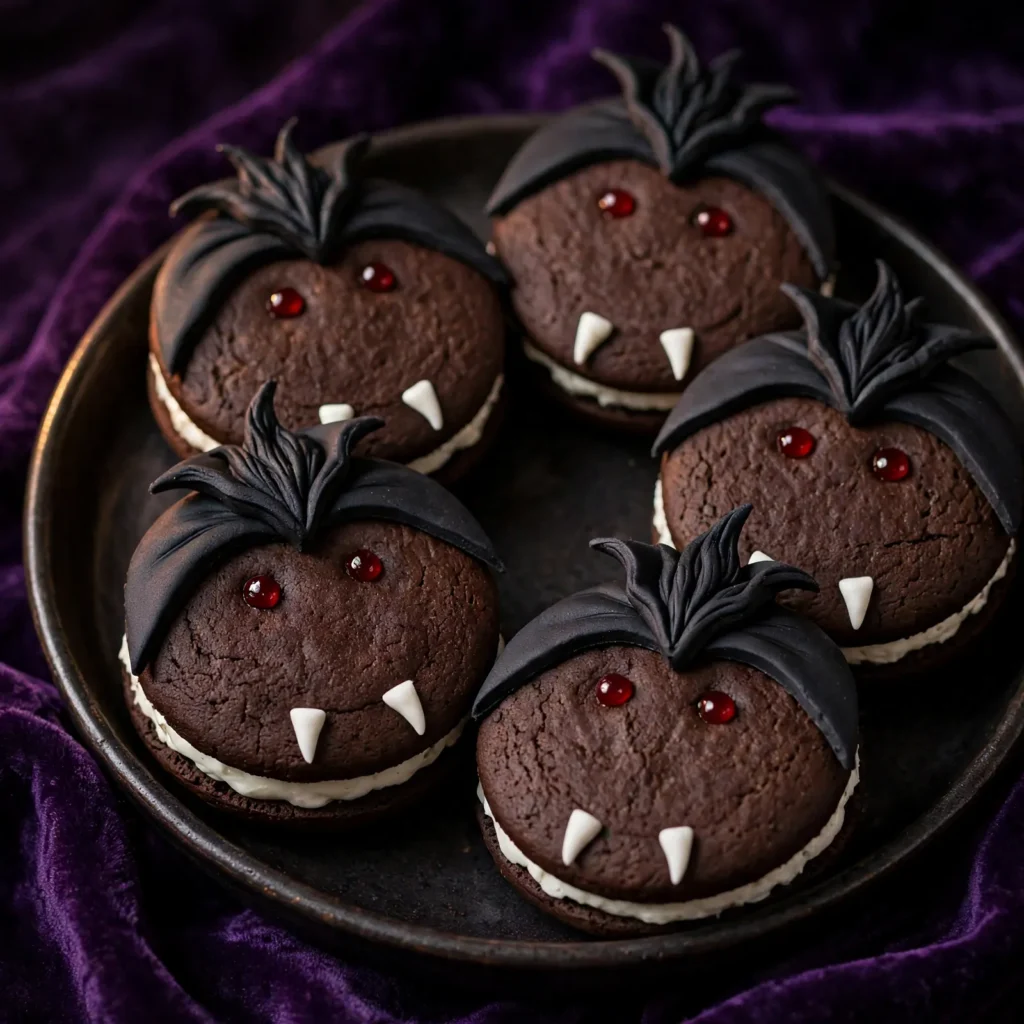
Store-bought chocolate sandwich cookies get a Halloween makeover that turns them into tiny Dracula faces with barely any effort. Black fondant shapes, tiny white fang candy pieces, and red gel eyes transform a simple cookie into something that looks genuinely impressive. These are one of the fastest Halloween cookie decorating projects on this entire list.
Ingredients:
- 24 chocolate sandwich cookies
- Black fondant
- Small white candy fangs or white chocolate chips shaped into points
- Red gel food coloring
- Black edible paint or black gel
- Small round white sprinkles for eyes
- Toothpick for detail work
Instructions:
- Lay sandwich cookies flat on a parchment-lined work surface.
- Roll black fondant thinly and cut out small cape shapes and angular hair pieces for each cookie.
- Press the fondant hair piece onto the top of each cookie, covering the upper third.
- Press the cape shape onto the lower half of the cookie, overlapping slightly.
- Press two small white round sprinkles onto the exposed cookie area as eyes.
- Add a tiny red gel dot to each eye using a toothpick.
- Press two small white candy fangs or pointed white chocolate chip pieces at the bottom center of the cookie as the vampire’s teeth. Serve immediately or refrigerate until ready.
Jack-o-Lantern Cookies
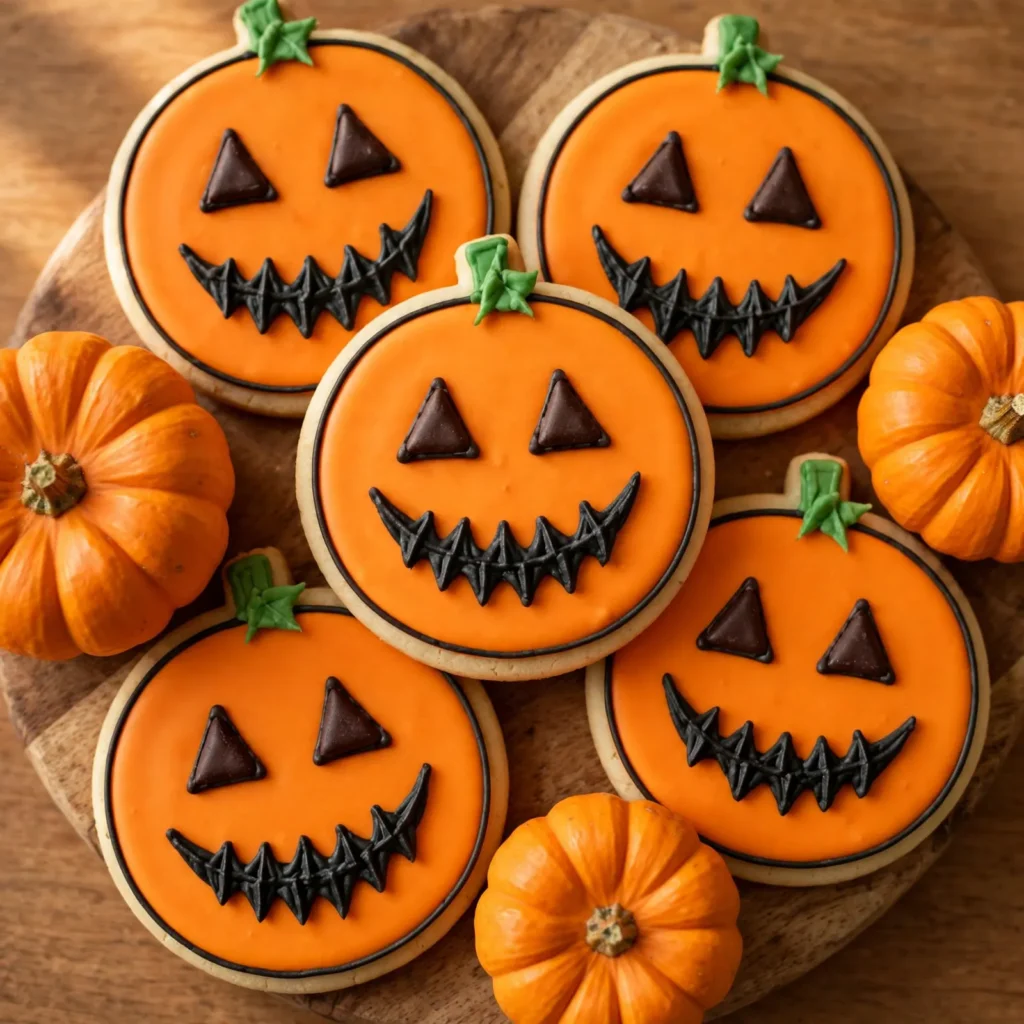
Orange-iced sugar cookies decorated with triangle eyes, a jagged grin, and a fondant stem on top are the most recognizable Halloween cookie design of all. These are the ones that photograph beautifully, hold up well for days, and appeal to absolutely everyone from toddlers to grandparents. A non-negotiable addition to any Halloween baking list.
Ingredients:
- 1 batch sugar cookie dough
- Round cookie cutter
- Orange royal icing
- Black royal icing for face details
- Green fondant for stems
- Chocolate chips for triangle eyes and nose
- Black edible marker or piping gel for outlining
Instructions:
- Prepare and bake round sugar cookies at 350°F (175°C) for 9 to 11 minutes. Cool completely.
- Flood each cookie with bright orange royal icing and let set for at least 1 hour.
- Roll small pieces of green fondant into teardrop shapes and press onto the top edge of each cookie as a pumpkin stem.
- Press chocolate chip triangles for eyes and a small triangle for the nose into the set icing.
- Use black royal icing in a piping bag with a small round tip to pipe a jagged toothy smile across the lower half.
- Pipe a thin black outline around the entire edge of the orange icing to define the pumpkin shape.
- Let dry completely before packaging or serving.
Graveyard Brownie Cookies
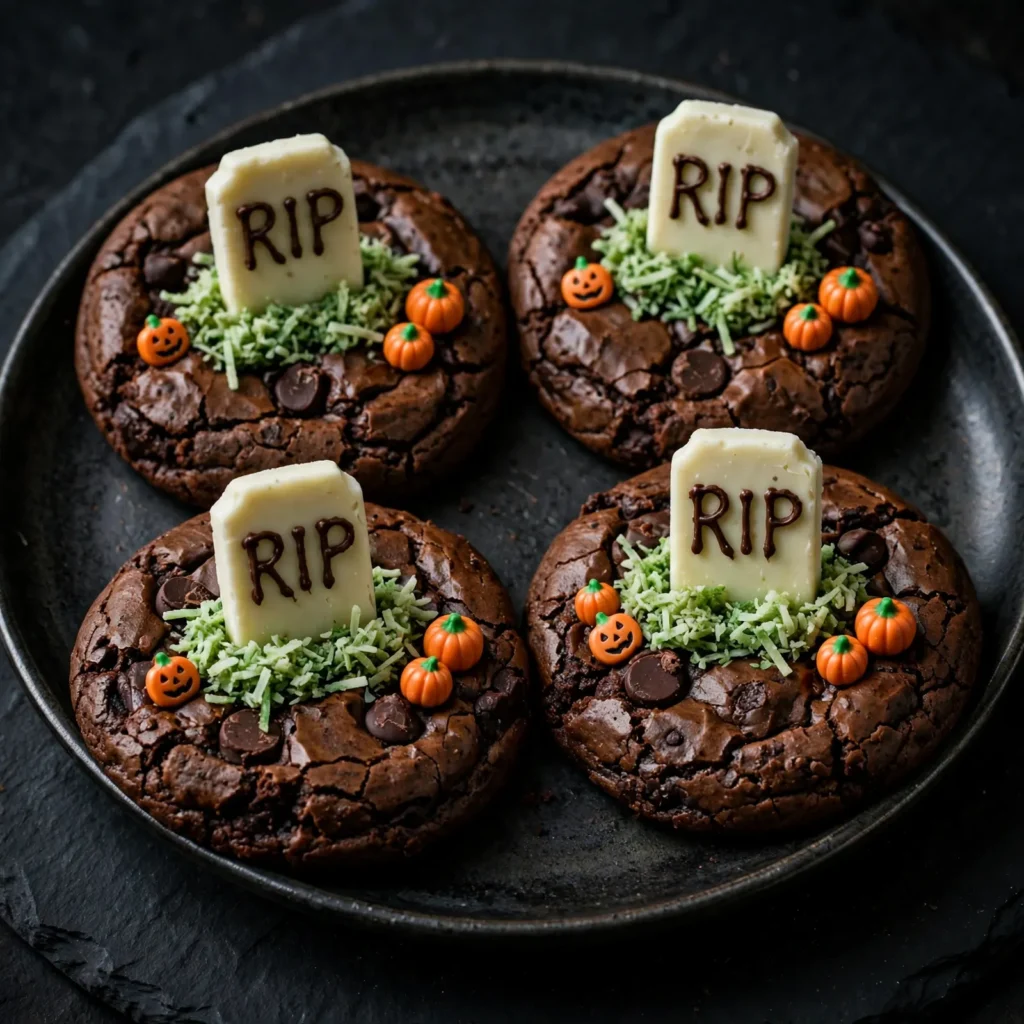
Fudgy brownie cookies make one of the richest Halloween bases you can decorate. Setting a white chocolate tombstone upright in the center of each one and surrounding it with green coconut grass creates a tiny graveyard scene that looks elaborate but comes together in under 30 minutes of decorating time after the cookies bake.
Ingredients:
- 1 box brownie mix plus required ingredients on the box
- 1/4 cup extra flour added to the brownie mix for a cookie consistency
- White chocolate bars, broken into rectangular pieces
- Black edible marker for writing RIP on tombstones
- 1 cup shredded coconut dyed green with food coloring
- Small candy pumpkins for decoration
- Chocolate buttercream for base attachment
Instructions:
- Prepare brownie mix with the extra flour until dough is thick and scoopable.
- Preheat oven to 350°F (175°C) and drop rounded tablespoons of dough onto a lined baking sheet.
- Bake for 10 to 12 minutes until set on top but still fudgy inside. Cool completely.
- Write RIP on each white chocolate rectangle piece using a black edible marker and let dry.
- Mix shredded coconut with two drops of green food coloring until evenly colored.
- Pipe a small mound of chocolate buttercream on each brownie near the back center.
- Stand a white chocolate tombstone upright in the buttercream, press green coconut around the base as grass, and add small candy pumpkins around the scene. Serve the same day.
Conclusion
These 15 Halloween cookies prove that spooky baking can be just as fun to make as it is to eat. From the simple ghost sugar cookies and classic pumpkin spice rounds to dramatic skull chocolates, graveyard brownie scenes, and no-bake monster krispie treats, every recipe here offers something genuinely festive without requiring professional decorating skills. I’ve seen how a plate of homemade Halloween cookies can make any party feel special and any October afternoon feel like a celebration. Save this post on Pinterest before Halloween sneaks up on you, try one or two recipes from the list, and share it with anyone who loves seasonal baking done right. For more healthy recipes and daily food inspiration, follow TheCookingVibes on Pinterest.