Sourdough Cinnamon Rolls — Pillowy Tangy Dough, Deeply Caramelized Filling
The difference between sourdough cinnamon rolls and a standard yeasted version is not dramatic in the way that a photograph can capture; it’s something you taste in the first bite and then understand immediately. The dough has a very mild, clean tang from the fermentation that makes the sweet filling and frosting taste more vivid in contrast, the same way a pinch of salt makes chocolate taste more chocolatey. The long, cold fermentation also produces a crumb structure that’s softer and more open than an overnight yeasted roll, and the flavor carries a depth that yeasted rolls only approach when they’re made extraordinarily well.
This sourdough cinnamon rolls recipe uses an active, bubbly sourdough starter to leaven an enriched dough of bread flour, eggs, butter, and whole milk. The dough rises at room temperature for 4 to 6 hours, is shaped and refrigerated overnight for the slow cold fermentation that develops the flavor, and is baked the following morning after a 1 to 2 hour room-temperature proof. The total active work is under an hour spread across two days. The filling uses brown butter and brown sugar for a caramelized, toffee-like depth, and the frosting is a tangy cream cheese base that complements the sourdough’s subtle acidity. Patience is the only skill this recipe actually requires.
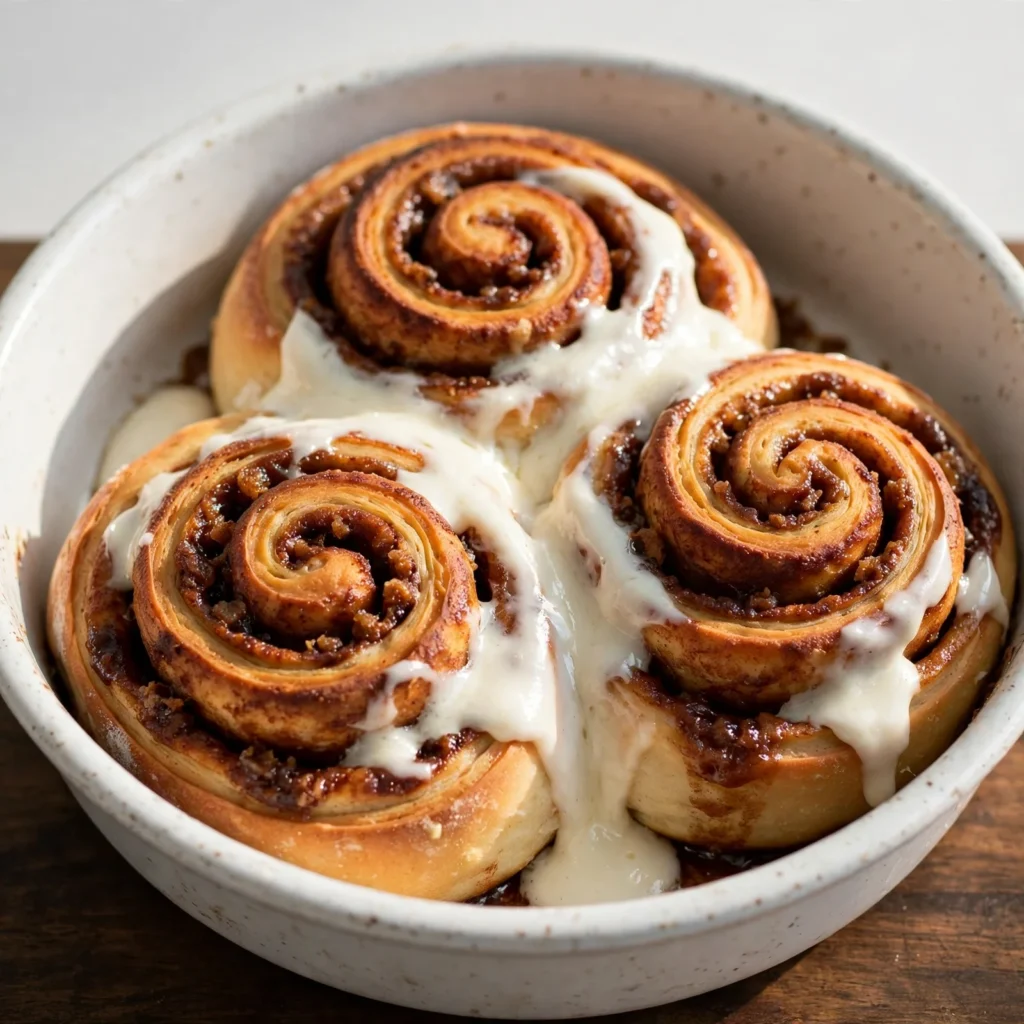
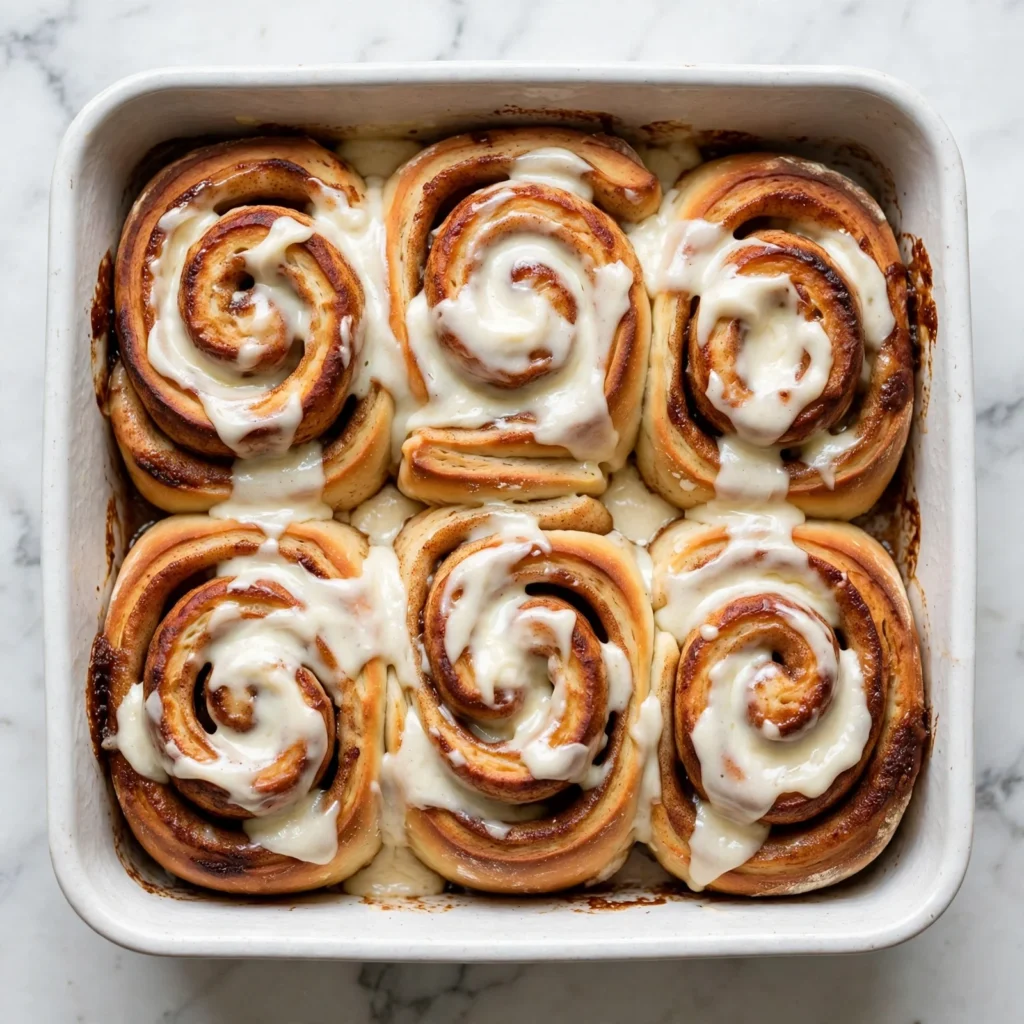
Why You’ll Love These Sourdough Cinnamon Rolls
- Flavor that standard yeasted rolls can’t replicate. The fermentation acids produced during the long cold rise interact with the filling’s sugars and the dough’s proteins to produce a complex, slightly tangy base that makes every bite taste more layered and interesting than the sweeter, one-dimensional character of a commercial yeasted roll.
- Softer crumb from longer fermentation. Extended cold fermentation gives the dough’s enzymes time to partially break down the flour’s starches and proteins into simpler structures; the baked rolls stay noticeably softer at room temperature for longer than same-day yeasted rolls.
- Most of the work happens while you sleep. The overnight refrigerator cold proof means the shaped rolls are ready to bake in the morning after just a short room-temperature proof; the 2 days of calendar time is mostly hands-off waiting.
- Brown butter filling changes the character completely. Browning the butter before combining it with the brown sugar and cinnamon produces a filling with a toasted, nutty toffee flavor rather than the plain sweet-butter combination of most standard recipes.
- Forgiving timeline with multiple flexible points. Unlike yeasted rolls where timing is rigid, sourdough dough tolerates a range of fermentation temperatures and times; if the overnight proof goes a bit longer than planned, the rolls develop more flavor rather than spoiling.
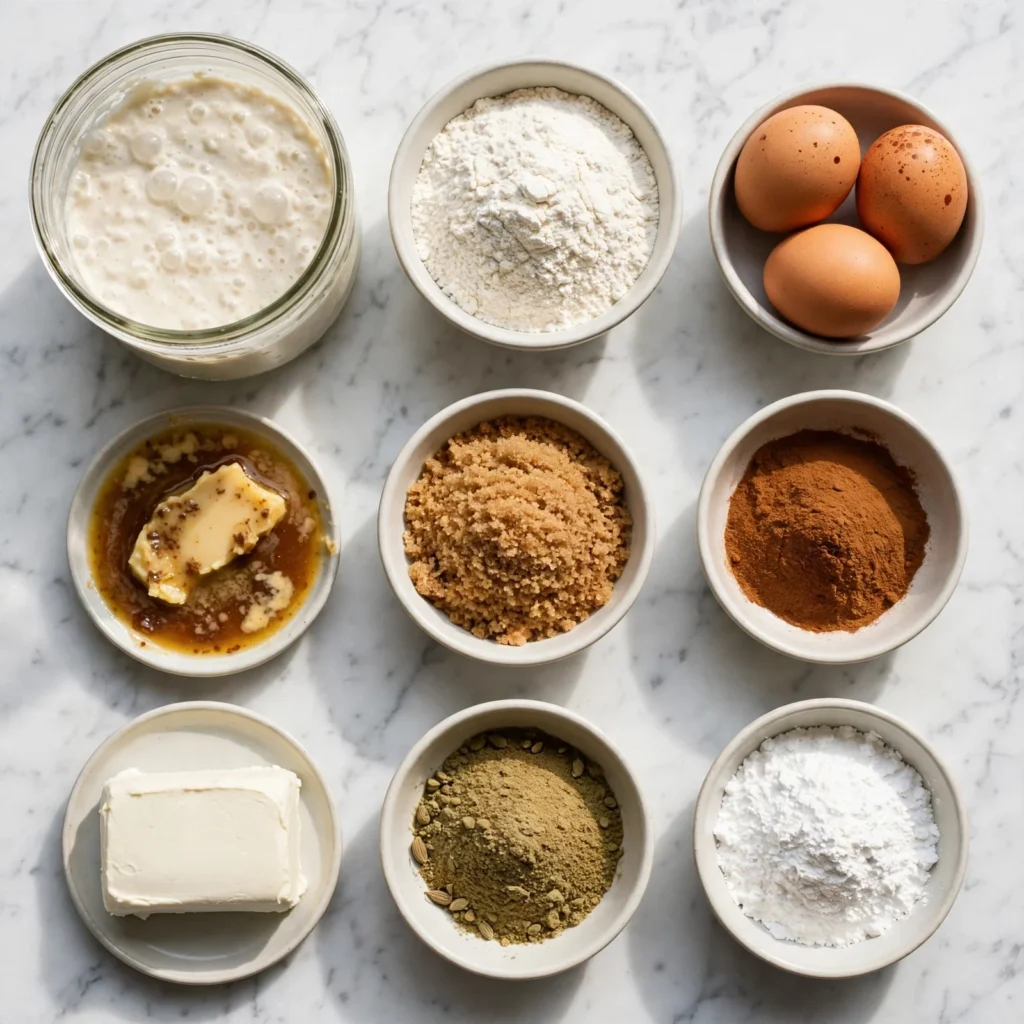
Ingredients You’ll Need
Recipe Timing
| Detail | Info |
|---|---|
| Servings | 12 rolls |
| Difficulty | Moderate |
| Course | Breakfast, Brunch, Dessert |
| Cuisine | American |
| Prep Time | 45 minutes (active work across two days) |
| Cook Time | 28 minutes |
| Rest Time | 8 to 16 hours (overnight cold proof + 1 to 2 hour morning proof) |
| Total Time | 9 hours 43 minutes (minimum, including 8-hour rest) |
For the sourdough starter, it must be active and at its peak when it goes into the dough. A starter fed 4 to 8 hours before mixing, visibly doubled in size, domed at the top, and passing the float test (dropping a small spoonful into water; it floats if active enough) will leaven the dough reliably. A starter that hasn’t been fed recently, that smells very acidic and flat, or that didn’t rise after its last feeding will produce a dough that ferments weakly and rolls that don’t rise well in the oven. This is the single most consequential variable in the entire recipe; a sluggish starter produces dense, gummy rolls even when every other step is executed perfectly.
For the flour, bread flour with 12 to 13% protein produces the ideal structure for this enriched sourdough dough. The higher protein content builds enough gluten to hold the dough’s structure through the long fermentation without becoming tight and difficult to work. All-purpose flour at 10 to 11% protein also works and produces a slightly softer, less structured roll; the fermentation time may need to be shortened by 1 to 2 hours at room temperature since lower-protein flour develops gluten more quickly.
For the butter in the filling, browning it is not optional for the deepest flavor version of this recipe. The browning step takes 5 minutes and converts the butter’s milk solids into nutty, toasted aromatic compounds that transform the filling from straightforwardly sweet into something with real depth. If time is short, softened butter at room temperature substitutes directly at the same quantity; the rolls are still excellent, just less complex in the filling.
The Dough:
- 120g (about 1/2 cup) active sourdough starter at 100% hydration, at peak — the leavening agent; must be visibly active and bubbly; the most consequential single ingredient
- 600g (about 4 3/4 cups) bread flour, plus extra for surface — the structural base; spooned and leveled, or weighed
- 2 large eggs, room temperature — add richness, structure, and contribute to the golden color of the crumb
- 240ml (1 cup) whole milk, warm at 35 to 38°C — the primary liquid; warm temperature activates the starter’s activity and makes the dough more extensible
- 85g (6 tablespoons) unsalted butter, softened — added after initial mixing; enriches the dough and produces the soft, pillowy texture; room temperature is essential for smooth incorporation
- 50g (1/4 cup) granulated sugar — sweetens the dough and feeds the starter
- 1 teaspoon fine salt — added separately from the starter and sugar; placed away from them during initial mixing to avoid early inhibition of fermentation
- 1 teaspoon pure vanilla extract
The Brown Butter Cinnamon Filling:
- 115g (1/2 cup) unsalted butter — browned before use; the browning produces the toffee-like depth that makes this filling distinctly better than a standard version
- 200g (1 cup packed) light brown sugar — contributes molasses depth; the Maillard caramelization during baking produces the characteristic sticky, jammy filling interior
- 2.5 teaspoons ground cinnamon — the primary spice; use a freshly opened jar for the most pronounced, warm, slightly sweet cinnamon flavor
- 1/4 teaspoon ground cardamom — optional; adds a floral, slightly citrusy warmth that pairs naturally with the sourdough’s tang
The Cream Cheese Frosting:
- 115g (4 oz) full-fat block cream cheese, fully softened — the base; must be block style at full room temperature or the frosting will be lumpy
- 60g (4 tablespoons) unsalted butter, softened — adds richness and ensures the frosting drapes smoothly over warm rolls
- 240g (2 cups) powdered sugar, sifted
- 1.5 teaspoons pure vanilla extract
- 2 to 3 tablespoons whole milk, as needed for consistency
- Pinch of fine salt
Allergen and Dietary Disclosure
These sourdough cinnamon rolls contain gluten (bread flour), dairy (butter in the dough and filling, cream cheese and butter in the frosting, milk in the dough), and eggs (in the dough). They are naturally nut-free as written.
For dairy-free: replace the butter in the dough, filling, and frosting with a good-quality vegan butter block (not margarine in a tub). Replace the whole milk with full-fat oat milk warmed to the same temperature. Replace the cream cheese with a dairy-free block-style cream cheese alternative. The brown butter step works with most vegan butter blocks though the flavor is slightly different; the rolls bake and proof similarly.
For egg-free: replace the two eggs with 4 tablespoons of full-fat plain Greek yogurt worked directly into the dough with the milk. The yogurt provides protein and moisture that partially replicates the eggs’ structural contribution. The crumb will be slightly denser and the rolls may not rise quite as tall; the flavor profile is otherwise very similar.
For gluten-free: this specific sourdough cinnamon roll recipe is not gluten-free adaptable in a straightforward way. Sourdough fermentation requires gluten for the network structure that traps fermentation gases and produces the characteristic open crumb; gluten-free flours do not behave equivalently in long-fermentation applications. A separate gluten-free cinnamon roll recipe using commercial yeast and gluten-free flour blends produces better results than attempting this method with gluten-free alternatives.
This recipe has not been tested in a certified allergen-free kitchen and cannot be guaranteed safe for any specific allergy.
Equipment Needed
- Large mixing bowl or stand mixer with dough hook — for initial mixing and the butter incorporation stage. The dough is enriched and slightly sticky; a stand mixer handles the butter incorporation phase on medium speed in about 6 minutes without effort. Hand kneading works but requires 10 to 12 minutes of active work and sticky hands; the dough becomes workable as the gluten develops.
- Bench scraper — for managing the sticky sourdough dough during folding and shaping. A bench scraper divides the dough cleanly, lifts it from the surface, and shapes the bottom of the cylinder before rolling without adding extra flour that would change the dough’s hydration.
- 9×13-inch (23x33cm) baking dish — the ideal format for 12 rolls with the space to allow a second rise without the rolls pressing against the edges too tightly before proofing. A dish with lower sides produces more even heat distribution around the rolls during baking than a high-sided pan.
- Sharp serrated knife or unflavored dental floss — for cutting the shaped roll cylinder cleanly without compressing the layers. Dental floss looped under the cylinder and crossed produces clean, even cuts that preserve the spiral layers better than a knife applied with downward pressure.
- Instant-read thermometer — for checking the milk temperature before adding it to the dough (35 to 38°C for starter-friendly warmth), and optionally for checking the rolls’ internal temperature at doneness (88 to 93°C at the center confirms fully baked through).
Step-by-Step Directions
Step 1: Mix the Dough
In a large bowl or the stand mixer bowl, combine the active sourdough starter, warm milk, eggs, sugar, and vanilla extract. Whisk briefly until the starter is dissolved into the liquid with no visible lumps. Add the bread flour and salt, placing the salt on the opposite side of the bowl from where you pour the starter mixture if doing this by hand; this brief separation prevents the salt from directly contacting the starter before mixing begins. Mix on low speed with the dough hook, or fold by hand, until all the flour is absorbed and a shaggy, rough dough forms with no dry flour remaining. Cover the bowl and rest for 30 minutes; this autolyse period hydrates the flour and begins gluten development without any additional mixing, which reduces the total kneading time needed.

Chef’s Note: The 30-minute autolyse rest is particularly valuable in an enriched sourdough dough because the flour has time to fully hydrate before the fat is added. Adding butter to under-hydrated flour produces a dough where the fat coats the flour before water can penetrate it, making gluten development slower and the dough harder to work. Allowing full hydration before fat addition is the technique that makes the butter incorporation stage go smoothly.
Step 2: Incorporate the Butter
After the 30-minute rest, knead or mix the dough until it passes the preliminary windowpane test: stretch a small piece; it should hold a thin translucent membrane without immediately tearing. Then add the softened butter in 3 to 4 additions on medium speed (or working by hand), waiting until each addition is fully incorporated before the next. The dough will look greasy and separated each time butter goes in; this resolves with 60 to 90 seconds of mixing as the fat distributes into the gluten network. After all the butter is incorporated, knead on medium speed for 4 to 6 more minutes until the dough is smooth, slightly tacky, elastic, and pulls away from the bowl sides cleanly. A final windowpane test should show a very thin, nearly transparent membrane that holds without tearing.
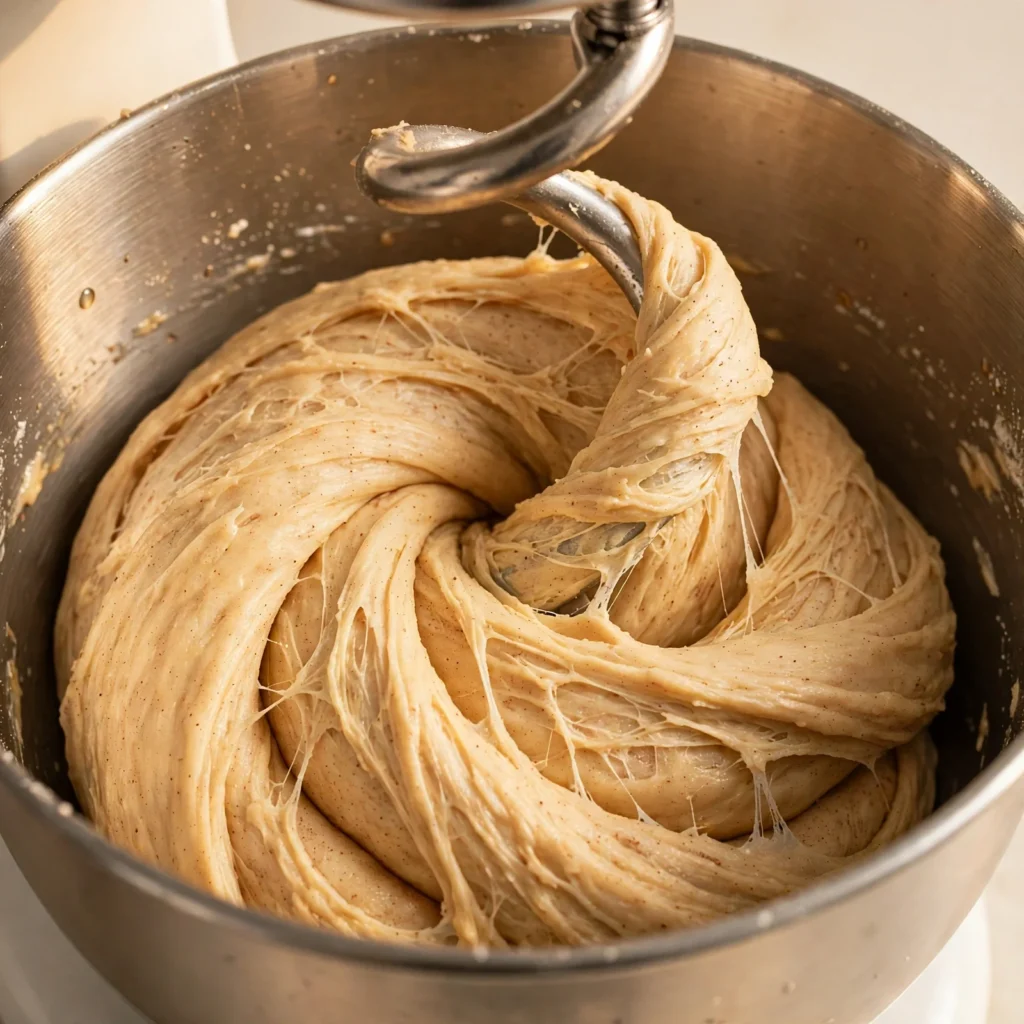
Step 3: Bulk Fermentation with Folds
Transfer the dough to a lightly oiled large bowl. Cover tightly with plastic wrap or a damp cloth. Over the next 4 to 6 hours at room temperature (24 to 26°C is ideal), perform 3 to 4 sets of stretch-and-fold every 30 to 45 minutes during the first 2 hours, then leave undisturbed for the remaining fermentation time. For each stretch-and-fold set, wet your hand slightly, grab one side of the dough, stretch it upward as high as it will go without tearing, and fold it over the center; rotate the bowl 90 degrees and repeat for a total of 4 folds per set. The dough should feel progressively stronger, more cohesive, and more elastic with each set; by the third set it should resist the stretching noticeably more than it did in the first set.
The bulk fermentation is complete when the dough has grown by 50 to 75% (not necessarily doubled), feels airy when you press the surface gently, and a small piece held up to light shows visible small bubbles throughout the interior.
Chef’s Note: The stretch-and-fold technique replaces traditional kneading during the bulk fermentation and is the method most commonly used by home bakers with enriched sourdough doughs. Each fold develops gluten strength without degassing the dough, which builds structure incrementally while preserving the fermentation gases the starter has already produced. By the time the bulk fermentation is complete, the dough has more gluten strength than it would from kneading alone and the crumb structure is already beginning to develop.
Step 4: Brown the Butter and Make the Filling
During the final hour of bulk fermentation, brown the butter for the filling: place the butter in a light-colored saucepan over medium heat, swirling every minute, until the milk solids turn deep amber and the butter smells unmistakably nutty and toffee-like, about 5 to 6 minutes. Remove immediately from the heat and pour into a heatproof bowl; add the brown sugar and cinnamon and whisk together until fully combined into a thick, aromatic paste. Allow to cool until spreadable but not hardened, about 20 minutes at room temperature. The filling should be soft enough to spread across the dough without tearing it.
Step 5: Shape the Rolls
Turn the bulk-fermented dough onto a lightly floured surface. Gently press and roll it into a rectangle approximately 45cm wide by 35cm deep, about 6 to 7mm thick, using firm even pressure with a rolling pin rather than fighting the dough. If the dough springs back aggressively, cover it with a cloth and rest for 10 minutes to allow the gluten to relax before continuing.
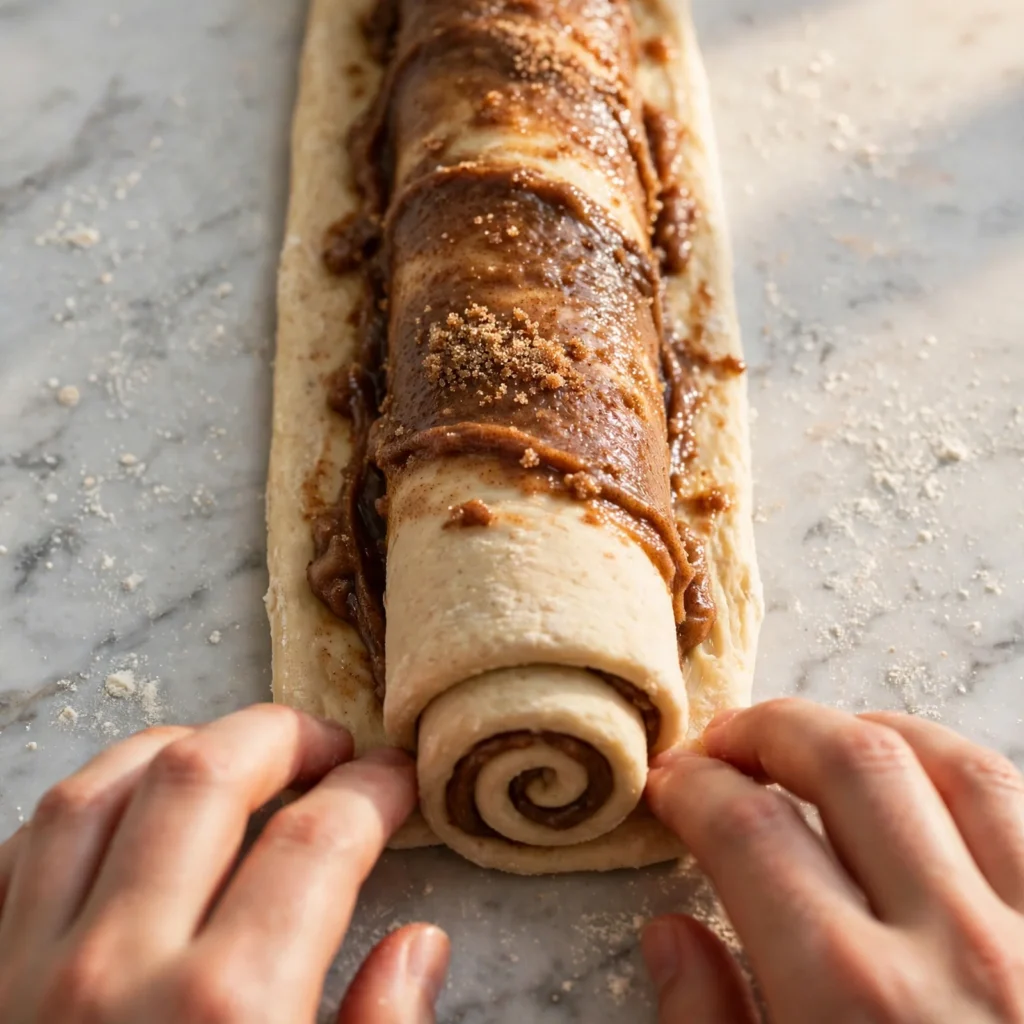
Spread the brown butter filling evenly across the entire dough surface, leaving a 2cm border along the far long edge. Starting from the near long edge, roll the dough into a tight cylinder, keeping even tension throughout and rolling away from you. Pinch the seam along the entire length to seal. Using dental floss or a sharp serrated knife, cut the cylinder into 12 equal rolls, each approximately 3.5 to 4cm thick.
Arrange the rolls cut-side up in the greased 9×13-inch baking dish with small gaps between each; they will expand during the cold proof and the final room-temperature proof to fill those gaps.
Chef’s Note: Leaving the 2cm clean border along the far edge of the dough before rolling is the detail that prevents the filling from leaking out of the unsealed end of the cylinder. Without this border, the filling at the far edge acts as a lubricant that prevents the seam from adhering, and the cylinder unrolls during cutting or baking. A clean border at the far edge gives the dough a surface to grip and seal against.
Step 6: Overnight Cold Proof
Cover the baking dish tightly with plastic wrap and refrigerate overnight, between 8 and 16 hours. During this time, the rolls proof slowly in the cold environment, which deepens the sourdough flavor through continued fermentation acid production while keeping the yeast activity slow enough to prevent over-proofing. The rolls will look slightly larger in the morning but not dramatically so; they finish their rise during the room-temperature proof the following morning.
In the morning, remove the dish from the refrigerator and leave it covered at room temperature for 1 to 2 hours until the rolls look visibly puffed, feel airy when the top is pressed gently (the indentation should fill in slowly over 5 seconds), and the gaps between the rolls have filled in significantly. The room-temperature proof time depends on the kitchen temperature; a cold kitchen (below 20°C) may need closer to 2.5 hours.
Step 7: Bake the Rolls
Preheat the oven to 190°C (375°F). Bake the proofed rolls on the center rack for 25 to 30 minutes until the tops are deep golden-brown across the entire surface, the visible filling edges are bubbling and caramelized, and an instant-read thermometer inserted into the center of the center-most roll reads at least 88°C (190°F). The center roll is always the last to finish; if the edges look done but the center looks pale, tent the edges loosely with foil and continue baking for 3 to 4 more minutes.
Remove from the oven and cool in the dish for 8 to 10 minutes before frosting; frosting applied to rolls straight from the oven dissolves completely rather than melting into the spirals attractively.
Step 8: Make the Frosting and Frost
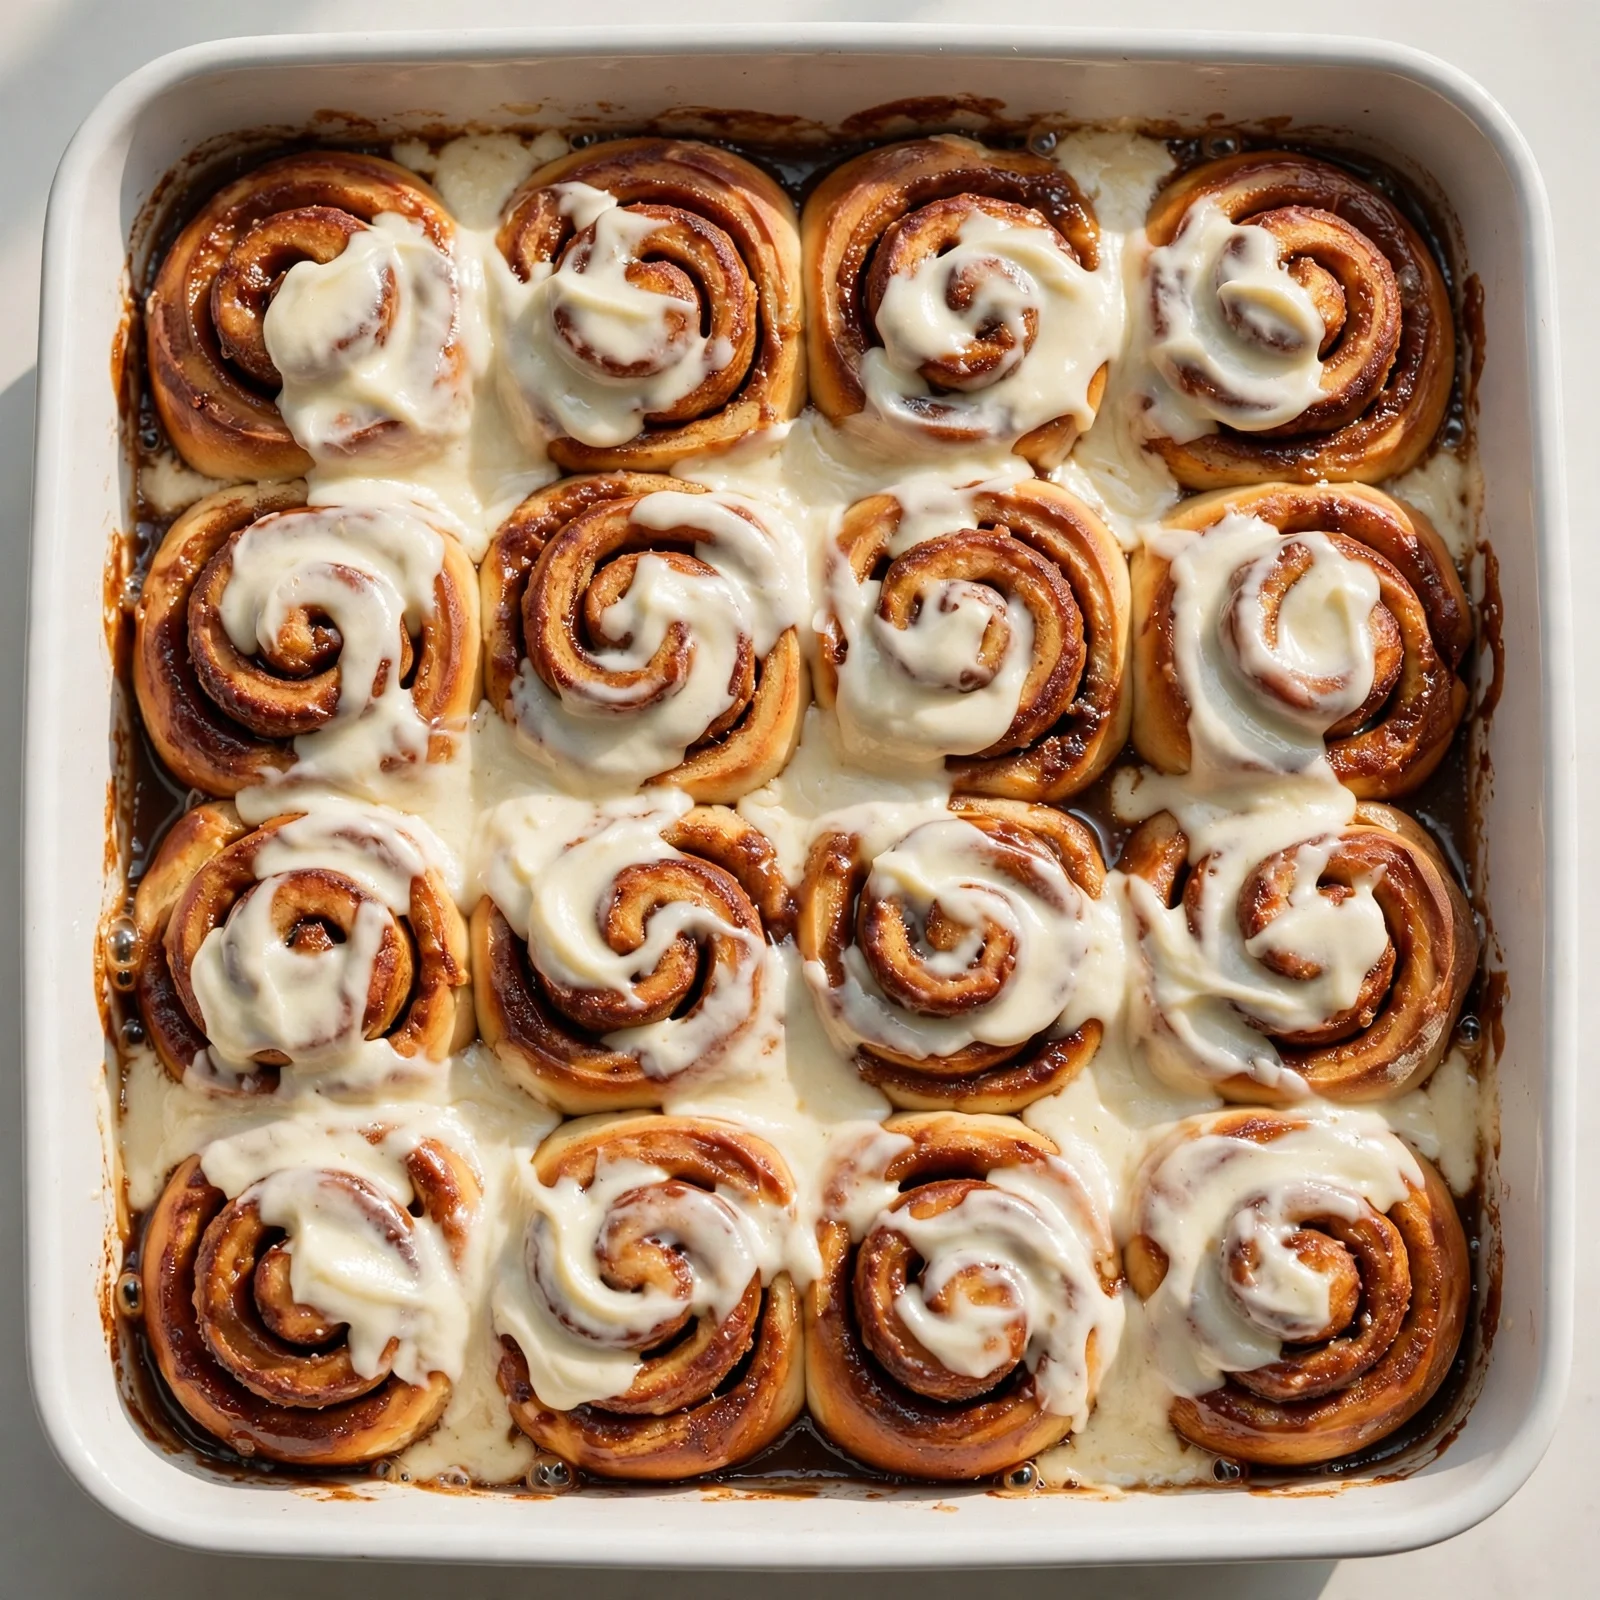
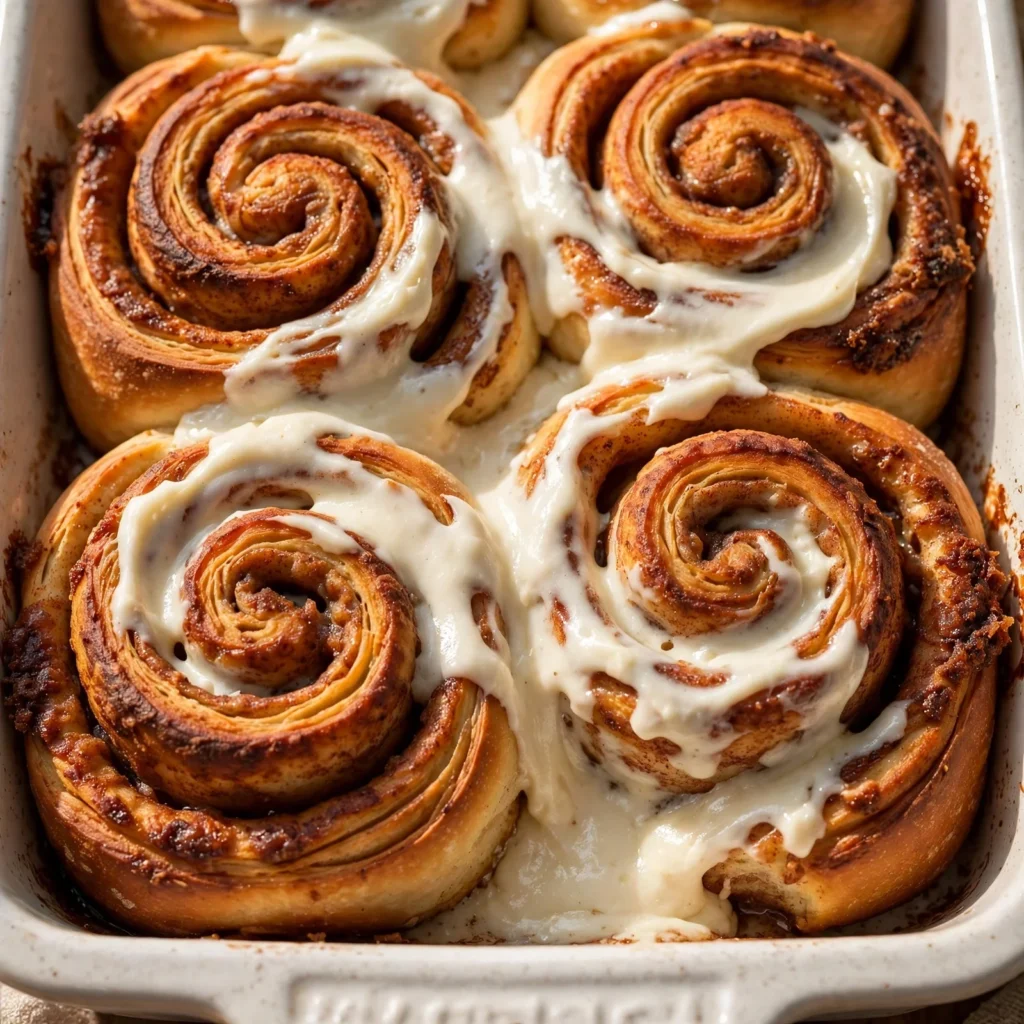
Beat the softened cream cheese and softened butter together with a hand mixer on medium speed for 90 seconds until completely smooth and lump-free. Add the sifted powdered sugar in two additions, beating on low after each, then on medium for 60 seconds. Add vanilla, salt, and milk one tablespoon at a time until the frosting is thick but pourable rather than rigid. Pour or spoon the frosting generously over the warm rolls, using a spatula to push it into the gaps between the spirals.
Common Mistakes and Troubleshooting
| Problem | Cause | Solution |
|---|---|---|
| Rolls dense and didn’t rise well | Starter wasn’t active at peak, or dough over-fermented at room temperature | Always use a starter that has visibly doubled after its most recent feeding; shorten room-temperature bulk if the kitchen is above 26°C |
| Dough too sticky to work with | High kitchen humidity, or butter added too warm | Use a bench scraper rather than adding flour; brief refrigerator rest of 15 minutes firms the dough without changing the recipe |
| Filling leaks out and burns on pan bottom | Butter in the filling too warm when applied, or far-edge border skipped | Cool the filling to spreadable but not flowing; always leave the 2cm clean border at the far edge before rolling |
| Rolls didn’t puff during morning proof | Cold proof too long and dough over-fermented, or kitchen too cold for the room-temperature proof | Cold proof maximum 16 hours; allow at least 2 hours at room temperature if kitchen is below 20°C |
| Crumb gummy and underbaked | Pulled from the oven before 88°C internal temperature | Always check the center roll’s temperature; tent the edges and continue baking until the center reaches 88°C |
| Spiral layers visible only faintly after baking | Cylinder rolled too loosely, or dough too thick | Roll firmly with even tension; maintain 6 to 7mm thickness across the entire dough surface |
Variations and Substitutions
- Overnight room-temperature timing (discard-based version): If you want to use the full amount of active starter without planning the timing around a peak, increase the starter to 150g and reduce the room-temperature bulk fermentation to 3 to 4 hours. The extra starter speeds fermentation and allows a shorter bulk time; the flavor is slightly less complex but the schedule is more flexible.
- Apple and cardamom filling: Replace the plain cinnamon filling with a mixture of 1 finely diced medium apple, 150g of light brown sugar, 1.5 teaspoons of cinnamon, 1 teaspoon of cardamom, and 85g of browned butter. The apple pieces add a subtle fruity moisture and sweetness that caramelizes into the layers during baking and pairs beautifully with the sourdough’s tang.
- Orange cream cheese frosting: Add the finely grated zest of 1 large orange and 1 tablespoon of fresh orange juice to the cream cheese frosting in place of 1 tablespoon of milk. The orange zest adds a floral citrus note that echoes the sourdough’s brightness and makes the frosting taste more complex without being identifiably orange-flavored.
- Chocolate swirl variation: Add 30g of Dutch-process cocoa powder and 30g of finely chopped dark chocolate to the brown butter and brown sugar filling before spreading. The cocoa adds a slightly bitter, complex depth that works particularly well with the longer fermentation’s mildly acidic character. Use a plain vanilla cream cheese frosting or dust lightly with cocoa instead of full frosting.
- No-fold simplified method: If the stretch-and-fold technique feels like too much attention during the bulk fermentation, substitute a single 10-minute hand knead after the autolyse rest, then let the dough bulk ferment completely undisturbed for 5 to 7 hours. The crumb will be slightly less open and the structure slightly less developed, but the flavor from the overnight cold proof will be nearly identical.
- Same-day faster version: Replace 50g of the sourdough starter with 4g (about 1.5 teaspoons) of instant yeast added with the flour. Reduce the room-temperature bulk fermentation to 1.5 to 2 hours and skip the overnight cold proof; proof the shaped rolls at room temperature for 45 to 60 minutes and bake the same day. The flavor will be milder and more yeast-forward than the overnight version but the technique and texture are comparable.
Serving Suggestions
- Serve warm, 8 to 10 minutes after frosting, when the cream cheese frosting has melted into the gaps between the spirals and the filling is still sticky and fragrant. This is the ideal eating window; the rolls are fully set, the frosting is fluid, and the caramelized filling is at its most vivid.
- Place the baking dish directly at the center of a brunch table with a large serving spoon and let guests pull their own. The frosted dish presentation, with the white frosting visible across the golden-brown tops, is attractive without any additional effort.
- Alongside strong black coffee or a properly brewed black tea; both bitter, roasted beverages contrast the richness of the brown butter filling and the sweetness of the frosting in a way that makes each bite of the roll taste more vivid and complex rather than overwhelmingly sweet.
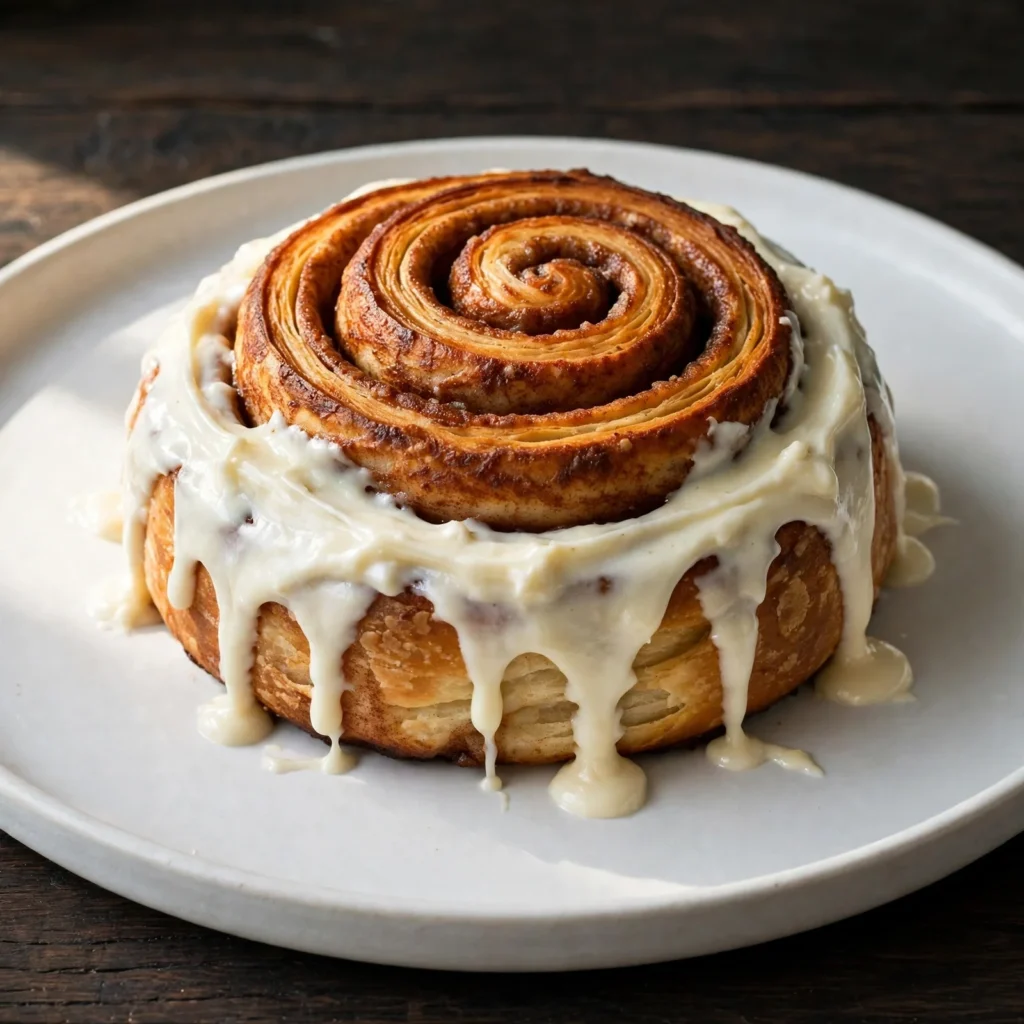
- For a more composed individual presentation, lift a single roll onto a wide white plate, add a small dollop of additional fresh frosting on top, and place one or two thin slices of fresh apple or a few blueberries alongside; the fresh fruit provides an acidic, textural contrast.
- Warm a day-old roll for 25 seconds at 50% microwave power and add a small spoonful of cold cream cheese frosting directly onto the warm surface; the cold frosting melts into a puddle against the warm roll and the eating experience is nearly identical to a freshly baked version.
- Pair with cold fresh-pressed orange juice; the vitamin C acidity and natural sweetness complement the sourdough tang in the roll and refresh the palate between bites of the rich, sweet filling and frosting.
Tips for the Best Results
- Feed your starter 4 to 8 hours before making the dough and use it only at peak. A starter used before it has peaked produces a weaker, less active dough that may not rise adequately during the bulk fermentation or the morning proof. The float test is a quick confirmation: drop a small spoonful into a glass of water and it should float, indicating enough gas production to indicate active fermentation. A starter that sinks needs more time; one that has peaked and collapsed smells very sharp and should be fed again before use.
- Don’t rush the bulk fermentation by raising the temperature. Placing the dough in a warm oven or near a heat source to accelerate bulk fermentation speeds the clock but reduces the flavor complexity that the slower, cooler fermentation produces. The organic acids responsible for the sourdough’s characteristic tang and the enzymes responsible for the softer crumb both develop more effectively at moderate temperatures (24 to 26°C) over a longer period than at elevated temperatures over a short one.
- Keep the filling at the right consistency: spreadable but not running. Brown butter filling that is still warm runs off the dough during rolling and pools on the pan rather than staying in the layers. Filling that is too cool is firm and tears the dough during spreading. The target consistency is similar to soft peanut butter: thick enough to stay where it’s spread but soft enough to work across the dough’s surface without dragging.
- Cold-proofed rolls are fragile: handle the dish gently. The overnight cold proof produces rolls that are partially proofed with a delicate gas structure inside the dough. Dropping the dish, pressing the rolls firmly, or stacking anything on the covered dish can deflate that structure and produce dense, heavy rolls. Carry the dish flat and two-handed from the refrigerator to the counter and place it down gently.
- Frost while the rolls are warm, not hot and not cold. Frosting applied at 5 minutes out of the oven dissolves into a thin, invisible coating that pools in the dish. Frosting applied after the rolls have cooled to room temperature sits on top rather than melting into the spirals. At 8 to 10 minutes post-oven, the roll surface is warm enough that the frosting melts into every gap and spiral while still maintaining enough body to produce a visible, generously coated surface.
Storage Tips
Refrigerator
Frosted sourdough cinnamon rolls keep in the refrigerator in a sealed container or covered dish for up to 4 days. The sourdough fermentation actually contributes to their shelf life: the organic acids produced during fermentation mildly inhibit mold growth, and the rolls stay softer at day 3 than a standard yeasted roll would. Store without the fresh frosting if possible; add a fresh dollop when reheating. The flavors deepen slightly during refrigerator storage, and many people find the day-2 version has the most developed, complex flavor of any eating point.
Freezer
Sourdough cinnamon rolls freeze very well for up to 2 months. Freeze after baking but before frosting for the best result: cool completely, wrap each roll individually in plastic wrap, and place in a freezer bag. Thaw overnight in the refrigerator, warm briefly in the microwave or oven, and frost fresh. Frosted rolls can also be frozen; thaw individually at room temperature for 1 to 2 hours and reheat gently. The texture after thawing is very close to fresh due to the sourdough’s open crumb structure, which rehydrates more readily than a tightly crumbed yeasted roll.
Reheating
Microwave reheating at 50% power for 20 to 30 seconds per roll produces the fastest result; the roll warms evenly without the exterior drying. For reheating multiple rolls, place them in the covered baking dish with 2 tablespoons of water added to the base of the dish and warm at 165°C (325°F) for 10 to 12 minutes; the water creates gentle steam that rehydrates the crumb. Add fresh frosting after reheating either way; heated frosting from a previous application tends to thin and separate rather than maintaining its creamy texture.
Make-ahead note: The absolute best practical approach for fresh morning sourdough cinnamon rolls is to assemble the filled, uncut cylinder the evening before, refrigerate overnight, slice into individual rolls the next morning, proof at room temperature for 1.5 to 2 hours, and bake. This shifts a single step to the morning but keeps the rolls at their freshest and most freshly proofed state, which produces the most dramatic oven spring and the most open, airy crumb.
Nutrition Information
Per serving, approximately one roll (1/12 of the recipe) with cream cheese frosting:
| Nutrient | Amount |
|---|---|
| Calories | 495 kcal |
| Protein | 9g |
| Total Carbohydrates | 75g |
| Dietary Fiber | 2g |
| Total Sugar | 40g |
| Total Fat | 19g |
| Saturated Fat | 11g |
| Cholesterol | 78mg |
| Sodium | 215mg |
| Vitamin C | 0mg |
| Calcium | 70mg |
| Iron | 2.8mg |
| Potassium | 115mg |
Nutrition values are approximate and may vary based on starter hydration, bread flour brand, butter quantity in filling, and frosting applied per roll.
Why This Recipe Works
The flavor advantage of sourdough cinnamon rolls over yeasted versions is biochemically traceable to two types of organic acids produced during fermentation: lactic acid and acetic acid. Lactic acid bacteria in the sourdough starter produce lactic acid under warm, relatively anaerobic conditions; this acid contributes a mild, yogurt-like tang. The same bacteria produce acetic acid under cooler, more aerobic conditions; this contributes a slightly sharper, more vinegar-adjacent acidity. An overnight cold proof, conducted at 4 to 5°C, favors acetic acid production, which is why cold-proofed sourdough rolls have a more pronounced, complex tang than room-temperature-proofed ones. The interaction of these acids with the brown butter filling’s caramelized sugars and the cream cheese frosting’s lactic acidity creates the layered, contrasting flavor profile that makes the first bite distinctly different from a yeasted equivalent.
The softness advantage of long-fermented sourdough rolls over same-day yeasted rolls is attributable to enzymatic activity during the extended fermentation period. Wheat flour contains amylase enzymes that gradually break starch chains into smaller, more soluble molecules over time; this process, called enzymatic hydrolysis, produces sugars that contribute to browning and moistness and converts some of the dough’s tightly bound starch structure into more water-retaining forms. Protease enzymes also act on the dough’s gluten network during long fermentation, partially hydrolyzing the protein bonds and producing a softer, more extensible dough that bakes into a more tender crumb than a short-fermented yeasted dough. Both enzyme types require time to work; they’re present in a same-day yeasted dough but have only 1 to 2 hours of activity compared to 8 to 16 hours in a cold-proofed sourdough dough.
Brown butter’s contribution to the filling is a direct product of the Maillard reaction occurring in the butter’s milk solids. When butter is heated to approximately 150 to 160°C, the water evaporates and the milk solid proteins and lactose reach the Maillard temperature threshold, producing hundreds of aromatic compounds including dihydro-2-furanone (which smells like caramel), pyrazines (which smell toasted and nutty), and various lactones (which contribute a butterscotch-adjacent warmth). These compounds dissolve into the surrounding butterfat and are suspended in the filling; during baking they interact further with the brown sugar’s caramelizing sucrose and the dough’s browning proteins, producing the deeply layered, complex filling flavor that plain softened butter and brown sugar cannot approximate.
The stretch-and-fold technique during bulk fermentation develops gluten strength through a specific mechanism different from traditional kneading. Kneading works protein networks by mechanical shear: adjacent protein strands slide across each other and form new cross-links under the applied force. Stretching and folding works through extensional deformation: the protein strands are aligned in the direction of stretch and form cross-links as they’re brought into contact during the fold. The difference in the practical result is that stretch-and-fold builds directionality into the gluten network, creating a more organized structure than random kneading, which produces a dough with stronger extensional resistance and a baked crumb with more defined, consistent air pockets rather than the more random structure of a kneaded dough.
The overnight cold proof’s role extends beyond flavor development into structure development. During the cold fermentation, the dough’s gluten network continues to cross-link and strengthen while the yeast activity is slowed by the temperature, preventing over-fermentation. The result is a dough removed from the refrigerator with noticeably more elasticity and strength than it had when it went in, which provides better resistance to the pressure of the filling expanding during baking. Rolls made from a cold-proofed dough maintain their spiral structure through the oven because the strengthened dough walls hold the layers distinct; rolls from a same-day proof have softer, more easily compressed walls that can collapse together during baking and produce less visually distinct spirals.
I’ve made this recipe with starter fed at three different timings relative to dough mixing: 2 hours before (under-peaked), 5 hours before (at peak), and 10 hours before (past peak and declining). The under-peaked starter produced rolls that barely doubled during bulk fermentation and required a 3-hour morning proof; the crumb was dense and slightly sticky. The at-peak starter produced the best rise, the airiest crumb, and the most reliable morning proof of 1.5 hours. The past-peak starter produced adequate but noticeably denser rolls with a more aggressively acidic flavor from the excess fermentation acids. The timing of the starter feeding is the single variable that most affects the final result.
Frequently Asked Questions
Can I make sourdough cinnamon rolls ahead of time?
Yes, and the recipe is specifically designed for advance preparation. The overnight cold proof in the refrigerator is the primary make-ahead step; the shaped rolls sit in the refrigerator for 8 to 16 hours and are ready for the morning proof and bake with no additional preparation the day before. Fully baked rolls keep refrigerated for 4 days and freeze well for 2 months. For the most flexible approach, freeze unbaked rolls after cutting and cold-proofing; thaw overnight in the refrigerator and proof and bake fresh the next morning.
Why didn’t my sourdough cinnamon rolls rise?
Insufficient rise almost always points to starter health. A starter that wasn’t at peak activity, hadn’t been fed recently enough, or was used past its rise-and-fall cycle produces weak fermentation that can’t leaven an enriched dough adequately. Before mixing, confirm that the starter has visibly doubled since its last feeding, smells yeasty and slightly tangy rather than sharply acidic or flat, and passes the float test. A sluggish bulk fermentation can sometimes be rescued by moving the dough to a slightly warmer spot (26 to 28°C) and extending the fermentation time by 1 to 2 hours.
Can I use discard starter for sourdough cinnamon rolls?
Technically yes, but the results differ significantly. Sourdough discard (unfed starter) contains far fewer active yeast cells and lactic acid bacteria than a fed, peaked starter; the leavening power is substantially reduced. Adding a small amount of instant yeast (4g per batch) alongside the discard compensates for the reduced fermentation activity and produces rolls that rise reliably. Discard-only rolls without supplemental yeast may rise eventually but require much longer fermentation times and produce inconsistent results depending on the discard’s age and condition.
How do I know when the morning proof is ready?
The morning proof is complete when the rolls have visibly puffed and look noticeably larger than when they came out of the refrigerator, the gaps between the rolls have reduced significantly, and pressing the top of a roll gently with a dampened fingertip leaves an indentation that fills in slowly over about 5 seconds rather than snapping back immediately or not recovering at all. A roll that snaps back immediately needs more time; one where the indentation doesn’t fill in at all is over-proofed. The visual change from the refrigerator to a proofed roll is relatively subtle compared to same-day yeasted rolls; don’t expect a dramatic doubling.
Can I make the filling without browning the butter?
Yes. Softened room-temperature butter at the same quantity (115g) spread across the dough with the brown sugar and cinnamon mixed on top, rather than pre-combined, produces a very good filling. The flavor is sweeter and less complex than the brown butter version but still produces a caramelized, sticky interior after baking. The softened butter approach is slightly easier since it doesn’t require the browning and cooling steps, and it produces no risk of the filling being too warm to spread properly.
Are sourdough cinnamon rolls better than regular cinnamon rolls?
“Better” depends on what you value. Sourdough cinnamon rolls have a more complex flavor with a mild tang, a softer crumb that stays fresh longer due to the fermentation acids, and a depth in the filling from the long fermentation’s interaction with the brown butter and brown sugar. Standard yeasted cinnamon rolls are faster, more consistent in timing, and have a sweeter, more straightforward flavor that many people prefer. Sourdough rolls require more planning and a maintained starter; yeasted rolls require 3 hours and a packet from the pantry. Both are genuinely good; they’re just different experiences.
What hydration should my starter be for this recipe?
This recipe is written for a 100% hydration starter, meaning it contains equal weights of flour and water. If your starter is a different hydration (for example, a stiff starter at 60 to 70% hydration or a liquid starter at 125% hydration), adjust the recipe liquid accordingly. For a stiffer starter, add 1 to 2 extra tablespoons of warm milk to compensate for the reduced liquid in the starter. For a more liquid starter, reduce the milk by 1 to 2 tablespoons. The adjustment doesn’t need to be precise; a small variation in liquid content is easily absorbed by bread flour during kneading.
Conclusion
Sourdough cinnamon rolls reward the investment of two days in a way that few baking projects can. The overnight cold proof isn’t just a scheduling convenience; it’s the step that produces the flavor complexity and crumb softness that make these genuinely different from a standard roll. Understanding that the starter’s health, not the technique complexity, determines 80% of the result takes most of the uncertainty out of the recipe.
Once you’ve made a batch and understand how the dough behaves at each stage, the process becomes intuitive. Feed the starter the night before, mix and bulk-ferment the next day, shape and refrigerate, proof and bake the morning after. That rhythm becomes a natural weekend routine and the sourdough cinnamon rolls become the thing people ask you to bring to every gathering.
If you loved this recipe, save it to your sourdough recipes and weekend baking Pinterest board so you can find it easily later. For more recipes and daily food inspiration, follow TheCookingVibes on Pinterest.
Sourdough Cinnamon Rolls
Ingredients
Equipment
Method
- Combine starter, warm milk, eggs, sugar, and vanilla in a large bowl. Add bread flour and salt (placed away from the starter initially). Mix until a shaggy dough forms. Cover and rest 30 minutes.
- Knead until preliminary windowpane is achieved. Add softened butter in 3 to 4 additions on medium speed or by hand, incorporating fully between each addition. Knead 4 to 6 more minutes until smooth, elastic, and clearing the bowl sides.
- Transfer to an oiled bowl. Cover. Over the next 4 to 6 hours, perform 3 to 4 sets of stretch-and-fold every 30 to 45 minutes during the first 2 hours. Fermentation is complete when the dough has grown 50 to 75% and shows internal bubbles.
- During the final hour of bulk fermentation, brown the filling butter until amber and nutty-smelling. Whisk in brown sugar, cinnamon, and cardamom until a thick paste forms. Cool 20 minutes until spreadable.
- Roll the dough into a 45x35cm rectangle, 6 to 7mm thick. Spread filling evenly, leaving a 2cm border along the far long edge. Roll tightly from the near long edge into a cylinder. Pinch the seam. Cut into 12 equal rolls with dental floss or a serrated knife.
- Arrange cut-side up in a greased 9×13-inch dish. Cover tightly and refrigerate overnight (8 to 16 hours).
- Remove from refrigerator. Let proof at room temperature 1 to 2 hours until visibly puffed and the indentation test fills in slowly. Preheat oven to 190°C (375°F).
- Bake 25 to 30 minutes until deep golden-brown and the center roll reads 88°C (190°F). Cool 8 to 10 minutes.
- Beat softened cream cheese and butter until smooth. Add sifted powdered sugar in two additions, then vanilla, salt, and milk to consistency. Pour generously over warm rolls.
Notes
- Always use the starter at peak activity; an under-peaked or past-peak starter is the single most common cause of dense, under-risen rolls.
- The brown butter filling must be cooled to spreadable consistency before applying; warm filling runs off the dough during rolling.
- Don’t rush the morning room-temperature proof; cold rolls need full 1 to 2 hours at kitchen temperature to complete proofing.
- Frost at 8 to 10 minutes post-oven, not immediately; correctly timed frosting melts into the spirals attractively.
- Allergens: Contains gluten (bread flour), dairy (butter, milk, cream cheese), and eggs. Naturally nut-free.
- This recipe has not been tested in a certified allergen-free kitchen and cannot be guaranteed safe for any specific allergy.