Fluffy Buttercream Frosting — Smooth, Pipeable, and Foolproof
The single most common reason buttercream frosting fails isn’t the recipe. It’s the butter temperature. Too cold and the frosting looks curdled and dense; too warm and it turns greasy and collapses the moment you try to pipe it. Get the butter right and everything else follows easily: the powdered sugar dissolves into a smooth, cloud-like base, the heavy cream brings it to exactly the right consistency, and the whole thing takes 10 minutes from start to finished frosting.
This buttercream frosting recipe is the American-style version, which uses softened butter, sifted powdered sugar, heavy cream, and vanilla. It sets firm enough to hold piped swirls on cupcakes, spreads smoothly across layer cakes without tearing the crumb, and stays stable at room temperature for several hours without melting or sliding. It’s the one frosting recipe worth mastering because it works for birthday cakes, cupcake batches, layer cakes, sheet cakes, and everything in between. Once you understand what each ingredient is doing, you can adjust the consistency, flavor, and sweetness level confidently every time.
Why You’ll Love This Buttercream Frosting
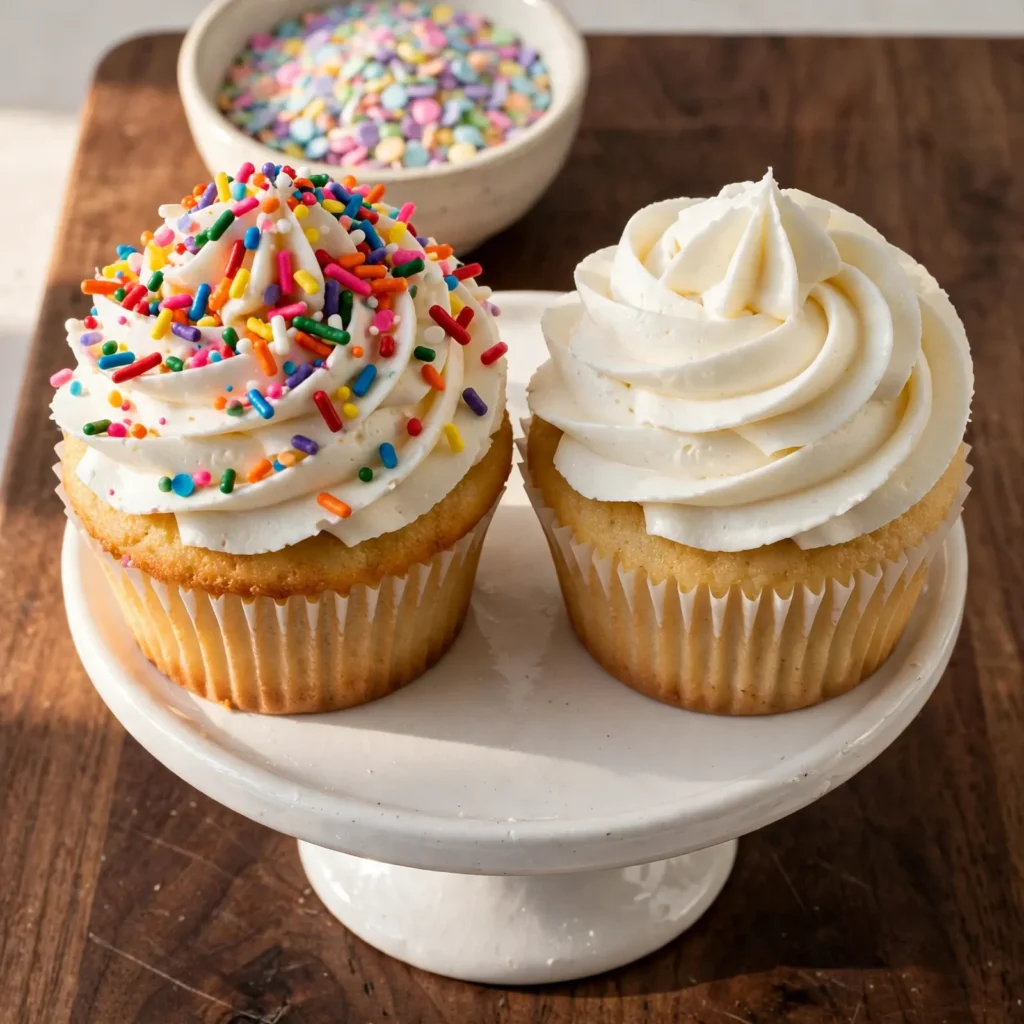
- Pipes cleanly without collapsing. The butter-to-cream ratio here is calibrated so the frosting holds a defined swirl when piped through a tip and keeps its shape for hours at room temperature. A frosting that’s too loose softens immediately after piping and loses definition.
- Smooth, lump-free texture from the first batch. Sifting the powdered sugar before it goes in and beating the butter fully before adding anything else are the two steps that prevent gritty, lumpy frosting. Both are built into this method.
- Adjustable consistency for any application. One to two extra tablespoons of heavy cream takes it from stiff (ideal for borders and rosettes) to spreadable (ideal for coating a layer cake). The same base recipe works for both; you control the final texture.
- Classic vanilla flavor that complements any cake. Pure vanilla extract gives the frosting a warm, clean sweetness rather than the artificial note that imitation vanilla introduces. It pairs with chocolate cake, vanilla cake, lemon cake, and red velvet without competing with any of them.
- Ready in 10 minutes with no special equipment. A hand mixer and a large bowl are all you need. The recipe scales up easily for large batches and keeps in the fridge for two weeks, which makes it a practical recipe to have on hand whenever a baking occasion comes up.
Ingredients You’ll Need
Recipe Timing
| Detail | Info |
|---|---|
| Yield | Frosts one 2-layer 8-inch cake or 24 cupcakes |
| Difficulty | Easy |
| Course | Frosting, Dessert |
| Cuisine | American |
| Prep Time | 10 minutes |
| Cook Time | 0 minutes |
| Total Time | 10 minutes |
The most important ingredient selection decision in this recipe is the butter temperature, which is a state rather than a brand. Softened butter should hold a clear thumbprint when you press your finger into it but not look shiny or leave grease on your finger. Set it out at room temperature for 60 to 90 minutes before you start, or up to 2 hours in a cool kitchen. Butter that is too cold produces a frosting that looks curdled even after prolonged beating. Butter that has softened into a shiny, melting state makes the frosting loose and greasy.
For the powdered sugar, always sift it directly into the mixing bowl rather than pouring it in loose. Powdered sugar clumps badly in the bag and those clumps don’t dissolve fully into the butter no matter how long you beat the mixture, leaving tiny gritty pockets throughout the finished frosting.
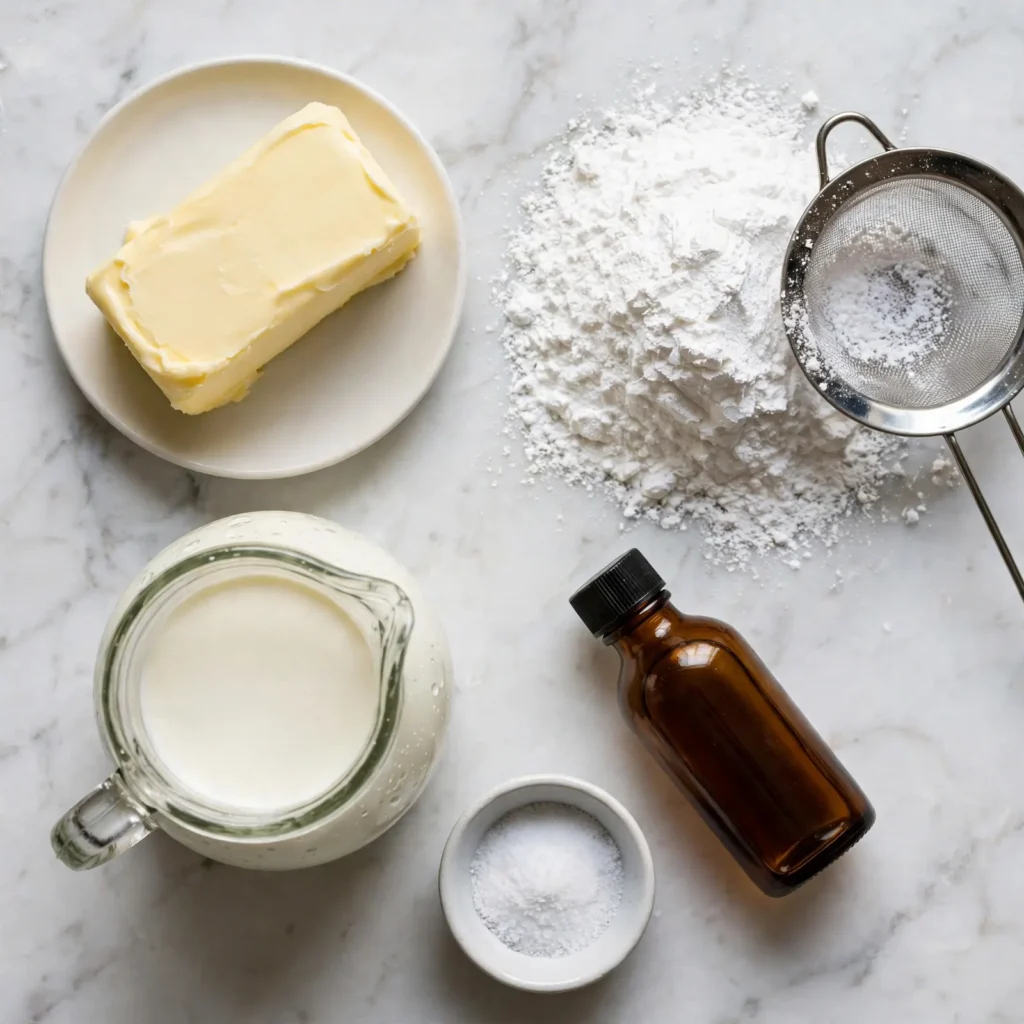
- 1 cup (225g) unsalted butter, softened to room temperature — The structural base of the frosting. Unsalted gives you full control over the salt level; salted butter varies between brands and can make the frosting inconsistently salty batch to batch. One cup of well-softened butter is the right amount for 4 cups of powdered sugar at this cream ratio; more butter makes the frosting too rich and soft to pipe cleanly.
- 4 cups (480g) powdered sugar, sifted — Sweetens and gives the frosting its structure. The quantity sounds like a lot, but at this ratio the finished frosting is sweet in a balanced way rather than cloying, especially with the salt and vanilla. Reduce to 3.5 cups for a slightly less sweet result; the consistency will be slightly softer, so use a touch less cream.
- 3 to 4 tbsp heavy whipping cream — This is the consistency control. Three tablespoons gives you a stiffer frosting ideal for piping; four tablespoons gives you a softer, more spreadable texture that glides across a cake surface. Add it one tablespoon at a time so you don’t overshoot the consistency you need.
- 2 tsp pure vanilla extract — The primary flavor. Use pure, not imitation. Pure vanilla has a rounded, warm depth; imitation has a sharper, artificial note that becomes more noticeable when the frosting is the main thing you’re tasting. For a vanilla-forward frosting, you can increase to 2.5 teaspoons.
- 1/4 tsp fine salt — Cuts the sweetness and prevents the frosting from tasting one-dimensional. This small amount makes a real, noticeable difference; skip it and the finished frosting tastes flat and overly sugary. If you use salted butter, reduce this to just a tiny pinch.
Allergen and Dietary Disclosure
This recipe contains dairy (butter and heavy cream). It does not contain eggs, gluten, or nuts in its base form.
For a dairy-free version, replace the butter with a solid plant-based butter block (not a spread or margarine tub, which contains too much water and produces a loose, greasy frosting). Replace the heavy cream with full-fat coconut cream, chilled and skimmed of the clear liquid, at the same quantity. The frosting will be slightly less stable at room temperature but pipes and spreads well when kept cool. The flavor is mild and works for most applications.
This recipe is naturally gluten-free as written. Always check vanilla extract labels if gluten is a concern; most pure vanilla extracts are gluten-free, but some flavored extracts may contain gluten-based additives.
This recipe has not been prepared in an allergen-free facility. Always verify individual product labels if you are managing a serious allergy.
Equipment Needed
- Stand mixer or hand mixer — Beating the butter properly is the entire foundation of this recipe. A hand mixer on medium-high speed takes about 3 to 4 minutes to get the butter light and fluffy before the sugar goes in; a stand mixer is faster but not necessary. Don’t attempt this with a fork or whisk; you won’t incorporate enough air into the butter and the frosting will be dense.
- Large mixing bowl — The powdered sugar generates a cloud of fine particles when it first hits the mixer. Use a bowl large enough to hold everything with room to spare, and start the mixer on the lowest speed setting when you first add sugar to prevent it from coating your kitchen.
- Fine mesh sieve — For sifting the powdered sugar. This takes 30 seconds and is the most impactful small step in the recipe. Lumpy sugar that skips the sieve produces lumpy frosting.
- Rubber spatula — For scraping down the sides and bottom of the bowl between additions. Cream cheese, butter, and sugar all cling to the bowl below the reach of the mixer beaters, and unincorporated pockets of any of them show up in the finished frosting.
- Piping bags and tips (optional) — For piping onto cupcakes. A large star tip (1M or 2D) is the most versatile and produces the classic swirl shape. Disposable piping bags are convenient; reusable ones work well if you’re baking regularly.
Step-by-Step Directions
Step 1: Beat the Butter Until Light and Fluffy
Place the softened butter in your large mixing bowl. Beat on medium-high speed for 3 to 4 minutes until the butter has turned noticeably paler in color, almost white, and has increased slightly in volume. It should look fluffy rather than dense and smooth. This is not a step you can rush by increasing the speed; the goal is aeration, which takes time regardless of how fast the beaters move.

Chef’s Note: The color change from yellow to near-white during beating is the visual cue that enough air has been incorporated. Under-beaten butter stays pale yellow and dense. The frosting built on pale yellow, dense butter will be heavier and pipe with less definition than frosting built on properly aerated butter. This single step sets the texture for everything that follows.
Step 2: Add the Powdered Sugar Gradually
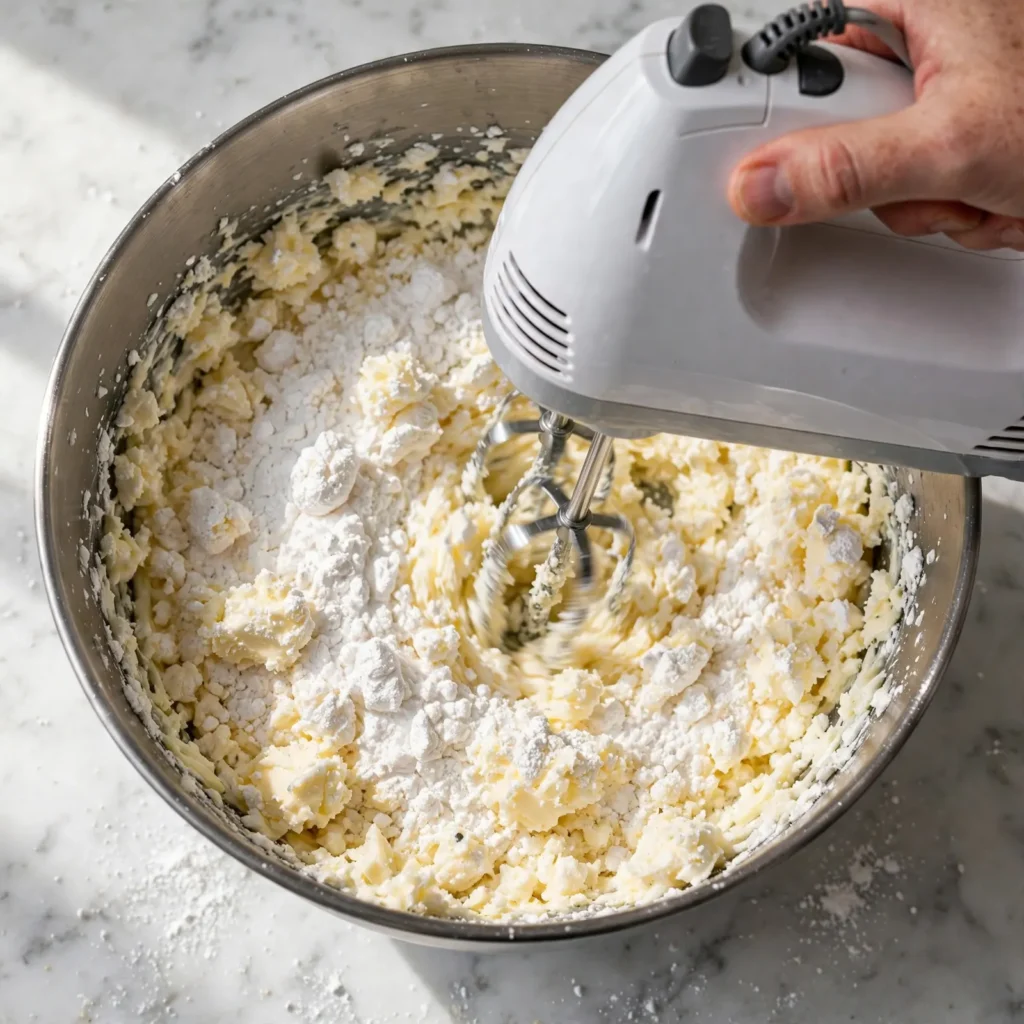
Set the mixer to the lowest speed setting. Add the sifted powdered sugar to the bowl one cup at a time, mixing on low after each addition until the sugar has disappeared into the butter before adding the next cup. Adding all the sugar at once at medium speed sends it flying out of the bowl. After all four cups are incorporated and the mixer is no longer throwing up sugar dust, increase to medium speed and beat for 30 seconds.
Chef’s Note: Adding the sugar on low speed before increasing to medium is the difference between sugar-dusted counters and a clean kitchen. The low-speed addition lets the sugar get wet before it has a chance to travel. Once it’s coated in butter and damp, increasing the speed is safe.
Step 3: Add Vanilla, Salt, and Cream
Add the vanilla extract and salt. With the mixer running on medium speed, pour in 3 tablespoons of heavy cream. Beat on medium-high for 2 to 3 full minutes until the frosting is visibly lighter, fluffier, and the texture has shifted from rough and dense to smooth and silky. Scrape down the sides and bottom of the bowl with a spatula and beat for another 30 seconds to incorporate anything that stuck to the bowl sides.
Taste the frosting. If it needs more sweetness, add a half cup of powdered sugar. If it needs more depth, add a few more drops of vanilla. If the consistency is too stiff for your purpose, add the fourth tablespoon of cream and beat briefly.
Step 4: Adjust and Use
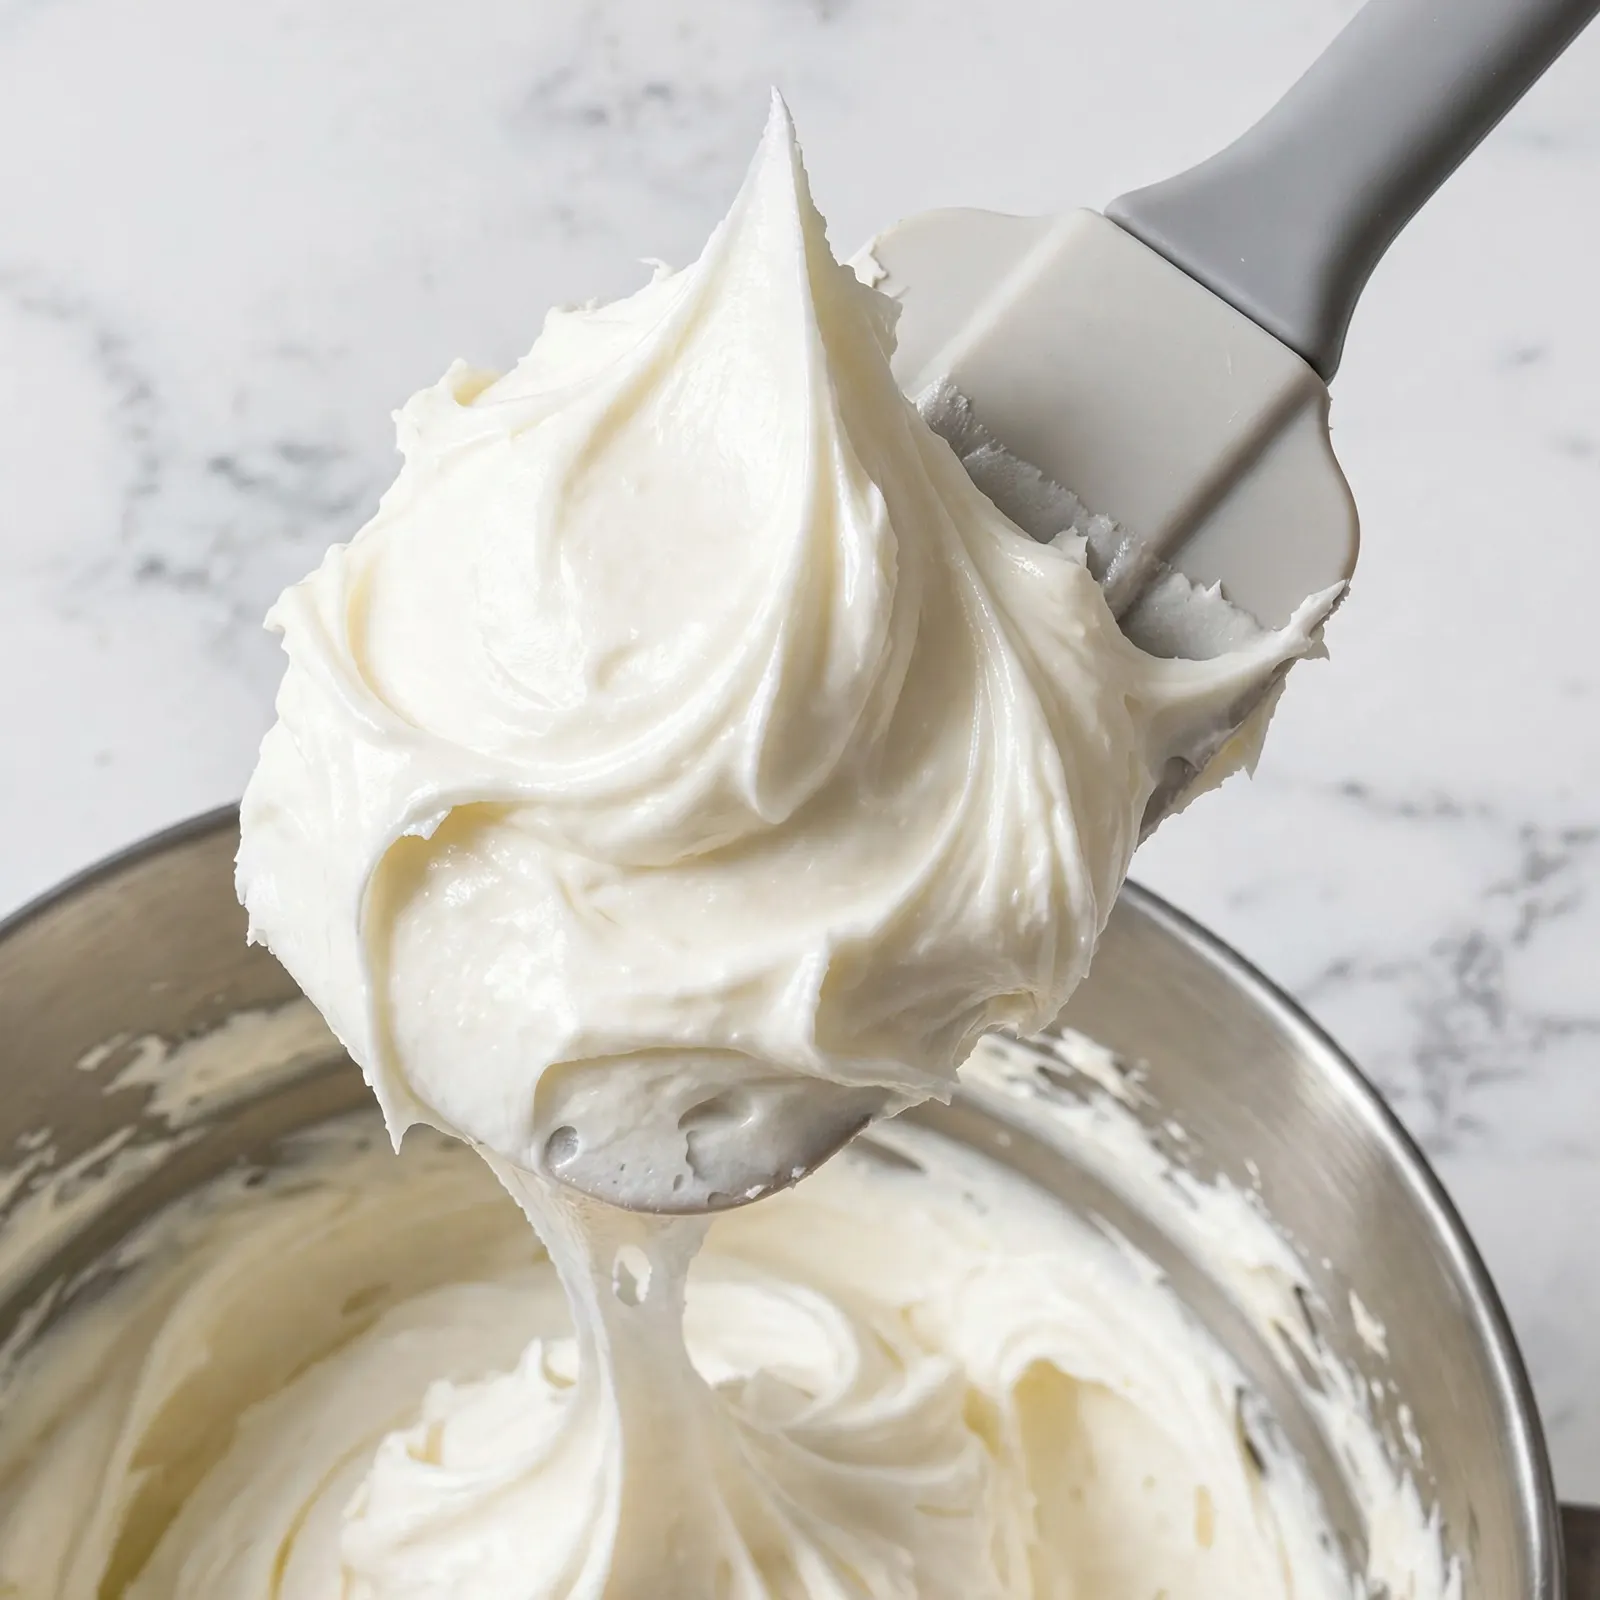
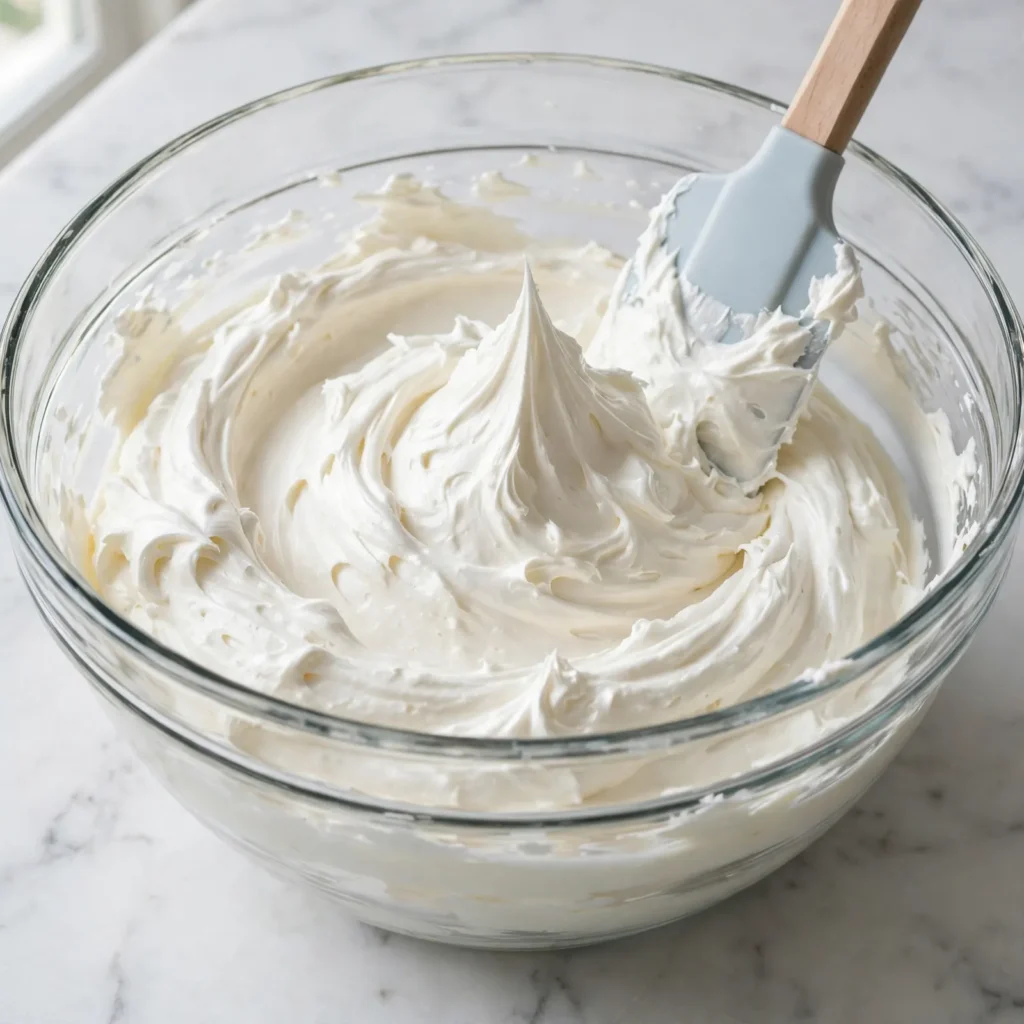
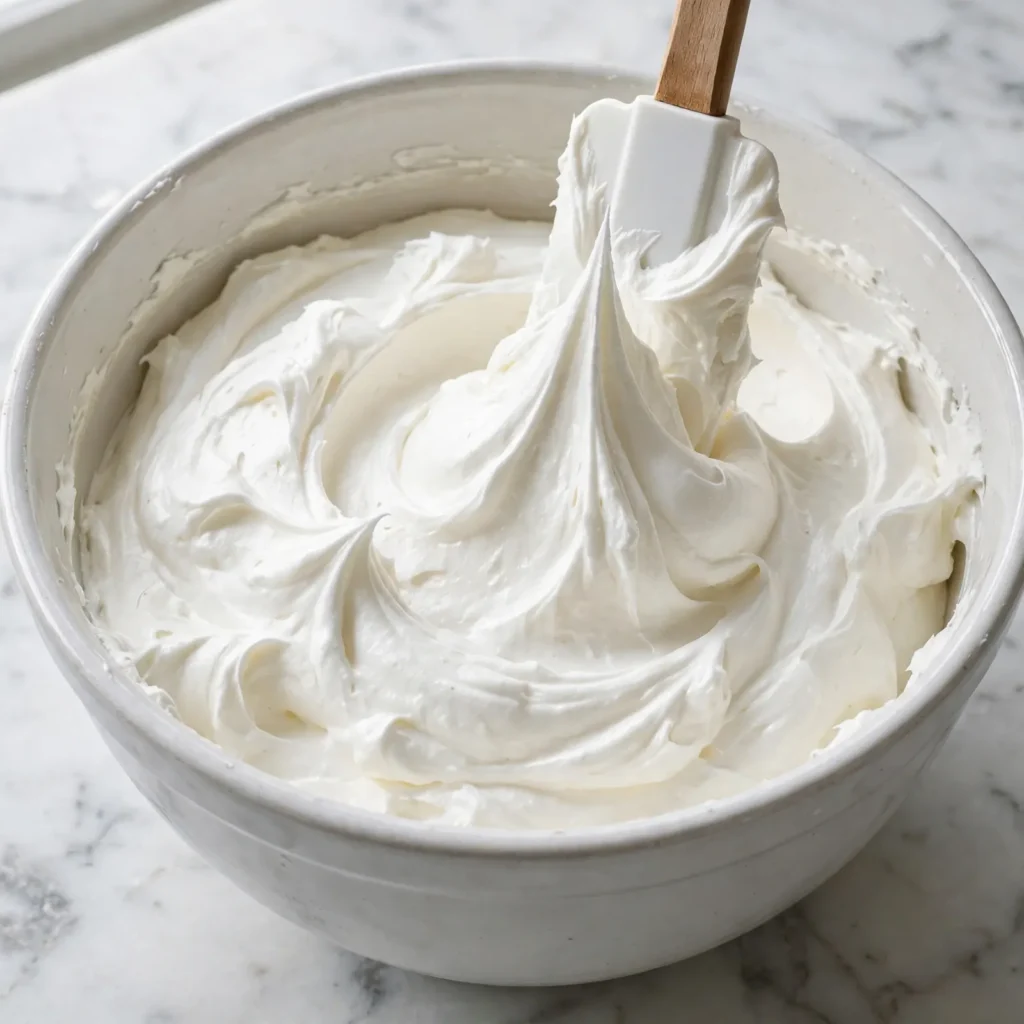
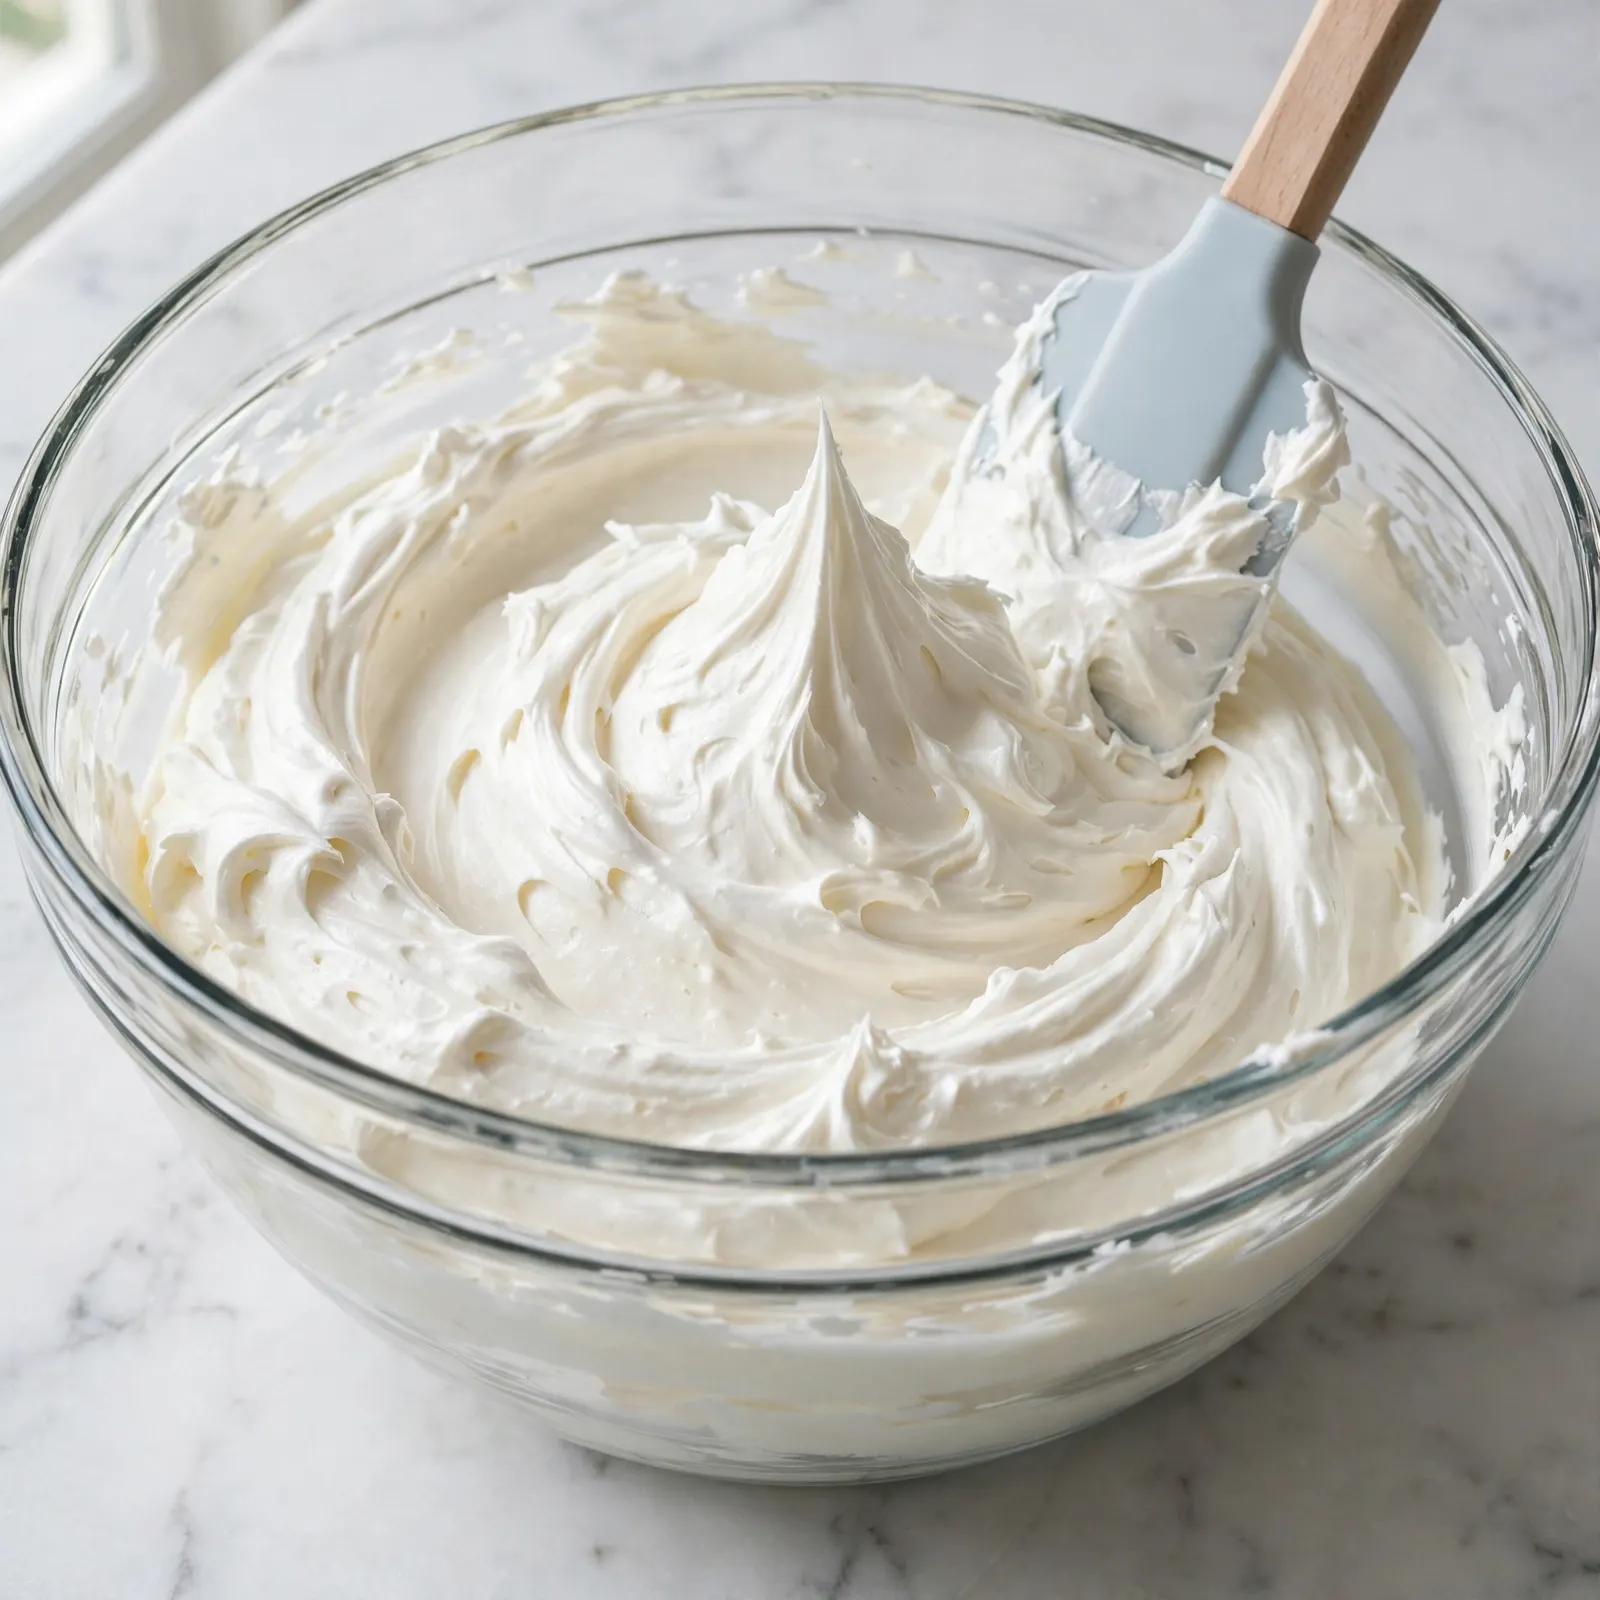
For spreading across a cake, the frosting is ready when it holds its shape on a spatula but glides off it smoothly when you draw the spatula through. For piping, it should hold a stiff peak when you pull the spatula upright. If it’s too stiff and tearing when you try to spread it, add cream half a tablespoon at a time and beat again. If it’s too loose to pipe, add another half cup of sifted powdered sugar and beat until incorporated.
Chef’s Note: I’ve found that the “right” consistency depends entirely on the ambient temperature in your kitchen. On a warm day above 25°C (77°F), lean toward the stiffer side; the body heat from your hands on the piping bag will soften it further by the time it reaches the tip. On a cool day, a slightly softer consistency is fine since it won’t melt during handling.
Common Mistakes and Troubleshooting
| Problem | Cause | Solution |
|---|---|---|
| Frosting is gritty with visible sugar lumps | Powdered sugar wasn’t sifted before adding, or was added too quickly | Always sift directly into the bowl. Add sugar one cup at a time on low speed. If already mixed, beat for an additional 3 to 4 minutes on medium-high; extended beating dissolves most lumps. |
| Frosting looks curdled or broken | Butter was too cold, or cream was added too quickly before butter was fully beaten | If butter is cold, warm the outside of the bowl briefly with your hands and beat again. A broken-looking frosting almost always comes back together with 2 more minutes of beating. |
| Frosting is too greasy and soft | Butter was too warm before beating, or kitchen is too hot | Refrigerate the frosting for 15 minutes and beat again. If the kitchen is consistently warm, work with butter that is slightly firmer than typical room temperature. |
| Frosting is too stiff to spread without tearing cake | Not enough cream, or too much powdered sugar relative to butter | Add heavy cream half a tablespoon at a time and beat after each addition until the frosting spreads off the spatula cleanly. |
| Frosting loses its shape quickly after piping | Butter too soft, too much cream, or kitchen too warm | Refrigerate the piped item for 15 minutes to set the frosting. Next batch: use slightly firmer butter and reduce the cream by half a tablespoon. |
Variations and Substitutions
Chocolate Buttercream: Add 1/2 cup (50g) of sifted unsweetened cocoa powder with the powdered sugar, and increase the heavy cream by 1 tablespoon to compensate for the extra dry ingredient. The cocoa thickens the frosting significantly; beat for an extra minute to ensure it’s fully incorporated and smooth.
Lemon Buttercream: Replace 1 teaspoon of the vanilla extract with 2 tablespoons of fresh lemon juice and 1 teaspoon of finely grated lemon zest. The lemon juice adds acidity that brightens the sweetness; it also slightly thins the frosting, so reduce the cream to 2 tablespoons and add more only if needed.
Strawberry Buttercream: Add 3 tablespoons of freeze-dried strawberry powder (ground in a food processor from freeze-dried strawberries) along with the powdered sugar. Freeze-dried fruit powder adds concentrated flavor and color without the moisture that fresh or frozen berries would introduce. Fresh berries add too much liquid and destabilize the frosting.
Brown Butter Buttercream: Brown the butter before using it: melt it in a light-colored saucepan over medium heat, swirling constantly until it turns deep golden and smells nutty, about 5 to 7 minutes. Cool completely in the fridge until solid, then bring back to room temperature and proceed as directed. The finished frosting has a toffee-like depth that pairs particularly well with vanilla or spiced cakes.
Coffee Buttercream: Dissolve 1 tablespoon of instant espresso powder in 1 tablespoon of hot water. Cool completely, then add it with the cream in Step 3. The espresso adds a bitter, roasted undertone that balances the sweetness naturally and pairs well with chocolate cake.
Less Sweet Version: Reduce the powdered sugar to 3 cups and increase the butter to 1.25 cups. The lower sugar ratio produces a frosting that is noticeably less sweet and richer in butter flavor. The texture is slightly softer, so chill the frosted item for 20 minutes before serving to firm it up.
Serving Suggestions
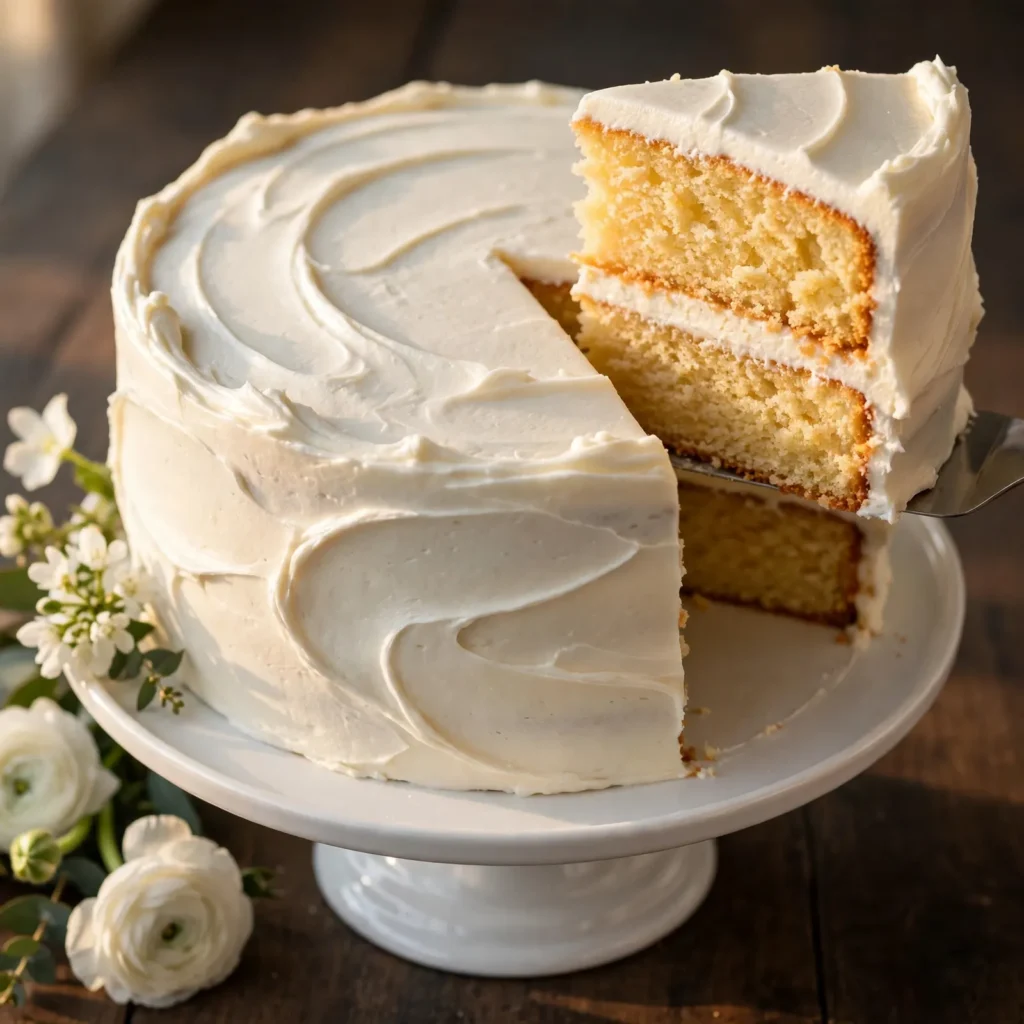
- Spread across a two-layer 8-inch vanilla or chocolate cake with an offset spatula. This recipe makes enough for a generous filling between layers and a full coat across the outside. For a crumb coat plus a final coat, increase the recipe by one and a half times.
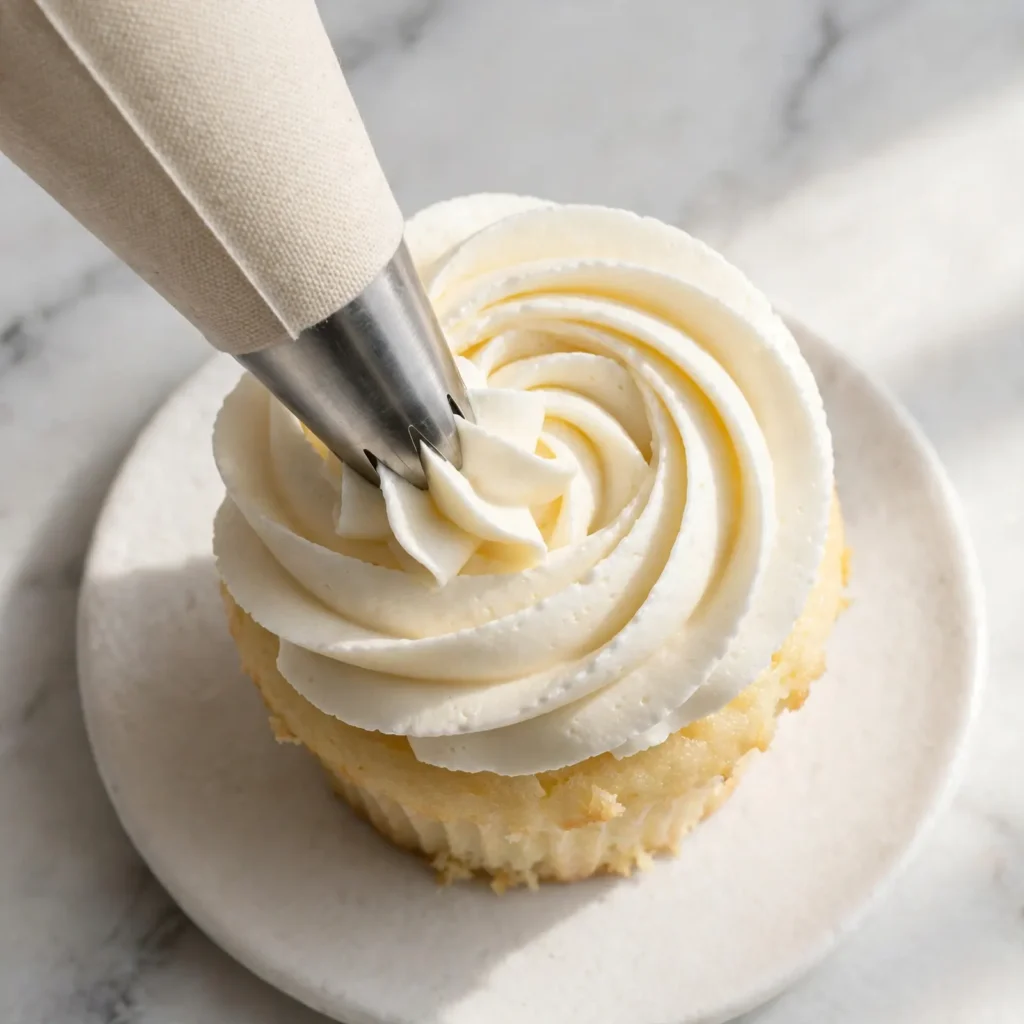
- Pipe onto 24 cupcakes using a large star tip (1M or 2D) with a continuous clockwise swirl starting from the outside edge and spiraling toward the center. One batch is exactly enough for 24 standard-sized cupcakes with a generous swirl.
- Use as a filling for sandwich cookies or between layers of a crepe cake. The frosting is firm enough to hold its shape when pressed between layers and soft enough to bite through cleanly.
- Color with gel food coloring for birthday cakes, baby showers, and holiday baking. Add gel coloring a few drops at a time, mixing thoroughly after each addition; gel produces vivid, saturated color without altering the frosting consistency the way liquid coloring does.
- Spread onto sugar cookies as a thick, smooth layer and add sprinkles immediately before the frosting sets. The frosting firms on the cookie surface within about 20 minutes at room temperature, so timing matters for toppings.
Tips for the Best Results
Butter temperature is the whole game. Room temperature means genuinely soft, not cold from the fridge with just the surface warmed. Press your finger firmly into the butter: it should leave a clear print without feeling cold in the center. Plan to take it out of the fridge 1 to 2 hours before you start. If you forget, cut it into 1-inch cubes and let it sit; the increased surface area speeds softening significantly.
Always sift the powdered sugar. It takes 30 seconds, it’s the most commonly skipped step, and it’s the reason some batches of buttercream have tiny gritty spots no matter how long you beat them. Sifting removes the clumps before they contact moisture; once those clumps get wet they’re harder to dissolve.
Beat the butter alone for a full 3 to 4 minutes before anything else goes in. This sounds like a long time when you’re looking at a bowl of butter doing seemingly nothing dramatic. But those minutes are what transform the butter from a solid block into a whipped, aerated base. The frosting that comes out of well-beaten butter is visibly lighter and pipes with more volume than frosting built on under-beaten butter.
Add cream in small increments. The difference between a stiffer piping frosting and a soft spreading frosting is often just half a tablespoon of cream. Start with 3 tablespoons, check the consistency, and add more only if you need it. Once you’ve added too much and the frosting is too loose, the only fix is more sifted powdered sugar, which makes the frosting sweeter.
Color the frosting after it’s fully mixed. Adding gel food coloring at the beginning affects how you read the consistency during mixing; a pastel blue frosting is harder to evaluate visually than white frosting. Mix the frosting to its final consistency first, then add color.
Storage Tips
Refrigerator
Transfer leftover buttercream frosting to an airtight container, press a layer of plastic wrap directly onto the surface of the frosting before sealing the lid (this prevents a dry skin from forming on the top), and refrigerate for up to 2 weeks. The frosting will firm significantly in the fridge; let it sit at room temperature for 30 to 45 minutes before using again and re-beat for 60 to 90 seconds to restore its fluffy texture.
Freezer
Buttercream frosting freezes exceptionally well for up to 3 months. Store in a freezer-safe airtight container with plastic wrap pressed onto the surface, the same way you would for refrigerator storage. Thaw overnight in the refrigerator, then bring to room temperature for 30 to 45 minutes and beat again until smooth. The re-beaten frosting is virtually identical to fresh-made and pipes and spreads without any issues.
Make-Ahead Note
This is one of the most practical recipes to make well ahead. Frosting made 3 to 5 days before you need it and refrigerated, then re-beaten on the day of baking, gives you the same result as same-day frosting. Many bakers prefer to make the frosting the day before a big baking project so day-of time is only spent on the cake or cookies themselves.
Frosted items: Cakes and cupcakes frosted with buttercream keep at room temperature under a cake dome or loosely wrapped for up to 2 days. In warm weather above 25°C (77°F), refrigerate frosted items and bring to room temperature for 30 to 45 minutes before serving.
Nutrition Information
Per serving, based on 24 servings (one standard cupcake swirl each). Values are approximate.
| Nutrient | Amount |
|---|---|
| Calories | 175 kcal |
| Protein | 0.3g |
| Carbohydrates | 24g |
| Fiber | 0g |
| Sugar | 23g |
| Total Fat | 9g |
| Saturated Fat | 5.7g |
| Cholesterol | 24mg |
| Sodium | 30mg |
| Potassium | 10mg |
| Calcium | 8mg |
| Iron | 0.1mg |
| Vitamin C | 0mg |
Nutrition values are approximate and may vary based on brands and portion sizes.
Why This Recipe Works
American buttercream is the simplest frosting to make and the most commonly over-sweetened, under-beaten, or gritty in home kitchens. The issues almost always trace back to the same three variables: butter state, sugar prep, and beating time.
Butter in the right state (soft, not warm) creates an emulsified base when beaten. The mechanical action of the beaters breaks the fat into tiny droplets and suspends them in a network of air bubbles. The technical term for what you see is a stable, aerated fat emulsion. That’s the fluffy, pale, cloud-like butter you want before any sugar goes in. Cold butter doesn’t emulsify this way; it stays in firm clumps regardless of how long you beat it. Too-warm butter has already lost its crystalline fat structure and collapses under the beaters rather than holding the air you’re trying to incorporate.
Sifted powdered sugar dissolves into this aerated fat base without resistance. The fine particles disperse through the fat network evenly. Unsifted sugar has lumps that are denser than the surrounding fat and don’t dissolve no matter how long you beat, because the clump’s interior never fully contacts enough fat to dissolve. The sieve step is mechanical, not cosmetic.
Beating the combined frosting on medium-high speed for 2 to 3 minutes after the cream goes in is the step that turns a dense, sugary mixture into a frosting that pipes with volume and definition. The cream introduces liquid that helps the remaining sugar dissolve while also thinning the fat network slightly, making it more flexible. The continued beating re-aerates the whole mixture after the density from the sugar was added. Skipping or shortening this final beat is the most common reason home buttercream is dense and heavy compared to bakery frosting.
The salt at 1/4 teaspoon is not there for saltiness. It’s there for contrast. Human taste perception of sweetness depends partly on the presence of a small amount of contrasting bitterness or salinity. Without any salt, even a moderate amount of powdered sugar tastes aggressively sweet because there’s nothing to provide contrast. The 1/4 teaspoon provides that contrast and makes the overall flavor of the frosting feel balanced rather than one-dimensional.
Frequently Asked Questions
Can I make buttercream frosting ahead of time?
Yes, and it’s one of the best frostings for advance preparation. Buttercream keeps in the refrigerator for up to 2 weeks in an airtight container and in the freezer for up to 3 months. Bring refrigerated frosting to room temperature for 30 to 45 minutes before using and re-beat with a hand mixer for 60 to 90 seconds to restore its fluffy, smooth texture. Frozen frosting should thaw overnight in the fridge before following the same re-beating process.
Why is my buttercream frosting gritty?
Gritty frosting almost always comes from powdered sugar that wasn’t sifted before mixing. The clumps in packed, unsifted sugar never fully dissolve into the butter base once they contact moisture. Sift directly into the bowl before starting. If the frosting is already made and slightly gritty, beat it on medium-high for an additional 3 to 4 minutes; the extended mechanical action dissolves most lumps that haven’t already had time to set.
Can I use milk instead of heavy cream?
Yes. Whole milk works as a direct substitute; the frosting will be slightly less rich and slightly thinner at the same quantity. Start with 2 tablespoons of whole milk and add more only if needed, because milk thins the frosting more aggressively than cream does. Skim or reduced-fat milk produces a noticeably thinner result that can be difficult to bring back to the right piping consistency. For the richest, most stable result, heavy cream is the best choice.
How do I make buttercream frosting less sweet?
There are two reliable approaches. First, reduce the powdered sugar to 3 to 3.5 cups and add an extra tablespoon of cream to compensate for the thicker consistency that results from less sugar. Second, add a small additional pinch of salt and an extra drop of vanilla extract; both reduce the perception of sweetness without changing the sugar quantity. Some bakers also add a teaspoon of fresh lemon juice, which adds acidity that directly counterbalances sweetness.
Why does my buttercream frosting look curdled or separated?
Curdled buttercream is almost always a temperature issue. If the butter was too cold when you started, the fat didn’t emulsify properly with the sugar and the mixture looks broken and chunky. Keep beating; warm butter buttercream usually comes together within an additional 2 to 3 minutes of mixing as the friction from the beaters warms the mixture slightly. If it doesn’t come together, warm the outside of the bowl briefly with your hands or a warm towel for 10 seconds and beat again immediately.
How much buttercream does this recipe make?
One batch of this recipe (1 cup butter, 4 cups powdered sugar) produces enough frosting to fill and frost one 2-layer 8-inch round cake, or generously frost 24 standard cupcakes with a tall piped swirl. For a 3-layer cake or a 9×13 sheet cake with a thicker coat, make one and a half batches. The recipe scales up cleanly; you can double or triple it in the same bowl with a stand mixer.
Can I color buttercream frosting?
Yes, and gel food coloring is the best choice. Gel produces vivid, saturated color from just a few drops without adding enough liquid to change the consistency. Liquid food coloring can thin the frosting if you need enough of it to achieve a deep color, and the color tends to be less vivid. Add gel coloring a drop or two at a time after the frosting is fully mixed, then beat briefly after each addition. For a very deep color like navy blue or black, let the colored frosting rest for 30 minutes; colors deepen as they sit and you may need less than you think.
Conclusion
Buttercream frosting is one of those recipes where the result is almost entirely about execution rather than ingredients. The ingredients are butter, powdered sugar, cream, vanilla, and salt: five things you probably already have. The difference between a dense, gritty frosting and a light, smooth, bakery-quality one comes down to the butter state, the sifted sugar, and the time you give the mixer at each stage.
Once you’ve made this buttercream correctly once, you understand what to look and feel for at each step, and it becomes something you can produce without measuring and timing with the same precision. That’s the point of learning one foundational frosting recipe well: it becomes the tool you reach for confidently every time a cake needs finishing.
If you loved this recipe, save it to your baking recipes Pinterest board so you can find it easily later. For more recipes and daily food inspiration, follow TheCookingVibes on Pinterest.
Fluffy Buttercream Frosting
Ingredients
Equipment
Method
- Place the softened butter in a large mixing bowl. Beat on medium-high speed for 3 to 4 minutes until the butter is pale, almost white, and visibly fluffy. Scrape down the sides once during beating.
- Set the mixer to the lowest speed. Add the sifted powdered sugar one cup at a time, mixing on low after each addition until the sugar is fully incorporated before adding the next cup.
- Add the vanilla extract, fine salt, and 3 tablespoons of heavy cream. Increase the speed to medium-high and beat for 2 to 3 minutes until the frosting is smooth, silky, and noticeably lighter in texture. Scrape the bowl and beat for another 30 seconds.
- Check the consistency. For piping, the frosting should hold a firm peak. For spreading, it should glide off a spatula smoothly. Add the fourth tablespoon of cream if a softer consistency is needed, or add another 1/2 cup of sifted powdered sugar if stiffer.
- Use immediately or store covered in the refrigerator for up to 2 weeks. Re-beat before using after refrigeration.
Notes
- Butter must be genuinely soft, not just surface-warm from the fridge. It should hold a clear thumbprint without feeling cold inside.
- Always sift powdered sugar before adding. Unsifted sugar creates gritty lumps that don’t dissolve no matter how long you beat.
- Beat butter alone for 3 to 4 full minutes before adding anything. This step determines the final texture of the frosting.
- Add cream one tablespoon at a time and stop when you reach the consistency you need. It’s easier to loosen frosting than to stiffen it back up.