Classic Coconut Cake — Moist Coconut Crumb, Toasted Coconut Frosting
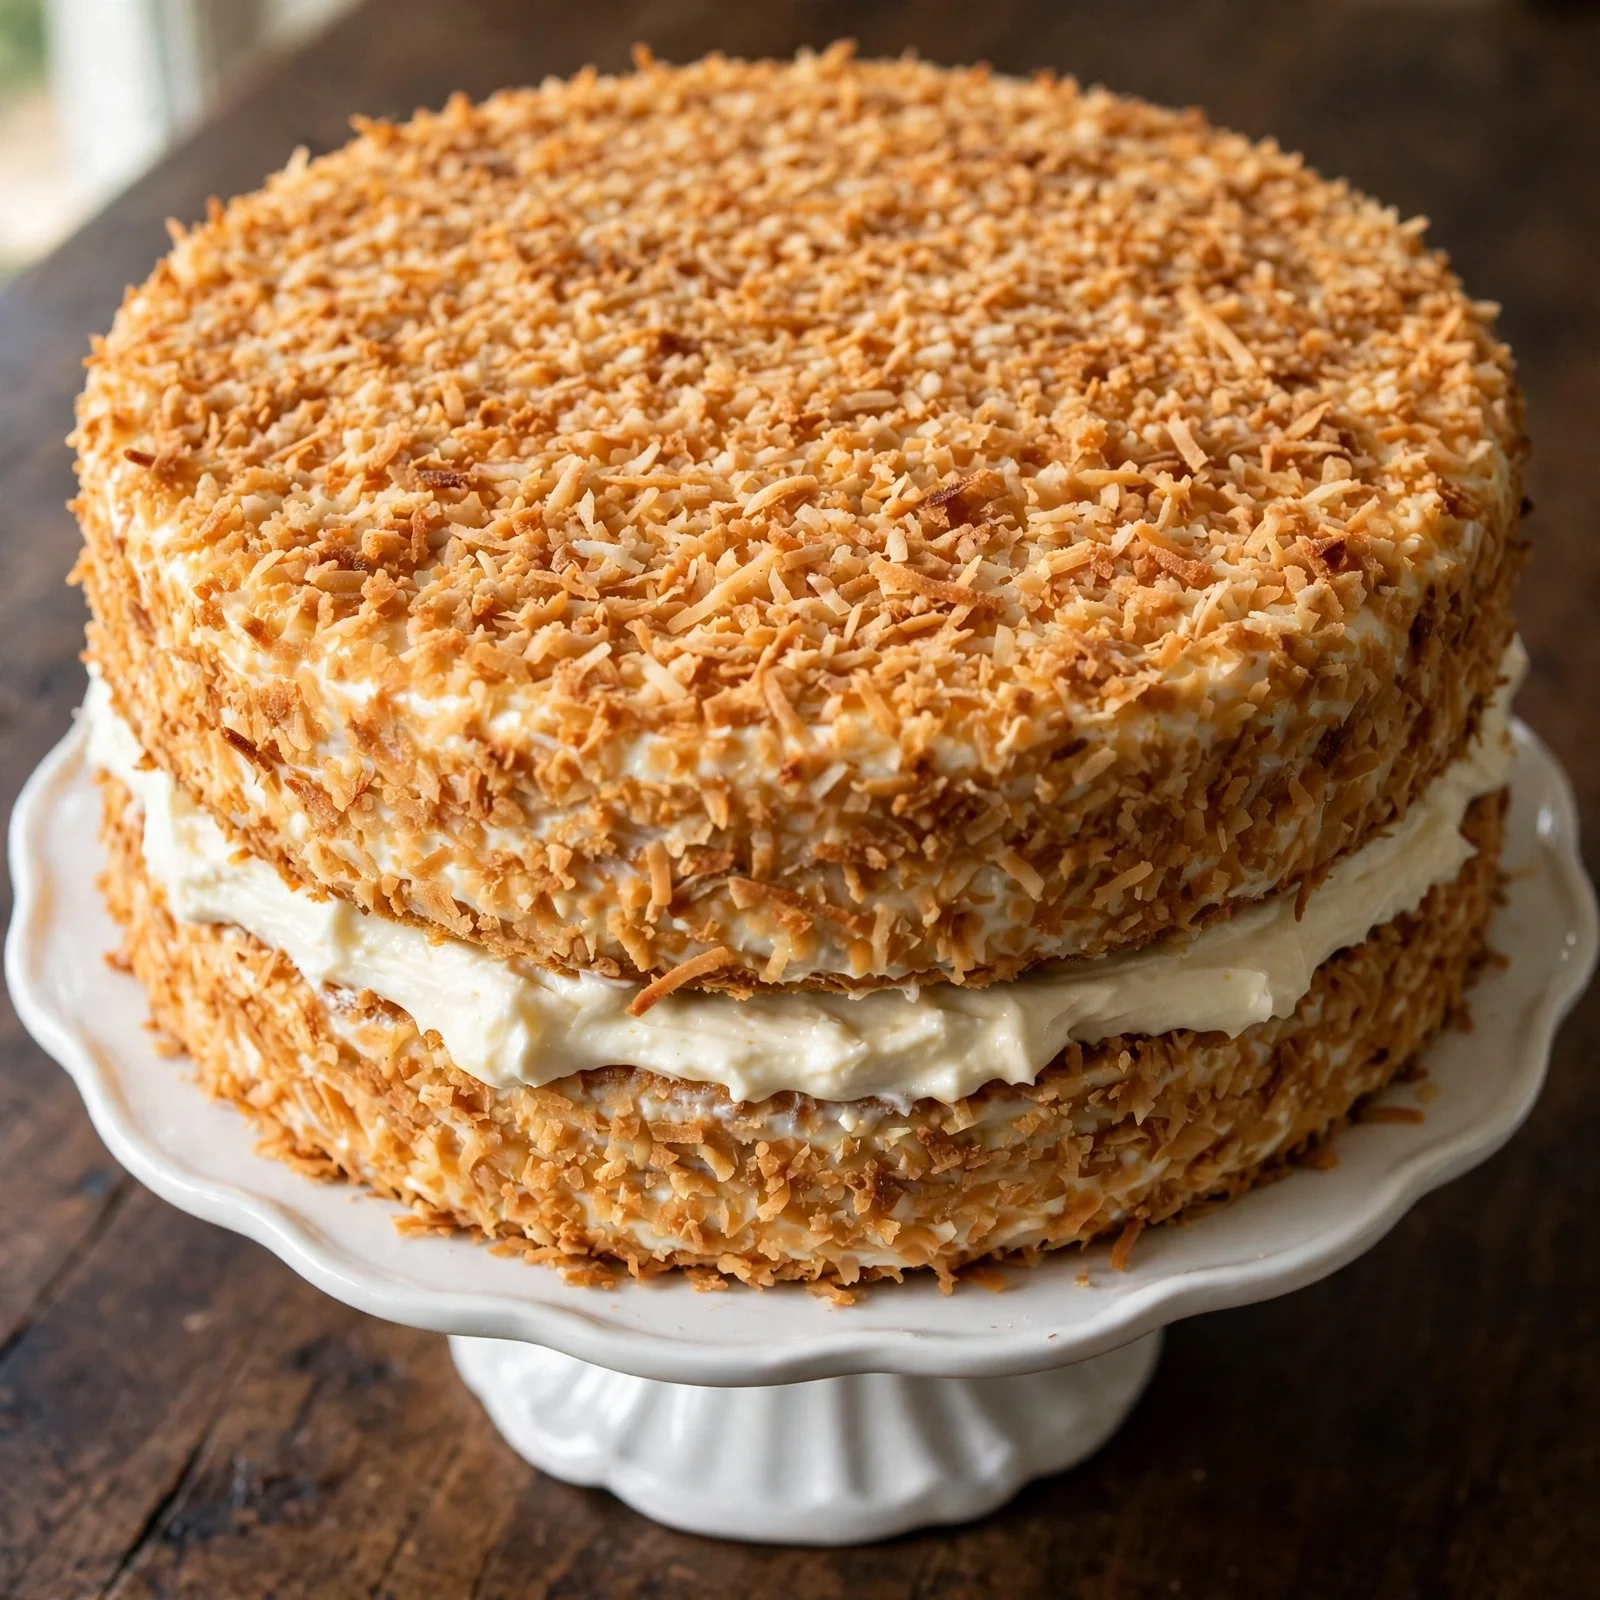
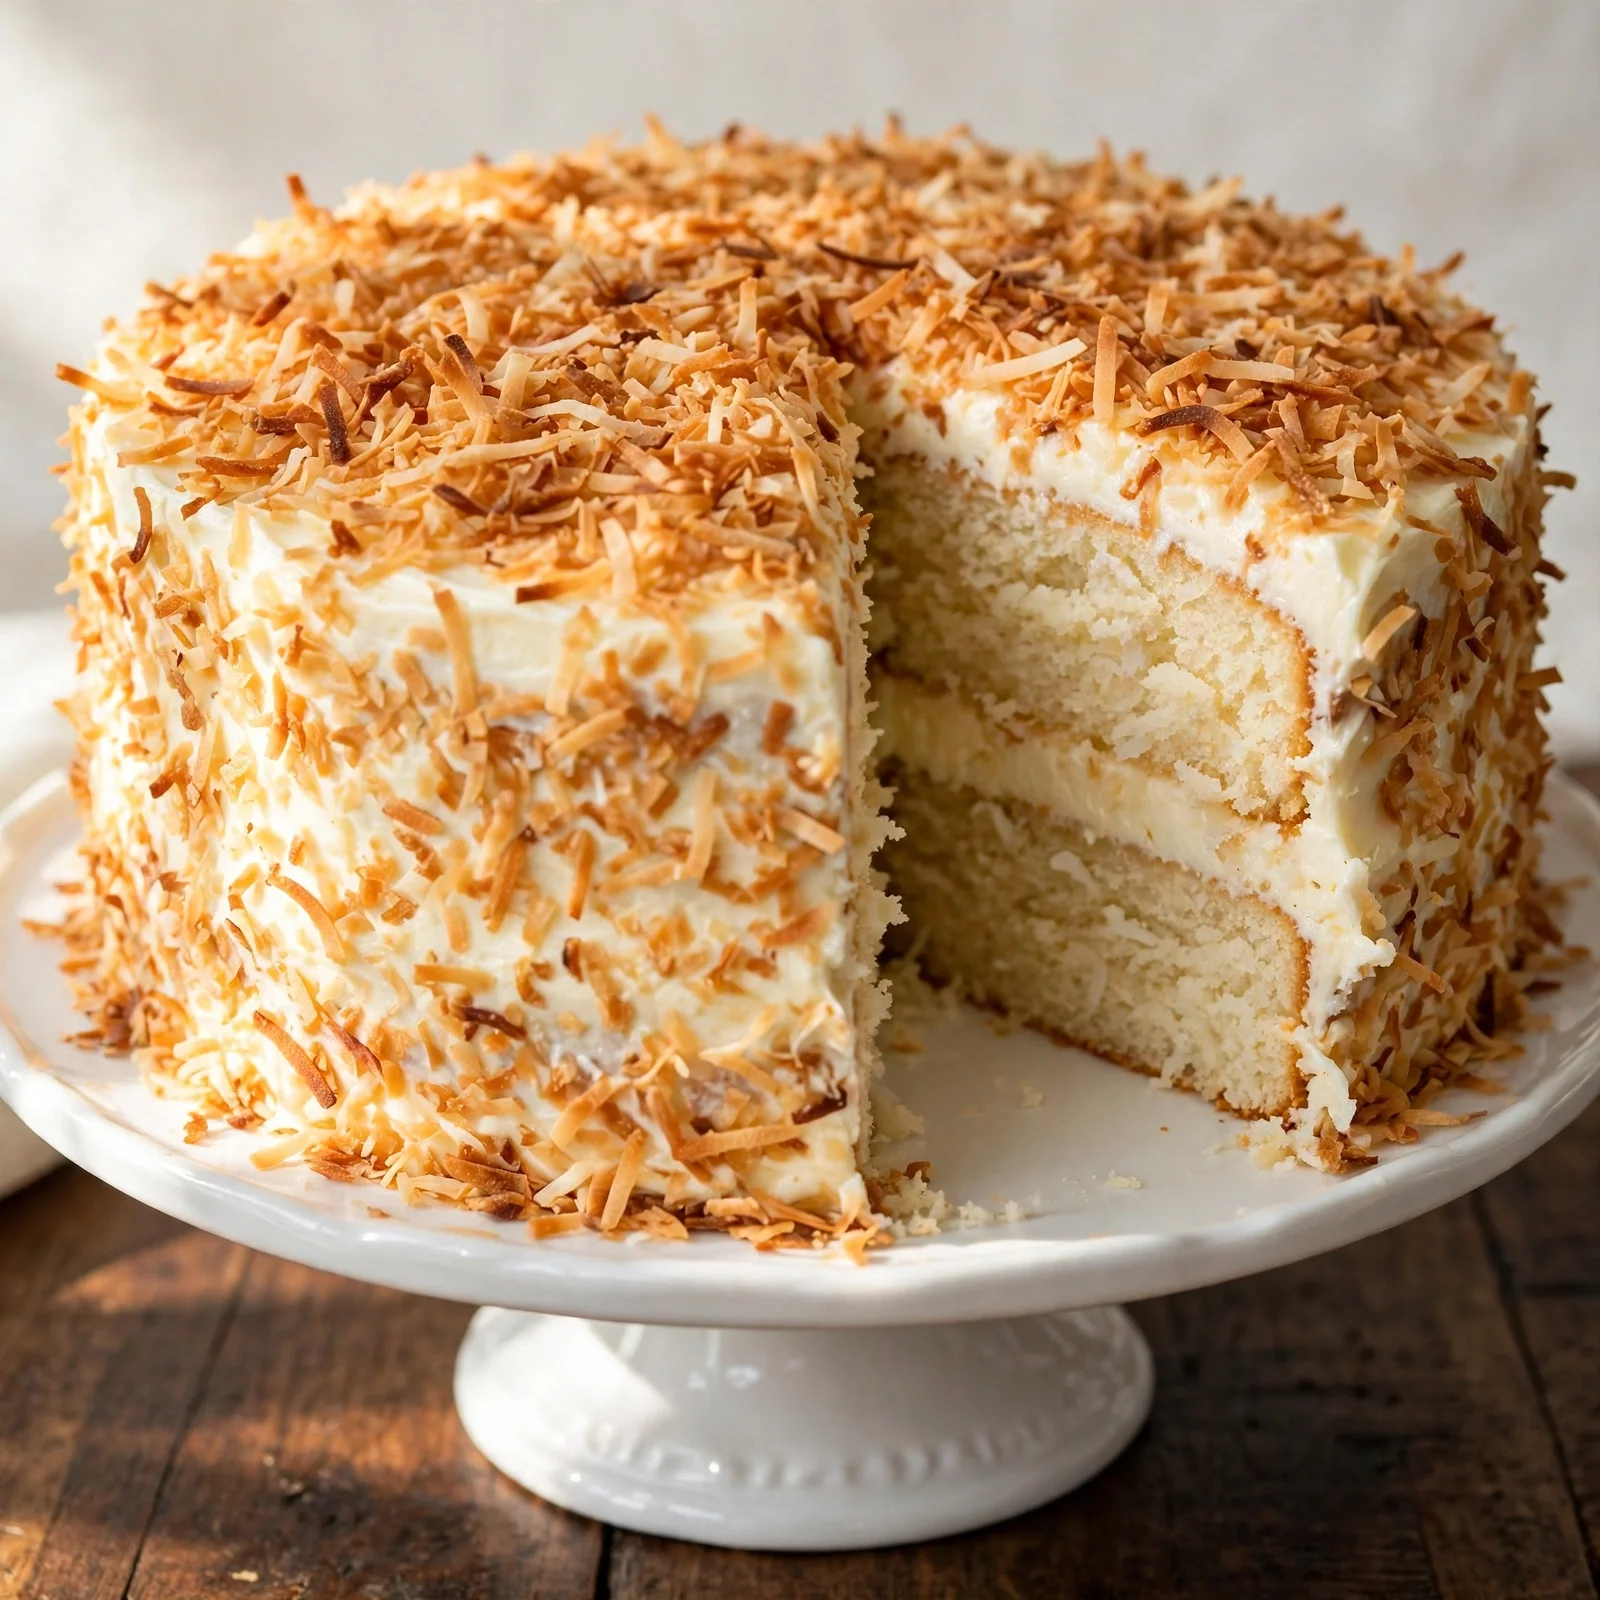
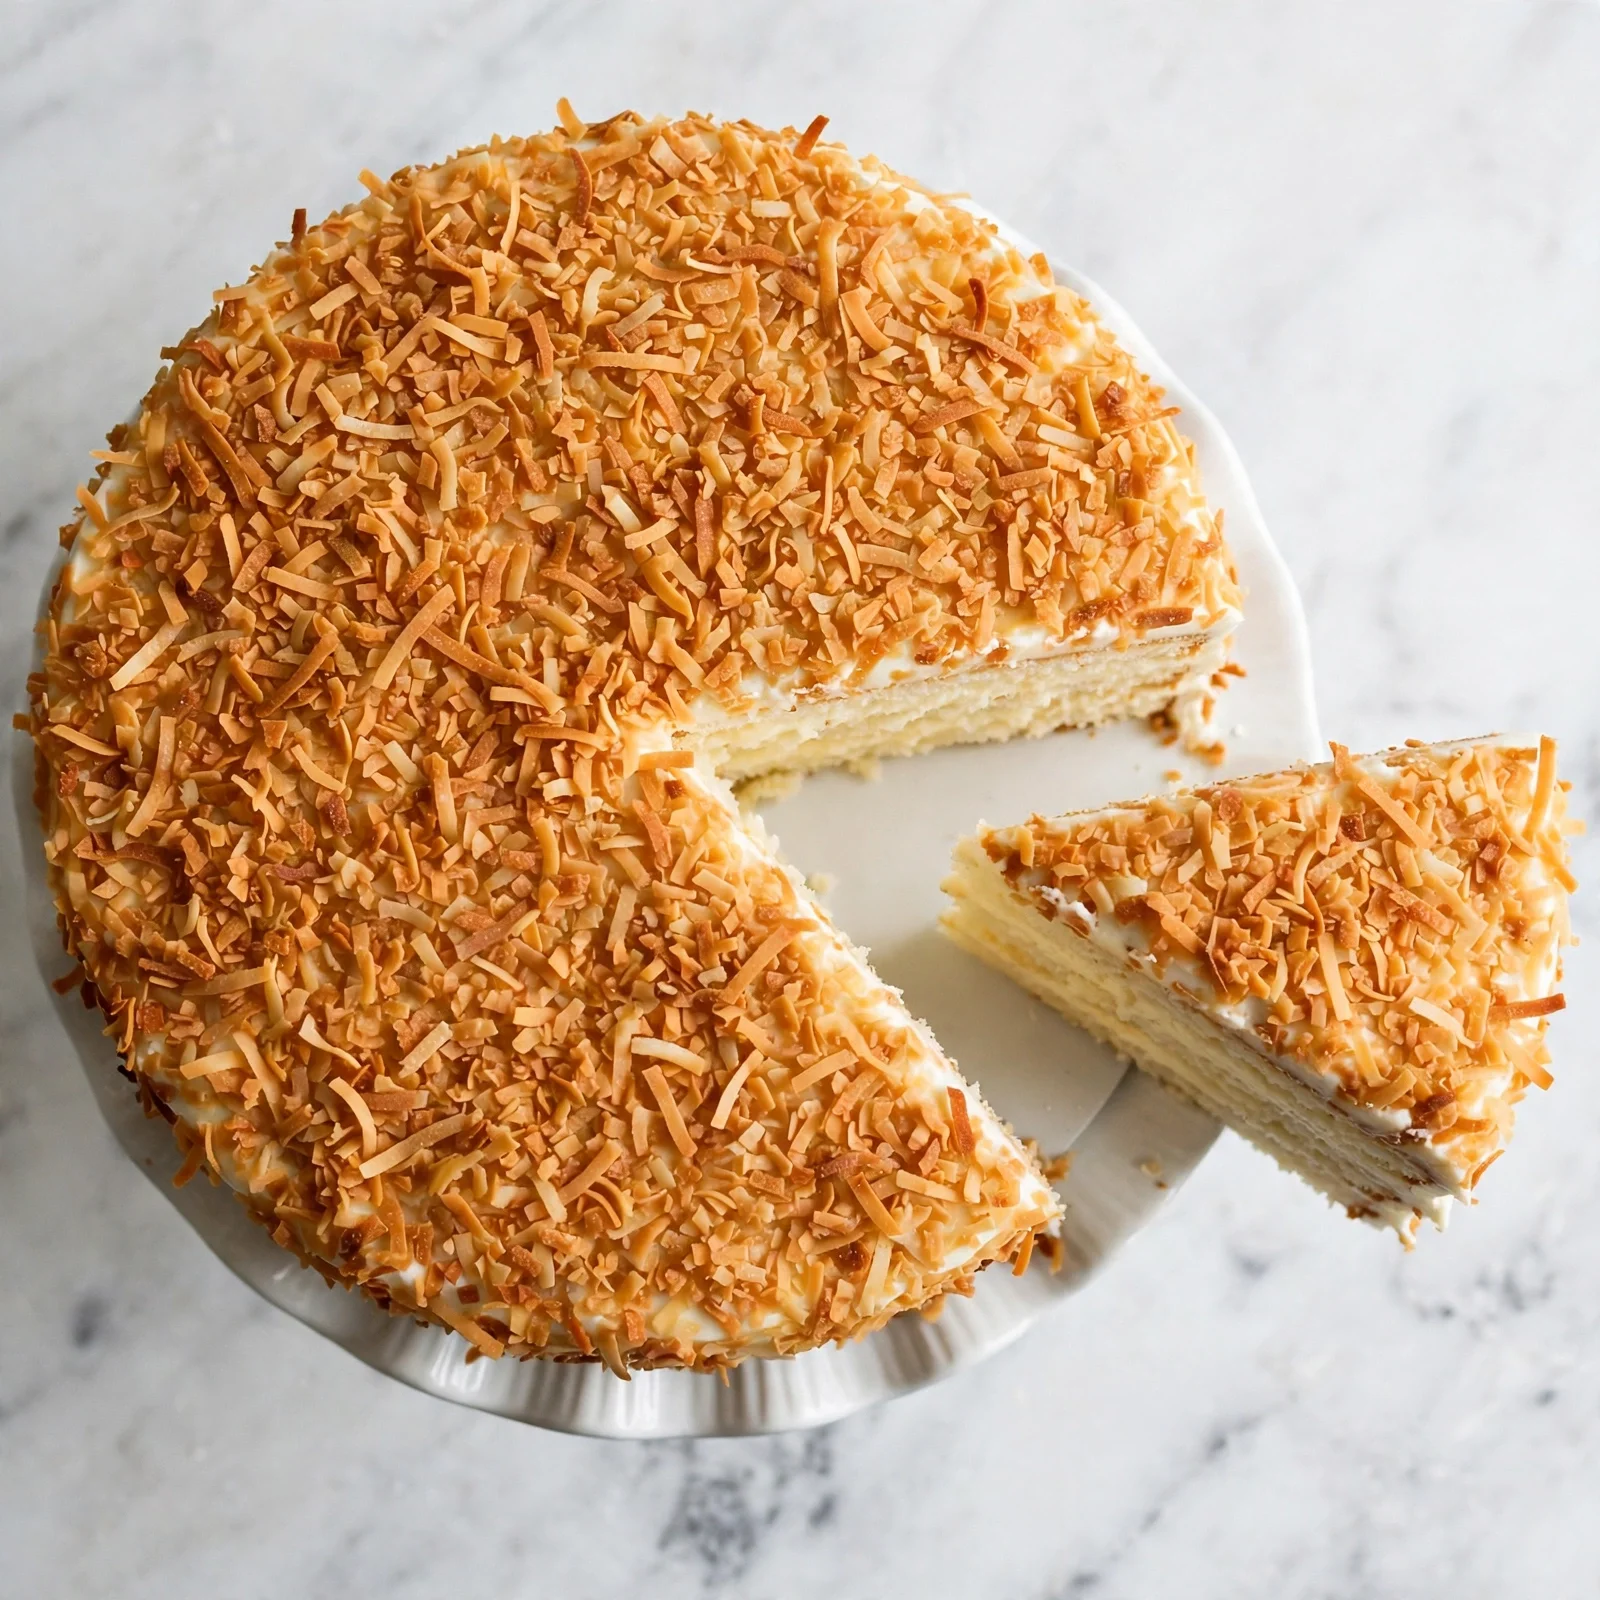
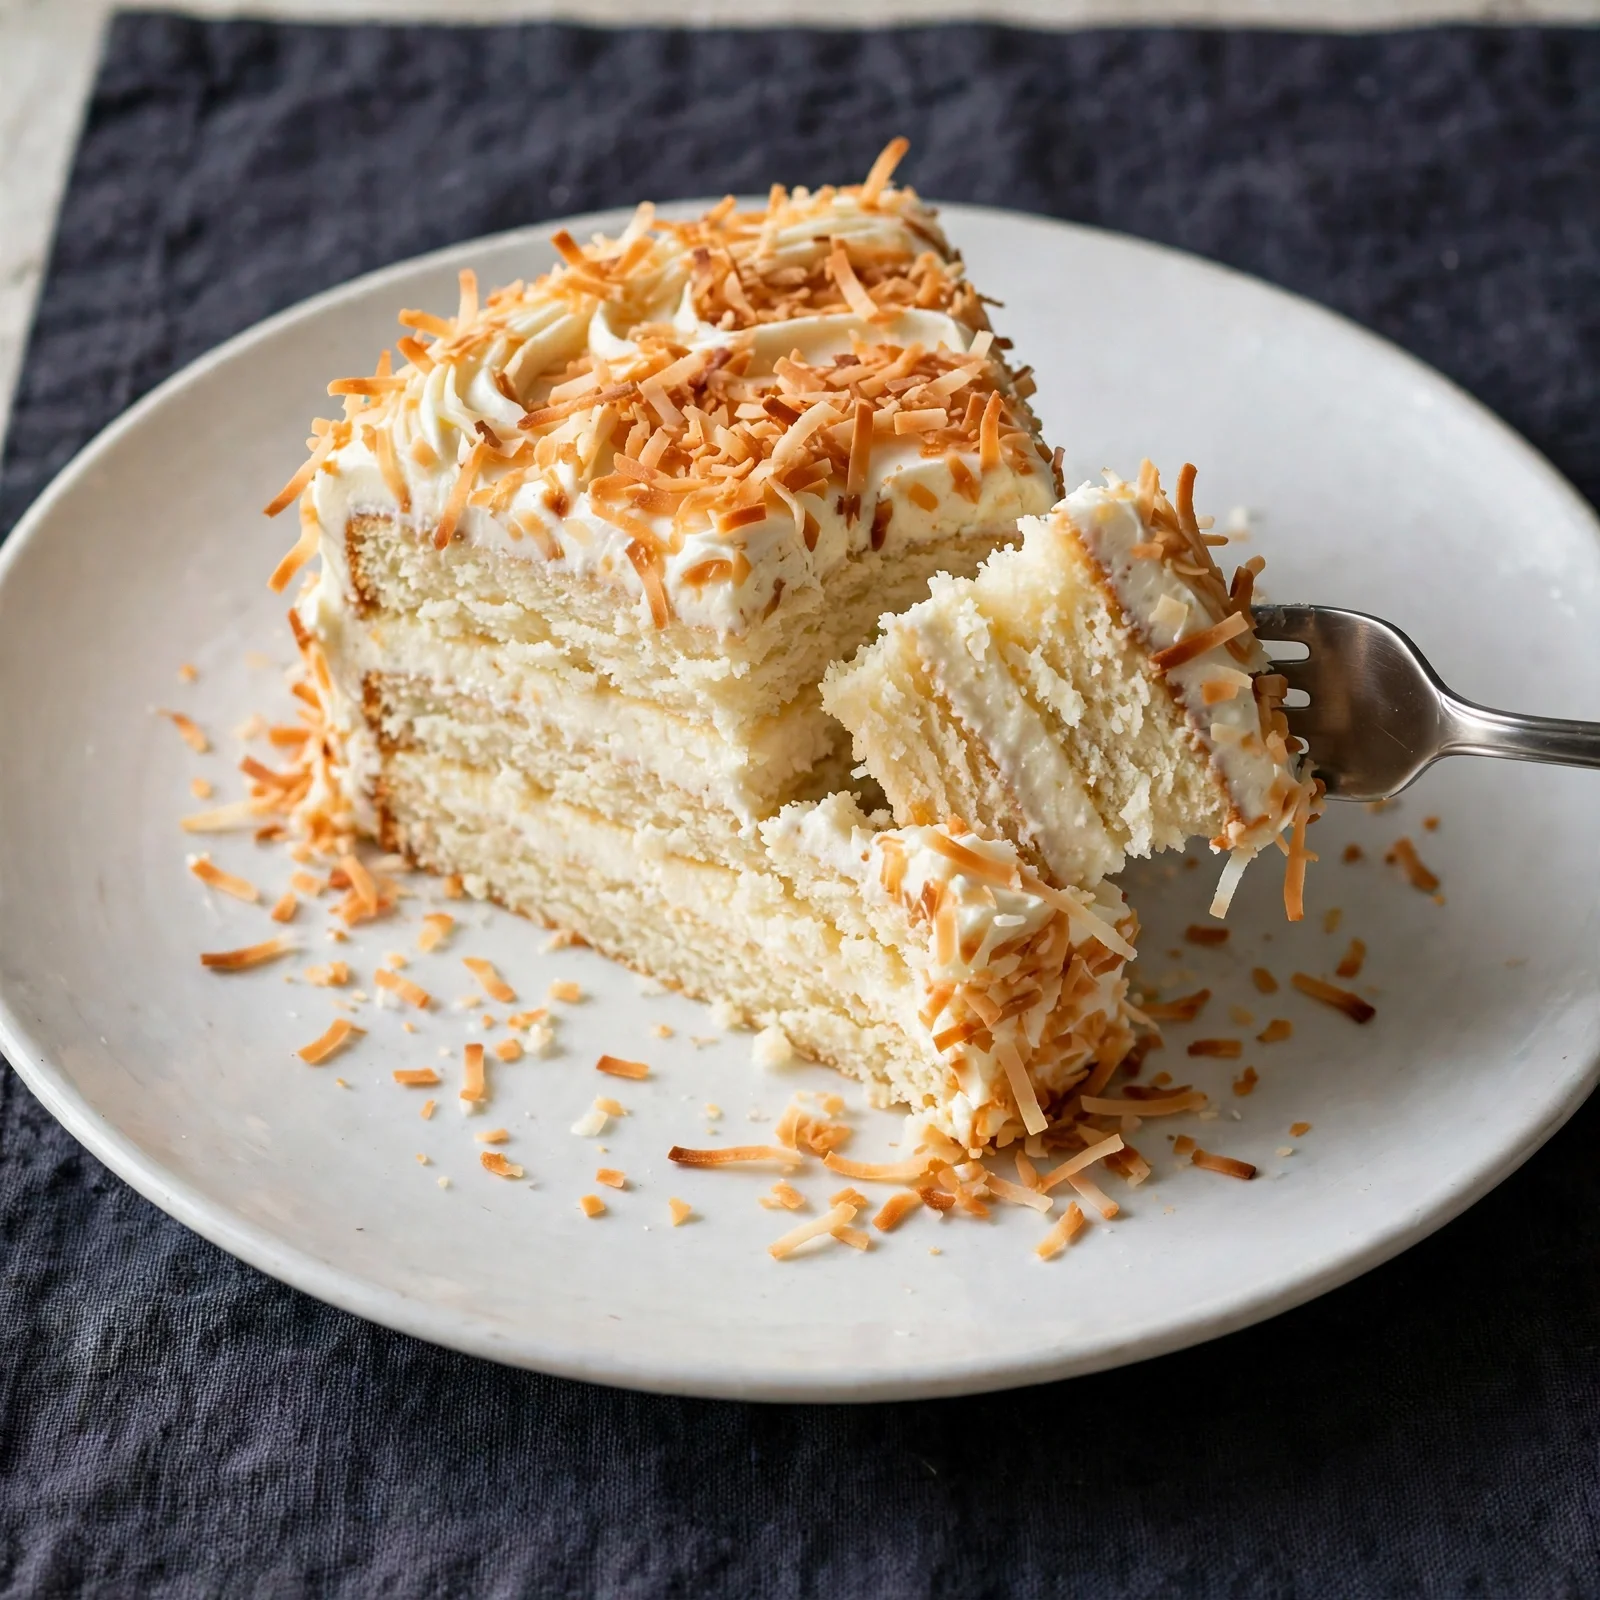
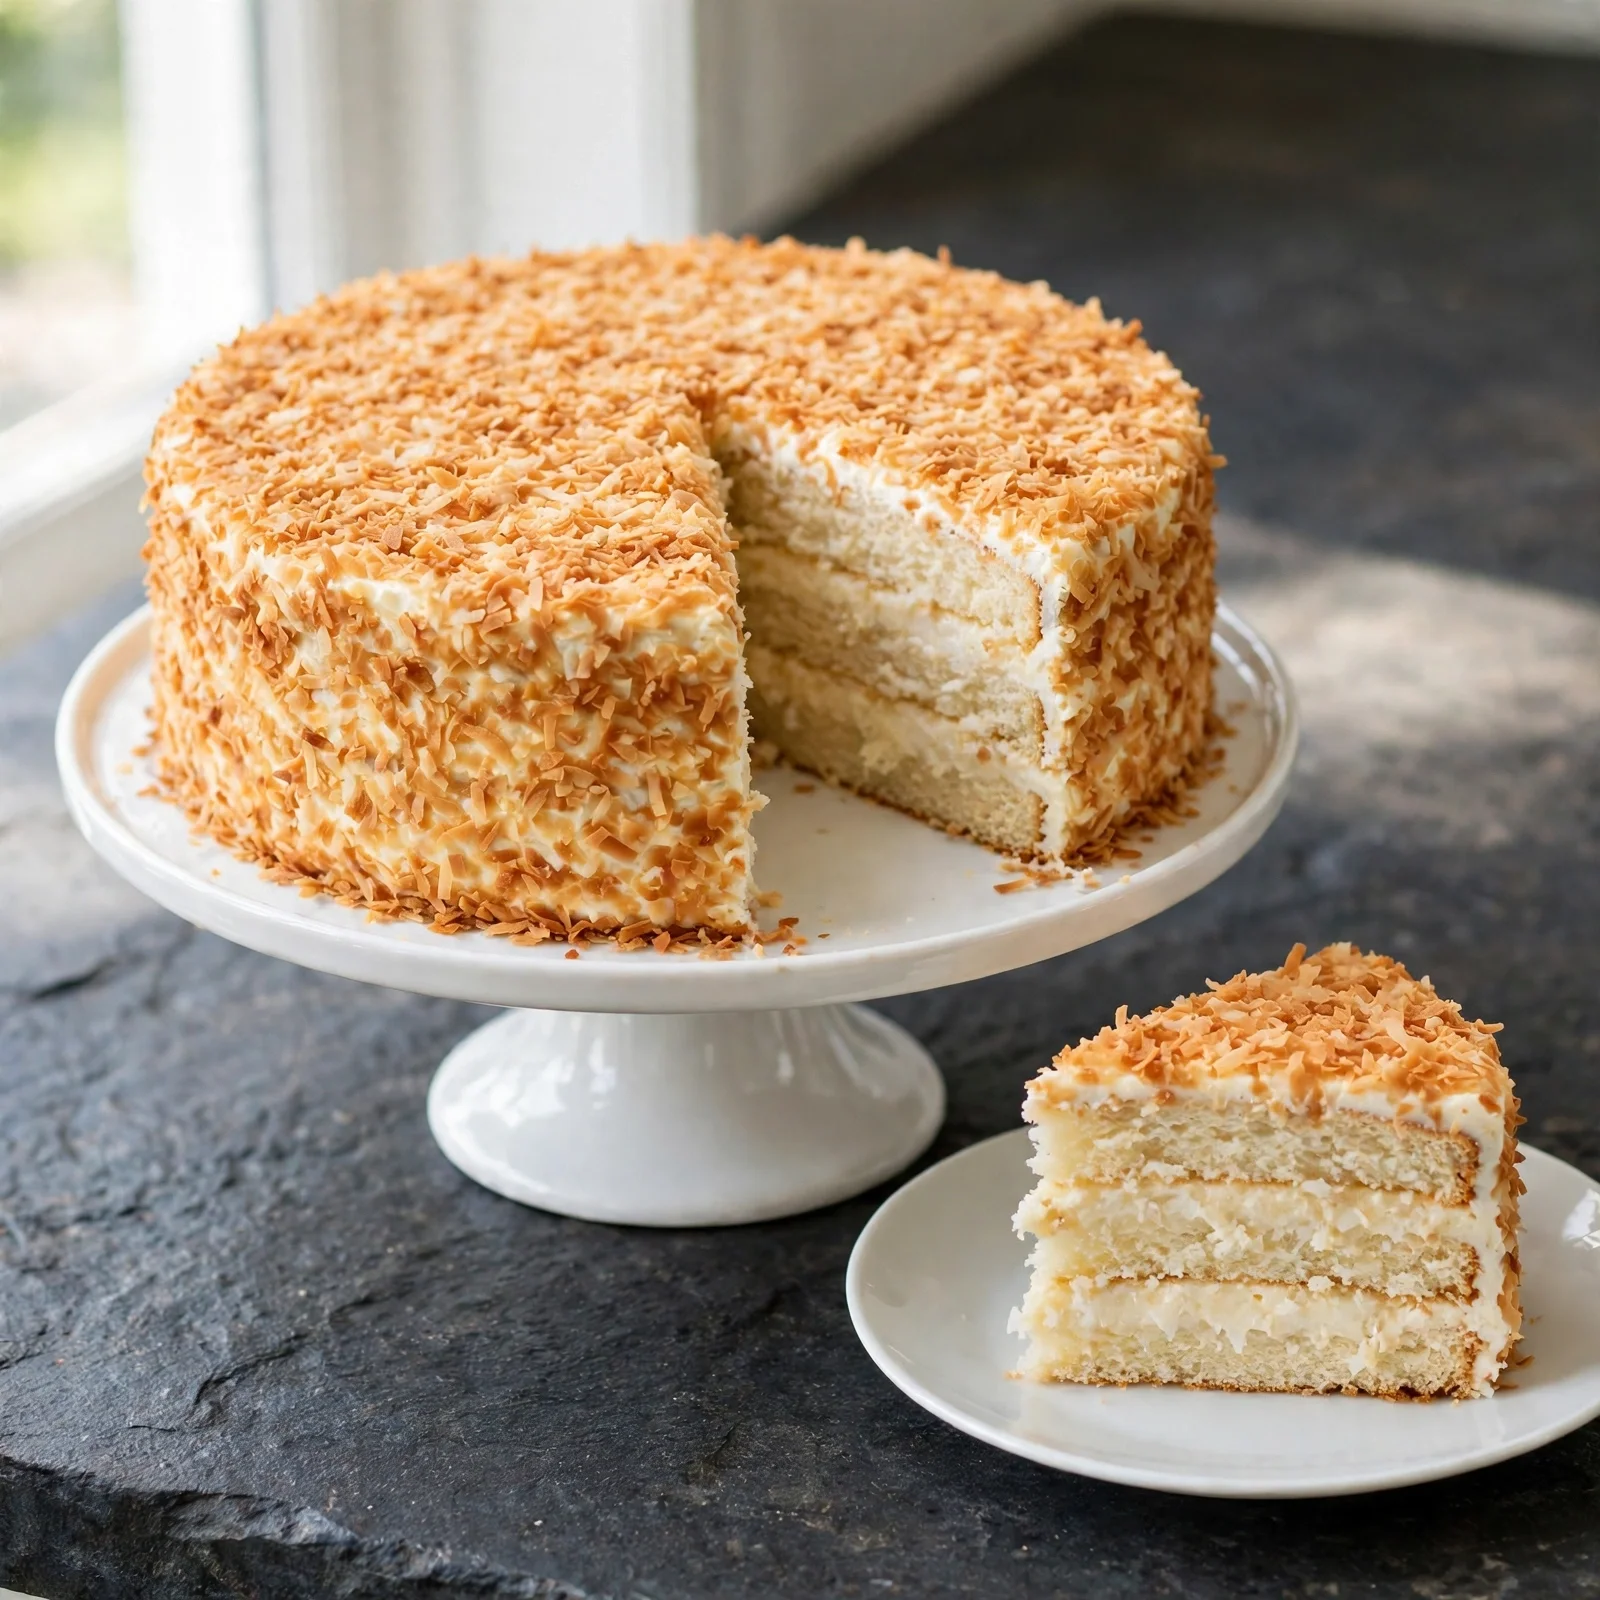
A well-made coconut cake announces itself before you even cut into it: the toasted coconut on the exterior has a warm, slightly nutty smell, the cream cheese frosting underneath it is thick enough to hold the coconut pressed into every surface, and when you finally cut a slice the crumb is a pale ivory white with visible shreds of coconut inside each layer. It doesn’t taste like coconut extract from a bottle; it tastes like actual coconut in three forms simultaneously, in the batter, in the frosting, and pressed across the exterior, which produces a flavor that’s layered and genuine rather than artificially sweet and one-dimensional.
This coconut cake recipe uses coconut milk in place of regular milk in the batter for a subtly rich, distinctly coconut-forward crumb, sweetened shredded coconut folded into each layer, a coconut cream cheese frosting that balances richness and tang, and toasted coconut pressed across the entire outside. It bakes in two 9-inch round pans, serves 12 to 16, and uses the creaming method for a tender, fine-textured crumb that holds its moisture well for days. The coconut flavor comes from real ingredients at every stage rather than from flavoring, which is the detail that makes it taste worth making from scratch.
Why You’ll Love This Coconut Cake
- Coconut flavor from three real sources, not extract. Coconut milk in the batter, sweetened shredded coconut folded into the layers, and toasted coconut pressed into the frosting produce a flavor that’s genuinely layered rather than the flat, artificial sweetness of a coconut extract-only version.
- Crumb that stays moist for days. The fat content in full-fat coconut milk adds moisture to the batter that standard dairy milk doesn’t provide at the same level; the baked layers stay soft and moist at room temperature for 3 to 4 days rather than drying out by the next day.
- Toasted coconut exterior that transforms the presentation. A cake covered in golden toasted coconut shreds looks deliberately composed and dramatically different from a plain frosted cake; it’s the detail that makes it look like something from a bakery with almost no extra technique.
- Cream cheese frosting that balances the sweetness. The tang in the cream cheese cuts through the coconut’s natural sweetness and provides a contrast that makes each bite taste more complex rather than cloying.
- Flat layers that stack cleanly. Baking at 175°C rather than the standard 180°C significantly reduces dome formation and produces layers that stack evenly without needing to be leveled, which matters when the exterior needs to look composed.
Ingredients You’ll Need
Recipe Timing
| Detail | Info |
|---|---|
| Servings | 12 to 16 slices |
| Difficulty | Moderate |
| Course | Dessert |
| Cuisine | American, Southern-inspired |
| Prep Time | 35 minutes |
| Cook Time | 32 minutes |
| Rest Time | 60 minutes (cooling before frosting) |
| Total Time | 2 hours 7 minutes |
For the coconut milk, use full-fat canned coconut milk, not the refrigerated coconut milk beverage sold alongside regular dairy milks. Full-fat canned coconut milk contains 17 to 22% fat and produces a noticeably richer, more coconut-forward crumb than the beverage, which is diluted and contains a fraction of the fat. Shake the can vigorously before opening to re-emulsify the fat that separates during storage; unmixed coconut milk adds the cream to some parts of the batter and mostly water to others, producing an uneven crumb.
For the shredded coconut in the batter, sweetened shredded coconut produces a moister crumb than unsweetened because the added sugar in the sweetened variety draws moisture to the coconut pieces and prevents them from absorbing moisture from the surrounding batter. Unsweetened desiccated coconut is drier and absorbs moisture from the batter during baking, which can make the crumb slightly drier than the sweetened version. Either works; just understand the trade-off and add an extra tablespoon of coconut milk to the batter if using unsweetened.
For the toasted coconut exterior, use large sweetened coconut flakes or shredded sweetened coconut rather than desiccated coconut; the larger pieces produce a more dramatic, visually textured exterior. Toast them in a dry skillet over medium heat rather than the oven; stovetop toasting allows you to watch the color change closely and pull the coconut at exactly the right golden color without the risk of uneven oven browning.
For the butter, it must be fully at room temperature before creaming begins. The same 18 to 21°C target that applies to any creaming-method cake applies here: soft enough to yield when pressed without sinking all the way in, slightly glossy on the surface, holding its shape rather than beginning to melt.
The Cake:
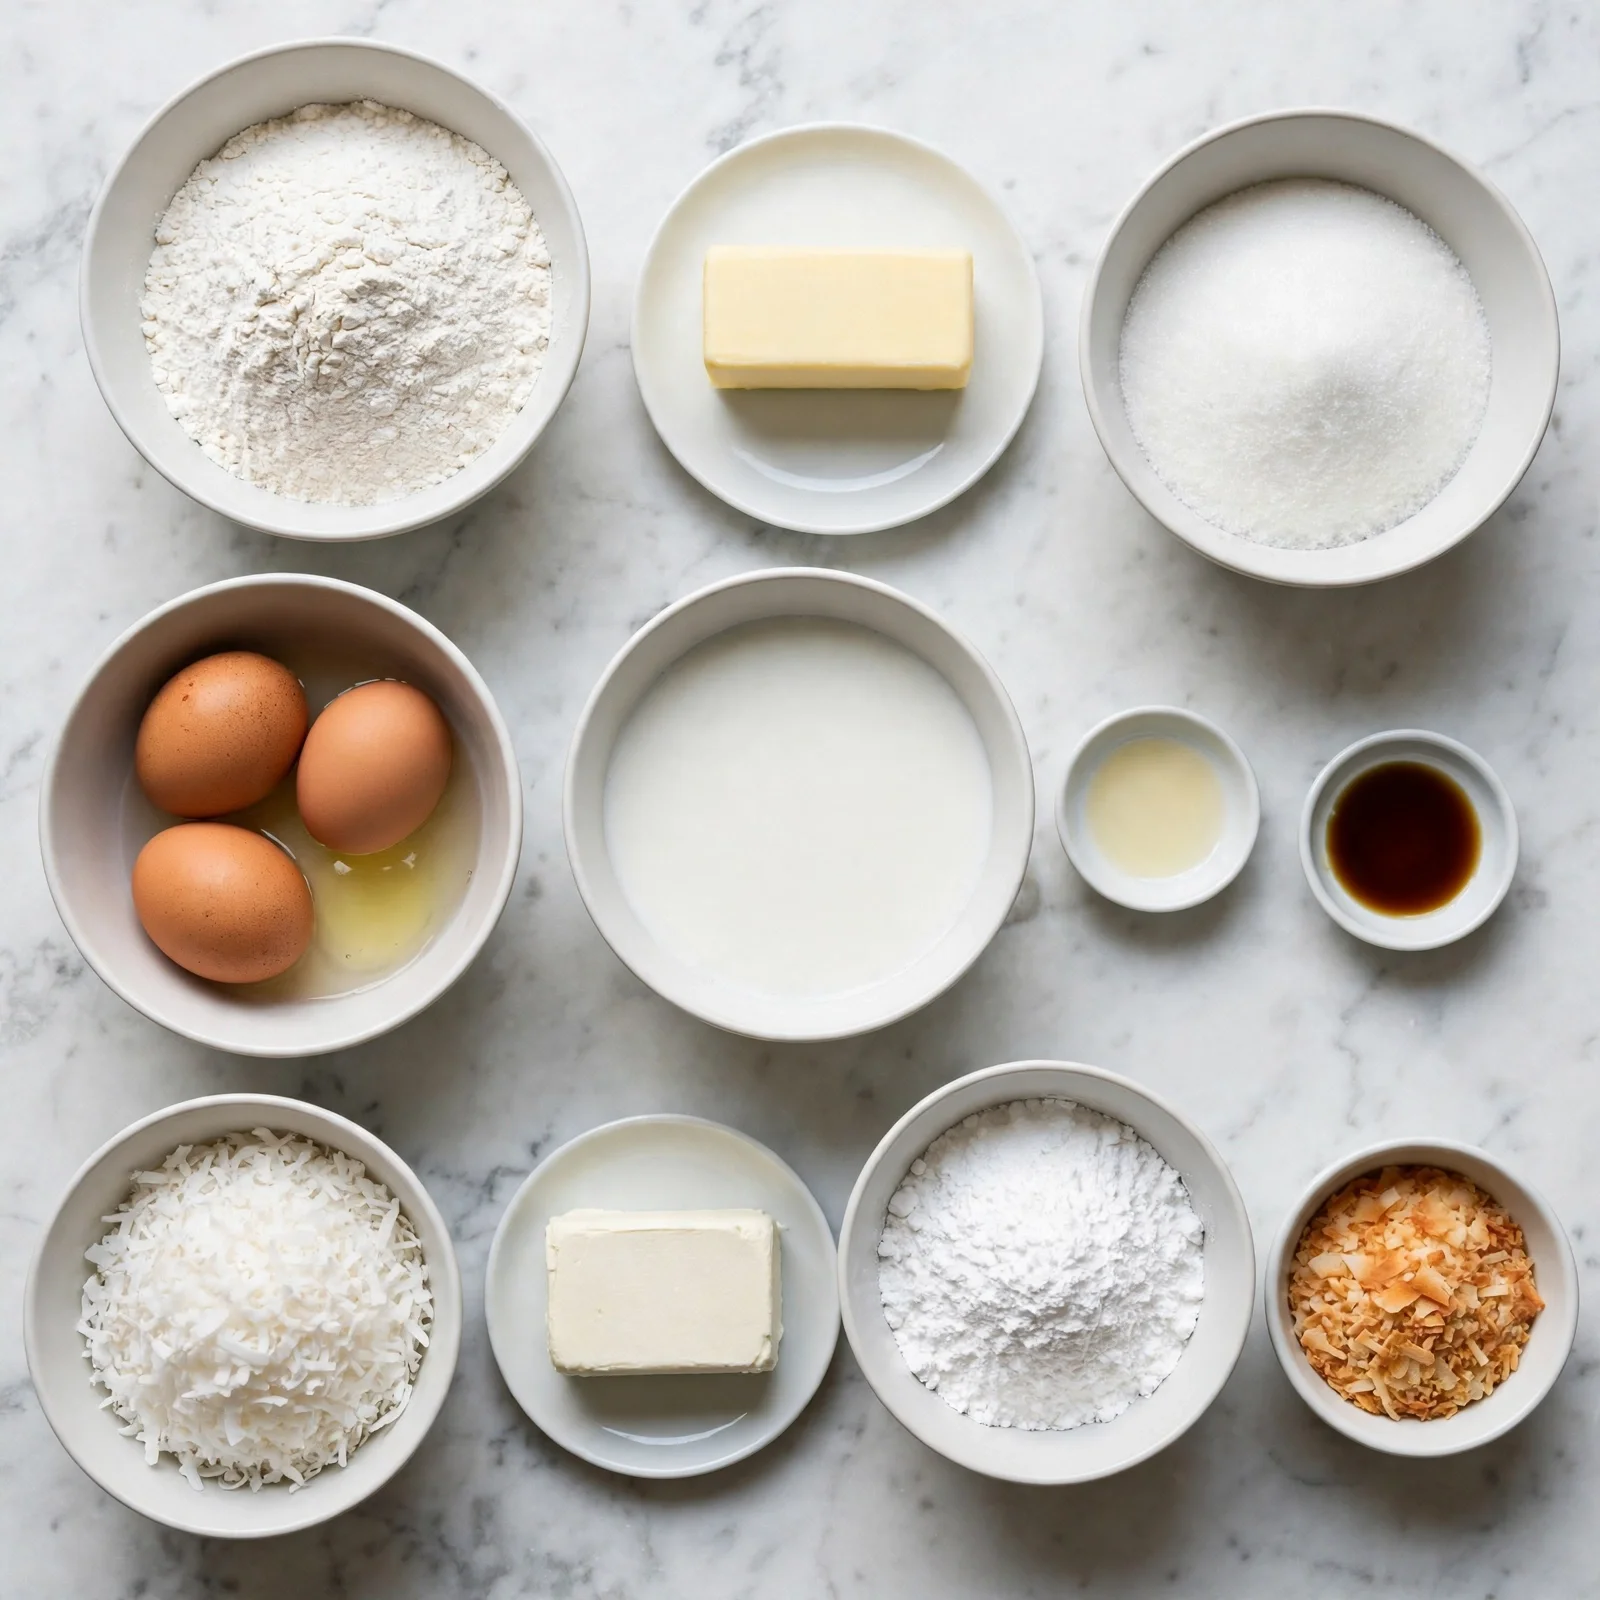
- 280g (2 1/4 cups, spooned and leveled) all-purpose flour — the structural base; cake flour works for a more delicate crumb but all-purpose produces a slightly sturdier layer that holds up well under the heavy coconut frosting and exterior decoration
- 1 tablespoon baking powder — the primary leavener; ensure it’s fresh and not expired
- 1/2 teaspoon fine salt
- 170g (3/4 cup) unsalted butter, at 18 to 21°C — the fat base; must be properly room temperature for creaming
- 300g (1 1/2 cups) granulated white sugar
- 3 large eggs plus 1 egg white, at room temperature — the extra egg white produces a slightly whiter, more delicate crumb and adds structure without the richness a full fourth egg would bring
- 1.5 teaspoons pure vanilla extract
- 1/2 teaspoon pure coconut extract — amplifies the coconut flavor without overwhelming it; use pure rather than imitation for the cleanest flavor
- 240ml (1 cup) full-fat canned coconut milk, well-shaken and at room temperature — the primary liquid; provides coconut flavor and fat simultaneously
- 80g (1 cup) sweetened shredded coconut — folded into the finished batter before baking
The Coconut Cream Cheese Frosting:
- 230g (1 cup) full-fat block cream cheese, fully softened — must be block-style at complete room temperature; cold cream cheese produces lumpy frosting
- 115g (1/2 cup) unsalted butter, softened — adds richness and spreadability
- 480g (4 cups) powdered sugar, sifted — always sift to prevent graininess
- 3 tablespoons coconut cream (the thick layer from the top of a chilled can of full-fat coconut milk) — adds a concentrated coconut flavor and richness to the frosting without making it runny; substitute heavy cream if coconut cream is unavailable
- 1 teaspoon pure vanilla extract
- 1/2 teaspoon pure coconut extract
- Pinch of fine salt
For the Exterior:
- 200g (about 2 1/2 cups) sweetened coconut flakes or shredded coconut, toasted to golden — pressed across the entire frosted exterior immediately after frosting while the frosting is still tacky enough to hold the coconut
Allergen and Dietary Disclosure
This coconut cake contains dairy (butter and cream cheese in the frosting, butter in the cake), eggs (whole eggs and egg white), and gluten (all-purpose flour). The shredded coconut and coconut milk are naturally dairy-free and gluten-free as individual ingredients. The cake is naturally nut-free as written; note that coconut is classified as a tree nut by some food safety authorities, so individuals with tree nut allergies should verify their tolerance with a healthcare provider before consuming.
For dairy-free: replace the butter in the cake with a good-quality vegan butter block at the same quantity. The cream cheese frosting requires block-style dairy-free cream cheese and vegan butter at the same quantities. The coconut milk and coconut cream in the recipe are already dairy-free; no adjustment is needed there. The finished flavor and texture are very close to the dairy version since coconut’s natural fat content compensates partially for the dairy fat.
For gluten-free: replace the all-purpose flour with a certified gluten-free 1:1 baking flour blend that includes xanthan gum. The shredded coconut and all other ingredients are naturally gluten-free. Begin checking doneness at 27 minutes rather than 30 since gluten-free cakes can set faster. The crumb will be very slightly denser than the wheat version but the flavor profile is unchanged.
For egg-free: replace each whole egg with 3 tablespoons of plain full-fat Greek yogurt; replace the egg white with 1 extra tablespoon of coconut milk. The structure will be slightly less tall and the crumb slightly denser than the egg version; the coconut flavor carries the recipe regardless.
This recipe has not been tested in a certified allergen-free kitchen and cannot be guaranteed safe for any specific allergy.
Equipment Needed
- Two 9-inch (23cm) round cake pans, minimum 5cm deep — both pans must be the same material and depth for even baking; a metal pan and a glass pan of the same diameter bake at different rates and produce layers that come out of the oven at different levels of doneness.
- Stand mixer or hand mixer with beater attachments — the creaming step requires sustained mechanical beating to incorporate adequate air; the full 4 to 5 minutes cannot be shortened by hand whisking within a practical time frame.
- Kitchen scale — for accurate flour measurement; scooped flour varies by 20 to 30% depending on technique and produces noticeably different results at the same cup volume.
- Two parchment paper rounds — for lining the cake pan bases; greased and floured sides combined with parchment bases produce reliably clean release every time without tearing or sticking.
- Large rimmed baking sheet — for the toasted coconut exterior step; place the frosted cake on a baking sheet before pressing coconut onto the sides so the fallen coconut lands on the sheet and can be scooped back up and pressed on again rather than being wasted on the counter.
- Offset spatula and optional cake turntable — the offset spatula applies frosting evenly around the sides without the hand disturbing the surface; a turntable makes this considerably easier by rotating the cake while the spatula stays stationary.
Step-by-Step Directions
Step 1: Prepare the Pans and Preheat
Preheat the oven to 175°C (350°F). Grease both 9-inch cake pans thoroughly with softened butter, including the full side walls. Place a parchment round in each base and press flat; grease the parchment surface as well. Dust the interior walls with a thin, even layer of flour, tap the pan gently all around, and invert over the sink to knock out the excess that would create visible white patches on the finished cake exterior.

Chef’s Note: The 175°C rather than 180°C baking temperature is a deliberate choice that reduces the rate at which the cake edges set relative to the rising center. At 180°C, the edges set faster than the center rises, creating a dome as the still-active center pushes upward against already-set sides. At 175°C, the differential is smaller and the layers bake noticeably flatter, which matters enormously for a cake that needs to look composed under a heavy coconut exterior.
Step 2: Cream the Butter and Sugar
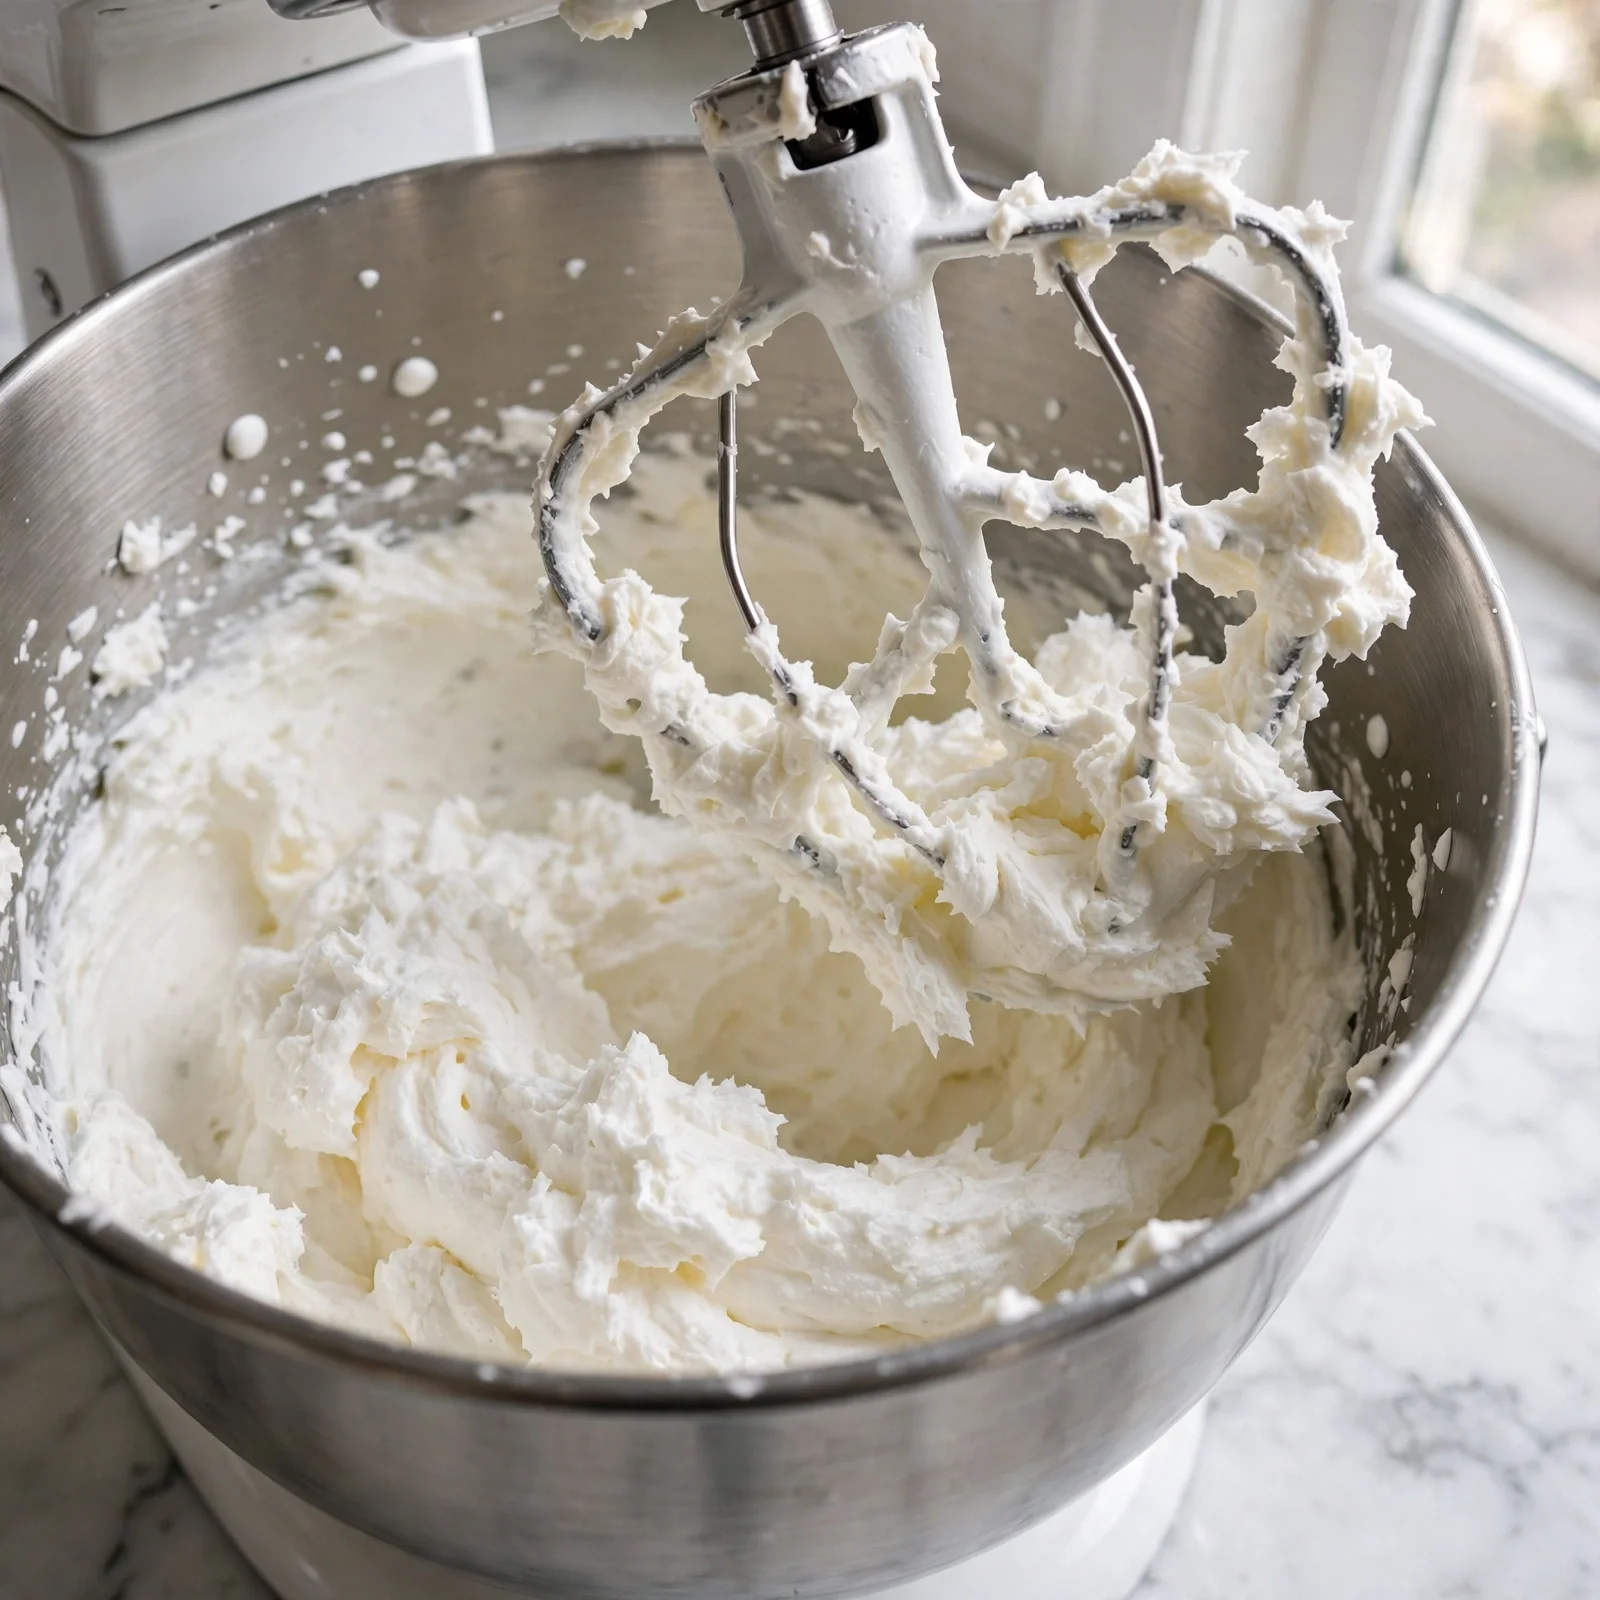
Combine the room-temperature butter and all the granulated sugar in the stand mixer bowl fitted with the beater attachment. Begin on low for 30 seconds to prevent a sugar cloud, then increase to medium and beat for 4 to 5 minutes until the mixture has approximately doubled in volume, shifted from pale yellow to a nearly white color, and looks very light and fluffy. Scrape the bowl sides and bottom at the 2-minute and 4-minute marks; the butter at the base doesn’t get incorporated by the beater and will produce dense streaks in the final batter if left unincorporated.
The finished creamed mixture should look almost like whipped cream: very pale, voluminous, and airy. If it still looks yellow and grainy after 5 minutes, the butter was too cold; allow the mixture to come to full room temperature and beat again.
Step 3: Add Eggs, Vanilla, and Coconut Extract
With the mixer on medium-low, add the room-temperature eggs and egg white one at a time, allowing each to fully incorporate before the next. Each addition takes 15 to 20 seconds to disappear into the creamed butter; if the batter looks curdled or separated at any point, add 1 tablespoon of the measured flour and beat briefly to re-emulsify. After all the eggs are incorporated, add the vanilla extract and coconut extract, beat for 30 seconds, and scrape the bowl thoroughly.
Chef’s Note: Adding the coconut extract with the eggs rather than with the liquid at the end ensures it distributes through the fat phase of the batter, where fat-soluble aromatic compounds dissolve and distribute most evenly. Coconut extract added with the milk distributes through the water phase instead, which produces patchier, less consistent flavor in the baked crumb.
Step 4: Alternate Dry and Wet Ingredients
Whisk together the all-purpose flour, baking powder, and salt in a separate bowl. With the mixer on low, add the flour mixture and the room-temperature coconut milk in alternating additions: flour, coconut milk, flour, coconut milk, flour (three flour additions, two coconut milk additions). Mix only until each addition is just incorporated before the next goes in; the moment no visible flour streaks remain, the mixing stops. Over-mixing after flour is added develops gluten and produces a tougher, denser crumb.
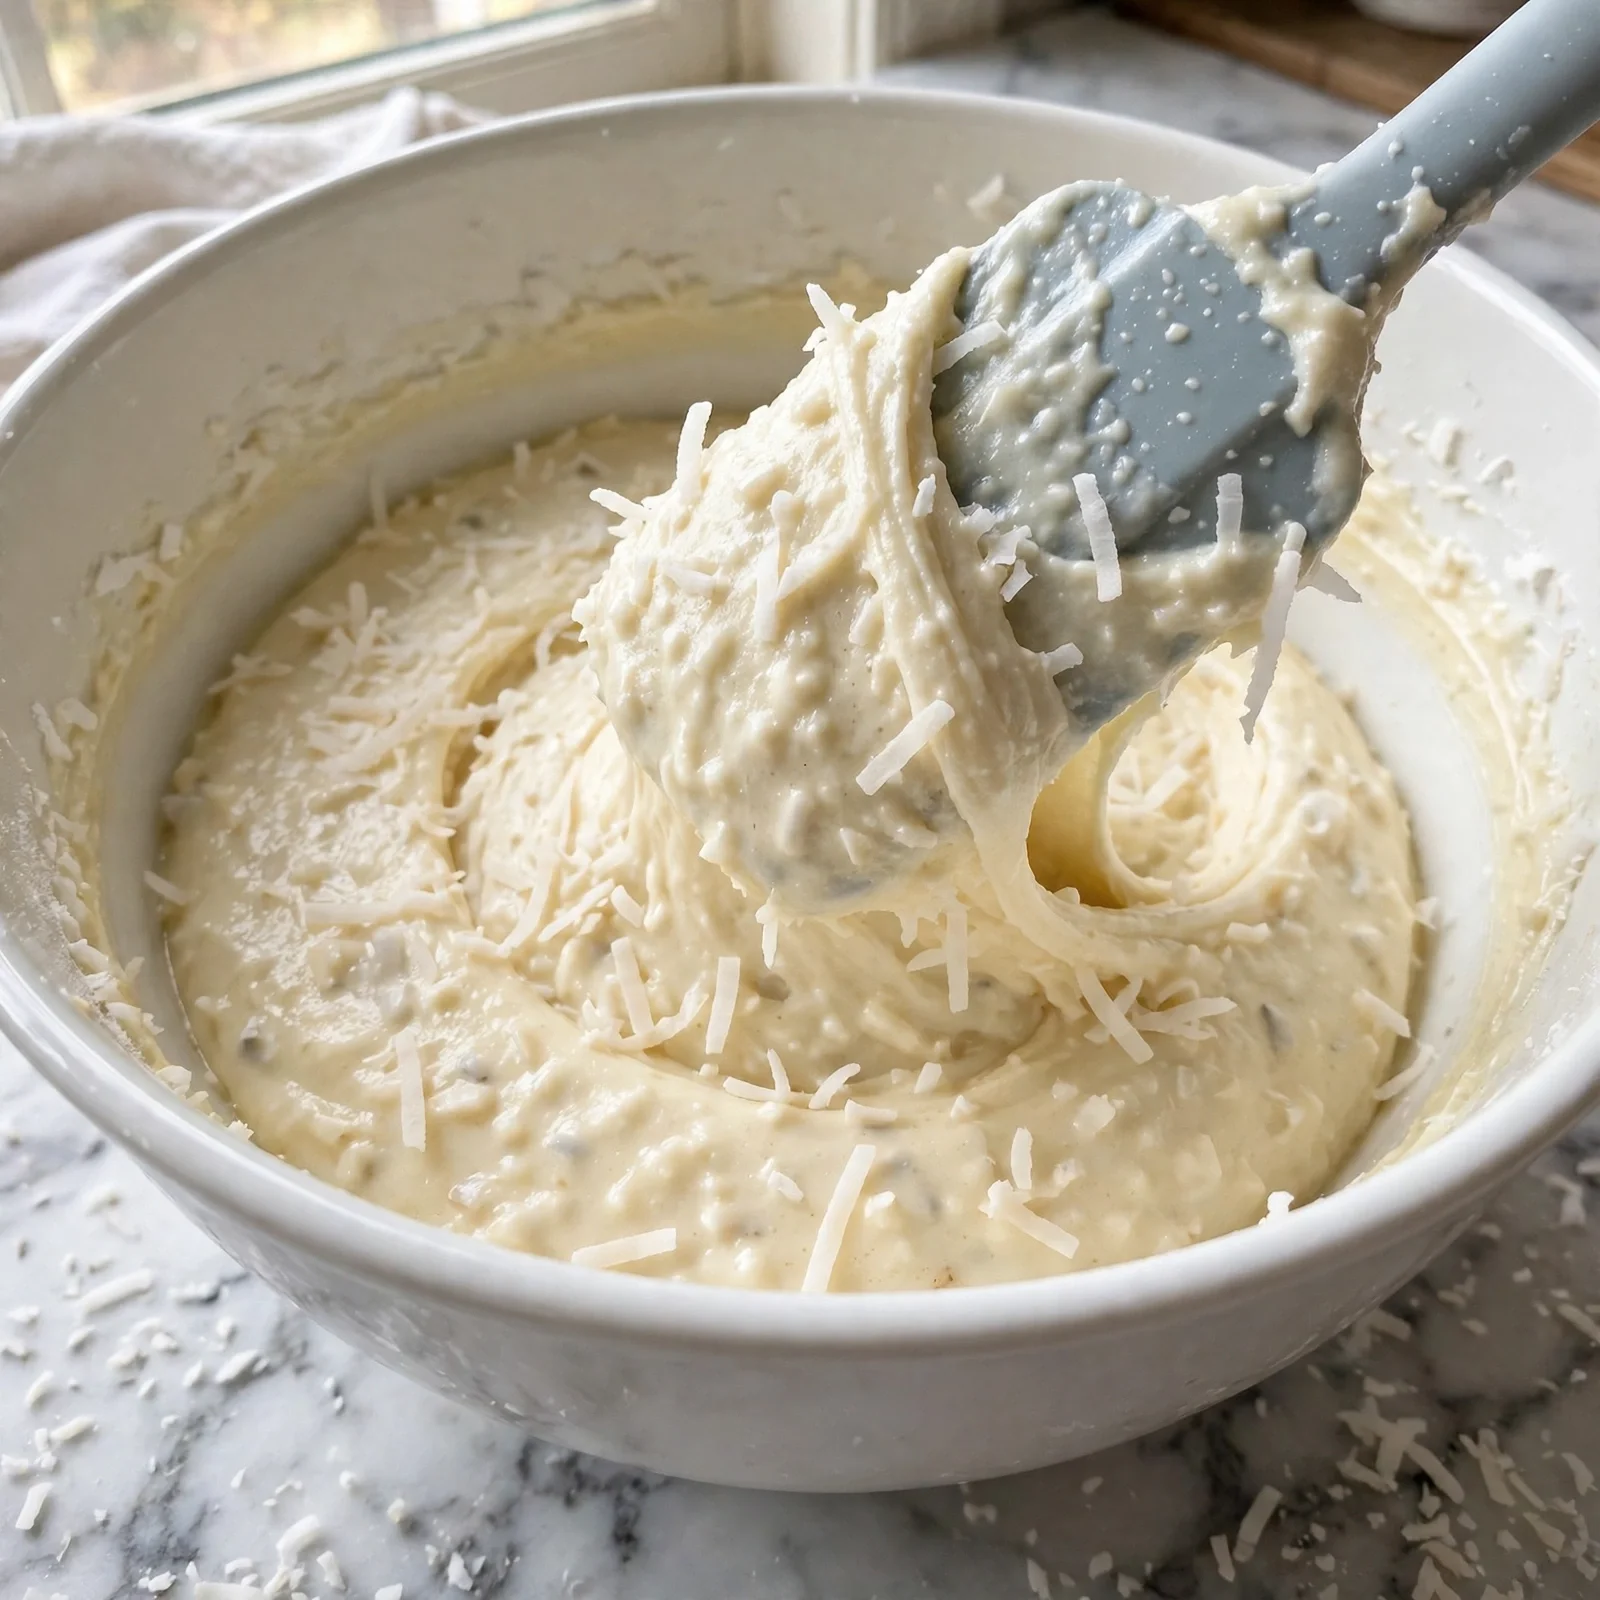
The finished batter should look smooth, slightly thick, and uniformly pale ivory in color from the coconut milk’s fat rather than pure white.
Chef’s Note: The alternating addition method keeps the batter’s emulsion stable throughout mixing by preventing any single component from overwhelming the fat-water balance built during creaming. Adding all the coconut milk at once floods the system with more water than the fat can absorb in one introduction and breaks the emulsion into a curdled-looking mass that bakes into an uneven crumb. Small alternating additions keep the emulsion intact and the batter smooth.
Step 5: Fold In the Shredded Coconut and Bake
Remove the bowl from the mixer and fold in the sweetened shredded coconut by hand using a large spatula, working in broad, circular strokes from the bottom of the bowl upward until the coconut is evenly distributed throughout the batter with no visible pockets of plain shredded coconut sitting at the top.
Divide the batter evenly between the two prepared pans; use a kitchen scale for the most accurate equal division. Spread each layer’s batter to the edges with an offset spatula, aiming for a flat or very slightly concave surface rather than a mounded center. Tap each filled pan firmly on the counter three times to release any large air pockets.
Bake both pans on the center rack for 28 to 34 minutes until a toothpick inserted into the geometric center of each layer comes out with only a few moist crumbs attached, the surface springs back completely when pressed gently, and the edges have begun to pull away very slightly from the pan walls.
Step 6: Cool the Layers
Place the pans on a wire rack and cool for exactly 10 minutes in the pans; too little time and the layers break during unmolding, too much and the condensation between parchment and pan base makes the exterior sides damp. Run a thin knife or offset spatula around the inside edge of each pan to loosen the sides, then invert onto the wire rack, peel the parchment off the base immediately, and flip right-side up. Allow to cool completely, at least 60 minutes, before frosting; a warm layer melts the cream cheese frosting on contact and the whole thing slides.
Step 7: Toast the Coconut and Make the Frosting
Place the sweetened coconut flakes or shredded coconut in a large dry skillet over medium heat. Stir constantly with a wooden spoon for 4 to 6 minutes, keeping the coconut moving across the pan surface at all times. The coconut will begin to color at the edges first; continue stirring until the majority of the pieces have turned a consistent, warm golden-brown. Remove from the heat immediately and transfer to a plate or baking sheet to cool completely; coconut left in the hot pan continues toasting and can go from golden to burnt in 60 seconds.
Beat the softened cream cheese and softened butter together on medium speed for 90 seconds until completely smooth and lump-free. Reduce to low and add the sifted powdered sugar in three additions, beating briefly after each to prevent a dust cloud, then increase to medium-high and beat for 3 to 4 minutes until the frosting is very fluffy, pale, and smooth. Add the coconut cream, vanilla extract, coconut extract, and pinch of salt. Beat 60 more seconds and check consistency: the frosting should drape slowly from a spatula in a smooth wave rather than standing in stiff peaks or running off in a liquid stream.
Step 8: Assemble, Frost, and Coat in Coconut
Place the first cooled layer on a cake stand or serving plate over a rimmed baking sheet to catch fallen coconut. Spread approximately one-third of the frosting in an even, flat layer across the top of the first layer all the way to the edges. Place the second layer on top and press gently to ensure it sits level. Apply a thin crumb coat of frosting over the entire exterior of the assembled cake, spreading it thinly enough to see the cake through it; this layer seals the crumbs so they don’t appear in the final coat. Refrigerate for 20 minutes until the crumb coat is firm.
Apply the final, full layer of frosting generously over the chilled crumb coat, covering the top and sides evenly. Working quickly before the frosting sets, press handfuls of toasted coconut onto the sides of the cake, rotating the stand to cover the full circumference, and scatter a generous layer across the top surface. The frosting should still be slightly tacky enough to hold the coconut pieces firmly; if the frosting has set too much, gently warm your palm and press the coconut against the sides with moderate, steady pressure.
Common Mistakes and Troubleshooting
| Problem | Cause | Solution |
|---|---|---|
| Crumb dense and heavy | Butter too cold for proper creaming, or batter over-mixed after flour was added | Butter must be 18 to 21°C; stop mixing the moment each flour addition is just incorporated |
| Dome on the layer tops | Oven too hot, or too much baking powder | Bake at 175°C; measure baking powder precisely with a leveled measuring spoon |
| Coconut milk curdled the batter | Coconut milk added too cold, or added too fast | Bring coconut milk to room temperature before use; add in two additions rather than all at once |
| Frosting lumpy and grainy | Cream cheese was too cold, or powdered sugar not sifted | Always soften cream cheese fully to room temperature; sift powdered sugar before every use |
| Toasted coconut burns before coloring evenly | Heat too high, or coconut left unattended | Use medium heat only; never stop stirring; transfer immediately when golden |
| Coconut exterior falls off the cake | Frosting too set before coconut was pressed on | Work quickly after the final coat; if frosting firms, re-spread a thin fresh layer where needed before pressing coconut |
Variations and Substitutions
- Pineapple coconut cake: Spread a thin layer of well-drained crushed pineapple (about 4 tablespoons) across the frosting between the two layers before placing the second layer. The pineapple adds a tropical tartness that cuts through the richness of the coconut frosting and produces a flavor that many people associate with a hummingbird or tropical cake. Reduce the filling frosting by 2 tablespoons to account for the volume of the pineapple.
- Lemon coconut cake: Add the finely grated zest of 2 large lemons to the batter alongside the vanilla and coconut extracts. Replace the coconut cream in the frosting with 2 tablespoons of fresh lemon juice plus 1 tablespoon of lemon zest. The lemon’s acidity brightens the coconut’s naturally sweet, mild flavor and produces a cake that tastes more vivid and tropical than the standard version.
- Chocolate coconut cake: Replace 40g (1/4 cup) of the all-purpose flour in the batter with 40g of Dutch-process cocoa powder, sifted before measuring. Keep the shredded coconut in the batter and the toasted coconut exterior; the dark chocolate crumb against the white frosting and golden coconut exterior produces a dramatic visual and a flavor combination where the slight bitterness of the cocoa contrasts the coconut’s sweetness in a way that makes both more vivid.
- Three-layer 8-inch version: Divide the same batter equally among three 8-inch round pans. Reduce the bake time to 22 to 26 minutes and begin checking at 20 minutes. Increase the frosting recipe by 50% to cover three layers adequately. The finished cake will be taller and more dramatically proportioned; the coconut exterior looks even more impressive on a taller cake.
- Coconut cupcakes: Fill standard 12-cup muffin tins lined with paper liners to 2/3 capacity with the same batter. Bake at 175°C for 18 to 22 minutes until a toothpick comes out clean. This recipe produces approximately 18 to 20 standard cupcakes. Frost with a swirl of coconut cream cheese frosting using a piping bag fitted with a large star tip, then dip the top of each frosted cupcake into a bowl of toasted coconut.
- Gluten-free coconut cake: Replace the all-purpose flour with a certified gluten-free 1:1 baking flour blend containing xanthan gum at the same weight. The method is identical. All other ingredients in this recipe are naturally gluten-free. Begin checking doneness at 27 minutes rather than 30 and use both the toothpick and spring-back tests since gluten-free batters don’t always show the same visual browning cues as wheat-based batters.
Serving Suggestions
- Serve at room temperature rather than cold; the cream cheese frosting firms in the refrigerator and the coconut crumb tightens slightly below room temperature. Remove from the refrigerator 30 to 45 minutes before serving to allow the frosting to soften back to its creamy, slightly yielding texture and the crumb to warm to its most moist and tender eating state.
- Pair with fresh mango slices arranged alongside each slice on the plate; the mango’s tropical sweetness and slight acidity amplify the coconut flavor in the cake and provide a fresh, juicy contrast to the dense, rich crumb and frosting.
- Serve with a hot cup of strong black tea; the tannins and slight bitterness of black tea contrast the coconut’s natural sweetness and make each bite of the cake taste more vivid between sips. Earl Grey is particularly good alongside coconut cake because its bergamot citrus note echoes the tropical character of the coconut.
- For a dessert table or celebration, place a small arrangement of edible flowers, fresh passion fruit halves, or thin slices of star fruit on the top of the finished cake immediately before serving. The tropical fruit and floral garnishes require no additional effort and elevate the presentation dramatically.
- For a birthday or celebration, add a simple layer of homemade or store-bought lemon curd between the layers alongside the frosting. The lemon curd adds a glossy, deeply yellow layer that’s visible in the cross-section when the cake is sliced and provides a bright, tangy contrast to the sweet coconut crumb.
- Pair with chilled coconut water or a fresh pineapple juice; both tropical drinks echo the flavor profile of the cake without duplicating it and provide a clean, refreshing contrast to the richness of the cream cheese frosting.
Tips for the Best Results
- Use full-fat canned coconut milk exclusively, not the beverage carton. The fat content difference between full-fat canned coconut milk (17 to 22% fat) and the refrigerated coconut milk beverage (1 to 2% fat) produces a dramatic difference in the baked crumb’s moisture and richness. The beverage version produces a cake closer to one made with skim milk; the canned full-fat version produces the tender, moist crumb this recipe is built around. Shake the can fully before opening.
- Toast the coconut attentively and stop at golden, not beyond. The window between perfectly golden and unpleasantly bitter burnt coconut is very narrow at medium heat; it can happen in 30 to 60 seconds of inattention. Stir constantly, watch for the color change beginning at the edges of each piece, and pull from the heat and transfer to a cool surface the moment the majority of the coconut is golden. The residual heat of the pan and the skillet both continue toasting; don’t leave the coconut in either.
- Bring every ingredient to room temperature before starting. Coconut milk, eggs, cream cheese, and butter all need to be at room temperature for this recipe to work correctly. Cold eggs curdle the creamed butter; cold coconut milk breaks the batter emulsion when added; cold cream cheese produces lumpy frosting regardless of how long you beat it. Plan 30 to 45 minutes of counter time for refrigerated ingredients before mixing begins.
- Apply the crumb coat before the final frosting and refrigerate between. The crumb coat, a thin layer of frosting that seals the loose crumbs onto the cake’s surface before the visible final layer is applied, is what prevents toasted coconut pieces from mixing with crumbs in the outer frosting. For a coconut cake specifically, skipping the crumb coat means the final layer picks up crumbs and shredded coconut from the cake interior that look messy under the toasted exterior coating.
- Press the toasted coconut onto the sides while the frosting is still tacky. The timing window is about 5 to 8 minutes after the final frosting coat is applied; during that time the cream cheese frosting is still soft enough to grip the coconut pieces with gentle pressing. After that it sets and the coconut slides rather than sticking. If the frosting has set before you’ve finished, adding a thin fresh stripe of frosting to each uncovered section gives the coconut the tacky surface it needs to adhere.
Storage Tips
Refrigerator
A frosted coconut cake keeps in the refrigerator for up to 5 days in a sealed cake box or under a large dome that doesn’t touch the toasted coconut exterior. The cream cheese frosting seals the cut surfaces of the crumb during refrigerator storage and keeps the layers from drying out; a refrigerated slice brought to room temperature for 30 to 40 minutes before eating is only marginally different from a same-day room-temperature slice. The toasted coconut softens slightly in the refrigerator as it absorbs moisture from the frosting; it remains flavorful but loses some of its initial crunch after day 2.
Freezer
The unfrosted cake layers freeze very well for up to 3 months. Cool completely, wrap each layer tightly in two layers of plastic wrap and then foil, and freeze flat. Thaw overnight in the refrigerator still wrapped, then allow to come fully to room temperature (about 1 hour) before frosting. The frosted assembled cake can also be frozen: freeze unwrapped until the frosting is solid (about 2 hours), then wrap carefully in plastic wrap, taking care not to crush the toasted coconut exterior. Thaw overnight in the refrigerator and bring to room temperature before serving. The toasted coconut texture is slightly softer after freezing and thawing but the flavor remains excellent.
Reheating
Coconut cake is served at room temperature and not reheated in the conventional sense. If a refrigerated slice is too cold and the frosting too firm, place it on a plate at room temperature for 25 to 35 minutes until the frosting softens and the crumb warms to its ideal eating texture. If the frosting has been stored separately, beat it briefly with a spatula or hand mixer at room temperature for 60 seconds to restore its creamy consistency before applying.
Make-ahead note: This cake is very practical to make in stages. Bake the layers up to 2 days ahead, wrap tightly in plastic wrap, and store at room temperature for 1 day or refrigerated for 2 days. Make the frosting up to 3 days ahead, refrigerate in a sealed container, and bring fully to room temperature before beating briefly and using. Toast the coconut up to 5 days ahead and store in a sealed container at room temperature. On the day of assembly, the entire process from frosting to finished takes about 20 minutes.
Nutrition Information
Per serving, approximately one slice (1/14 of the cake, with frosting and toasted coconut exterior):
| Nutrient | Amount |
|---|---|
| Calories | 520 kcal |
| Protein | 5g |
| Total Carbohydrates | 70g |
| Dietary Fiber | 2g |
| Total Sugar | 54g |
| Total Fat | 25g |
| Saturated Fat | 17g |
| Cholesterol | 85mg |
| Sodium | 195mg |
| Vitamin C | 0mg |
| Calcium | 65mg |
| Iron | 1.2mg |
| Potassium | 120mg |
Nutrition values are approximate and may vary based on butter brand, coconut milk fat content, frosting quantity applied, and toasted coconut amount used.
Why This Recipe Works
The moisture advantage of this coconut cake over a standard butter cake made with dairy milk is directly attributable to the composition of full-fat canned coconut milk. Coconut milk contains approximately 17 to 22% fat by weight, compared to whole cow’s milk’s approximately 3.5%. This higher fat content provides two distinct benefits in the baked crumb. First, fat physically lubricates the starch granule surfaces in the flour during baking, reducing the tendency of gelatinized starch to form tight, rigid networks that feel dry and grainy on the palate; more fat means a more tender, more lubricated starch structure. Second, coconut fat solidifies at approximately 24 to 25°C rather than the 32 to 35°C of dairy fat, which means coconut fat in the crumb stays slightly softer at room temperature than dairy fat would, contributing to the crumb’s perceived moistness even after the cake has been stored for a day or two.
The flavor architecture of this recipe uses three coconut delivery mechanisms that each contribute different aspects of the total flavor profile. The full-fat coconut milk introduces coconut’s characteristic medium-chain fatty acids and lauric acid, which carry the fat-soluble aromatic compounds responsible for coconut’s warm, tropical richness. The shredded coconut folded into the batter provides physical pieces that contain their own moisture and aromatics; during baking, these pieces caramelize slightly at their surfaces and release concentrated coconut flavor into the surrounding crumb. The coconut extract provides vanillin and synthetic cocoanol compounds that reinforce the perception of coconut aroma without being individually identifiable as artificial when used in a small quantity alongside the real coconut milk and shredded coconut; at 1/2 teaspoon in this batter, it amplifies the natural coconut rather than replacing it.
The decision to use one egg white alongside three whole eggs rather than four whole eggs is a classic technique for producing a lighter, paler crumb in an enriched cake. Each egg yolk contains approximately 5g of fat and significant quantities of beta-carotene (which produces the yellow color of a standard cake crumb); replacing one yolk with an egg white removes that fat contribution and that color contribution, producing a crumb that is visually whiter and structurally slightly more delicate. The egg white’s protein still contributes structural support and sets the crumb during baking; the net result is a crumb that reads as lighter and more refined than a four-whole-egg cake without being fragile.
Cream cheese’s specific contribution to the frosting is not interchangeable with other dairy-based frostings for this application. Cream cheese contains approximately 33 to 34% fat and 50 to 55% moisture, with a pH of approximately 4.4 to 4.6 from its natural lactic acid content. This mild acidity is what produces the characteristic tang that separates cream cheese frosting from plain buttercream; at this pH level, the perception of sweetness from the powdered sugar is counterbalanced by a brightness that prevents the frosting from tasting cloying. For a cake as naturally sweet as a coconut cake, this acidity balance is particularly important; a plain buttercream frosting on this cake would produce a dessert that many people find too sweet, while the cream cheese version tastes balanced and complete.
Toasting the coconut exterior transforms the presentation and the flavor simultaneously through two processes: Maillard browning and caramelization of the coconut’s natural sugars. The sweetened coconut flakes contain sucrose that begins to caramelize above approximately 160°C, producing the characteristic amber color and toffee-like aroma of toasted coconut. The coconut’s proteins and amino acids simultaneously undergo Maillard browning alongside the caramelizing sugars, producing nutty, roasted aromatic compounds that the untoasted coconut entirely lacks. The combination of caramelized sugars and Maillard compounds produces the toasted coconut flavor that is noticeably more complex and interesting than untoasted coconut, which tastes primarily sweet and mildly coconut-flavored.
I’ve made this recipe with the shredded coconut in the batter omitted, partially included, and at the full 80g. Without any shredded coconut in the batter, the crumb is smooth and uniform but the coconut flavor is lighter and less textured; it tastes like a coconut-flavored cake rather than a coconut cake. At 40g, the coconut pieces are present but infrequent and don’t create a consistent coconut texture throughout the crumb. At 80g, every bite of the crumb contains at least one or two shredded coconut pieces that provide both a textural contrast to the smooth cake and a concentrated burst of coconut flavor; this is the version that tastes most genuinely made-with-coconut rather than merely coconut-flavored.
Frequently Asked Questions
Can I make coconut cake ahead of time?
Yes, and the make-ahead options are quite flexible. The layers bake up to 2 days ahead and keep well wrapped at room temperature or refrigerated. The frosting makes up to 3 days ahead, refrigerated, and beats back to its original creamy consistency at room temperature. The toasted coconut stays crisp in a sealed container at room temperature for up to 5 days. Assembling the full cake on the day of serving from pre-prepared components takes about 20 minutes. The finished frosted and coconut-coated cake keeps refrigerated for up to 5 days.
Why is my coconut cake dense?
Dense coconut cake almost always comes from one of three sources: butter that was too cold to cream properly, over-mixing after the flour was added, or too much flour from scooping the cup rather than spooning and leveling. The creaming step requires butter at 18 to 21°C; cold butter won’t incorporate air regardless of how long you beat it. After the flour goes in, mixing must stop the moment the flour disappears; additional mixing develops gluten and tightens the crumb. Weighing the flour on a kitchen scale eliminates the scooping-variable entirely.
Can I use coconut extract instead of coconut milk?
No; they’re not equivalent substitutes. Coconut extract contributes aroma compounds but no fat, no liquid, and none of the structural contribution that the 240ml of coconut milk provides to the batter. Replacing the coconut milk with regular dairy milk and increasing the coconut extract produces a cake with a noticeably drier, less tender crumb and a more artificial coconut flavor than the full-fat coconut milk version. If full-fat canned coconut milk is unavailable, full-fat coconut cream thinned with 60ml of water to reach the same 240ml volume is the best substitute; it has even more fat than coconut milk and produces an equally rich or slightly richer result.
How do I know when the coconut cake layers are done?
Two tests used together provide the most reliable confirmation. Insert a toothpick into the absolute center of each layer; it should come out with a few moist crumbs attached but no wet, raw batter clinging to it. Press the center of the surface gently with a clean fingertip; the surface should spring back completely to its original level without leaving any permanent indentation. The edges pulling very slightly away from the pan sides are a supporting visual sign. Begin checking at 28 minutes but allow up to 34 minutes; oven variation is significant enough that a fixed time isn’t reliable without these two physical checks.
Is coconut a tree nut allergen?
Coconut is classified as a tree nut by the United States Food and Drug Administration, and some countries include it in their tree nut allergen labeling requirements. However, individuals with traditional tree nut allergies (almonds, cashews, walnuts, etc.) may or may not react to coconut; the cross-reactivity is not universal. Anyone with a tree nut allergy should consult with their healthcare provider before consuming coconut products. This recipe uses coconut in multiple forms (coconut milk, shredded coconut, coconut extract) and is not suitable for anyone advised to avoid coconut specifically.
Can I use unsweetened coconut in this recipe?
Yes, with a small adjustment. Unsweetened shredded or desiccated coconut is drier than the sweetened variety and will absorb some moisture from the batter during baking. To compensate, add 1 extra tablespoon of coconut milk to the batter and reduce the bake time check to 26 minutes since the drier coconut can cause the layers to appear set sooner. The finished flavor is slightly less sweet in the crumb, which some people prefer alongside the sweetened frosting; both versions produce good results.
Why is my cream cheese frosting runny?
Runny cream cheese frosting almost always comes from cream cheese that was too warm when beaten (above 24°C) or from adding too much liquid. Cream cheese at proper room temperature (18 to 21°C) produces a stable frosting; warmer cream cheese releases water and the frosting becomes too fluid to hold its shape. If the frosting is too thin, refrigerate for 20 minutes to firm it and then beat again briefly before using. Adding more sifted powdered sugar in tablespoon increments also thickens it, though it increases sweetness; the refrigerator method is preferable for maintaining the flavor balance.
Conclusion
Coconut cake earns its place as a celebration cake because the toasted coconut exterior makes it look genuinely impressive with relatively straightforward technique, and because the flavor from real coconut at every stage produces something that tastes unmistakably from-scratch. The make-ahead stages, layers two days ahead, frosting three days ahead, toasted coconut five days ahead, mean the assembly on the day is fast and calm rather than rushed.
The decision to use full-fat canned coconut milk rather than the beverage, to toast the coconut exterior rather than using it raw, and to include shredded coconut in the batter itself rather than only on the outside: these three choices are what separate a coconut cake that tastes genuinely coconut-forward from one where the flavor is peripheral. Make those three choices and the rest of the recipe follows naturally.
If you loved this recipe, save it to your layer cake recipes and tropical baking Pinterest board so you can find it easily later. For more healthy recipes and daily food inspiration, follow TheCookingVibes on Pinterest.
Classic Coconut Cake
Ingredients
Equipment
Method
- Preheat oven to 175°C (350°F). Grease two 9-inch cake pans, line bases with parchment rounds, grease parchment, and dust interior walls with flour.
- Beat room-temperature butter and sugar on medium speed for 4 to 5 minutes until pale, doubled in volume, and very fluffy. Scrape bowl sides at 2 and 4 minutes.
- Add room-temperature eggs and egg white one at a time on medium-low, incorporating each fully before the next. Add vanilla and coconut extracts; beat 30 seconds. Scrape the bowl.
- Whisk flour, baking powder, and salt in a separate bowl. Add to creamed mixture alternating with room-temperature coconut milk in 5 additions (flour, milk, flour, milk, flour) on low speed. Mix until each addition just disappears before the next.
- Remove from mixer. Fold in sweetened shredded coconut by hand until evenly distributed. Divide batter evenly between prepared pans. Smooth surfaces flat. Tap each pan twice. Bake 28 to 34 minutes until a toothpick comes out with moist crumbs only and the surface springs back fully when pressed.
- Cool in pans on a wire rack for 10 minutes. Unmold, peel parchment, turn right-side up, and cool completely for at least 60 minutes.
- Toast sweetened coconut flakes in a dry skillet over medium heat, stirring constantly for 4 to 6 minutes until golden. Transfer immediately to a cool surface.
- Beat softened cream cheese and butter on medium speed for 90 seconds until smooth. Add sifted powdered sugar in three additions on low, then beat on medium-high for 3 to 4 minutes until fluffy. Add coconut cream, extracts, and salt; beat 60 seconds more.
- Assemble layers with one-third of the frosting between them. Apply a thin crumb coat over the exterior. Refrigerate 20 minutes. Apply the final frosting layer. Press toasted coconut over the sides and top while the frosting is still tacky.
Notes
- Always use full-fat canned coconut milk, not the refrigerated beverage carton; the fat content difference is significant in the finished crumb.
- Butter and cream cheese must both be at true room temperature (18 to 21°C); cold ingredients produce dense cake and lumpy frosting.
- Toast the coconut over medium heat with constant stirring; it goes from golden to burnt very quickly.
- Apply toasted coconut to the sides while the final frosting coat is still tacky; a set frosting won’t hold the coconut pieces.
- Allergens: Contains dairy (butter, cream cheese, coconut cream), eggs, and gluten (all-purpose flour). Coconut is classified as a tree nut by some regulatory bodies; individuals with tree nut allergies should consult a healthcare provider before consuming.
- This recipe has not been tested in a certified allergen-free kitchen and cannot be guaranteed safe for any specific allergy.