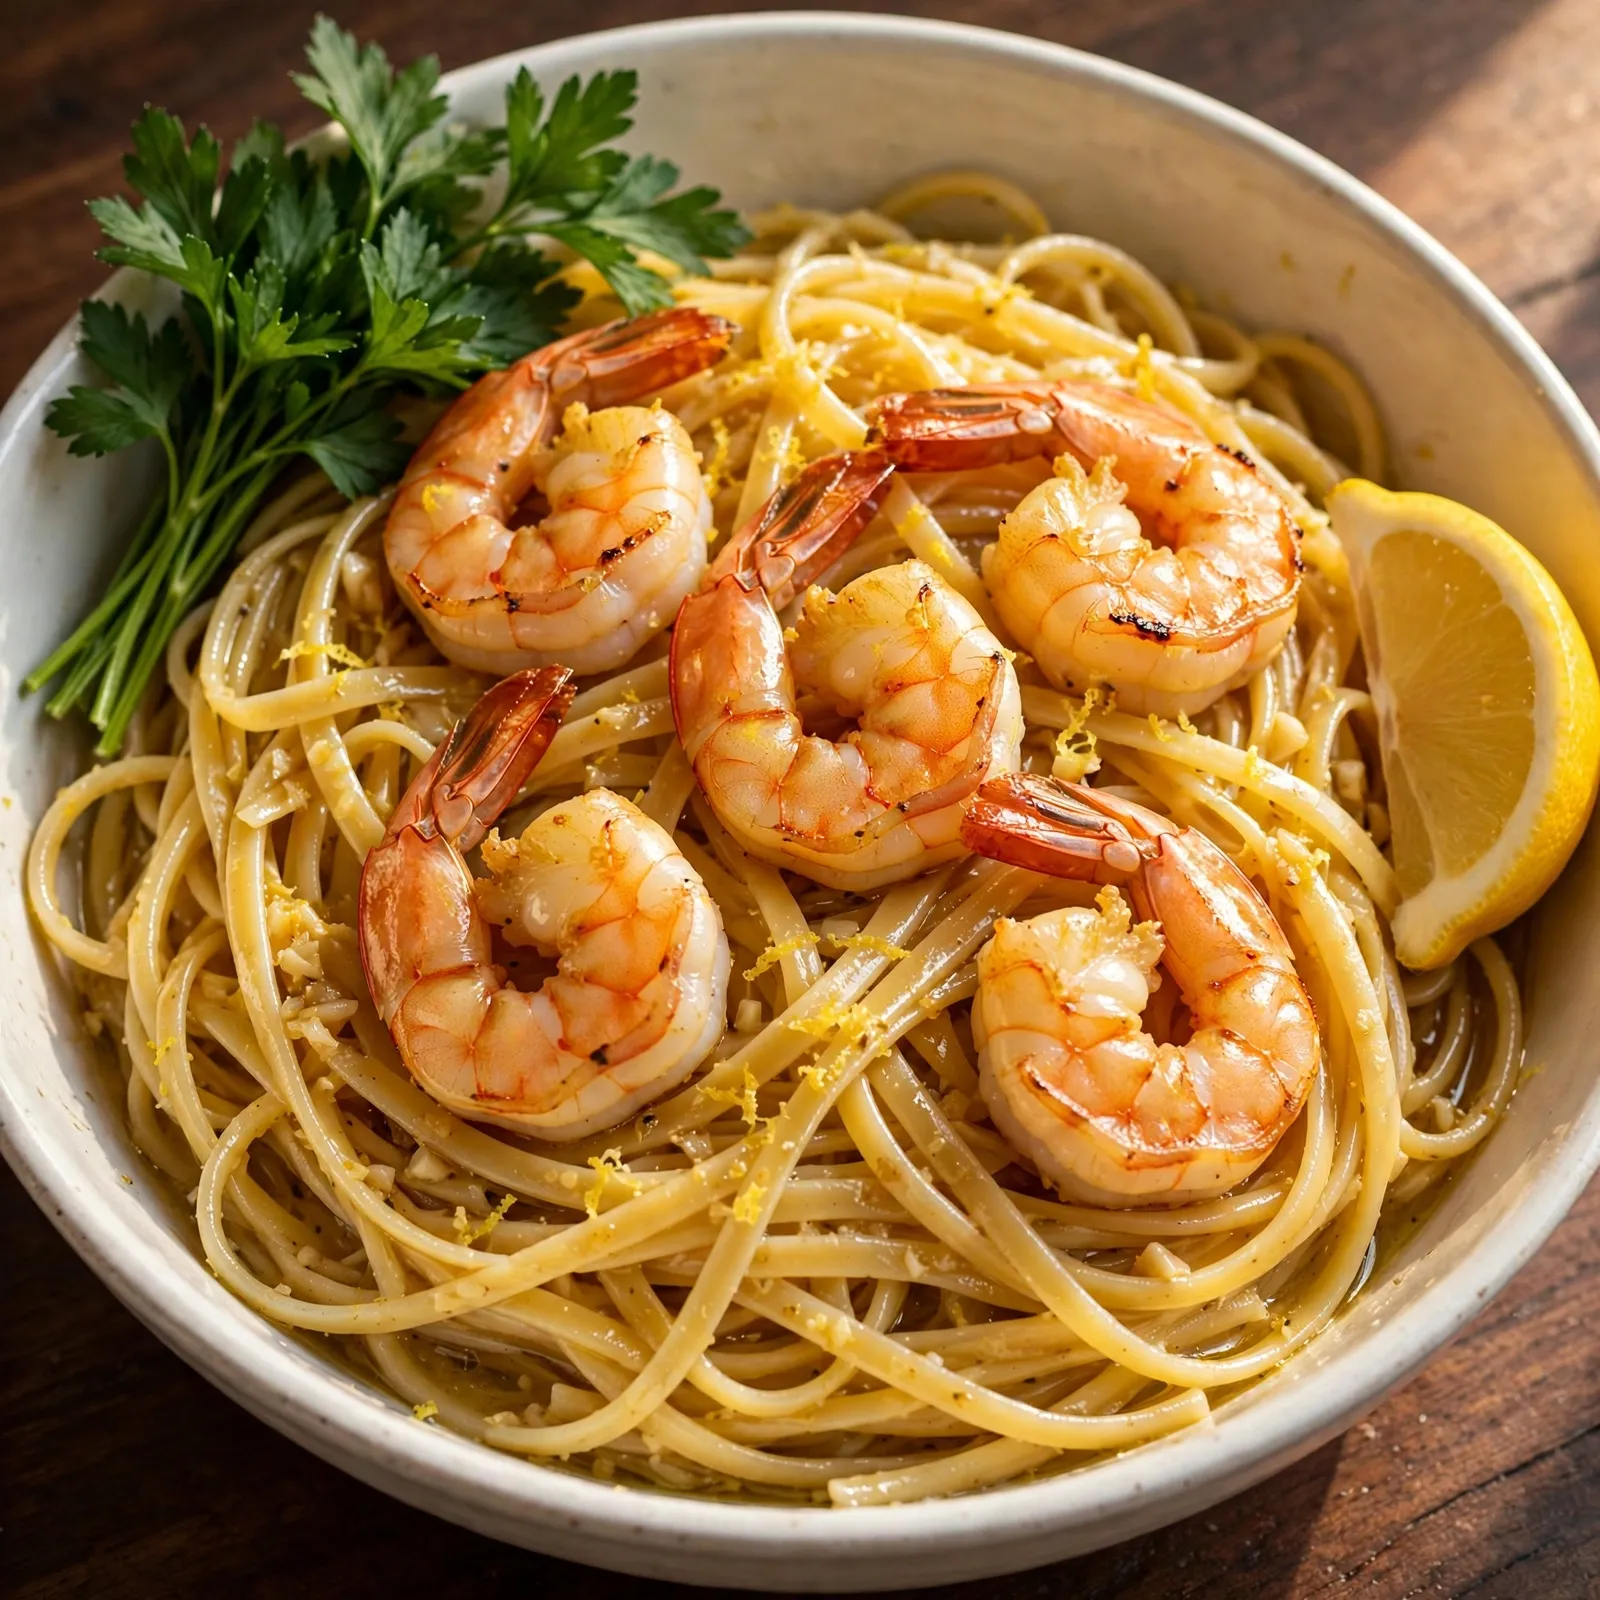
Easy Shrimp Pasta (Garlicky, Buttery, Ready in 30 Min)
The moment shrimp hit a properly hot skillet with butter and garlic — the same trio that makes a classic Shrimp Scampi so good — the kitchen produces a smell that is genuinely hard to ignore: the garlic sizzling in butter, the shrimp developing a slight char at the edges, the whole thing coming together in under 3 minutes before any liquid or pasta joins the pan. That speed, the fact that shrimp go from raw to perfectly cooked in less time than it takes to boil a pot of water, is what makes shrimp pasta one of the most practical elegant dinners available on a weeknight.
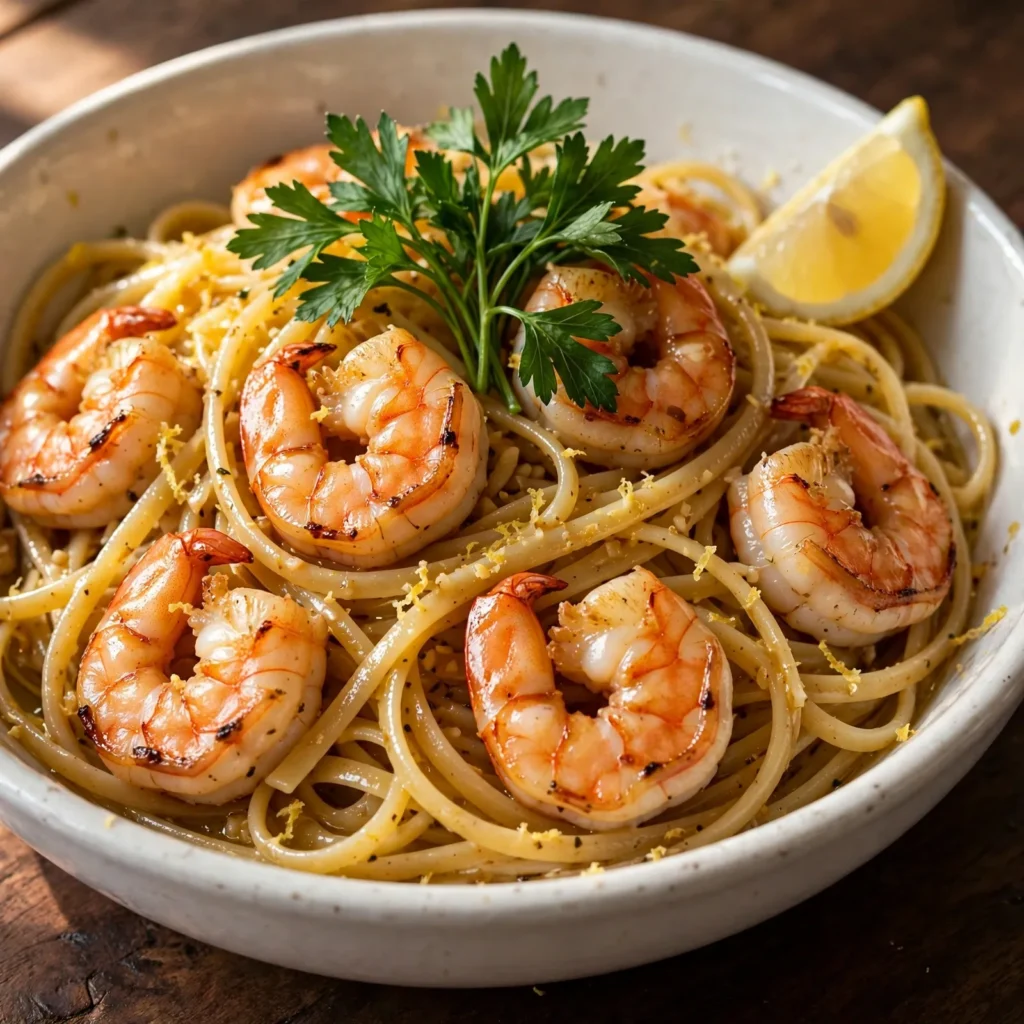
Why You’ll Love This Shrimp Pasta
- The sauce is genuinely glossy and coating, not watery. A small amount of pasta water combined with butter creates an emulsified sauce that clings to the linguine in a defined, restaurant-quality layer rather than pooling at the bottom of the bowl.
- Shrimp cook in 3 minutes total. The speed is real: large shrimp need 90 seconds per side over high heat. Knowing exactly when to pull them prevents the single most common shrimp mistake, overcooking, before it happens.
- One skillet plus one pot. The shrimp sear in the skillet, the sauce builds in the same skillet, the pasta boils in the pot. Both come together in the skillet for the final toss. Cleanup is straightforward.
- Bright, balanced flavor without excess richness. Butter and olive oil in equal amounts give the sauce body without the heaviness of a cream-based sauce. The lemon juice and white grape juice deglaze cut through the fat and keep every bite tasting fresh rather than cloying.
- Restaurant quality in a weeknight timeline. The full recipe from cold start to bowls on the table takes 30 minutes — no longer than a weeknight Chicken Fried Rice. The garlic butter sauce, the properly seared shrimp, and the emulsified finish are the same techniques used in restaurant aglio e olio applications, scaled to home-kitchen simplicity.
Ingredients You’ll Need
Recipe Timing
| Detail | Info |
|---|---|
| Servings | 4 |
| Difficulty | Easy |
| Course | Main Course |
| Cuisine | Italian-American |
| Prep Time | 10 minutes |
| Cook Time | 20 minutes |
| Total Time | 30 minutes |
The most important ingredient decision in this recipe is the shrimp size and preparation. Use large to jumbo shrimp (21/25 count or 16/20 count per pound), peeled and deveined, with the tails left on or removed according to your preference. Large shrimp have enough mass to develop a proper sear without overcooking all the way through simultaneously, which produces the combination of a slightly charred exterior and a tender, just-cooked interior. Small shrimp (41/50 count) cook through too quickly to develop meaningful surface color and are better suited to pasta dishes where they are incorporated into a sauce rather than featured as the protein element.
Fresh shrimp are ideal but high-quality frozen shrimp work just as well, provided they are thawed completely before cooking. To thaw quickly, place frozen shrimp in a colander under cold running water for 5 to 7 minutes. Pat every piece thoroughly dry with paper towels before seasoning: water on the surface of shrimp steams rather than sears, which prevents any color development and produces a pale, soft exterior.
For the pasta, linguine is the traditional choice for a garlic butter shrimp sauce because its flat, slightly wide noodles pick up the sauce from both sides as they are tossed. Spaghetti and fettuccine are both good alternatives. Avoid short pasta shapes like penne or rigatoni: the chunky format doesn’t allow the sauce to coat as evenly as long pasta does.
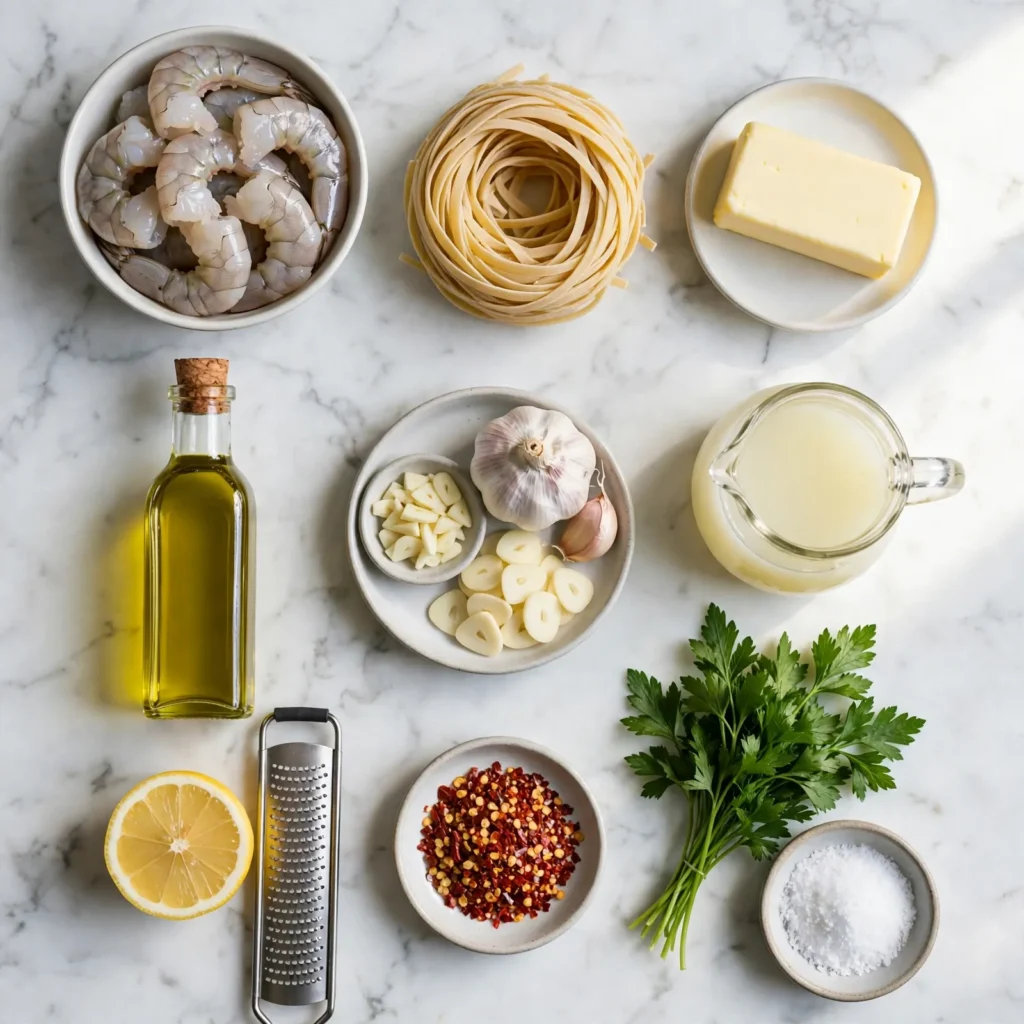
- 400g (14 oz) large shrimp (21/25 or 16/20 count), peeled and deveined, tails on or off. The primary protein. Pat completely dry before seasoning.
- 300g (10 oz) linguine or spaghetti. Cooked in well-salted water to 1 minute short of the package’s al dente time. Reserve 1 cup of pasta water before draining.
- 4 tablespoons (60g) unsalted butter, divided. 2 tablespoons go into the shrimp sear; 2 tablespoons go into the sauce. Split butter provides both the initial searing richness and a final creamy emulsification when whisked into the sauce off the heat.
- 3 tablespoons (45ml) extra virgin olive oil, divided. Combined with the butter for the sear to raise the smoke point, and added to the sauce for a fruity, savory depth that butter alone doesn’t provide.
- 6 cloves garlic, very thinly sliced. Sliced rather than minced so the garlic cooks to a pale golden, nutty softness in the sauce without burning before the liquid goes in. Minced garlic at this quantity would cook unevenly in the time the sauce takes to build.
- 1/4 cup (60ml) white grape juice. Used to deglaze the pan after the shrimp are removed. White grape juice provides the same bright acidity and natural sweetness that white wine delivers in the classic version of this dish, without any alcohol. It lifts the fond from the pan cleanly and gives the sauce a more complex, layered character than plain broth would.
- 2 tablespoons (30ml) fresh lemon juice (about 1 lemon). Added alongside the grape juice. Reinforces the citrus brightness and adds a sharper, cleaner acid note than the grape juice alone.
- 1/2 teaspoon lemon zest. Stirred in with the lemon juice. The zest carries the aromatic essential oils of the lemon that the juice alone doesn’t deliver.
- 1/2 teaspoon fine sea salt, plus more for the pasta water.
- 1/4 teaspoon black pepper.
- 1/4 teaspoon red pepper flakes (optional). Adds a gentle, lingering warmth to the sauce without making the dish spicy. Omit for a completely mild version.
- 1/2 cup (20g) fresh flat-leaf parsley, roughly chopped. Folded in at the very last moment so it stays bright green and fresh-tasting rather than wilting into the hot sauce.
- Extra lemon wedges, for serving.
Allergen and Dietary Disclosure
This recipe contains shellfish (shrimp) and dairy (butter). As written with wheat pasta, it also contains gluten.
For a gluten-free version, substitute certified gluten-free linguine or spaghetti (rice-based pasta works well in this application) in the same quantity. The sauce and shrimp preparation are naturally gluten-free.
For a dairy-free version, replace the butter entirely with an additional 4 tablespoons of olive oil. The sauce will be slightly less glossy and less rich but the garlic and lemon flavors remain fully intact. Alternatively, use a high-quality vegan butter block (not a soft spread) for the same technique with a result nearly identical to the dairy version.
Free from eggs and nuts as written. Not guaranteed safe for any specific allergy without checking all individual ingredient labels.
Step-by-Step Directions
Step 1: Cook the Pasta Underdone
Bring a large pot of water to a rolling boil. Add enough salt that the water tastes noticeably briny, like a light broth: this seasons the pasta from the inside. Add the linguine and cook for 1 minute less than the package’s al dente time. Before draining, use a ladle or measuring cup to scoop out 1 cup of the starchy pasta water and set it aside: this liquid is the emulsifying agent for the finished sauce. Drain the pasta, toss with a small drizzle of olive oil to prevent sticking, and set aside.

Chef’s Note: The pasta water is not optional in this recipe. The dissolved starch it contains is what allows the butter and olive oil to emulsify into a glossy, coating sauce rather than staying as separate fat droplets. Plain water added to a butter sauce simply does not produce the same result.
Step 2: Season and Dry the Shrimp
While the pasta cooks, pat the shrimp thoroughly dry on all sides with paper towels, pressing firmly enough to absorb all visible surface moisture. Season evenly with salt, black pepper, and the red pepper flakes if using. Any moisture remaining on the shrimp surface will steam rather than sear when the shrimp hit the hot pan, preventing the golden exterior that both looks good and adds flavor to the finished dish.
Step 3: Sear the Shrimp
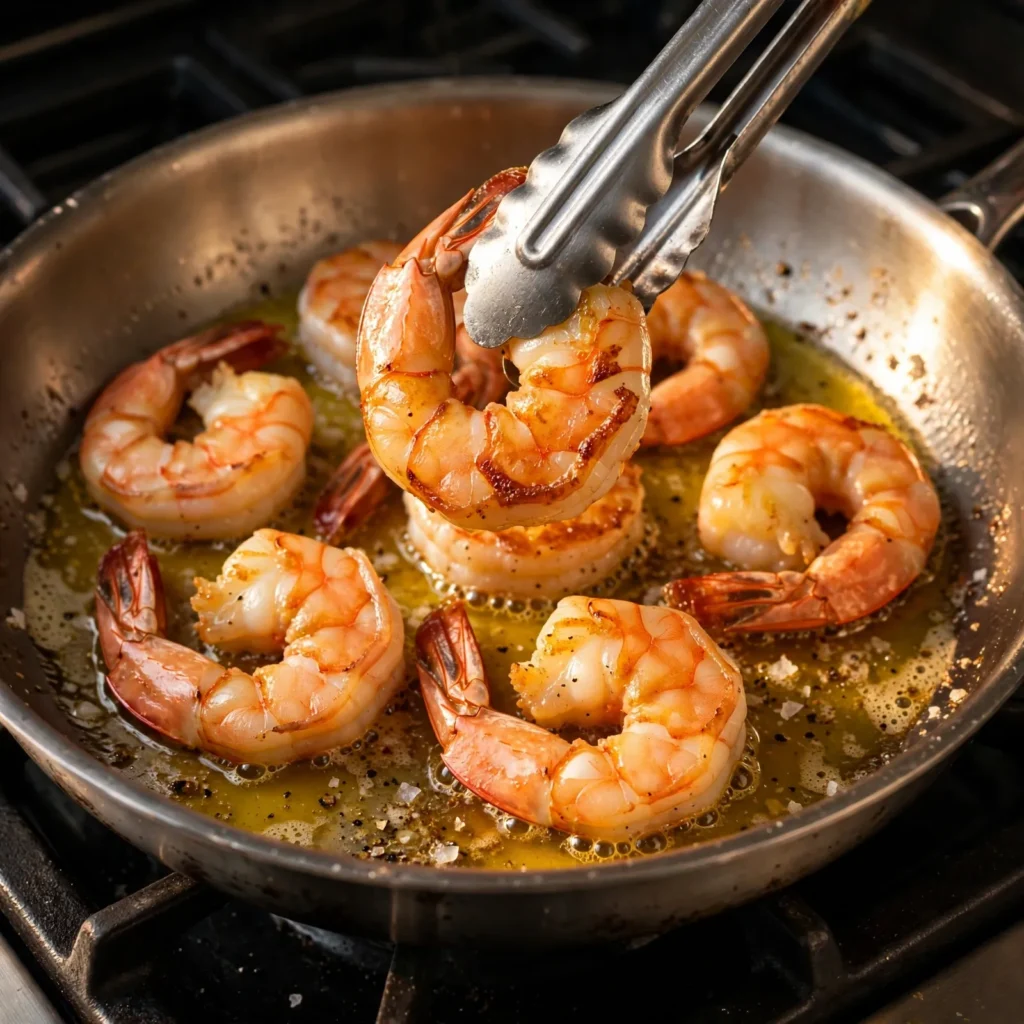
Heat 2 tablespoons of butter and 2 tablespoons of olive oil in a large, wide skillet over medium-high heat until the butter has melted, the foam has subsided, and the mixture is visibly shimmering and beginning to show the first signs of browning around the edges of the pan. Add the shrimp in a single layer without crowding: work in two batches if necessary, since crowded shrimp steam each other rather than searing. Cook without touching for exactly 90 seconds until the underside of each shrimp is a deep golden-pink with a slight char at the edges. Flip each shrimp using tongs and cook for 60 to 75 seconds on the second side until the shrimp is fully opaque throughout with no translucent grey area at the center. Transfer immediately to a plate.
Food Safety Note: Shrimp are fully cooked when they turn from translucent grey to completely opaque pink-white throughout, and when their body forms a loose C-shape rather than a tight O. An O-shape indicates overcooking. The internal temperature of fully cooked shrimp is 63°C (145°F).
Step 4: Build the Garlic Sauce
Without cleaning the skillet, reduce the heat to medium. Add the remaining 1 tablespoon of olive oil to the pan with the shrimp drippings. Add the thinly sliced garlic and cook, stirring gently, for 60 to 90 seconds until the garlic turns pale golden and smells nutty and aromatic. Watch the pan closely: sliced garlic at this quantity can go from perfectly golden to bitter and dark in under 30 seconds. Pull the pan from the burner if it looks like it’s cooking too fast.
Chef’s Note: The garlic must be golden, not brown. Brown garlic carries a bitter character that spreads through the entire sauce and cannot be corrected afterward. Pale gold garlic has a sweeter, nuttier, more complex flavor that is exactly what the sauce needs as its base.
Step 5: Deglaze and Build the Sauce
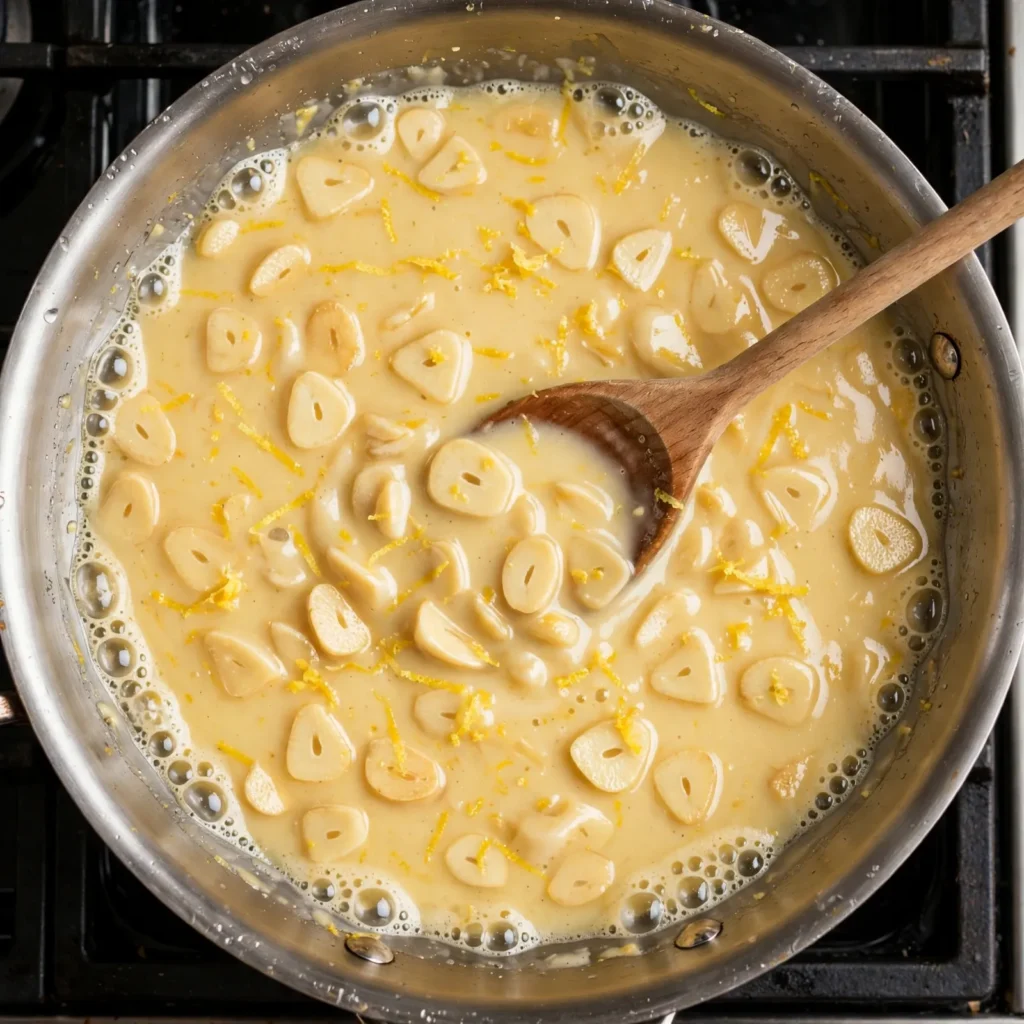
Pour the white grape juice into the pan with the golden garlic. The liquid will sizzle aggressively when it hits the hot surface. Use a wooden spoon to scrape all the browned bits from the bottom of the pan as the liquid bubbles: those bits are concentrated shrimp and garlic flavor. Add the lemon juice and lemon zest. Let the liquid cook down for 60 seconds until it has reduced by about one-third and smells bright and fragrant.
Add 1/3 cup of the reserved pasta water and the remaining 2 tablespoons of butter. Swirl the pan and stir with a wooden spoon until the butter is fully melted and the sauce looks slightly creamy and emulsified rather than separated into visible pools of fat and liquid. The sauce should coat the back of a spoon lightly.
Step 6: Add the Pasta and Toss
Add the drained, slightly undercooked linguine directly to the simmering sauce. Toss the pasta using tongs, lifting and turning the noodles to coat every strand in the sauce, for 1 to 2 minutes over medium heat. The pasta will absorb the sauce as it finishes cooking and releases a little more starch, which further thickens and glosses the sauce around the noodles. If the sauce looks tight or the pasta begins to stick, add the reserved pasta water 2 tablespoons at a time and toss again. The finished pasta should look glossy and well-coated, with the sauce clinging rather than pooling at the bottom.
Step 7: Return the Shrimp and Add the Parsley
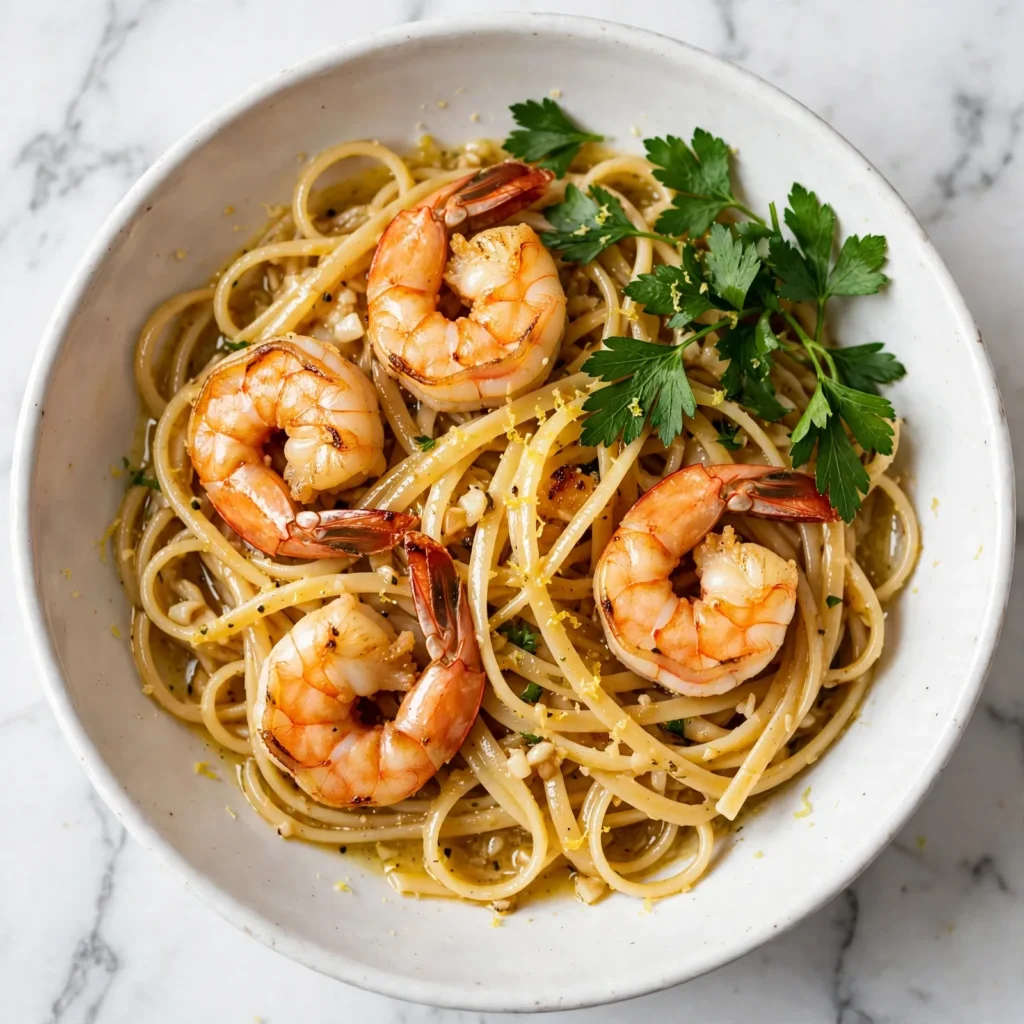
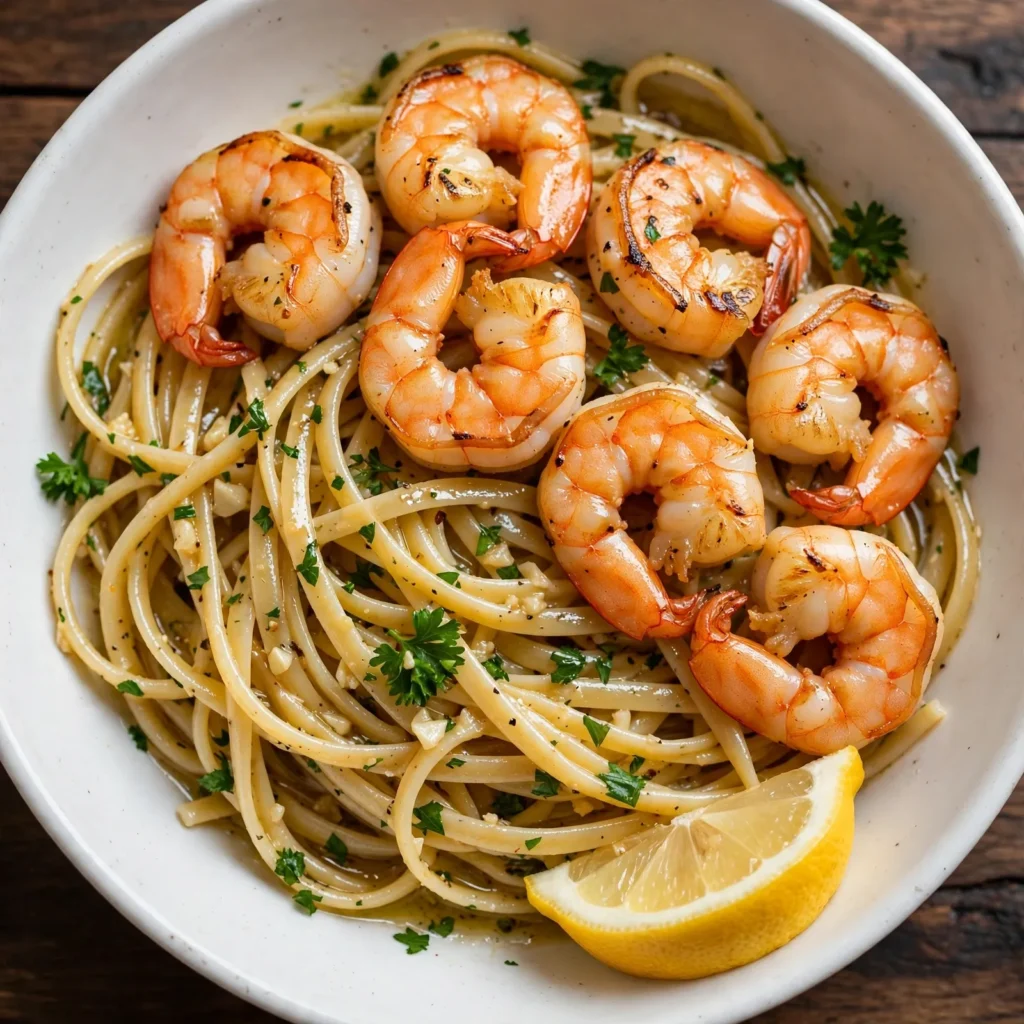
Nestle the seared shrimp back into the pasta, pressing them gently into the noodles so they reheat from the surrounding heat rather than cooking further over direct flame. Scatter the chopped parsley over the top and toss once or twice to distribute it through the pasta. Taste and adjust salt at this point. Serve immediately, portioning into wide bowls with a lemon wedge alongside.
Common Mistakes and Troubleshooting
| Problem | Cause | Solution |
|---|---|---|
| Shrimp rubbery and tight | Overcooked; second side cooked too long | Shrimp are done when fully opaque and in a loose C-shape: pull them the moment no translucent grey remains |
| Shrimp pale with no golden crust | Surface moisture not removed; pan not hot enough; shrimp crowded | Pat shrimp completely dry; heat pan until butter foam subsides and shimmers; cook in batches |
| Sauce watery and not coating the pasta | Pasta water not used; butter not fully emulsified | Add starchy pasta water and swirl the butter in off the heat; never skip the pasta water |
| Garlic bitter in the finished sauce | Garlic browned rather than turned pale golden; heat too high | Cook garlic over medium heat only; watch closely and pull the pan if color develops too fast |
| Pasta clumping when it hits the sauce | Pasta cooled and stuck together before being added | Add pasta directly to the sauce while it is still warm; toss immediately with tongs |
| Sauce too acidic | Too much lemon juice; grape juice not reduced enough | Reduce the deglaze liquid for the full 60 seconds; balance acidity with a small pinch of sugar or an extra half tablespoon of butter |
Variations and Substitutions
Creamy Shrimp Pasta: After the pasta water and butter emulsify in Step 5, add 1/2 cup of heavy cream and let it simmer for 2 minutes until slightly thickened before adding the pasta. The cream transforms the dish from a light, aglio-e-olio style sauce into a richer, coating cream sauce while preserving the garlic and lemon character. Top with freshly grated Parmesan.
Spicy Shrimp Pasta with Tomatoes: Add 1 cup of halved cherry tomatoes to the skillet alongside the garlic in Step 4. Let them cook for 2 to 3 minutes until they begin to burst and release their juices. Increase the red pepper flakes to 1/2 teaspoon. The tomatoes add a fresh acidity and a slight jammy sweetness that complements the shrimp and garlic beautifully.
Cajun Shrimp Pasta: Replace the salt, pepper, and red pepper flakes with 1.5 teaspoons of a homemade Cajun spice rub (smoked paprika, garlic powder, onion powder, cayenne, thyme, oregano) as the shrimp seasoning. Add 1/2 cup of diced bell pepper alongside the garlic in the sauce. Follow the rest of the recipe as written. The finished dish has a smokier, more assertively spiced character, closer in spirit to a Jambalaya Recipe, while still working with the garlic butter base.
Lemon Shrimp Pasta with Capers: Add 2 tablespoons of drained capers alongside the garlic in Step 4 and let them cook for 30 seconds until fragrant. Increase the lemon zest to 1 teaspoon. The capers add a briny, salty pop that intensifies the seafood flavor without any additional salt needed in the sauce. A Mediterranean-style variation that works particularly well in summer.
Shrimp Pasta with Spinach: Add 2 large handfuls of fresh baby spinach to the skillet in the last 30 seconds of the pasta toss in Step 6, folding it through the hot pasta until just wilted and bright green. The spinach adds color, iron, and a mild green freshness that balances the richness of the butter sauce.
Brown Butter Shrimp Pasta: Instead of stopping the butter at the melted-and-foaming stage, continue cooking the butter in the skillet for 2 to 3 minutes until the milk solids turn golden-brown and the butter smells distinctly nutty. Sear the shrimp in this browned butter. Use the remaining browned butter for the sauce base. The finished dish has a noticeably more caramelized, toasty depth that elevates the entire recipe.
Serving Suggestions
- As a complete one-bowl dinner. Shrimp pasta with the garlic butter sauce needs nothing alongside it to be a satisfying meal. Portion it into wide, shallow bowls with a lemon wedge on the rim and let the shrimp take center stage.
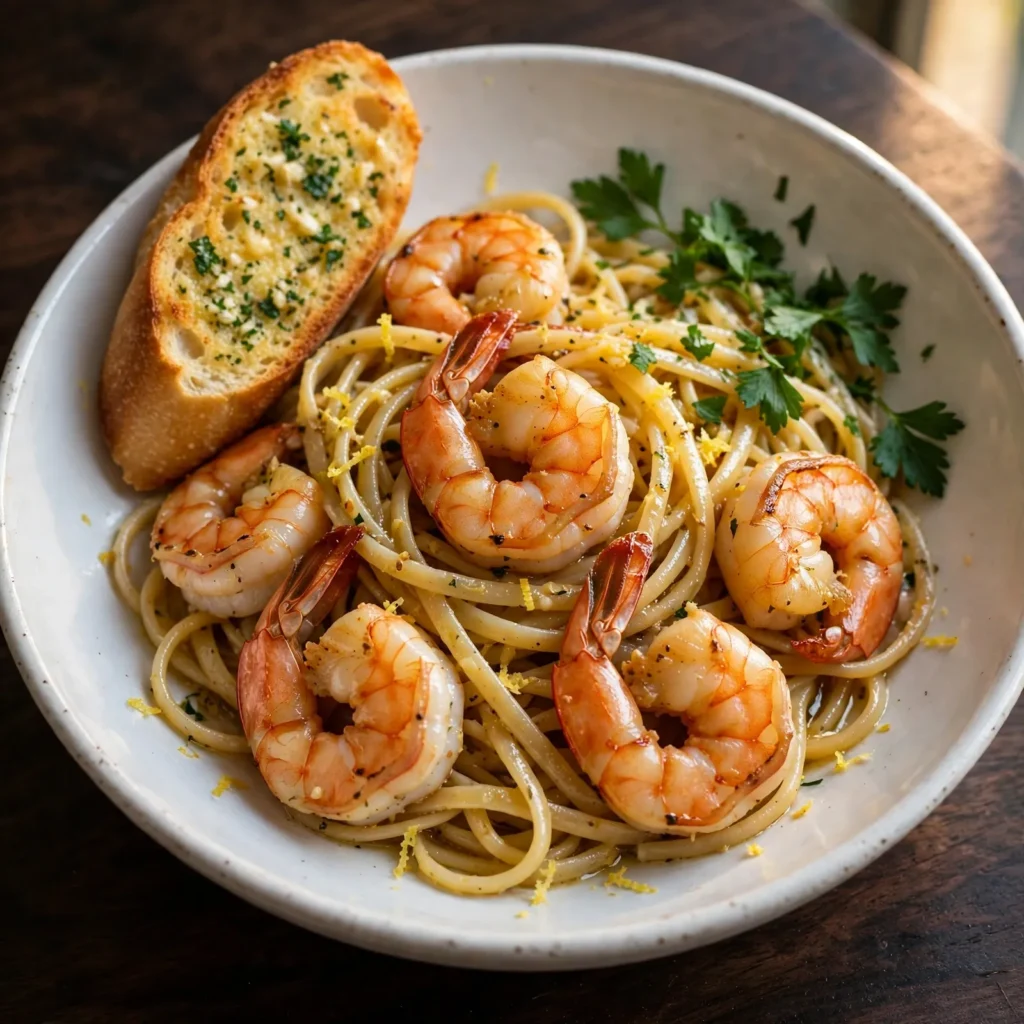
- With garlic bread for sauce dipping. The garlic butter sauce pools slightly at the base of the bowl and is worth capturing with a piece of crusty bread. A warm slice of garlic bread alongside the pasta turns the last few minutes of eating into the best part.
- With a crisp green salad. An arugula salad with lemon vinaigrette provides a peppery, acidic contrast to the buttery pasta that refreshes the palate between bites without competing with the main dish.
- With a glass of cold sparkling water and lemon. The lemon and garlic in the sauce pair naturally with a citrus-forward, cold drink. The acidity of sparkling water with a squeeze of lemon mirrors the sauce’s flavor profile in a way that makes the food taste more vibrant.
- As a dinner party main course. The recipe scales easily to six or eight servings. Shrimp pasta plated in wide bowls with extra parsley and lemon wedges looks impressive enough for a dinner gathering and comes together quickly enough that it can be made while guests are at the table with minimal kitchen stress.
- Topped with freshly grated Parmesan. A small mound of freshly grated Parmesan over each bowl adds a salty, sharp layer that deepens the savory character of the garlic butter sauce. This is a personal preference rather than a traditional addition to aglio e olio style pasta, but it works well.
Tips for the Best Results
- Dry the shrimp until there is no visible moisture. This is the preparation step with the most direct impact on the eating quality of the finished dish. Shrimp that go into the pan wet steam rather than sear, which produces a pale, slightly rubbery exterior with none of the flavor contribution that a properly seared shrimp carries into the sauce. Two minutes of thorough paper towel drying is the whole effort required.
- Pull the shrimp before they look completely done. The residual heat of the pan and the subsequent return to the hot sauce will finish cooking the shrimp. If they look perfectly cooked when you pull them from the skillet, they will be overcooked by the time they reach the bowl. A very slightly translucent center at the thickest part when removed is the signal to stop.
- Always reserve the pasta water before draining. It is easy to forget this and drain it away, which is why it helps to set a measuring cup or ladle in the colander before the pasta goes in. Starchy pasta water is the emulsifying ingredient that creates a glossy sauce. Plain water added afterward does not produce the same result because it contains no dissolved starch.
- Use sliced garlic, not minced. In a recipe where garlic is sautéed for 60 to 90 seconds in butter over medium heat, thin slices cook more evenly and can be monitored more easily than fine mince. Minced garlic at this quantity can burn in patches before the rest of the pan is ready, and even a few burnt pieces make the entire sauce taste bitter.
- Serve immediately. Shrimp pasta with a butter sauce is at its absolute best within 5 minutes of plating. The sauce stays glossy and coating, the shrimp are at peak texture, and the parsley is bright green. As the pasta sits, the butter separates slightly, the pasta absorbs more of the sauce, and the shrimp continue to firm up from residual heat. Make it and serve it.
Storage Tips
Refrigerator
Transfer cooled shrimp pasta to an airtight container and refrigerate for up to 2 days. The butter sauce sets as it cools, making the pasta look clumped and dry when cold: this is normal and reverses with reheating. Shrimp tend to firm up in the fridge, which makes them chewier reheated than fresh. For this reason, shrimp pasta is best eaten the day it is made. If storing leftovers, consider removing the shrimp and storing them separately to reheat for a shorter time than the pasta.
Freezer
Shrimp pasta does not freeze well. The shrimp become tough and rubbery after freezing and thawing, and the butter sauce separates entirely when frozen and reheated. If you have leftover shrimp, freeze them separately without the pasta and sauce, then make a fresh sauce when ready to use them. Cooked shrimp freeze for up to 1 month in a sealed freezer bag with as little air as possible.
Reheating
From the fridge: add the pasta to a skillet over medium-low heat with 2 to 3 tablespoons of water or broth. Stir gently as it heats for 3 to 4 minutes until warmed through. Add a small amount of butter and a squeeze of fresh lemon at the end to restore the sauce’s brightness, since both flatten during storage. Add the shrimp only in the last 60 seconds of reheating so they warm without continuing to cook. The microwave at 50% power in 90-second intervals with a splash of liquid added before heating also works, though the stovetop method produces better texture.
Nutrition Information
Per serving (approximately 1/4 of the full recipe)
| Nutrient | Amount |
|---|---|
| Calories | 490 kcal |
| Protein | 34g |
| Carbohydrates | 55g |
| Fiber | 2.5g |
| Sugar | 3g |
| Total Fat | 15g |
| Saturated Fat | 7g |
| Cholesterol | 225mg |
| Sodium | 680mg |
| Vitamin C | 15mg |
| Calcium | 95mg |
| Iron | 2.5mg |
| Potassium | 380mg |
Nutrition values are approximate and may vary based on brands and portion sizes.
Why This Recipe Works
The butter-and-olive-oil combination in equal amounts is a deliberate fat-balance decision. Butter alone as the cooking and sauce fat produces a sauce that is rich but can feel heavy, particularly in a light pasta dish where seafood is the protein. Butter also has a relatively low smoke point and can burn at the temperatures needed to sear shrimp effectively. Olive oil alone produces a more acidic, fruity sauce but lacks the creamy emulsifying capacity of the milk solids in butter. The two together raise the smoke point enough for high-heat shrimp searing while the butter’s milk solids provide the sauce with its glossy, slightly creamy character and the olive oil adds a savory, fruity depth that neither fat contributes independently.
The starchy pasta water is not a restaurant trick for its own sake: it is a functional emulsifier. When fat (butter and olive oil) meets water in a sauce, they naturally want to separate, which is why a pasta sauce with no starch component looks oily and feels greasy rather than coating. The dissolved starch in pasta water behaves as a stabilizer that bridges the fat and water phases, allowing them to stay combined as a smooth, glossy emulsion. The starch particles coat the fat droplets and prevent them from aggregating back into a visible pool, which is why the sauce stays uniformly coating rather than separating to the bowl’s bottom. No pasta water means no emulsification, which means no proper sauce regardless of technique.
Searing the shrimp in two batches rather than all at once addresses a physics problem. When you add a large quantity of cold shrimp to a hot pan simultaneously, the combined thermal mass of the cold shrimp drops the pan temperature dramatically. The pan then needs 60 to 90 seconds to recover its heat, during which time the shrimp are cooking but steaming rather than searing. Two smaller batches allow the pan to maintain a high enough temperature for immediate contact-browning from the first second, which is what produces the Maillard-browned crust and the flavor contribution the shrimp make to the sauce through the fond they leave behind.
White grape juice as a deglazing agent outperforms plain broth in this specific application because of its sugar content. When the juice hits the hot pan and begins reducing, its natural sugars concentrate and develop a mild caramelization that adds sweetness and complexity to the sauce. Broth, which is low in natural sugars, deglazes the pan effectively but contributes a purely savory, sometimes metallic note when reduced quickly. The grape juice’s sugar also helps the sauce develop a slight glossiness as it reduces, contributing to the emulsified texture alongside the butter and pasta water.
Sliced garlic rather than minced is a texture and control decision. In a sauce where the garlic needs to cook for 60 to 90 seconds to reach the pale golden stage without burning, thin slices cook more predictably and evenly than a fine mince, which has a much higher surface-area-to-mass ratio and can brown in patches within 30 seconds. Thin slices also remain visible in the finished dish as distinct, softened golden pieces that are pleasant to eat, while minced garlic becomes invisible but potentially bitter if even a small portion burns.
I’ve made this recipe with both fresh and frozen-and-thawed shrimp in side-by-side comparisons. When the frozen shrimp were properly thawed and thoroughly dried before searing, the textural and flavor difference from fresh shrimp was minimal at the pan and undetectable in the finished bowl. The drying step matters more than whether the shrimp started frozen or fresh.
Frequently Asked Questions
Can I make shrimp pasta ahead of time?
Shrimp pasta is not well-suited to advance preparation because shrimp continue firming up from residual heat and become noticeably chewier within 30 minutes of cooking. The sauce also separates and the pasta absorbs most of it as it sits. For a dinner party, prep everything in advance: thaw and dry the shrimp, slice the garlic, chop the parsley, cook and drain the pasta, and measure the liquids. The actual cooking time is 10 minutes, which is practical to do while guests are seated.
Why are my shrimp rubbery?
Rubbery shrimp are overcooked. Shrimp proteins tighten and become firm as their internal temperature rises, and at temperatures above approximately 70°C (158°F), the proteins contract so aggressively that the shrimp feel tough and chewy rather than tender. The practical fix: pull the shrimp the moment the last visible grey-translucent area at the thickest part disappears. At that point, they are fully cooked. Everything that happens after is over-cooking.
Can I use a different pasta shape?
Yes, with a preference note. Long pasta shapes (spaghetti, fettuccine, bucatini, linguine) work best with this sauce because their surface area allows the garlic butter to coat every strand evenly as you toss. Short pasta shapes like penne or rigatoni work but don’t hold the sauce as cohesively, and the shrimp look disproportionately large against the small pasta pieces. For a quicker weeknight dinner where long pasta is impractical, short shapes are fine but the tossing technique changes: fold rather than twirl.
How do I know when the shrimp are cooked?
Shrimp are done when they turn from translucent grey-blue to fully opaque pink-white throughout, and when their body curls into a loose C-shape. A tight O-shape means overcooked. If you want a temperature check, 63°C (145°F) at the thickest point confirms full doneness. At 90 seconds per side in a properly heated pan, large shrimp (21/25 count) consistently reach doneness without any guesswork. The key is not moving them during those 90 seconds on the first side.
Is shrimp pasta gluten-free?
As written, no: the recipe uses standard wheat pasta. To make it gluten-free, use certified gluten-free linguine or spaghetti (rice-based varieties are the most similar in texture to wheat pasta). All other ingredients in the recipe, including the shrimp, butter, olive oil, garlic, white grape juice, lemon, and parsley, are naturally gluten-free. Verify the white grape juice label if serving to someone with serious gluten sensitivity.
Can I use pre-cooked shrimp?
Pre-cooked shrimp can be used but the result is significantly different from the recipe as written. Raw shrimp contribute flavor to the pan as they cook: the fond they leave behind is concentrated seafood flavor that becomes part of the sauce. Pre-cooked shrimp have already released that flavor during their initial cooking and add very little to the sauce. They also overcook almost instantly in a hot skillet (since they only need to reheat, not cook through) and become rubbery very easily. If pre-cooked shrimp are all that’s available, add them at the very last moment, off the heat, and toss them once to warm through rather than searing.
What can I use instead of white grape juice?
Conclusion
Shrimp pasta works because every technical decision in the recipe serves a specific purpose: drying the shrimp produces a proper sear, the pasta water creates the emulsified sauce, the white grape juice gives the deglaze both brightness and body, and pulling the shrimp at exactly the right moment keeps them tender rather than rubbery. None of these steps are difficult. They simply require knowing why each one exists, which makes them easy to execute correctly every time. Make this shrimp pasta recipe once with those principles in mind and it will become the recipe you turn to whenever you need dinner on the table in 30 minutes without compromising on how it looks or how it tastes — the same reason Marry Me Chicken stays in my weeknight rotation.
If you loved this recipe, save it to your easy pasta dinner recipes Pinterest board so you can find it easily later. For more new recipes follow thecookingvibes pinterest account.
Easy Shrimp Pasta
Ingredients
Equipment
Method
- Cook linguine in salted boiling water for 1 minute less than the package’s al dente time. Reserve 1 cup pasta water before draining. Drain and toss with a drizzle of oil to prevent sticking.
- Pat shrimp completely dry on all sides. Season with salt, pepper, and red pepper flakes.
- Heat 2 tablespoons butter and 2 tablespoons olive oil in a large wide skillet over medium-high heat until shimmering. Add shrimp in a single layer in batches if needed. Cook 90 seconds undisturbed until golden-pink underneath. Flip and cook 60 to 75 seconds more until fully opaque. Transfer to a plate. Do not clean the pan.
- Reduce heat to medium. Add remaining 1 tablespoon olive oil. Add sliced garlic and stir gently for 60 to 90 seconds until pale golden. Watch closely and do not let it brown.
- Pour in white grape juice, scraping all browned bits from the pan bottom. Add lemon juice and lemon zest. Cook 60 seconds until reduced by one-third. Add 1/3 cup reserved pasta water and the remaining 2 tablespoons butter. Swirl and stir until butter melts and sauce looks emulsified and glossy.
- Add drained pasta to the sauce. Toss with tongs over medium heat for 1 to 2 minutes until every strand is coated and pasta has finished cooking. Add reserved pasta water 2 tablespoons at a time if the sauce tightens.
- Return shrimp to the pasta. Scatter parsley over the top and toss once to distribute. Taste and adjust salt. Serve immediately.
Notes
- Pat shrimp completely dry before searing: surface moisture prevents golden crust formation.
- Always reserve pasta water before draining: the starch it contains is what makes the sauce glossy and coating.
- Pull shrimp the moment they are fully opaque in a loose C-shape: an O-shape means overcooked.
- Use sliced garlic, not minced, to avoid burning before the sauce is built.